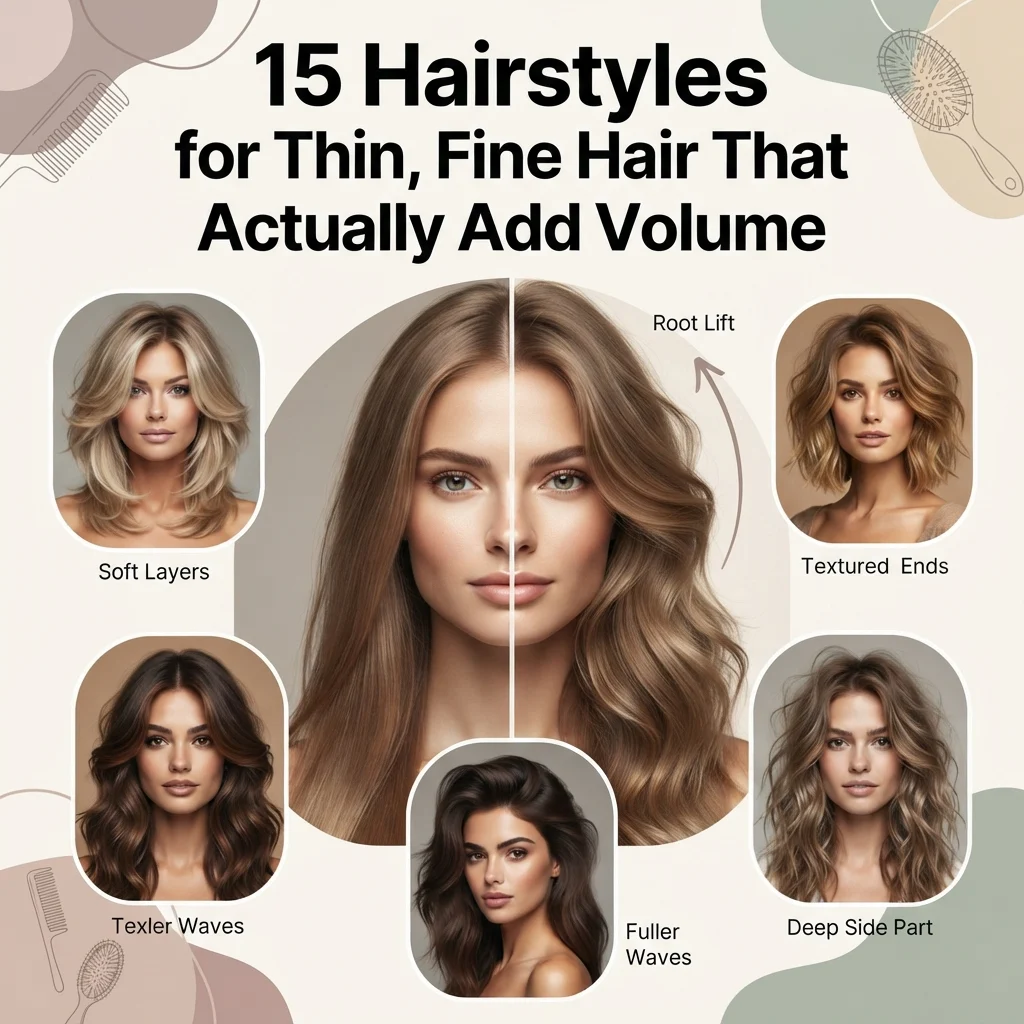
15 Hairstyles for Thin, Fine Hair That Actually Add Volume

Hairstyles for thin fine hair work by manipulating how light and shadow move across the hair’s surface, since fine strands can’t create real bulk on their own the way coarse or dense hair can. This guide gives you 15 hairstyle ideas for thin fine hair (covering cut, color, styling technique, and product) with the exact method behind each one, so the fullness you build actually holds through a full day instead of falling by noon.
Fine, thin hair isn’t a flaw to correct so much as a different set of physics to work with. Less weight means it moves easily, holds shine well, and takes color evenly, all real advantages once the cut and styling technique stop fighting the hair’s natural behavior. Every idea below is chosen because it adds visual density without adding the weight that flattens fine strands in the first place. Here are 15 ideas worth saving, and stealing.
Why These Hairstyles for Thin, Fine Hair Work So Well
Fine and thin are technically two different things, and the distinction matters for choosing the right fix: fine refers to the diameter of each individual strand, while thin refers to the total number of hairs per square inch of scalp (density). Someone can have fine hair that’s still dense, or thick-diameter hair that’s sparse, most people dealing with a lack of visible volume have some combination of both, which is why a single “add volume” trick rarely works for everyone the same way.
The techniques that build real, lasting density are specific rather than generic. Cut-wise: a blunt, one-length or minimally layered cut keeps the maximum amount of hair at the same weight line, which reads as fuller than heavily layered ends that thin out gradually and reveal scalp. Color-wise: a root-smudge balayage or money-piece highlight creates the illusion of depth and dimension through tonal contrast, since flat, single-process color reflects light uniformly and looks thinner by comparison. Product-wise: root-lift mousse, texturizing spray, and dry shampoo root powder are the three formulas that build actual grip and lift at the root without the heavy silicone coating that weighs fine strands flat.
| Element | Hairstyles for Thin, Fine Hair |
| Philosophy | Build density through cut, color contrast, and root lift, not weight or bulk |
| Key Techniques | Blunt cutting, root-smudge balayage, backcombing, root-lift blow-drying |
| Key Products | Root-lift mousse, dry shampoo root powder, texturizing spray, lightweight leave-in |
15 Hairstyles for Thin, Fine Hair Worth Saving and Stealing
1. Root-Smudge Balayage for Instant Depth
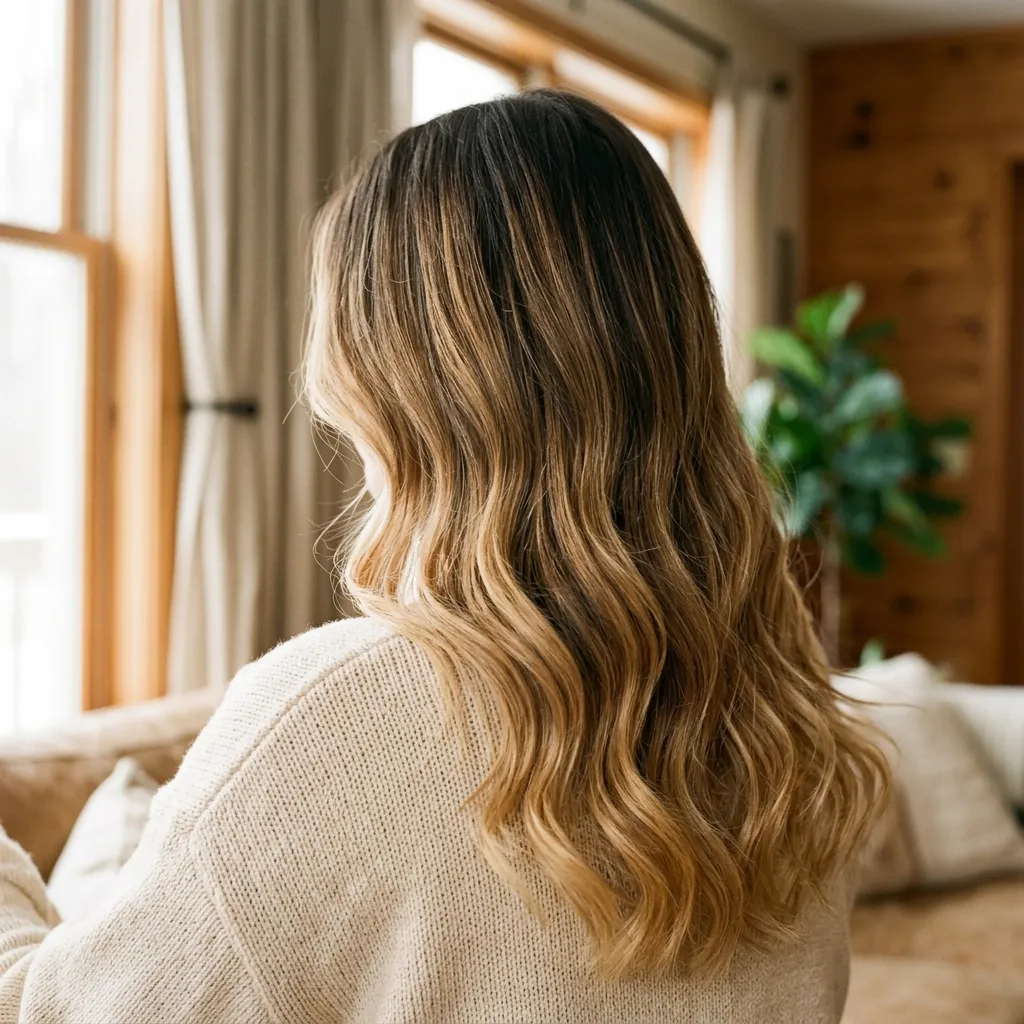
Vibe: Layered, like the hair has depth it didn’t have before.
Why it works: A root smudge blends a deeper shade close to the scalp before the balayage lightens outward, and that tonal shift creates a shadow effect that reads as thickness, the eye perceives contrast as depth, the same way a shaded illustration looks more three-dimensional than a flat one. Flat, single-process color reflects light evenly across the whole head, which is exactly what makes thin areas more visible rather than less.
How to get it: Ask your colorist for a root smudge one to two shades deeper than your balayage, blended two inches from the scalp so there’s no harsh line, with the lightened pieces concentrated around the face and crown where volume matters most visually.
💡 Quick Win: A root touch-up powder in a slightly deeper shade than your base color fakes a smudge effect between salon visits.
Shop The Look
| Product |
| Root touch-up powder, matched shade |
| Color-safe sulfate-free shampoo |
| Purple or blue shampoo for tone upkeep |
| Wide-tooth detangling comb |
| Leave-in heat protectant spray |
2. Blunt One-Length Bob (No Layers)
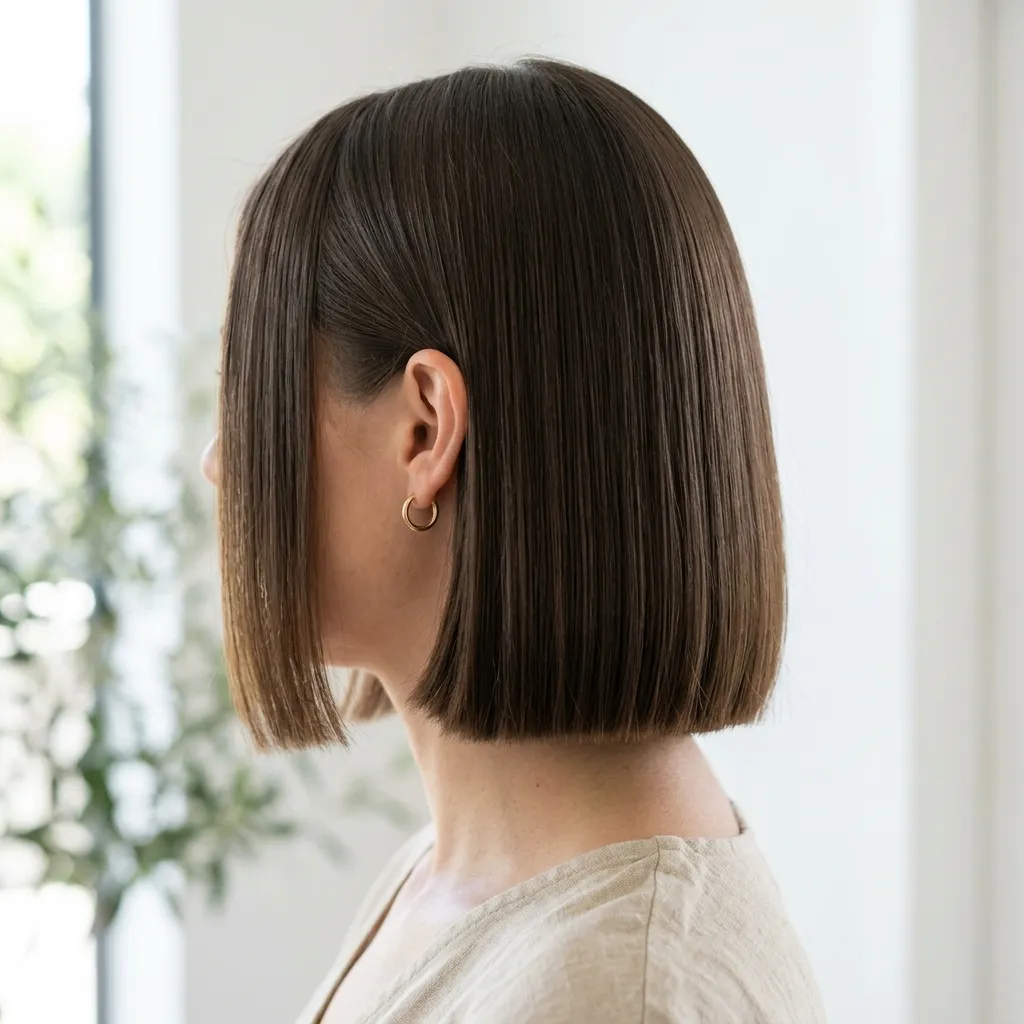
Vibe: Grounded, like every strand is pulling its own visual weight.
Why it works: Layering removes hair at different lengths throughout the head, which on fine hair means the ends taper into wispy, see-through pieces rather than a solid line. The classic cause of hair that looks thinner after a layered cut, not fuller. A blunt, one-length cut keeps every strand ending at the same point, so the hemline reads as one solid, dense line instead of several thinning ones.
How to get it: Request a one-length bob with zero internal layering, cut with the hair pulled straight down (not over-directed), landing anywhere between the chin and collarbone depending on how much length you want to keep.
Shop The Look
| Product |
| Blunt-cut precision hair shears (for touch-ups) |
| Volumizing shampoo, weightless formula |
| Root-lift mousse |
| Boar bristle round brush |
| Shine serum, lightweight |
3. Root-Lift Blow-Dry with a Round Brush
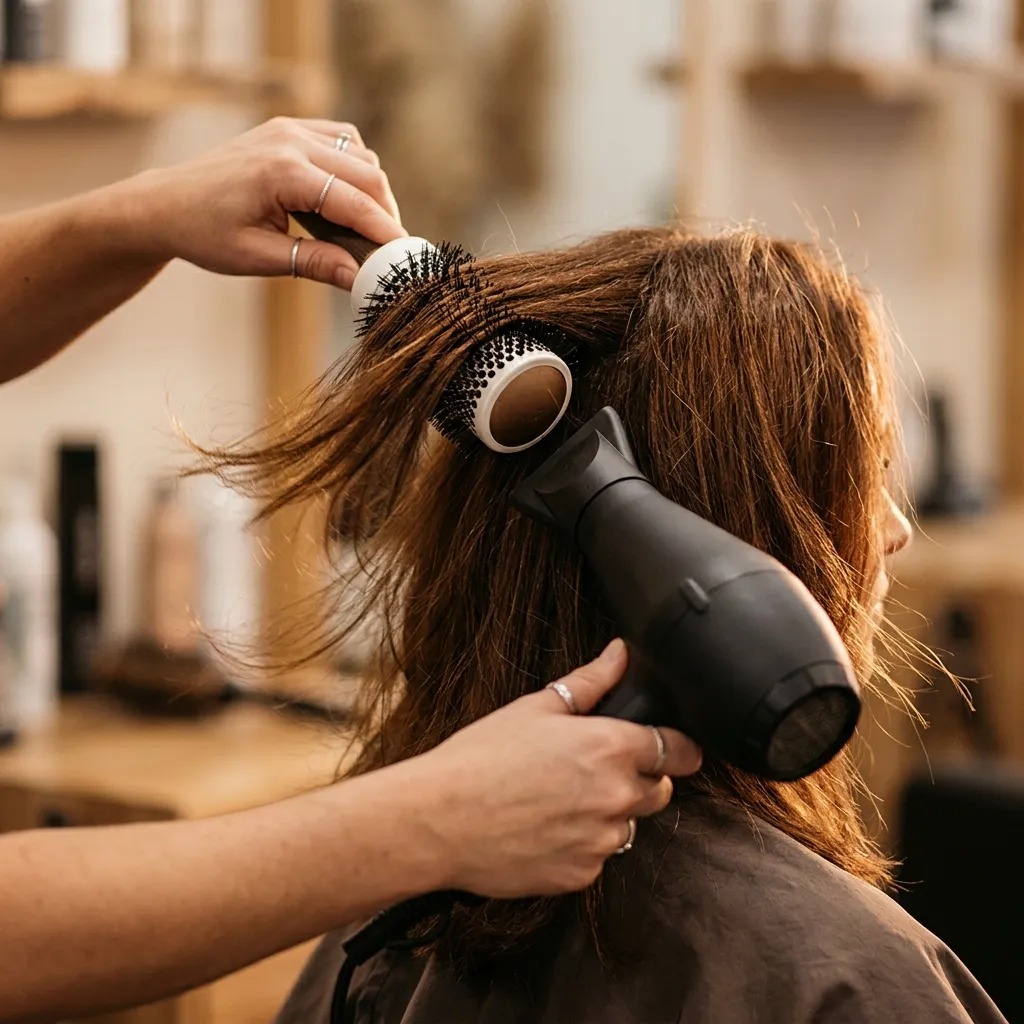
Vibe: Buoyant, like the roots are standing at attention.
Why it works: Directing airflow against the hair’s natural fall, rather than with it, forces the cuticle to lift at the root before it dries in place, which is a mechanical volume technique rather than a product-based one the shape gets locked in by heat, not held up by weight of product. This is why a proper root-lift blow-dry outlasts most volumizing sprays used without any heat styling at all.
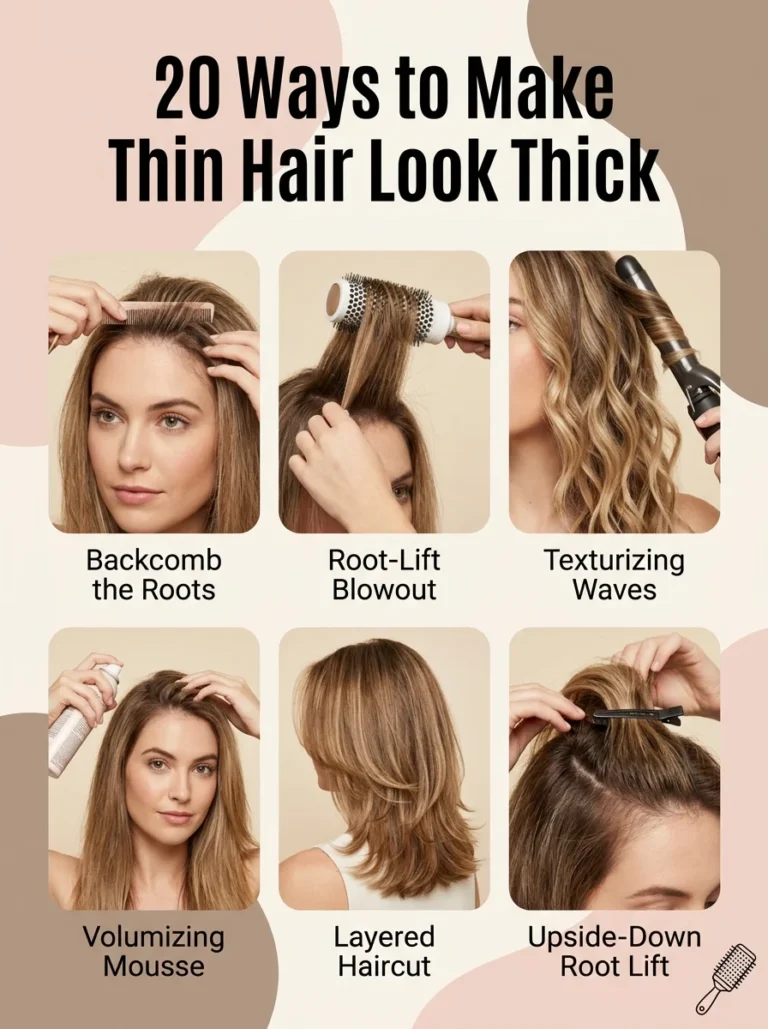
How to get it: Section damp hair at the crown, lift each section straight up with a small round brush, and direct the dryer’s nozzle down against the lifted section’s root for 10–15 seconds until fully dry before releasing.
Shop The Look
| Product |
| Small ceramic round brush |
| Ionic blow dryer with concentrator nozzle |
| Root-lift spray or mousse |
| Heat protectant spray |
| Duckbill clips for sectioning |
4. Curtain Bangs for Face-Framing Volume

Vibe: Soft, like the face gets its own frame of movement.
Why it works: Curtain bangs are cut longer at the center and shorter toward the temples, creating graduated layers that add visible texture and movement around the face without removing length from the rest of the head a targeted volume technique rather than an all-over one. Because they’re worn parted and swept to the sides rather than blunt across the forehead, they also avoid adding the flat, heavy panel effect a full fringe can create on fine hair.
How to get it: Have the bangs cut to fall between the cheekbone and chin, longest at the center part and graduating shorter toward the outer edges, then style by blow-drying with a round brush curving each side away from the face.
💡 Quick Win: A texturizing spray applied to damp bangs before blow-drying keeps them from sticking flat to the forehead.
Shop The Look
| Product |
| Small round brush for bang styling |
| Texturizing spray, lightweight |
| Mini flat iron for touch-ups |
| Heat protectant spray |
| Bang-specific dry shampoo |
5. Volumizing Headband Half-Up
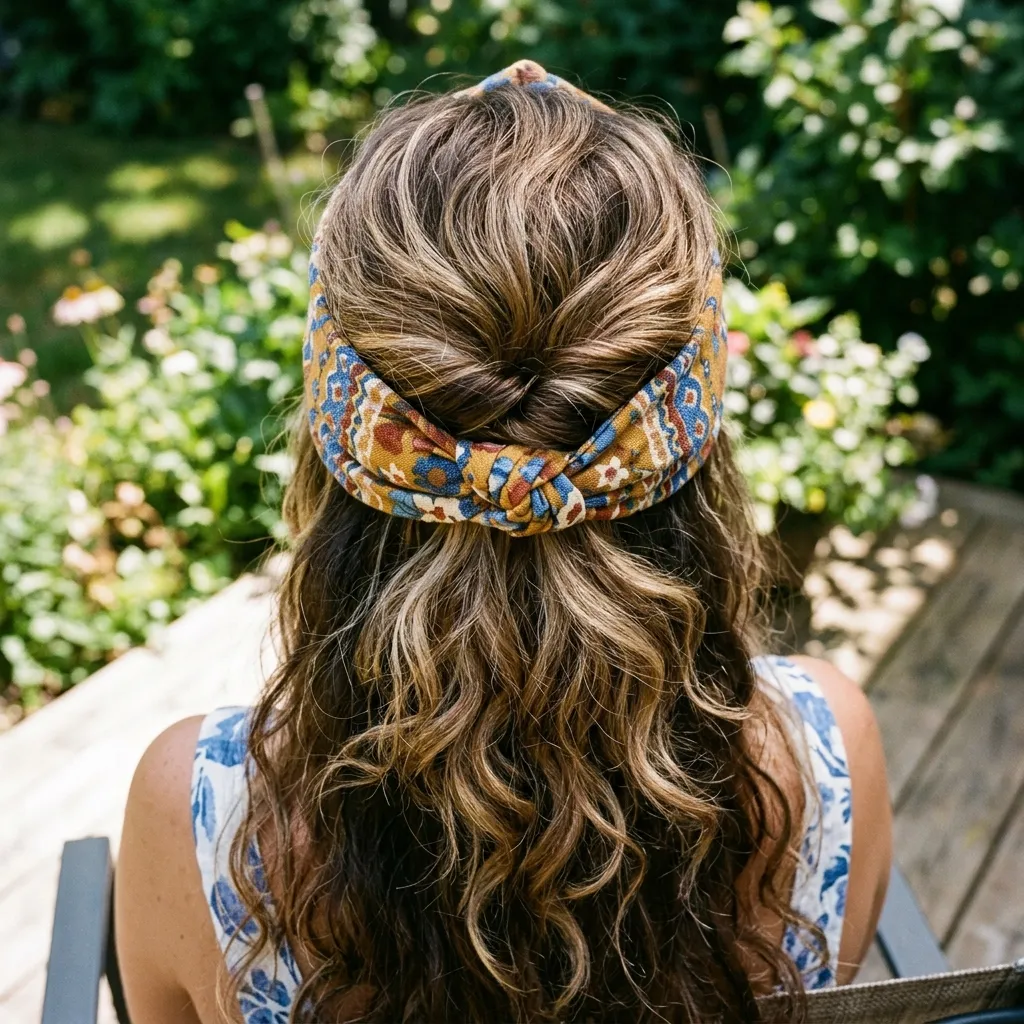
Vibe: Playful, like the crown got an instant lift with no effort.
Why it works: A structured headband placed just behind the hairline naturally pushes the top layer of hair upward and back, creating an instant lift effect at the crown. The exact area where fine hair typically falls flattest first through the day. This is a mechanical, not product-based, volume solution, which means it works even on hair that’s freshly washed and otherwise too slippery to hold styling product.
How to get it: Position a wide, structured headband about an inch behind the natural hairline rather than directly on it, and gently pull small sections of hair over the band at the crown to blend the line and add extra lift.
Shop The Look
| Product |
| Wide structured fabric headband |
| Small bobby pins for blending |
| Lightweight hairspray |
| Teasing comb for crown lift |
| Silk-lined headband for slip-resistance |
6. Money-Piece Face-Framing Highlights
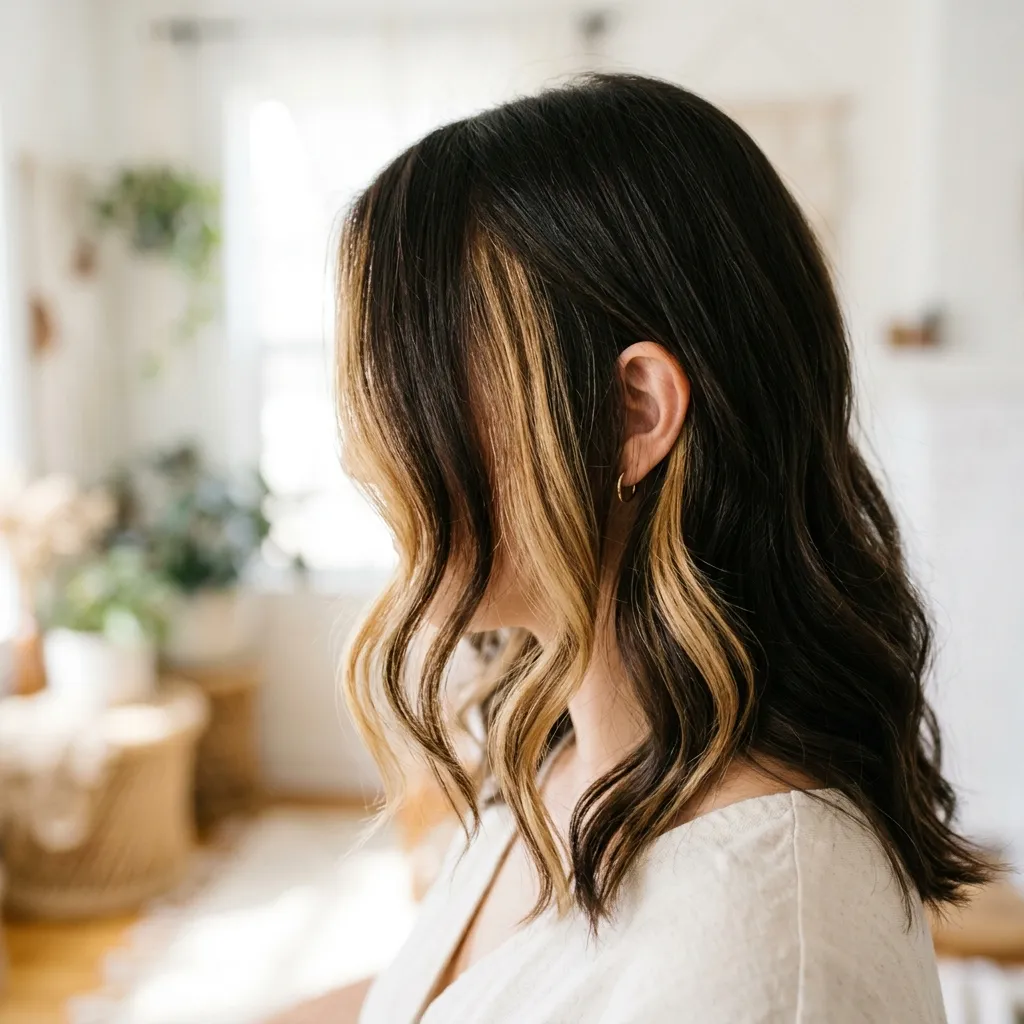
Vibe: Luminous, like light is caught exactly where the eye lands first.
Why it works: A money piece lightens only the two sections framing the face, which draws attention to that zone through contrast rather than relying on volume to do the visual work. A technique that works even on very fine hair since it doesn’t depend on the hair’s physical bulk at all. Because it’s isolated to two sections, it also processes faster and costs less than a full-head lightening service.
How to get it: Ask your colorist to lighten only the front two-inch sections on each side of the face to two to three shades lighter than your base, then blend a soft toner over those pieces so the transition doesn’t look like a hard block of color.
💡 Quick Win: A temporary highlighting spray applied to just the front pieces tests the effect before committing to a permanent color service.
Shop The Look
| Product |
| Temporary highlighting spray |
| Color-safe conditioning mask |
| Purple shampoo for tone maintenance |
| Fine-tooth sectioning comb |
| Heat protectant for colored hair |
7. Perm-Set Beachy Waves for Body
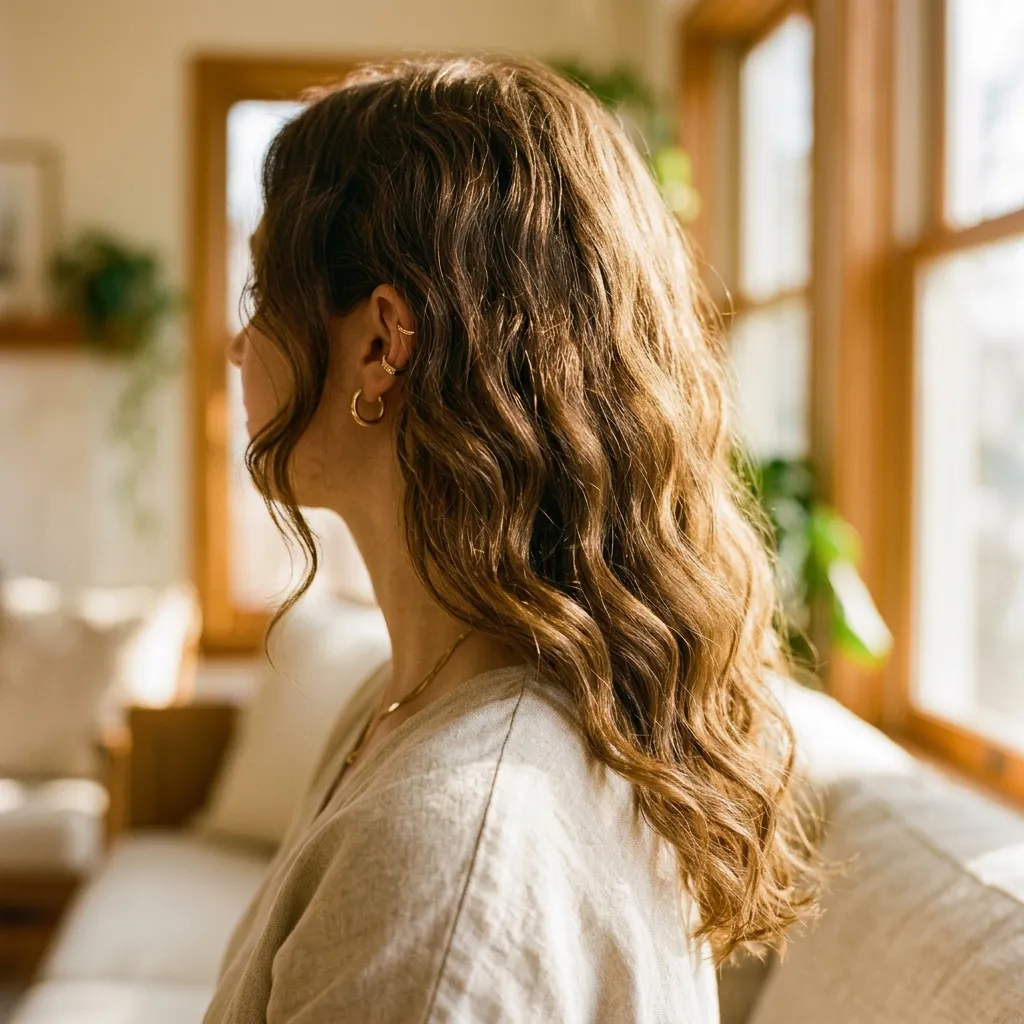
Vibe: Airy, like the hair finally has a shape of its own.
Why it works: A loose body-wave perm restructures the hair’s internal bonds around a large-diameter rod, giving fine hair a permanent bend that creates the appearance of texture and thickness without any daily styling effort: a structural fix rather than a temporary styling one, which is why it holds through washing and humidity in a way curling irons can’t. The looser the rod size, the more the result reads as natural body rather than defined curl.
How to get it: Request a body-wave perm using large-diameter rods (1.5 inches or wider) rather than standard perm rods, which creates soft, loose waves instead of tight curls, and ask your stylist about a gentler, lower-strength solution designed specifically for fine hair.
Shop The Look
| Product |
| Sulfate-free shampoo for permed hair |
| Leave-in conditioner for chemically treated hair |
| Diffuser attachment for blow dryer |
| Sea salt texturizing spray |
| Wide-tooth comb for wave definition |
8. Zigzag Part for Root Camouflage
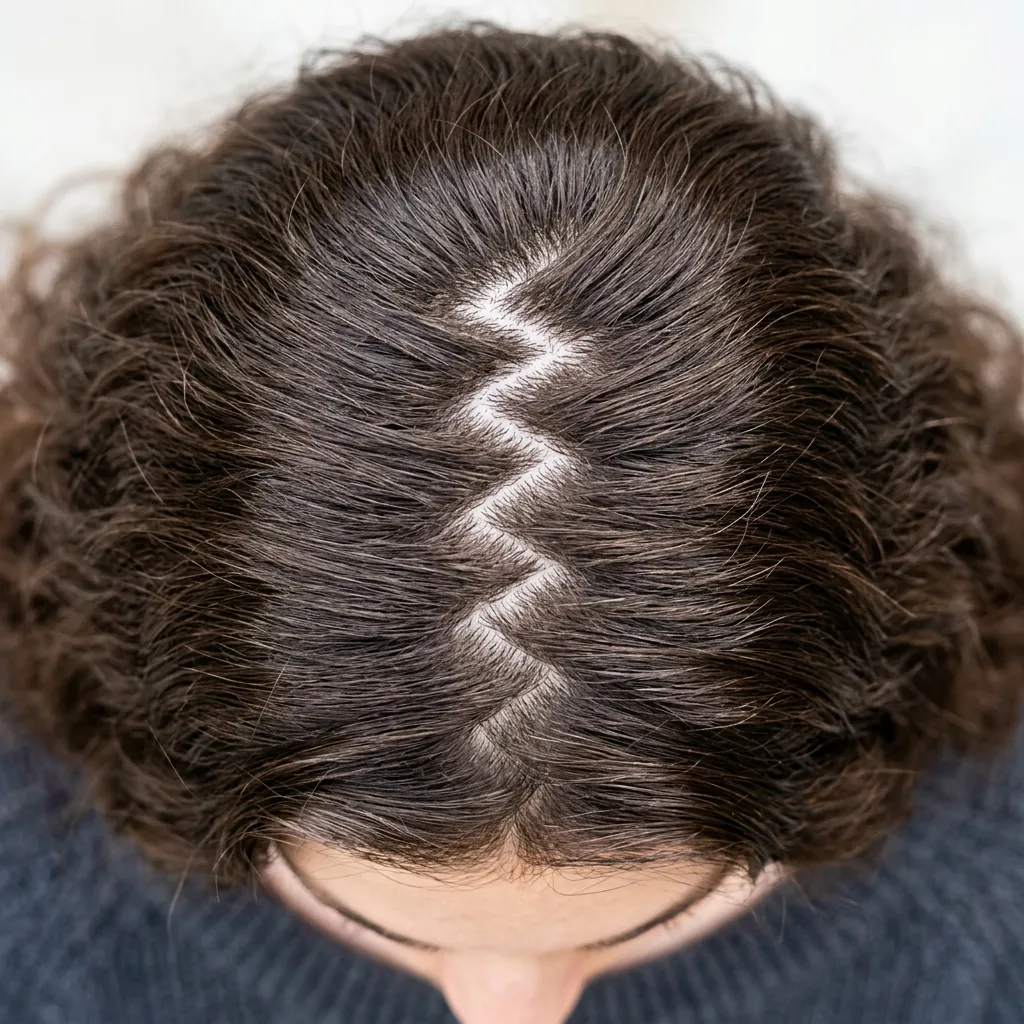
Vibe: Layered, like the scalp disappears without any extra effort.
Why it works: A straight, sharp part exposes a continuous line of scalp along its entire length, which is exactly where thinning is most visible from directly overhead. A zigzag part breaks that continuous line into irregular segments, so no single strip of scalp stays exposed for more than an inch or two at a time a simple geometry trick that camouflages density loss without changing anything about the hair itself.
How to get it: Use the pointed end of a rat-tail comb to create small, irregular zigzag movements across the crown instead of one straight line, working in half-inch segments that angle slightly left and right as you go.
💡 Quick Win: A root-concealing powder in your exact hair color, tapped lightly along the part afterward, reinforces the camouflage effect in seconds.
Shop The Look
| Product |
| Rat-tail comb, fine-tooth |
| Root concealing powder, color-matched |
| Small precision brush for powder application |
| Lightweight finishing spray |
| Teasing comb for crown volume |
9. Low Textured Bun with a Backcombed Crown
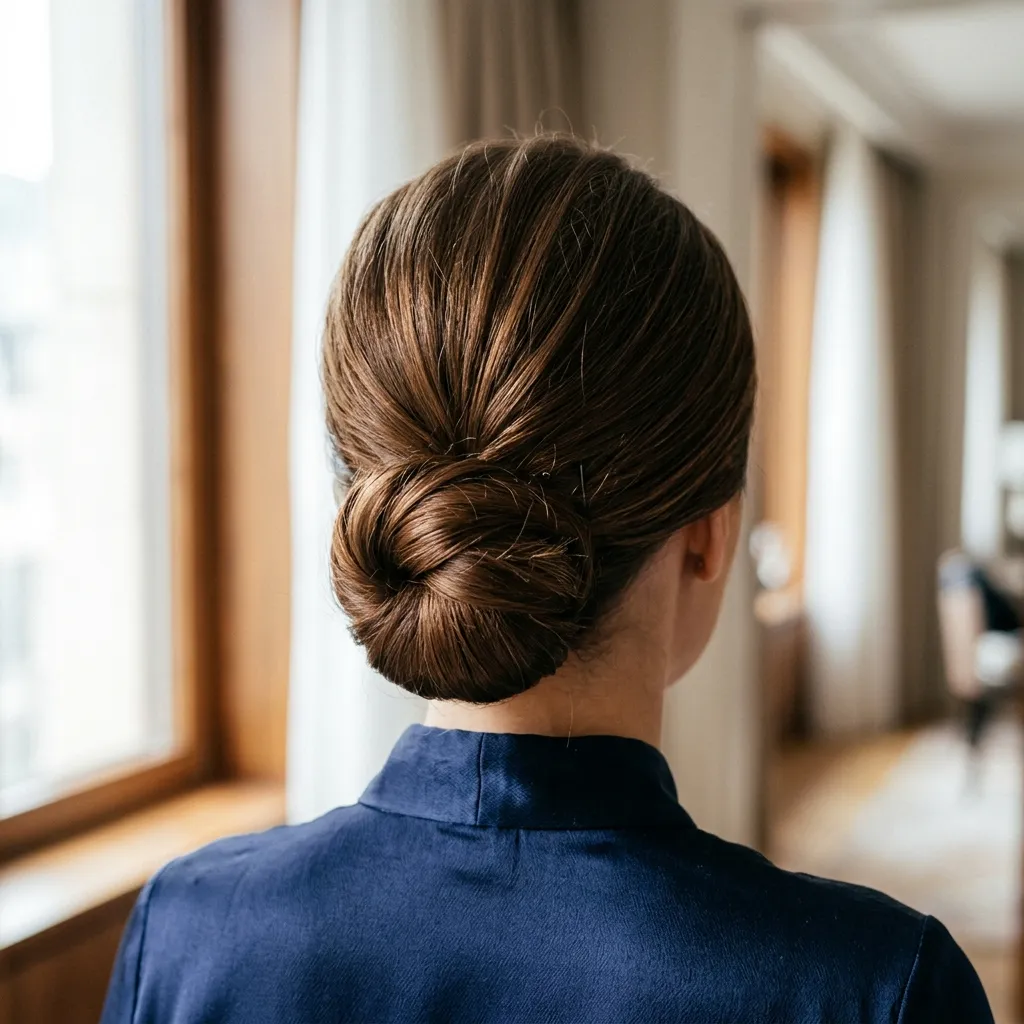
Vibe: Grounded, like the whole shape holds without looking stiff.
Why it works: Backcombing (teasing) the crown section before gathering the rest of the hair into a low bun adds trapped air and structure exactly where the bun’s base sits flattest against the head, preventing the flat, thin-looking silhouette a smooth low bun creates on fine hair. The bun itself sits low and loose rather than tight and sleek, since tight buns show scalp along the part and pull hair flat, working against the volume the teasing just created.
How to get it: Backcomb a two-inch section at the crown with a fine-tooth comb, smooth just the top layer over it to hide the texture, then gather the rest of the hair into a loose, low bun secured with bobby pins rather than a tight elastic wrap.
Shop The Look
| Product |
| Fine-tooth teasing comb |
| Bobby pins, color-matched |
| Texturizing clay for grip |
| Finishing spray, flexible hold |
| Smoothing brush for top layer |
10. Dry Shampoo Root Powder for Instant Lift
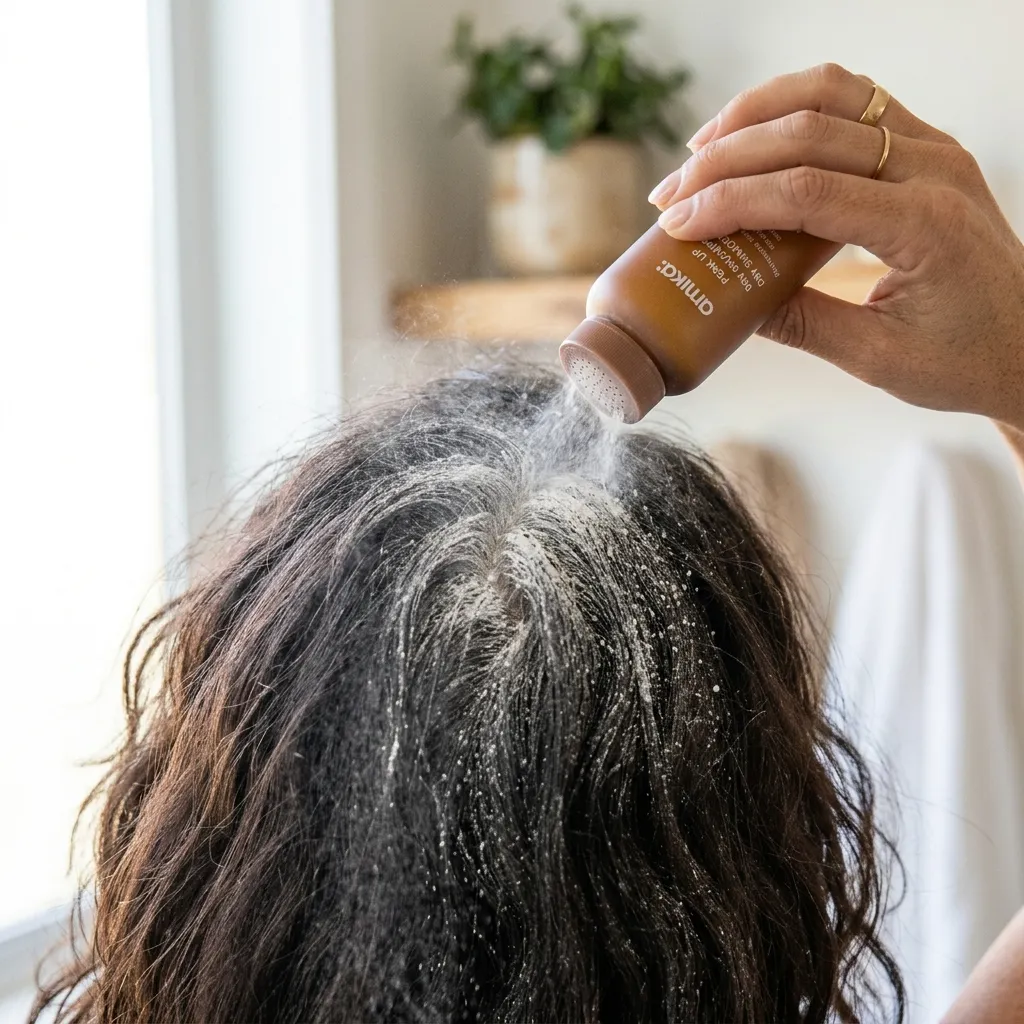
Vibe: Textured, like the roots finally have something to grip.
Why it works: Dry shampoo doesn’t just absorb oil: its powder base also coats individual strands near the root with a light, matte texture that increases friction between hairs, which is what gives fine hair something to grip and hold shape against, unlike freshly washed hair, which is often too slippery to hold any style. This is why many stylists apply dry shampoo to clean, dry hair specifically for volume, not just on second-day hair to manage oil.
How to get it: Spray or dust dry shampoo powder directly at the roots on clean, dry hair, then massage it in with fingertips and flip the head upside down for a few seconds before styling to distribute lift evenly.
Shop The Look
| Product |
| Dry shampoo, powder formula |
| Tinted dry shampoo for dark hair |
| Root-teasing brush |
| Volumizing texture spray |
| Wide-tooth comb for even distribution |
11. Clip-In Volumizing Wefts at the Crown
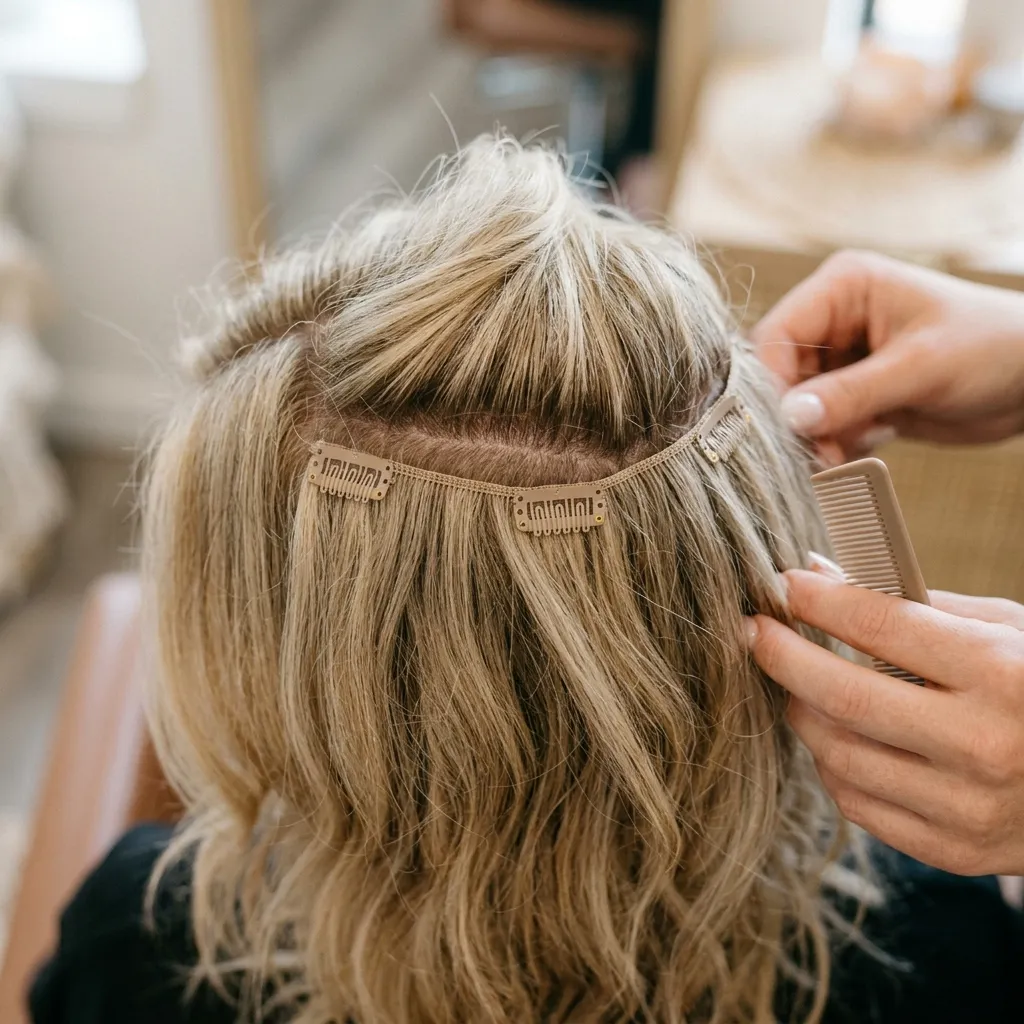
Vibe: Grounded, like the crown finally has real coverage.
Why it works: Volumizing wefts are cut shorter and thinner than full clip-in extensions specifically so they add density without adding noticeable length, blending into the natural hair rather than sitting as an obvious add-on. The goal is thickness, not inches. Placed at the crown specifically, they target the area where thinning is most visible from above and where natural styling has the least leverage to create lift on its own.
How to get it: Section a one-inch strip at the crown, tease the natural hair slightly at that section’s base for grip, then clip in a color-matched volumizing weft and blend the surrounding hair over the seam with a round brush.
💡 Quick Win: Buying wefts one shade lighter than your base color (rather than an exact match) actually blends more naturally, since underneath hair often looks slightly darker than the surface.
Shop The Look
| Product |
| Volumizing clip-in wefts, color-matched |
| Weft storage case |
| Fine-tooth teasing comb |
| Small duckbill clips for sectioning |
| Heat-safe styling brush |
12. All-Over Gloss Tone for Shine Density Illusion
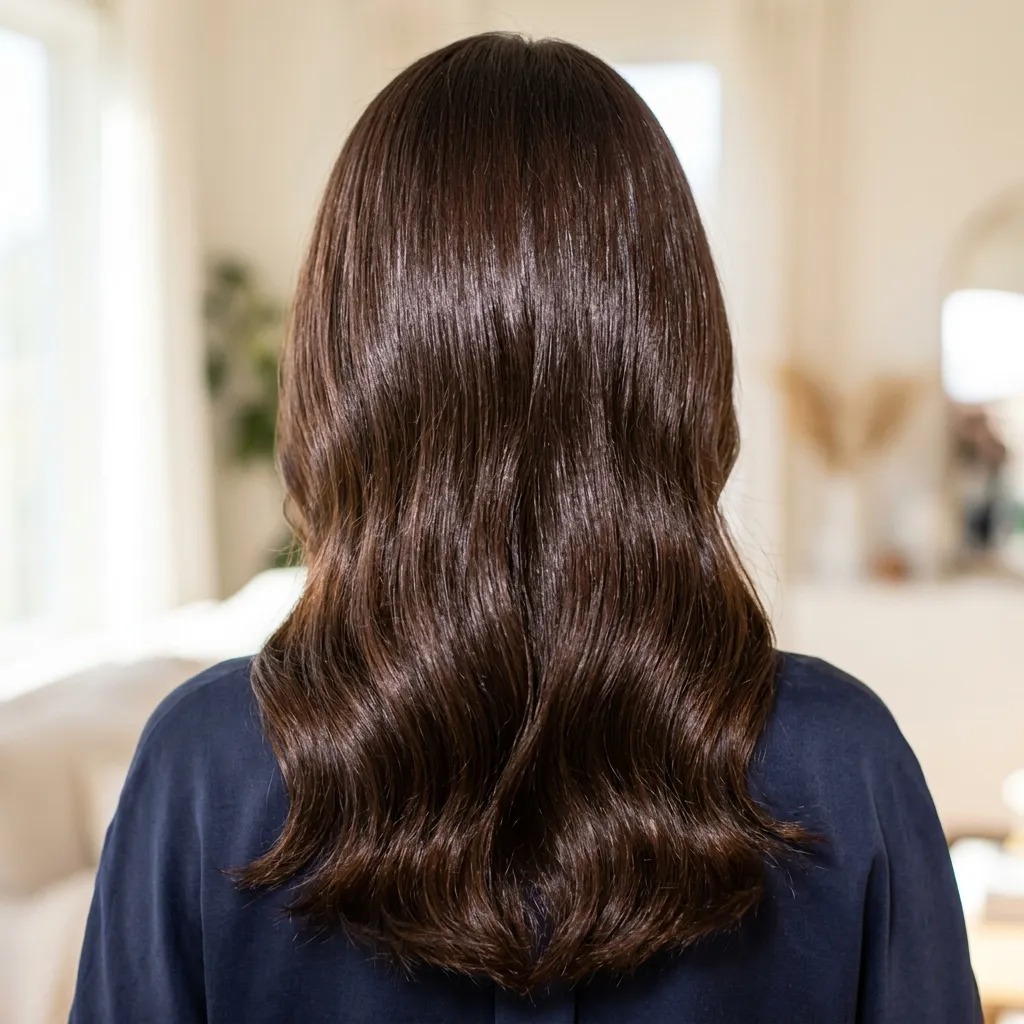
Vibe: Luminous, like the hair reflects more light than it did before.
Why it works: A clear or lightly tinted gloss treatment smooths the hair’s cuticle layer, which increases how evenly it reflects light and evenly reflected light reads as denser hair, since gaps and thin patches are what scatter light unevenly and reveal themselves as dull or see-through. This is a shine-based volume illusion rather than a structural one, which makes it one of the fastest, lowest-commitment options on this list.
How to get it: Get a clear glaze or gloss treatment at the salon every four to six weeks, or use an at-home gloss formula between visits, applying it to towel-dried hair and leaving it on for the full processing time listed on the product before rinsing.
Shop The Look
| Product |
| At-home clear hair gloss treatment |
| Color-safe shampoo, sulfate-free |
| Glossing serum for shine finish |
| Wide-tooth comb for even application |
| Silk pillowcase for shine preservation |
13. Textured Lob with Point-Cut Ends
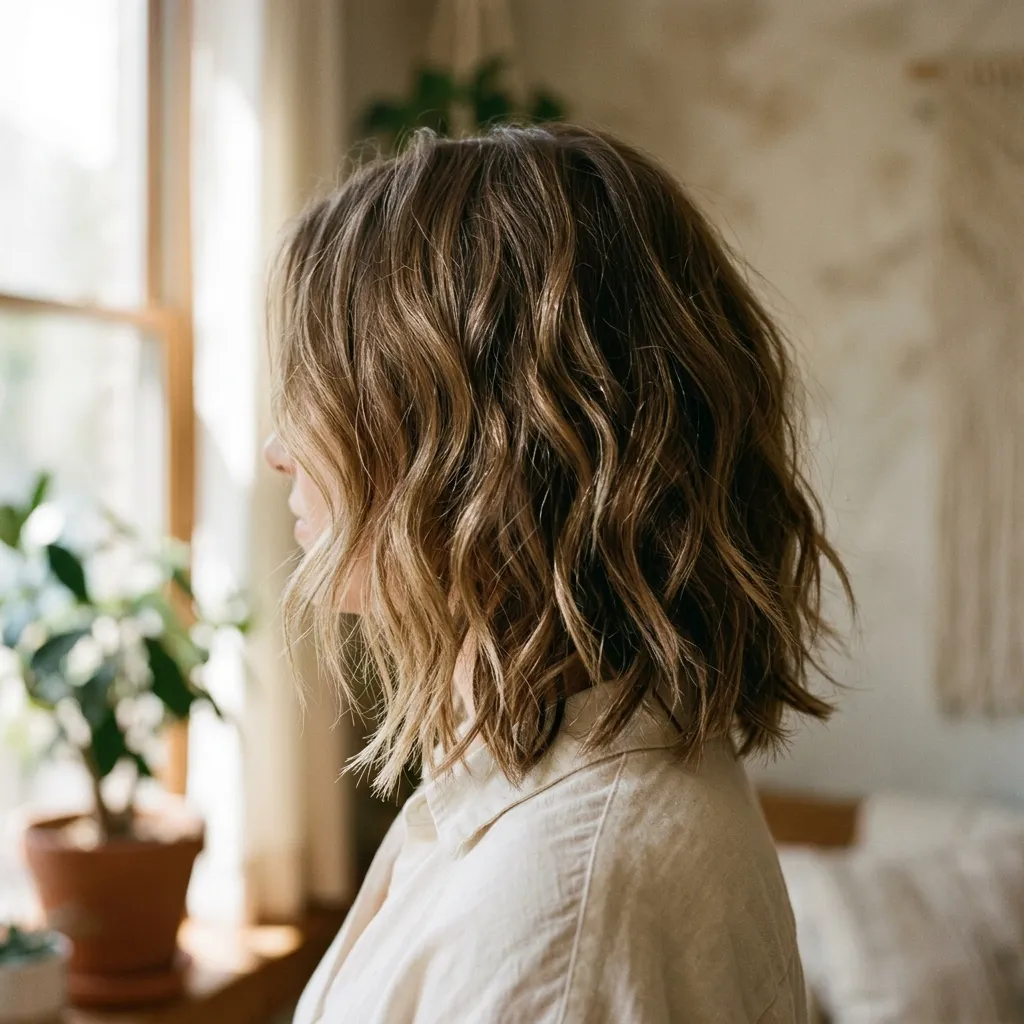
Vibe: Layered, like the ends have movement instead of a flat wall.
Why it works: Point-cutting (cutting into the ends at an angle rather than straight across) removes small amounts of bulk unevenly along the hemline, which creates soft, feathered texture without the dramatic length loss that heavy layering causes. A subtler technique that keeps more overall length while still avoiding a stiff, blunt-only look for those who want texture. This differs from the fully blunt bob earlier in the list by trading a small amount of density for movement at the ends.
How to get it: Ask your stylist specifically for “point cutting” or “notching” only at the very ends, rather than internal layering throughout the length, which keeps the bulk of the hair’s weight intact higher up.
Shop The Look
| Product |
| Texturizing spray for ends |
| Lightweight curl cream |
| Small barrel curling wand |
| Shine spray, fine mist |
| Heat protectant for daily styling |
14. Pixie Crop with Textured Fringe
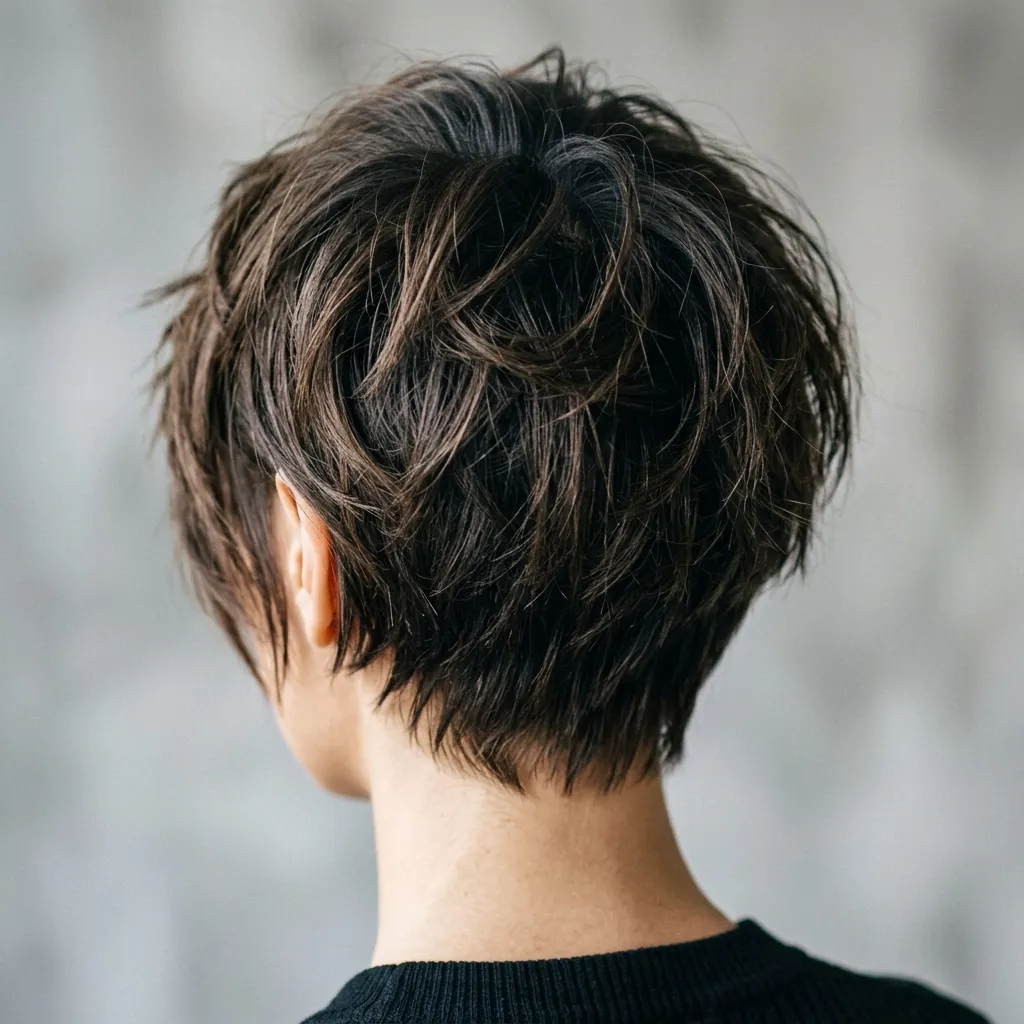
Vibe: Grounded, like every strand has a clear job to do.
Why it works: Short hair carries far less of its own weight than long hair, which means fine strands don’t need to fight gravity to hold a shape. A pixie crop is often the single most effective length change for visible density, since the hair-to-scalp ratio improves dramatically at shorter lengths even with the same total hair count. A textured, piecey fringe adds movement at the front without the flat panel effect a blunt fringe risks on fine hair.
How to get it: Ask for a pixie with texturized, point-cut layers throughout (not a smooth, uniform crop) and a fringe cut with a razor or texturizing shears for a piecey, broken-up finish rather than one clean line.
💡 Quick Win: A small amount of matte texture paste worked through dry ends with fingertips creates definition without any added weight or shine.
Shop The Look
| Product |
| Matte texture paste |
| Small round brush for fringe styling |
| Precision styling comb |
| Lightweight finishing spray |
| Travel-size texturizing wax |
15. French Braid Pancaking for Fuller Braids
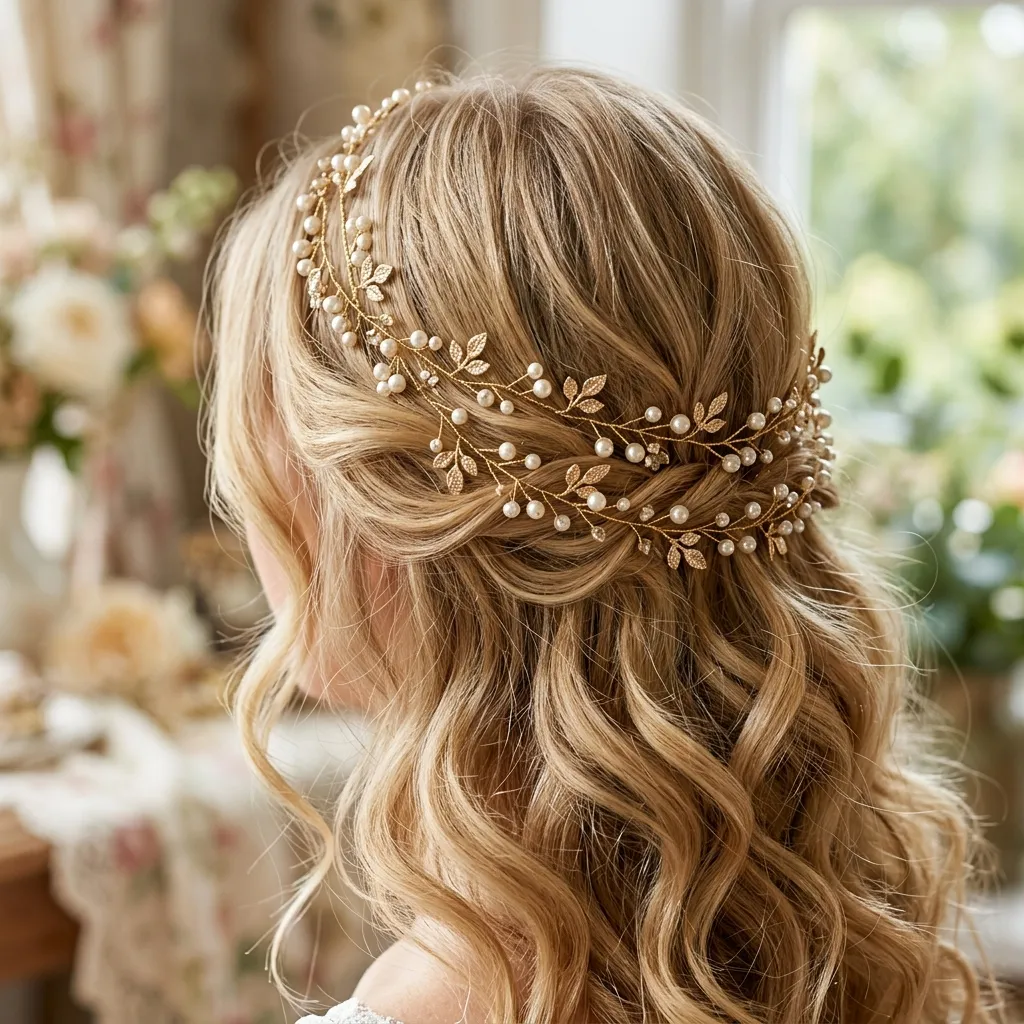
Vibe: Layered, like a braid that finally looks as full as it feels.
Why it works: Pancaking is the technique of gently pulling apart the outer edges of each braid section after braiding, which widens the visible surface area of the plait without adding a single strand of hair, a purely geometric volume trick. A tightly braided fine-hair plait looks thin because every section is compressed close together; pancaking spreads that same hair across more visual space.
How to get it: Braid as usual, then starting at the top, gently pinch each woven section between your fingers and pull the edges outward and slightly forward, working down the length of the braid until the whole thing looks noticeably wider than when you started.
Shop The Look
| Product |
| Fine-tooth comb for clean sectioning |
| Texturizing spray for grip |
| Small clear elastic for the end |
| Flexible-hold finishing spray |
| Edge control gel for baby hairs |
How to Start Your Thin, Fine Hair Transformation
Your single first move is booking a blunt, one-length cut with zero internal layering. Nearly every other idea on this list (the root-smudge color, the round-brush blow-dry, the low bun with backcombing) works better on a solid, even hemline than on hair already thinned out by heavy layers, which is why the cut has to come first before any color or styling technique can do its job properly.
The most common mistake is asking for “lots of layers for volume,” which does the opposite on fine hair. Removing weight at different lengths throughout the head leaves the ends wispy and see-through rather than full. Fix it by requesting point-cutting only at the very ends, or no internal layering at all, and let color and styling technique do the volume work instead of the cut.
Three items under $50 create real impact fast: a root-lift mousse (around $18–24), a powder-formula dry shampoo (around $12–20), and a small ceramic round brush for blow-drying (around $15–25). Together they cover the three main mechanisms (product grip, root lift, and heat-set shape) this list relies on.
A cut and color change takes one salon visit and shows results immediately; building a full styling routine around it takes two to three weeks of practice. A starter routine (cut plus root-lift products) runs $80–150 including the haircut; adding color services like balayage or a money piece brings a fuller transformation to $200–400 depending on length and colorist experience.
Frequently Asked Questions About Hairstyles for Thin, Fine Hair
What’s the difference between fine hair and thin hair?
Fine refers to the diameter of each individual strand, while thin refers to the total number of hairs per square inch of scalp, or density. Someone can have fine strands that are still densely packed, or thicker strands that are sparse, and most people dealing with a lack of visible volume have some combination of both, which is why cut and color techniques that address density work differently from ones that address strand thickness.
What hair colors add the most volume to thin, fine hair?
Multi-tonal techniques like root-smudge balayage and money-piece highlights create the illusion of volume through contrast and shadow, since evenly reflected flat color makes thin areas more visible rather than less. A deeper root shade one to two levels darker than the mid-lengths, blended two inches from the scalp, is the specific detail that creates the shadow effect responsible for most of the perceived density gain.
How much does it cost to style thin, fine hair for more volume?
A basic product routine (root-lift mousse, dry shampoo powder, and a round brush) runs $45–70 in reusable tools and products. A blunt cut with minimal layering typically costs the same as any standard haircut, $40–90 depending on your salon, while adding balayage or a money piece for color-based volume runs $150–350 depending on length and how much lightening is involved.
Does this work for curly or wavy thin hair, not just straight?
Yes, though the technique priorities shift slightly. Curly and wavy thin hair benefits most from the color and product ideas on this list (root-smudge balayage, dry shampoo root powder, and glossing treatments) since curl pattern already provides some natural volume that straight fine hair lacks. Point-cutting still helps avoid the thin, stringy ends that heavy layering can cause on wavy or curly fine hair specifically.
Do bangs help or hurt thin, fine hair?
Curtain bangs specifically help, since they’re cut with graduated length and styled off the face rather than as one blunt panel, adding movement without the flat, heavy look a full, blunt fringe can create on fine hair. A full, blunt fringe worn straight across the forehead is the version more likely to look flat and thin, since it concentrates all the hair’s weight into one dense-looking but ultimately heavy line.
Ready to Build Real Volume Into Your Fine Hair?
Across these 15 ideas, you’ve got cut techniques like the blunt bob and point-cut lob, color tricks like the root smudge and money piece, and styling methods like root-lift blow-drying and braid pancaking working together rather than any single fix carrying the whole look. None of this needs a full overhaul in one visit, and starting with just the cut or just a new product routine is a completely legitimate way to begin.
Today, pick up a root-lift mousse or a powder dry shampoo and test the round-brush blow-dry technique on your next wash day before booking anything at the salon. Once the routine clicks, the payoff isn’t just more visible hair. It’s not needing to think about your roots by 2 p.m. anymore. Save the ideas that match your current length and cut, since those are the ones you can actually put to work the next time you’re in front of the mirror