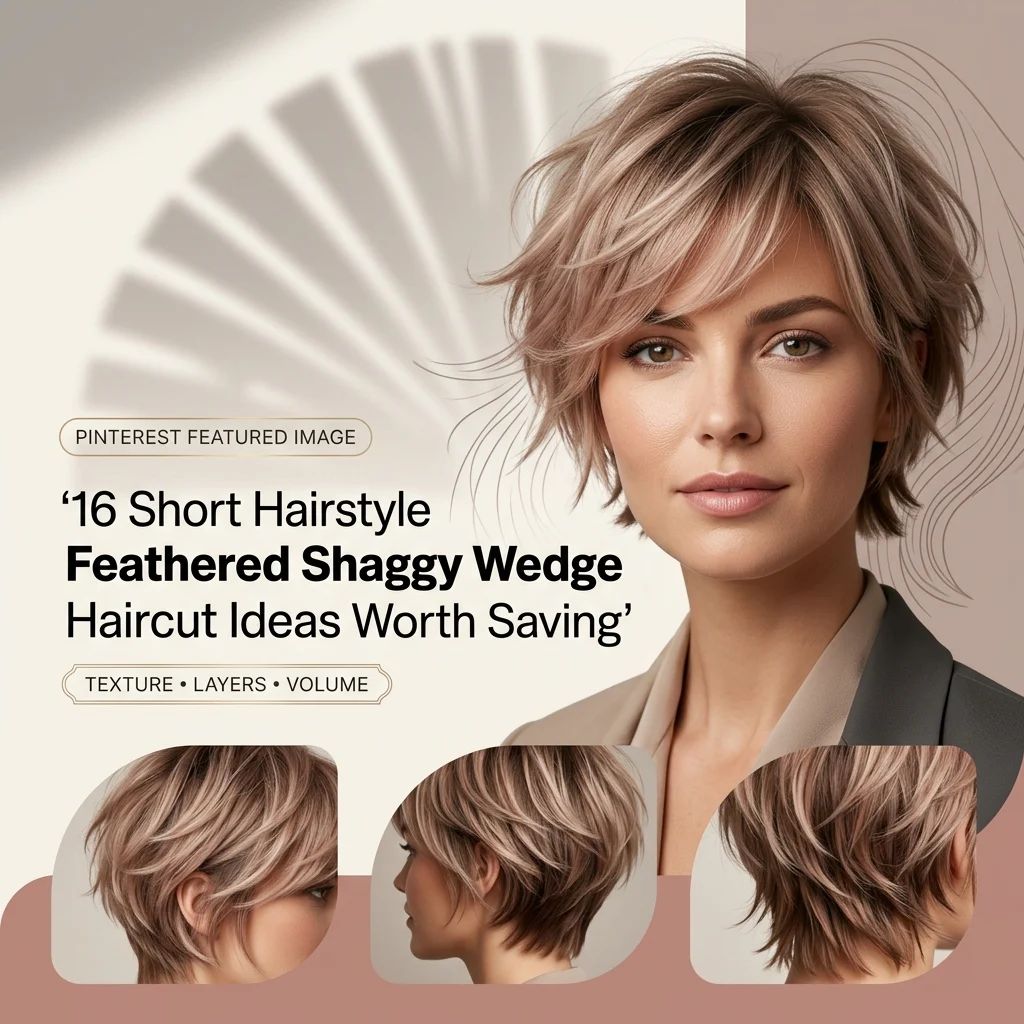
16 Feathered Shaggy Wedge Haircut Ideas for Short Hair

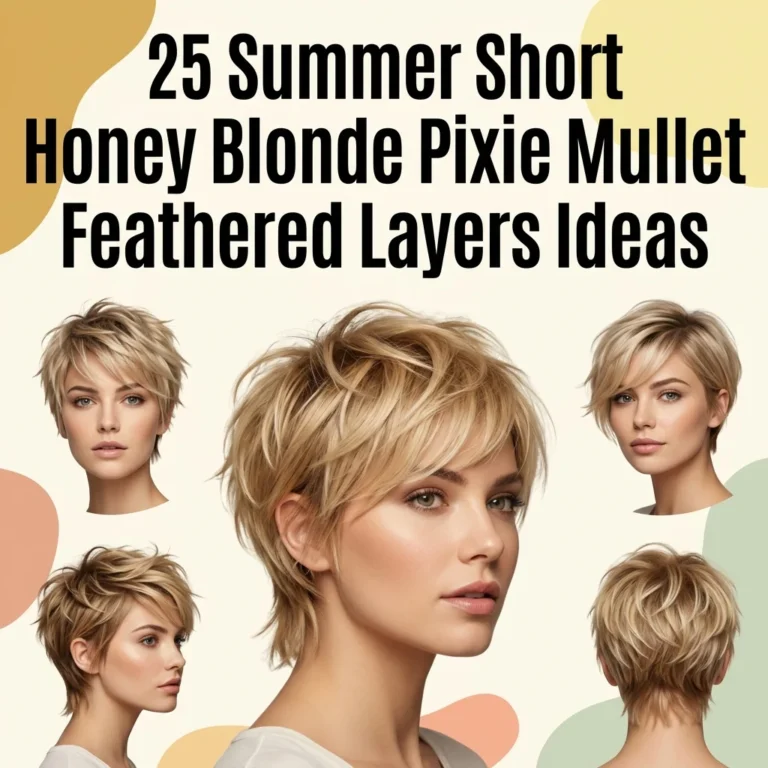
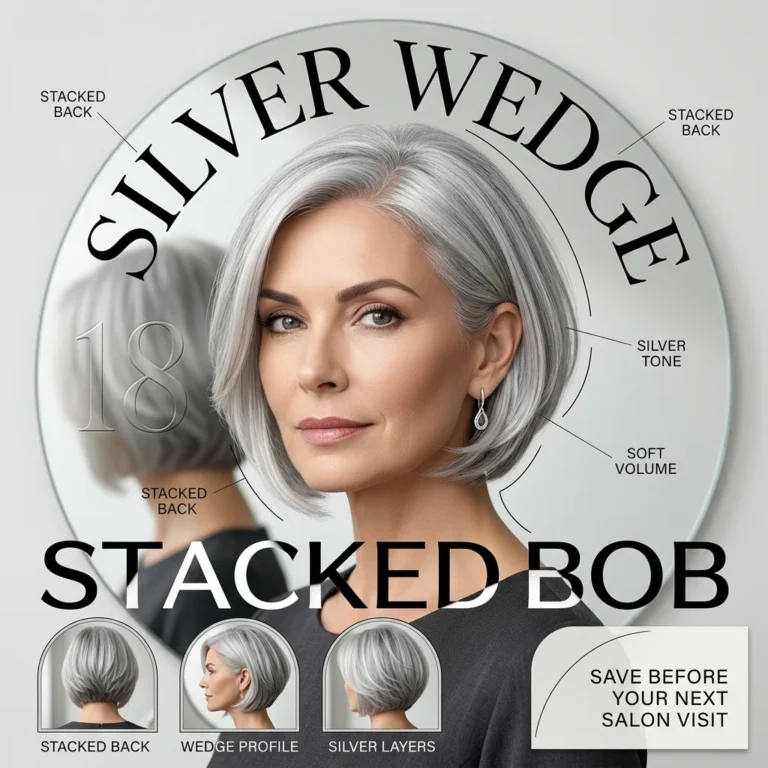
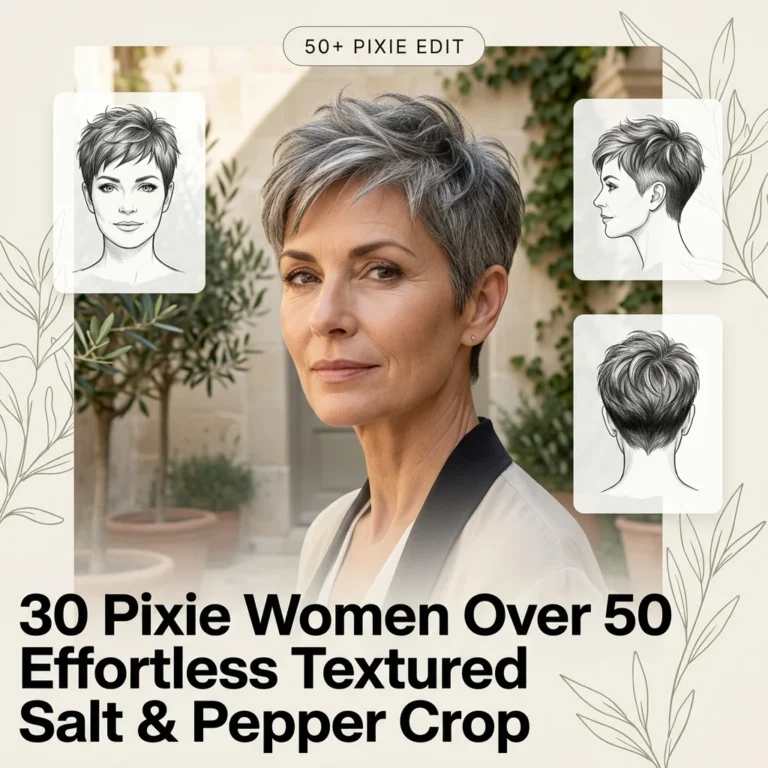
The feathered shaggy wedge haircut is a short, layered cut built on a rounded-back, angled-front silhouette with soft, wispy ends that flick outward instead of lying flat. This article gives you all 16 feathered shaggy wedge variations color, texture, shape, and finish so you can walk into your next salon appointment with an exact reference photo in hand.
At its best, this cut feels light on the neck and full at the crown, like the hair is always mid-movement even when you’re standing still. It’s playful without looking undone, structured without looking stiff a cut that reads modern-retro, somewhere between a ’70s shag and a sharp 2020s wedge. The layering catches light at the edges, giving even flat, fine hair the illusion of density. Here are 16 ideas worth saving and stealing.
Style at a Glance
| Element | Classic Wedge | Feathered Shag |
|---|---|---|
| Philosophy | Graduated, structured shape | Loose, textured movement |
| Key Cutting Technique | Blunt graduation, scissor-over-comb | Razor cutting, point cutting |
| Best For | Thick, straight hair | Fine, wavy, or textured hair |
16 Feathered Shaggy Wedge Haircut Ideas
1. Bronde Balayage Feathered Wedge
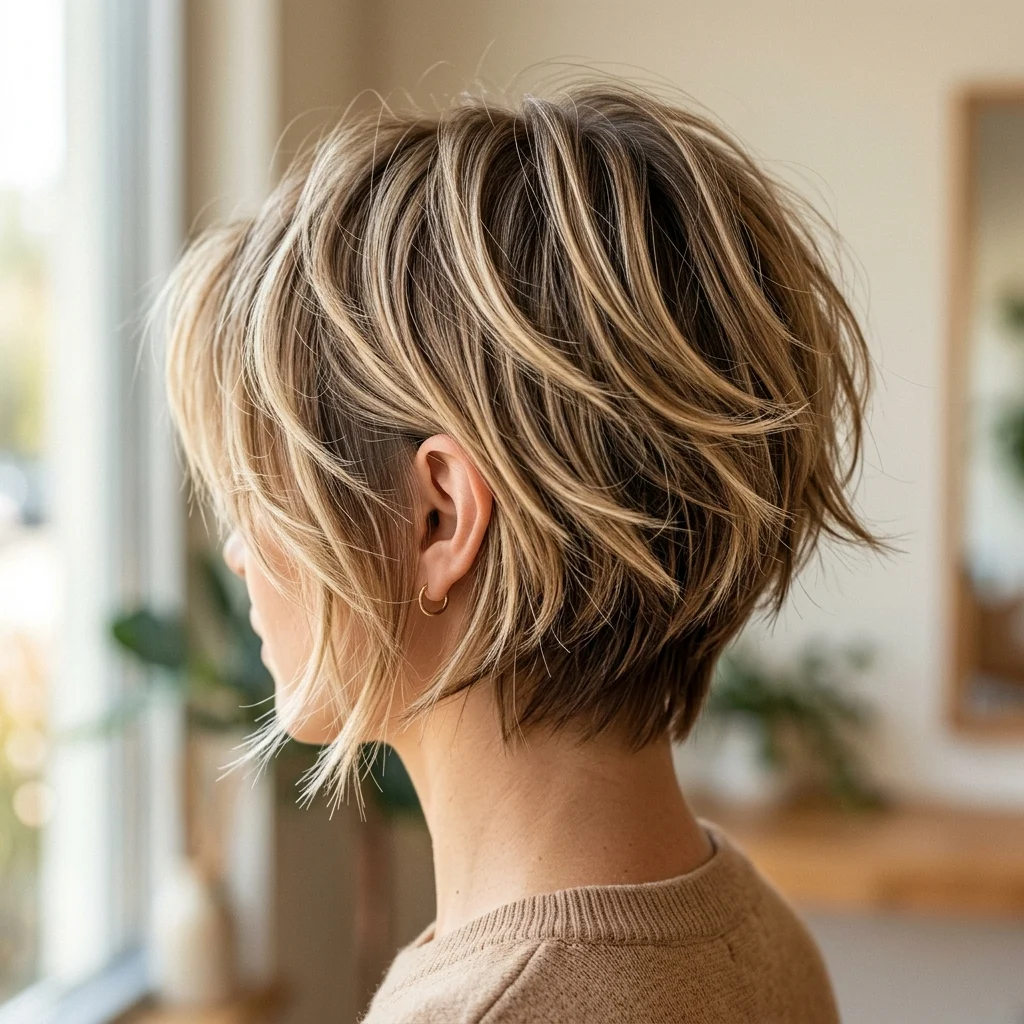
Vibe: Sun-warmed, like hair that’s spent a season outdoors.
Why it works: Balayage placement follows the direction of the feathered layers, so lighter pieces land exactly where the ends flick outward. This creates depth through color contrast rather than relying on the cut alone a technique colorists call “dimensional placement.” The graduated wedge base keeps the lighter tones concentrated at the face-framing pieces.
How to get it: Ask your colorist for balayage painted only on the top two layers of hair, leaving the underlayer darker to create shadow and depth. Request a warm honey-to-caramel gradient rather than cool blonde, since warm tones photograph better against short, textured layers.
💡 Quick Win: A single at-home gloss treatment in a honey-toned shade refreshes the warmth between salon visits without committing to a full balayage redo.
Shop The Look
| Product |
|---|
| Sea salt texturizing spray for beach waves |
| Honey-tone hair gloss at-home treatment |
| Boar bristle round brush for blowouts |
| Heat protectant spray for color-treated hair |
| Matte finishing paste for short hair |
2. Razor-Cut Feathered Layers
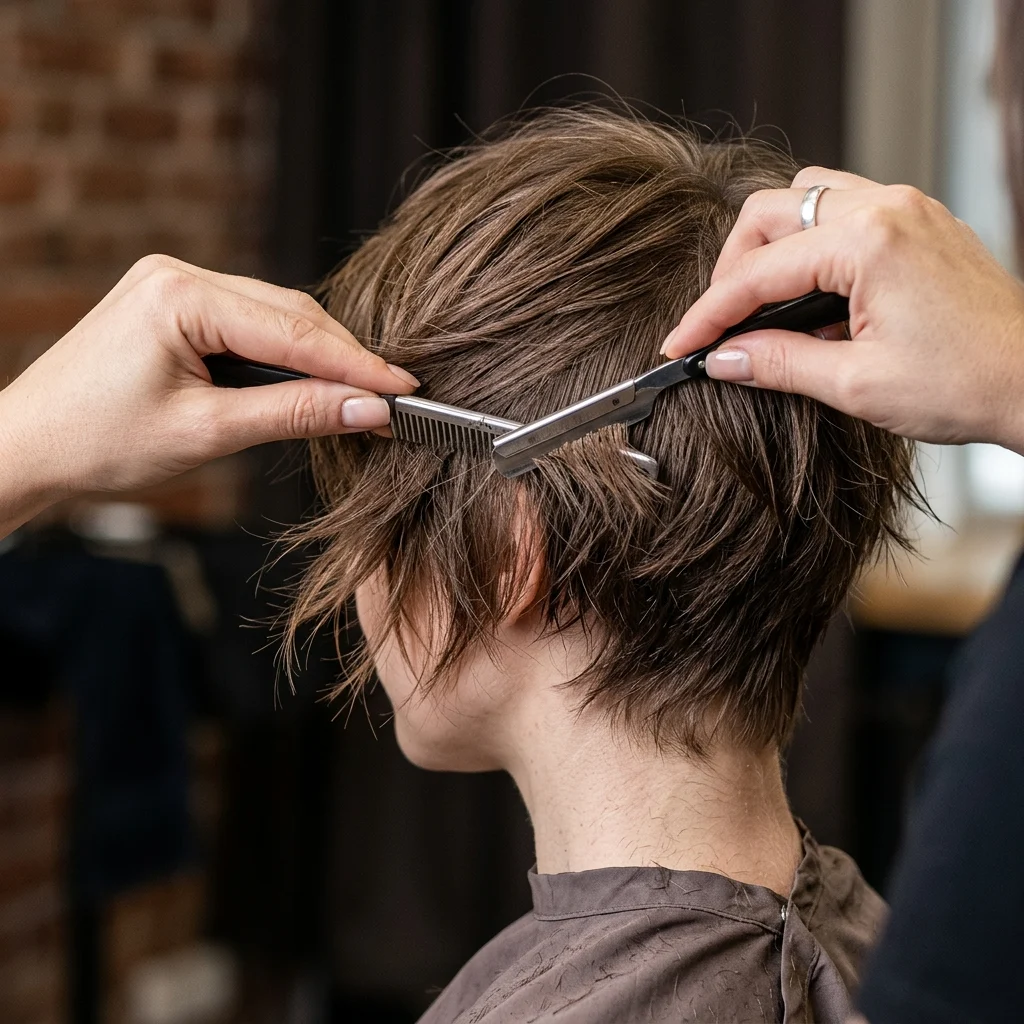
Vibe: Raw, like the ends were shaped by wind rather than scissors.
Why it works: Razor cutting removes hair at an angle instead of straight across, which thins the ends and creates the signature “feathered” flick. This is the core technique that separates a shag from a standard bob negative space is built into the cut itself rather than added with product.
How to get it: Ask specifically for “razor-cut ends” or “point-cutting” at your consultation blunt scissor cuts alone won’t produce feathering. The technique works best on hair with at least some natural wave or texture, since razor edges catch and separate more visibly than on pin-straight strands.
Shop The Look
| Product |
|---|
| Texturizing clay for separated ends |
| Wide-tooth detangling comb |
| Flexible-hold hairspray for texture |
| Ceramic flat iron with tapered barrel |
| Leave-in conditioner for damaged ends |
3. High-Shine Glossy Blowout Finish
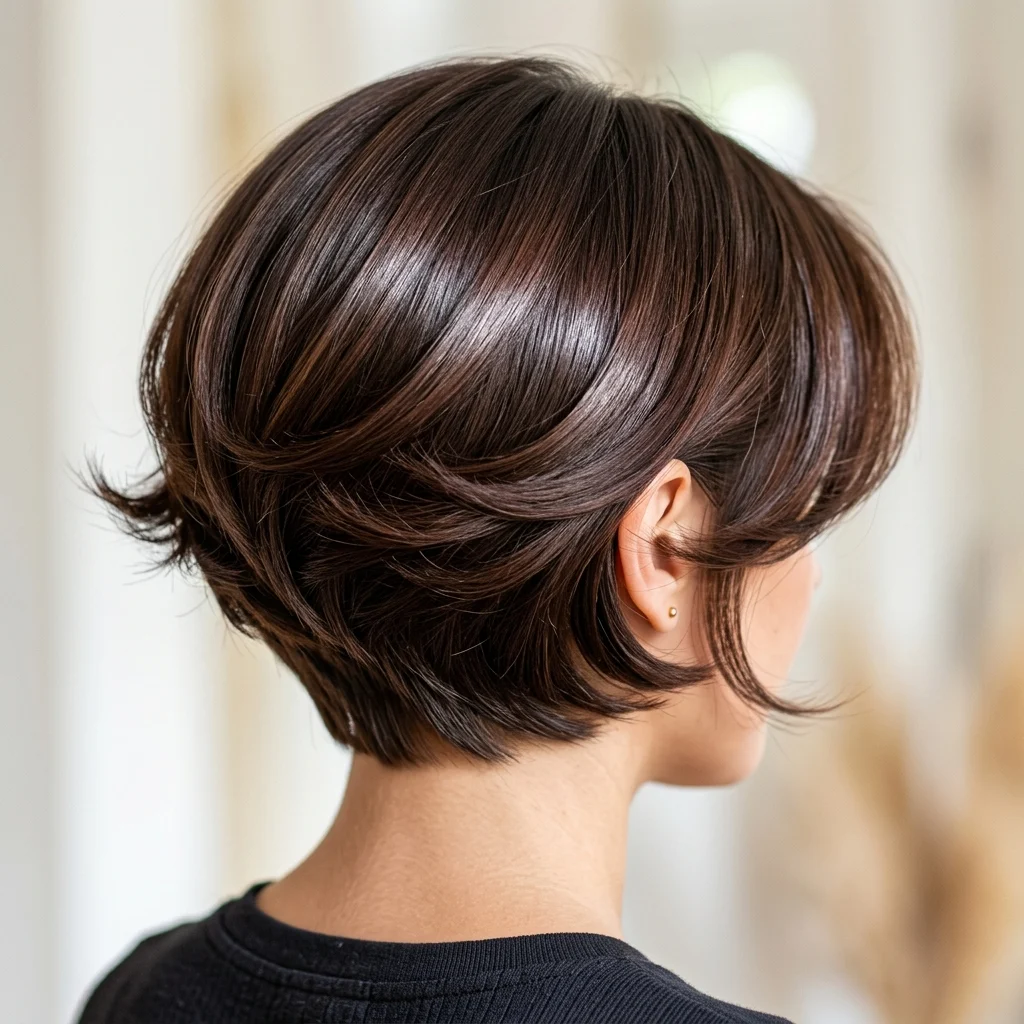
Vibe: Luminous, like the hair itself is reflecting the room’s light.
Why it works: Shine is a property of the hair’s cuticle lying flat, which round-brush blow-drying achieves at the root while still allowing the razor-cut ends to flick outward. The contrast between smooth roots and textured, separated ends is what keeps this look from reading as an ordinary bob blowout.
How to get it: Dry the roots first with a boar bristle round brush pulling hair up and away from the scalp, then finish only the last two inches with a curling iron wrapped away from the face to create the flick. Apply a lightweight, silicone-based shine serum to damp hair before drying, not after.
💡 Quick Win: Two pumps of shine serum rubbed between palms and smoothed over the crown instantly upgrades an air-dried day into a polished one.
Shop The Look
| Product |
|---|
| Silicone-based hair shine serum |
| 1-inch ceramic curling iron |
| Ionic blow dryer with concentrator nozzle |
| Anti-frizz smoothing cream |
| Round brush set for short hair |
4. The Classic Stacked Wedge Silhouette
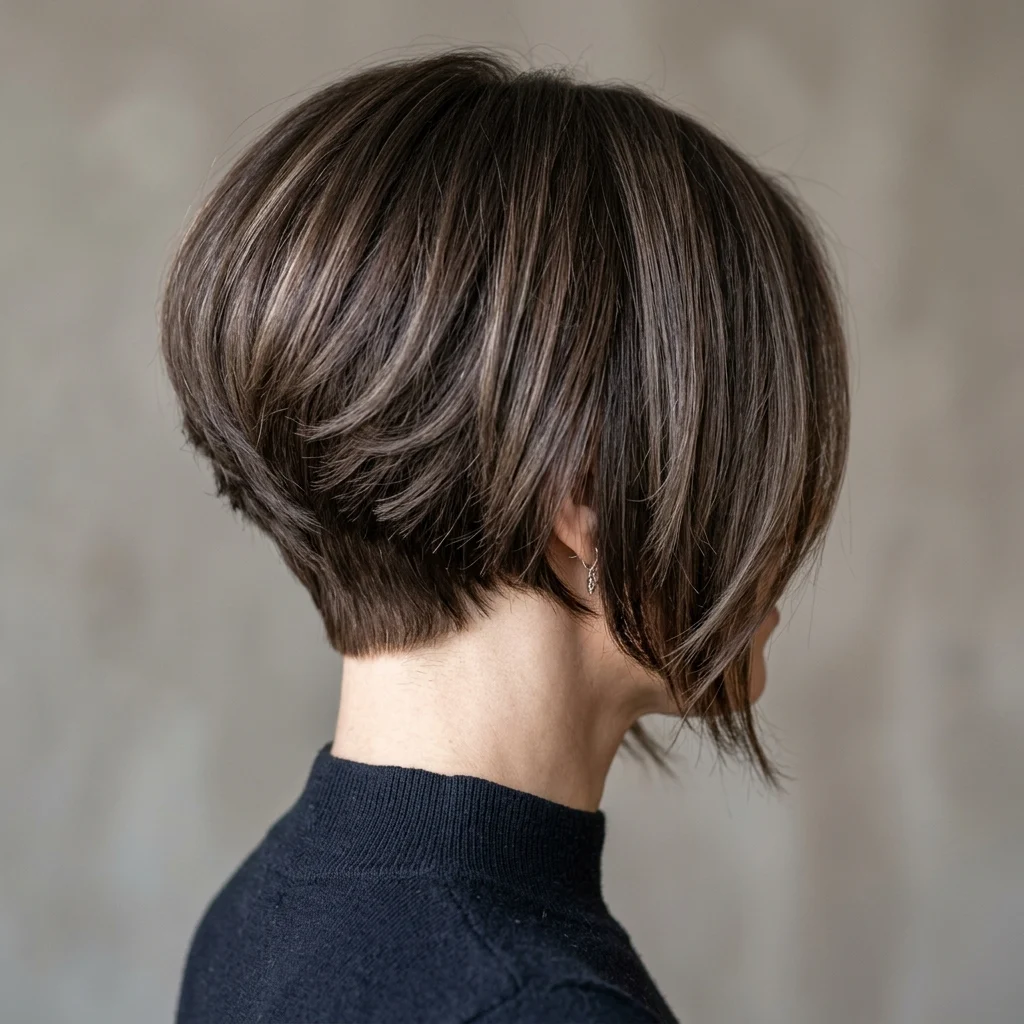
Vibe: Structured, like architecture built into hair.
Why it works: The stacked wedge relies on graduation. Each layer at the back sits slightly shorter and rounder than the one above it, building visual weight at the crown while the nape stays close to the head. This proportion principle is what gives the cut its signature rounded-back, longer-front silhouette without needing curls or product to hold the shape.
How to get it: Request “stacking” specifically at the back a technique where the stylist cuts the underlayers shorter than the top layers using a comb-and-scissor lift. Keep the front sections at chin-length or longer to maintain the wedge’s forward-sloping line.
Shop The Look
| Product |
|---|
| Densifying volume mousse |
| Teasing comb for root lift |
| Firm-hold texturizing gel |
| Vent brush for volume blowouts |
| Satin-lined beanie to protect shape overnight |
5. Curtain Bangs for Face-Framing Softness
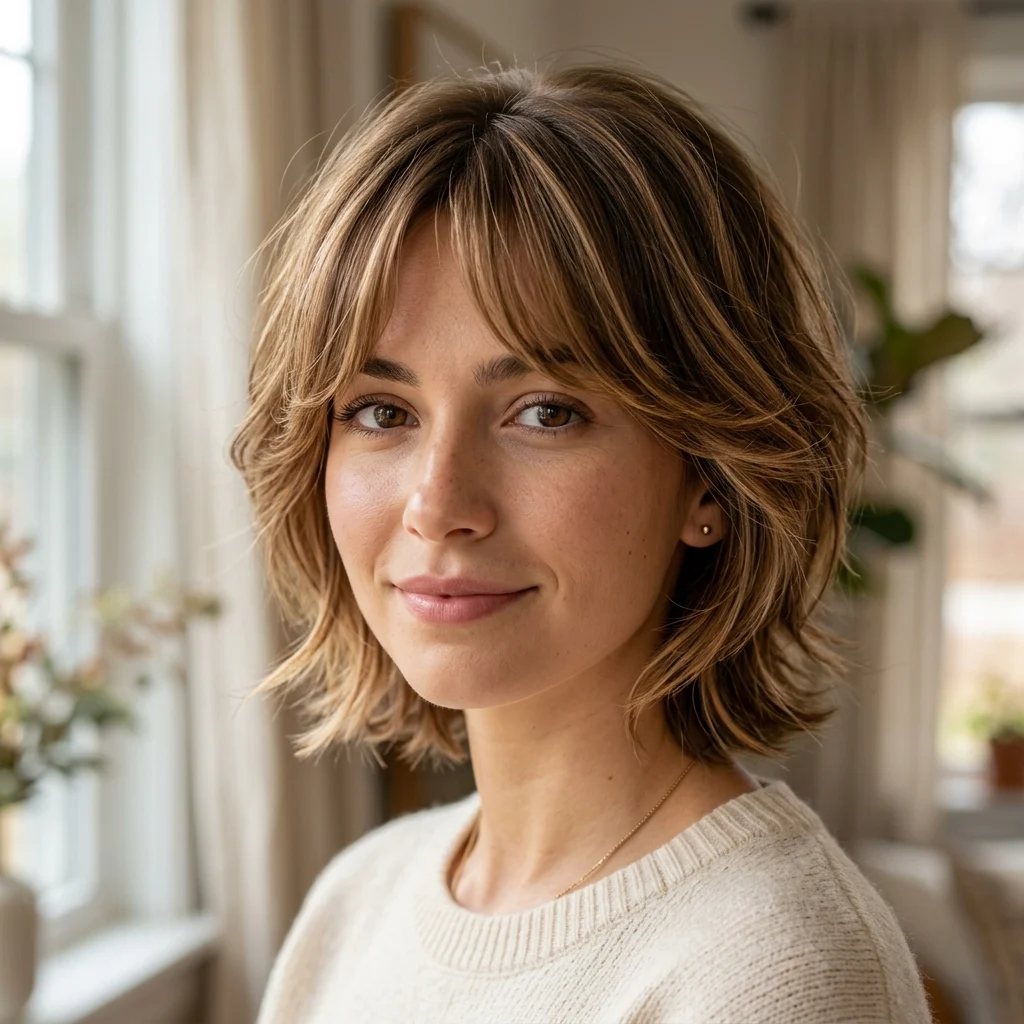
Vibe: Soft, like the hair is gently framing rather than covering.
Why it works: Curtain bangs are cut longest at the center part and shortest just above the brow line, then blended into the shag’s side layers so there’s no hard line between “bangs” and “hair.” This graduated blending is a texture-matching principle. The bang layer must echo the same razor-cut finish as the rest of the shag or it will look like a separate piece.
How to get it: Have the stylist cut the bangs while your hair is dry and already styled with its natural part, not wet. This prevents bangs that are too short once they dry and shrink. Blend the bang length into the layer directly behind it for at least two inches so the transition is seamless.
💡 Quick Win: A round brush and 30 seconds of blow-drying with a slight outward rotation is all curtain bangs need daily, no flat iron required.
Shop The Look
| Product |
|---|
| Small round brush for bangs |
| Lightweight bang-taming pomade |
| Mini travel-size flat iron |
| Bristle styling brush for touch-ups |
| Setting spray for humidity control |
6. Icy Platinum Feathered Wedge
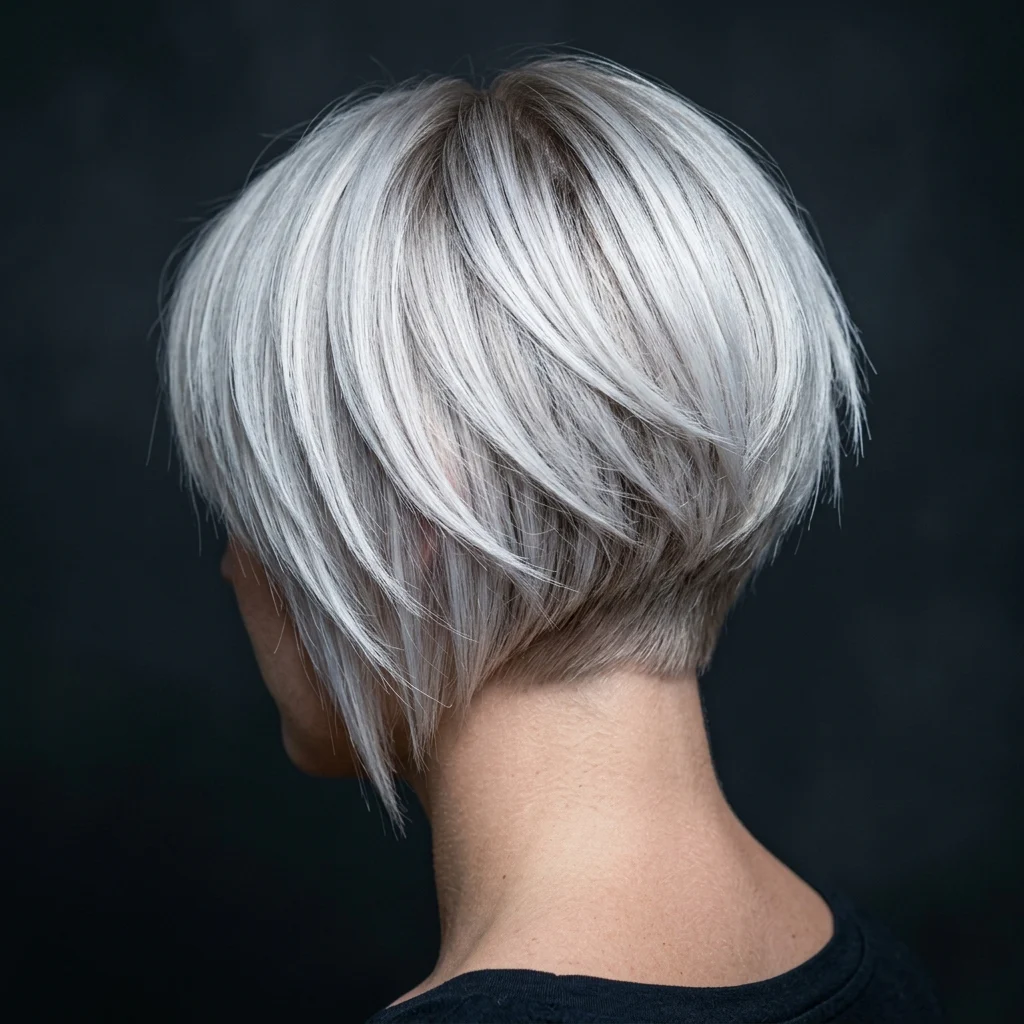
Vibe: Sleek, like frost catching light.
Why it works: Cool-toned platinum requires an even, high-lift base, and the feathered layers help disguise the toning maintenance a solid platinum shade usually demands. Because the ends are already textured and separated, minor tonal shifts between salon visits blend rather than show as an obvious line of demarcation.
How to get it: Use a purple-pigmented shampoo once or twice weekly to neutralize brassy yellow undertones between toning appointments. Keep a root shadow of one shade darker at the part to reduce the frequency of root touch-ups needed on this high-maintenance color.
Shop The Look
| Product |
|---|
| Purple toning shampoo for blonde hair |
| Bond-repair hair mask for lightened hair |
| Root touch-up powder in ash blonde |
| UV-protectant leave-in spray for color |
| Silver-toned dry shampoo for blondes |
7. Point-Cut Shag Texture
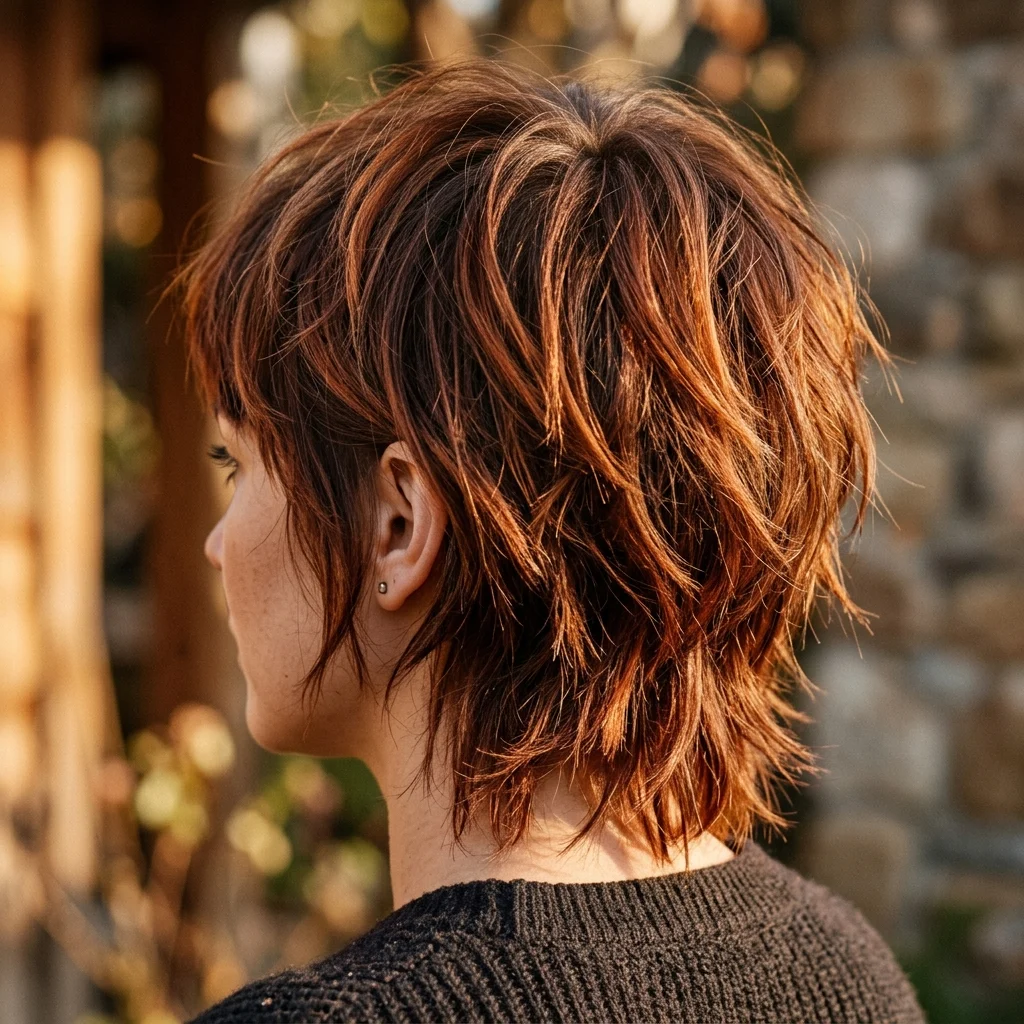
Vibe: Lived-in, like the texture has always been there.
Why it works: Point cutting, snipping vertically into the ends rather than cutting straight across, removes bulk and creates the choppy, uneven silhouette associated with a true shag. This differs from razor cutting in that it adds visible “notches” of varying length rather than a soft taper, giving coarser or thicker hair more movement without excess weight.
How to get it: Request point cutting specifically through the mid-lengths and ends, not just the very tips, so texture builds throughout the layer rather than only at the bottom edge. This technique works especially well on thicker hair types that need weight removed to let the shag’s shape show.
💡 Quick Win: Scrunching a texturizing cream into damp hair before air-drying enhances point-cut texture without needing a curling iron.
Shop The Look
| Product |
|---|
| Texturizing cream for wavy or thick hair |
| Sea salt spray for enhanced texture |
| Diffuser attachment for curly blow dryers |
| Copper-toned semi-permanent gloss |
| Wide barrel curling wand for loose waves |
8. Deep Side Part for Dimension
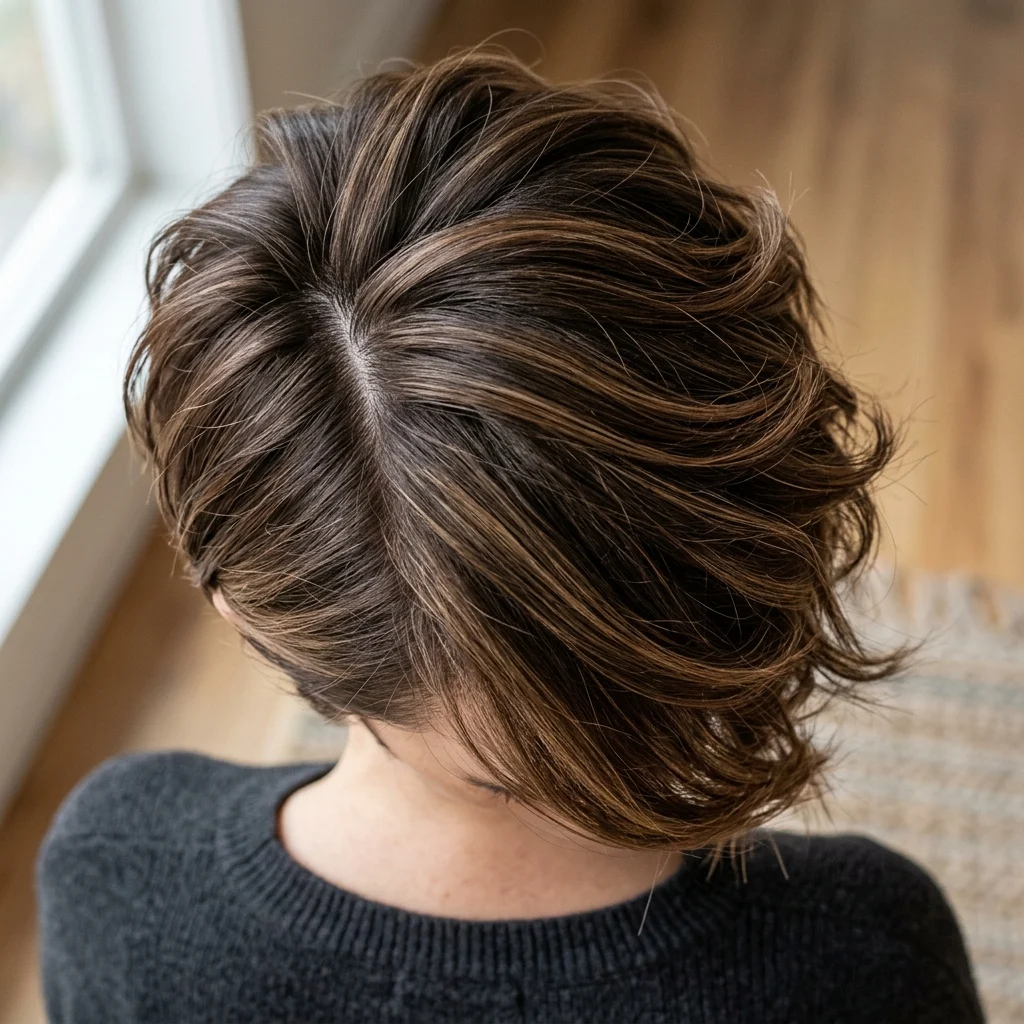
Vibe: Asymmetrical, like the hair is caught mid-turn.
Why it works: A deep side part shifts the visual weight of the cut off-center, which elongates the face and adds height at the crown through negative space the parted-away side reveals more scalp and layering, creating an illusion of volume on the fuller side. This is a proportion trick stylists use on rounder face shapes.
How to get it: Part the hair at least two inches off-center, roughly above the arch of one eyebrow, rather than the classic one-inch side part. Blow-dry the roots on the fuller side with a round brush lifting away from the scalp to exaggerate the volume shift.
Shop The Look
| Product |
|---|
| Root-lifting spray for volume |
| Fine-tooth parting comb |
| Volumizing dry shampoo |
| Medium-hold styling cream |
| Bobby pins in matching hair tone |
9. Espresso Root-Smudge Balayage
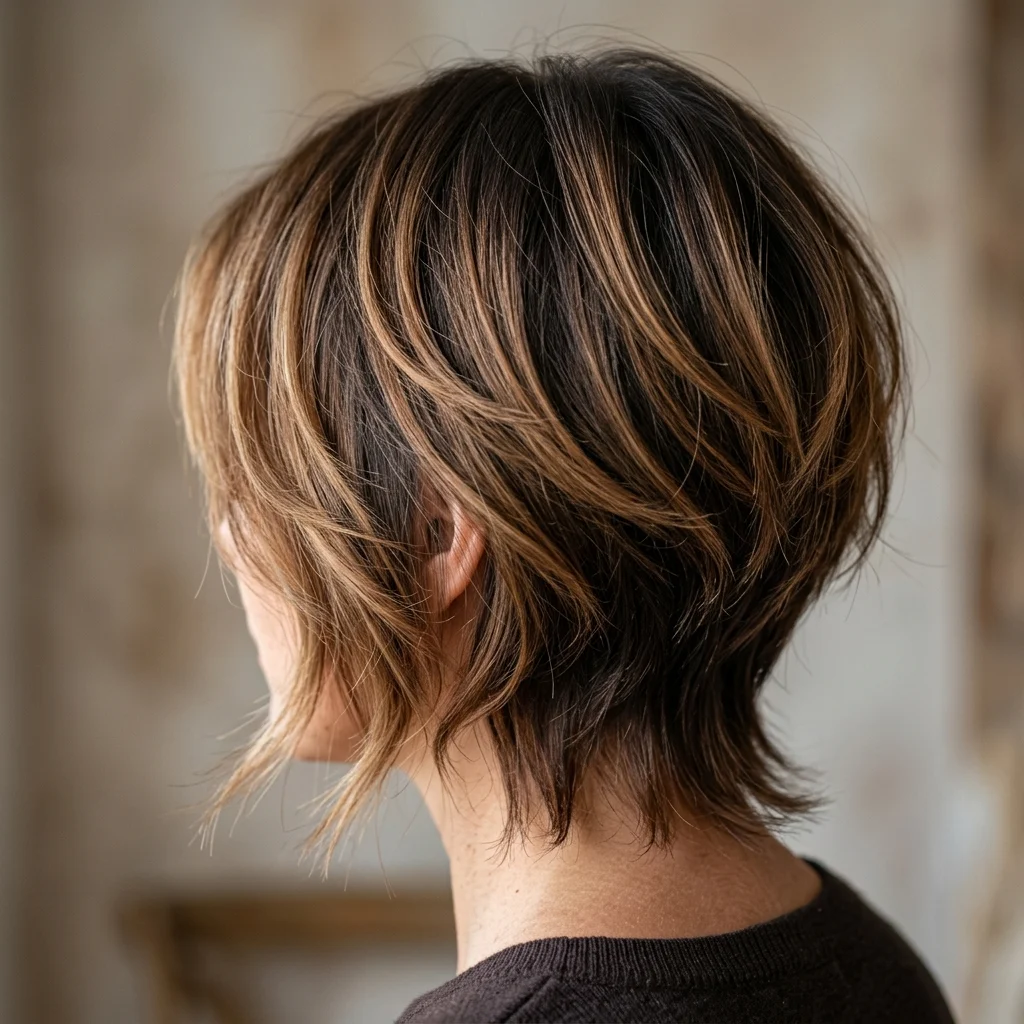
Vibe: Grounded, like the color deepens the shorter the hair gets.
Why it works: A root smudge blends a soft, smoky shadow directly at the part using a balayage technique, so regrowth is far less visible between colorist visits, the smudge eliminates the hard demarcation line typical of traditional highlights. On a short shag, where roots grow out fast relative to overall length, this is a maintenance-driven color choice as much as an aesthetic one.
How to get it: Ask your colorist for a “root smudge” or “shadow root” using a shade one to two levels darker than your balayage ends, blended with a tint brush directly at the scalp rather than painted freehand. This extends time between appointments to roughly ten to twelve weeks instead of the usual six.
💡 Quick Win: A root concealer powder in a matching espresso shade buys an extra two to three weeks before your next color appointment.
Shop The Look
| Product |
|---|
| Root concealer powder in espresso brown |
| Color-safe sulfate-free shampoo |
| Toning gloss for balayage upkeep |
| Heat protectant mist for colored hair |
| Wide-tooth comb for gentle detangling |
10. Tousled Matte Texture Finish
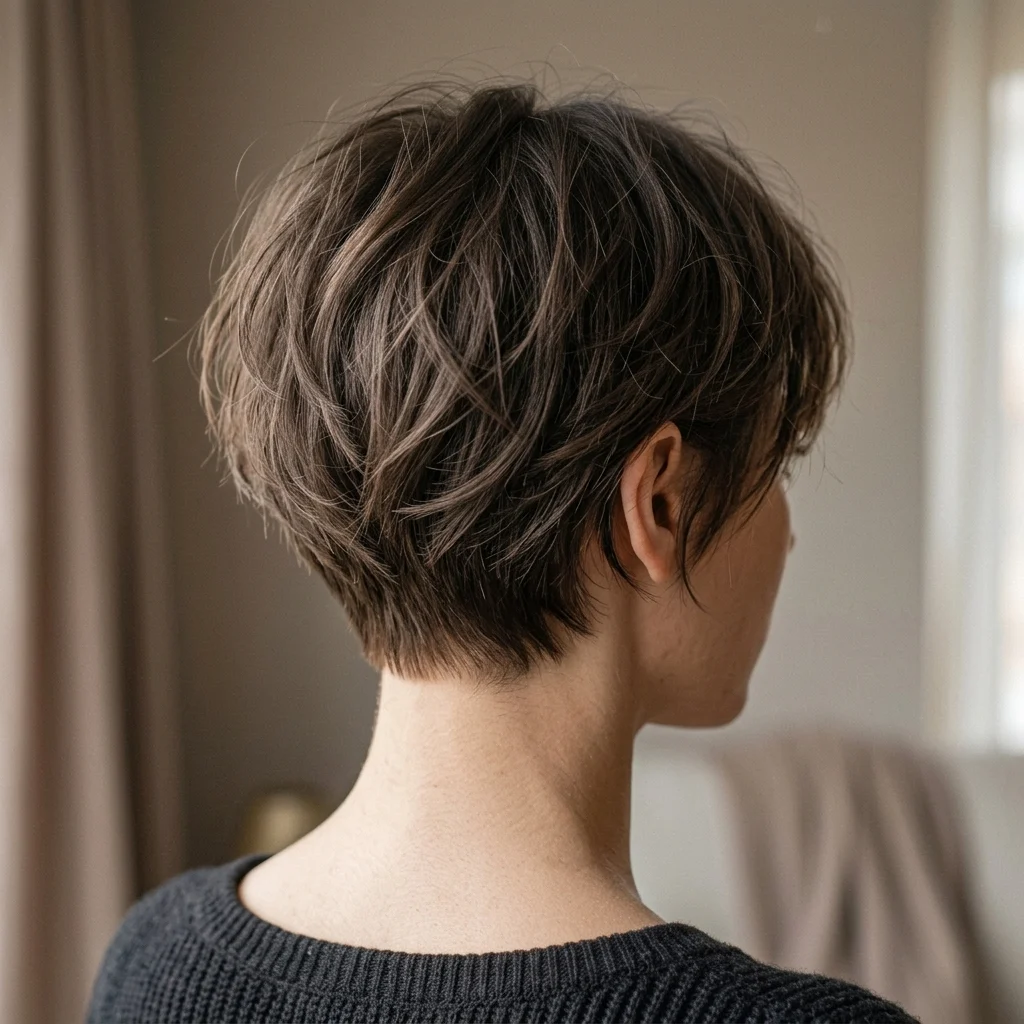
Vibe: Undone, like it was styled by hand, not a mirror.
Why it works: Matte finishing products contain clay or wax rather than silicone, which absorbs light instead of reflecting it this is what gives the “undone” texture its lived-in look, as opposed to the glossy finish of a blowout. On feathered layers specifically, matte product also helps separated pieces hold their shape without clumping into strands.
How to get it: Rub a dime-sized amount of matte clay between your palms until warm, then scrunch it upward into damp or towel-dried hair rather than smoothing it down. Focus product at the ends and crown, avoiding the roots to prevent a greasy-looking flat top.
Shop The Look
| Product |
|---|
| Matte styling clay for short hair |
| Texture powder for root volume |
| Air-dry cream for wavy texture |
| Wide-tooth pick comb |
| Absorbent microfiber hair towel |
11. Asymmetrical Long-in-Front Wedge
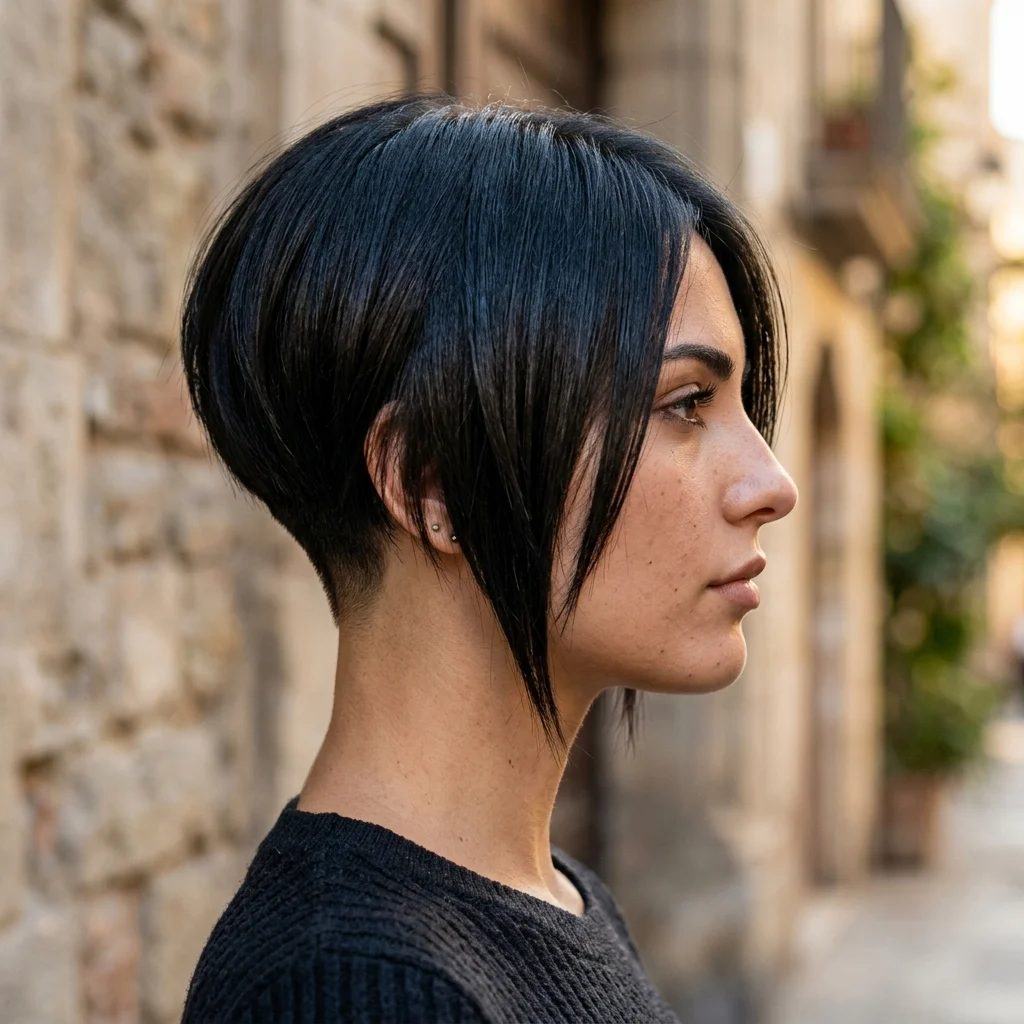
Vibe: Bold, like the silhouette makes a decision and commits to it.
Why it works: This variation exaggerates the wedge’s natural front-to-back length gradient, keeping the nape cropped close while front pieces reach the jaw or collarbone. The dramatic scale contrast is a visual-weight principle. The eye is drawn first to the longest point, making the whole cut feel more sculptural and less like a uniform bob.
How to get it: Ask for at least a four-inch length difference between the shortest nape pieces and the longest front pieces, with the transition happening gradually through the sides rather than in one abrupt step. This shape suits straight or slightly wavy hair best, since curl pattern can shorten the visual length difference.
Shop The Look
| Product |
|---|
| Anti-frizz serum for sleek fronts |
| Flat iron with narrow tapered plates |
| Firm-hold pomade for sculpted pieces |
| Boar bristle brush for shine |
| Clear glossing spray for jet-black hair |
12. Undercut Nape Design
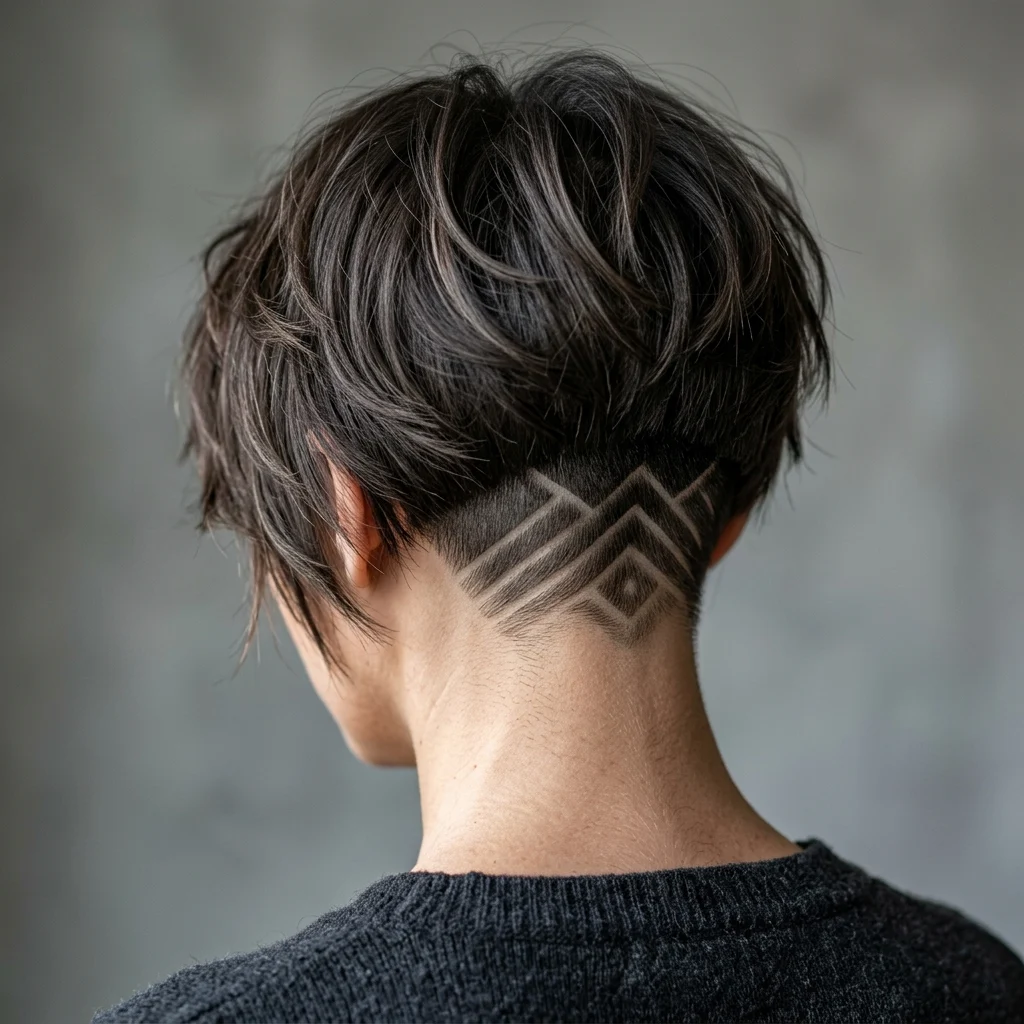
Vibe: Edgy, like there’s a secret underneath the softness.
Why it works: An undercut nape removes bulk from beneath the top layer entirely, using clippers rather than scissors, which lets the feathered top layers fall with less resistance and more natural movement. It’s a hidden-detail technique. Invisible when hair is down, revealed when tucked or worn up.
How to get it: Have the clipper work done in a fade or single-length crop beneath the occipital bone, leaving at least two inches of longer hair on top to cover it when worn down. Book a touch-up every four to six weeks, since undercuts grow out faster visually than the surrounding layers.
💡 Quick Win: A texturizing clip pinning the crown hair up for a day instantly reveals the undercut detail without any extra styling.
Shop The Look
| Product |
|---|
| Small claw clip for half-up styling |
| Edge control gel for clean nape lines |
| Cordless trimmer for at-home touch-ups |
| Matte pomade for top-layer separation |
| Boar bristle neck brush for clean-up |
13. Disconnected Undercut Layers
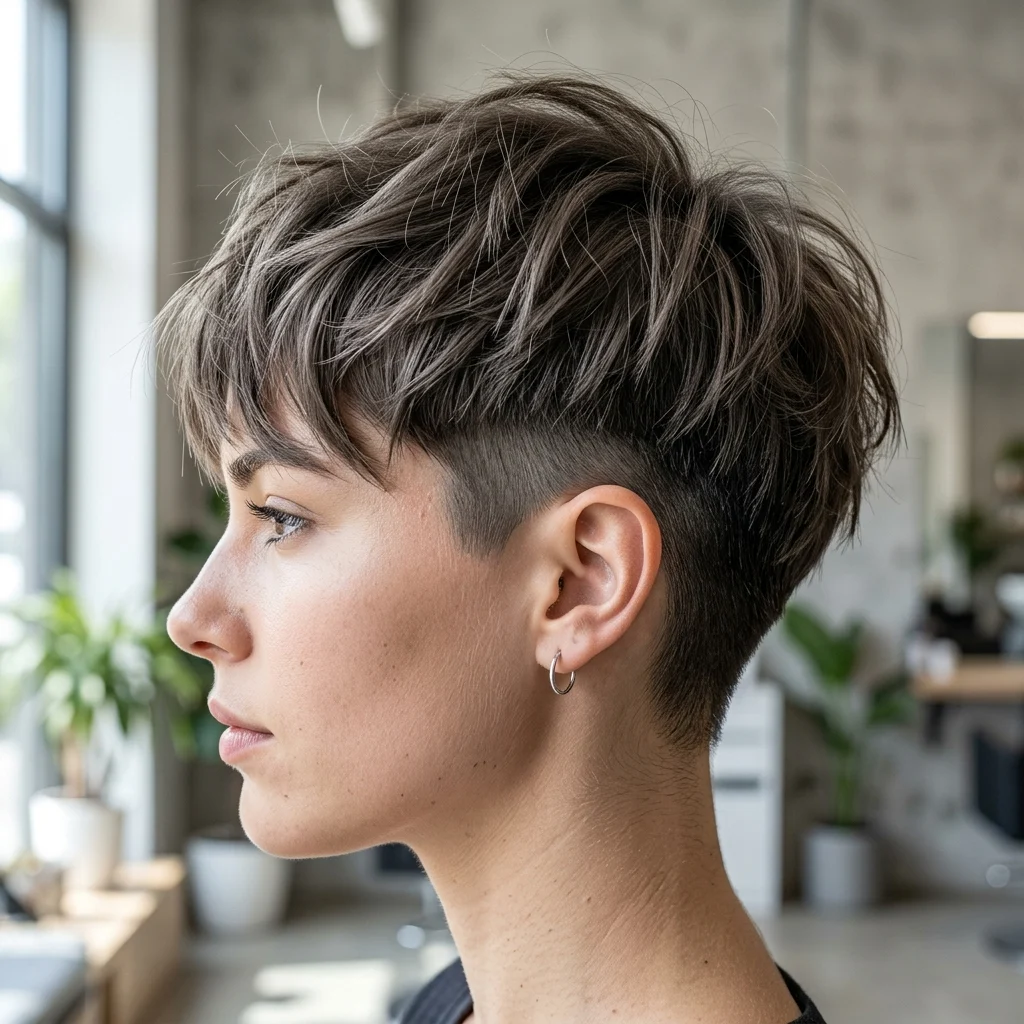
Vibe: Sharp, like two different textures colliding on purpose.
Why it works: Unlike a blended undercut, a disconnected cut leaves a visible, abrupt line between the short underlayer and the longer feathered top, a contrast technique borrowed from editorial and punk-influenced styling. This works because the shag’s inherent messiness softens what would otherwise read as too severe.
How to get it: Request the stylist cut the undercut section with clippers at a fixed guard length, then leave the top layer untouched by the guard so there’s a hard visual line rather than a gradual taper. This look needs regular maintenance. The disconnection reads best within two to three weeks of a fresh cut.
Shop The Look
| Product |
|---|
| Precision clipper set for sharp lines |
| Firm-hold texturizing wax |
| Detail trimmer for clean edges |
| Volumizing root spray for top layer |
| Shine-free matte finishing spray |
14. Volumizing Wedge for Fine Hair
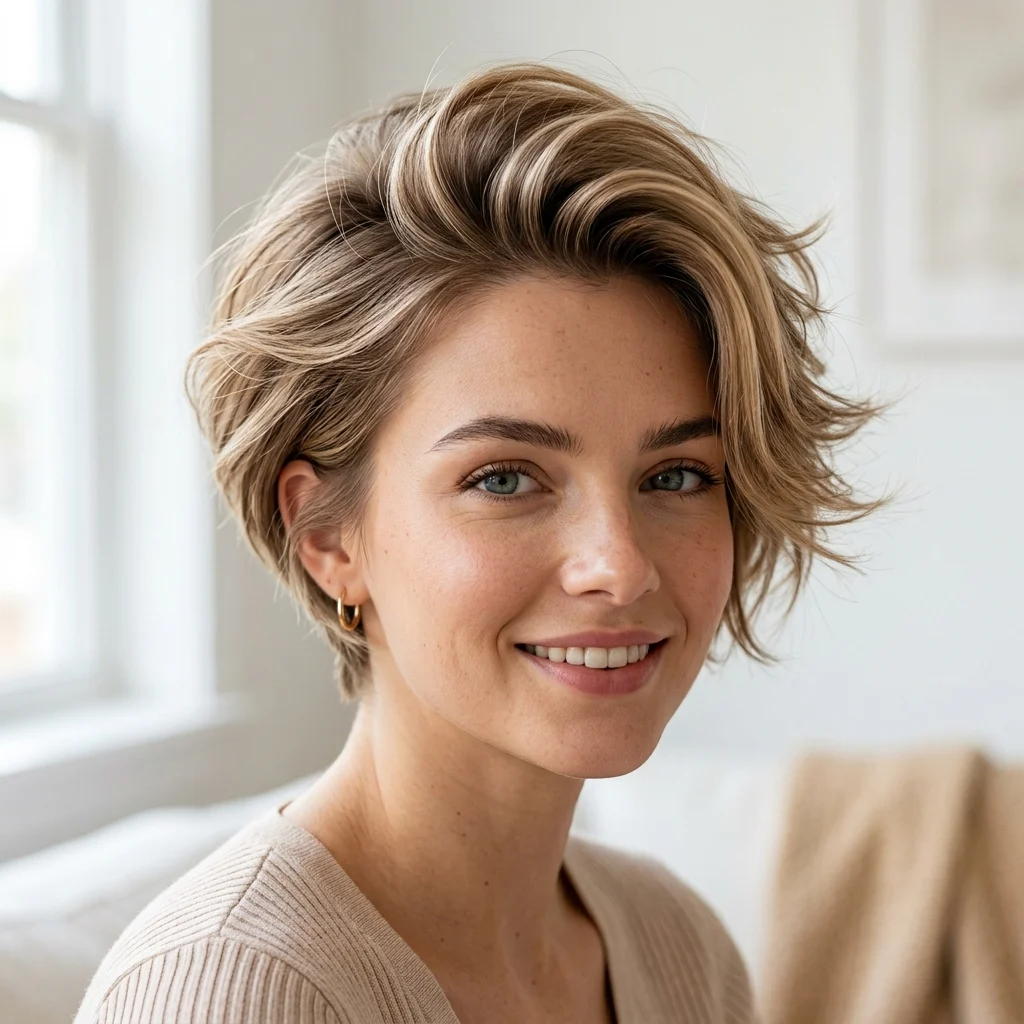
Vibe: Airy, like the hair is lighter than it actually is.
Why it works: Fine hair reads as thin because there’s less individual strand diameter to create shadow and depth. Short, graduated layers concentrate visual mass at the crown instead of spreading it thin across long lengths. This is why fine-haired clients are consistently told shorter cuts read fuller than long ones.
How to get it: Keep the layers shorter overall, chin-length maximum on top, so weight doesn’t drag the crown flat, and ask for the heaviest layer concentration at the crown rather than the ends. Blow-dry upside down for the first thirty seconds to set lift at the root before flipping hair back over.
💡 Quick Win: A fiber-infused volumizing mousse applied only at the roots on damp hair adds lasting lift without weighing down fine strands.
Shop The Look
| Product |
|---|
| Root-lifting volumizing mousse |
| Fine-hair thickening spray |
| Small round brush for crown lift |
| Lightweight dry shampoo for fine hair |
| Volumizing shampoo and conditioner set |
15. Textured Pixie-Wedge Hybrid with Clip Accents
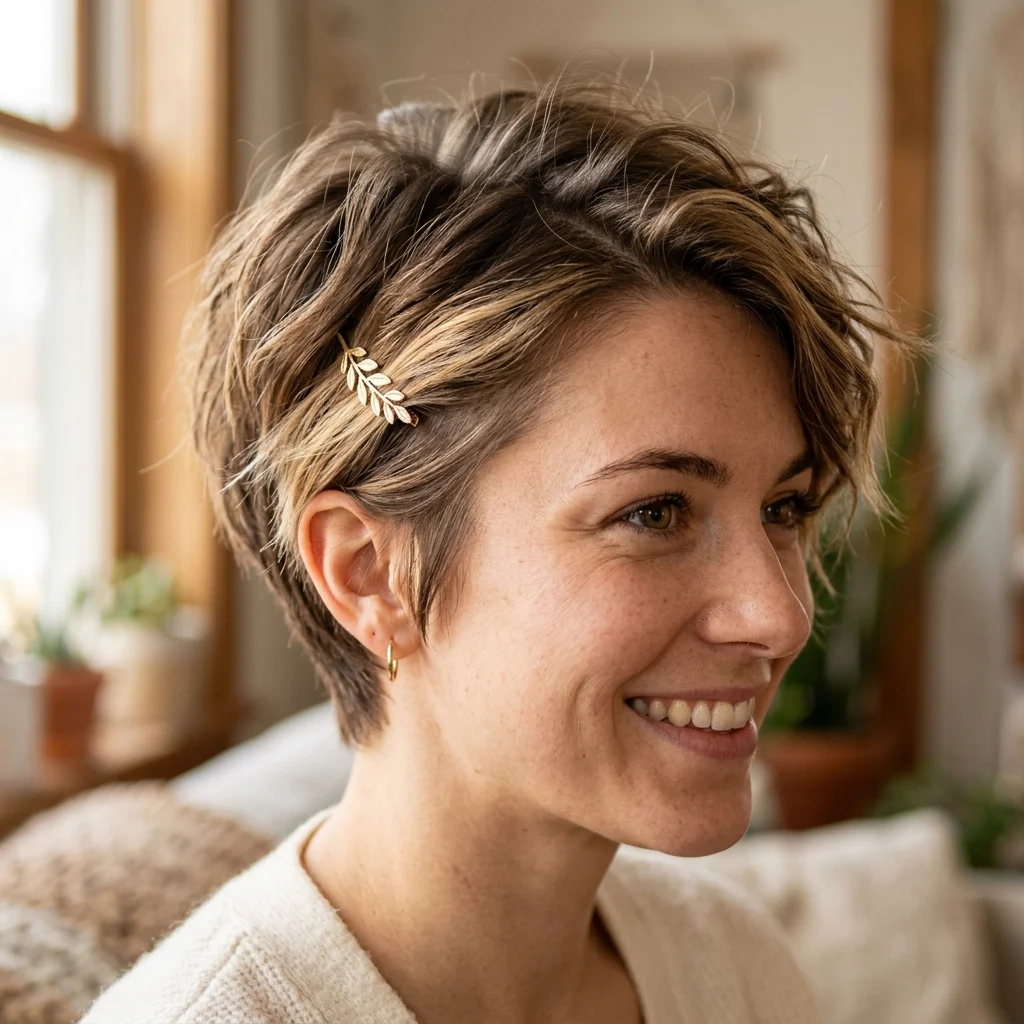
Vibe: Playful, like the hair has room to be rearranged daily.
Why it works: Combining a cropped pixie side with a longer, feathered wedge top creates a hybrid silhouette that offers styling flexibility. The shortest hair needs no product at all, while the longer top layer can be flicked, tucked, or clipped differently each day. This is a versatility principle: the shorter the base cut, the more the top layer’s styling changes the entire look.
How to get it: Keep sides cropped to under an inch while leaving three to four inches on top, blended with point cutting so the transition doesn’t look like two separate haircuts. Use a small metal clip to pin back one side when you want an asymmetrical, undone effect.
Shop The Look
| Product |
|---|
| Small gold minimalist hair clip |
| Pixie-length texturizing paste |
| Compact travel-size curling wand |
| Clear brow-and-hair gel for baby hairs |
| Flexible mist hairspray for pinned styles |
16. Off-Center Part with Swoop Bang
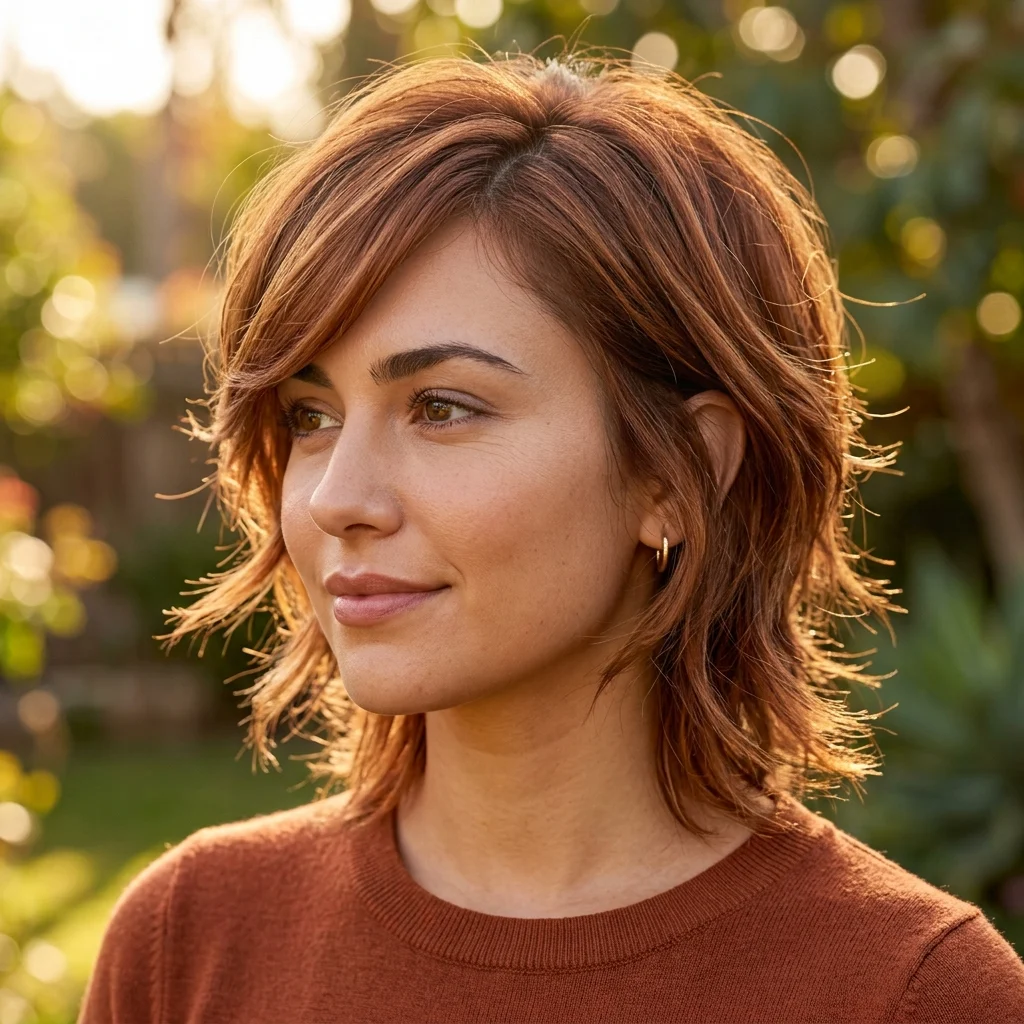
Vibe: Flowing, like the part itself is part of the style.
Why it works: A swoop bang is cut on a diagonal rather than straight across, so it sweeps naturally in the direction of the part instead of needing to be pinned or blown dry into place. Paired with an off-center part, the diagonal line draws the eye across the face rather than down it, a technique used to soften angular jawlines.
How to get it: Have the bang cut on the diagonal while dry, following the natural fall of your part, and blend it into the first side layer for at least an inch and a half. Use a small round brush to reinforce the swoop direction during blow-drying rather than fighting the hair’s natural fall.
Shop The Look
| Product |
|---|
| Small round brush for bang styling |
| Copper-toned semi-permanent hair gloss |
| Lightweight hold hairspray for movement |
| Heat protectant spray for daily styling |
| Fine-tooth comb for precise parting |
How to Start Your Feathered Shaggy Wedge Transformation
The single best first move is booking a consultation where you show the stylist a photo and say the two words “razor-cut” and “graduated” specifically. Most miscommunication in short-cut haircuts happens because “shaggy” and “feathered” mean different things to different stylists, and naming the technique anchors the whole conversation.
The most common mistake is going too short too fast on the first cut, especially with a heavy undercut, before you know how the graduation will grow out. Because feathered layers rely on length contrast to read as textured rather than choppy, an overly aggressive first cut can leave you with an awkward, bulky in-between stage for months. Fix it by asking for a “conservative first cut” with room to go shorter at the next visit.
Three items under $50 that make an immediate difference: a sea-salt texturizing spray, a small round brush for bang and crown lift, and a dime-sized matte styling clay. Each targets a different part of the shag’s finish: texture, lift, and separation.
A first cut and color combination typically takes one salon visit and one to two hours. Full color development (balayage plus root smudge) can run $150–$300 depending on region; a cut alone typically runs $45–$90. The cut itself looks intentional within one to two wearings once you learn the styling routine.
Frequently Asked Questions About Feathered Shaggy Wedge Haircuts
What’s the difference between a wedge haircut and a shag haircut?
A wedge haircut is defined by its angled silhouette (short and rounded at the nape, graduating longer toward the face) while a shag is defined by heavy, choppy layering throughout the whole head. A feathered shaggy wedge combines both: it keeps the wedge’s structured, graduated shape but adds shag-style razor-cut layers for texture. On their own, a pure wedge looks smoother and more sculptural, while a pure shag looks looser and more uniform in length.
What hair colors work best with a feathered shaggy wedge?
Dimensional colors work best because the feathered ends need contrast to read as texture: bronde balayage, espresso root smudge, and icy platinum with a shadow root are the three most requested shades for this cut. Solid, single-process color can look flat on short layers since there’s no light-and-dark interplay to highlight the movement. Warm tones like caramel and copper tend to photograph better in natural light than cool ash shades.
How much does a feathered shaggy wedge haircut typically cost?
A cut alone at a mid-range salon typically runs $45 to $90 depending on region, while adding balayage or a root smudge brings the total to $150–$300 for the first visit. Touch-up cuts to maintain the shape run every six to eight weeks at roughly the same base price as the original cut. Budget salons and cosmetology schools can bring the first-cut price down to $20–$35.
Does this haircut work for fine hair or only thick hair?
Fine hair actually tends to benefit most, since the short, graduated layers concentrate visual density at the crown instead of spreading thin strands across a longer length. Thick or coarse hair can also work well but needs a stylist experienced in texture-specific point cutting to avoid bulk at the ends. The main adjustment for fine hair is keeping the layers shorter overall, chin-length maximum on top, to prevent the crown from falling flat.
How do you style a feathered shaggy wedge at home?
Start with a lightweight texturizing spray on damp hair, then blow-dry the roots with a round brush lifting away from the scalp before finishing the last two inches with a curling iron wrapped away from the face to create the signature flick. Once dry, rub a dime-sized amount of matte clay between your palms and scrunch it into the ends for separation. Most people can style this cut in under ten minutes once the routine becomes familiar.
Ready to Create Your Feathered Shaggy Wedge Haircut?
Across these 16 ideas, you’ve seen how color placement, cutting technique, part direction, and finishing product all shape the same core silhouette in different ways. Starting small (a single consultation, one reference photo, one honest conversation about maintenance) is genuinely the right way to approach a cut this specific, not a compromise. Today, save your three favorite reference photos from this list and screenshot the exact wording (“razor-cut,” “root smudge,” “curtain bangs blended into shag layers”) to bring to your stylist. Once it grows in, you’ll likely notice how light the cut feels on your neck and how little effort it takes to look finished on a second-day-hair morning. Pin the versions that caught your eye most (the icy platinum wedge, the espresso root smudge, the curtain-bang blend), so you have them ready the next time you’re in the chair.