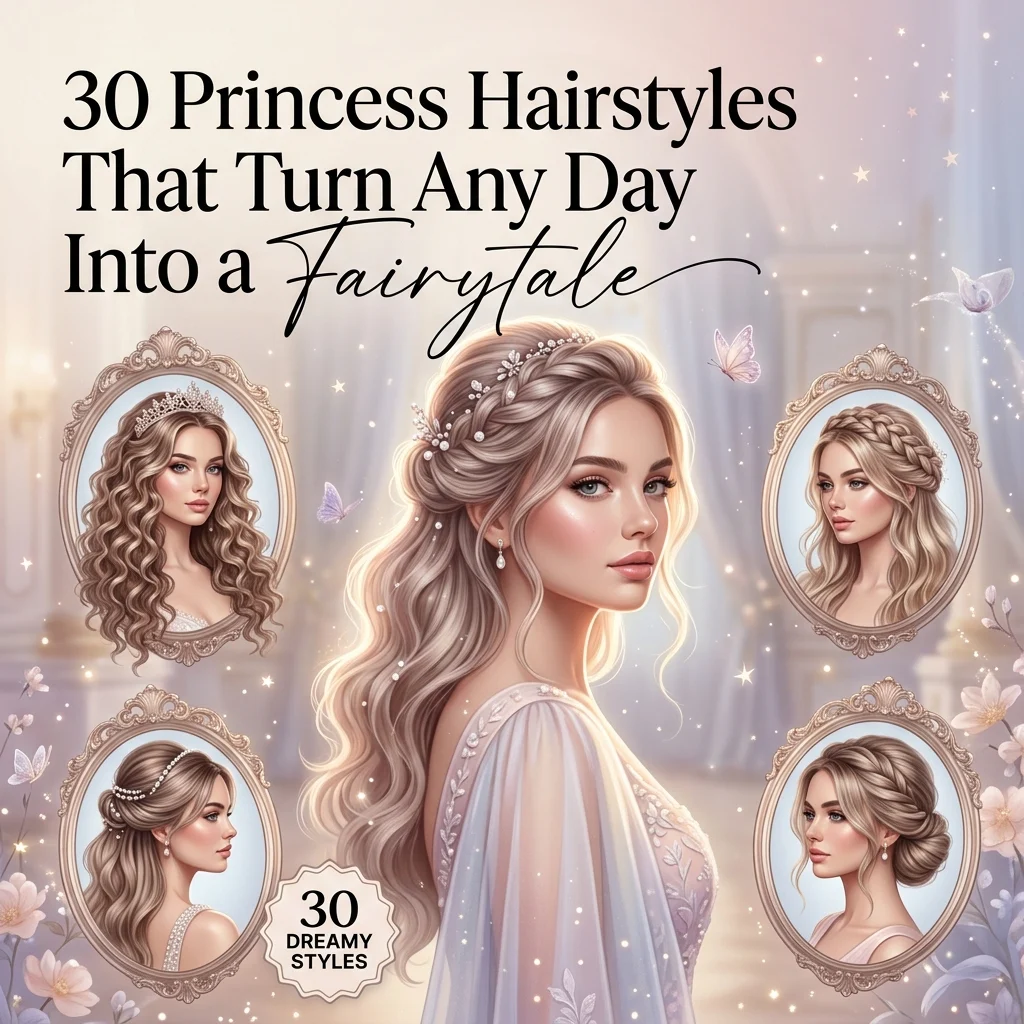
30 Princess Hairstyles That Turn Any Day Into a Fairytale

Princess hairstyles are romantic, polished looks built on soft curls, braided detail, and delicate accessories that make everyday hair feel like it belongs in a fairytale. This guide walks through 30 princess hairstyle ideas, covering color, texture, braids, accessories, and quick everyday versions.
There’s something about a loose curl catching the light or a braid wrapping neatly into a crown that feels instantly more magical than an ordinary hairstyle. The mood here is soft, luminous, and a little whimsical, like tulle catching a breeze. Every look leans into shine, movement, and small sparkling details rather than anything stiff or overdone. Whether you’re dressing up for a special event or want a softer everyday version, this style rewards patience and a light touch.
Here are 30 ideas worth saving, and stealing.
Why Princess Hairstyles Work So Well
Princess hairstyles draw from a mix of sources: Victorian era romantic updos, classic Disney animation references, and modern bridal styling traditions. What sets them apart from a loose bohemian look is structure. A princess style still has movement, but it’s shaped, pinned, and finished rather than left undone.
The color and material vocabulary here is specific. Popular tones include champagne blonde, rose gold, honey brown, and copper red, all chosen for how they catch light in curls. Tools lean on a curling wand for soft ringlets, bobby pins for structure, and finishing touches like pearl hairpins, rhinestone combs, and silk ribbon.
This look has surged again thanks to the popularity of period romance shows, a general shift toward softer “soft girl” beauty trends, and Pinterest search spikes tied to prom season, weddings, and costume events. It photographs well, which matters for how these searches are used.
Beginners can absolutely start here. A simple half up twist with a ribbon captures most of the look in under five minutes, while a full crown braid takes practice and a few tries to get symmetrical.
Style at a Glance
| Element | Core Trait 1 | Core Trait 2 |
| Philosophy | Romantic and polished | Soft movement, not rigid structure |
| Tools | Curling wand, bobby pins | Rhinestone combs, silk ribbon |
| Color Palette | Champagne blonde, rose gold | Honey brown, copper red |
30 Princess Hairstyles That Turn Any Day Into a Fairytale
1. Rose Gold Balayage Fit for a Princess (COLOR)
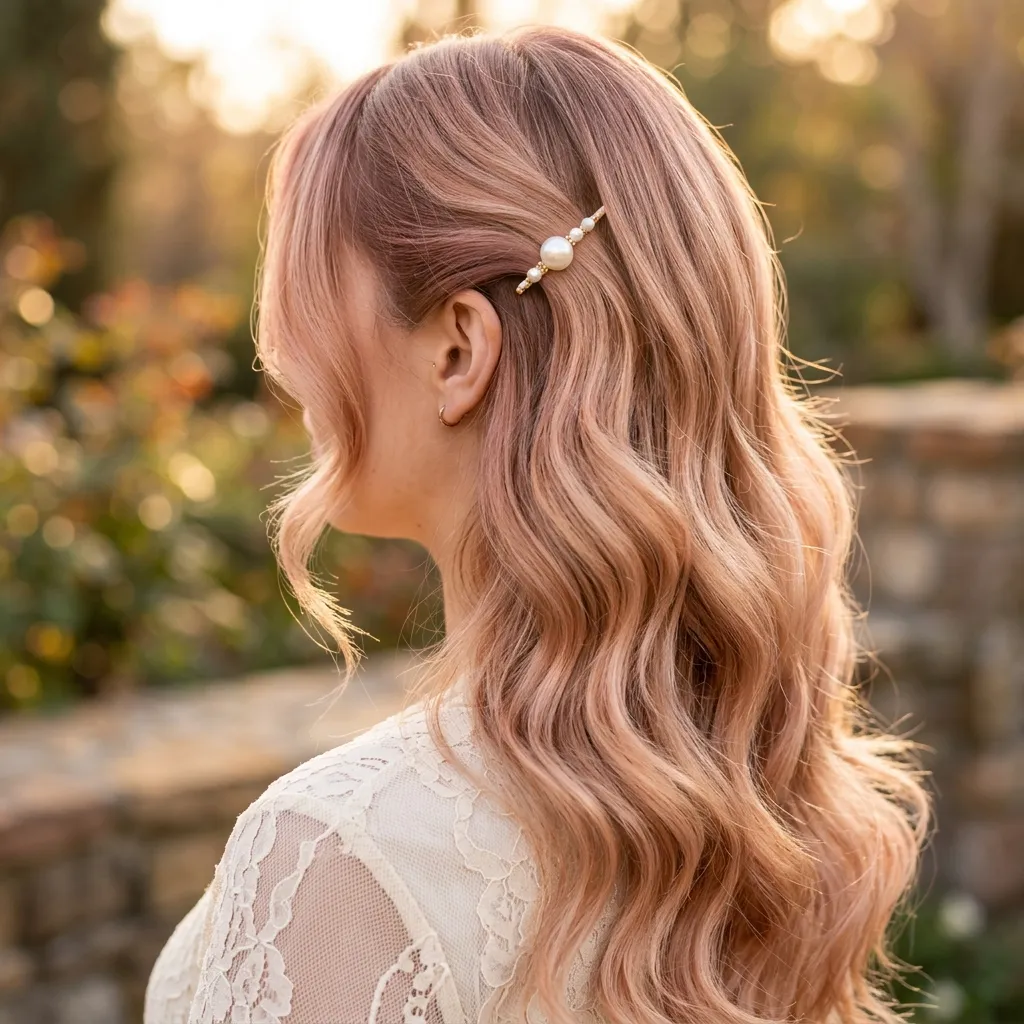
Vibe: Warm and luminous.
Why it works: Balayage painted only on the mid lengths creates a soft gradient instead of a harsh line at the root. This uneven placement mimics how the sun would naturally lighten hair over a season, so the color reads as authentic rather than applied. The pink undertone also reflects warm light differently than a flat blonde, which is why it photographs with visible shimmer in curls.
How to get it: Ask your colorist for a rose gold balayage using a pink toned glaze over a champagne blonde base, applied hand painted rather than foiled. Request the color start about two inches from the root so regrowth stays soft for longer. At home, use Kristin Ess Rose Gold Temporary Tint Deposit Conditioner every third wash to keep the pink tone from fading into a plain blonde.
💡 Quick Win: A rose gold toning gloss added at your next salon visit refreshes the shade for under $40.
Also view: Soft Fairytale Waves for Beginners
Shop the Look
| Product |
| Rose gold shimmer hair toner spray |
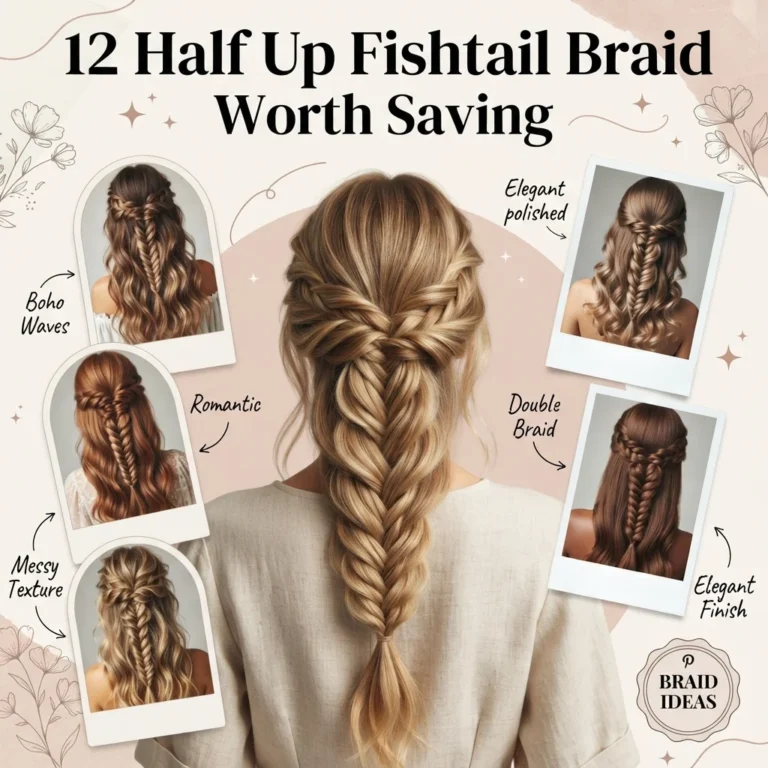
| Silk pillowcase for color protection |
| Wide tooth detangling comb |
| Heat protectant shine spray |
| Pearl hairpin set |
2. Soft Beachy Waves with a Royal Twist
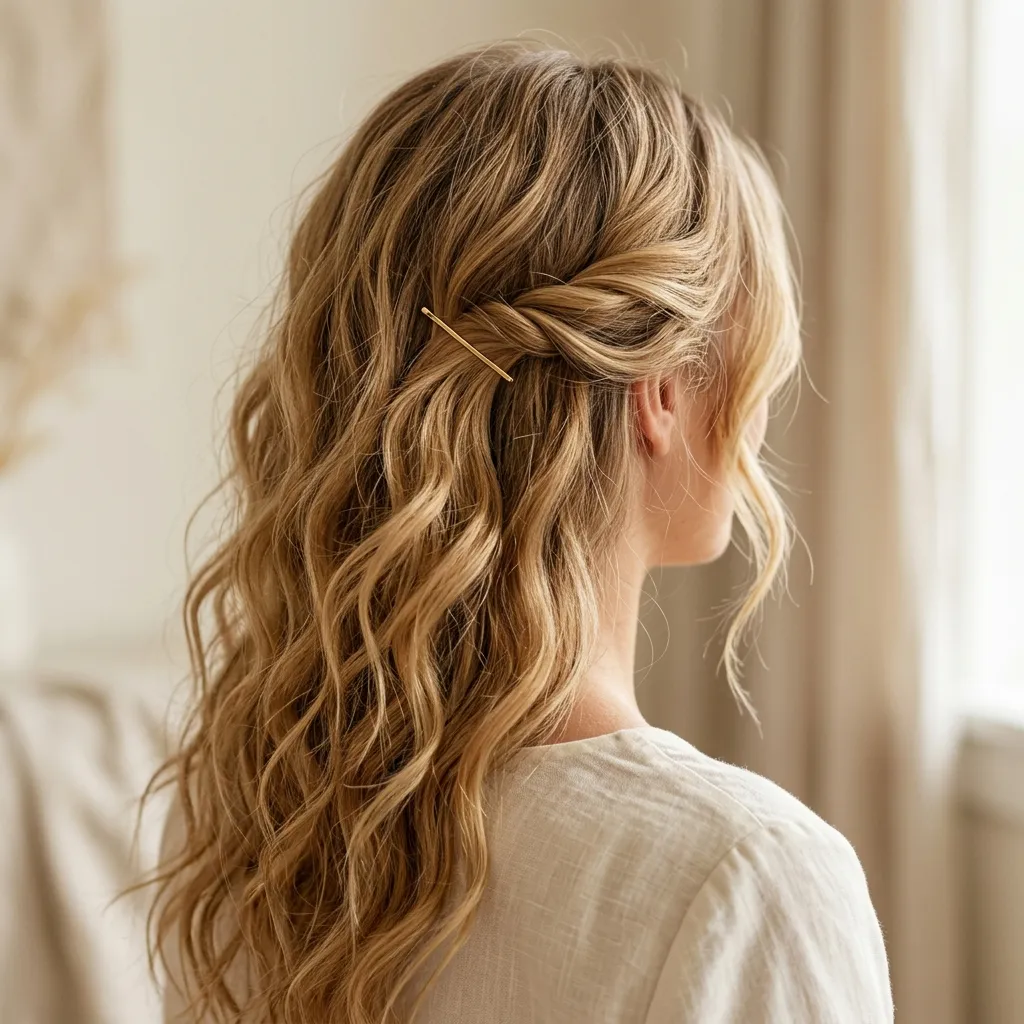
Vibe: Undone and soft.
Why it works: Combining loose texture with one structured twist keeps the look from reading as messy, since the eye has one clear focal point to rest on. Without that twist, loose waves alone can look unfinished, especially on longer hair where the ends carry most of the visual weight. The small pinned section acts like punctuation, signaling that the rest of the texture is intentional rather than undone by accident.
How to get it: Curl one inch sections away from your face with a 1.25 inch wand, alternating direction slightly so the wave pattern feels irregular and natural. Once curled, twist a small front section back toward the crown and secure it flat with two crossed pins. Finish with a light mist of Bumble and bumble Surf Spray focused only on the mid lengths, avoiding the roots so the twist stays smooth.
Shop the Look
| Product |
| 1.25 inch curling wand |
| Texturizing sea salt spray |
| Small gold bobby pin set |
| Flexible hold hairspray |
| Boar bristle brush |
3. The Classic Princess Half Up Half Down
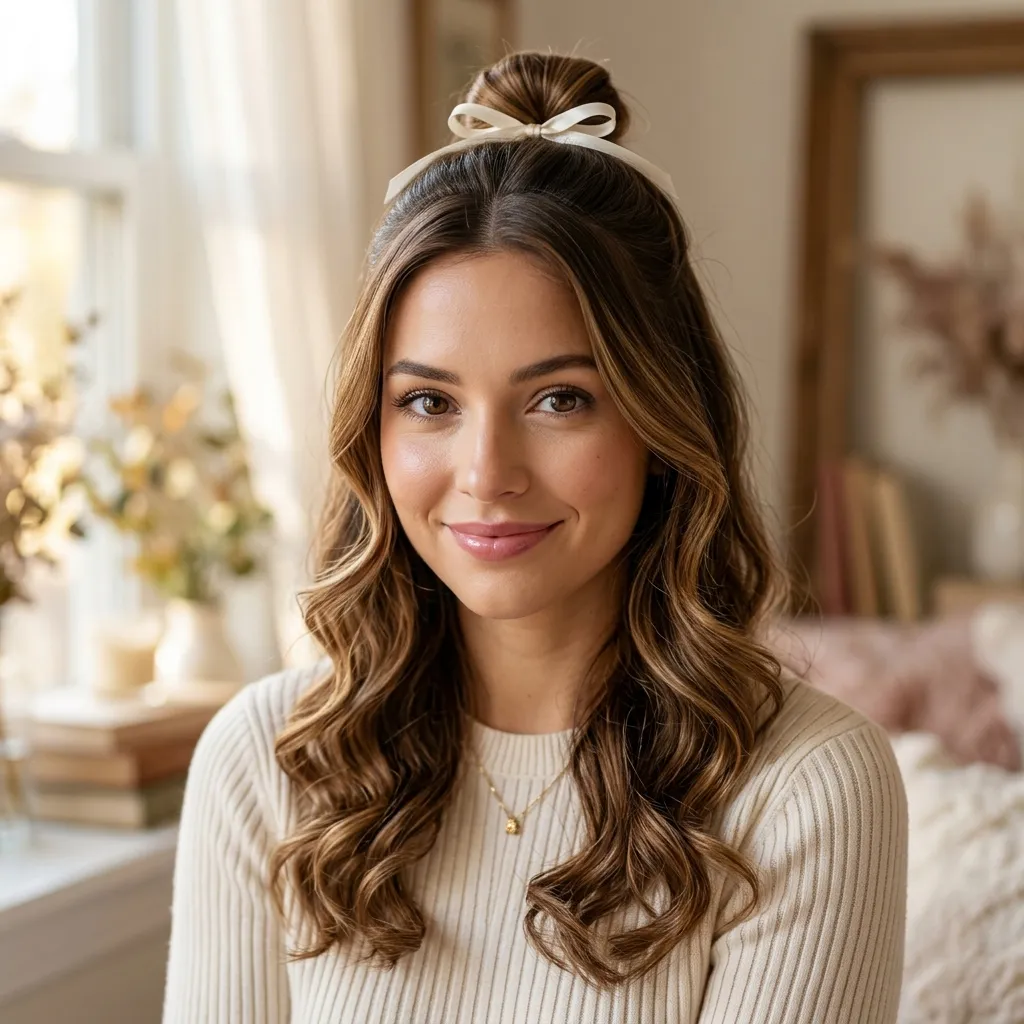
Vibe: Timeless and soft.
Why it works: Lifting only the crown section adds height and structure while the loose lower half keeps movement, which balances proportion between the top and bottom of the head. This split also flatters most face shapes, since the lifted section draws the eye upward while the curled length softens the jawline. It reads as more finished than a plain half up ponytail because the twisted base hides the elastic entirely.
How to get it: Section hair from ear to ear across the crown, twist the front section back toward the center, and secure with two crossed bobby pins hidden beneath the hair. Curl the remaining loose length in one inch sections, working away from the face for a soft, uniform wave. Let the curls cool fully before separating them gently with your fingers rather than a brush, which keeps the shape looser, and set the finish with Living Proof No Frizz Humidity Shield.
💡 Quick Win: Wrap a thin satin ribbon around the base of the twist to hide the pins instantly.
Shop the Look
| Product |
| Satin ribbon spool set |
| Crossed bobby pin pack |
| Volumizing root powder |
| Medium barrel curling iron |
| Shine finishing serum |
4. Dutch Braid Crown Wrap
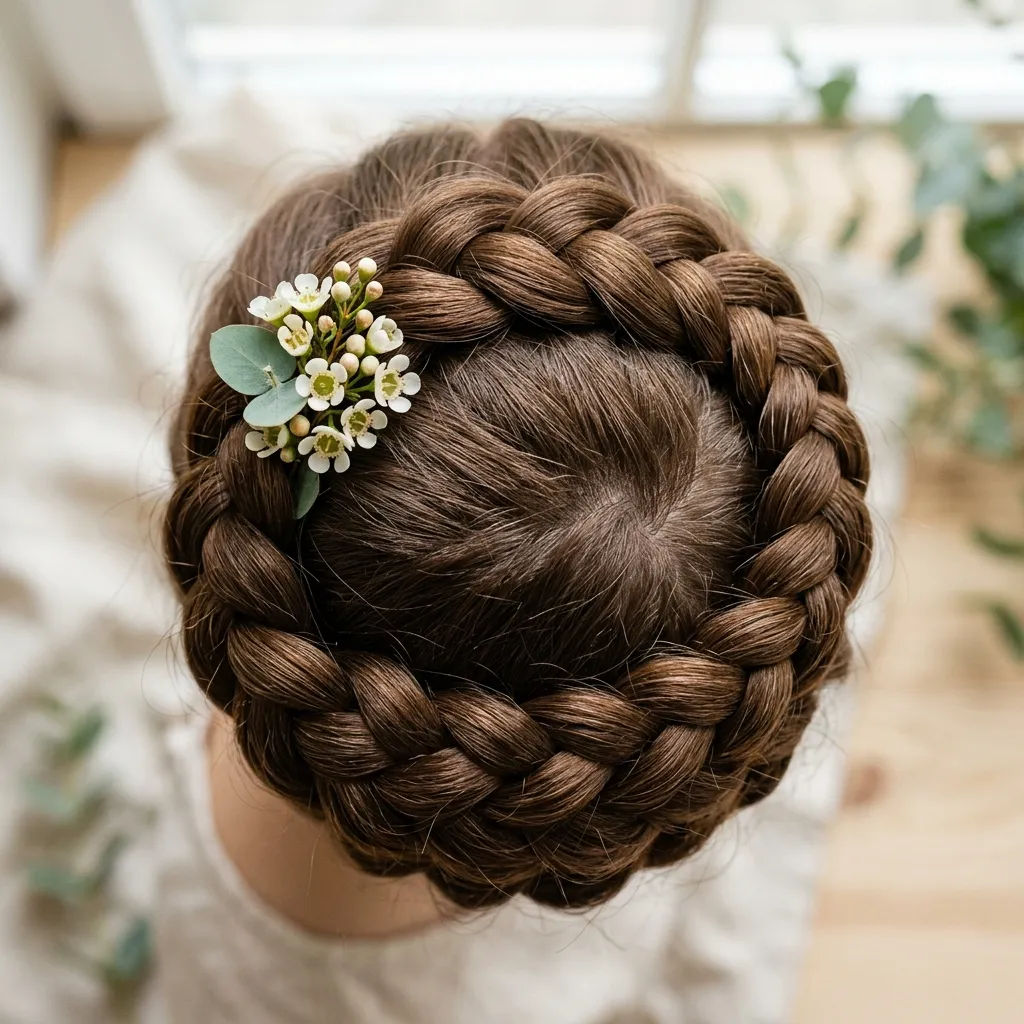
Vibe: Structured and grounded.
Why it works: A Dutch braid sits on top of the strands rather than under them, so it reads as raised and dimensional even in fine hair that a regular French braid can flatten. The visible texture also holds up better through a full day of movement, since each crossed section locks the previous one in place. Wrapping it fully around the head creates a genuine crown shape rather than a single braid draped to one side.
How to get it: Start the braid at one ear, crossing strands under as you work steadily around the hairline toward the opposite side. Keep tension even throughout so the braid width stays consistent from start to finish. Once you reach the far ear, tuck the remaining tail underneath the braid, smooth flyaways with Aveda Control Paste, and pin it flat so no loose ends show.
Shop the Look
| Product |
| Small silicone hair elastics |
| Edge control styling wax |
| Fine tooth rat tail comb |
| Bobby pins in matching shade |
| Matte finish hairspray |
5. Rhinestone Tiara Comb Updo
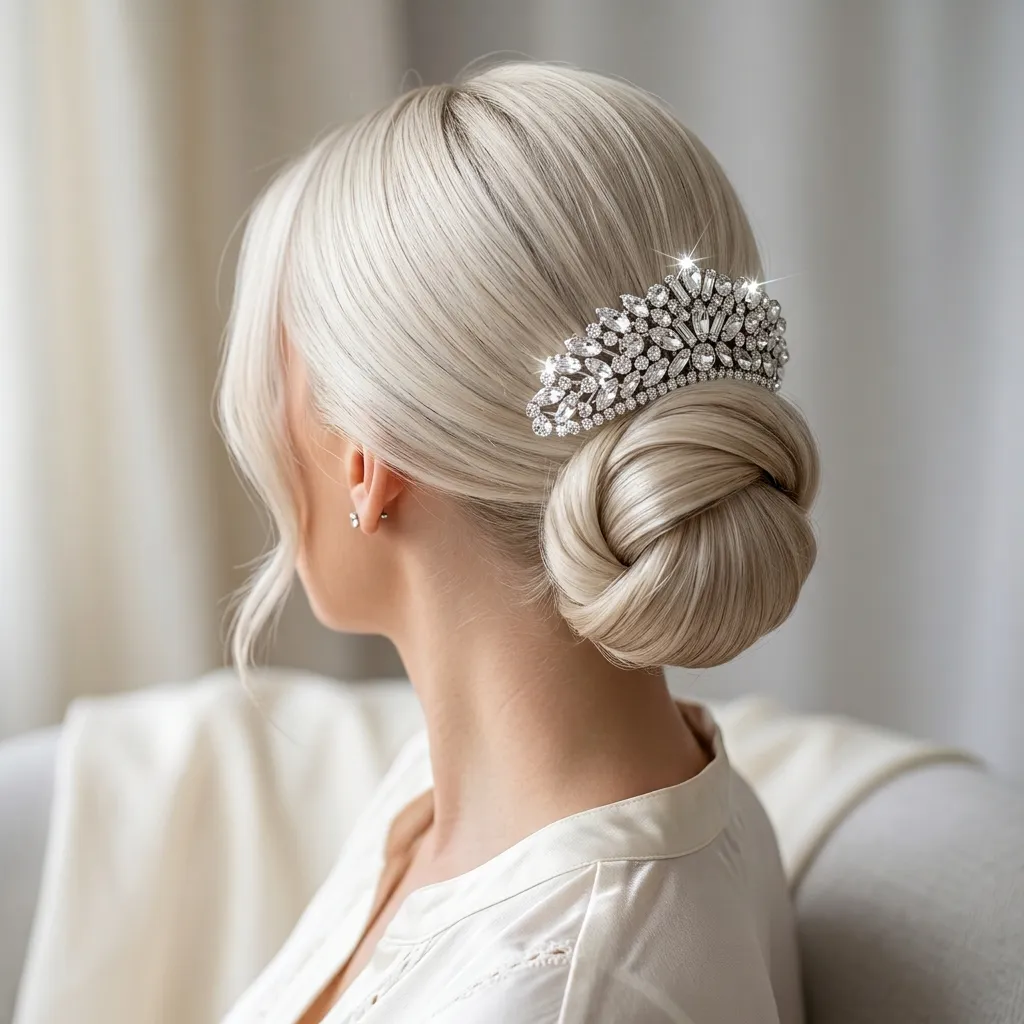
Vibe: Polished and sparkling.
Why it works: Placing the comb at the crown rather than the back keeps it visible from the front, which is where most photos and mirror views are taken. A smooth, low bun as the base also lets the sparkle of the comb stand out, since there is no competing texture to distract from it. This combination reads as event ready without requiring an elaborate braid underneath.
How to get it: Smooth hair fully into a low bun using a boar bristle brush and a small amount of smoothing gel to control flyaways. Wrap the ponytail around itself and pin it securely at the nape before adding the comb. Slide the rhinestone comb in at a slight backward angle just above the hairline, finishing with a mist of L’Oreal Elnett Satin Hairspray so it stays anchored through movement.
💡 Quick Win: A single rhinestone comb under $15 upgrades a plain bun into an event ready look.
Shop the Look
| Product |
| Rhinestone hair comb |
| Smoothing edge brush |
| Bun shaping donut |
| Anti frizz finishing cream |
| Clear silicone hair ties |
6. Champagne Blonde Highlights for Fairytale Shine
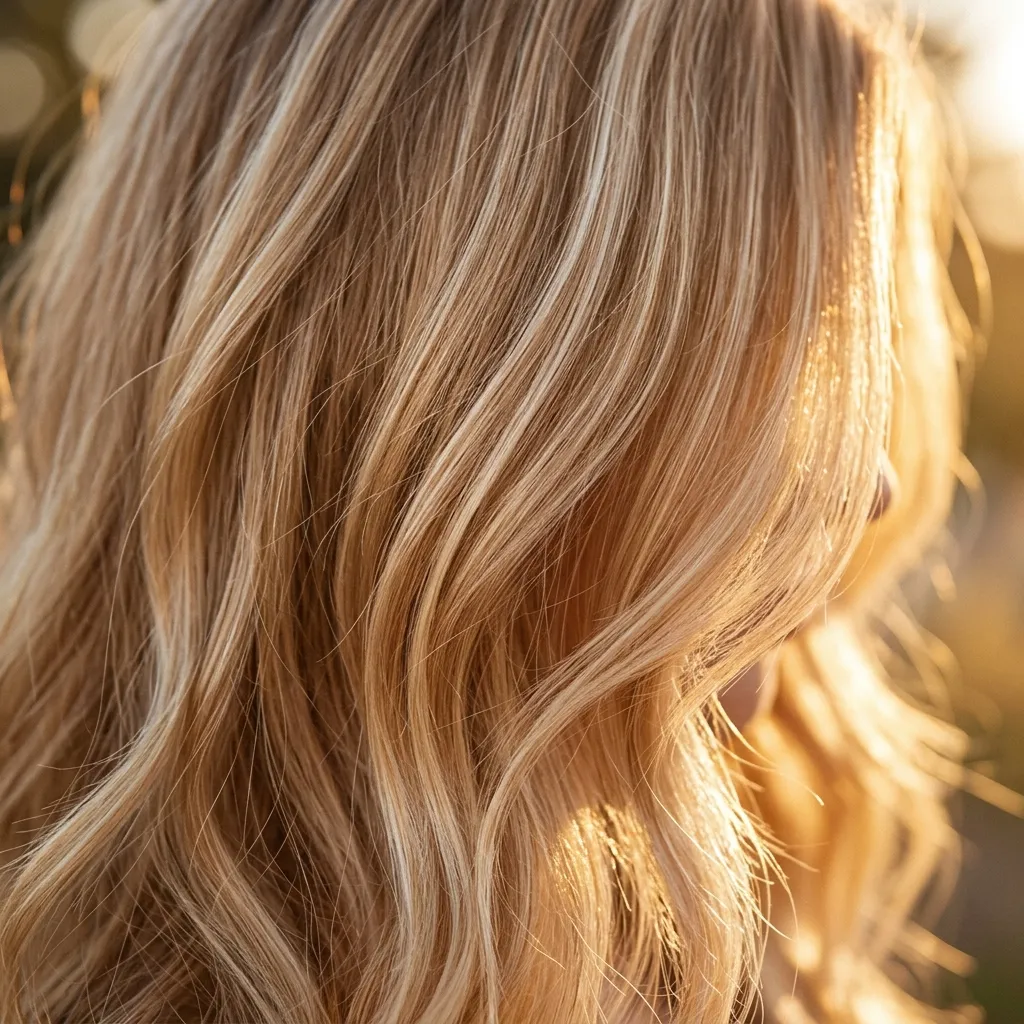
Vibe: Bright and glowing.
Why it works: Fine, face framing highlights placed closest to the skin reflect light back toward the face, which reads as brightness without committing to a full color change. This placement also softens the transition between natural roots and lightened ends, since the concentration of highlights fades as it moves away from the hairline. It is a lower maintenance approach than an all over blonde, since regrowth is far less noticeable.
How to get it: Request champagne blonde foils placed only at the front two inches on each side of the part, keeping the rest of the head at its natural depth. Ask your colorist to blend with a warm toner rather than a cool one, which avoids any brassy undertones as the color settles. Maintain the shine at home with Olaplex No.4P Blonde Enhancer Purple Shampoo used two to three times a week.
Shop the Look
| Product |
| Purple toning shampoo |
| UV protectant hair oil |
| Wide barrel curling iron |
| Color safe conditioner |
| Detangling wet brush |
7. Voluminous Curls with Cascading Ringlets
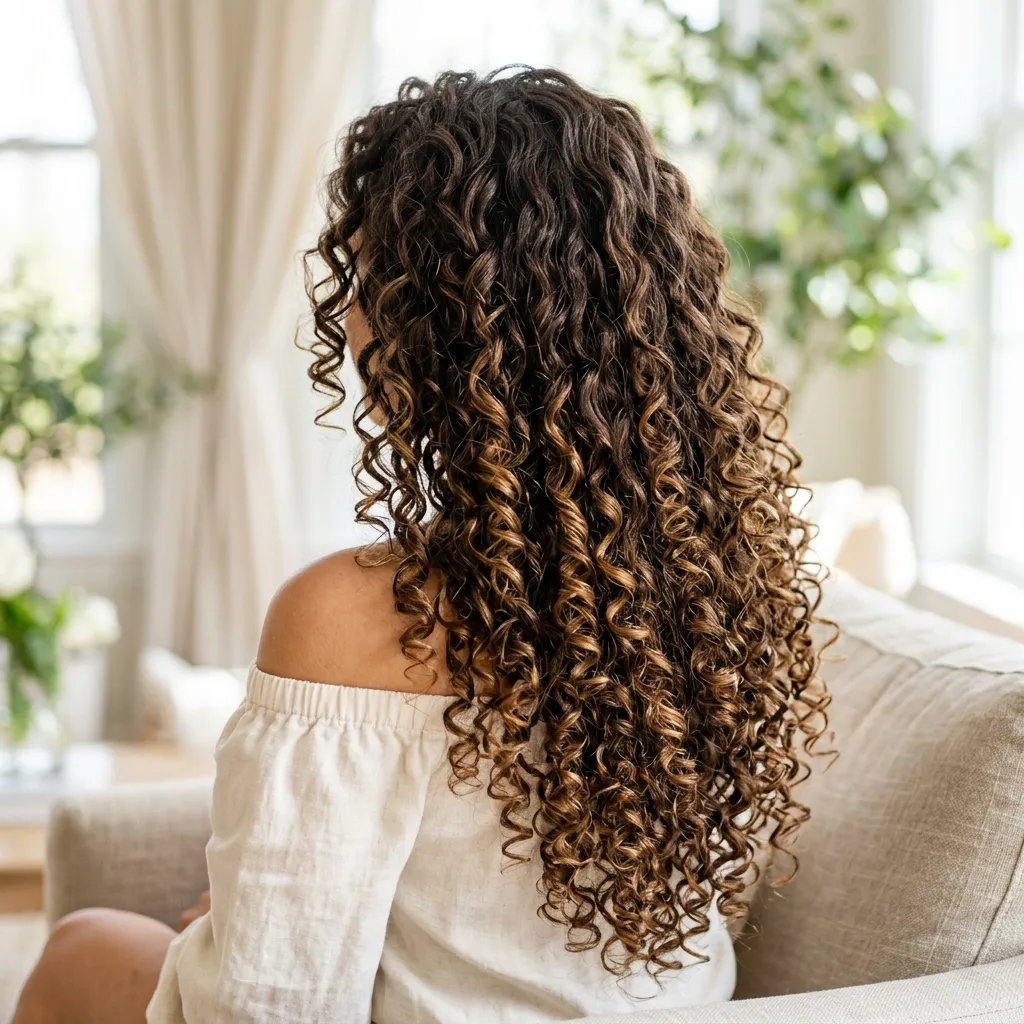
Vibe: Bouncy and full.
Why it works: Using a smaller barrel size than usual and holding strictly vertical sections creates tighter, springier curls that hold shape far longer than horizontal curling. Vertical sectioning also distributes volume evenly across the whole head instead of concentrating it near the crown. The result mimics a natural ringlet pattern rather than the looser wave most standard curling techniques produce.
How to get it: Curl half inch vertical sections with a 0.75 inch wand, working from underneath layers first and moving upward. Hold each finished curl in your palm for about ten seconds to let it cool into shape before letting go. Once all sections are done, apply a small amount of Moroccanoil Curl Defining Cream and gently separate curls with your fingers to preserve the ringlet definition.
💡 Quick Win: Sleeping in a loose braid overnight sets similar ringlets without any heat.
Shop the Look
| Product |
| 0.75 inch curling wand |
| Curl defining cream |
| Diffuser attachment for blow dryer |
| Flexible hold curl spray |
| Silk scrunchie set |
8. Elegant Low Chignon Bun
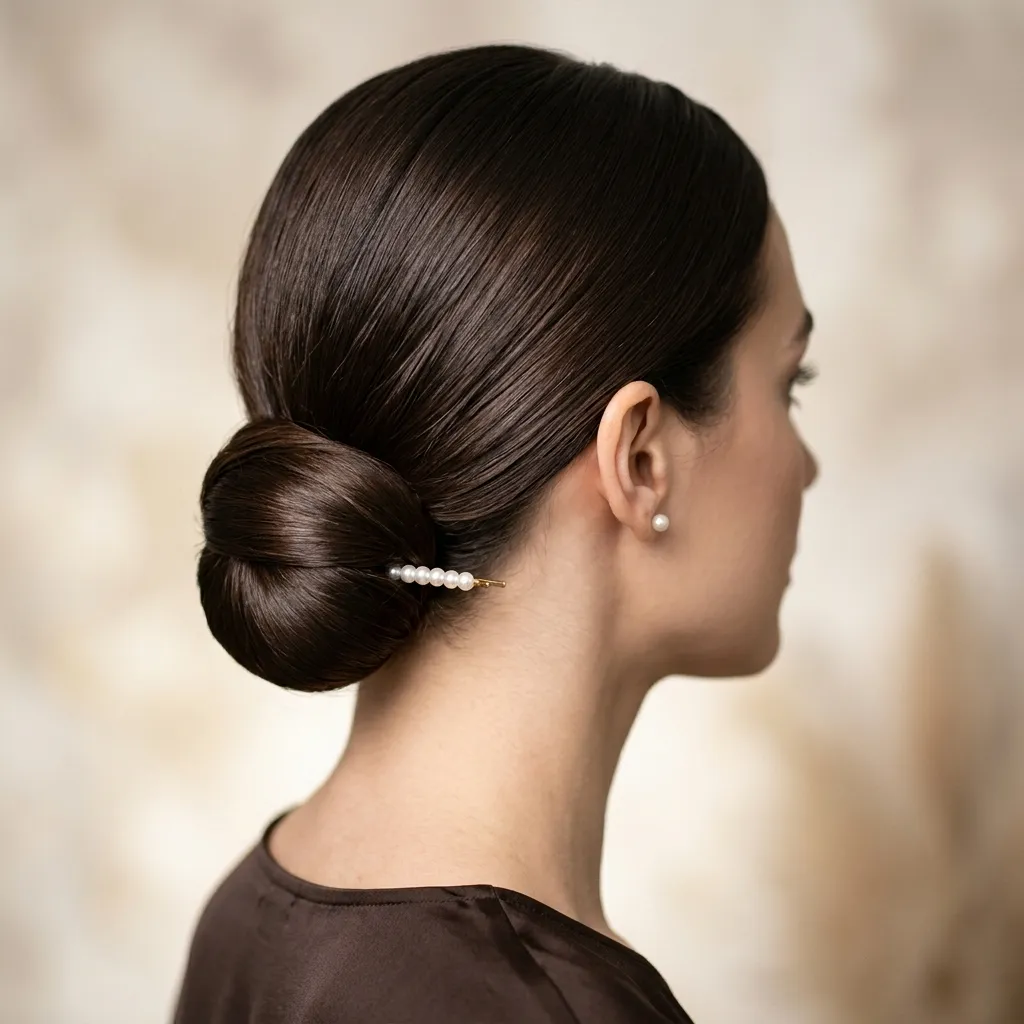
Vibe: Sleek and quiet.
Why it works: A low placement at the nape balances heavier features like a full fringe or statement earrings, keeping the overall silhouette from feeling top heavy. The smooth, wrapped shape also draws attention to the neckline, which is why this style is often chosen for formal occasions with structured necklines. Its simplicity makes it one of the more durable princess styles, holding shape for hours without needing touch ups.
How to get it: Gather hair low at the nape of the neck, smoothing flyaways first with a boar bristle brush and a touch of smoothing gel. Twist the ponytail into a tight coil, wrapping it around the base in a spiral shape. Secure the coil with Goody Slideproof U shaped pins tucked underneath so none are visible from any angle, then mist lightly with Moroccanoil Glimmer Shine Spray.
Shop the Look
| Product |
| U shaped hair pins |
| Smoothing hair gel |
| Small pearl hairpin |
| Shine spray finishing mist |
| Fine tooth comb |
9. Twisted Side Ponytail with Ribbon
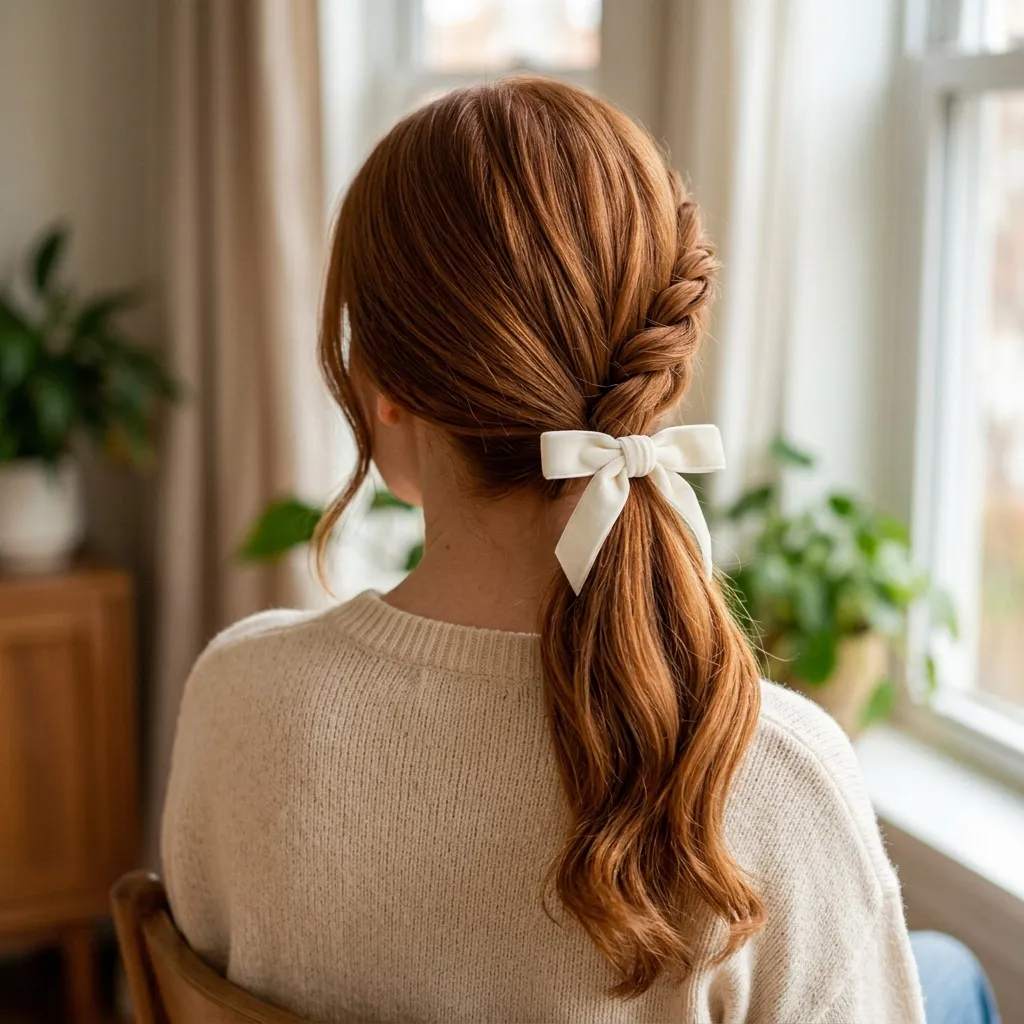
Vibe: Playful and light.
Why it works: Twisting the crown before gathering hair into a side ponytail adds texture and hides the elastic, which keeps the eye moving along the twist rather than stopping at a plain tie. Sweeping the ponytail to one side also creates asymmetry, which reads as more dynamic than a centered ponytail. The ribbon finishes the look by covering the transition point where the twist meets the gathered hair.
How to get it: Twist two front sections back separately, then cross and pin them together where they meet at one side of the head. Gather all remaining hair into that same side, securing with a clear elastic placed directly under the twist. Finish flyaways with Verb Ghost Texturizing Spray, then tie a velvet ribbon over the elastic in a simple bow, letting the tails hang loose against the ponytail.
💡 Quick Win: A pre tied velvet bow clip skips the ribbon tying step entirely.
Shop the Look
| Product |
| Velvet ribbon bow |
| Clear silicone elastics |
| Texturizing spray |
| Small round brush |
| Shine drops serum |
10. Pearl Hairpin Scattered Waves
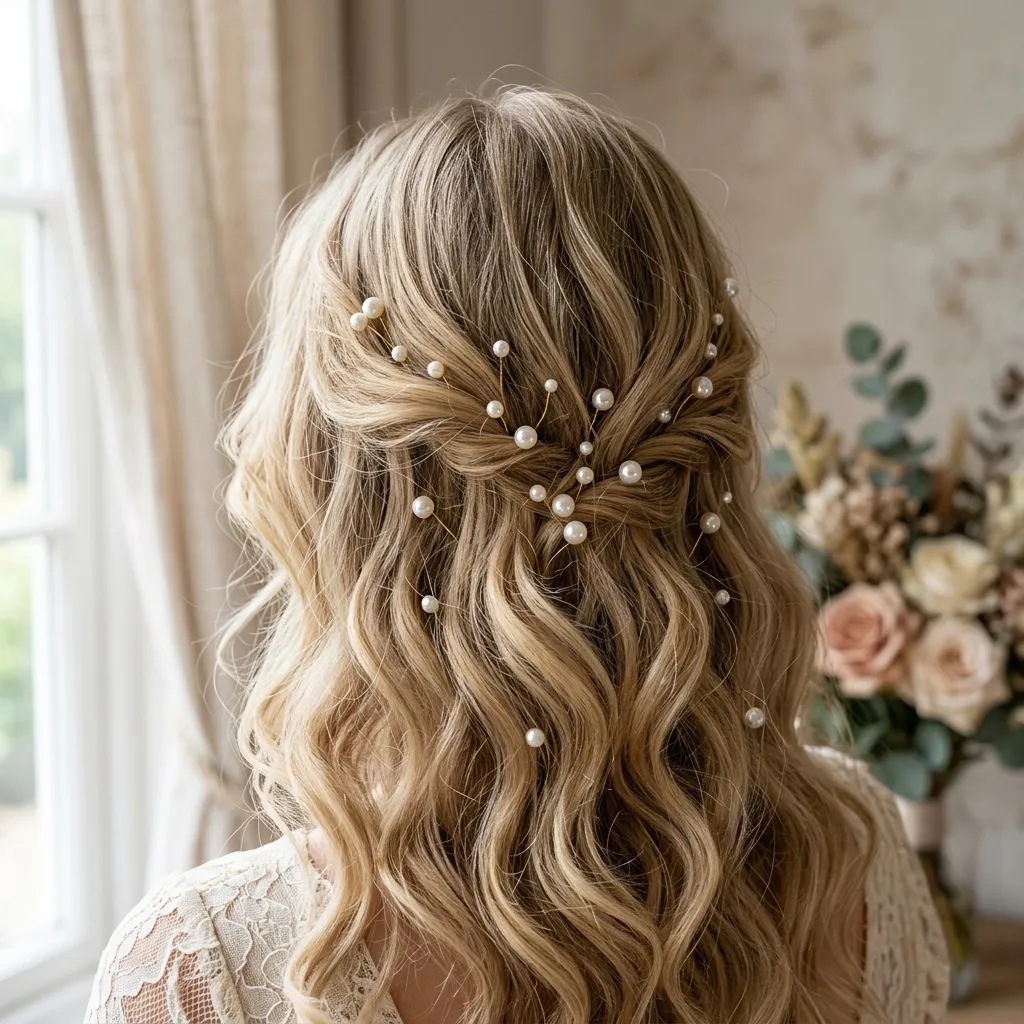
Vibe: Delicate and dreamy.
Why it works: Scattering small pins asymmetrically across the head, rather than clustering them in one spot, creates visual interest without needing an elaborate braid or updo underneath. This approach also works on hair that has not been freshly washed, since the pins draw attention away from any flatness at the roots. The pearls catch light differently depending on the angle, which is why this style photographs well from multiple sides.
How to get it: Curl hair in loose waves using a medium barrel wand, keeping the curl pattern soft rather than tight. Once curled, tuck five to seven small pearl pins randomly along one side of the head, angling most of them closer to the part. Vary the height of each pin slightly so the placement looks organic, and set the whole style with GHD Curve wand curls for extra hold.
Shop the Look
| Product |
| Small pearl hairpin set |
| Loose wave curling wand |
| Texture spray |
| Shine finishing mist |
| Wide tooth comb |
11. Copper Red Ombre for a Bold Princess Look
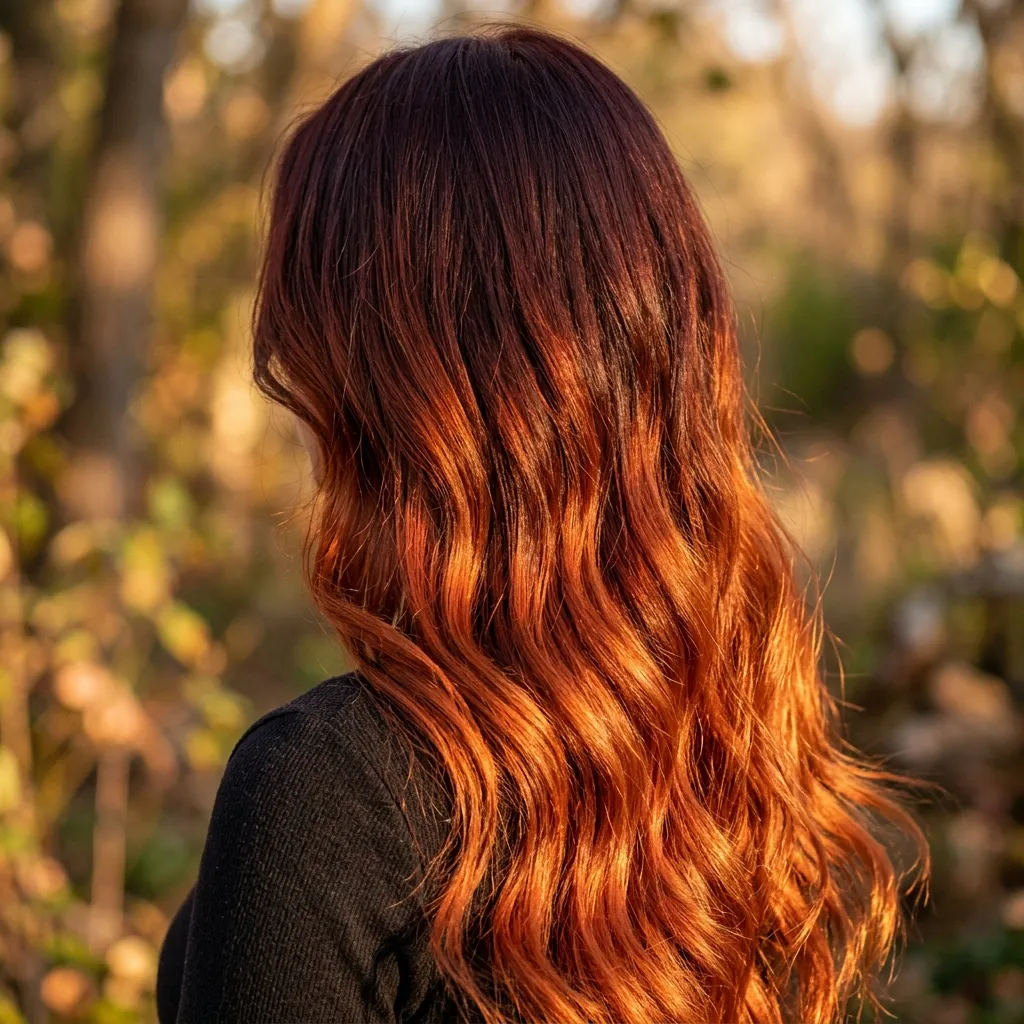
Vibe: Warm and bold.
Why it works: Keeping the root two shades darker than the natural color and only brightening the last third of the hair avoids a harsh regrowth line while still delivering a dramatic finish. This gradual transition also makes the color easier to maintain, since it can go three to four months between touch ups without looking outgrown. The copper tone specifically reflects warm light more vividly than a standard red, which is why it stands out in photos.
How to get it: Ask your colorist for a soft root smudge in auburn that blends gradually rather than stopping abruptly. Request the vivid copper red gloss start around the cheekbone, concentrated most heavily at the ends. At home, use Overtone Copper Conditioning Color Mask once a week to keep the vibrancy from fading between salon visits.
Shop the Look
| Product |
| Color depositing copper mask |
| Heat protectant spray |
| Sulfate free color safe shampoo |
| Wide barrel curling wand |
| Shine enhancing oil |
12. Sleek Straight Hair with Glass Like Shine
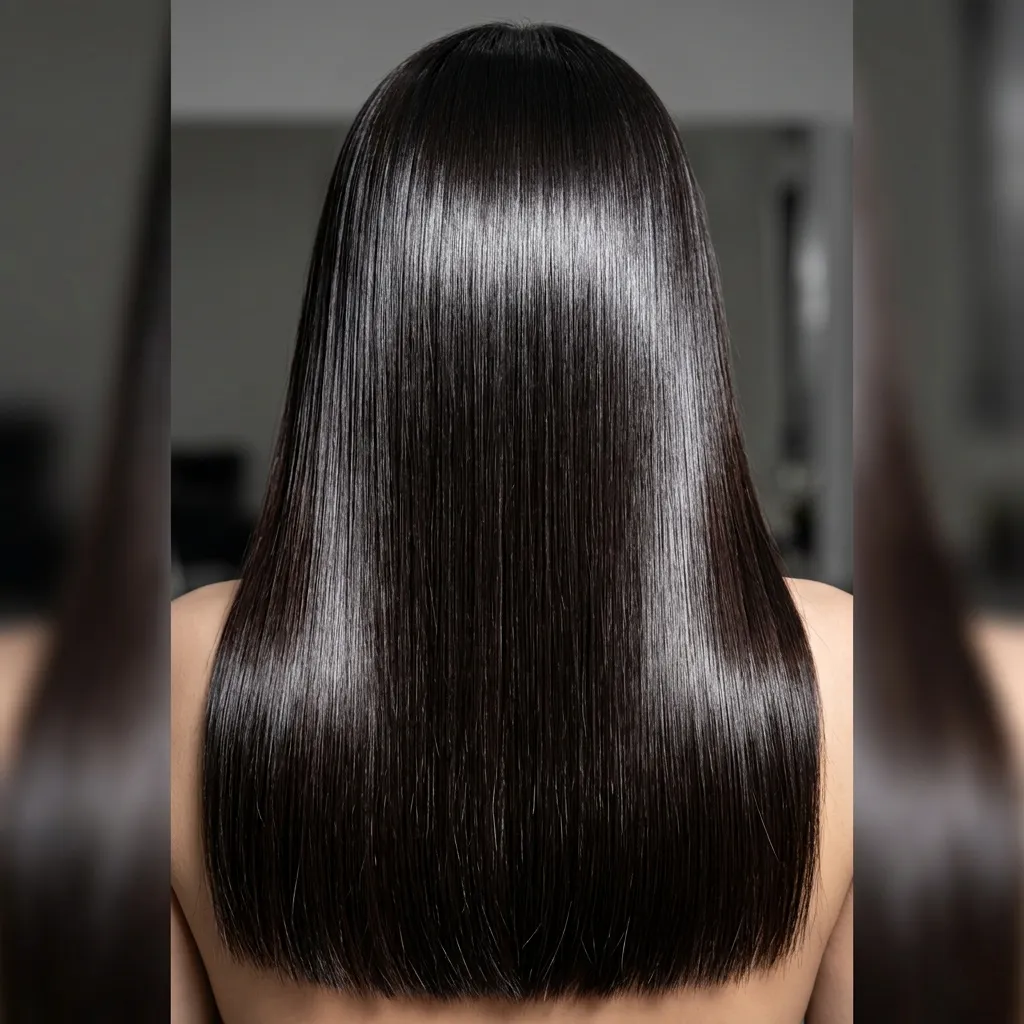
Vibe: Sleek and reflective.
Why it works: Flat ironing in small one inch sections seals the hair cuticle completely flat, which is what creates a true mirror like shine rather than a dull straight finish. Working in smaller sections also reduces the number of passes needed per section, limiting heat exposure and preserving overall hair health. This technique works best on hair with minimal natural texture, since any underlying wave will resist lying fully flat.
How to get it: Blow dry hair first using a round brush, pulling sections taut from root to tip to remove initial texture. Flat iron in one inch sections at a low to medium heat setting, moving the iron slowly and steadily through each pass. Finish each section immediately with a drop of Moroccanoil Treatment Oil while the hair is still warm, which locks in extra shine.
💡 Quick Win: A glossing serum applied to damp hair before blow drying adds shine before any heat styling even begins.
Shop the Look
| Product |
| Ceramic flat iron |
| Glossing hair serum |
| Round boar bristle brush |
| Heat protectant mist |
| Anti frizz finishing cream |
13. Soft Side Swept Bangs for Round Faces
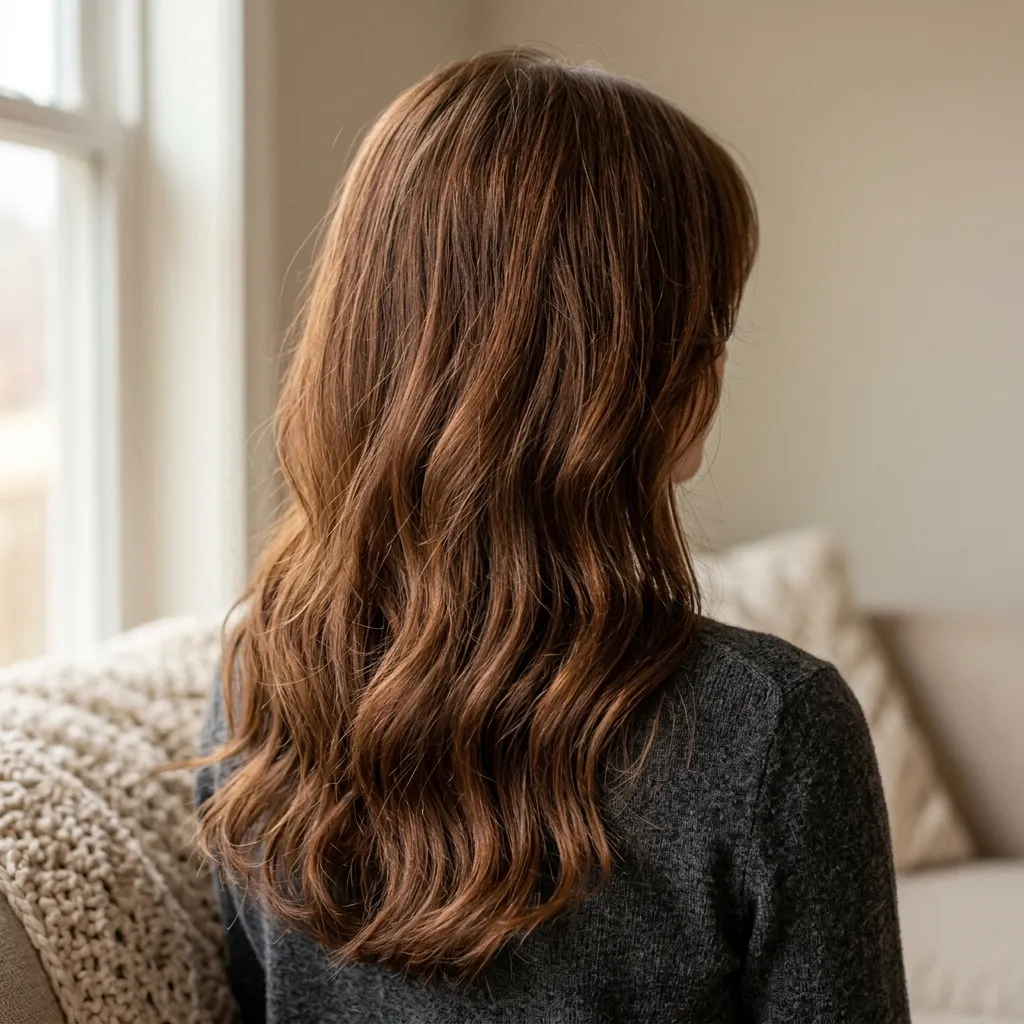
Vibe: Softening and flattering.
Why it works: Side swept, longer bangs create a diagonal line that elongates a round face shape, unlike blunt full bangs which tend to widen it visually. The diagonal angle also draws the eye from the cheekbone up toward the forehead, subtly shifting visual proportion. Because they blend into the rest of the length rather than stopping short, they avoid the boxed in look that a hard bang line can create.
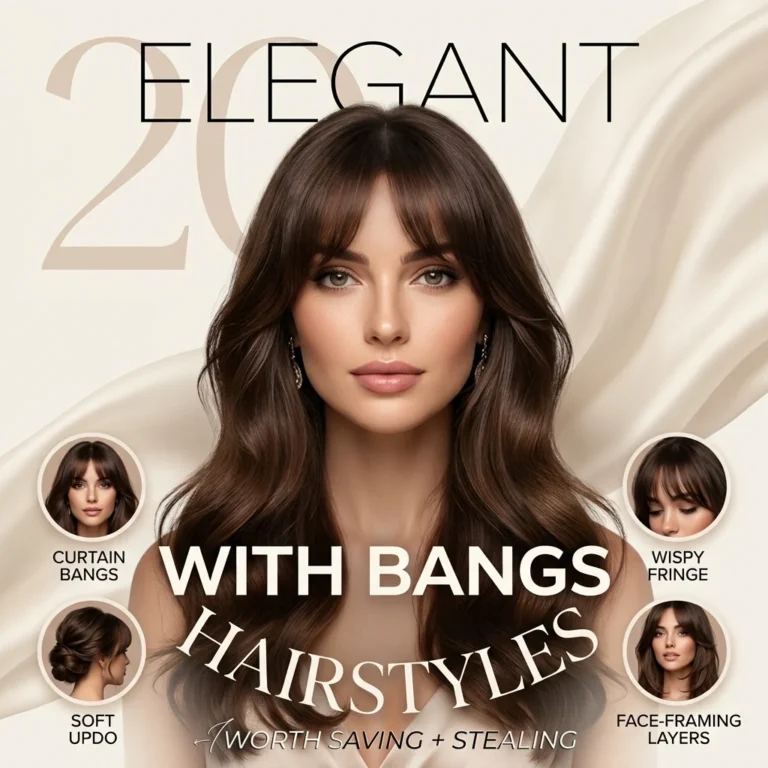
How to get it: Ask your stylist for curtain bangs cut just past the cheekbone, longer than a traditional full fringe. Request that the ends be layered gradually so they taper into the surrounding length instead of ending abruptly. Style them by blow drying with a small round brush and Living Proof Style Lab Blow Dry Cream, curving the ends slightly away from the face for a soft finish.
Shop the Look
| Product |
| Small round brush for bangs |
| Bang trimming scissors |
| Lightweight styling cream |
| Mini flat iron |
| Volumizing root spray |
14. Double Dutch Braid Pigtails
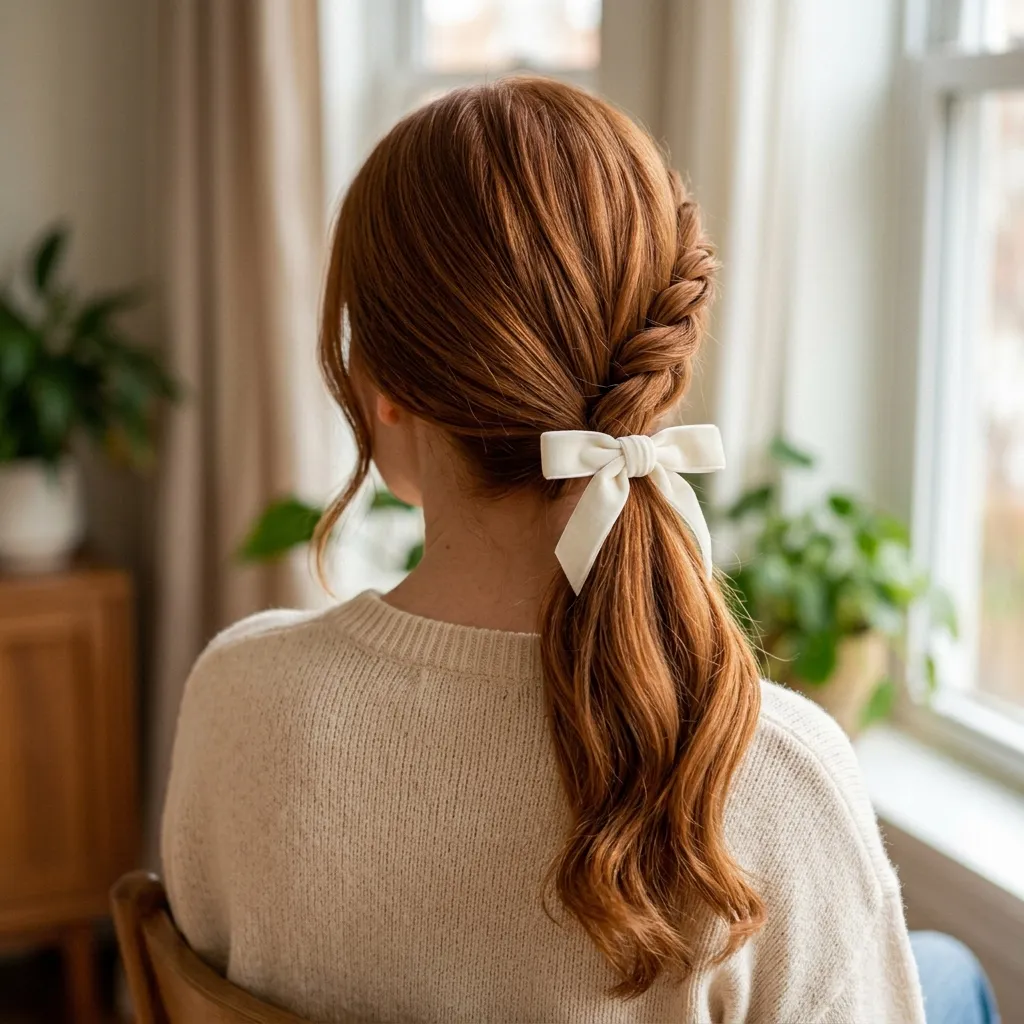
Vibe: Symmetrical and playful.
Why it works: Parting hair precisely down the center before braiding keeps both pigtails equal in size, which is what makes the finished look feel deliberate rather than lopsided. Braiding both sides in the same direction, rather than mirroring them, keeps the visual pattern consistent when viewed from the front. This style also holds up well through active movement since Dutch braids sit close to the scalp and resist loosening.
How to get it: Part hair down the middle using a fine tooth comb, making sure the part is straight from forehead to nape. Dutch braid each side starting at the crown, keeping tension consistent as you work down to the ends. Detangle first with It’s a 10 Miracle Leave-In, then secure each braid with a clear elastic and tie a small ribbon bow directly over each tie to finish the look.
Shop the Look
| Product |
| Fine tooth parting comb |
| Small ribbon bow set |
| Clear silicone elastics |
| Edge smoothing gel |
| Detangling spray |
15. French Braid into a Bun
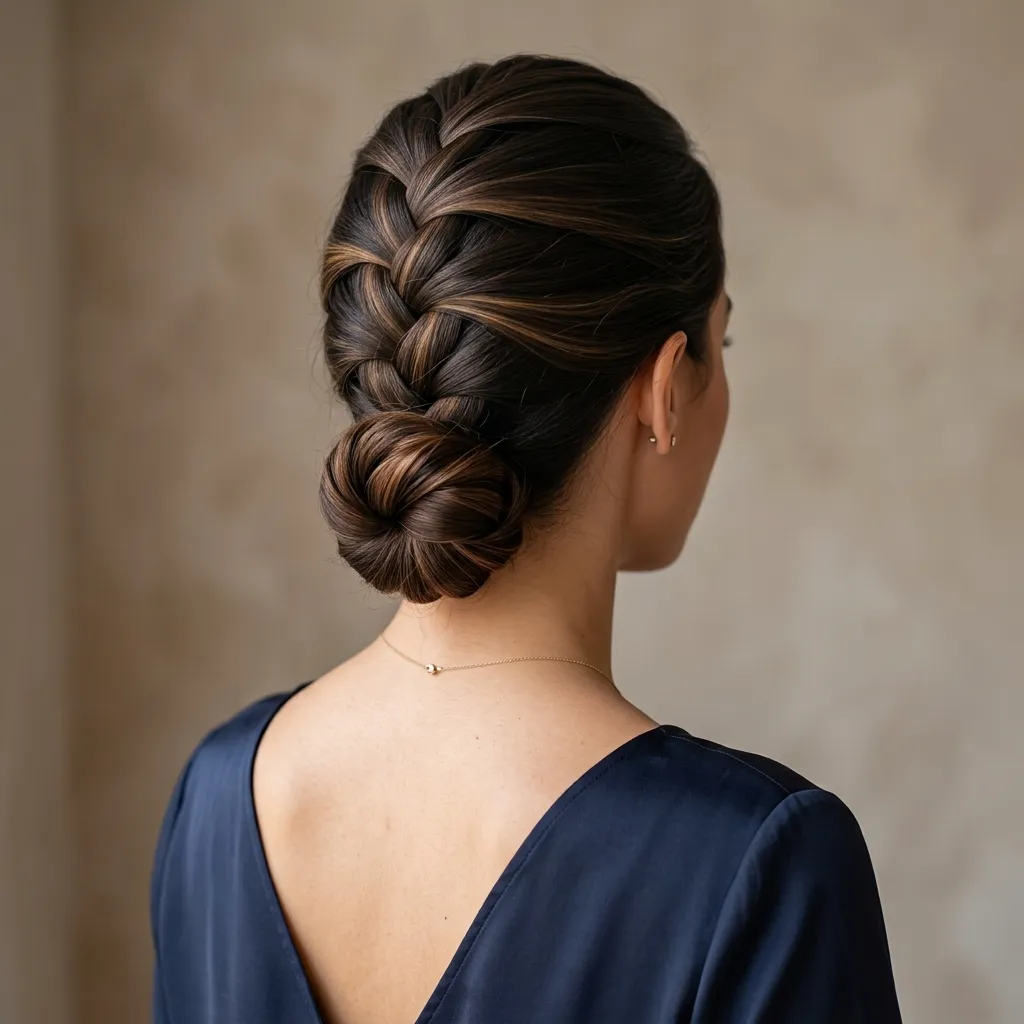
Vibe: Elegant and structured.
Why it works: Braiding the top half and twisting the remaining length into a bun combines two techniques so the style holds shape through a full day without loosening at the crown. The braid also distributes tension evenly across the scalp, which makes it more comfortable for extended wear than a single tight bun. This layered structure gives the illusion of a more complex updo while actually requiring only two basic techniques.
How to get it: French braid from the crown down to the nape, incorporating hair evenly from both sides as you go. Once you reach the nape, stop braiding and twist the remaining loose tail into a tight coil. Pin the coil flat directly beneath where the braid ends, tucking any loose ends underneath and setting with Not Your Mother’s Way to Grow Hairspray so the transition looks seamless.
💡 Quick Win: Spraying the braid with a light hold hairspray before bed helps it stay neat for a second day wear.
Shop the Look
| Product |
| Bobby pin variety pack |
| Light hold hairspray |
| Smoothing hair oil |
| Small elastic hair ties |
| Edge control brush |
16. Platinum Blonde with Silver Undertones
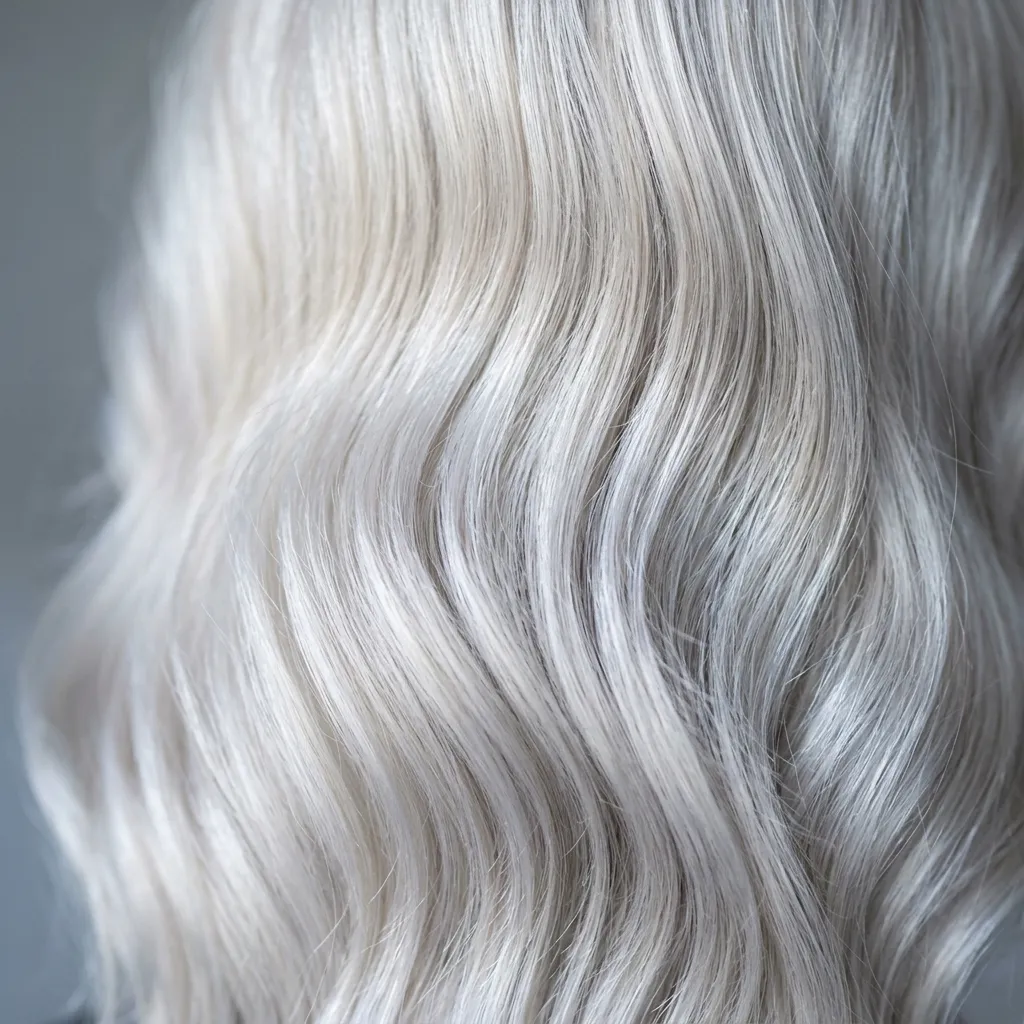
Vibe: Cool and ethereal.
Why it works: A violet based toner neutralizes the yellow undertones that naturally occur in lightened hair, which is what creates a true icy silver rather than a warm blonde. This process requires the hair to be lifted to a very pale yellow first, since toner alone cannot correct darker underlying warmth. The cool tone also tends to photograph brighter under artificial light, which is why it is popular for evening events.
How to get it: Request a platinum lift in stages if your hair is currently a medium to dark shade, since going too fast in one session can compromise strength. Follow the lift with a violet based toner applied in the salon to neutralize any remaining warmth. Maintain the tone at home with Fanola No Yellow Shampoo used once a week, along with an Olaplex No.3 Hair Perfector treatment to offset the lightening process.
Shop the Look
| Product |
| Purple toning shampoo |
| Bond repair hair treatment |
| Silver shimmer hairspray |
| Deep conditioning hair mask |
| Wide tooth detangling comb |
17. Loose Beach Waves with Face Framing Layers
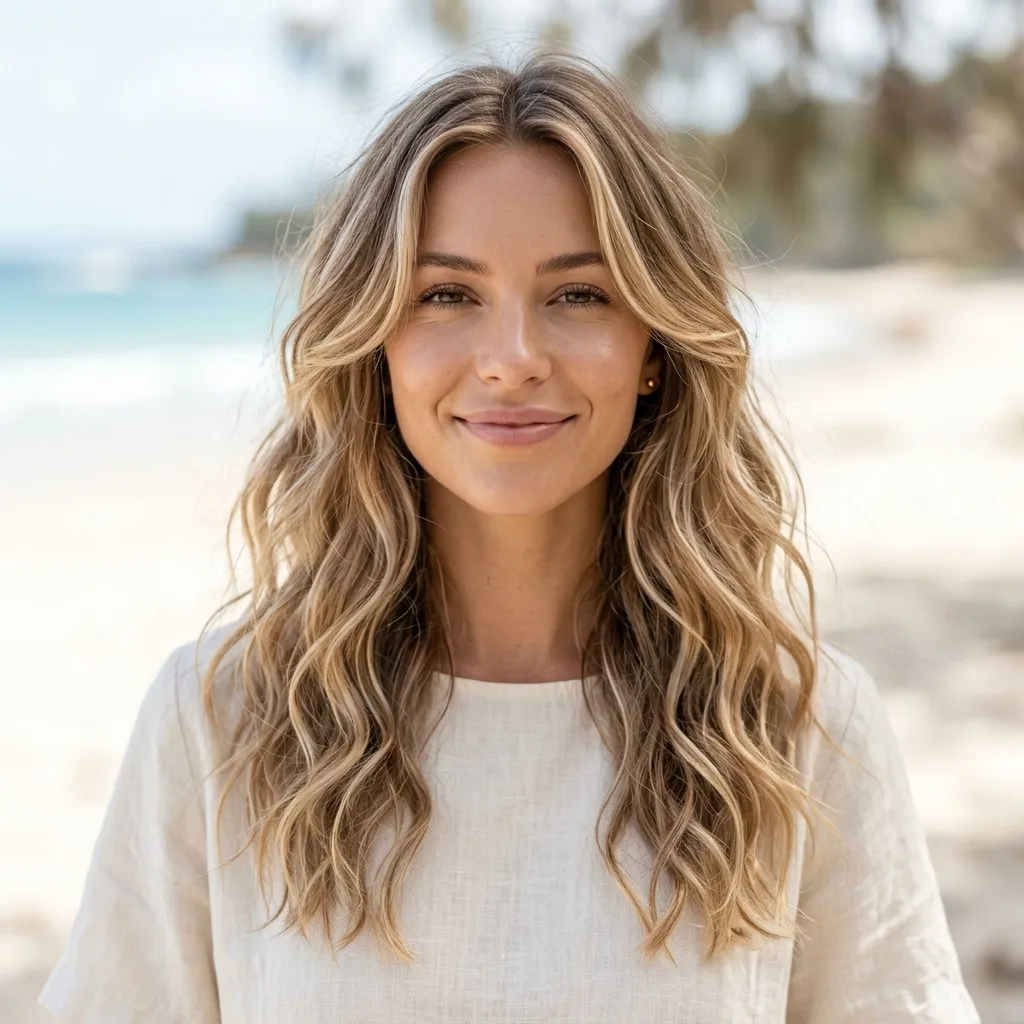
Vibe: Relaxed and sun kissed.
Why it works: Shorter layers cut around the face catch curl more easily than the rest of the length, framing features without needing a full head of tight curls. This contrast between curled shorter pieces and straighter mid lengths mimics how hair naturally waves after time at the beach. It reads as effortless because not every section is styled identically, which avoids the overly done appearance of a full curl set.
How to get it: Curl only the face framing layers and the very ends of the rest of the hair using a 1.5 inch wand. Leave the mid lengths mostly straight to create intentional contrast between styled and natural texture. Finish with OUAI Leave-In Conditioner followed by a light mist of sea salt spray on the ends only, scrunching gently with your hands to enhance the wave.
Shop the Look
| Product |
| 1.5 inch curling wand |
| Sea salt texture spray |
| Lightweight leave in conditioner |
| Flexible hold hairspray |
| Wide tooth comb |
18. Flower Crown Half Up Style
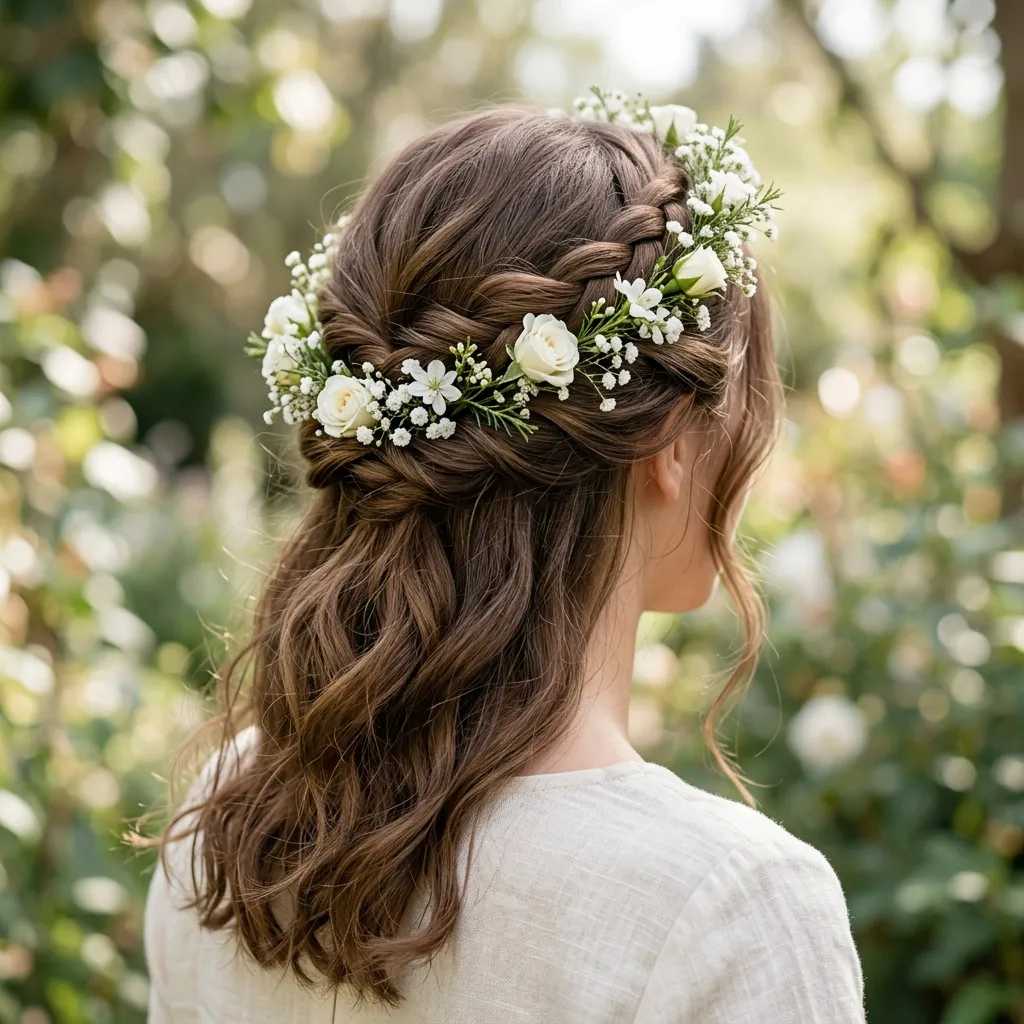
Vibe: Whimsical and light.
Why it works: Weaving small flowers into a twisted section rather than scattering them loosely keeps them secure through movement and photographs, since twisted hair grips stems naturally. The half up base also means the flowers sit at eye level in most photos, making them the clear focal point of the style. Choosing small, sparse blooms rather than a full floral band keeps the overall look from feeling costume like.
How to get it: Twist two front sections back toward the crown, pinning them together where they meet at the center. Tuck three to five small stemmed flowers into the twist, spacing them slightly apart rather than clustering them tightly. Secure each flower stem individually with a Scunci bobby pin, angling the pins downward so they hold the stem in place through movement.
💡 Quick Win: Faux baby’s breath sprigs from a craft store hold their shape all day unlike fresh flowers.
Shop the Look
| Product |
| Faux baby’s breath floral pick |
| Small white flower hairpin set |
| Bobby pin variety pack |
| Texturizing spray |
| Flexible hold hairspray |
19. High Ponytail with a Bow
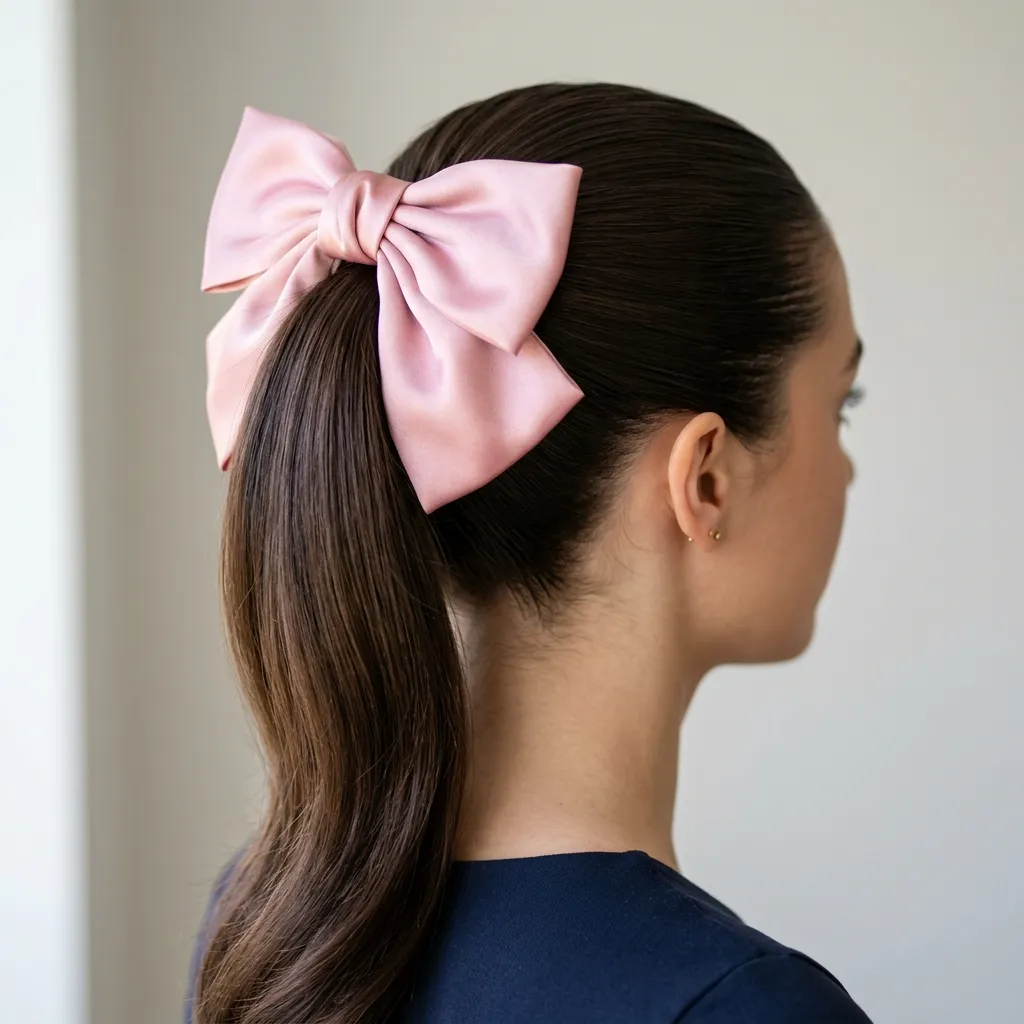
Vibe: Polished and youthful.
Why it works: Placing the ponytail at the highest point of the crown, rather than lower, lifts the whole face and gives the bow room to sit prominently without competing with length. A smooth base is essential here, since any texture would distract from the clean line the high placement is meant to create. The bow itself becomes a focal accessory precisely because the rest of the style is kept deliberately simple.
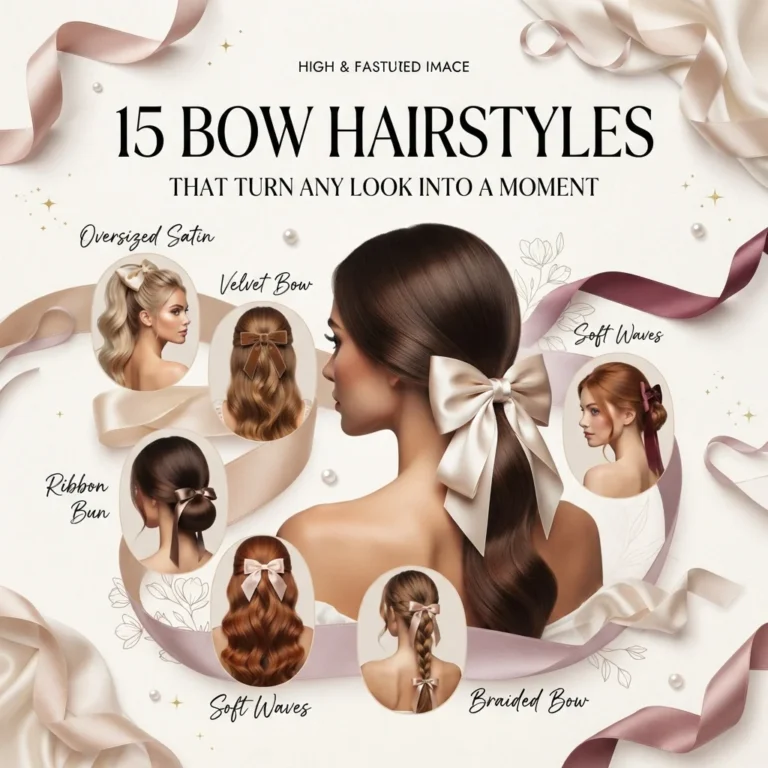
How to get it: Gather all hair at the highest point of the crown, smoothing thoroughly with a boar bristle brush before securing. Use a strong hold elastic to prevent slipping throughout the day, wrapping it several times for extra security. Secure with a Scunci No Damage Elastic, then clip a large satin bow directly over it, positioning it slightly forward so it is visible from the front angle.
Shop the Look
| Product |
| Large satin bow clip |
| Smoothing edge brush |
| Strong hold hair elastic |
| Anti frizz finishing gel |
| Shine spray mist |
20. Waterfall Braid Down the Back
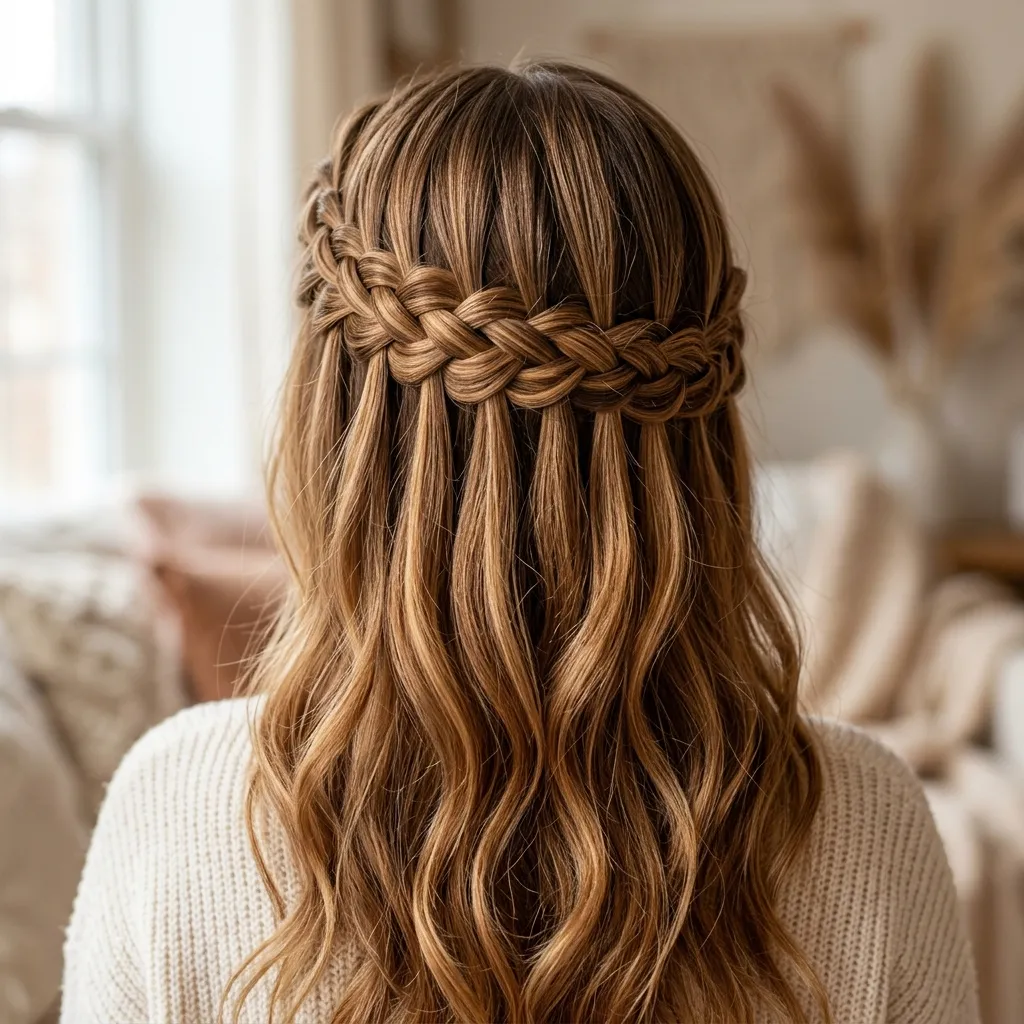
Vibe: Romantic and flowing.
Why it works: Dropping one strand at each crossing point instead of incorporating it lets hair cascade continuously through the braid, creating the waterfall effect that a normal braid cannot replicate. This technique works best on hair with some existing wave, since the dropped sections fall more naturally into soft strands rather than flat pieces. The horizontal path across the back also means the style is visible from nearly any angle, unlike a braid worn to one side.
How to get it: Start a three strand braid at one temple, positioned just above the ear at the hairline. At each crossing point, drop the bottom strand instead of braiding it in, then pick up a new piece of loose hair to replace it. Continue working horizontally across the back of the head, finishing with Not Your Mother’s Way to Grow Hairspray and securing the final section with a small clear elastic.
💡 Quick Win: Curling the hair first makes the dropped strands fall in soft waves rather than flat pieces.
Shop the Look
| Product |
| Curling wand for prep waves |
| Small clear elastics |
| Detangling wet brush |
| Light hold finishing spray |
| Bobby pins for securing ends |
21. Honey Brown Balayage with Golden Highlights
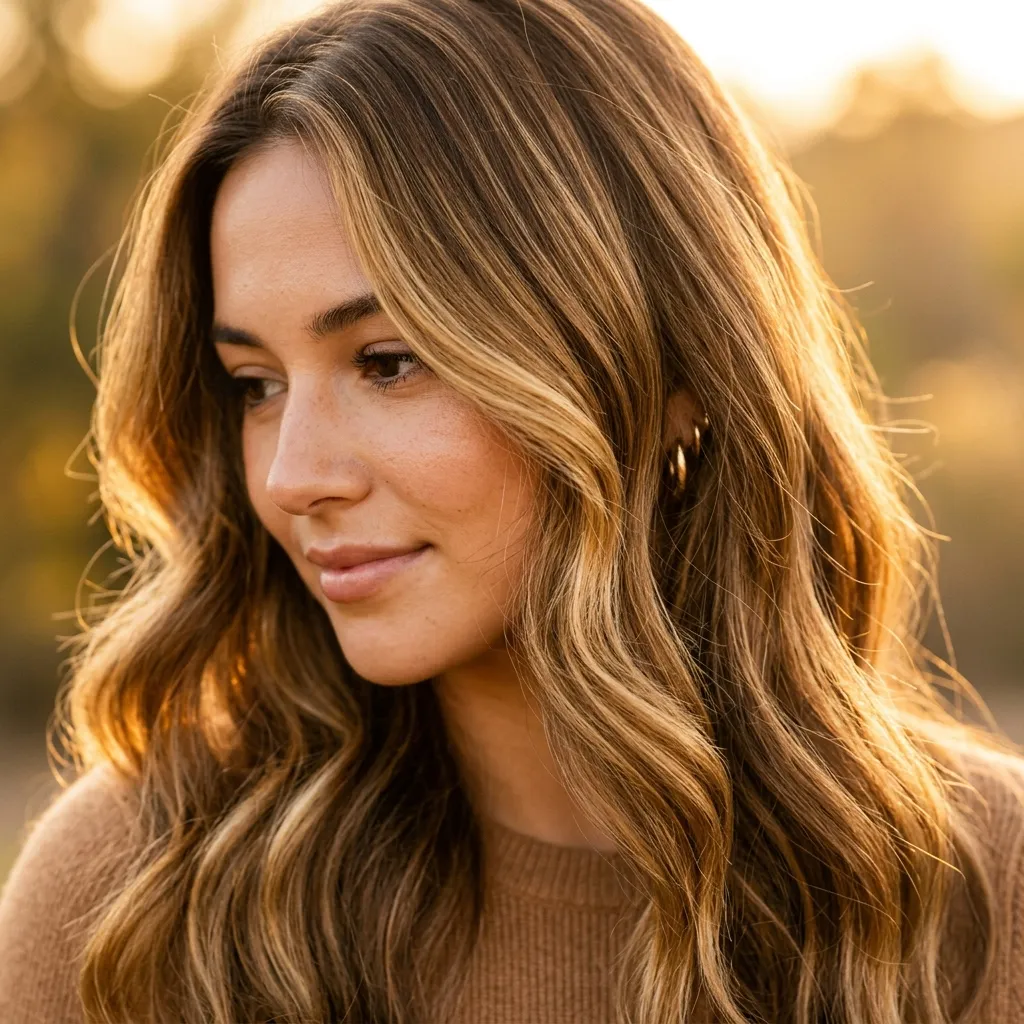
Vibe: Warm and dimensional.
Why it works: Painting highlights in a sweeping vertical motion rather than horizontal foils creates a natural sun kissed pattern that grows out softly instead of showing a hard demarcation line. This freehand technique also allows the colorist to concentrate lighter pieces exactly where light naturally hits, like the crown and the ends. The honey brown base underneath keeps the overall color grounded, preventing the highlights from looking disconnected from the rest of the hair.
How to get it: Ask for a honey brown base color first if your natural shade needs adjusting, then request golden balayage concentrated around the face and through the ends. Have your colorist finish with a warm gloss to tie the base and highlights together into one cohesive tone. At home, use Redken Shades EQ Gloss Treatment weekly to keep the golden tones from turning brassy over time.
Shop the Look
| Product |
| Golden shine hair gloss |
| Color safe shampoo and conditioner |
| Heat protectant spray |
| Medium barrel curling iron |
| Argan oil hair serum |
22. Five Minute Messy Bun for Busy Mornings
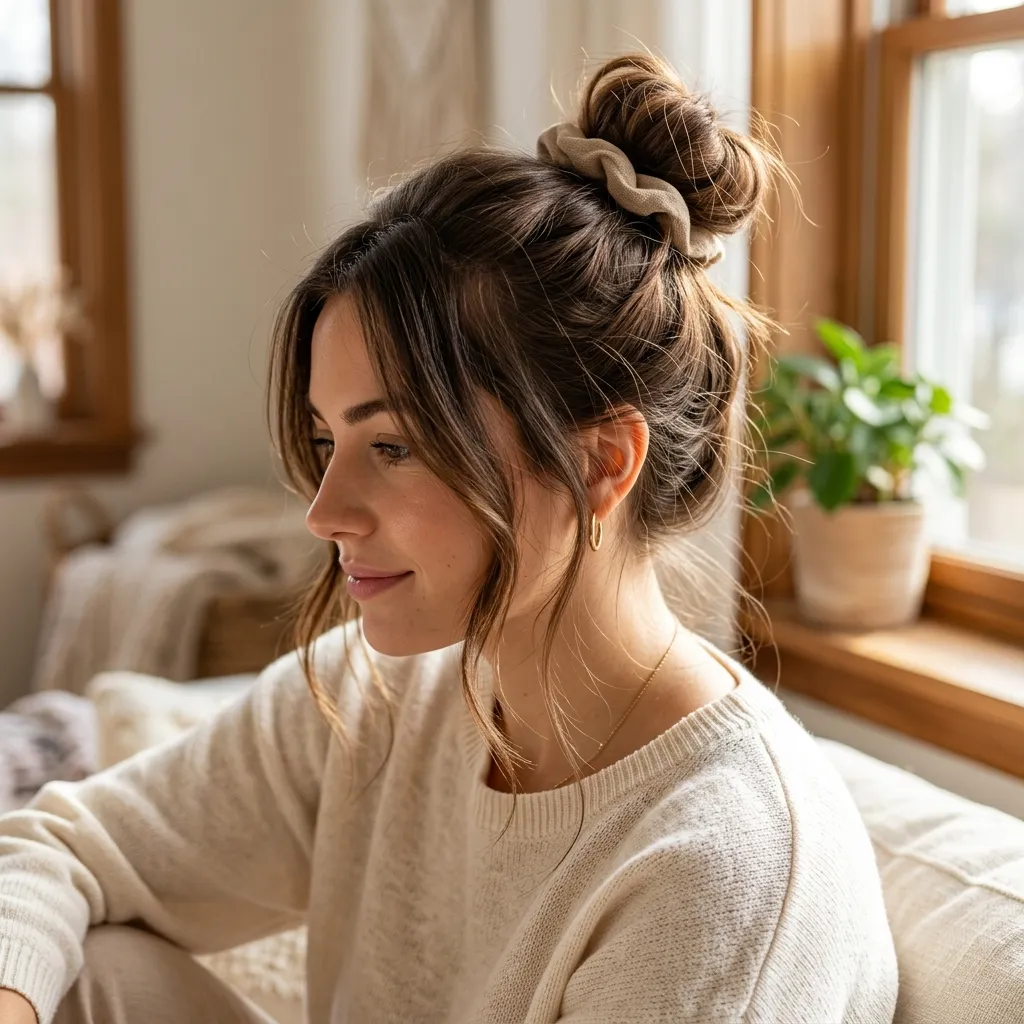
Vibe: Effortless and quick.
Why it works: Twisting the ponytail loosely instead of tightly before wrapping it lets pieces fall out naturally, giving a soft finished look without any actual styling time invested. This technique also works better on unwashed hair than freshly clean hair, since the added texture helps the bun hold its loose shape. Pulling a few pieces free around the face softens the overall silhouette, keeping it from looking like a rushed afterthought.
How to get it: Gather hair into a loose, low ponytail rather than pulling it too tight against the scalp. Twist the ponytail once around itself and wrap it loosely around the base, securing with a soft scrunchie rather than a tight elastic. Refresh roots first with Batiste Dry Shampoo, then gently pull a few face framing pieces loose from the front, letting them fall naturally on either side.
💡 Quick Win: Dry shampoo applied at the roots first gives the bun grip and texture in seconds.
Shop the Look
| Product |
| Volumizing dry shampoo |
| Silk scrunchie set |
| Texturizing spray |
| Bobby pins for stray pieces |
| Shine finishing mist |
23. Big Bouncy Curls, Old Hollywood Glam
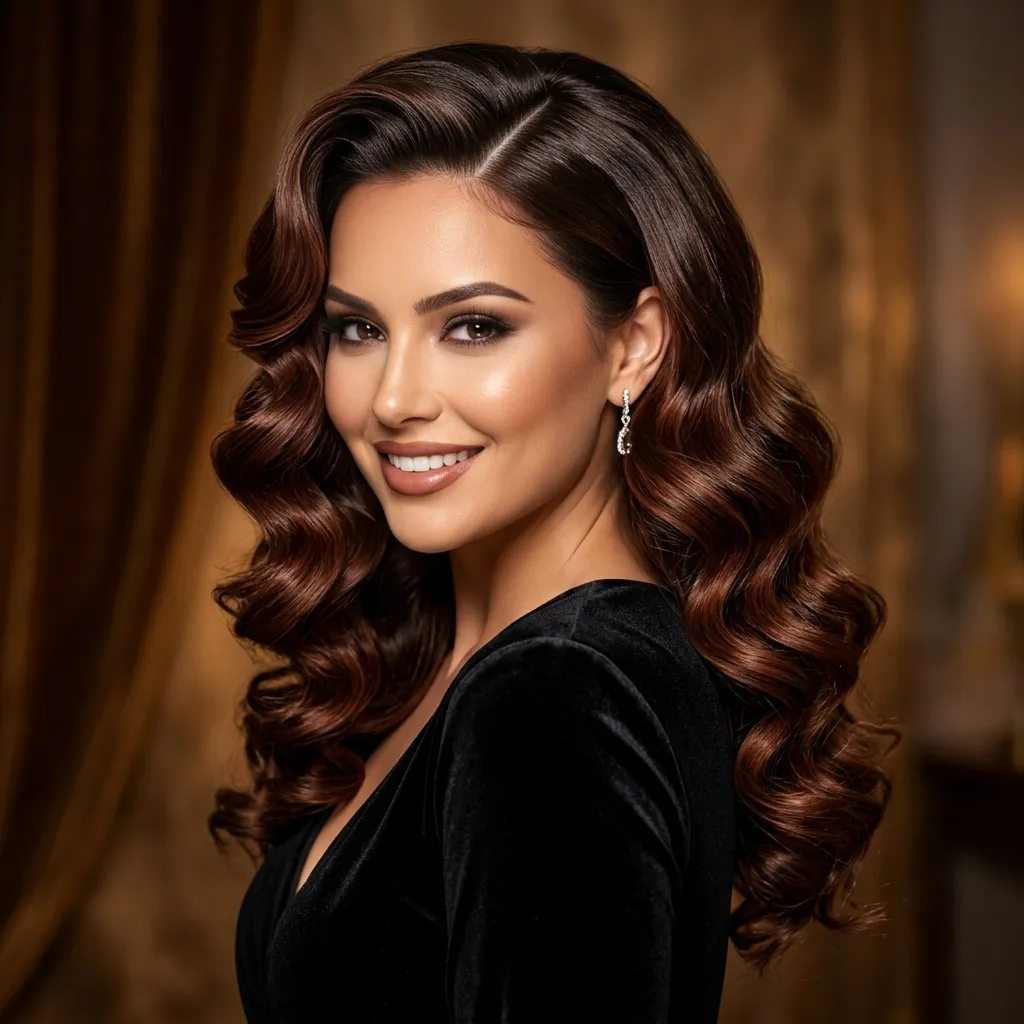
Vibe: Glamorous and full.
Why it works: Curling all sections in the same direction, away from the face, creates the uniform wave pattern associated with classic glamour styling rather than a random curl set. Working with larger two inch sections instead of small pieces also produces the softer, broader wave typical of this look, rather than tight ringlets. A deep side part adds asymmetry that balances the otherwise symmetrical curl pattern, keeping the style from feeling too formal.
How to get it: Curl two inch sections all in the same direction using a 1.5 inch iron, working from the nape upward toward the crown. Once all sections are curled and cooled, brush through gently with a wide tooth brush to blend the curls into soft waves. Set the finished curls with L’Oreal Elnett Satin Hairspray, create a deep side part, then pin back any loose pieces near the part for a clean line.
Shop the Look
| Product |
| 1.5 inch curling iron |
| Firm hold setting spray |
| Wide tooth cooling brush |
| Shine enhancing serum |
| Bobby pins for side part |
24. Fishtail Braid Side Sweep
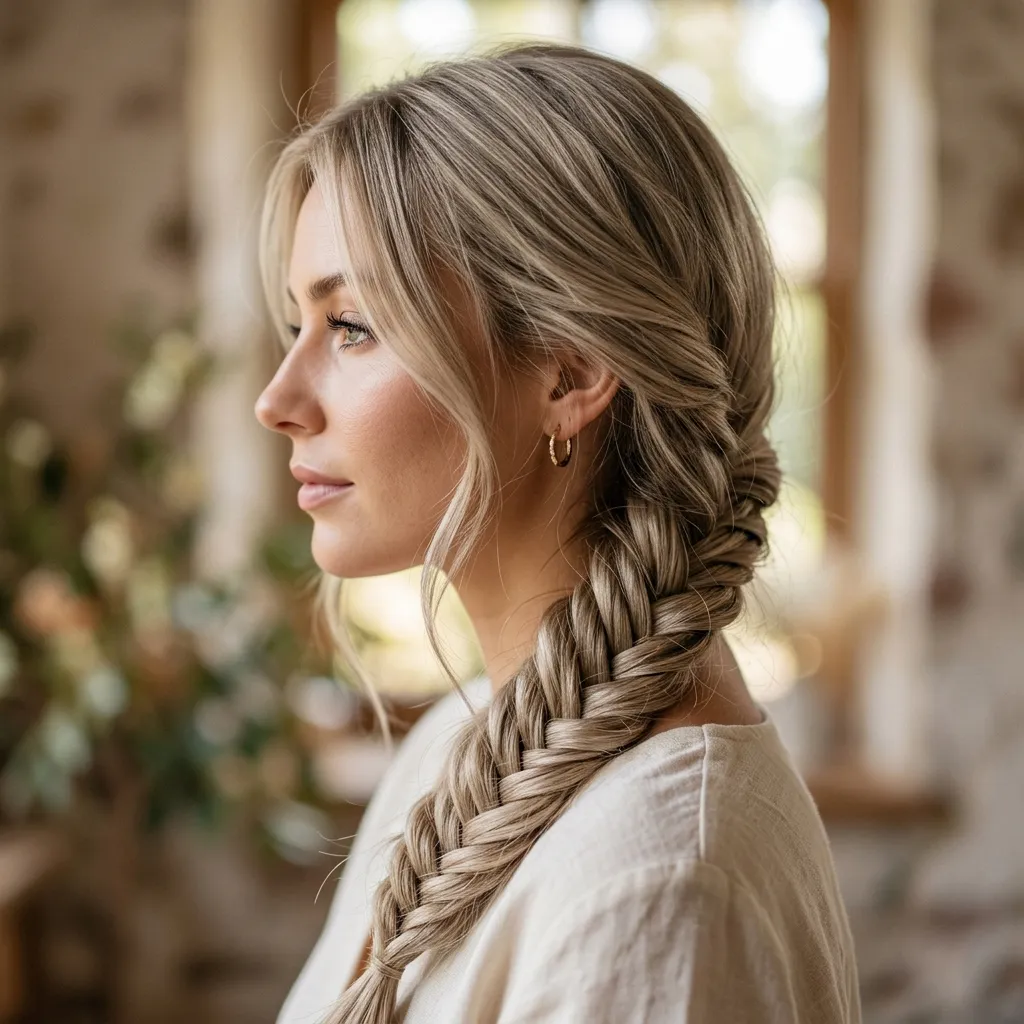
Vibe: Delicate and textured.
Why it works: Fishtail braiding uses thin strand crossovers instead of three thick sections, producing a finer, more intricate texture that reads as more detailed from a distance than a standard braid. Sweeping the finished braid over one shoulder also puts the texture front and center in most photo angles. This braid style tends to loosen gradually rather than unraveling all at once, which makes it more forgiving for a full day of wear.
How to get it: Split hair into two even sections, working at the nape or slightly to one side depending on where you want the braid to sit. Take a thin piece from the outer edge of each section and cross it over to join the opposite section, repeating this pattern steadily down the length. Prep with Bumble and bumble Surf Spray, secure the end with a small clear elastic, then gently pull on each loop from the outside in to widen the woven pattern.
💡 Quick Win: Pulling gently on each loop after braiding widens the fishtail pattern for extra volume.
Shop the Look
| Product |
| Small clear hair elastic |
| Texturizing sea salt spray |
| Fine tooth comb |
| Light hold hairspray |
| Shine finishing drops |
25. Twisted Crown Braid, Milkmaid Style
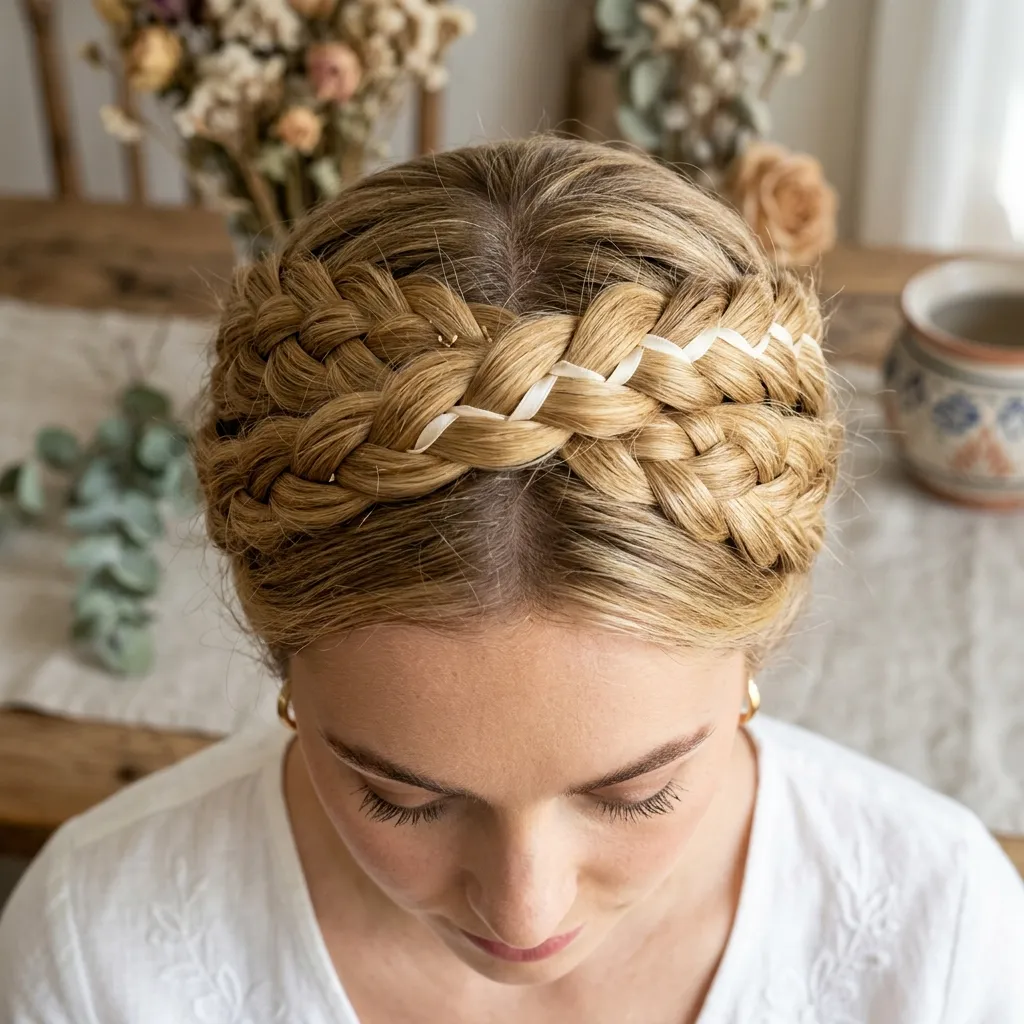
Vibe: Fresh and grounded.
Why it works: Crossing two braids at the crown rather than laying them flat creates height and a true crown shape, which is what separates this from a simple wrapped braid worn low. Starting both braids at the ears also keeps the style symmetrical, which reads as more polished than a single side braid pinned across. The woven ribbon adds a decorative detail without requiring any additional accessories like combs or clips.
How to get it: Braid two sections starting at each ear, keeping the tension consistent so both braids match in thickness. Cross the finished braids over the crown in opposite directions, so each one ends near the ear it did not start at. Pin each end securely with Eco Style Gel controlling any flyaways, then weave a thin ribbon along one braid for extra detail.
Shop the Look
| Product |
| Ribbon for braid weaving |
| Bobby pin variety pack |
| Edge smoothing gel |
| Texturizing spray |
| Detangling wide tooth comb |
26. Jeweled Barrettes on Loose Waves
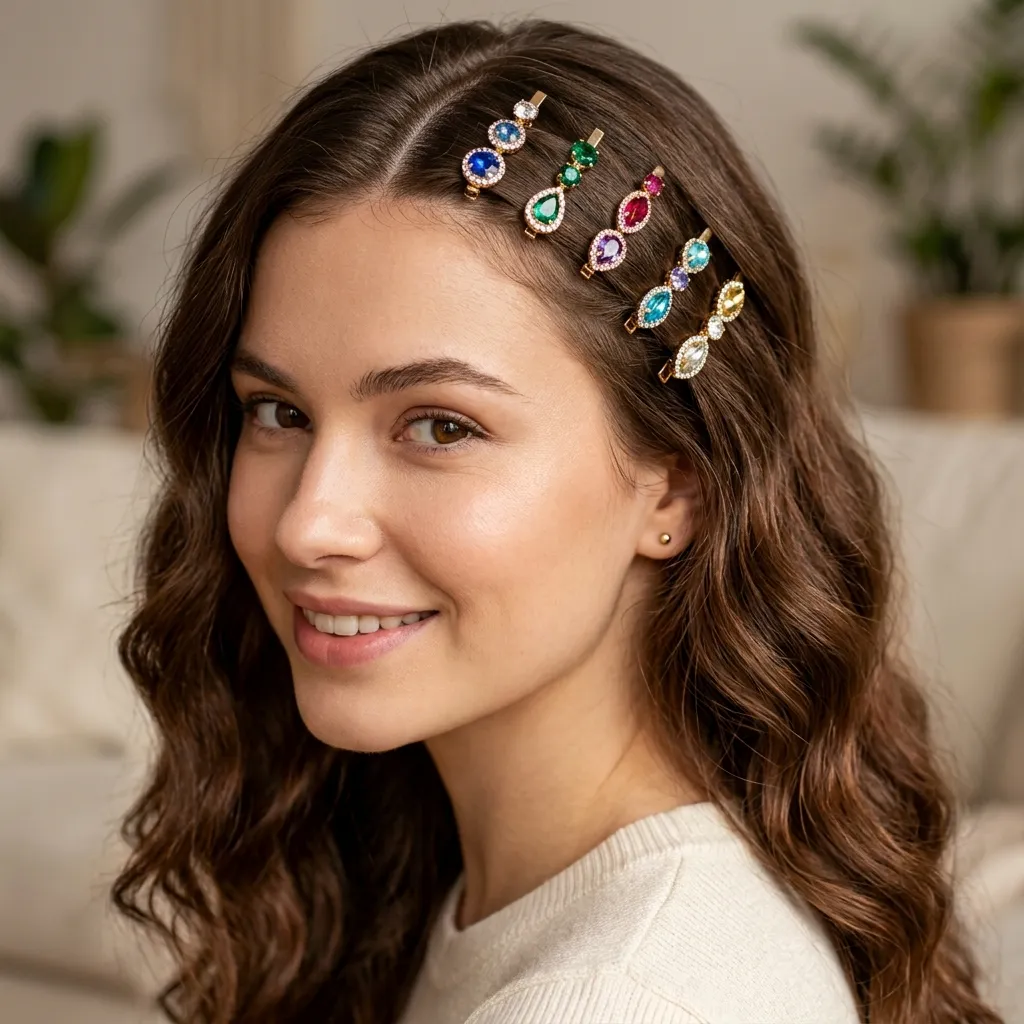
Vibe: Playful and sparkling.
Why it works: Clustering three or four small jeweled clips along one section of the part, rather than spacing them evenly across the whole head, mimics a trend based cluster placement that reads as intentional rather than scattered. This concentrated placement also creates a clear focal point without requiring any additional braiding or twisting underneath. Loose waves as the base give the clips somewhere secure to grip, since flat straight hair tends to let clips slide.
How to get it: Curl hair in loose waves using a medium barrel wand, keeping the texture soft rather than tightly defined. Clip three to four small jeweled barrettes in a tight cluster along one side of the part, rather than spreading them out evenly. Layer the clips at slightly different heights within the cluster, finishing with a mist of Amika Un.done Texture Spray so the placement looks organic.
💡 Quick Win: Mixed metal jeweled clips from a beauty supply store work for both dressy and everyday looks.
Shop the Look
| Product |
| Jeweled barrette clip set |
| Loose wave curling wand |
| Texturizing spray |
| Shine finishing mist |
| Wide tooth detangling comb |
27. Caramel Balayage for Warm Undertones
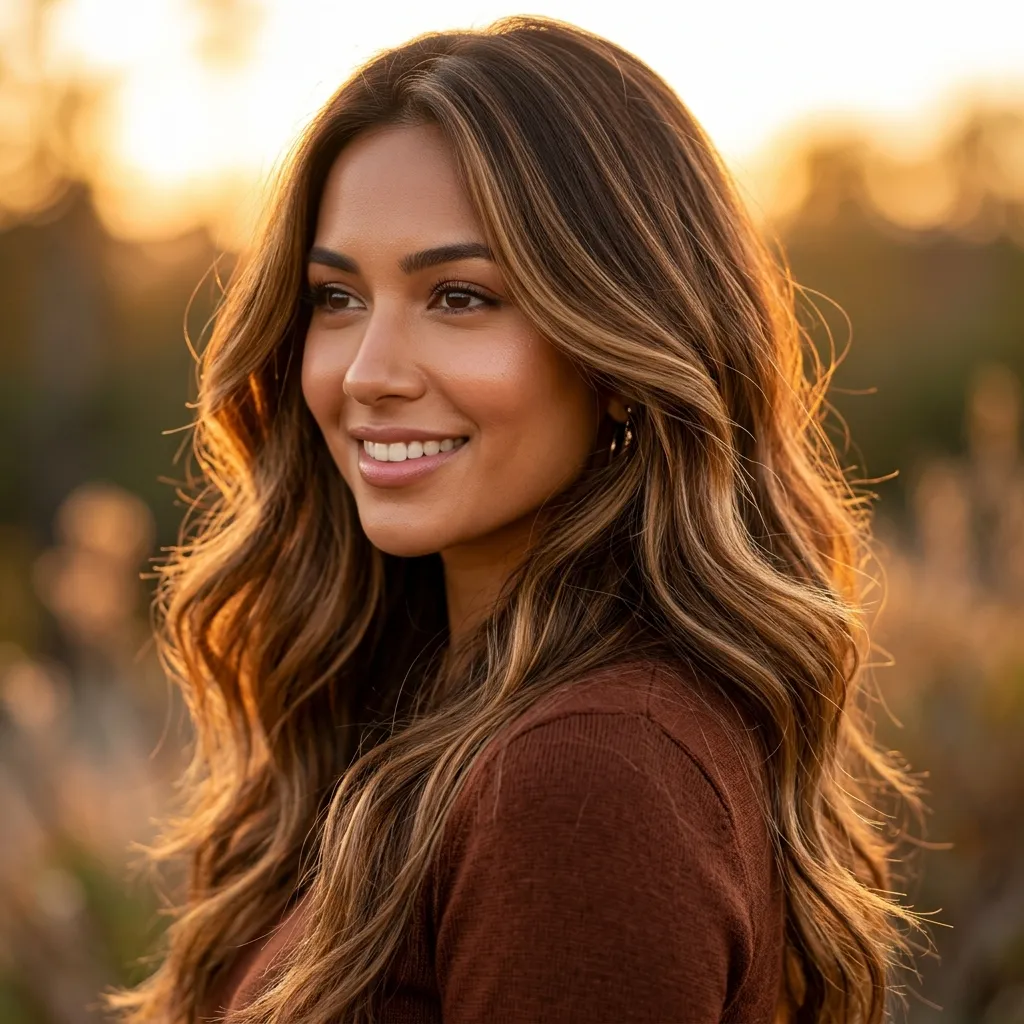
Vibe: Rich and warm.
Why it works: Matching the balayage tone to a warm undertone base, rather than a cool ash tone, keeps the color from clashing with warm skin, which is a common mismatch stylists regularly correct for. Caramel specifically sits between blonde and brunette, making it a flattering middle ground for those unsure about committing to a lighter shade. The rich depth also photographs well in both daylight and warm indoor lighting, unlike cooler tones that can look washed out indoors.
How to get it: Ask your colorist for caramel balayage placed on a warm chestnut base, specifying that you want to avoid any ash or cool toner. Request the balayage be concentrated at the face frame and ends, with the crown left slightly darker for dimension. Maintain the warmth at home using Olaplex No.3 Hair Perfector weekly, avoiding any purple or blue toning products which can pull the color cool.
Shop the Look
| Product |
| Warm tone glossing treatment |
| Color safe conditioning mask |
| Heat protectant spray |
| Medium barrel curling wand |
| Argan oil finishing serum |
28. Soft Textured Lob with Waves
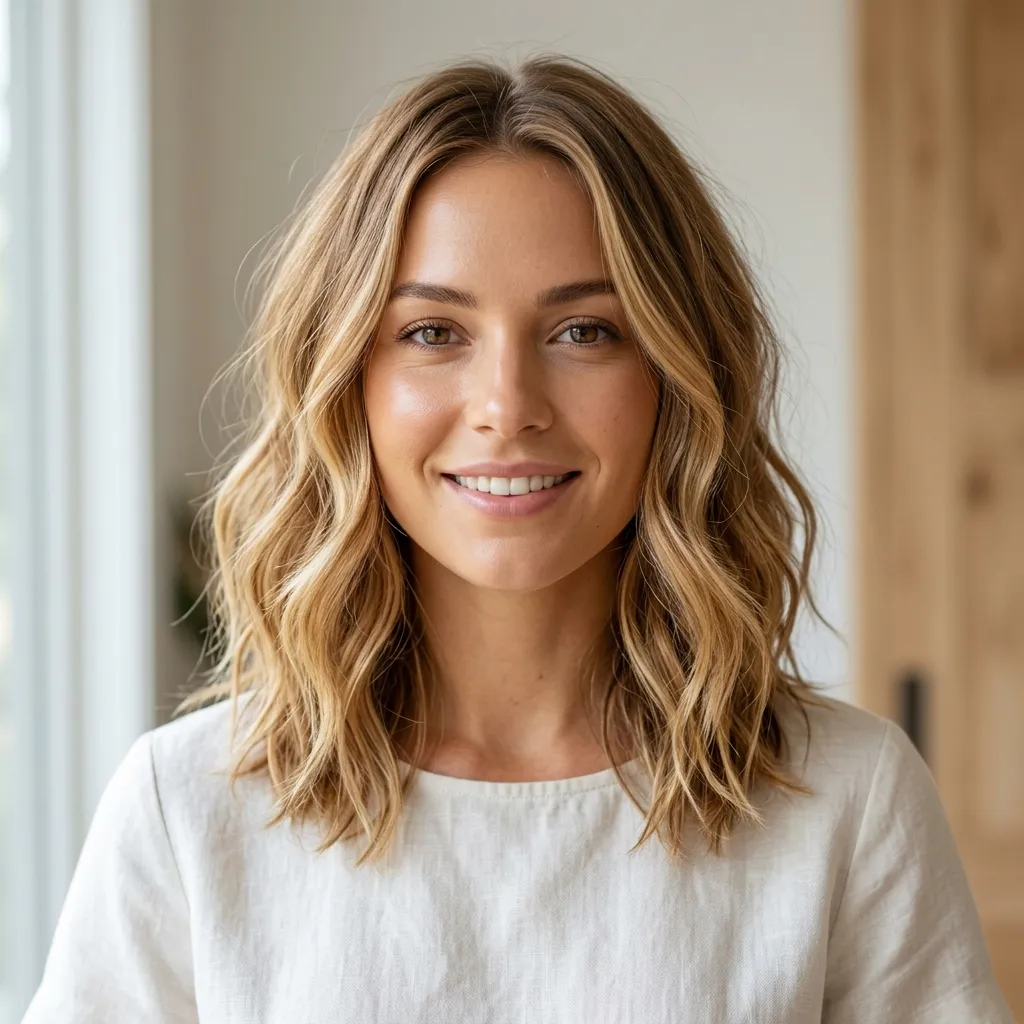
Vibe: Fresh and light.
Why it works: A point cut technique removes weight from the ends, letting shorter hair hold soft waves without the heaviness that a blunt cut edge can create. This texture also makes shoulder length hair appear fuller, since the cut edges catch light differently than a single flat line would. The shorter overall length means curls set faster and require less heat exposure than styling long hair.
How to get it: Ask your stylist for a point cut lob at shoulder length, specifying that the ends should be textured rather than blunt. Curl one inch sections loosely with a 1.25 inch wand, alternating curl direction slightly for a more natural finish. Finish by applying OUAI Leave-In Conditioner to the ends only, which keeps the shorter length from feeling dry or brittle.
Shop the Look
| Product |
| 1.25 inch curling wand |
| Texturizing sea salt spray |
| Lightweight leave in conditioner |
| Flexible hold hairspray |
| Wide tooth comb |
29. Long Layers for Oval Face Shapes
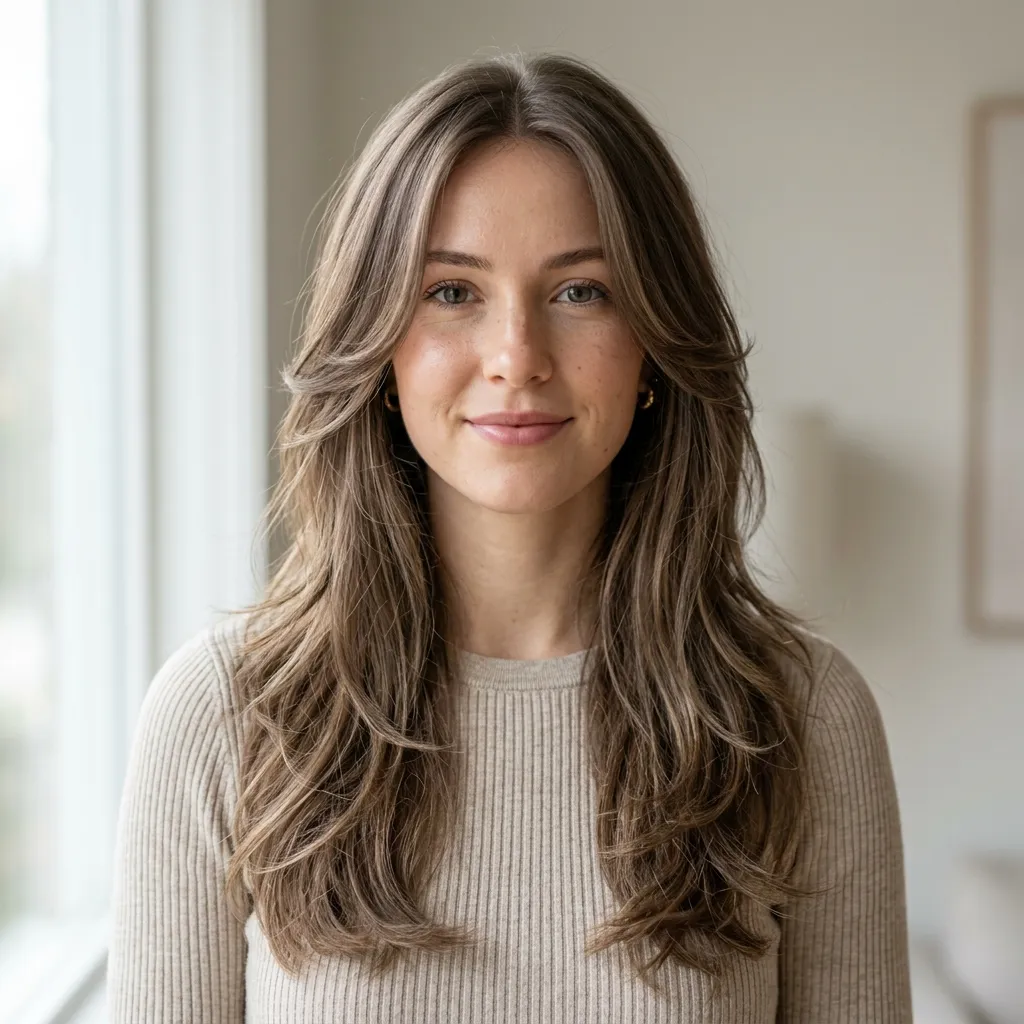
Vibe: Balanced and soft.
Why it works: Long layers starting at the cheekbone add movement without shortening the overall length, which suits an oval face shape that already has naturally balanced proportions to begin with. Because oval faces do not require the correction other shapes need, the layering here is purely about adding dimension rather than reshaping anything. This approach also keeps long hair from looking flat or one dimensional, especially past shoulder length.
How to get it: Ask your stylist for face framing layers beginning at the cheekbone, gradually blending into the rest of the length rather than cut with a sharp line. Request the heaviest layering around the front pieces, with length maintained through the back for overall balance. Prep at the root with Bumble and bumble Thickening Full Form Mousse, then style with a light curl at the ends using a large barrel wand.
💡 Quick Win: A quick blow dry with a round brush at the roots keeps long layers from falling flat by midday.
Shop the Look
| Product |
| Round brush for blow drying |
| Volumizing root mousse |
| Heat protectant spray |
| Lightweight hair oil |
| Flexible hold hairspray |
30. Simple Braided Headband for Everyday Elegance
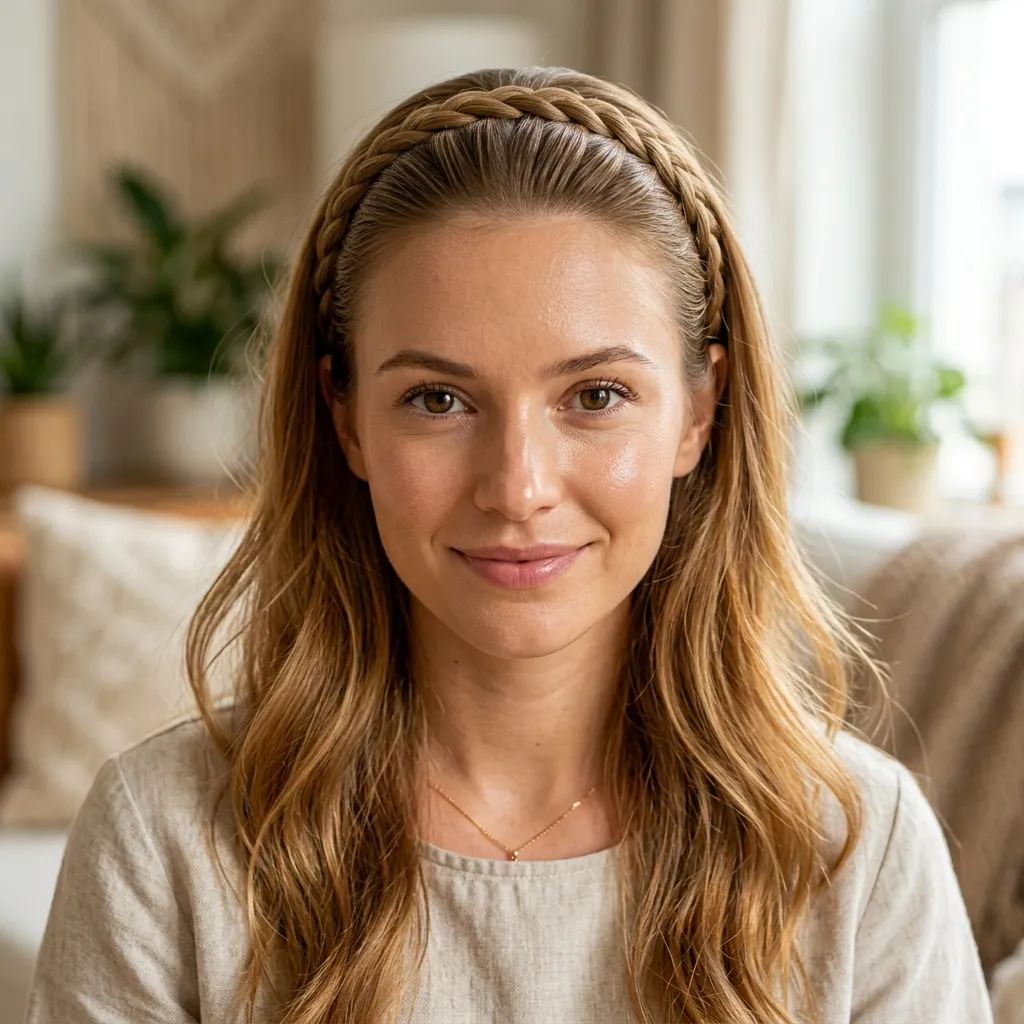
Vibe: Simple and clean.
Why it works: A single thin braid pinned across the crown functions like an accessory, pulling hair away from the face without the time commitment of a full braided style. Keeping the braid thin, rather than thick, means it reads as a subtle detail instead of the main focus of the hairstyle. This style also works well as a transitional look, taking hair from a workout or errands straight into something more polished.
How to get it: Take a one inch section from each temple, keeping the sections small enough that the finished braids stay thin. Braid each section loosely down a few inches, then cross them at the back of the crown so they meet in the middle. Pin the two braid ends together flat against the head with Goody bobby pins, tucking any loose ends underneath so the transition is not visible.
💡 Quick Win: This style takes under three minutes and works well on unwashed, second day hair.
Shop the Look
| Product |
| Small clear hair elastics |
| Bobby pins for securing braid |
| Texturizing spray |
| Lightweight finishing serum |
| Wide tooth comb |
How to Start Your Princess Hairstyle Transformation
The single best first move is buying one good curling wand in a 1.25 inch barrel. This size is versatile enough to create everything from loose waves to tighter ringlets, and it anchors nearly every look in this list without needing three different tools right away.
The most common mistake beginners make is curling every section in the same direction toward the face. This flattens the crown and makes curls collapse within an hour. Fix it by alternating curl direction section by section, and always leave the top inch of each section uncurled near the root.
Three items under $50 that create immediate impact: a pack of small pearl hairpins, a satin ribbon spool in ivory or blush, and a flexible hold hairspray that won’t stiffen soft curls.
A simple version of this style, like a half up twist or a braided headband, takes under ten minutes once you’ve practiced twice. A fuller transformation, including a color change like balayage, is realistically a two to three hour salon appointment and can run from $80 for partial highlights to $250 or more for a full balayage with gloss, depending on hair length and salon.
Frequently Asked Questions About Princess Hairstyles
What makes a hairstyle look like a “princess” style versus a regular updo?
A princess hairstyle typically combines soft curls or waves with a structured element, like a twist, braid, or comb, plus a small decorative accessory such as a pearl pin or ribbon. A regular updo can be sleek and minimal, while princess styles lean into romance and visible detail, often costing under $20 in added accessories to make the difference clear.
What hair colors work best for a princess hairstyle look?
Warm, light reflecting tones tend to photograph the best, including champagne blonde, rose gold, honey brown, and copper red. These shades catch light in curls more visibly than flat, cool tones like ash grey. A gloss or toner refresh every six to eight weeks keeps the color looking its brightest.
How much does it cost to get a full princess hairstyle look done professionally?
Pricing varies by service. A curling and updo styling appointment for an event typically runs $60 to $120 depending on length and complexity, while adding a color service like balayage adds $100 to $250. A DIY version at home, using a $30 curling wand and a $10 accessory set, achieves a similar look for under $50 total.
Can this style work for fine, thin hair or does it need thick hair to look right?
Fine hair can absolutely work, though it benefits from added texture first. A volumizing root powder or a light texturizing spray before curling helps hold shape longer, and smaller barrel curls tend to look fuller on fine strands than large, loose waves.
What is the most requested princess hairstyle element right now?
Braided crown styles, particularly the Dutch braid crown wrap and the milkmaid twisted crown, are currently the most searched princess hairstyle element. Their popularity ties to romantic period drama styling trends, and both can be recreated at home with practice using just bobby pins and a fine tooth comb, no salon visit required.
Ready to Create Your Dream Princess Hairstyle?
From rose gold color to fishtail braids, jeweled clips, and five minute everyday buns, these 30 ideas cover color, texture, braiding, and quick options for busy mornings. You don’t need to master all of it at once, and starting with one simple twist or a single new hairpin is a genuinely good place to begin.
Try one look today, maybe the braided headband or the half up twist, and notice how much more finished it feels with almost no extra effort. That’s the real appeal of this style: soft, romantic hair that still feels put together, and put together in a way that makes you want to catch your reflection twice. Save your three favorites now, and let the pearl pins and ribbon be the easy part you actually look forward to.