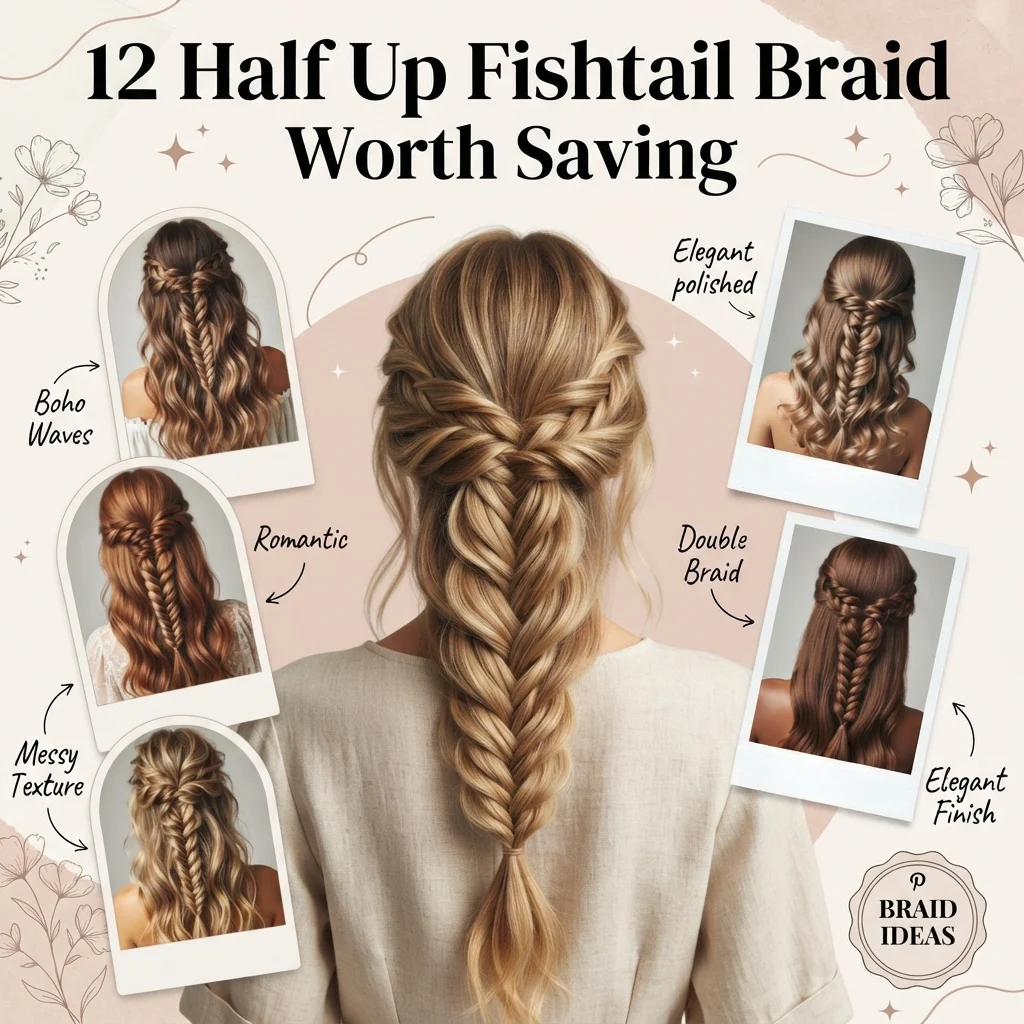
12 Half Up Fishtail Braid Hairstyles Worth Saving

Half up fishtail braid hairstyles combine a woven, herringbone-patterned braid across the crown with the rest of the hair left down, giving the polish of a braided updo without committing to a full one. This article gives you 12 genuinely wearable half up fishtail braid hairstyles, broken down by braid placement, texture, and finishing accessory, so you leave with an actual technique to practice rather than a vague reference photo.
There’s a specific movement to this style that a plain half-up ponytail can’t match. The herringbone weave catches light in a way a simple braid doesn’t, shifting texture with every turn of the head. A loose fishtail unraveling slightly by the second half of the day still reads as intentional rather than undone. A tight, glossy version photographs like it took an hour and took ten minutes instead. Here are 12 half up fishtail braid hairstyles worth saving, and actually practicing before you need them.
Why Half Up Fishtail Braid Hairstyles Work So Well
The fishtail braid is a two-strand weave, distinct from the standard three-strand braid, where small sections are crossed alternately from the outer edge of each side into the opposite section, a technique with roots in equestrian and folk hairstyling traditions long before it became a runway and red-carpet staple in the early 2010s. What separates a half-up fishtail from a full braided style is restraint: the braid runs only across the crown, gathering the top sections while the lengths fall loose beneath it, which keeps the movement and shine of down hair while still adding the structural interest a plain half-up ponytail lacks.
The technique relies on texture and tension rather than heavy product: hair with some grip (day-old, texturized, or lightly dry-shampooed) holds the weave far better than freshly washed, slippery hair. The finishing accessories that pair naturally with this category run small and textural: thin satin or grosgrain ribbon woven directly into the braid, pearl or gold hairpins tucked along the weave’s edge, small fresh or silk florals at the point where the braid ends. Color-wise, dimensional tones (balayage, copper glaze, warm chestnut) read best in a fishtail specifically because the herringbone pattern exposes more individual strands to light than a smooth three-strand braid does.
This style is trending because Pinterest and TikTok search data show sustained interest in “fishtail braid tutorial” content, driven by a broader return to visible braiding techniques across bridal, festival, and everyday hairstyling after several years of sleek, minimal styles dominating search trends. It’s also a practical trend. A half-up fishtail takes roughly a third of the time a full fishtail down the entire length requires, which matters to people styling their own hair before work or an event without professional help.
Yes, this style works on both thick and fine hair, though the technique shifts slightly for each. Thick hair holds a looser, chunkier fishtail well since there’s enough volume to keep the weave visible even when sections are pulled wide; fine hair needs a tighter weave with smaller sections and a texturizing spray worked in beforehand, or the braid pattern can look thin and stringy rather than defined.
Style at a Glance
| Element | Detail |
|---|---|
| Philosophy | A structured, woven accent across the crown that keeps the movement of down hair while adding braided detail and shine |
| Key Techniques | Two-strand herringbone weave, loose versus tight tension, ribbon and pin integration at the braid’s edge |
| Color Palette | Balayage dimension, warm chestnut, soft copper glaze |
12 Half Up Fishtail Braid Hairstyles
1. Classic Loose Half-Up Fishtail Braid
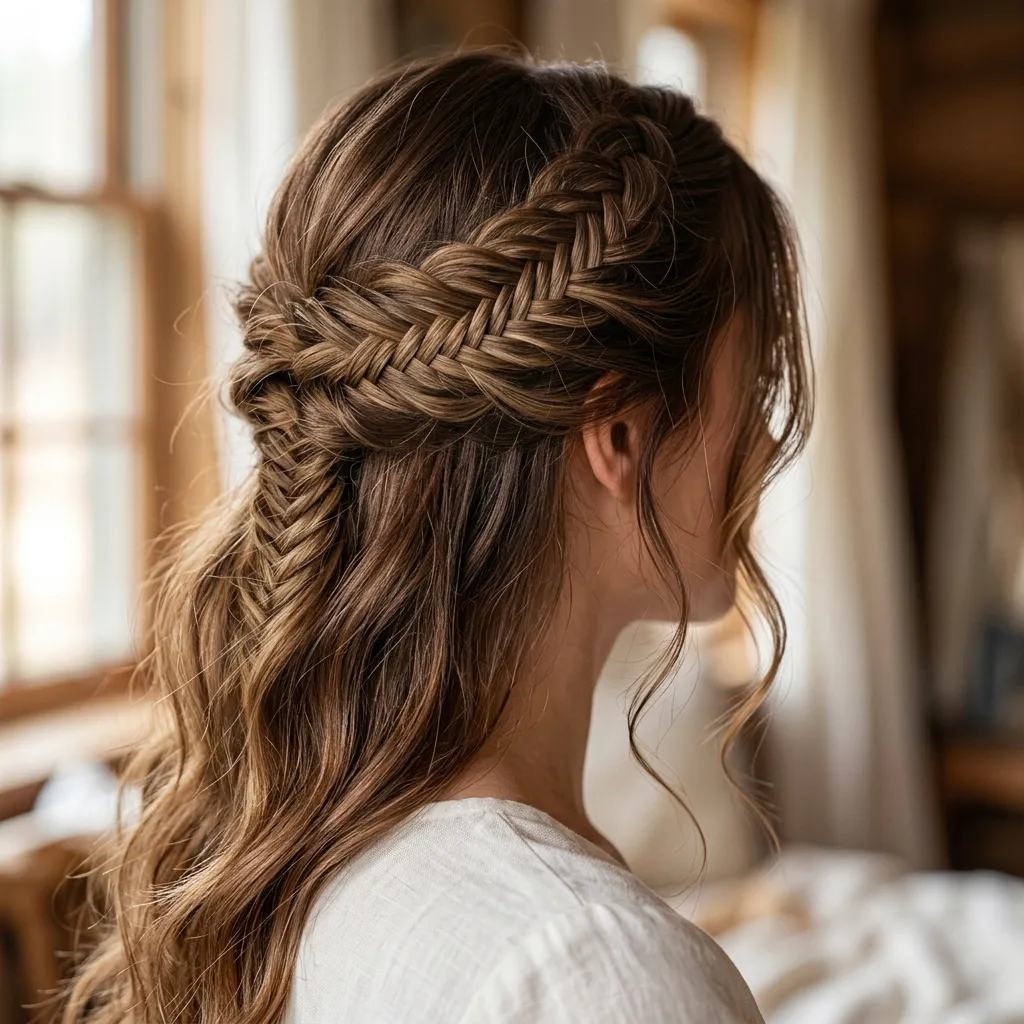
Vibe: Luminous. The version of this braid that looks effortless because it genuinely is.
Why it works: Pulling gently on each woven section after the braid is finished widens the herringbone pattern and softens the otherwise tight, geometric look of a fresh fishtail, which is the specific texture principle that makes this variation read as undone rather than engineered. The wider weave also catches more light across its surface than a tightly braided version, which is why this style photographs with visible texture even from a distance.
How to get it: Braid a two-inch section from each side of the crown using the standard fishtail technique (cross a thin piece from the outer edge of the left section over into the right, and repeat, alternating sides) then secure with a small clear elastic and gently pull each loop outward with your fingers, working from the top down.
Shop the Look
| Product |
|---|
| Clear silicone hair elastics, small size |
| Texturizing sea salt spray, lightweight |
| Fine-tooth rat-tail comb for sectioning |
| Flexible-hold finishing spray |
| Wide-tooth detangling brush |
2. Balayage-Highlighted Fishtail for Visible Dimension
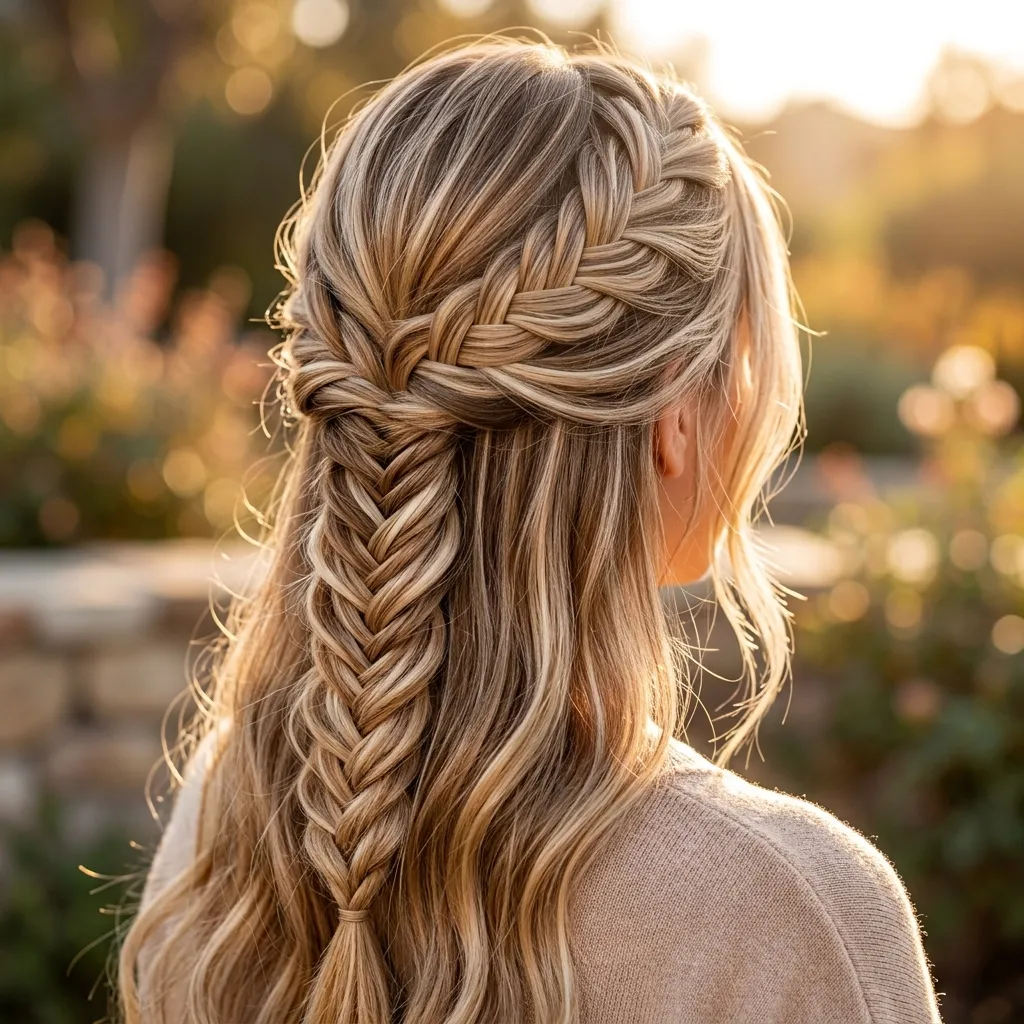
Vibe: Sun-warmed, color that moves visibly with every strand crossed into the weave.
Why it works: A fishtail exposes more individual strand surfaces to the light than a standard three-strand braid does, since the weave alternates thin diagonal sections rather than thick vertical ones placing balayage highlights specifically through the top and mid-lengths means the color shows inside the braid itself, not just at the ends. This is the single style on this list where highlight placement matters more than the braiding technique itself.
How to get it: Ask your colorist for balayage concentrated through the crown and mid-lengths rather than only at the face-frame, since that’s the section that becomes the fishtail. Braid the half-up section loosely enough that individual highlighted strands remain visible rather than blending into a single braided mass.
Quick Win: If your highlights are placed lower on the length, braid the fishtail slightly further back from the crown so the braid catches more of the highlighted mid-length hair as it’s gathered in.
Shop the Look
| Product |
|---|
| Root touch-up powder, honey blonde shade |
| Argan oil hair serum for shine |
| Shine-enhancing hair oil mist |
| Small clear elastics for braid ends |
| Wide-barrel curling wand, 1.25-inch |
3. Double Fishtail Braids Half-Up
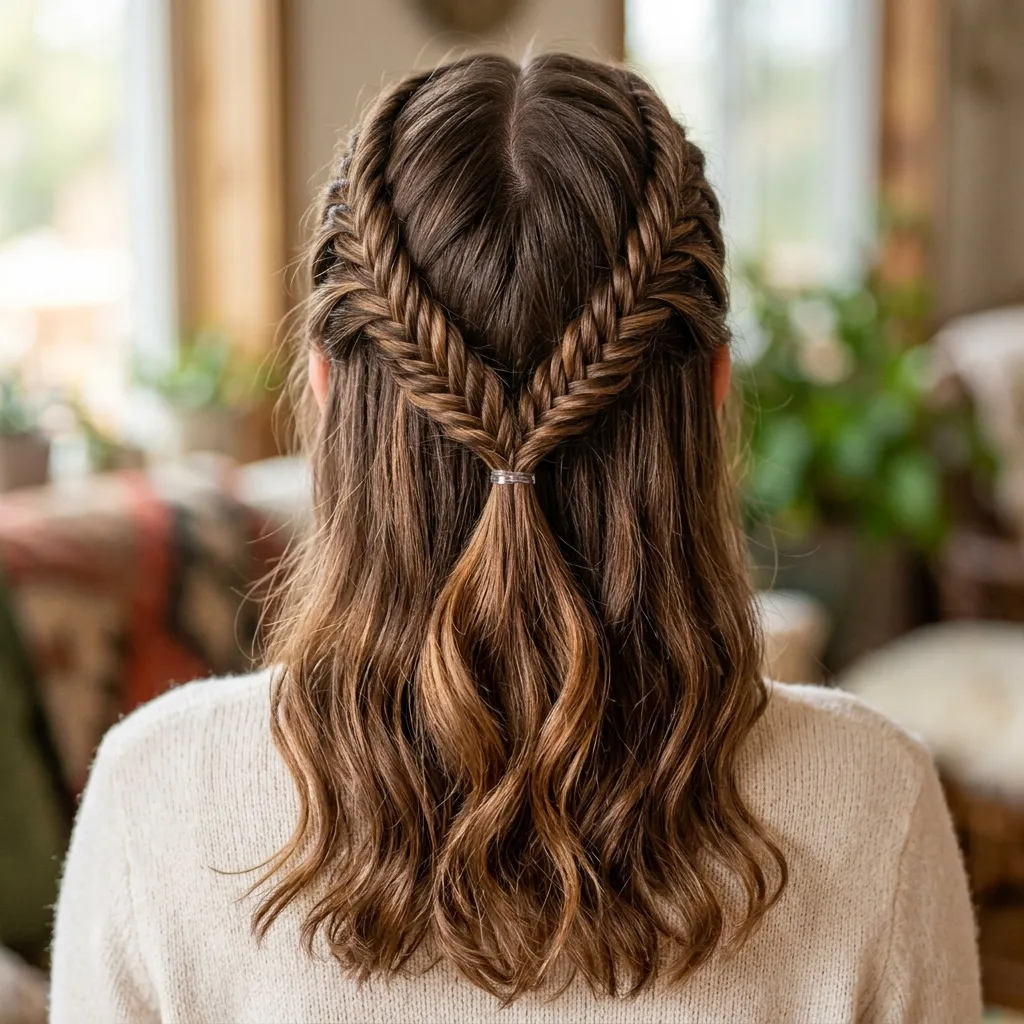
Vibe: Playful. A symmetrical detail that reads as more considered than a single braid.
Why it works: Splitting the crown into two sections and braiding each separately before joining them at the center is a repetition principle. The matched pair creates visual rhythm and balance that a single off-center fishtail doesn’t offer, which is why this version is disproportionately popular for events where the back of the hair gets photographed as often as the front.
How to get it: Part the crown down the center, section each side into a two-inch panel, fishtail-braid each one separately toward the back, then join both braids together at the center back with a single small elastic before letting the remaining hair fall loose beneath.
Shop the Look
| Product |
|---|
| Fine-tooth sectioning comb |
| Small clear elastics, multi-pack |
| Bobby pins, color-matched 30-piece |
| Flexible-hold finishing spray |
| Smoothing edge control gel, travel size |
4. Glossy Sleek Fishtail for Event Photography
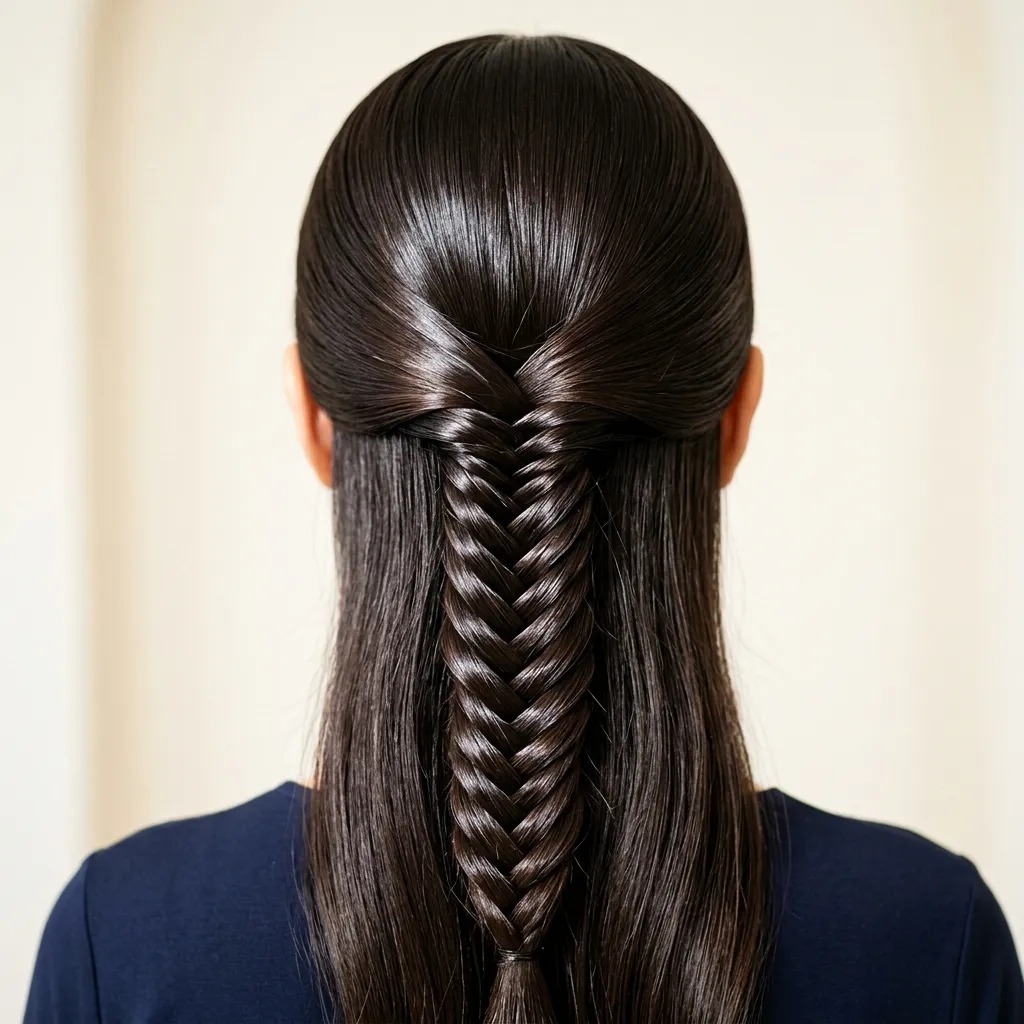
Vibe: Polished, a controlled, high-shine finish built for a camera flash.
Why it works: A tightly woven fishtail with smaller sections and firmer tension produces a flatter, more reflective surface than a loose braid, which is the specific quality that reads as “done” in flash or bright studio photography where a looser, more textured braid can look undone rather than styled. Smoothing gel applied before braiding, not after, is what keeps the crown glass-smooth rather than frizzy under direct light.
How to get it: Apply a strong-hold smoothing gel to the crown before sectioning, then braid the fishtail using narrower sections than a casual version, roughly half an inch per cross rather than a full inch, which produces the tighter, more reflective weave this look depends on.
Shop the Look
| Product |
|---|
| Strong-hold smoothing gel, clear formula |
| Boar bristle smoothing brush, small |
| High-shine finishing spray |
| Fine-tooth rat-tail comb for tight sectioning |
| Anti-frizz serum, lightweight |
5. Ribbon-Woven Fishtail Braid
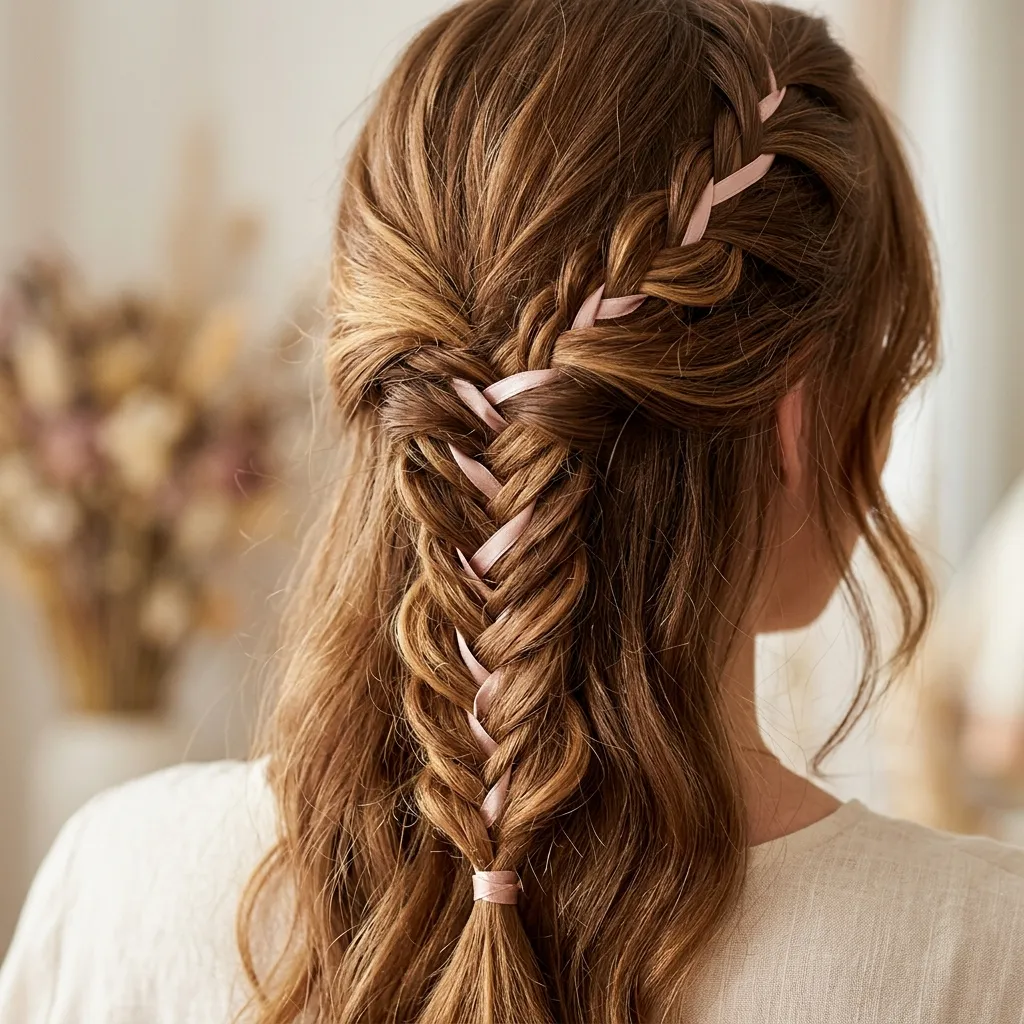
Vibe: Layered, a small textile detail that changes the whole braid’s character.
Why it works: Weaving a length of ribbon into the fishtail alongside the hair sections adds a continuous color thread that draws the eye the full length of the braid, which is a different visual effect than a single pin or clip placed at one point: the ribbon becomes part of the structure rather than an accessory added afterward, which is why it reads as more integrated and less costume-like than a bow tied on top.
How to get it: Pin one end of a thin satin ribbon at the crown before you begin braiding, then treat it as a third “strand”, cross it into the weave alongside the hair sections at every other pass rather than every single one, so it appears as an intermittent thread rather than a solid stripe.
Quick Win: Choose a ribbon color that matches one tone already present in your hair color rather than a contrasting one, which keeps the detail looking coordinated instead of costume-like.
Shop the Look
| Product |
|---|
| Thin satin ribbon roll, blush pink |
| Small clear elastics for braid ends |
| Bobby pins, color-matched |
| Flexible-hold finishing spray |
| Fine-tooth comb for clean sectioning |
6. Chunky Textured Fishtail for Thick Hair
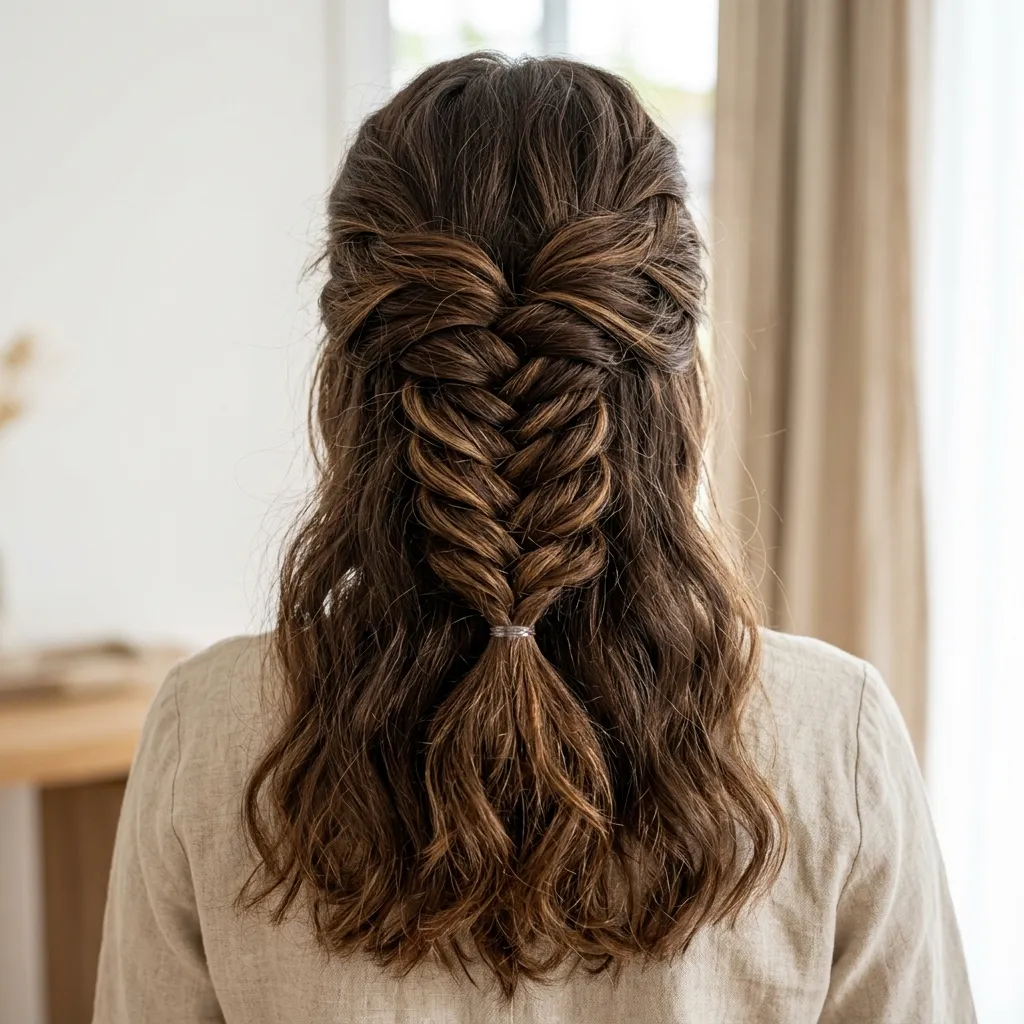
Vibe: Grounded, a braid with real visual weight, built for hair that has the density to support it.
Why it works: Using wider sections, closer to an inch and a half per cross rather than the half-inch used in a sleek version, is the specific adjustment thick hair needs, since narrow sections on dense hair create a bulky, uneven weave that loses the herringbone pattern’s definition. The wider crosses let each section’s full volume show individually, which is what keeps the pattern crisp rather than muddy on thick hair.
How to get it: Section a wider panel across the crown than you would for fine hair, roughly three inches total, and use larger individual sections for each cross of the fishtail, checking every few crosses that the pattern is still visibly alternating rather than collapsing into a solid braided mass.
Shop the Look
| Product |
|---|
| Wide-tooth detangling comb |
| Firm-hold hairspray, no-flake formula |
| Large clear elastics for thick hair |
| Smoothing edge control gel |
| Boar bristle brush, full size |
7. Side-Swept Fishtail for an Asymmetrical Frame
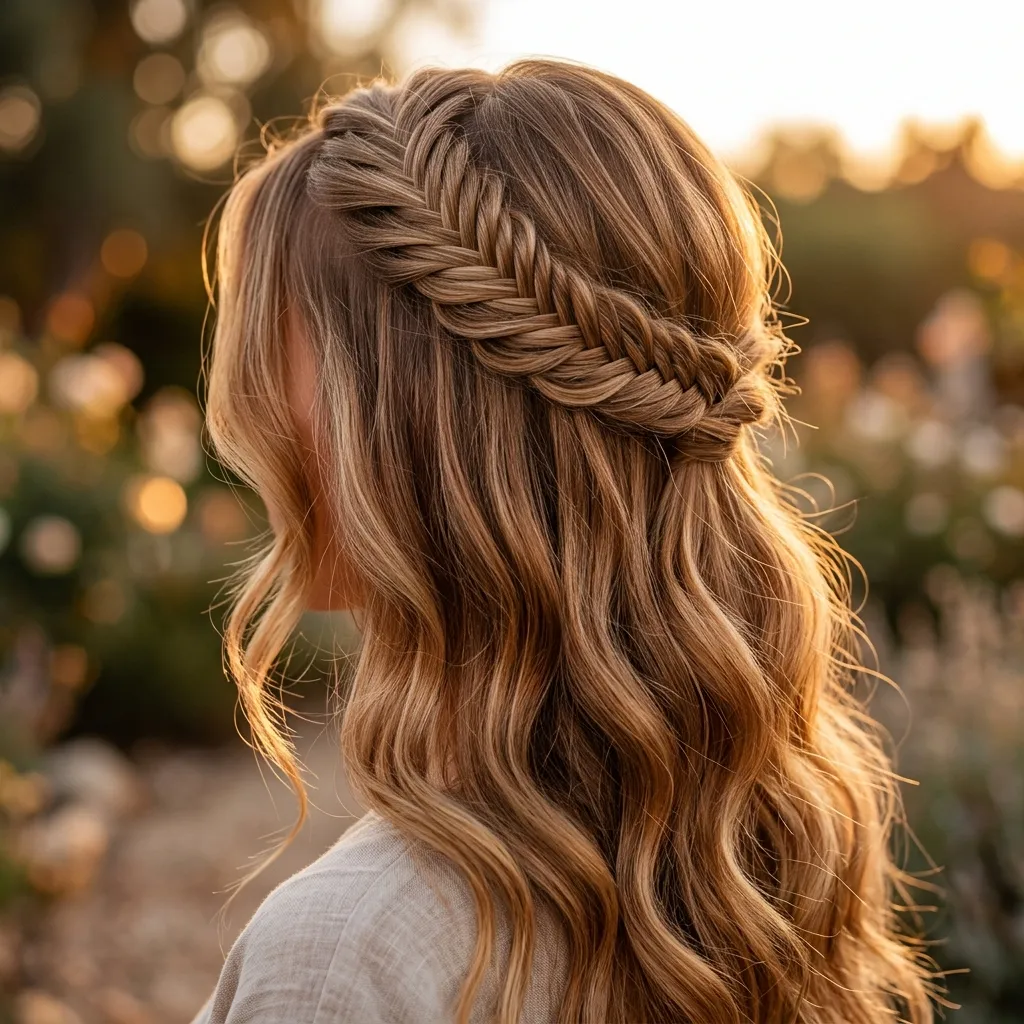
Vibe: Romantic. A diagonal line that softens the whole face-frame.
Why it works: Starting the braid from a deep side part rather than the center shifts the visual weight of the style diagonally across the head, a proportion technique that flatters rounder face shapes by drawing the eye at an angle rather than straight down the center part. The asymmetry also means the braid ends further from center, which creates a visually longer, more elongated line than a symmetrical half-up fishtail.
How to get it: Part hair deeply to one side, roughly 80/20 rather than a standard part, and begin the fishtail section from the heavier side, angling it diagonally across the crown toward the opposite ear before securing.
Shop the Look
| Product |
|---|
| Duckbill sectioning clips, 4-piece |
| Deep side-part comb |
| Volumizing root spray, lightweight |
| Small clear elastics for braid ends |
| Flexible-hold finishing spray |
8. Copper-Toned Fishtail Braid
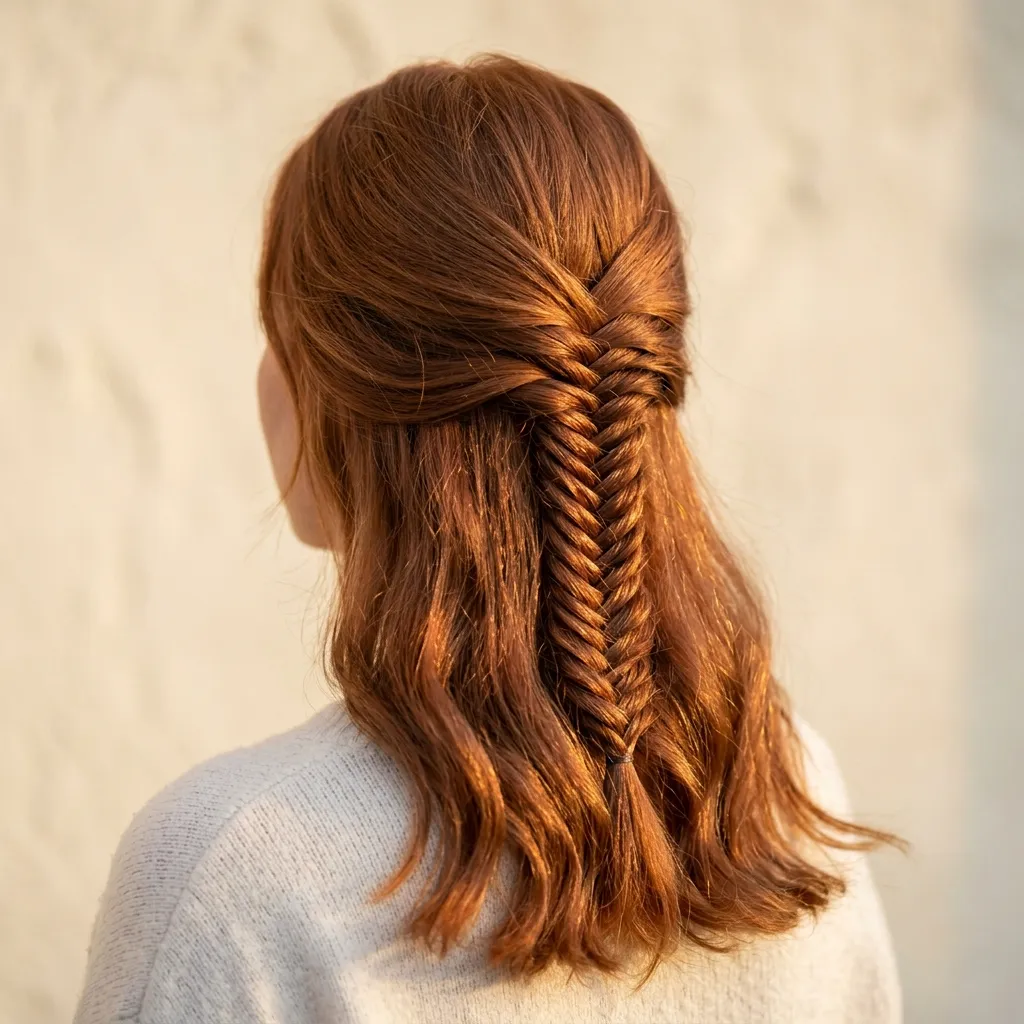
Vibe: Warm, color and technique reinforcing the same reflective quality.
Why it works: Soft copper is a medium-saturation, high-reflectivity tone, and a fishtail’s alternating diagonal pattern exposes more individual strand surfaces to light than a smooth ponytail or a three-strand braid would, which means copper-toned hair shows more visible shine and color movement specifically in this braid style than in most other half-up options.
How to get it: Request an all-over soft copper glaze or gloss treatment, then braid the fishtail with medium tension, not too tight, which flattens the color’s reflective quality, and not too loose, which scatters light unevenly across the weave.
Shop the Look
| Product |
|---|
| Color-safe shampoo for copper tones |
| Purple-free color-depositing conditioner, copper shade |
| Shine-enhancing hair oil mist |
| Small clear elastics for braid ends |
| Heat protectant spray with UV filter |
9. Crown-Wrapped Fishtail Half-Up
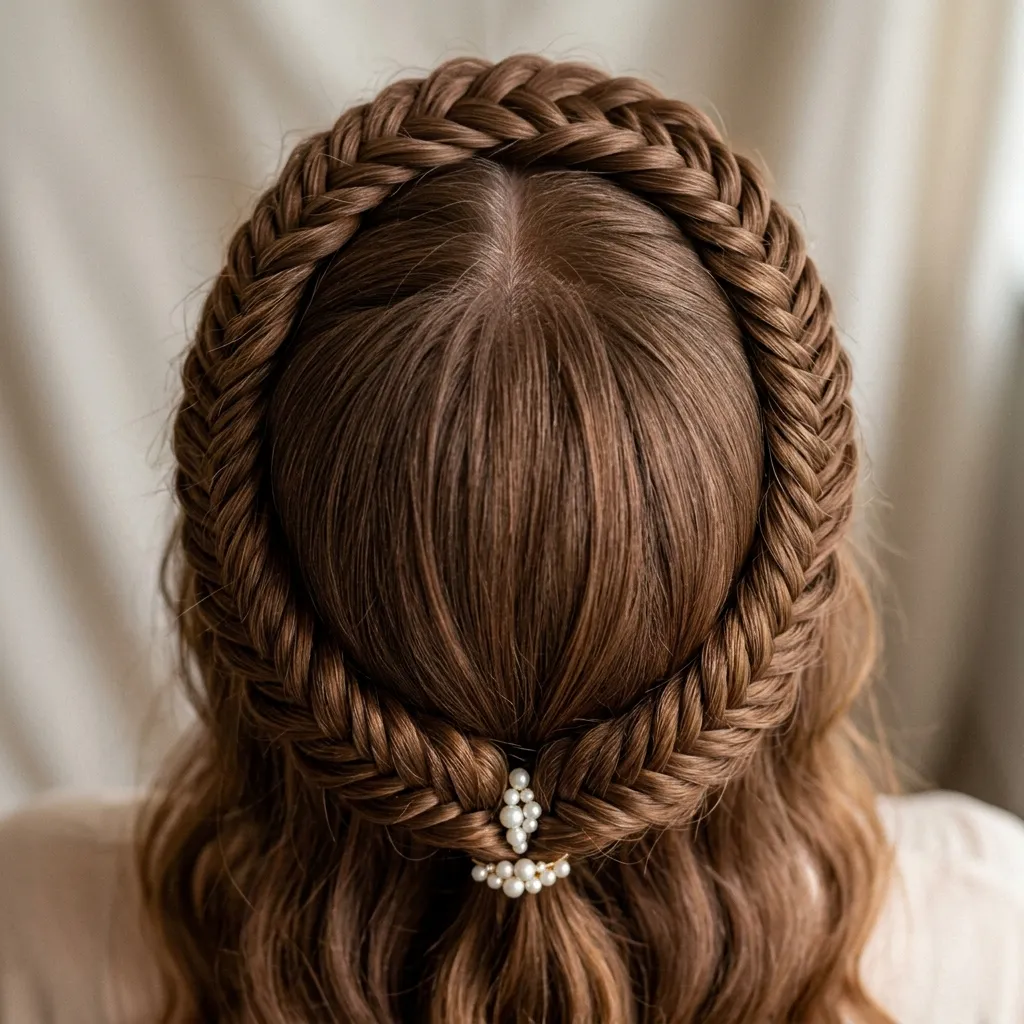
Vibe: Still, a quiet, structural detail that circles the head rather than sitting flat across it.
Why it works: Wrapping the fishtail fully around the crown, rather than braiding straight back, changes the braid from a linear accent into a structural frame, the curved path follows the head’s shape the way a headband does, which creates a more finished, “done” silhouette from every angle including directly overhead, a view that a straight-back fishtail doesn’t account for.
How to get it: Begin the fishtail section at one temple, braid it in a curved path following the natural crown line around to the opposite temple, and pin the end securely at the back with the pin hidden beneath the remaining loose hair.
Quick Win: If keeping the curve consistent is difficult, section the crown into three shorter panels rather than one long one, and braid each panel individually, joining them end to end as you go around the head.
Shop the Look
| Product |
|---|
| Small pearl hairpin, single accent piece |
| Bobby pins, color-matched 40-piece |
| Fine-tooth sectioning comb |
| Flexible-hold finishing spray |
| Smoothing edge control gel |
10. Five-Minute Fishtail for Busy Mornings
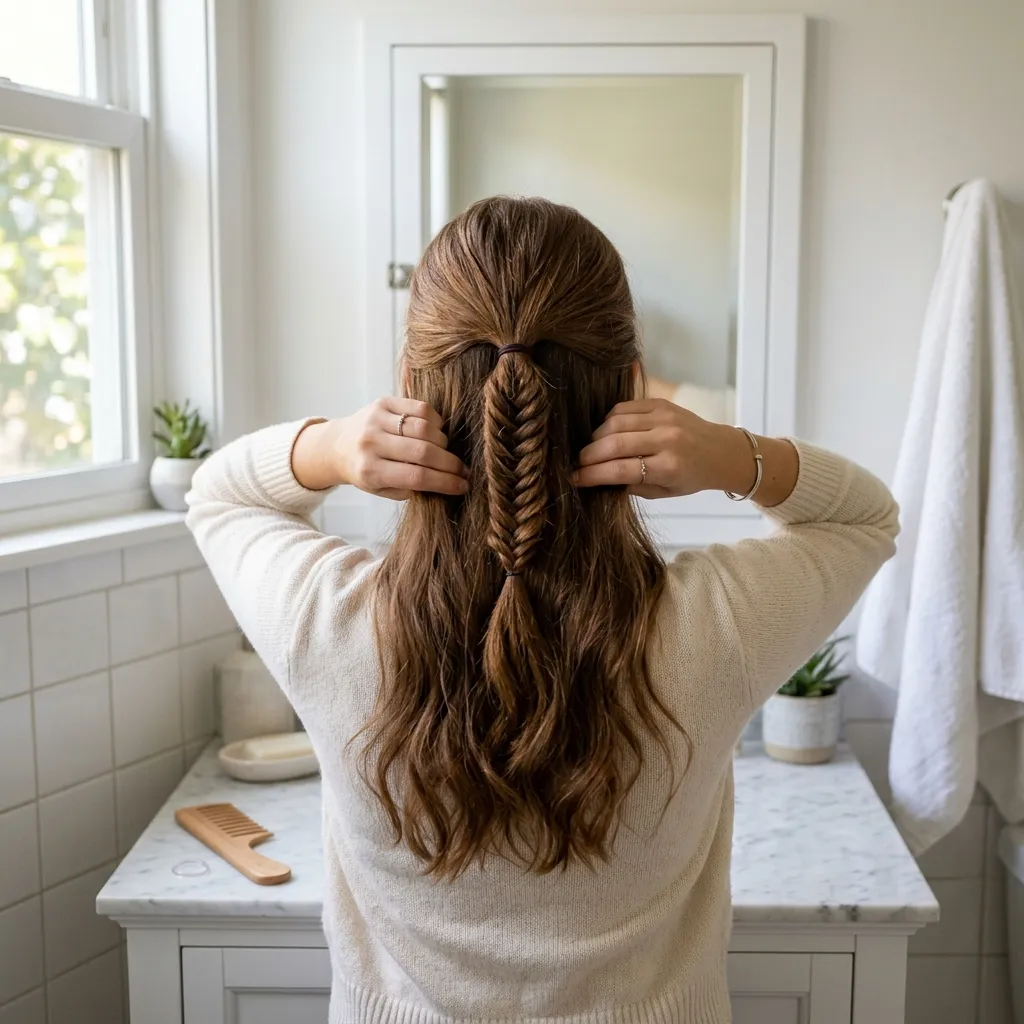
Vibe: Efficient, a version built around speed, not precision.
Why it works: This isn’t a different braid so much as a deliberately looser, faster approach, using thicker sections and fewer total crosses cuts the styling time roughly in half compared to a fine, tightly woven fishtail, since fewer individual crosses means fewer decisions and less precision required per section, which matters most on mornings without time for a mirror-and-comb routine.
How to get it: Section a single wide panel across the crown, wider than you’d use for a polished version, and braid using large, quick crosses rather than fine ones, accepting a slightly looser, chunkier finish in exchange for a braid that takes under five minutes start to finish.
Shop the Look
| Product |
|---|
| Wide-tooth detangling comb |
| Large clear elastics, multi-pack |
| Dry shampoo for grip on clean hair |
| Flexible-hold finishing spray |
| Compact travel mirror |
11. Floral-Pinned Fishtail for Special Occasions
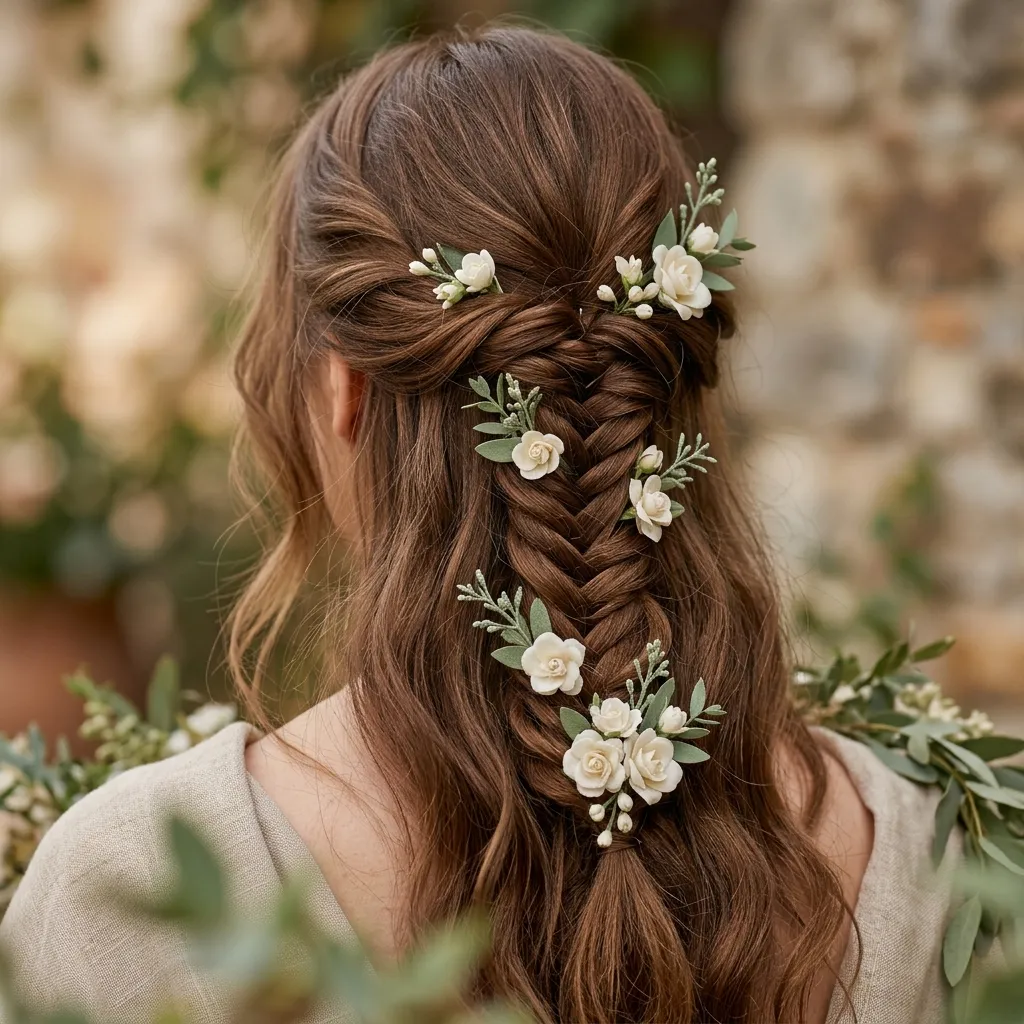
Vibe: Layered, small botanical details that elevate the braid for an event.
Why it works: Tucking small florals directly into the gaps of the herringbone weave, rather than pinning them on top of the braid’s surface, lets them sit at the same depth as the hair itself, which reads as more integrated and less like an accessory glued on afterward: a principle borrowed directly from bridal and event hairstyling, where florals are woven in during the braiding process rather than added at the end.
How to get it: As you braid, pause every third or fourth cross and tuck a small silk or fresh floral stem directly into the gap created by the weave before continuing, rather than pinning finished flowers onto the completed braid.
Shop the Look
| Product |
|---|
| Small ivory silk flower pick set |
| Thin greenery sprig, sage tone |
| Small clear elastics for braid ends |
| Bobby pins, color-matched |
| Flexible-hold finishing spray |
12. Matte Undone Fishtail for Everyday Wear
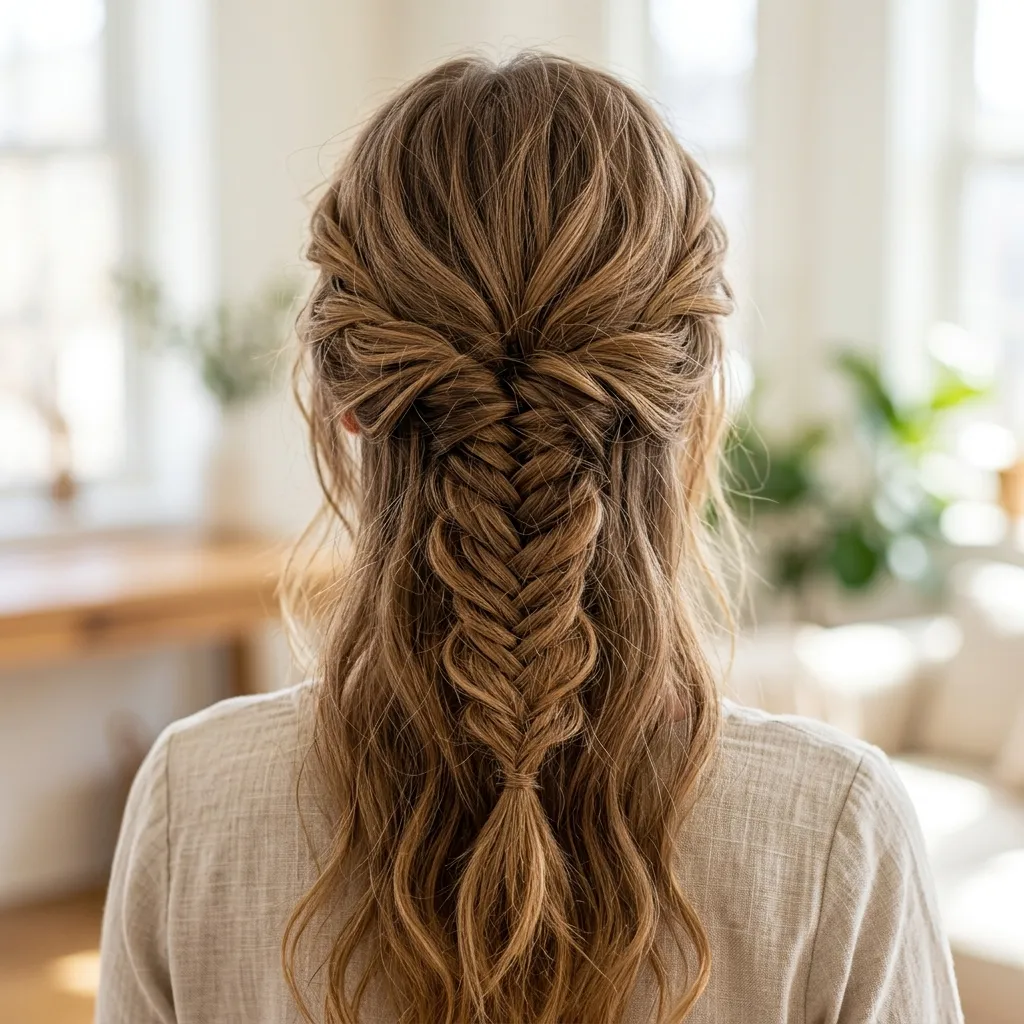
Vibe: Raw, a low-effort, low-shine finish built for a regular day rather than an event.
Why it works: Using a matte texturizing spray instead of a shine serum or gloss product keeps this version visually distinct from the glossy, event-ready fishtail elsewhere in this list, which is a deliberate finish choice, matte products diffuse light across the hair’s surface rather than reflecting it, producing the softer, more casual look this style is built around. Finger-braiding rather than comb-sectioning also naturally loosens the weave as you go, reinforcing the same undone quality.
How to get it: Apply a matte texturizing spray to dry hair before sectioning, then braid the fishtail using your fingers rather than a comb to divide sections, which naturally produces a looser, less uniform weave than comb-sectioned braiding does.
Shop the Look
| Product |
|---|
| Matte texturizing spray, lightweight |
| Wide-tooth finger-styling comb |
| Small clear elastics for braid ends |
| Dry texture spray for second-day wear |
| Flexible-hold finishing spray |
How to Start Practicing Your Half-Up Fishtail Braid
The single first move is practicing the basic two-strand fishtail technique on a small, two-inch test section before attempting the full half-up style, not starting with the full crown on the first try. The fishtail’s alternating diagonal cross is a genuinely different motor pattern from a standard three-strand braid, and most people find their fingers “want” to fall back into the familiar three-strand motion until they’ve repeated the fishtail cross enough times for it to feel automatic. Practicing on a small, low-stakes section first is what makes the full crown version achievable without frustration.
The most common mistake beginners make is pulling sections too thick on each cross, which collapses the fine herringbone pattern into what looks like a lumpy, uneven three-strand braid instead of a fishtail. The fix is deliberately using thinner sections than feels natural at first, roughly a quarter to half inch per cross for a polished look, since the visual definition of a fishtail comes specifically from the high number of thin, alternating crosses, not from a few thick ones.
Three items under $50 make an immediate difference: a fine-tooth rat-tail comb for clean sectioning ($6–12), a pack of small clear silicone elastics that disappear into the finished braid ($8–15), and a travel-size texturizing spray that adds the grip fishtail braids need to hold their shape ($10–18).
Realistically, the basic technique takes three to five practice sessions to feel comfortable, and a full half-up fishtail takes 10–20 minutes once the motion is familiar, compared to 30–45 minutes while still learning. A full starter kit of comb, elastics, and spray costs $25–45 total, and no professional styling is required to master this technique at home.
Frequently Asked Questions About Half Up Fishtail Braid Hairstyles
What’s the difference between a fishtail braid and a regular three-strand braid?
A fishtail braid uses two sections rather than three, crossing a thin piece from the outer edge of each section alternately into the opposite side, which produces a finer, more textured herringbone pattern than the blockier weave of a standard three-strand braid. A three-strand braid is generally faster to learn and produces a thicker, more uniform rope-like texture, while a fishtail takes more individual crosses to complete the same length but creates more visible surface texture and shine. Half-up versions of both styles are common, but the fishtail’s finer weave is specifically why it’s the more requested technique for dimensional or highlighted hair.
What hair color works best for a fishtail braid specifically?
Dimensional, multi-tonal color (balayage, soft copper glaze, or warm chestnut with subtle highlights) works particularly well because the fishtail’s alternating diagonal crosses expose more individual strand surfaces to light than a smooth ponytail or a thicker three-strand braid does. Flat, single-process color can look less dynamic in this braid style specifically, since there’s less tonal variation for the weave pattern to reveal. Highlights placed through the crown and mid-lengths, rather than only at the ends, show up most visibly within the braid itself.
Does getting this braid done professionally cost much, and is it worth it for special occasions?
A professional half-up fishtail braid at a salon typically runs $35–65 depending on region and hair length, making it one of the more affordable professional styling options compared to a full bridal updo. For a single special occasion, many people find it worth the cost specifically because achieving a tight, glossy, event-ready fishtail on your own hair, from behind your own head, is genuinely more difficult than braiding hair you can see in front of you. For everyday or practice versions, the technique costs nothing beyond a $25–45 starter kit of tools once learned.
Does a half-up fishtail braid work with hair extensions?
Yes. Clip-in extensions blend well into a half-up fishtail, particularly if they’re clipped in just below the crown section that gets braided, so the extension wefts are hidden within the braid’s weave rather than at a visible seam. Match the extension shade closely to your natural mid-length color rather than your root color, since the fishtail exposes mid-length strands more visibly than a smooth ponytail does. Thinner, tape-in or sew-in extensions blend even more seamlessly for this specific braid style since there’s no clip bulk to work around while sectioning.
What’s the most requested finishing accessory for a fishtail braid right now?
Small pearl and gold hairpins tucked along the braid’s edge remain the most requested finishing accessory, favored because they add detail without covering or interrupting the visible herringbone pattern the braid is chosen for in the first place. Thin ribbon woven directly into the braid follows closely behind, particularly for engagement or shower events where a soft color accent is wanted without a bulkier floral or crystal piece. Both accessory types work across nearly every version in this list, from the classic loose braid to the crown-wrapped style.
Ready to Master Your Half Up Fishtail Braid?
These twelve ideas cover real range within this technique: from the classic loose, effortless version and color-driven options like the balayage-highlighted braid, through structural variations like the crown-wrapped style and the diagonal side-swept frame, to fast, practical adaptations built for an ordinary busy morning, so there’s a genuinely matched version here whether your priority is speed, polish, or a specific event look. You don’t need to master all twelve at once; practicing the basic two-strand cross on a small test section this week, before attempting the full crown, is the smarter and more achievable starting point than jumping straight to a special-occasion version.
Do this today: pick up a fine-tooth rat-tail comb and a pack of small clear elastics, and spend ten minutes braiding a single two-inch section until the alternating cross starts to feel automatic. Once it clicks, you’ll have a technique that turns an ordinary ponytail into something with real movement and shine, in less time than it takes to heat up a curling iron. Save the two or three versions that matched your hair length and the occasions you actually have coming up, and keep the ribbon-woven or floral-pinned options bookmarked for whenever the next event lands on your calendar.