20 Fairy Hairstyles | Whimsical Ideas Worth Saving & Stealing

Fairy hairstyles are whimsical, nature-inspired hair looks that combine soft braiding, pastel or opalescent color, and natural accessories like dried flowers and ribbon into an ethereal, storybook effect without tipping into costume territory. This guide gives you 20 wearable fairy hairstyle ideas (covering color, braid structure, shimmer, and accessory placement) with the exact technique, timing, and product behind each one, so the look holds up under normal daylight, not just festival lighting.
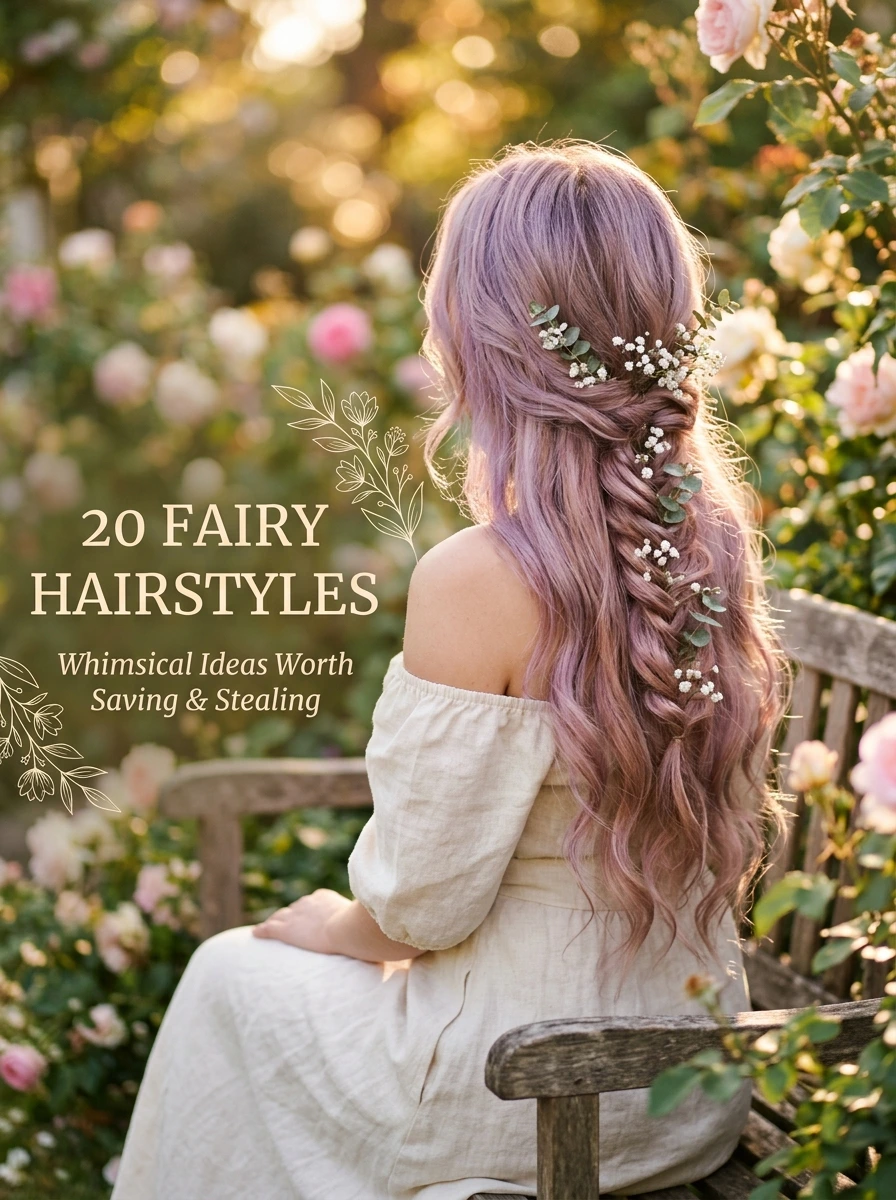
Most attempts at fairy hair fail for one of two reasons: the styling is pulled too tight, which reads as a formal updo instead of something undone, or the accessories are placed evenly, which reads as costume rather than natural. Every idea here is built around the specific techniques (loosened braid tension, odd-number accessory placement, root-concentrated shimmer) that separate a look people compliment from one they recognize as trying too hard. Here are 20 ideas worth saving, and stealing.
Why Fairy Hairstyles Work So Well
Fairy hair draws from three overlapping references: the Pre-Raphaelite painting tradition of loose, visible-movement waves; cottagecore’s pastoral, handmade aesthetic that spread across fashion and home decor from 2020–2023; and renaissance-faire and festival hair culture, where flower crowns became a recurring seasonal look rather than a costume piece. It’s distinct from mermaidcore, which leans ocean blues, shells, and a wet-look finish, and from witchcore, which favors near-black bases and tighter, more structured braiding. Fairy hair stays land-based and dry-textured, defined above all by looseness.
The materials and colors that make the look read correctly are specific. Color-wise: lavender, opal white, rose gold, moss green, and sunset copper are the five tones that perform best, typically applied through hand-painted balayage or a dip-dye gradient rather than flat, single-process color, since flat color removes the light-catching variation the style depends on. Material-wise: baby’s breath and preserved eucalyptus hold their shape through hours of wear without wilting, faux pearl pins add detail without weight, and 1.5–2 inch wired-edge silk ribbon holds a wrap shape for a full day. Texture stays loose throughout: waves from a curling wand rather than a flat iron, and braids widened after plaiting rather than left tight.
Interest in this style tracks measurable seasonal behavior rather than vague trendiness. Fairycore-tagged content on TikTok and Pinterest has grown steadily since 2022, and fairy hairstyle searches spike each year between April and August, tracking wedding season, garden-party styling, and festival season. Colorists report lavender-to-rose-gold and moss-green money-piece requests as some of their most frequent spring consultations, which has pushed brands like Overtone and Arctic Fox to release limited pastel and opal shade ranges timed to that window.
Short and fine hair can achieve genuine results, with real limits. A braided headband, half-up knot, or clip-in flower crown translates cleanly to bob-length hair since they only use the front few inches. A full trailing braid updo or a wrapped hair-vine crown genuinely needs length past the shoulders, there isn’t enough hair below that to cascade or wrap convincingly. Fine hair benefits from texturizing spray before any braiding, since fine strands slip out of loose braids faster than coarse hair.
| Element | Fairy Hairstyles |
| Philosophy | Undone softness over polish. Loosened tension and odd-number placement read as natural; tight, symmetrical styling reads as costume |
| Key Materials | Wired-edge silk ribbon, baby’s breath and preserved eucalyptus, faux pearl pins, wire hair vine, fine-mist shimmer spray |
| Key Colors | Lavender, opal white, rose gold, moss green, sunset copper |
20 Fairy Hairstyles Worth Saving and Stealing
1. Opal Shimmer Balayage
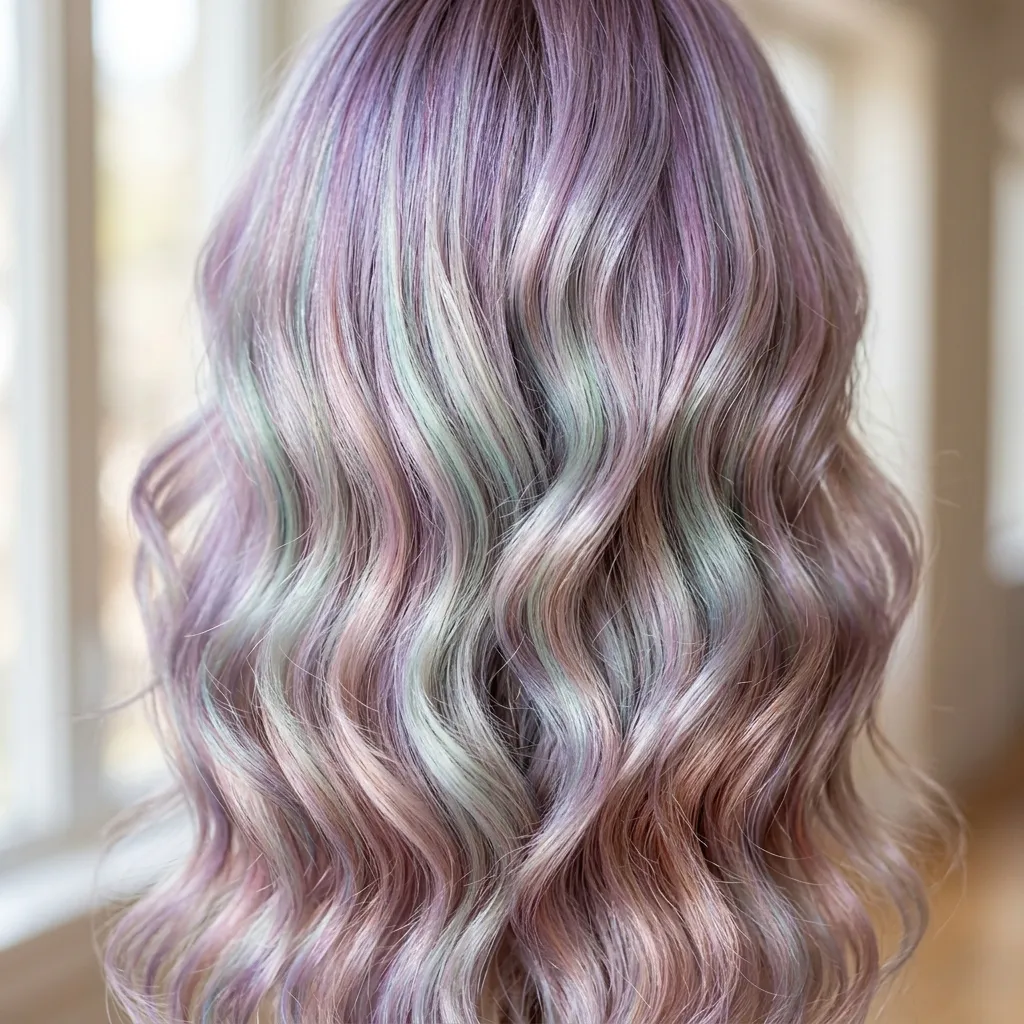
Vibe: Luminous, like light bending through a soap bubble.
Why it works: Balayage is hand-painted, so pigment sits unevenly by design. That’s why it reads as movement, not flat dye, as light changes. An opal glaze is a clear, color-shifting toner that reflects different hues by angle, the same optical trick that makes mother-of-pearl seem to change color. It needs a lightened base underneath to show; applied over dark, unlightened hair it mutes to a faint sheen.
How to get it: Ask for low-lift balayage through the mid-lengths and ends, leaving root shadow for lower upkeep, then a 10–15 minute opal glaze. Full service runs $150–$300 and the glaze’s shift lasts four to six weeks.
💡 Quick Win: A clear shimmer oil with light-reflecting mica on dry ends fakes most of the opal effect for one event, no dye required.
Shop The Look
| Product |
| Iridescent shimmer hair oil with mica |
| Opal-tone temporary hair gloss spray |
| Wide-tooth detangling comb |
| Silk pillowcase for color preservation |
| Color-safe sulfate-free shampoo bar |
2. Loose Fishtail Braid with Baby’s Breath
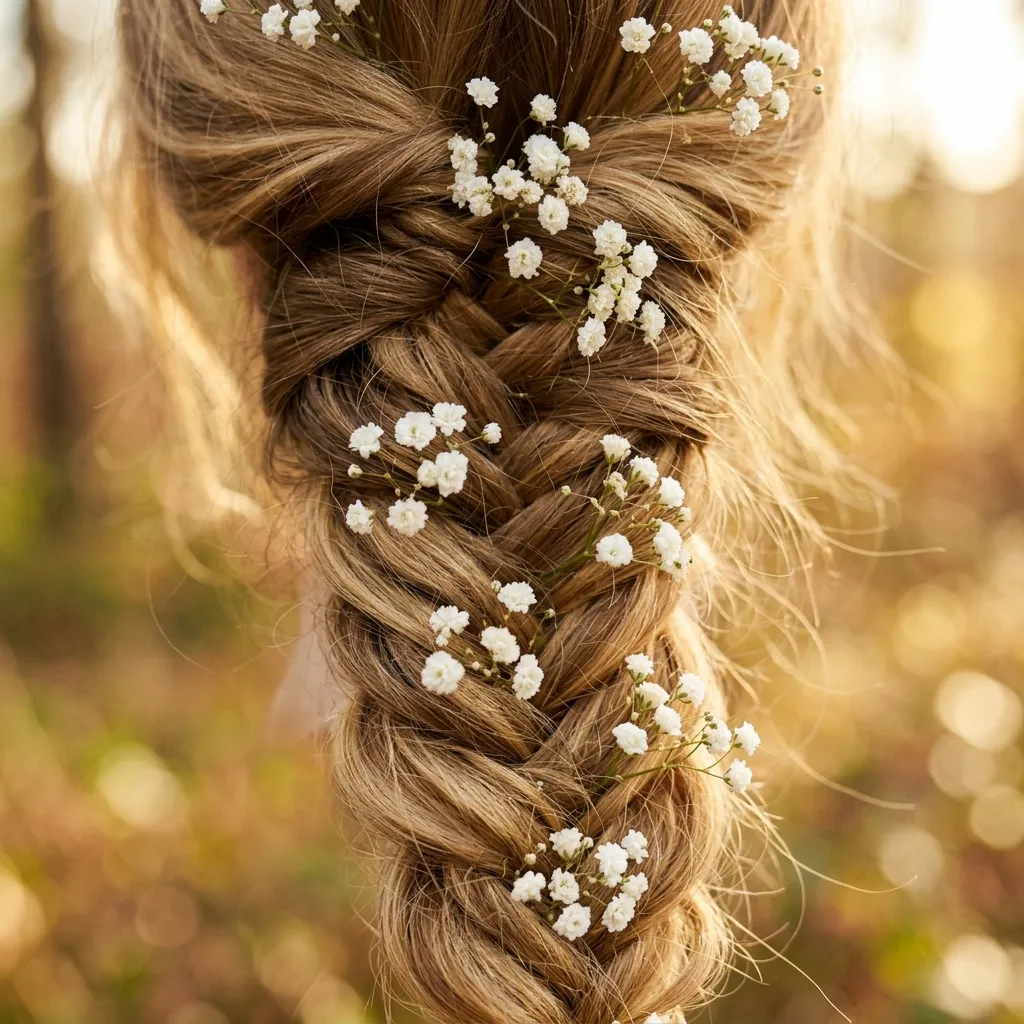
Vibe: Soft and a little wild, like hair that’s been outside all day.
Why it works: A fishtail is built from two sections instead of three, giving finer, more numerous strand layers, more surface area to tuck stems into than a classic plait. Baby’s breath earns its place here because each stem is under 2mm thick, light enough to add no drag, and rigid enough to hold position for a full day without a floral pick.
How to get it: Braid at roughly 70% tension, then pinch and pull each section’s outer edge outward to widen it before tucking single stems into the gaps every two to three inches, trimmed to about 1.5 inches so nothing pokes past the edge.
Shop The Look
| Product |
| Faux baby’s breath floral sprigs |
| Fine-tooth rat-tail comb |
| Clear elastic hair ties, small |
| Texturizing sea salt spray |
| Bobby pins, blonde-tone |
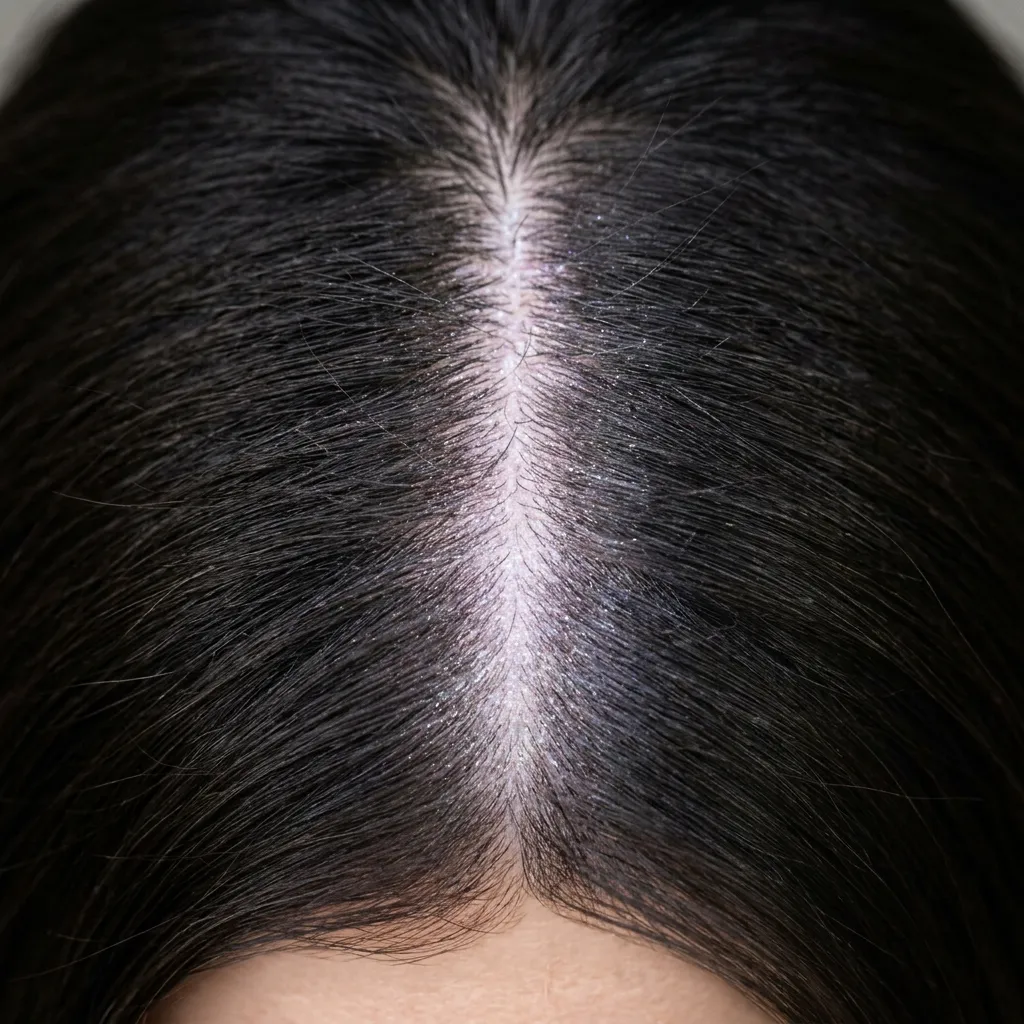
3. Iridescent Glitter-Root Shimmer
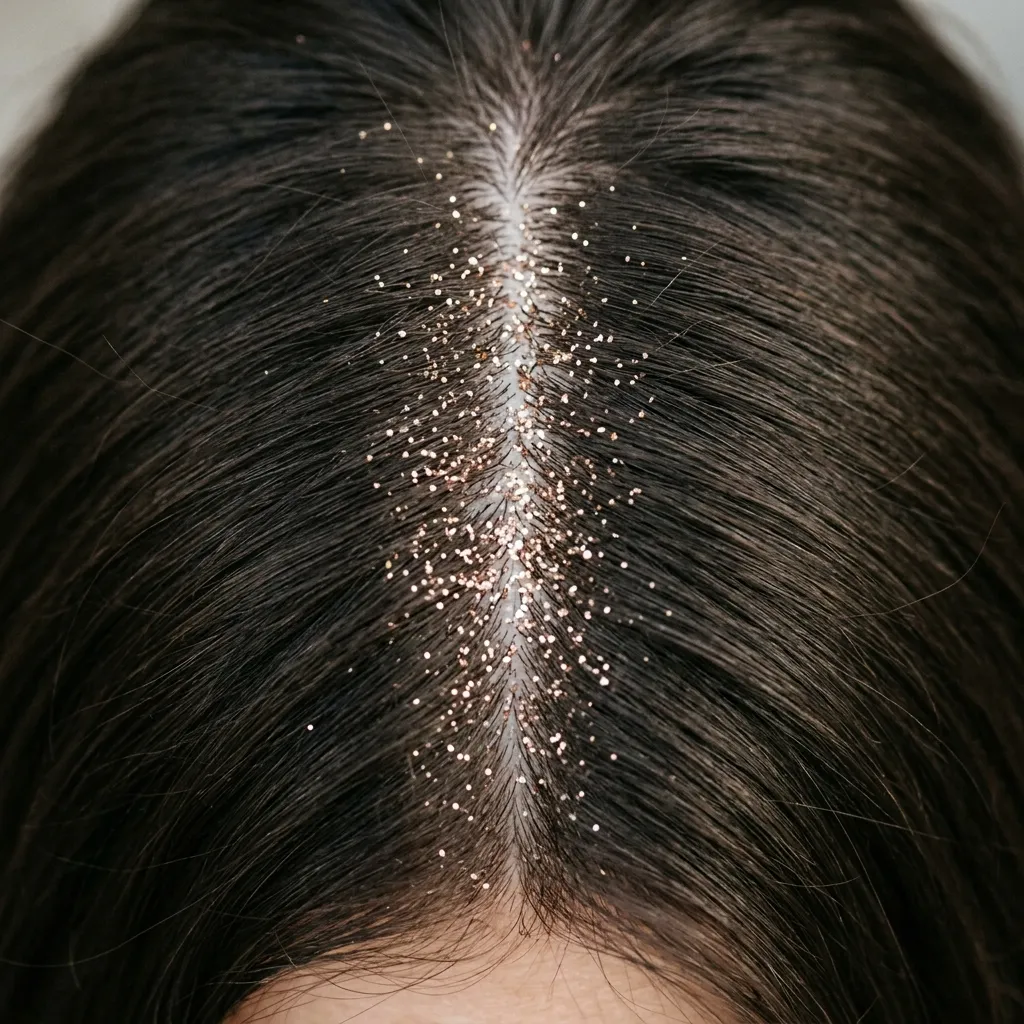
Vibe: Glimmering, like a part line dusted with frost.
Why it works: Concentrating shimmer along the part instead of the whole head is a contained-focal-point technique. The same reason one accent wall reads as deliberate where four matching ones don’t. It also solves a real problem: glitter spread across the full head sheds onto clothing within hours, while a two-inch band at the part sheds minimally.
How to get it: Use a cosmetic-grade, biodegradable glitter gel rated for skin contact, applied along the part with a small brush in one thin pass, then set with a light mist of flexible-hold hairspray.
💡 Quick Win: A rose-gold glitter roll-on stick applies mess-free in under two minutes, versus five to seven for a brush-and-gel routine.
Shop The Look
| Product |
| Cosmetic-grade biodegradable glitter gel |
| Small precision makeup brush |
| Rose gold glitter roll-on stick |
| Setting spray for glitter hold |
| Micro makeup wipes for touch-ups |
4. Braided Flower Crown Updo
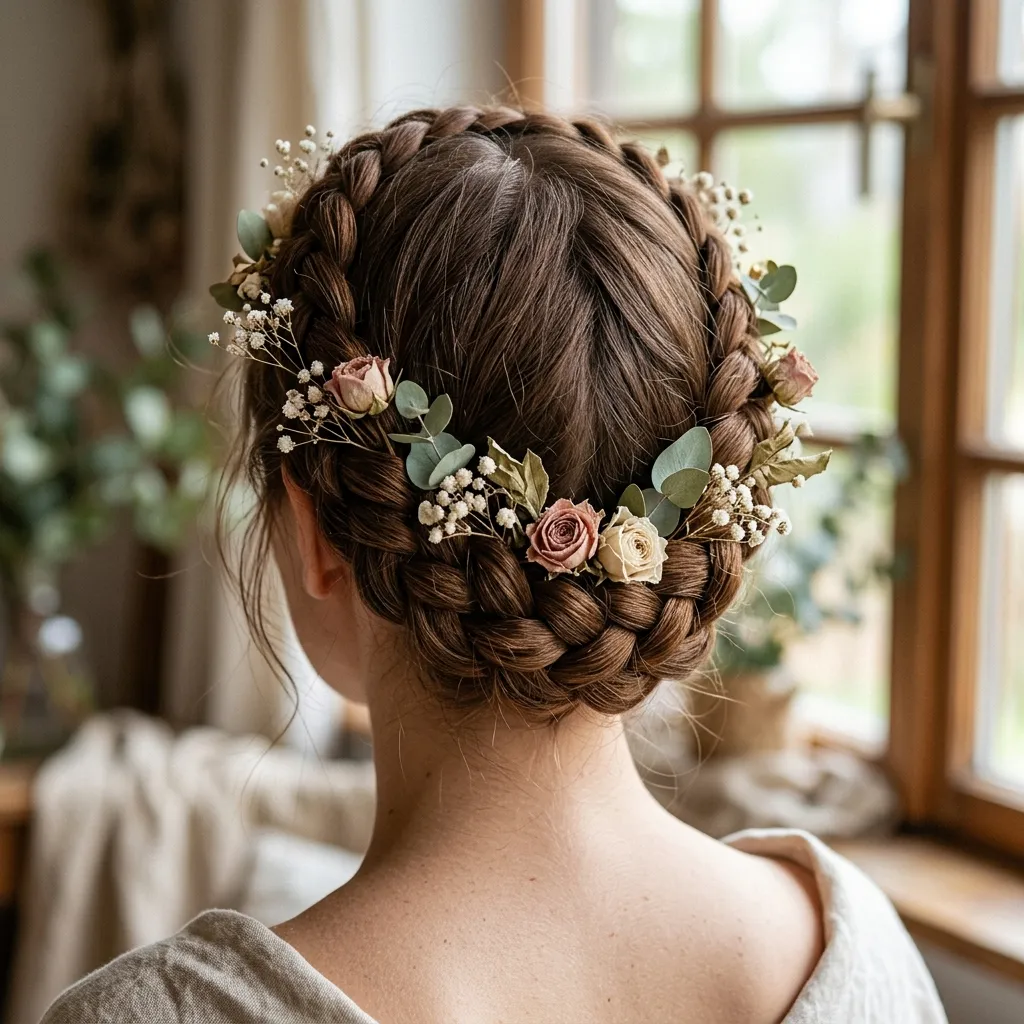
Vibe: Storybook, like a crown grown rather than made.
Why it works: Two Dutch braids of matching tension, crossed and pinned around the head, form a ring that acts as scaffolding, because the braid absorbs the visual “structure,” florals can sit loosely along the seam without the look reading as cluttered. Strip the braid out and the same flowers pinned into loose hair would scatter rather than compose.
How to get it: Dutch braid from each temple to the nape in one-inch sections, cross and pin the ends flat at the back, then tuck dried or good silk flowers along the visible seam. Five to seven stems is usually enough. Holds six to eight hours before re-tucking.
Shop The Look
| Product |
| Dried flower hair pin set |
| Bobby pins, brunette-tone, 60-count |
| Edge control gel |
| Small silk rosebud picks |
| Flexible hold hairspray, travel size |
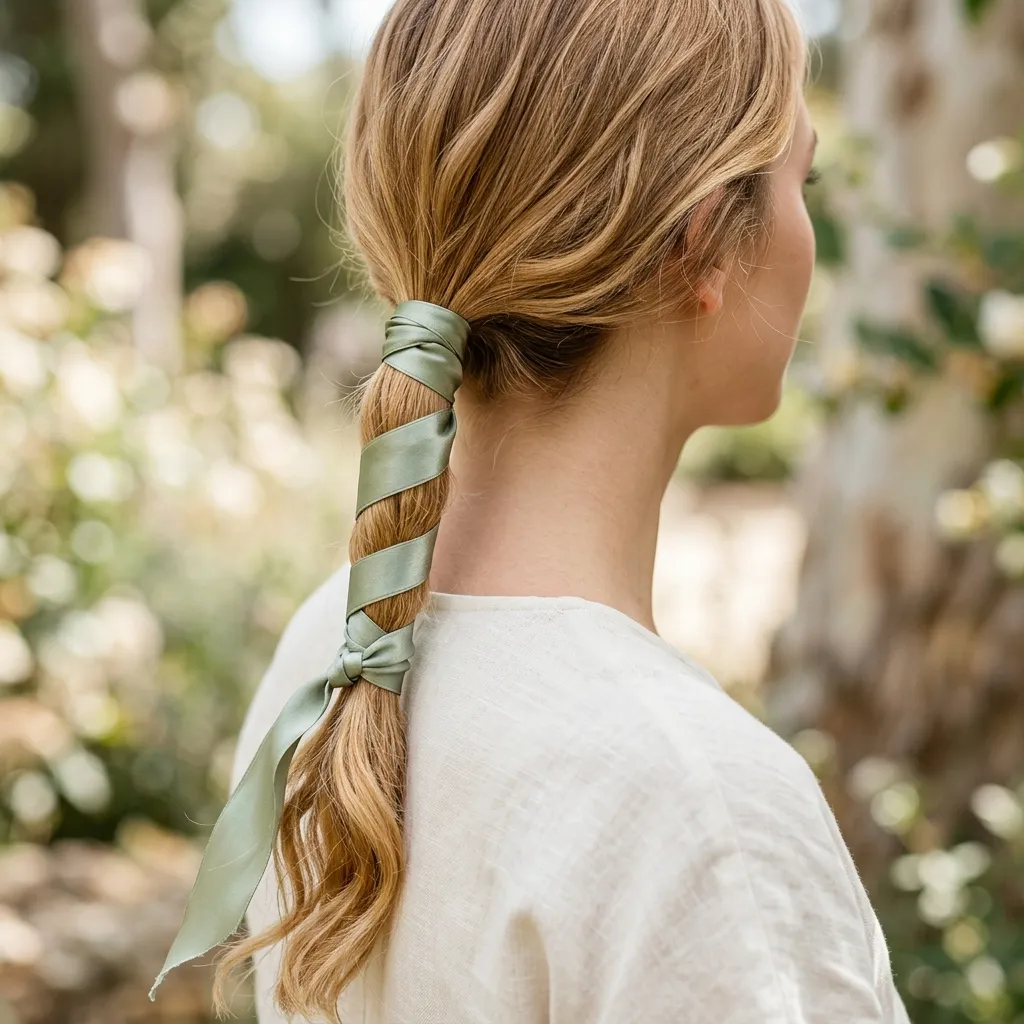
5. Silk Ribbon-Wrapped Ponytail
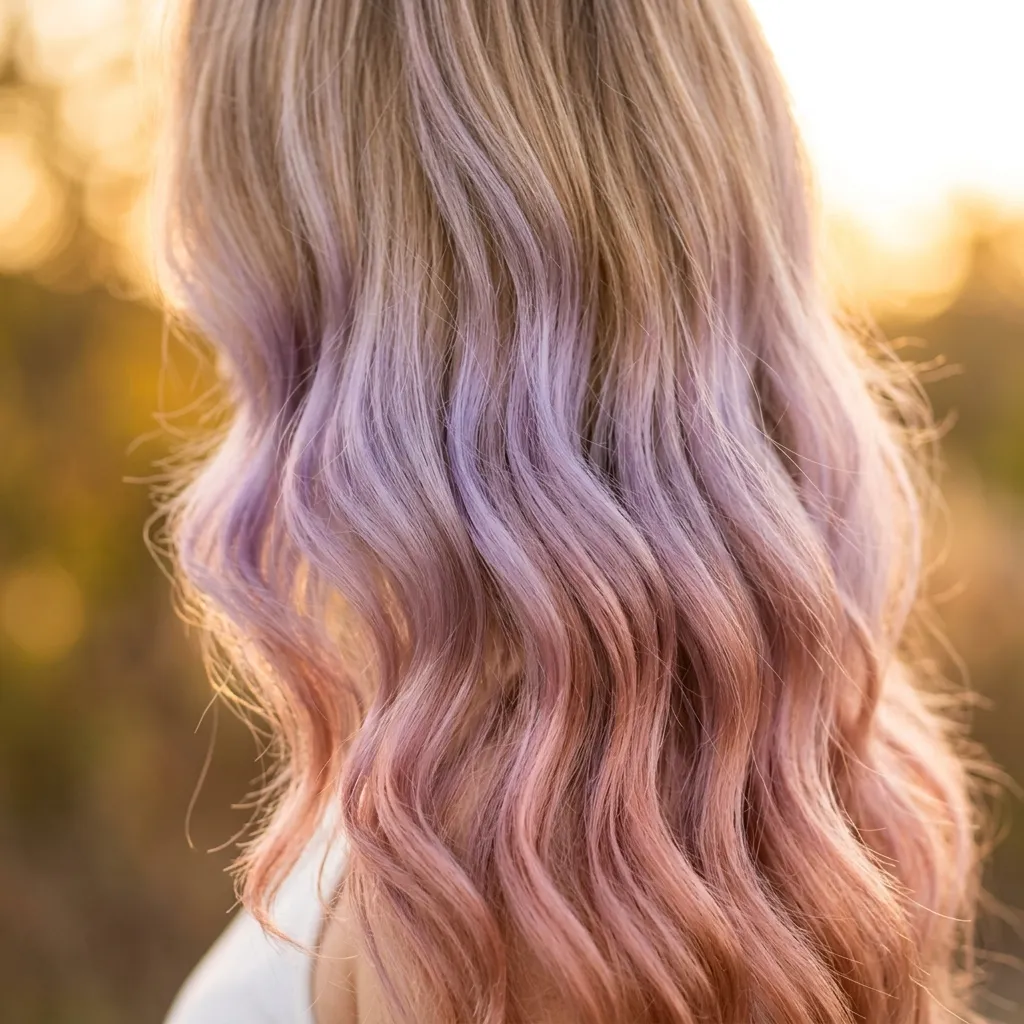
Vibe: Breezy, like a ribbon caught mid-flutter.
Why it works: A tight ribbon spiral adds a continuous downward line that pulls the eye toward the ends, the same length-elongation trick as vertical stripes in clothing. Leaving the last four to six inches unwrapped keeps the tail loose and hand-styled rather than stiff and packaged.
How to get it: Secure with a clear elastic first, then wrap a two-inch wired-edge ribbon at the base, overlapping each pass by a third of its width, pinning the start and leaving six inches trailing free.
💡 Quick Win: Wired-edge ribbon holds its shape two to three times longer than unwired silk, meaning fewer pins and less touch-up.
Shop The Look
| Product |
| Wired-edge satin ribbon, sage green |
| Clear snag-free hair elastics |
| Small U-shaped hairpins |
| Smoothing edge brush |
| Shine-boosting finishing spray |
6. Lavender-to-Rose-Gold Dip Dye
Vibe: Dreamlike, like the edge of a sunset caught in the hair.
Why it works: The gradient depends on blending, not a hard line. A color brush works both wet pigments together in an overlap zone. Lavender and rose gold sit on opposite temperature sides of the color wheel, so their overlap briefly reads as soft mauve, the transitional tone that makes the blend look mixed rather than layered.
How to get it: Apply semi-permanent lavender to the mid-shaft, then work rose gold from the ends upward while both are wet, blending the middle two to three inches with a tint brush. Both fade over four to six washes.
Shop The Look
| Product |
| Semi-permanent lavender hair dye |
| Semi-permanent rose gold hair dye |
| Color-blending tint brush |
| Sectioning clips, 6-pack |
| Color-depositing purple shampoo |
7. Woodland Twist Braids with Eucalyptus Sprigs
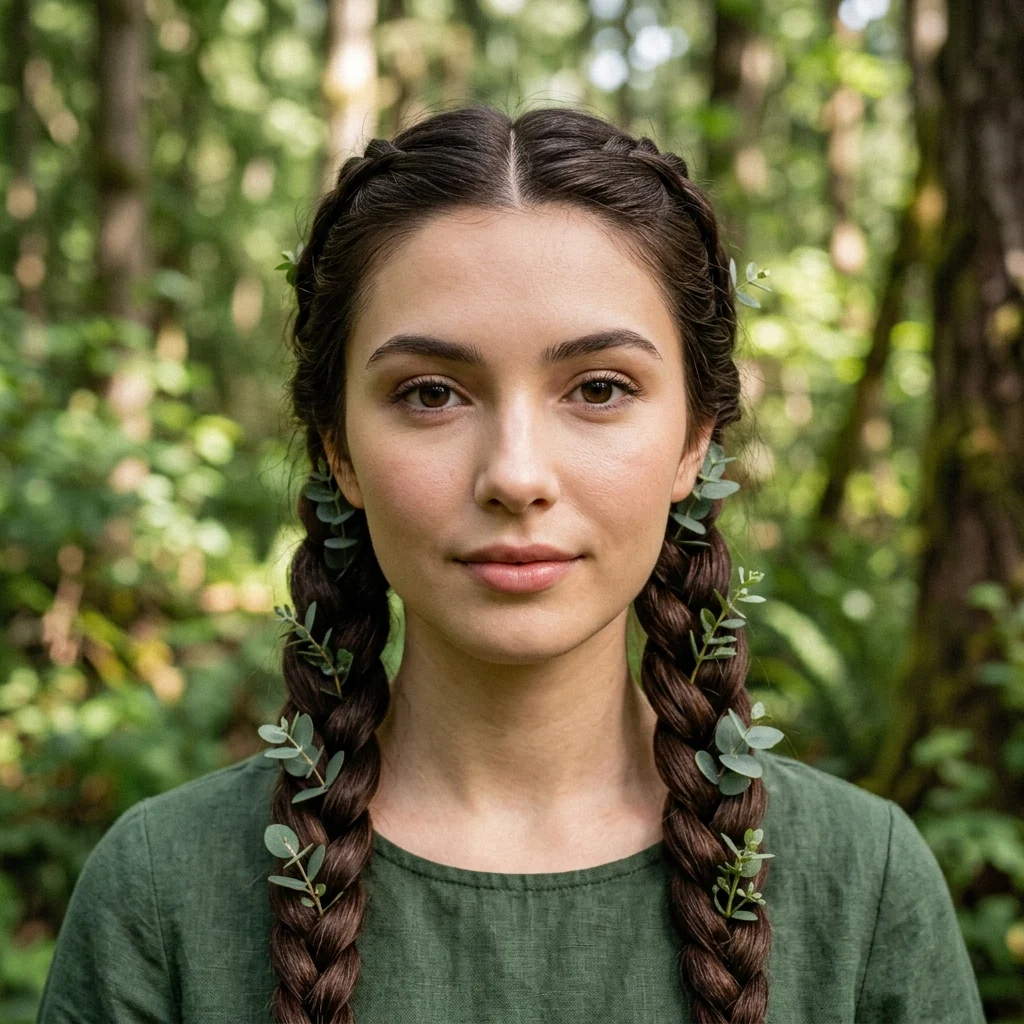
Vibe: Grounded, like hair pulled straight from the forest floor.
Why it works: A rope twist wraps two sections around each other rather than weaving three, producing a tighter spiral that holds small rigid stems better than a looser braid. Preserved eucalyptus is specified over fresh because fresh stems wilt within two to three hours; preserved stems hold shape all day.
How to get it: Twist two sections repeatedly in the same direction, then slide eucalyptus sprigs under the twist every inch, securing with small clear pins rather than weaving stems through, which can snap the leaves.
💡 Quick Win: Misting fresh eucalyptus and refrigerating it until 15 minutes before styling extends wear time by about an hour.
Shop The Look
| Product |
| Preserved eucalyptus floral sprigs |
| Small clear snag-free pins |
| Texturizing clay for grip |
| Rope-twist styling comb |
| Frizz-taming leave-in cream |
8. Deep Side Part with Face-Framing Tendrils
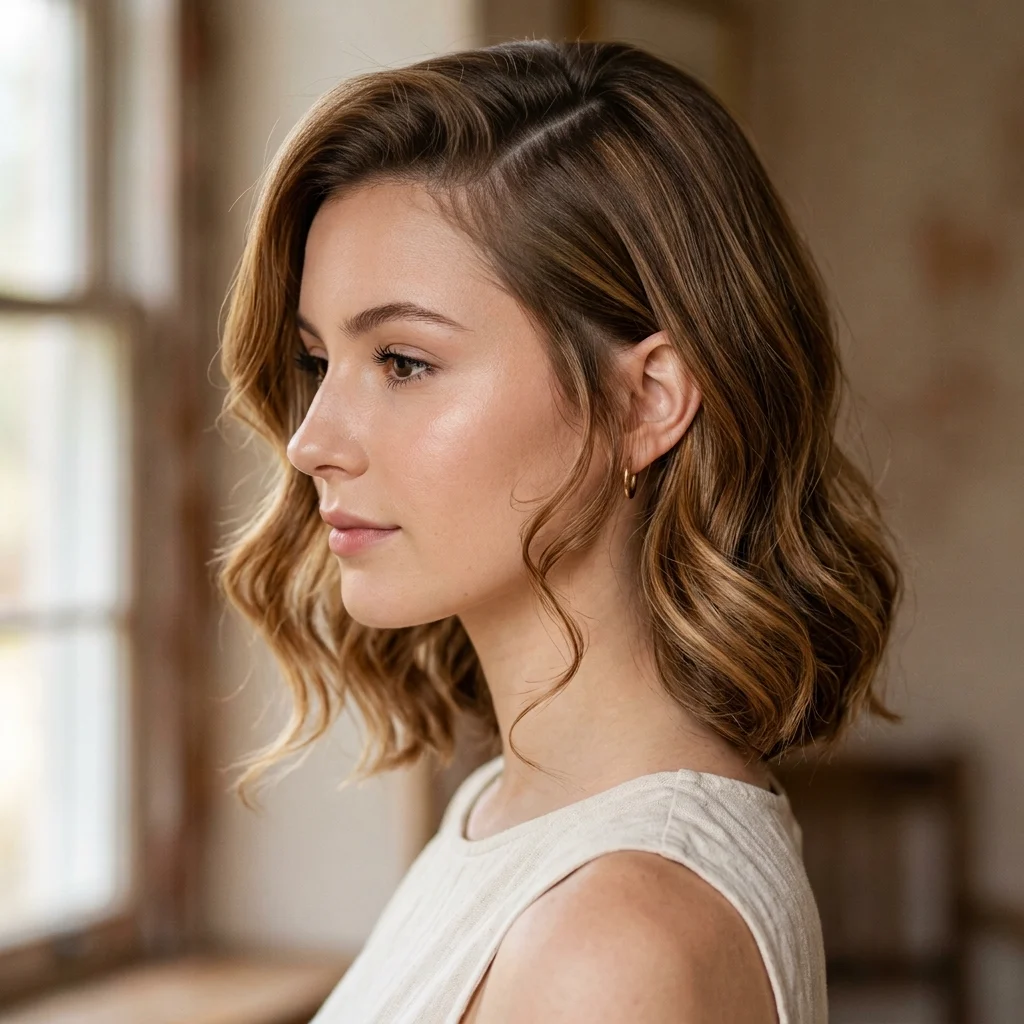
Vibe: Delicate, like curls left to fall where they want.
Why it works: Moving the part at least two inches off-center shifts visual weight asymmetrically, a proportion trick that softens the formal symmetry of an updo sitting behind it. Curling only the front two-inch sections separately introduces negative space around the face. The gap that keeps the look from reading as everything pulled back.
How to get it: Part at least two inches off-center, isolate the front two-inch section on each side, and curl only those with a half-inch wand for eight to ten seconds each, leaving the rest free for whatever base style follows.
Shop The Look
| Product |
| Half-inch curling wand |
| Fine-tooth parting comb |
| Heat protectant spray |
| Lightweight curl-defining cream |
| Flexible hold hairspray |
9. Half-Up Fairy Top Knot with Trailing Curls
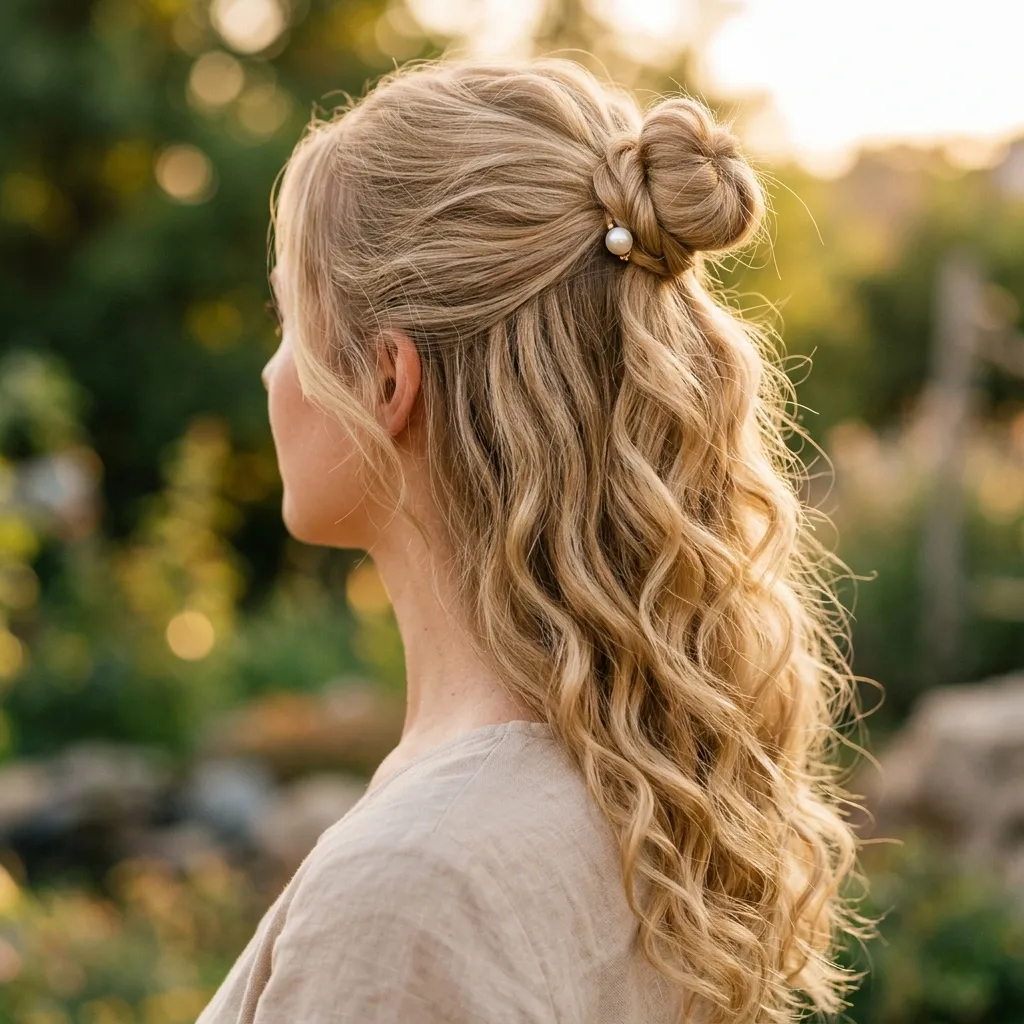
Vibe: Whimsical, like half the hair decided to stay wild.
Why it works: Splitting the head into a structured top third and loose lower two-thirds is a tension-contrast technique. The visible twist at the crown gives enough order that the curls below read as deliberate, not just left alone. It also keeps hair off the neck while leaving most of its length and movement visible.
How to get it: Gather the top third ear to ear, twist into a loose knot rather than a smooth bun, and secure with two pins crossed in an X so a few pieces slip free naturally.
💡 Quick Win: A single pearl-headed pin through the knot base finishes the look in under 10 seconds, no florals needed.
Shop The Look
| Product |
| Pearl-headed decorative hairpin |
| Small hair donut |
| Curling wand, three-quarter inch |
| Texture spray for beachy curls |
| Clear elastic for base securing |
10. Pearl-Dusted Shimmer Spray Finish
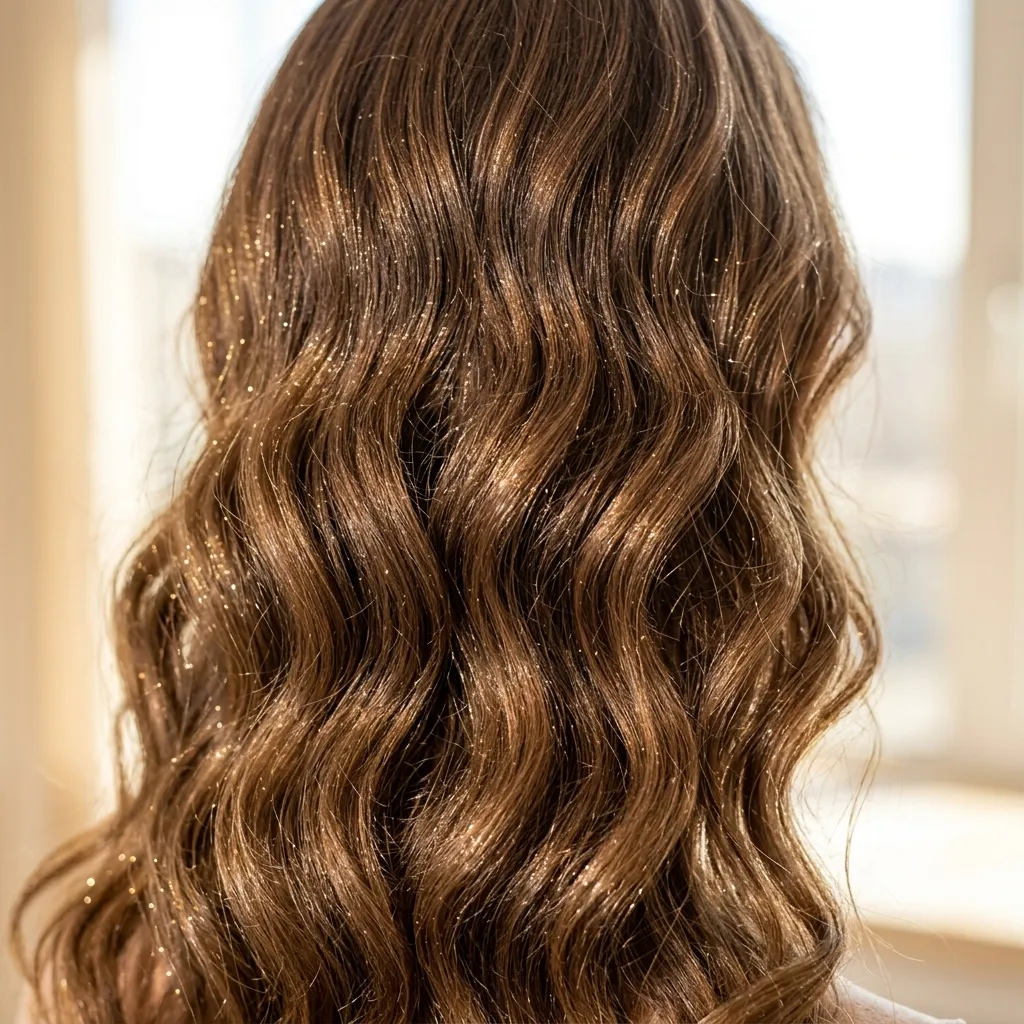
Vibe: Luminous, like hair dusted with morning frost.
Why it works: A finishing shimmer spray works through light reflection, not pigment. Fine mica particles sit on the cuticle and bounce light back, which is why it reads as glow rather than glitter and works on any base color without altering it. Nothing is deposited into the shaft, making this the lowest-commitment fairy detail available.
How to get it: Hold the can 12 inches away and mist lightly over fully dry hair only, wet hair causes uneven clumping. Focus on the crown and the outer edges of the waves, where ambient light naturally lands.
Shop The Look
| Product |
| Fine-mist hair shimmer spray |
| Wide-set boar bristle brush |
| Anti-frizz finishing serum |
| Travel-size setting spray |
| Microfiber hair towel |
11. Butterfly Clip Constellation
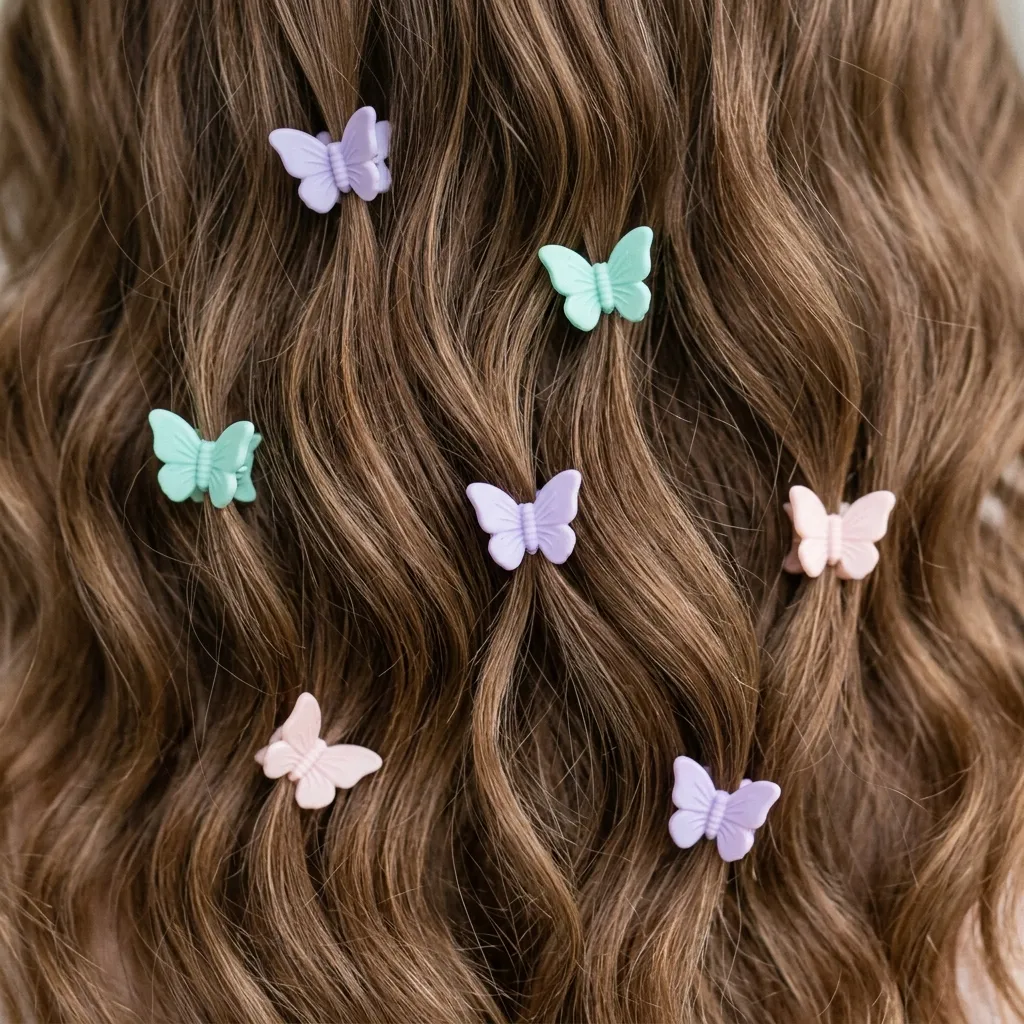
Vibe: Playful, like butterflies mid-landing.
Why it works: Odd-numbered, unevenly spaced clips follow the same logic florists use for arranging stems even numbers and equal spacing register as a uniform grid, while odd, uneven groupings register as organic. Small clips under an inch add detail without the weight of larger barrettes, keeping the eye moving instead of snapping to one accessory.
How to get it: Use five or seven clips, always odd, clustering two or three near the crown and letting the rest trail unevenly down one side, never mirror the placement, since symmetry breaks the effect.
💡 Quick Win: Mini claw clips in the same pastel finish grip thicker hair better while keeping the scattered-cluster placement.
Shop The Look
| Product |
| Pastel mini butterfly hair clip set |
| Mini claw clips, pastel tones |
| Lightweight hairspray for soft hold |
| Fine-tooth sectioning comb |
| Small jewelry box for clip storage |
12. Moss Green Money-Piece Highlights
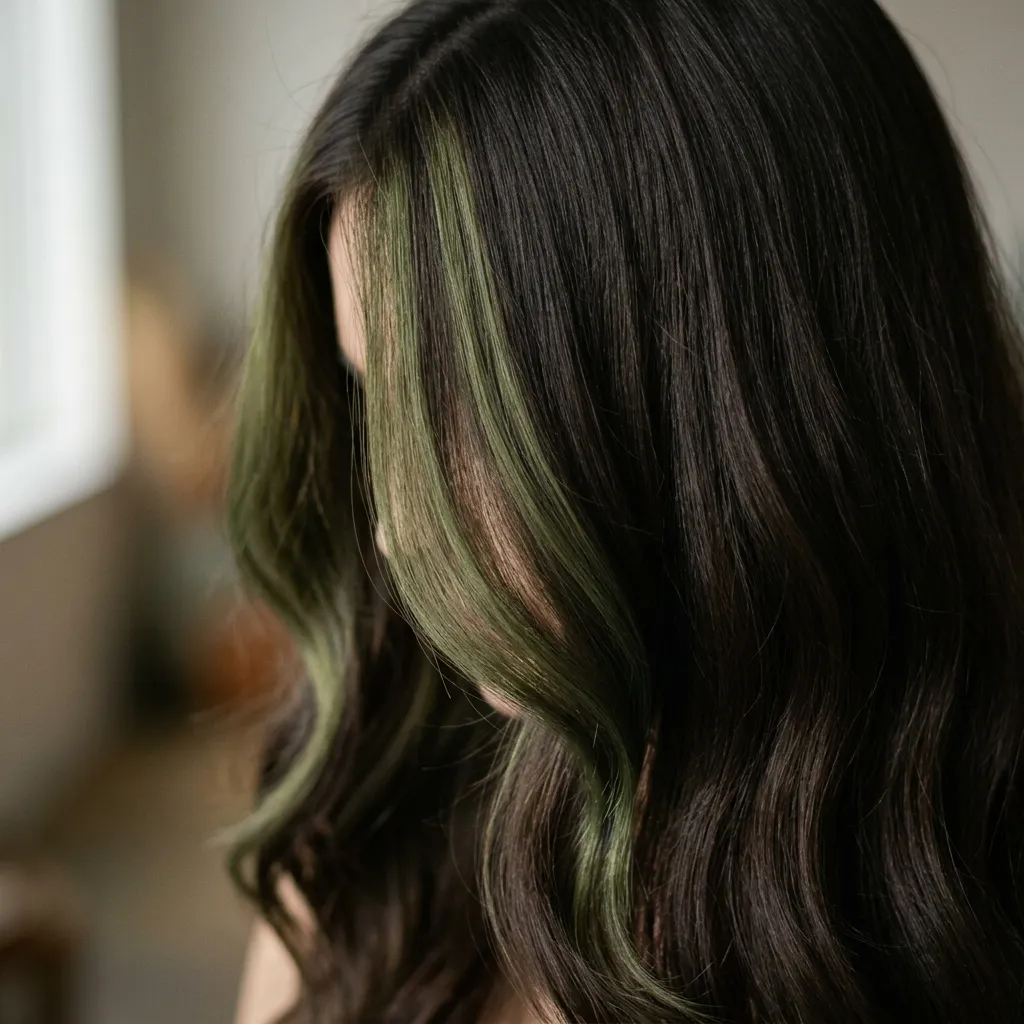
Vibe: Earthy, like moss growing along a dark riverbank.
Why it works: A money piece lightens only the two face-framing sections, roughly 10–15% of total hair volume, placing color exactly where the eye lands first in conversation, for less time and cost than a full-head service. Moss green, being muted and desaturated, stays wearable in professional settings, unlike a brighter mint or emerald.
How to get it: Have a colorist lighten only the face-framing pieces to a pale base, then apply muted moss-green toner to just those sections. This isolated service typically runs $80–$150 and processes in under 45 minutes.
Shop The Look
| Product |
| Semi-permanent moss green toner |
| Color-safe conditioning mask |
| Root touch-up brush kit |
| Purple shampoo for tone correction |
| Silicone-free leave-in conditioner |
13. Cotton-Candy Beachy Waves
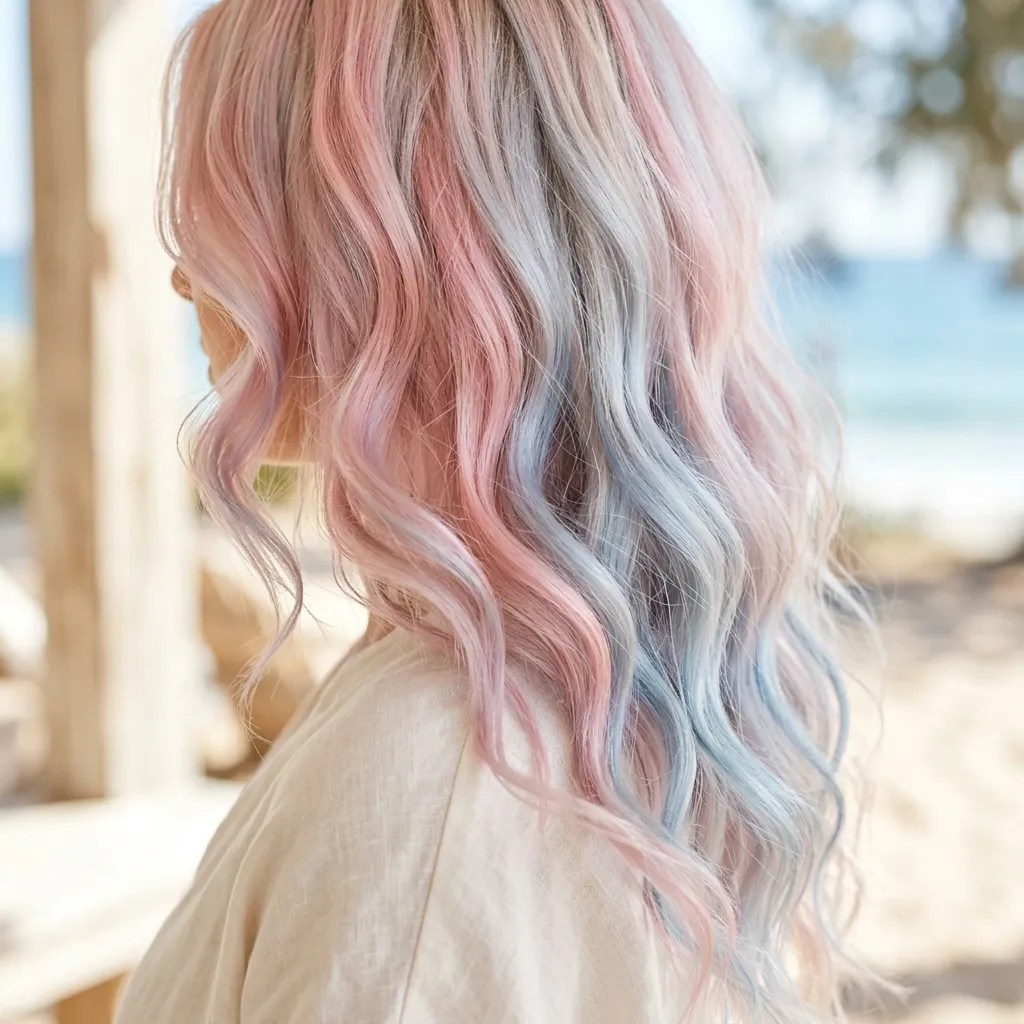
Vibe: Airy, like hair caught in a light breeze.
Why it works: Beachy waves come from a flat iron used in a bend-and-release motion, alternating direction section to section. That irregularity is what produces natural-looking texture instead of a defined curl. Layering pink and blue over that irregular wave gives the color visible movement as each bend catches the two tones differently.
How to get it: Clamp the iron at the root, twist a half-turn while pulling slowly to the ends, alternating twist direction on adjacent sections. Once cooled, rake fingers through once rather than brushing, which removes the texture.
💡 Quick Win: Sea salt spray on damp hair before flat-ironing extends the wave’s hold by several hours.
Shop The Look
| Product |
| Flat iron with rounded barrel edges |
| Texturizing sea salt spray |
| Semi-permanent pastel pink hair dye |
| Semi-permanent powder blue hair dye |
| Heat protectant mist |
14. Double Dutch Braids into a Low Bun
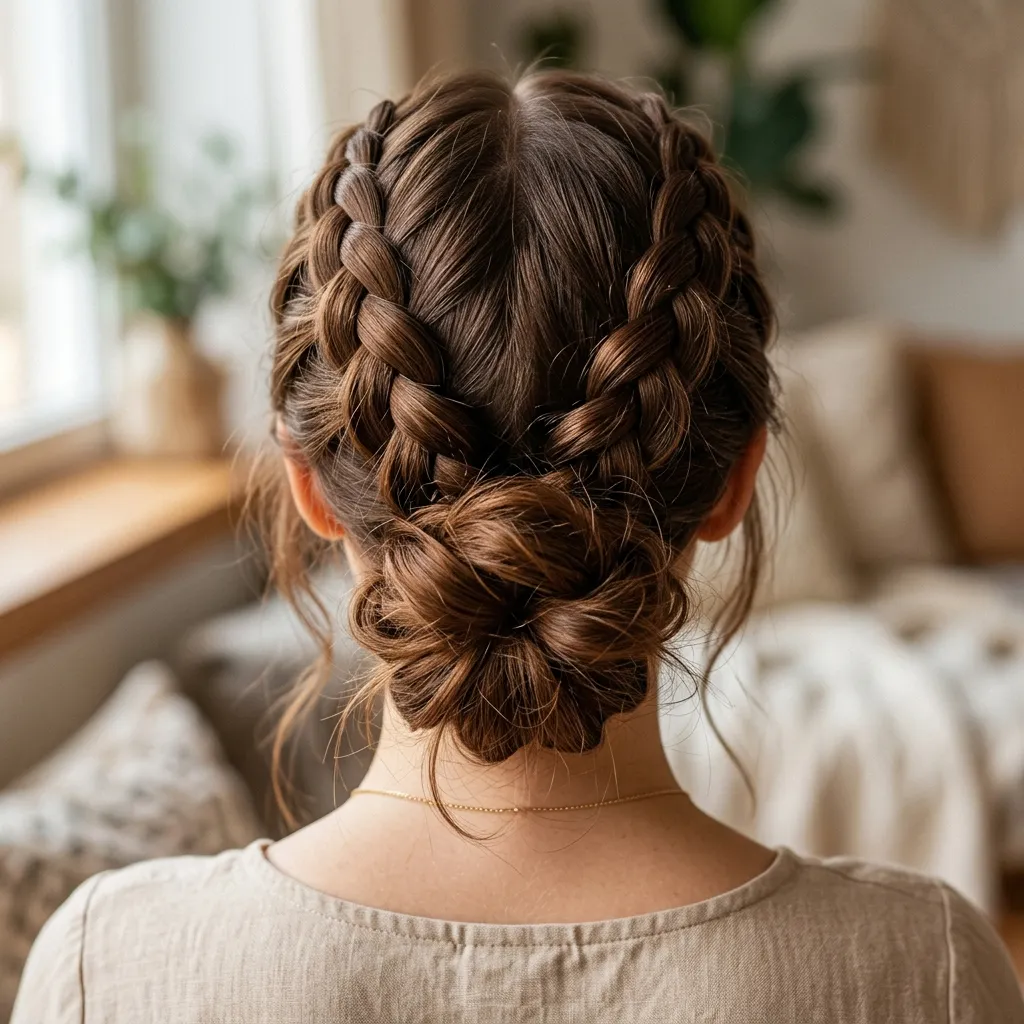
Vibe: Soft, like a bun that hasn’t quite decided to stay put.
Why it works: Dutch braids cross strands under rather than over, sitting on top of the hair’s surface for visible dimension before it even reaches the bun. Merging two braids into one loose bun adds asymmetry to an otherwise symmetrical base, and pulling pieces free at the hairline keeps it from reading as a formal, competition-style updo.
How to get it: Dutch braid each side from temple to nape, join both tails, twist loosely rather than braiding further, and pin into a low bun while tugging several short pieces loose around the crown.
Shop The Look
| Product |
| Bun-shaping donut, small |
| U-shaped hairpins, brunette |
| Texturizing clay |
| Flexible-hold finishing spray |
| Fine-tooth sectioning comb |
15. Wrapped Hair Vine Crown
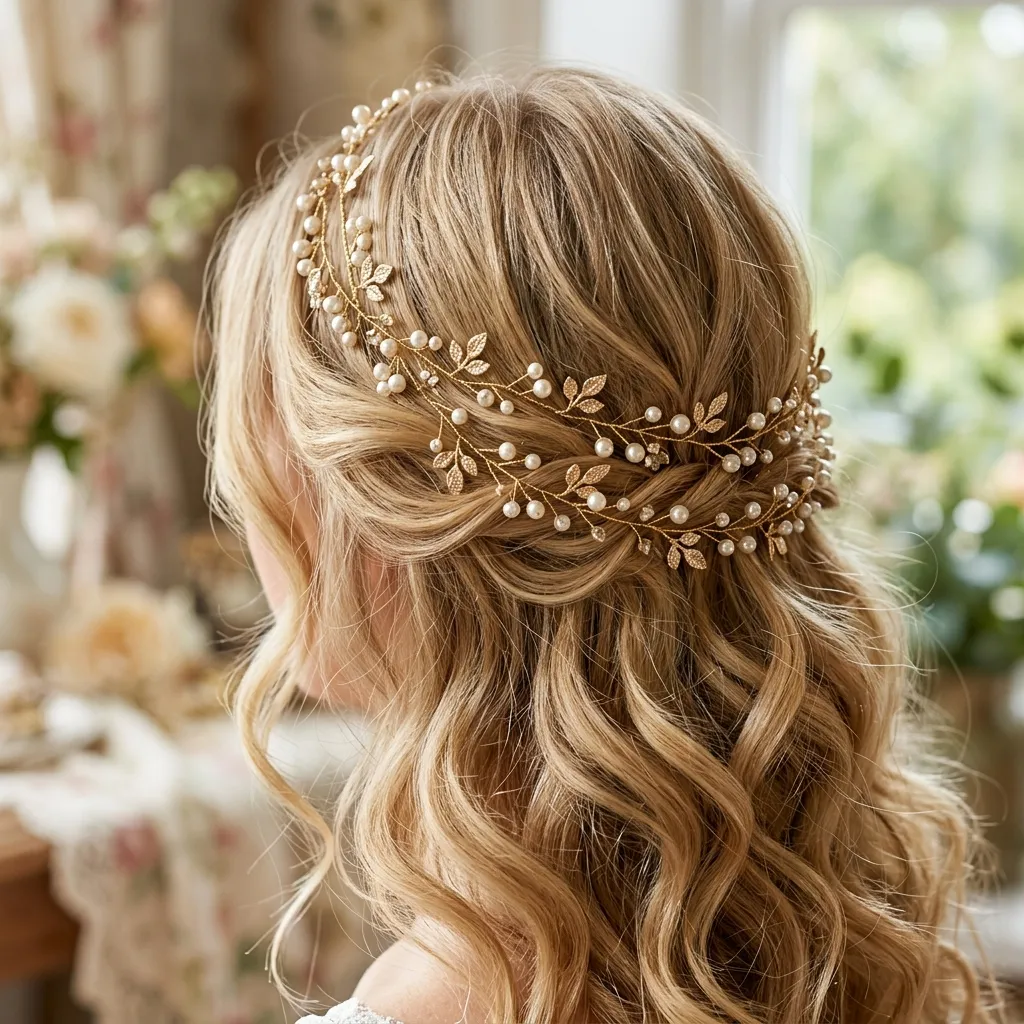
Vibe: Storybook, like a crown borrowed from a garden.
Why it works: A wire vine bends by hand to the exact curve of the head instead of sitting on a rigid pre-formed base, so it hugs the hairline instead of perching above it like a costume-store crown. Pearls and leaves clustered unevenly along the wire follow the same organic-spacing logic as the butterfly clips. What keeps a metallic piece from reading as jewelry.
How to get it: Pre-bend the wire to roughly match your head’s curve, then wrap starting behind one ear, crossing loosely over the crown and tucking the end behind the other. A pre-shaped vine typically needs only two or three pins.
💡 Quick Win: Practice the hand-bend on a wig head or doorknob first, gold-toned wire loses its shape after two or three re-bends.
Shop The Look
| Product |
| Gold wire pearl-and-leaf hair vine |
| Small clear bobby pins |
| Lightweight hold hairspray |
| Wide-tooth detangling comb |
| Silk hair scarf for storage |
16. Braided Headband for Bob-Length Hair
Vibe: Soft, like a headband hair grew into on its own.
Why it works: Hair shorter than shoulder length can’t support a full flower crown or trailing braid. Those need two to four inches more length than a bob typically has. Using just one one-inch section from the front stays proportional to a bob’s shorter length instead of overwhelming it the way a wider accessory would.
How to get it: Take a one-inch section above one ear, braid it across the crown to the opposite side with a standard three-strand technique, and pin the end flat so it tucks invisibly into the rest of the bob.
Shop The Look
| Product |
| Small clear elastics |
| Flat bobby pins, auburn-tone |
| Volumizing texture spray for bobs |
| Mini flower hairpin, single stem |
| Lightweight curl cream |
17. Opalescent Root Shimmer for Dark Hair
Vibe: Quiet, like frost settling along a dark path at dusk.
Why it works: Dark hair creates high tonal contrast against light shimmer product, so even a small amount registers clearly, the same value-contrast principle painters use for a light highlight against a dark ground. Keeping application to the root and part avoids the flat, static look shimmer gets when spread too thin.
How to get it: Warm shimmer cream between fingertips, apply sparingly along the part and root, and blend the outer edge with a dry brush so there’s no visible stopping point.
💡 Quick Win: Test any new shimmer shade behind one ear first. Opal tones read differently on cool versus warm dark hair.
Shop The Look
| Product |
| Opalescent shimmer cream for dark hair |
| Small clean blending brush |
| Root-touch precision comb |
| Shine-enhancing hair serum |
| Anti-static finishing mist |
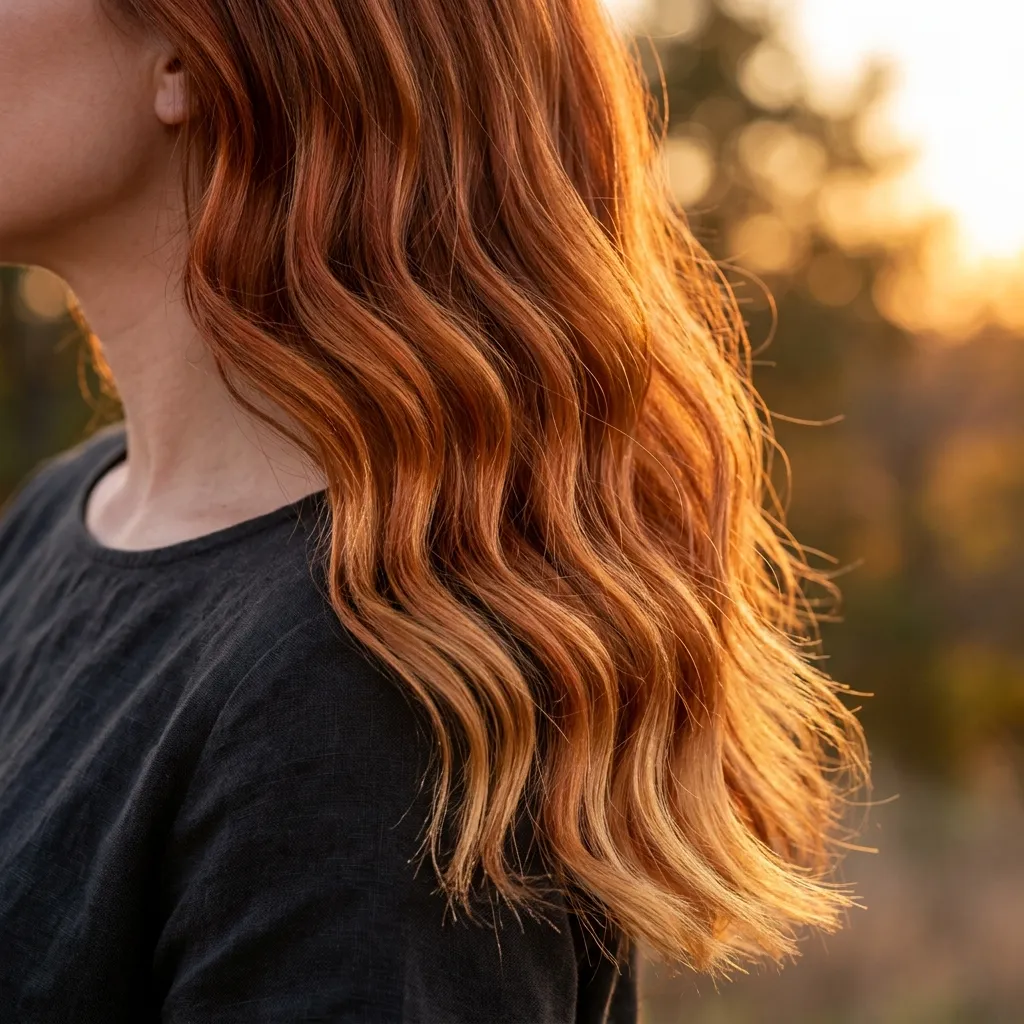
18. Sunset Copper Balayage with Gilded Ends
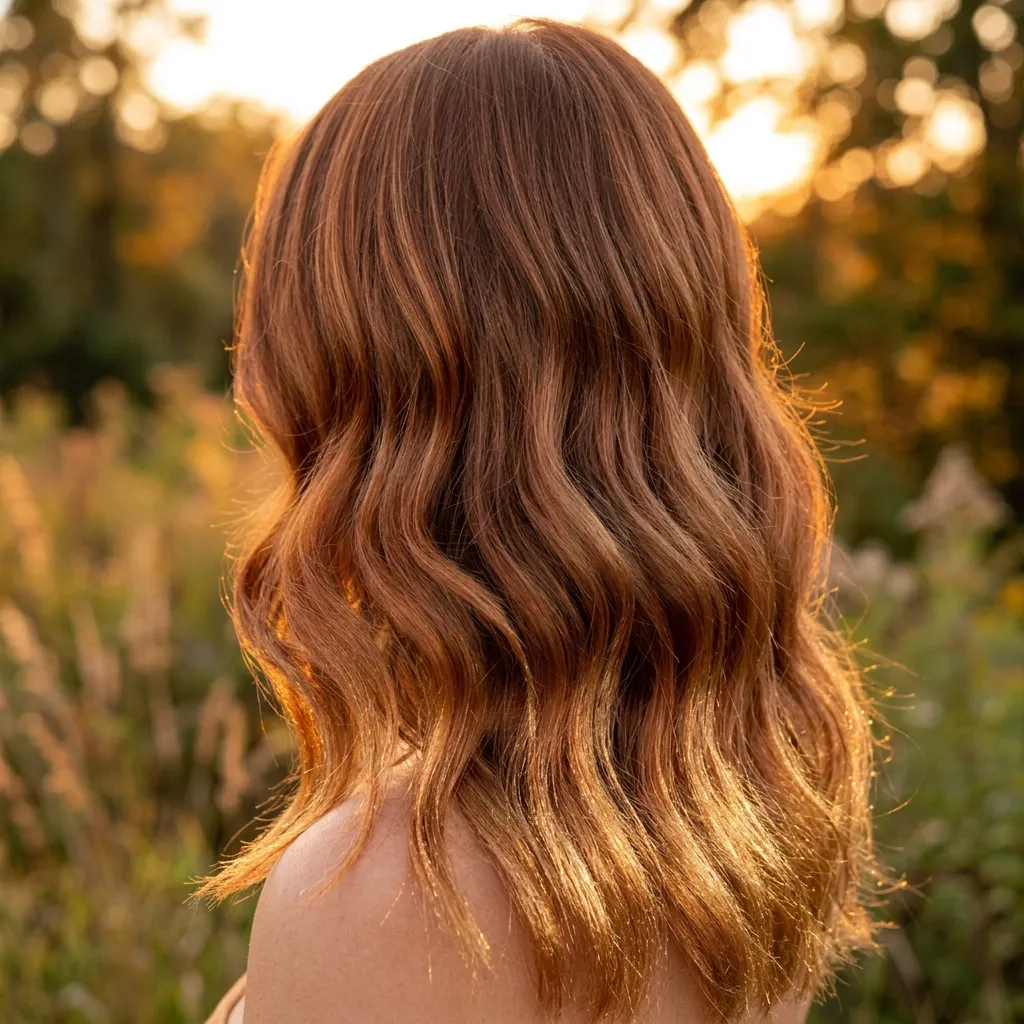
Vibe: Radiant, like the last light before dusk.
Why it works: Balayage naturally builds warmth from mid-length to end, and a gold shimmer glaze on just the last inch or two uses the same accent principle as a gilded picture frame, a small, concentrated area of extra shine framing the whole color without competing with it. Copper and gold sit next to each other on the warm side of the wheel, so the transition reads as continuous.
How to get it: Have copper balayage applied through the mid-lengths, then request a gold-shimmer glaze on only the final one to two inches during the same appointment.
Shop The Look
| Product |
| Copper-tone semi-permanent glaze |
| Gold shimmer end-gloss treatment |
| Color-safe heat protectant |
| Auburn-tone edge control gel |
| Wide-barrel curling iron |
19. Center-Part Waterfall Braid Frame
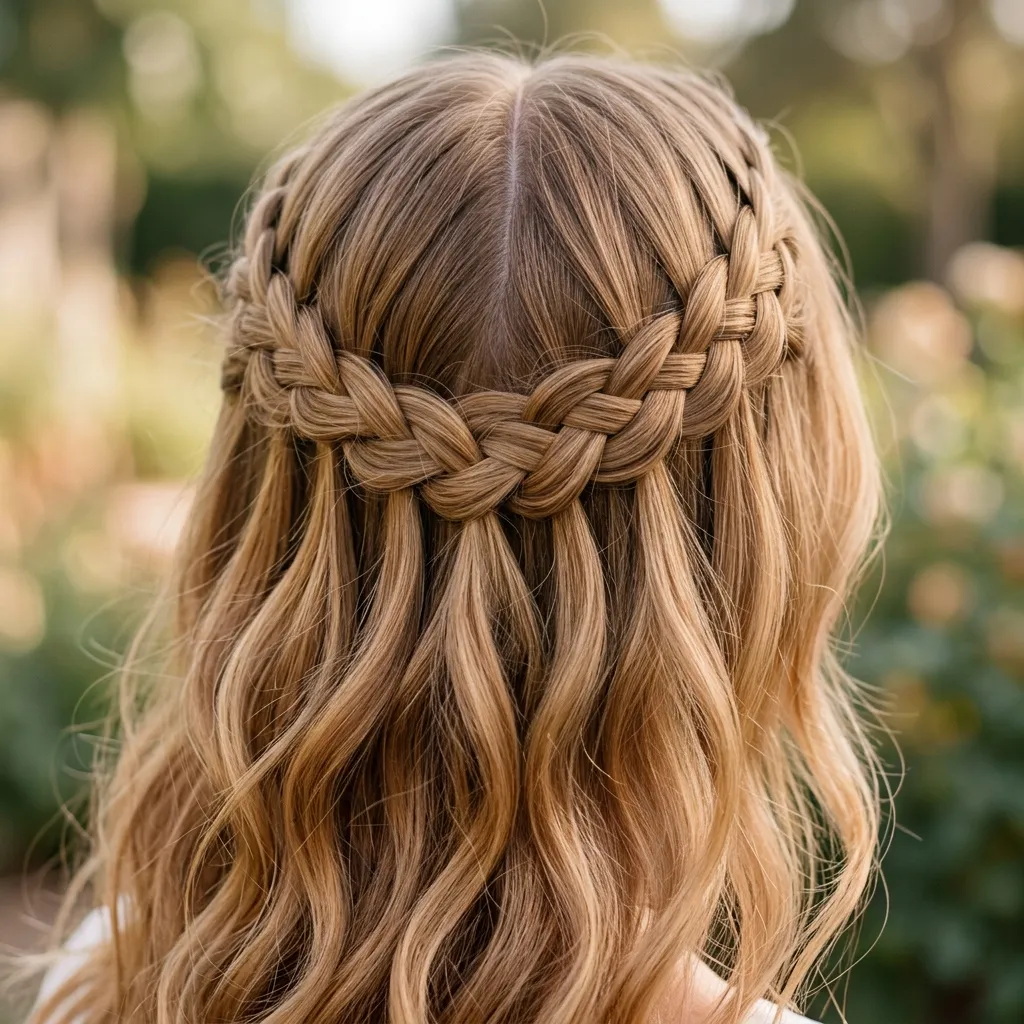
Vibe: Flowing, like hair falling in place of water.
Why it works: A waterfall braid deliberately drops one strand at each pass instead of locking every section in, which is the entire mechanism behind the cascade. A braid designed to let go on purpose. Starting from a center part keeps both sides symmetrically framed, balancing the natural asymmetry of the strands falling at slightly different points.
How to get it: Part down the center, braid horizontally across the crown, and at each crossing point drop the bottom strand entirely, picking up a fresh strand from the top to continue.
💡 Quick Win: Curl the released strands before braiding so they cascade in soft waves instead of hanging flat.
Shop The Look
| Product |
| Fine-tooth center-part comb |
| Small clear elastic for braid end |
| Curling wand for cascading strands |
| Lightweight shine spray |
| Flexible hold hairspray |
20. Tousled Milkmaid Updo with Baby’s Breath Pins
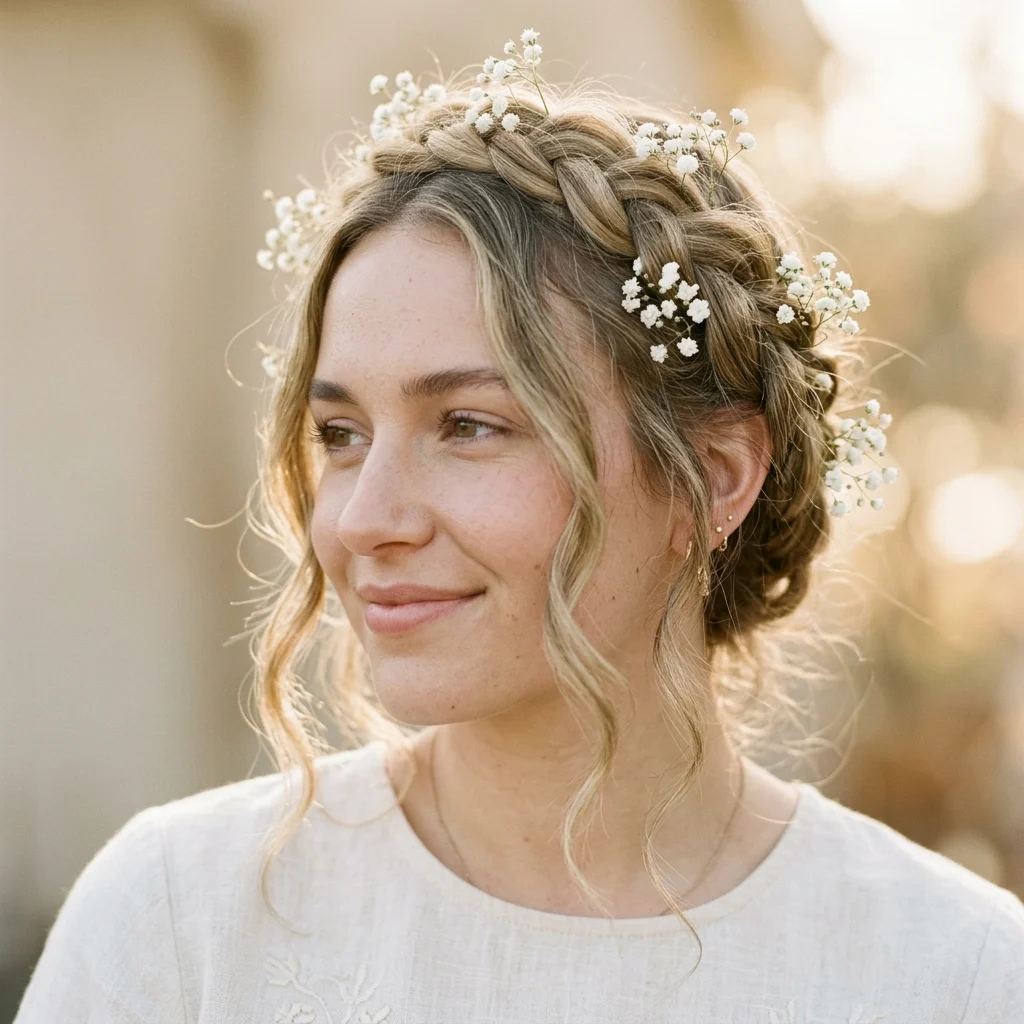
Vibe: Whimsical, like a braid crown left slightly undone on purpose.
Why it works: Crossing two braids over the crown with slightly raised tension, rather than pinning flat, adds lift and dimension so the shape doesn’t read as flat or dated. Loosening the strands afterward and tucking in single baby’s breath stems keeps it closer to an everyday updo with fairy detail than a full costume piece.
How to get it: Braid two low sections, cross them over the crown to meet near the opposite temple, pin underneath, then pull the outer edges of each braid loose before tucking stems into the gaps at uneven intervals.
Shop The Look
| Product |
| Faux baby’s breath floral hairpins |
| Long U-shaped pins |
| Texturizing spray for braid loosening |
| Flexible hold finishing spray |
| Wide-tooth comb for detangling |
How to Start Your Fairy Hairstyle Transformation
Your single first move is buying one texture tool: a half-inch curling wand. Nearly every technique here (the fishtail braid, the half-up knot, the waterfall frame, the milkmaid updo) is built on loose, S-shaped waves rather than sleek, straight hair, so a wand producing soft bends (not tight ringlets, which read as a different, more formal style) is the one piece of equipment that makes every other idea executable. Without that texture underneath, even a correct braid or accessory placement looks flat rather than fairy-like.
The most common beginner mistake is braiding at full, scalp-tight tension. A tight braid looks polished and formal, the opposite of the undone effect the style depends on, and it’s a mistake nearly everyone makes because tight braiding is what most people learn first. The fix is mechanical: braid at roughly 60–70% of normal tension, then widen every section by pinching and pulling the outer edges outward once finished, the same correction used across five ideas in this list.
Three items under $50 create immediate impact. A dozen faux baby’s breath hairpins ($10–15) work with almost any braid or updo. A fine-mist iridescent shimmer spray ($18–28) adds visible glow to a plain ponytail with zero skill required. A two-inch wired-edge pastel ribbon ($6–10) turns a basic low ponytail into a wrapped style in under five minutes. Any one alone noticeably shifts a plain hairstyle toward fairy territory.
A single style from this list takes 15 to 40 minutes depending on complexity. The ribbon-wrapped ponytail and shimmer finish sit at the fast end, while the hair-vine crown and flower crown updo take closer to 35–40 minutes with practice. Real comfort with three or four techniques takes two to three weekends. A full accessory kit (ribbon, pins, florals, shimmer spray) runs $45–65 and, unlike hair color, is reusable across dozens of future looks.
Frequently Asked Questions About Fairy Hairstyles
What’s the difference between fairy hairstyles and mermaidcore hair?
Fairy hairstyles use pastel and earthy woodland tones (lavender, moss green, rose gold, and opal) paired with braids, ribbon, and florals. Mermaidcore instead leans into ocean blues and teals, often with a wet-look finish, and swaps florals for shell or pearl clips. Both share a loose, wave-based base texture, but the palette and accessory category, botanical versus aquatic, set them apart.
What hair colors work best for a fairy hairstyle look?
Lavender, opal white, rose gold, moss green, and sunset copper are the five most-requested fairy hair colors, almost always applied through balayage or a dip-dye gradient since flat color removes the light-catching shift the style depends on. A semi-permanent lavender or rose-gold gloss is the lowest-commitment entry point, typically fading over four to six washes instead of requiring a salon correction.
How much does a fairy hairstyle look actually cost?
A DIY version using ribbon, floral pins, and shimmer spray runs $20–65 in reusable supplies. A salon service like balayage with an opal or pastel glaze costs $150–$350 depending on length and how much lightening is required, while a professionally styled updo for a single event usually runs $75–$150. Budget toward the higher end for hair that’s never been lightened, since the first lift takes longer.
Does this style work for curly or coily hair textures?
Yes. Curly and coily hair need less active styling to reach the loose, tousled base texture fairy hairstyles are built on, since it’s already present naturally. Braids, half-up knots, and flower crowns all translate directly; the main adjustments are a wider-tooth comb for sectioning without disrupting curl pattern, and a lighter styling cream instead of heavy gel, which can flatten volume.
What’s the single most popular fairy hairstyle accessory to try first?
Faux baby’s breath hairpins are the most-searched and purchased fairy hair accessory, largely because they cost under $15, work with almost any base style, and need no color commitment or braiding skill. Most people new to the style start there before moving to more advanced techniques like the hair-vine crown or a full balayage change.
Ready to Create Your Dream Fairy Hairstyle?
Across these 20 ideas, you’ve got color techniques like opal balayage and moss-green money pieces, structural styles like the braided flower crown and double Dutch braid bun, and finishing details like the butterfly clip constellation and root shimmer to mix and match. None of this needs to happen in one sitting, a single ribbon-wrapped ponytail or one sprig of baby’s breath tucked into your usual braid is a complete first step on its own.
Today, pick up a set of faux baby’s breath pins or a bottle of shimmer spray and test it on the hairstyle you already wear most, before deciding on any full color change. Once it clicks, the appeal has less to do with any one technique and more with how it feels day to day, a little undone, a little glimmering, like your hair was styled outdoors instead of in front of a mirror. Save the ideas that match the materials and time you actually have, since those are the ones you’ll reach for again the next time you want your hair to look like it grew that way.