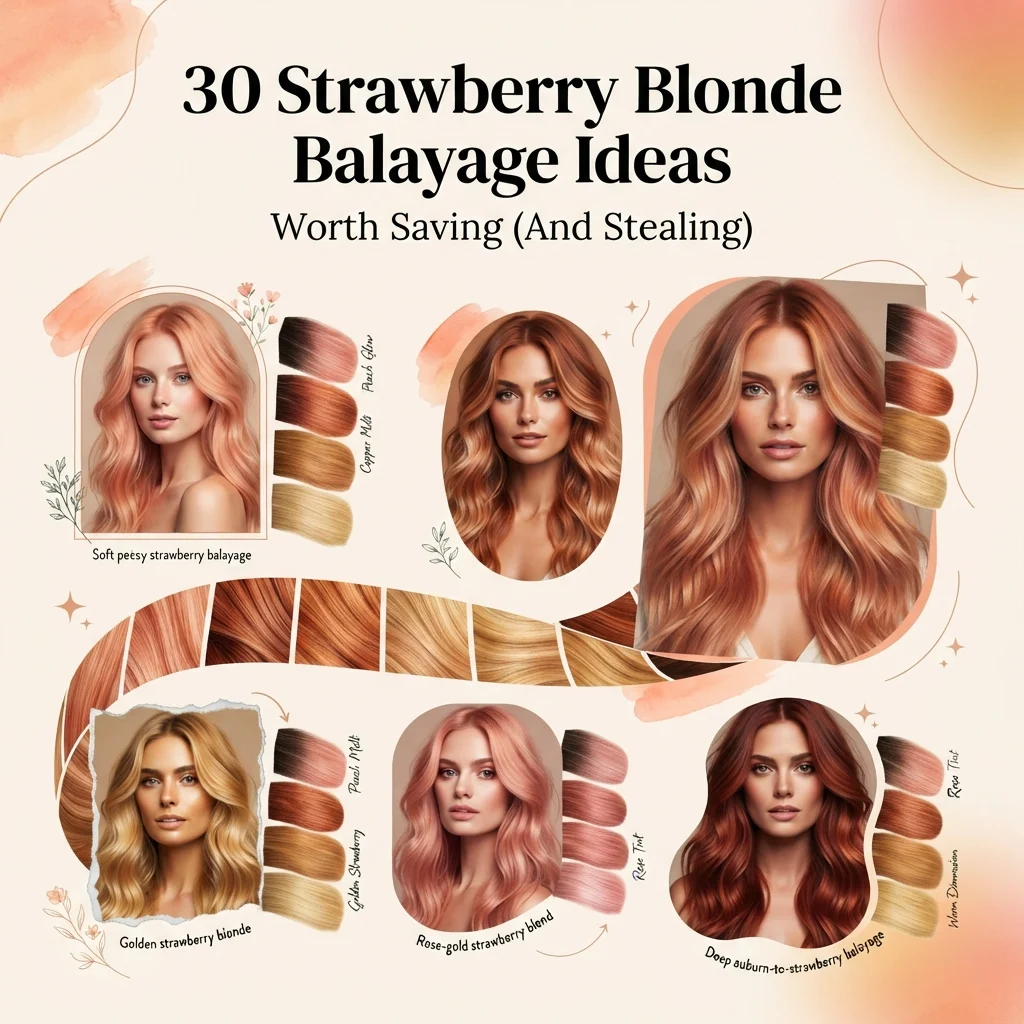
30 Strawberry Blonde Balayage Ideas Worth Saving

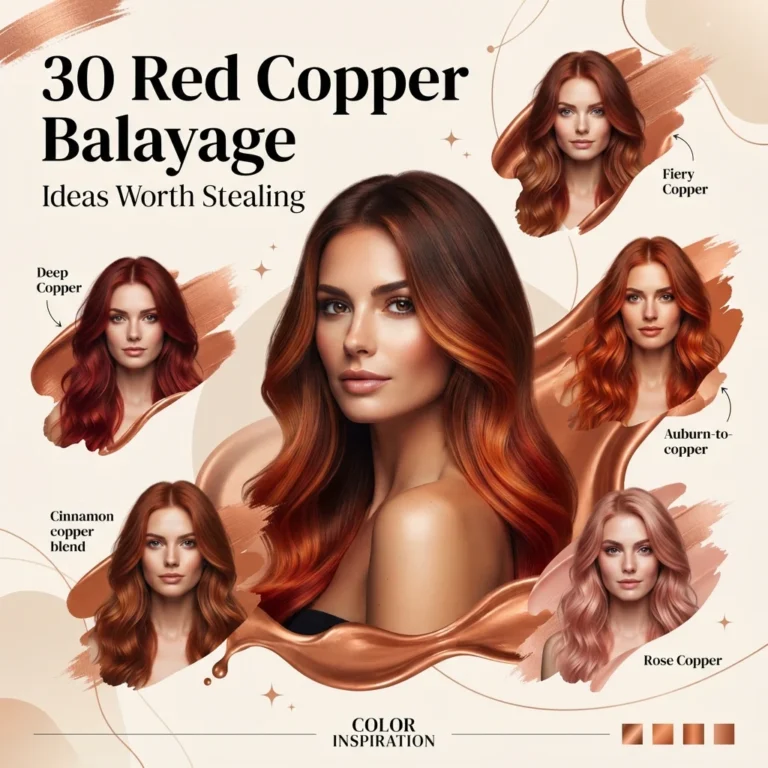
Strawberry blonde balayage is a hand-painted coloring technique that sweeps warm copper, gold, and rose-toned highlights through strawberry blonde or red-based hair to create soft, sun-lightened dimension. This guide walks through 30 strawberry blonde balayage ideas, spanning color depth, texture, cut, styling technique, and maintenance level, so you can find the exact variation that fits your base color and upkeep budget.
There’s a particular warmth to this shade that photographs don’t fully capture, the way copper catches light differently than a flat, single-process color, the way it moves when you walk instead of sitting still on the strands. Strawberry blonde balayage feels less like a color change and more like your hair remembering a summer it never had. It’s soft where foil highlights can feel harsh, and it grows out honestly instead of leaving a hard line at the root. Here are 30 ideas worth saving, and stealing.
Why Strawberry Blonde Balayage Works So Well
Balayage, from the French word meaning “to sweep,” is a hand-painting technique credited to colorists at Parisian salons Carita and Dessange in the 1970s, who developed it as a freehand alternative to the rigid, uniform foil highlighting that dominated the era. What distinguishes balayage from foilyage or traditional foil highlights is entirely about application: color is painted directly onto the surface of dry or lightly dampened sections rather than saturated through a wrapped foil packet, which means the pigment naturally concentrates where sunlight would actually hit the hair and leaves the root untouched by design rather than by accident.
The palette leans warm on purpose, and the exact tones matter. Copper gold, rose gold, honey blonde, apricot cream, and strawberry vanilla are the five core tonal families colorists work within, each achieved by layering a specific direct-dye gloss over lightened sections rather than relying on the lightener alone to produce the finished color. Redken Shades EQ in shade 08CG produces the classic copper-gold cast most associated with the style, while 7RR shifts the same base toward a pinker rose gold; Wella Color Charm Gloss in “Golden Blonde” is the industry-standard formula for the softer honey-strawberry family, and Olaplex No.3 is used as a bond-building treatment alongside any of these formulas to offset the structural stress of repeated lightening.
The look is trending again for reasons that go beyond aesthetics alone. Warm, “your color but richer” balayage has been steadily overtaking cool ash-toned balayage across Pinterest search data and TikTok hair content since around 2023, reflecting a broader cultural shift toward hair color that reads as enhanced-natural rather than obviously processed, a shift that runs parallel to the same “your best self, not a different self” philosophy driving skincare and minimalist beauty trends more broadly. Strawberry blonde in particular has also benefited from a wave of visible celebrity and influencer color changes toward warm copper and rose-gold tones, which has pushed search interest for “strawberry blonde balayage” specifically, rather than the more generic “blonde balayage,” to some of its highest recorded levels.
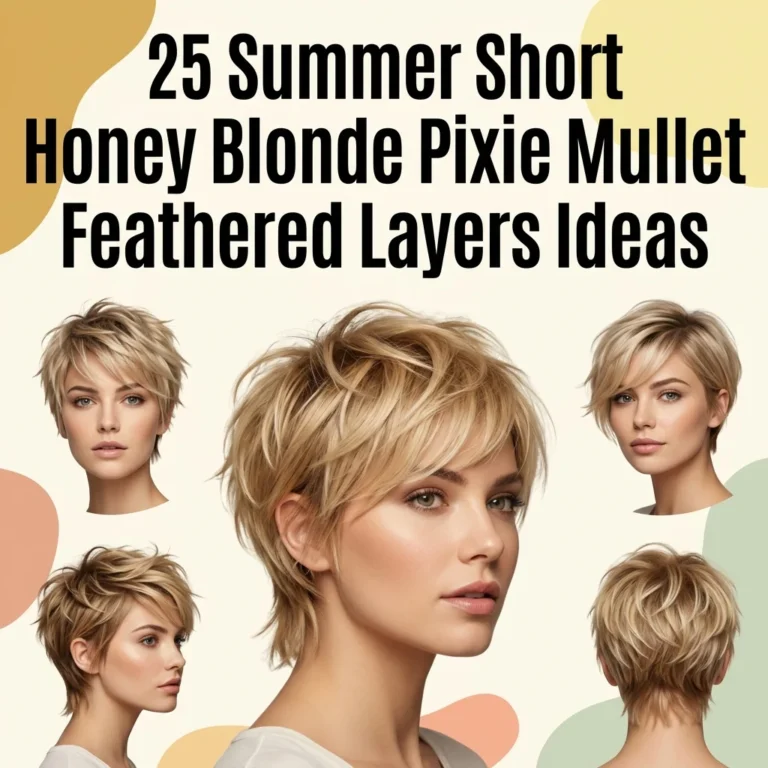
Fine or short hair, and hair on a modest budget, can genuinely wear this style well, though it requires an honest adjustment to expectations. The technique that makes it achievable is reducing the number and width of painted sections rather than reducing the intensity of the color itself, concentrating two or three narrow, warm pieces close to the face rather than distributing lightener broadly through a full head that doesn’t have the length or density to support heavy dimensional color.
Style at a Glance
| Element | Detail |
|---|---|
| Philosophy | Hand-painted dimension that mimics naturally sun-lightened hair |
| Key Tones | Copper gold, rose gold, honey blonde, apricot, strawberry vanilla |
| Maintenance | Root touch-up every 10 to 14 weeks; gloss refresh every 6 to 8 weeks |
30 Strawberry Blonde Balayage Ideas
1. Copper Gold Money Piece
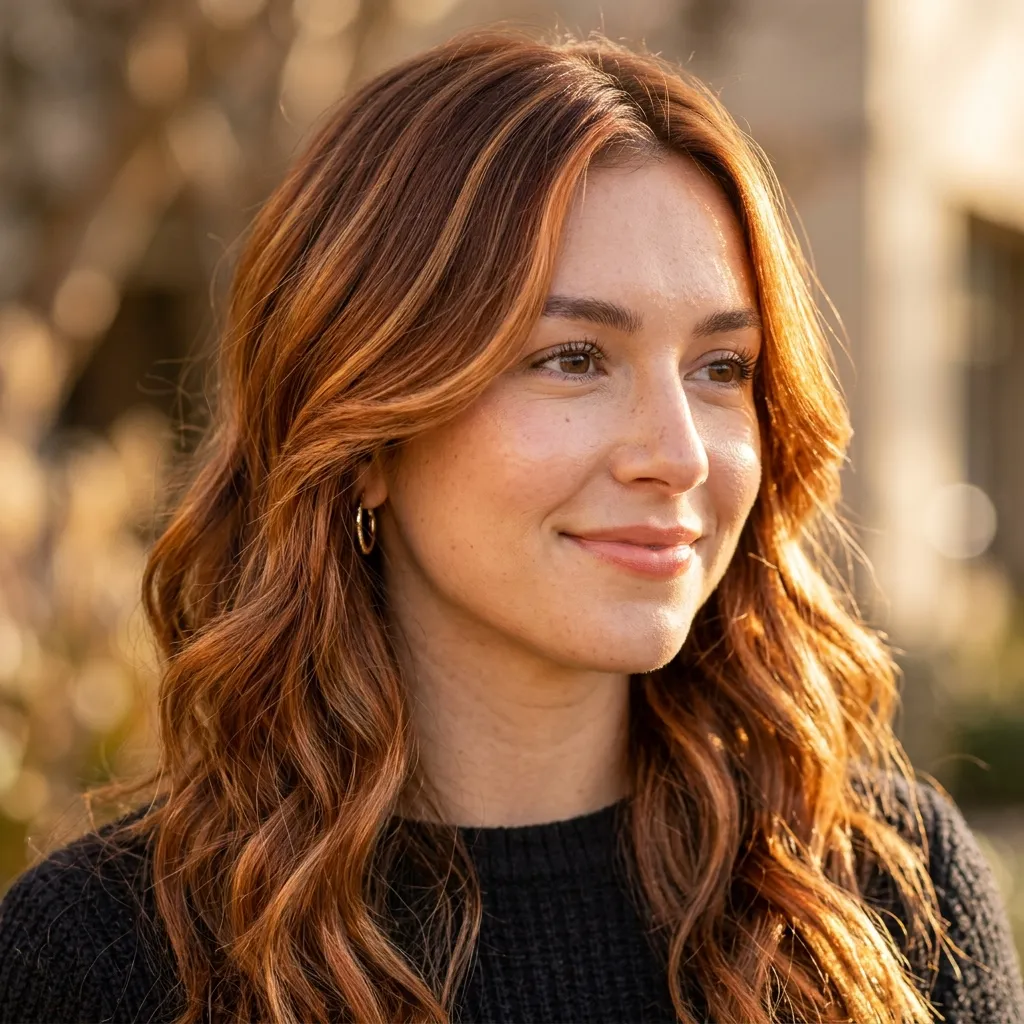
Vibe:Radiant is the word for this one, the face-framing pieces catch light every time you look up.
Why it works: A “money piece” concentrates the two or three lightest, warmest painted sections directly around the face rather than distributing lightness evenly through the whole head, and colorists rely on it because the face-framing area is the single zone that receives the most natural light exposure in everyday life and the most visual attention in photographs.
This works on a purely optical level: brightening the area the eye lands on first creates maximum perceived contrast and dimension for a comparatively small amount of processed hair, which is also why the technique became the standard entry point for clients nervous about a bigger commitment.
How to get it: Ask your colorist for two 1-inch sections on either side of the part, painted with a lightener like Wella Blondor mixed to a 20-volume developer, then toned with either Redken Shades EQ 08CG for a true copper-gold cast, Wella Color Charm Gloss in “Golden Blonde” for something slightly softer, or Joico’s LumiShine Copper Gold demi-permanent if your colorist stocks it, all three land in the same tonal family with slightly different intensity. At home, extend the effect between salon visits with a color-depositing conditioner like Kevin Murphy Colour.Me in the “Copper” shade, applied for five minutes once a week to keep the money piece from dulling before your next appointment.
Shop the Look
| Product |
|---|
| Kevin Murphy Colour.Me copper color-depositing conditioner |
| Wide-barrel ceramic curling iron for face-framing waves |
| Copper-tone UV hair protectant spray |
| Boar bristle round brush |
| Satin-lined baseball cap for sun protection |
2. Glass-Hair Sleek Strawberry Blonde
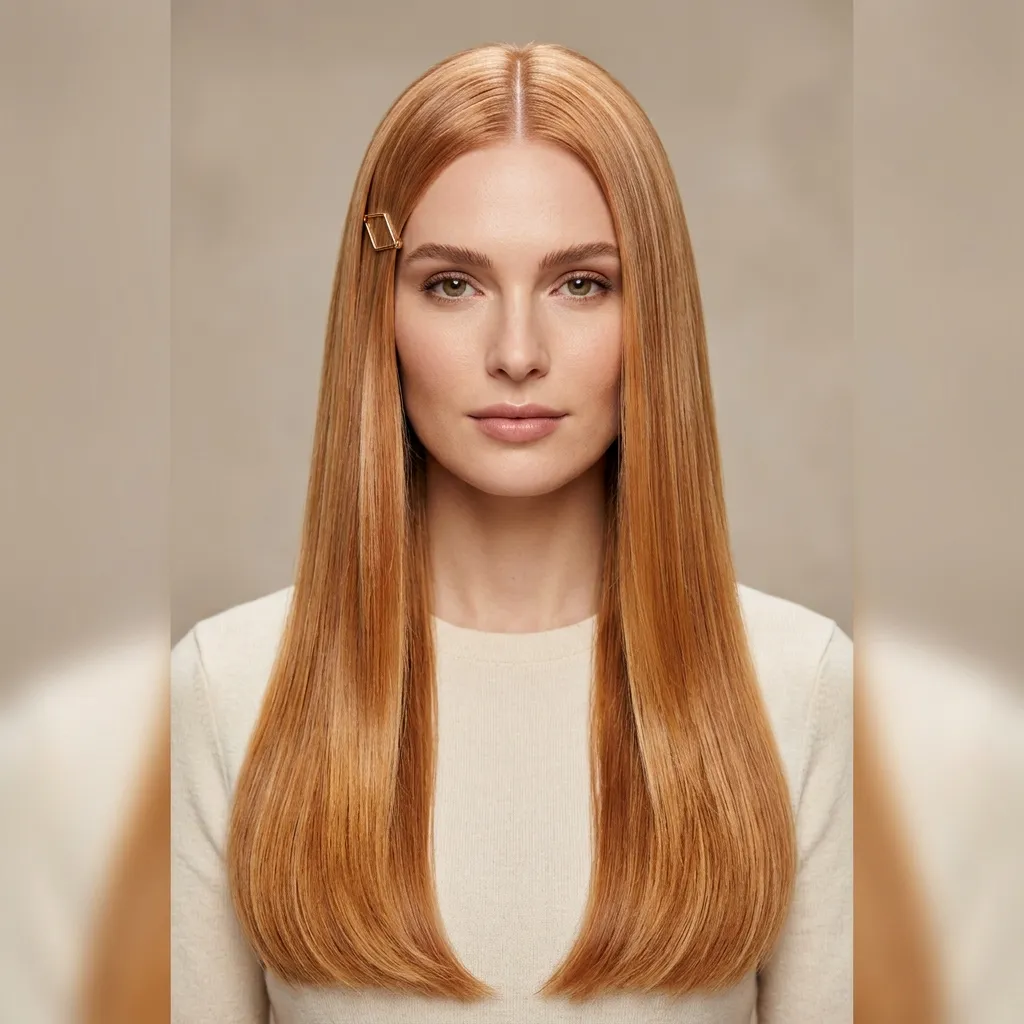
Vibe:Polished is the feeling here, strands so smooth the color reads like poured glass under light.
Why it works: “Glass hair” styling relies on a completely flat cuticle layer to maximize how much light the hair reflects, and warm balayage tones like copper and rose gold reflect noticeably more visible light than cool ash tones because they sit closer to the red end of the color spectrum, a wavelength range the human eye perceives as inherently more luminous.
How to get it: Blow-dry hair fully straight using a paddle brush and a heat protectant like Color Wow Dream Coat, then follow with a titanium flat iron set to 350°F, taking 1-inch sections and running the iron through in one continuous pass without stopping mid-strand, which is the step most people skip and the reason their results look streaky rather than glassy.
Shop the Look
| Product |
|---|
| Color Wow Dream Coat anti-frizz treatment |
| Titanium flat iron with adjustable heat settings |
| Gisou Honey Infused Hair Oil |
| Wide paddle brush for blow-drying |
| Silk-wrapped hair tie for damage-free ponytails |
3. Long Layers with Face-Framing Balayage
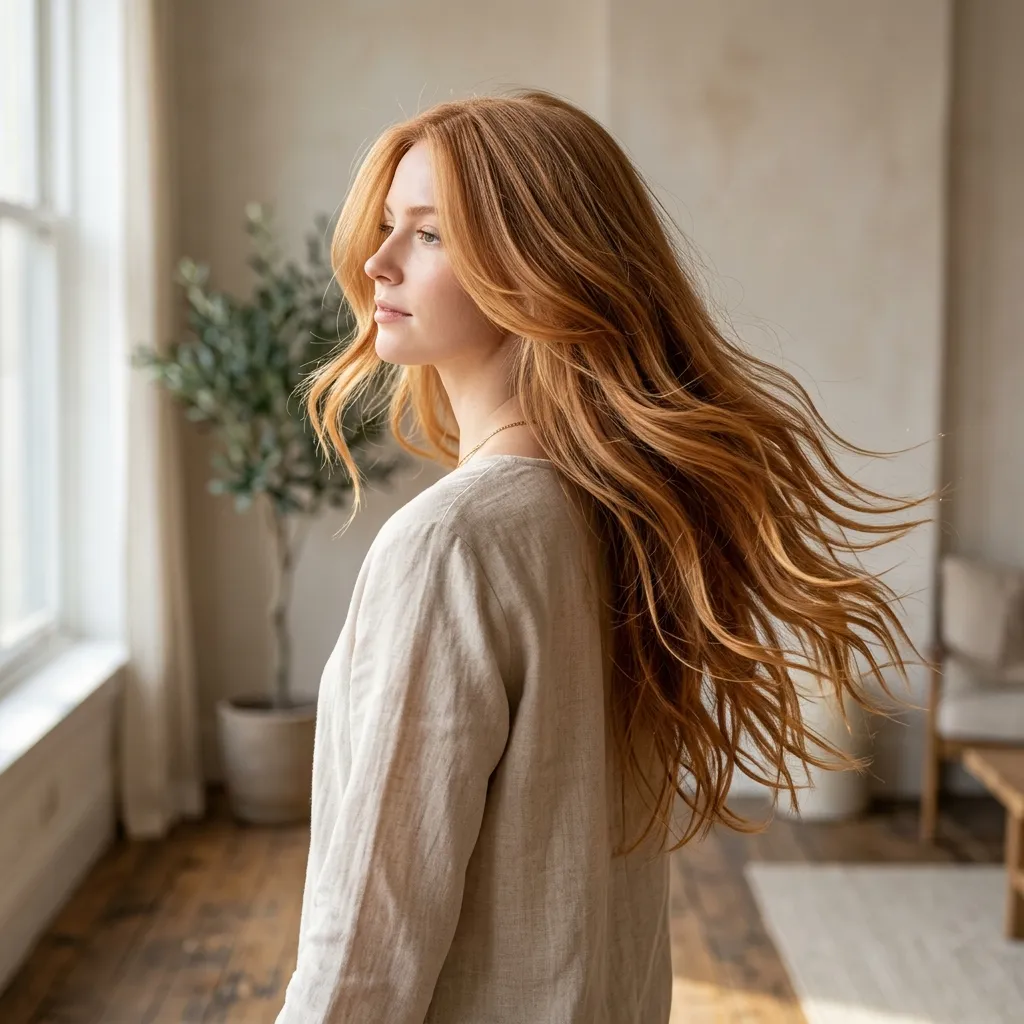
Vibe:Fluid is the right word, long layers let the copper and gold pieces travel and shift as the hair moves.
Why it works: Long layers create multiple internal lengths within a single head of hair rather than one continuous mass, and because balayage lightener catches each layer at a slightly different point along the strand, the finished result reads as overlapping bands of color instead of one flat plane of highlight sitting on top of a single, uniform length.
Colorists sometimes call the resulting effect “money piece velocity,” a shorthand for why long-layered cuts appear noticeably more dimensional than one-length hair even when the exact same quantity of lightener is applied to both, the difference is structural, not chemical.
How to get it: Request layers cut with a “point-cutting” technique, where the stylist cuts vertically into the ends rather than straight across with the blades held flat, which softens the transition between each layer and gives the balayage considerably more surface area to show through as the hair moves. Pair the cut with a texturizing spray at the roots, such as Oribe Dry Texturizing Spray, Bumble and bumble Surf Spray, or Kevin Murphy Session.Spray, to add lift that lets the underneath layers peek out rather than lying flat and hidden beneath the top layer.
Shop the Look
| Product |
|---|
| Oribe Dry Texturizing Spray |
| Thinning shears-safe layered cut reference photo set |
| Volumizing root-lift mousse |
| Wide-tooth detangling comb |
| Heat protectant leave-in spray |
4. High Ponytail Showcasing Balayage Dimension
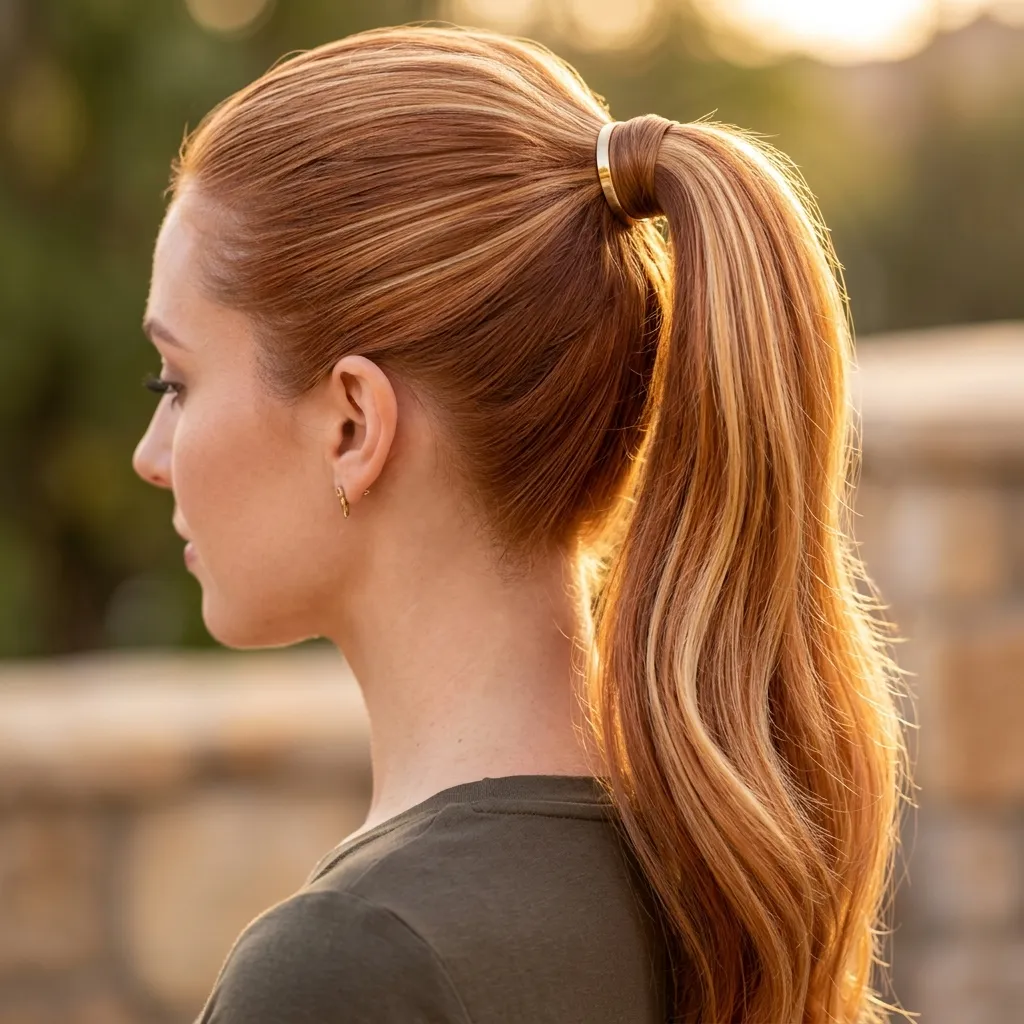
Vibe:Sleek and sun-warmed at once, the ponytail pulls every painted piece into a single, visible sweep of color.
Why it works: Pulling hair back into a high ponytail removes the face-framing pieces from view entirely but exposes the mid-shaft and length sections instead, which is precisely where balayage tends to be the most concentrated in a full-head service, so the style reads almost inverted compared to how the same color looks when hair is worn down.
This matters because balayage is applied to the surface of sections rather than saturating every strand through completely, so a ponytail effectively compresses the hair into a single visual cable where all of those painted ribbons run parallel and stack directly against one another, intensifying the appearance of dimension rather than diluting it the way loose hair sometimes does.
How to get it: Smooth the front section with a boar bristle brush and a light-hold gel, choosing between Bumble and bumble Thickening Dryspun Finish, Oribe Rigid Memory Spray used sparingly, or R+Co Television Perfect Hair Spray, before securing with a thin elastic, then wrap a 1-inch section of hair around the base and pin it to hide the elastic entirely. Set the ponytail with a cool shot from the blow dryer to lock the sleekness in place for several hours, which also helps the painted sections along the length catch and hold light more consistently throughout the day.
Shop the Look
| Product |
|---|
| Bumble and bumble Thickening Dryspun Finish |
| Thin, damage-free elastic hair tie set |
| Boar bristle smoothing brush |
| Bobby pins in a warm gold tone |
| Anti-frizz finishing serum |
5. Silk Scarf Headband Styling
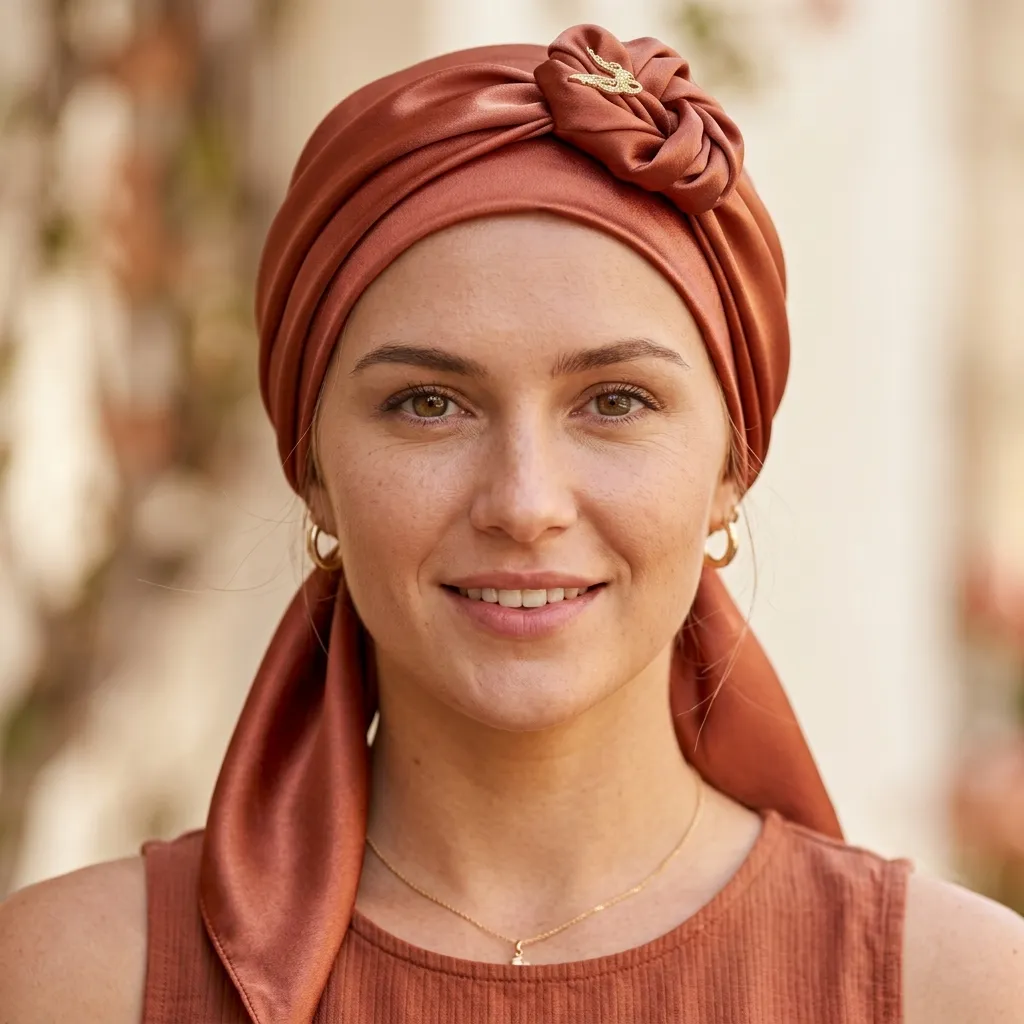
Vibe: Breezy is the mood, a silk scarf tied at the crown lets the balayage frame the face without competing for attention.
Why it works: A headband scarf functions as a visual frame, and framing devices in general draw the eye toward whatever sits closest to the frame’s own edge, which in this case is the face-adjacent balayage rather than the scarf pattern itself. Choosing a scarf in a warm, muted tone, rust, cream, or dusty rose, rather than a bright or cool-toned print keeps the overall color palette cohesive instead of pulling attention away from the hair color, a principle stylists refer to as “tonal harmony” when pairing accessories with a specific hair shade.
How to get it: Fold a square silk scarf into a roughly 2-inch band, position it just behind the hairline rather than directly on top of it, and tie it at the nape or in a small bow at the crown, leaving the front pieces loose to fall naturally over the scarf’s edge rather than tucking everything underneath. Choose a scarf in a rust, terracotta, or cream colorway specifically to echo the copper and gold tones already in the hair rather than contrast against them, since a cool-toned print in blue or silver will visually fight the warmth of the balayage instead of complementing it.
💡 Quick Win: A $12 silk-blend scarf in a warm rust tone does the same face-framing job as an expensive headband and can be re-tied a dozen different ways depending on how much of the crown balayage you want visible that day.
Shop the Look
| Product |
|---|
| Silk-blend square scarf in rust or terracotta |
| Gold-tone hair pin set |
| Texturizing sea salt spray |
| Small round hairbrush for scarf-adjacent styling |
| Frizz-taming hair oil mist |
6. Rose Gold Balayage on Dark Blonde Base
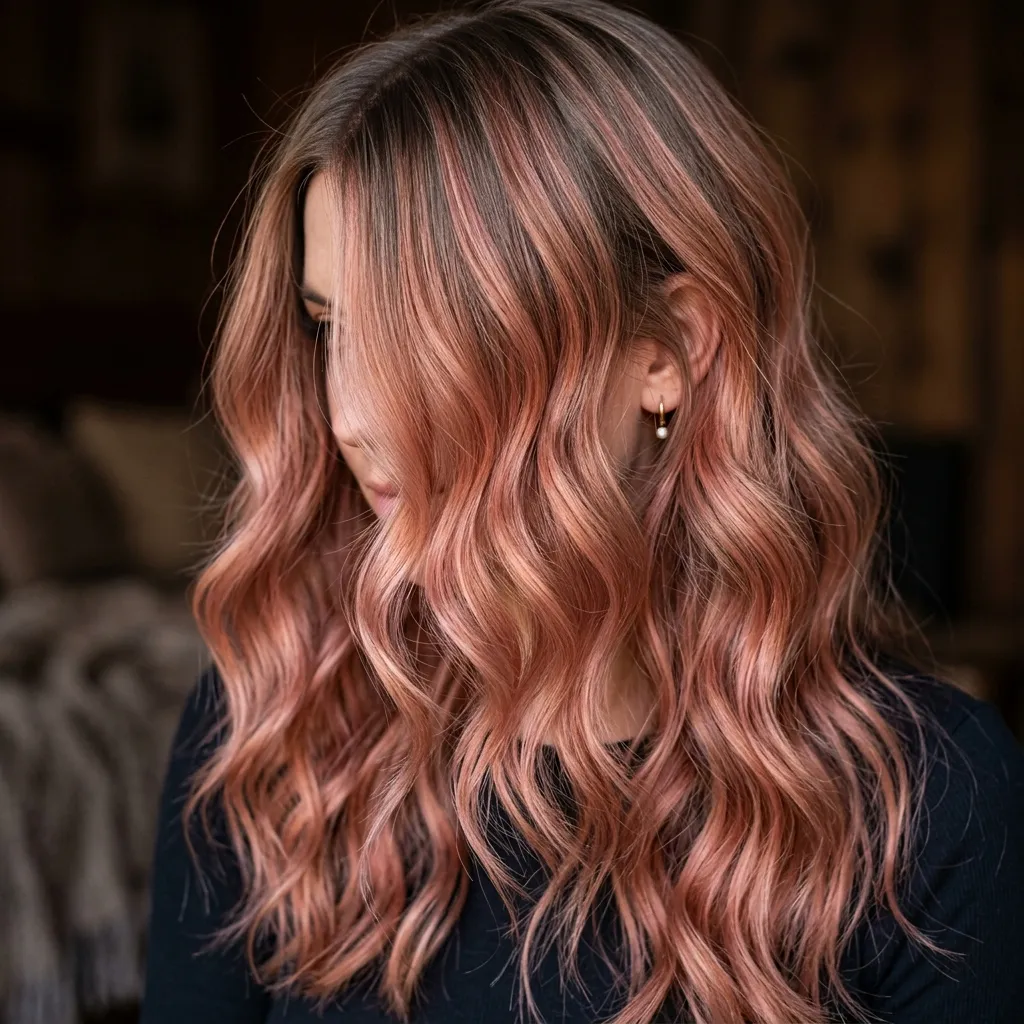
Vibe: Muted and romantic, the rose gold reads more pink-copper than orange, softer against a darker base.
Why it works: Rose gold balayage is created by toning already-lightened sections with a violet-red gloss rather than a straight copper or gold formula, and that single formula swap shifts the underlying warmth of the finished color toward pink instead of orange, which is a meaningfully different visual result from a standard copper application.
This distinction matters most on a dark blonde base specifically, because dark blonde hair typically carries a fair amount of natural gold pigment already present in the cuticle, and layering a cooler, pink-leaning gloss on top of that base neutralizes some of that existing gold rather than amplifying it, producing a noticeably softer, less saturated version of strawberry blonde than a copper-gold formula would achieve on the exact same starting hair.
How to get it: Ask your colorist for a rose gold toner formula, such as Redken Shades EQ 7RR mixed with a small amount of 08P, Wella Color Charm Gloss in “Rose Gold,” or Pulp Riot Faction 8 in a similar violet-red family, applied over lightened sections for eight to ten minutes depending on how saturated you want the pink cast to read. At home, maintain the pink-copper balance with a purple shampoo used sparingly, once every two weeks at most, since overuse will push the tone too cool and mute the strawberry warmth entirely rather than simply keeping brassiness in check.
Shop the Look
| Product |
|---|
| Rose gold color-depositing hair mask |
| Purple shampoo formulated for blondes |
| Silk pillowcase to reduce color fade from friction |
| Heat protectant spray with UV filter |
| Wide-tooth comb for wet detangling |
7. Beachy Wave Balayage for Natural Movement
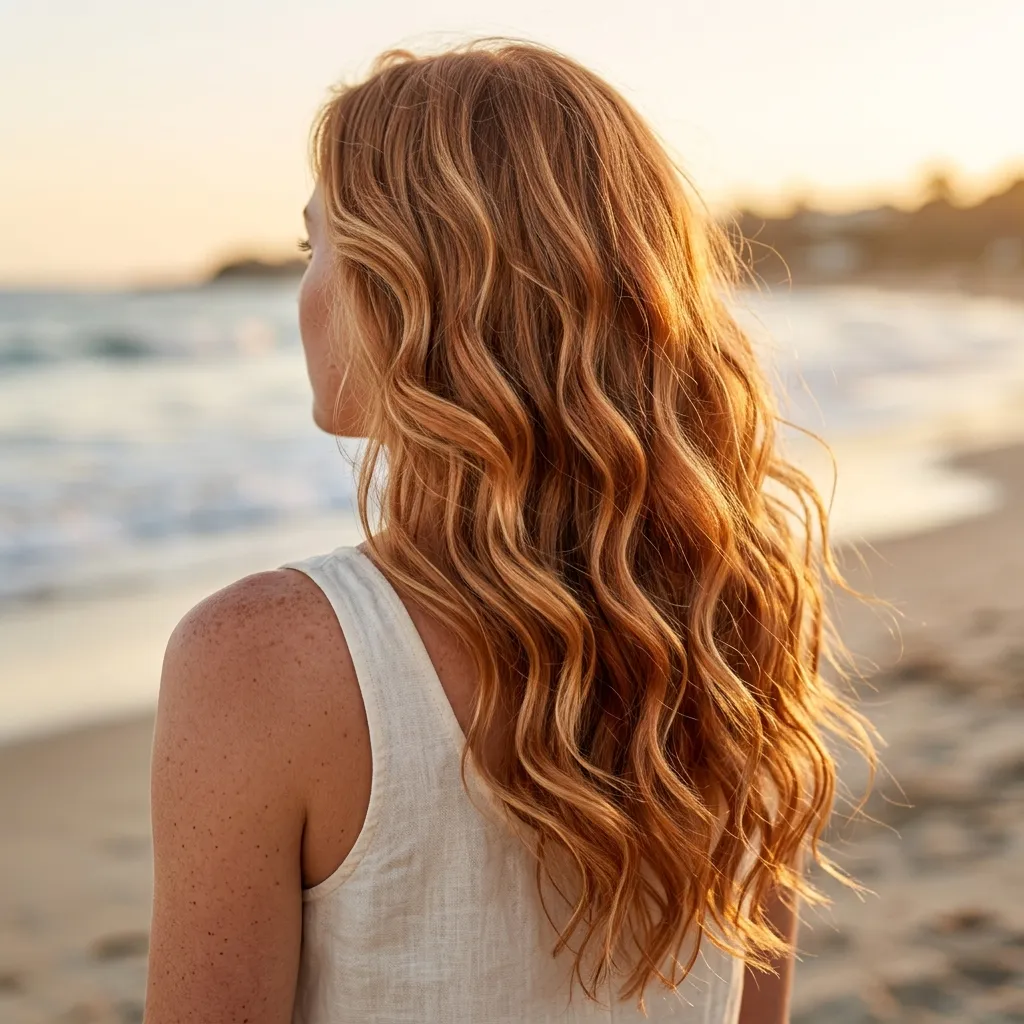
Vibe: Tousled and sun-warmed, loose waves let the copper and gold pieces catch light from every angle instead of one flat plane.
Why it works: Waves physically change the angle at which light strikes each strand along its length, and because balayage lightener is concentrated on the outer curve of any given section rather than distributed evenly around it, waving the hair rotates those lighter pieces in and out of direct view as the hair naturally moves throughout the day.
This is the core structural reason balayage was designed from the outset to be worn with some degree of texture rather than pin-straight, the technique’s soft, gradual placement is specifically built to catch and lose light dynamically as hair shifts, which is the opposite of a crisp foil highlight’s hard line, that style reads best stick-straight because the contrast is doing all the visual work rather than movement.
How to get it: Use a 1-inch curling wand, alternating the direction of the curl, away from the face on some sections, toward it on others, to avoid the uniform, catalog-style wave pattern that reads as obviously styled rather than naturally textured, then run fingers through once the curls have cooled to loosen them into a softer wave. Finish with a texturizing spray focused specifically at the mid-lengths, choosing between Ouai Wave Spray, Bumble and bumble Surf Infusion, or Sun Bum Beach Waves Spray, and avoid applying it at the roots, which tends to flatten the crown rather than adding the intended texture.
Shop the Look
| Product |
|---|
| Ouai Wave Spray |
| 1-inch curling wand |
| Heat protectant mist |
| Sea salt finishing spray |
| Flexible-hold hairspray |
8. Strawberry Blonde Shag Cut
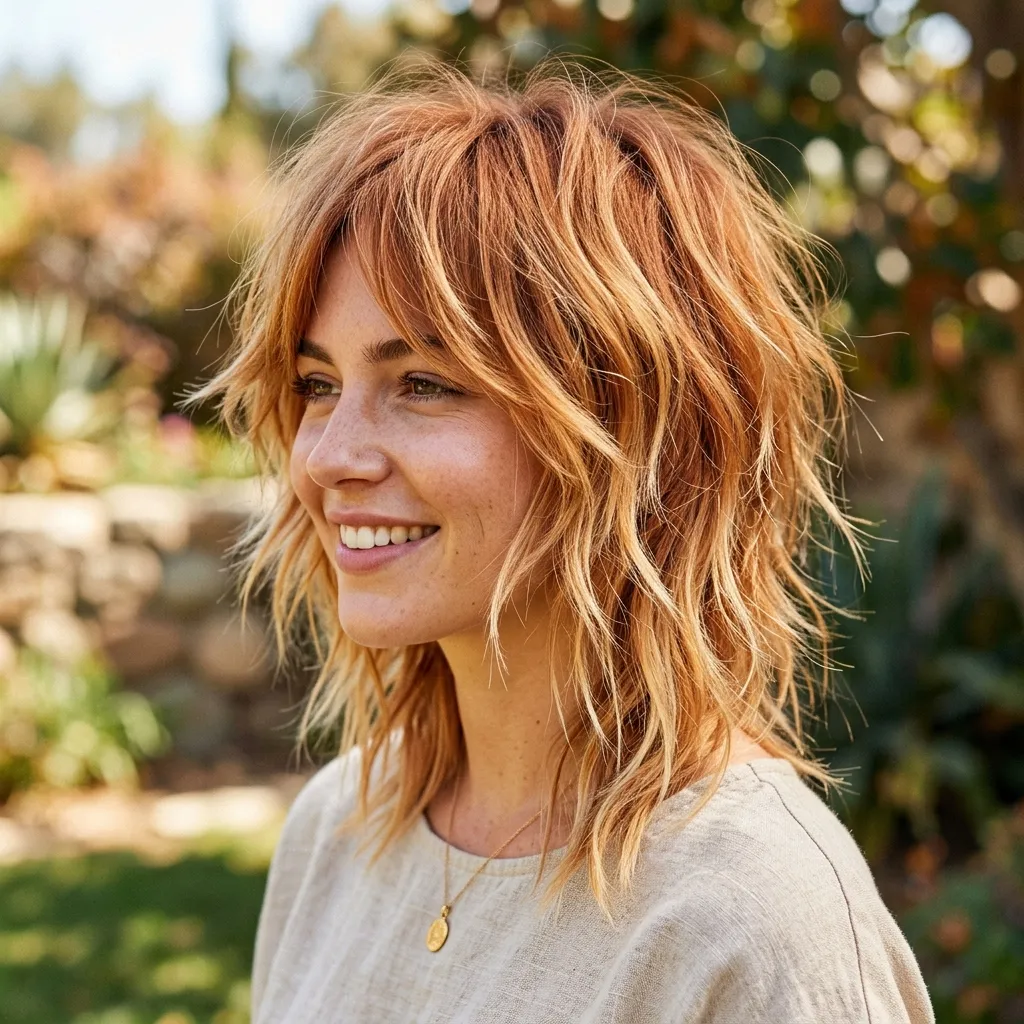
Vibe: Undone in the best way, the shag’s choppy layers give the balayage constant movement, even standing still.
Why it works: A shag cut is built on heavily disconnected layers, with noticeably shorter pieces framing the crown and face rather than one uniform layer structure, which creates dozens of small, separate strands throughout the head instead of large, unified sections of hair that would otherwise catch color as a single mass.
Balayage lightener painted onto a shag naturally catches on the tips of these shorter pieces first, since they sit closest to the surface and receive the most direct application, producing a piecey, sun-bleached effect that concentrates specifically at the ends rather than spreading into a smooth, even gradient the way it would on a one-length cut.
How to get it: Ask for a shag cut with heavy layering starting at the cheekbone and face-framing pieces cut to roughly chin length, then have the colorist paint lightener concentrated specifically on the ends and outer layers rather than working it through the full length of the hair. Style with a texturizing paste worked into just the tips to emphasize the choppy, piece-y finish, choosing between Oribe Dry Texture Spray, Kevin Murphy Killer.Curls for a slightly more defined texture, or R+Co Rockaway Salt Spray for a looser, beachier version of the same effect.
Shop the Look
| Product |
|---|
| Texturizing paste for piece-y ends |
| Round brush for volume at the crown |
| Flexible-hold texture spray |
| Small clip-on curling iron for face pieces |
| Dry shampoo in a warm-toned formula |
9. Half-Up Braided Style for Balayage Contrast
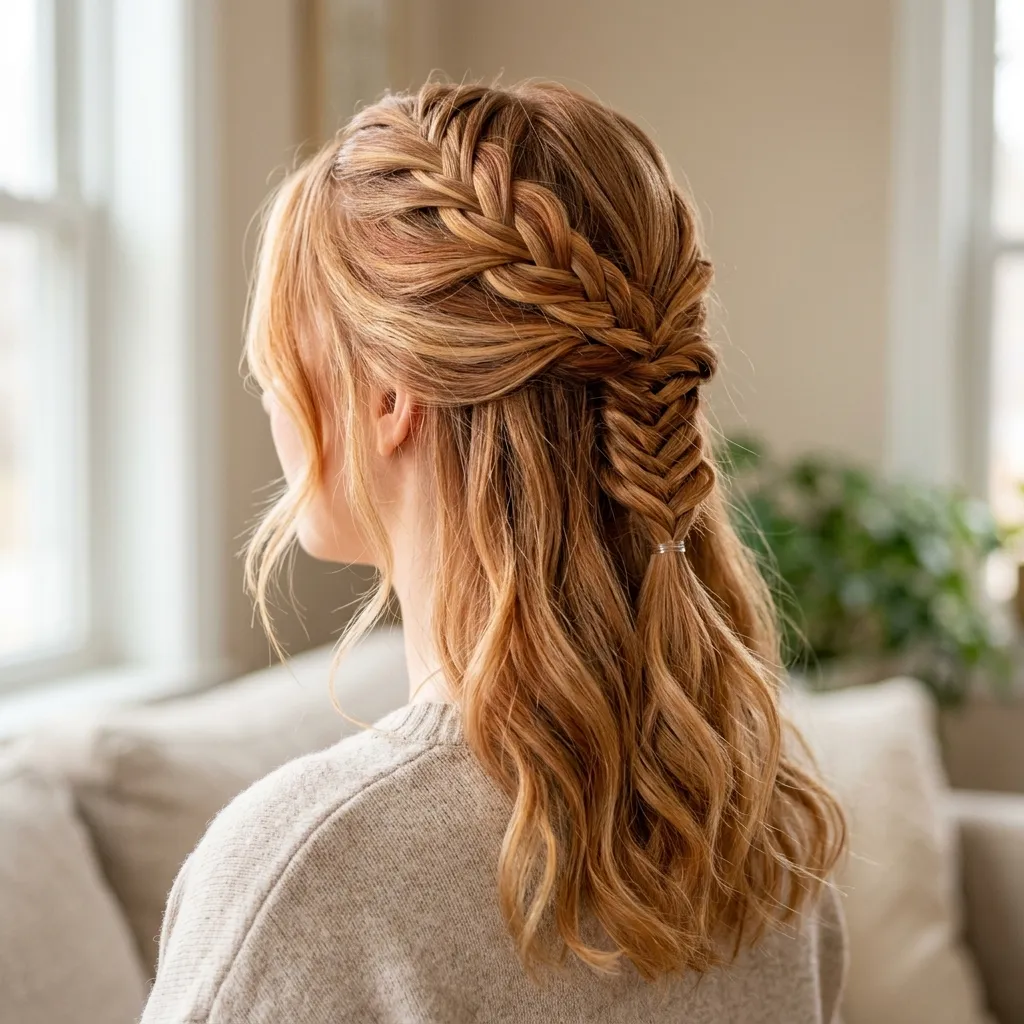
Vibe: Playful and light, a small braid pulls just enough hair back to reveal the balayage without hiding your length.
Why it works: A half-up braid isolates a thin section of hair at the crown and twists or braids it against the rest of the loose hair, which creates both a textural and a tonal contrast between the smooth, compact braid itself and the looser, more relaxed strands falling freely around it.
Because balayage color intensity naturally varies from section to section depending on exactly where the colorist painted, braiding pulls certain lightened pieces taut and fully visible while leaving other painted sections loose and soft, which gives the eye two genuinely different ways to read the same underlying color within a single style rather than one flat presentation.
How to get it: Section a roughly 2-inch piece from each side of the crown, French braid it back to meet at the center-back of the head, and secure it with a small clear elastic before releasing the rest of the hair to fall naturally around it. Loosen the braid slightly by gently pulling on the outer edges once it’s finished for a relaxed, lived-in look rather than a tight, competition-style finish, and finish with a texturizing spray such as Bumble and bumble Hairdresser’s Invisible Oil Spray, Amika Un.done Volume Spray, or Verb Texture Spray for extra grip along the braid itself.
Shop the Look
| Product |
|---|
| Small clear hair elastics |
| Edge-taming brush for baby hairs |
| Texturizing spray for braid grip |
| Decorative gold hair cuff |
| Shine-enhancing hair serum |
10. Gold-Tone Hair Clips for Warm Tone Pairing
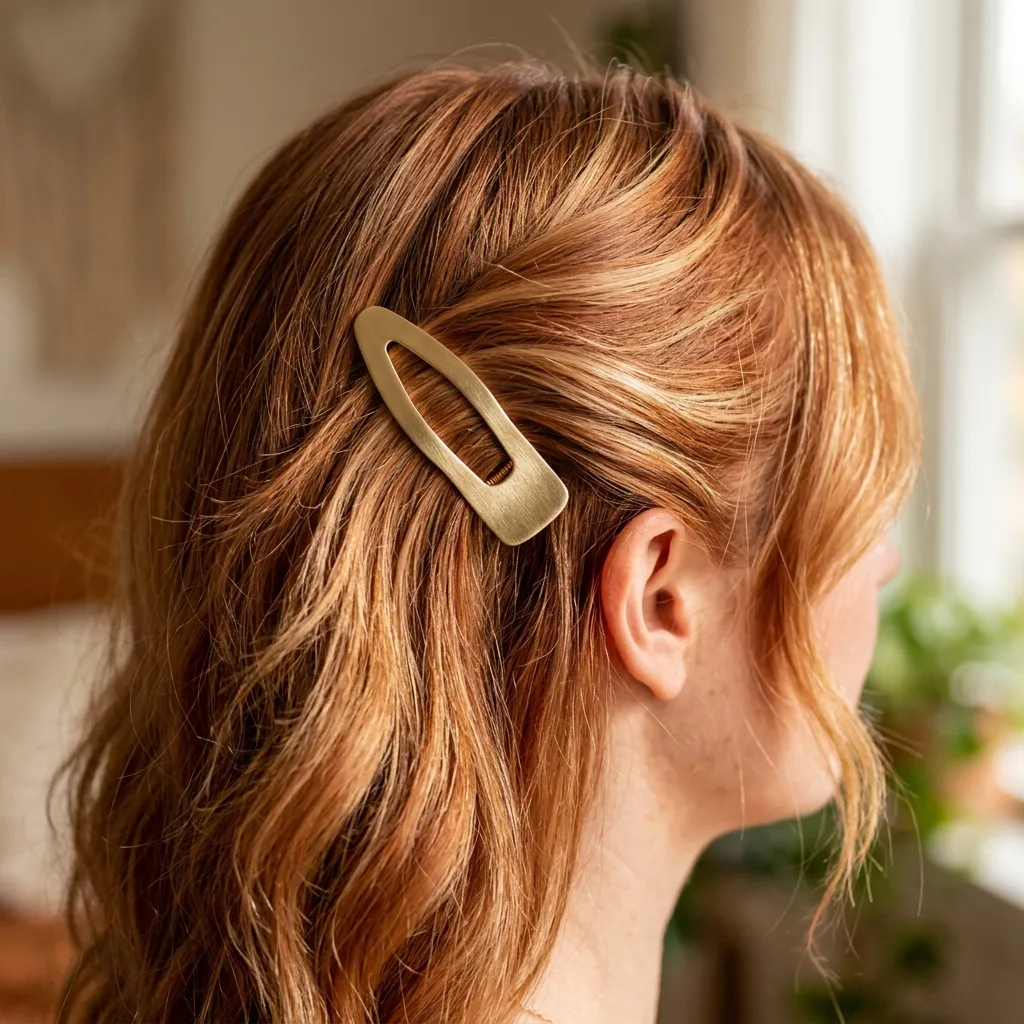
Vibe: Refined is the vibe, a single gold clip reads intentional rather than accessorized, echoing the copper without competing.
Why it works: Metal tone matching is a subtle but genuinely observable styling principle, warm metals like gold, brass, and rose gold reflect light within roughly the same wavelength range as copper and strawberry-blonde hair pigment, which means a gold clip visually “belongs” against warm hair in a way that a silver or chrome clip simply does not, the cooler metal can read as a faint but noticeable color clash next to warm strands.
How to get it: Choose a clip in brushed or matte gold rather than high-shine, polished gold, since matte finishes consistently read as more sophisticated and less costume-like against natural hair color, particularly in daylight where high-shine metal can look artificially reflective. Place it just above the ear on the side with the most visible face-framing balayage, sweeping a small section back before clipping, and consider having two or three options on hand, a brushed gold claw for casual days, a small decorative gold barrette for slightly dressier occasions, and a plain gold bobby-pin set for everyday styling.
Shop the Look
| Product |
|---|
| Matte gold hair clip set |
| Brushed brass claw clip |
| Small decorative hair pins |
| Texturizing spray for clip grip |
| Shine spray for polished finish |
11. Honey Strawberry Blend for Warm Complexions
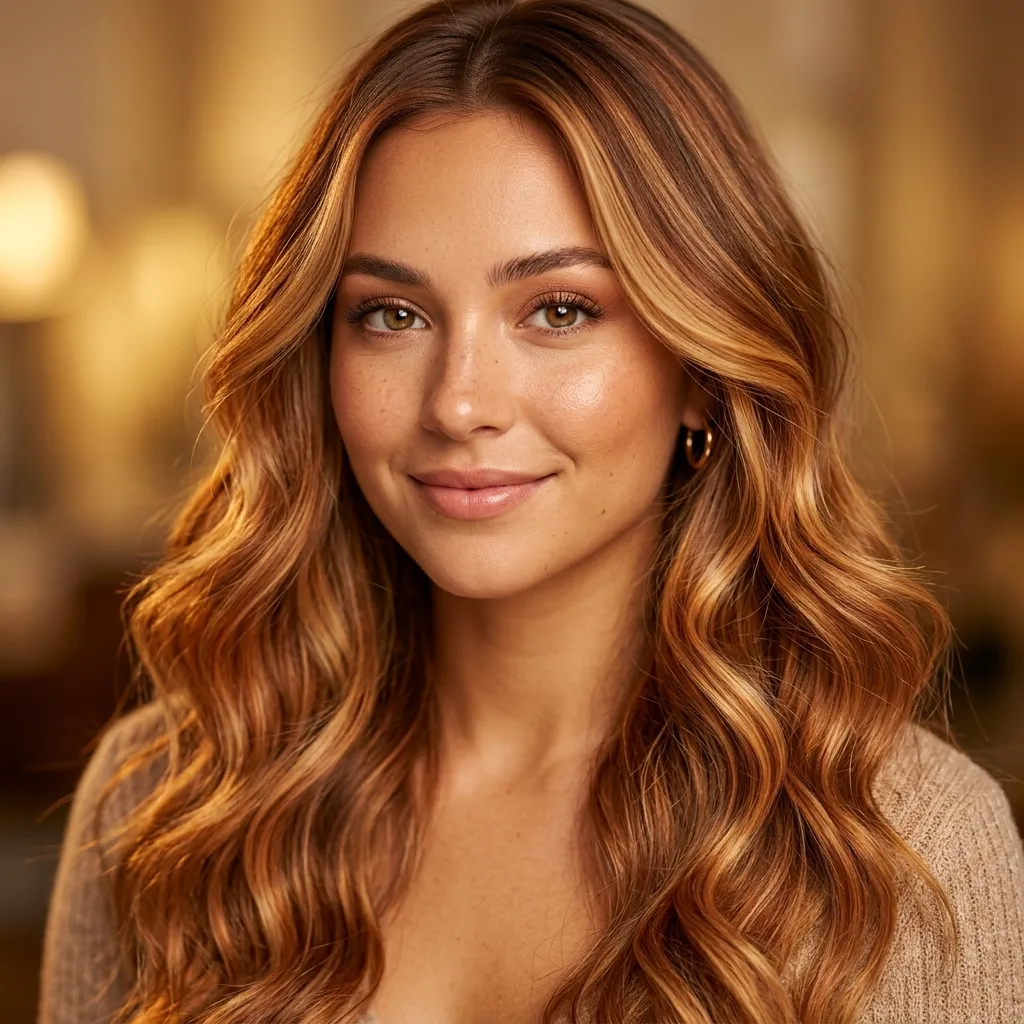
Vibe: Glowing and warm, this blend leans golden-amber rather than pink, built to sit close to the skin’s own undertone.
Why it works: Honey strawberry balayage combines a golden-amber base tone with copper accents rather than the pink-leaning formula used for rose gold strawberry blonde, and that distinction makes it especially flattering against warm or olive skin undertones specifically, because the color repeats the skin’s own existing warmth instead of contrasting against it. .
How to get it: Request a honey-gold gloss formula, choosing between Wella Color Charm Gloss in “Golden Blonde,” Redken Shades EQ 08GB, or Joico LumiShine Honey Gold, layered with a copper glaze at the ends only rather than a full-strength copper formula applied throughout the entire length. This two-step glazing approach keeps the crown noticeably softer and warmer while concentrating richer copper tone specifically where the hair would naturally lighten most from ordinary sun exposure, mimicking a real, gradual sun-lightening pattern rather than an evenly applied color.
Shop the Look
| Product |
|---|
| Golden-toned hair gloss kit for at-home refresh |
| Amber shine-enhancing hair oil |
| Warm-toned dry shampoo |
| Wide-tooth wet detangling comb |
| Leave-in conditioner with UV protection |
12. Curly Hair Strawberry Balayage Placement
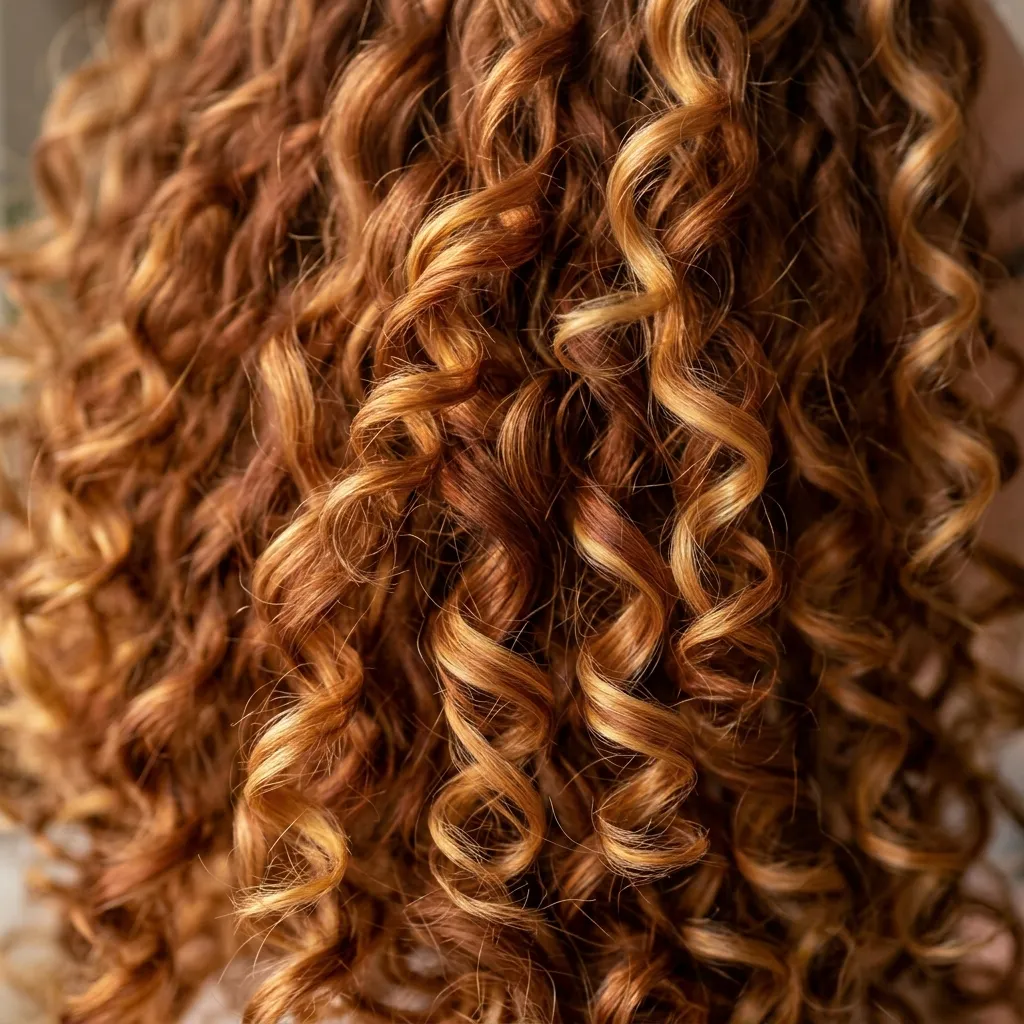
Vibe: Springy and rich, on curls, the balayage clusters at the outer curve of each ringlet, catching light in unexpected places.
Why it works: Curl pattern fundamentally changes where lightener naturally lands during balayage application, because the outer curve of each curl sits physically closer to the surface and therefore catches more of the painted product than the inner curve, which stays largely shielded by the surrounding curl structure.
How to get it: Ask your colorist specifically for “curl-by-curl” or “dry curl” balayage application, where lightener is painted onto stretched, dry curls rather than wet, straightened sections, so the placement mimics precisely where the curls will actually sit once they spring back into their natural pattern. At home, use a curl cream such as DevaCurl SuperCream, Ouidad Climate Control Heat and Humidity Gel, or Innersense Curl Cream to define the curl pattern daily, since the painted sections stay clearly visible only when the curl itself holds its shape rather than collapsing into a frizzy, blended mass by midday.
Shop the Look
| Product |
|---|
| Curl-defining cream for daily styling |
| Diffuser attachment for blow dryer |
| Leave-in conditioner for curl definition |
| Microfiber curl-drying towel |
| Lightweight curl-refreshing spray |
13. Blunt Bob with Copper Balayage
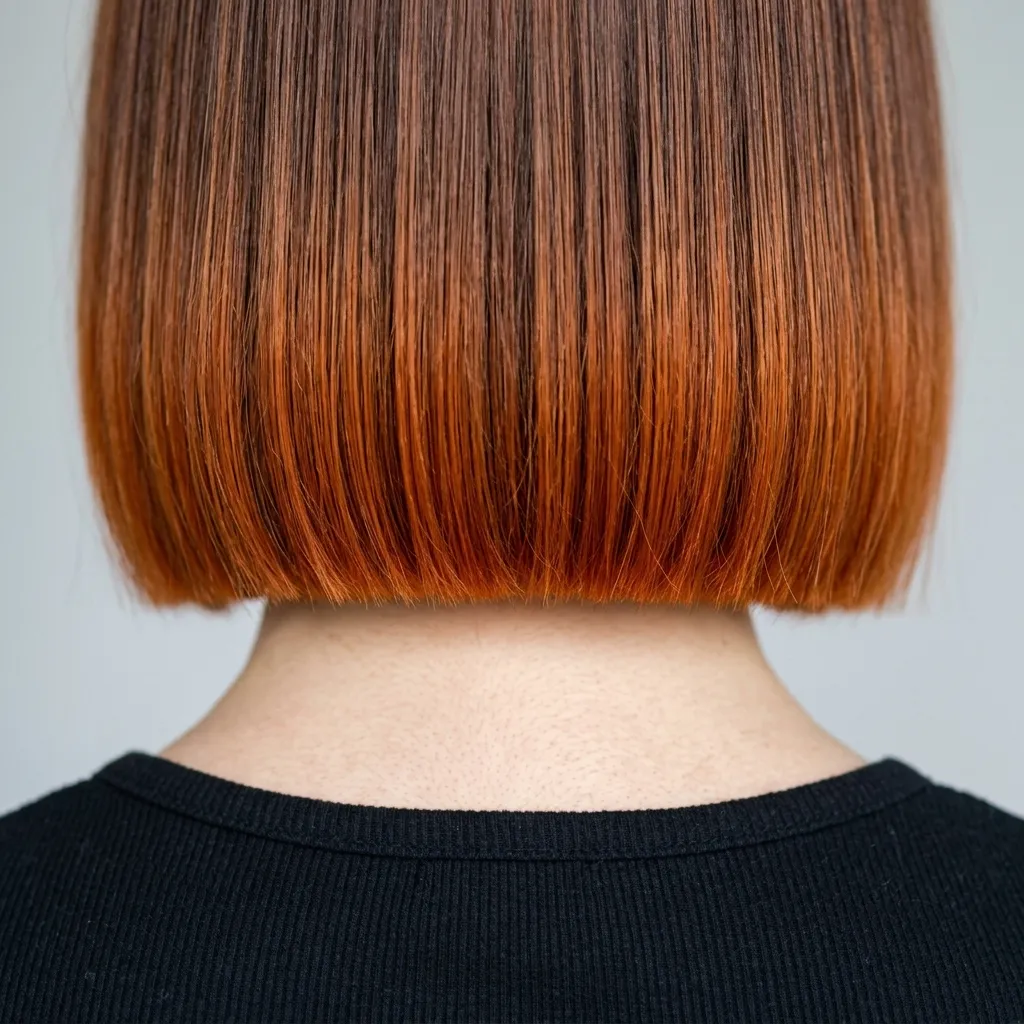
Vibe: Sharp and warm, a blunt line contains the color, so the copper reads concentrated at the ends rather than diffused.
Why it works: A blunt, one-length bob has no internal layering to disperse lightener through varying depths of hair the way a layered cut would, so balayage painted onto a blunt cut concentrates almost entirely at the perimeter and the very ends, creating a clearly defined, high-contrast band of copper sitting against a noticeably darker root above it.
How to get it: Request a one-length blunt bob cut to roughly collarbone length, then ask for a heavier concentration of copper lightener on the bottom two inches only, leaving the crown and mid-lengths closer to the natural base color rather than lightening the full length evenly. Style pin-straight with a flat iron to keep the blunt line crisp and graphic, since any added texture or wave will soften the deliberate, high-contrast look this particular cut and color combination is specifically built to show off.
Shop the Look
| Product |
|---|
| Flat iron for precision blunt-line styling |
| Heat protectant serum |
| Glossing spray for shine at the ends |
| Small round brush for blow-drying bobs |
| Anti-frizz finishing cream |
14. Deep Side Part to Highlight Face-Framing Pieces
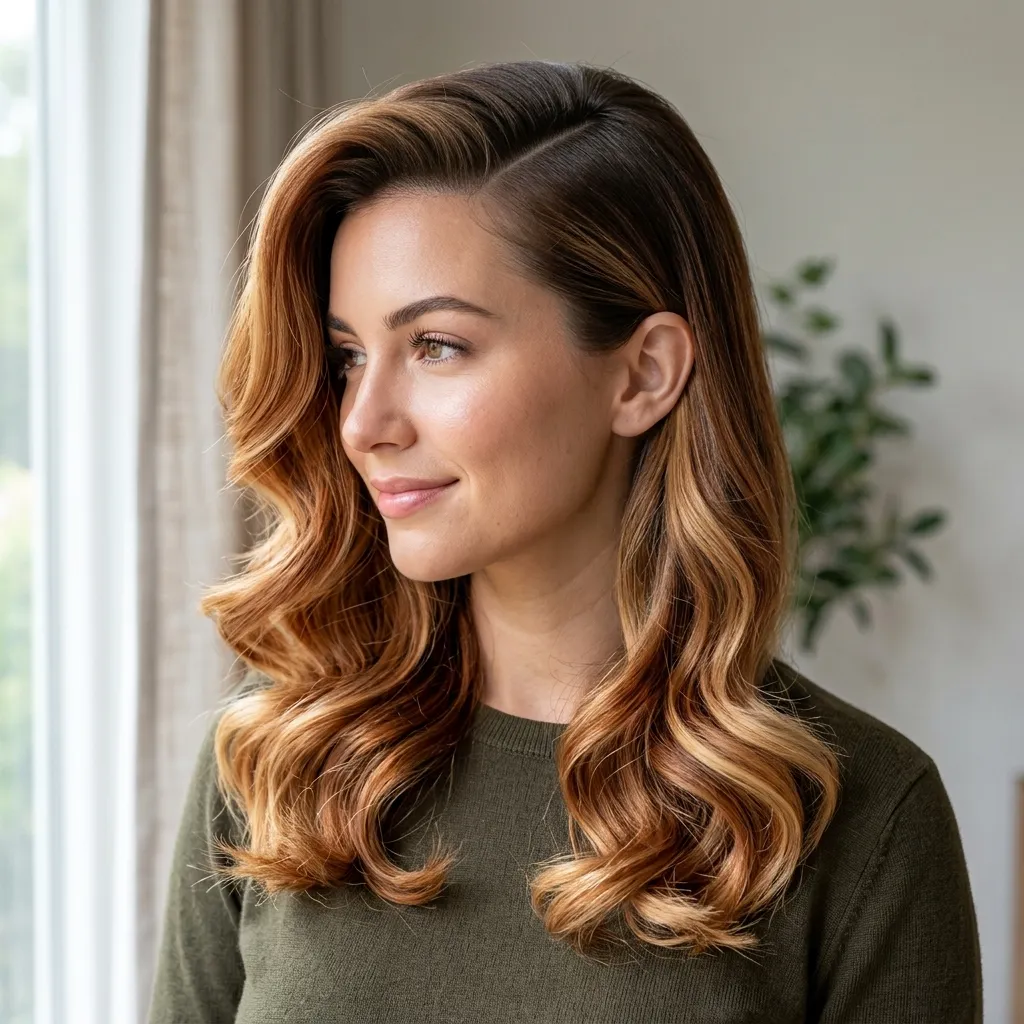
Vibe: Sculpted and asymmetrical, a deep part shifts more hair to one side, exposing a wider swath of balayage on the heavier side.
Why it works: A deep side part redistributes hair volume unevenly across the head, putting significantly more hair, and by extension more painted surface area, on one side of the face than the other, which creates asymmetrical dimension instead of the mirrored, symmetrical result a center part typically produces.
How to get it: Part hair 2 to 3 inches off-center using a fine-tooth comb, then blow-dry the heavier side away from the face with a round brush to maximize how much of the painted surface area is actually visible once the style is finished. Use a small amount of pomade along the part line itself, choosing between Oribe Superfine Pomade, Bumble and bumble Grooming Creme, or a similarly lightweight option, to keep flyaways from disrupting the sharp, deliberate line the deep part is meant to create.
Shop the Look
| Product |
|---|
| Fine-tooth parting comb |
| Lightweight pomade for part-line control |
| Round brush for volume blow-drying |
| Flexible-hold hairspray |
| Shine serum for finishing |
15. Claw Clip Half-Up Look
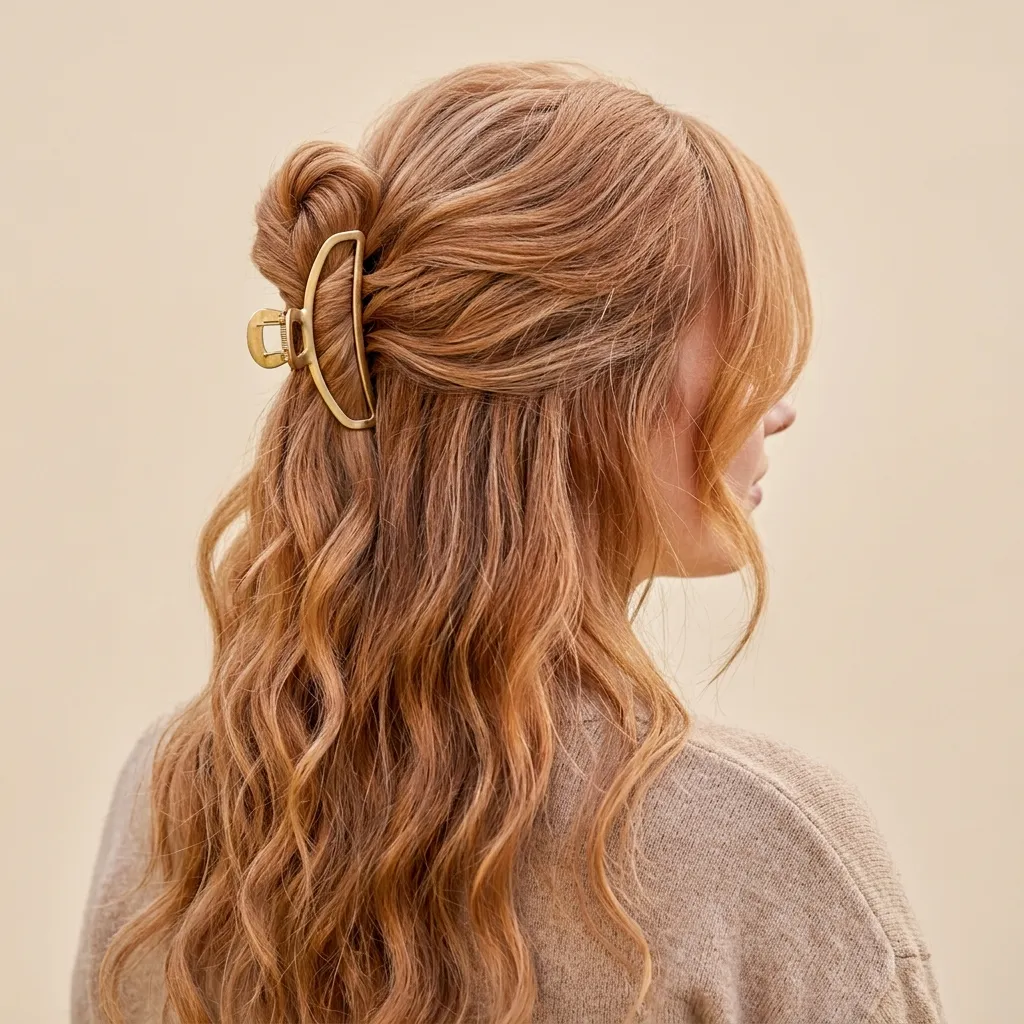
Vibe: Effortless and casual, a claw clip does the styling work in ten seconds while still showing off the crown balayage.
Why it works: A claw clip gathers hair loosely rather than pulling it tight against the scalp, which preserves natural texture and volume specifically at the crown while still lifting hair off the face and exposing the highest-placed balayage pieces that a fully-down style would otherwise cover entirely. The underlying mechanism here is about volume retention: unlike an elastic, which compresses hair into a single flat section, a claw clip’s open jaw structure lets hair maintain its natural body and separation, so individual painted strands remain visible rather than blending into one flattened, indistinct mass the way a tight ponytail sometimes does.
How to get it: Gather the top third of the hair loosely, don’t pull tight, twist once, and secure with a medium claw clip positioned at the crown rather than low on the back of the head, which keeps more length and color visible below it. Pull a few face-framing pieces loose after clipping to soften the overall style and let the money-piece balayage fall naturally, and choose a claw in tortoiseshell or matte gold rather than a plain black plastic clip, which tends to read as more utilitarian than intentional against warm hair.
Shop the Look
| Product |
|---|
| Medium tortoiseshell or gold-tone claw clip |
| Texturizing spray for grip and volume |
| Shine mist for finishing |
| Small round brush for crown lift |
| Flyaway-taming styling stick |
16. Apricot Cream Balayage
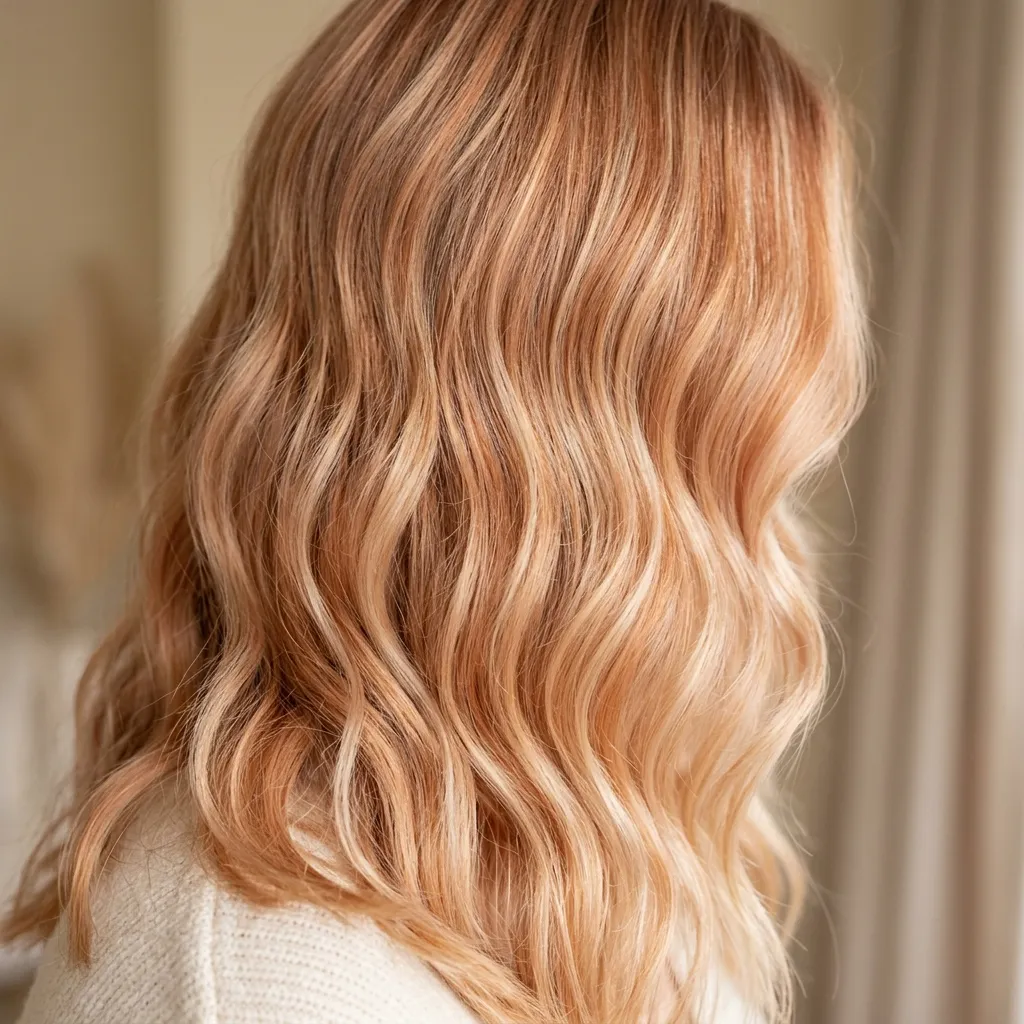
Vibe: Soft and warm-lit, apricot cream sits between honey and rose gold, a gentler middle-ground copper.
Why it works: Apricot cream balayage is formulated by mixing a warm copper base with a small amount of a pale, cream-toned gloss, which dilutes the saturation of a straight copper formula considerably without shifting the underlying hue toward either pink or gold in the process.
How to get it: Ask your colorist for a “diluted copper” or apricot gloss formula, often built as a roughly 1:1 mix of a copper-gold shade with a clear or pale demi-permanent base, choosing between Redken Shades EQ 09N mixed with 08CG, or Wella Color Charm Gloss “Pale Gold” blended with a small amount of copper toner, applied over balayage-lightened sections. Maintain the softness at home with a color-safe conditioner rather than a pigmented one, since the tone is already deliberately subtle and doesn’t need reinforcement, only fade protection to keep it from drifting warmer over time.
Shop the Look
| Product |
|---|
| Color-safe sulfate-free shampoo and conditioner set |
| Leave-in heat protectant with shine boost |
| Wide-tooth detangling comb |
| Soft-bristle brush for fine hair |
| UV protectant hair mist |
17. Voluminous Blowout Balayage
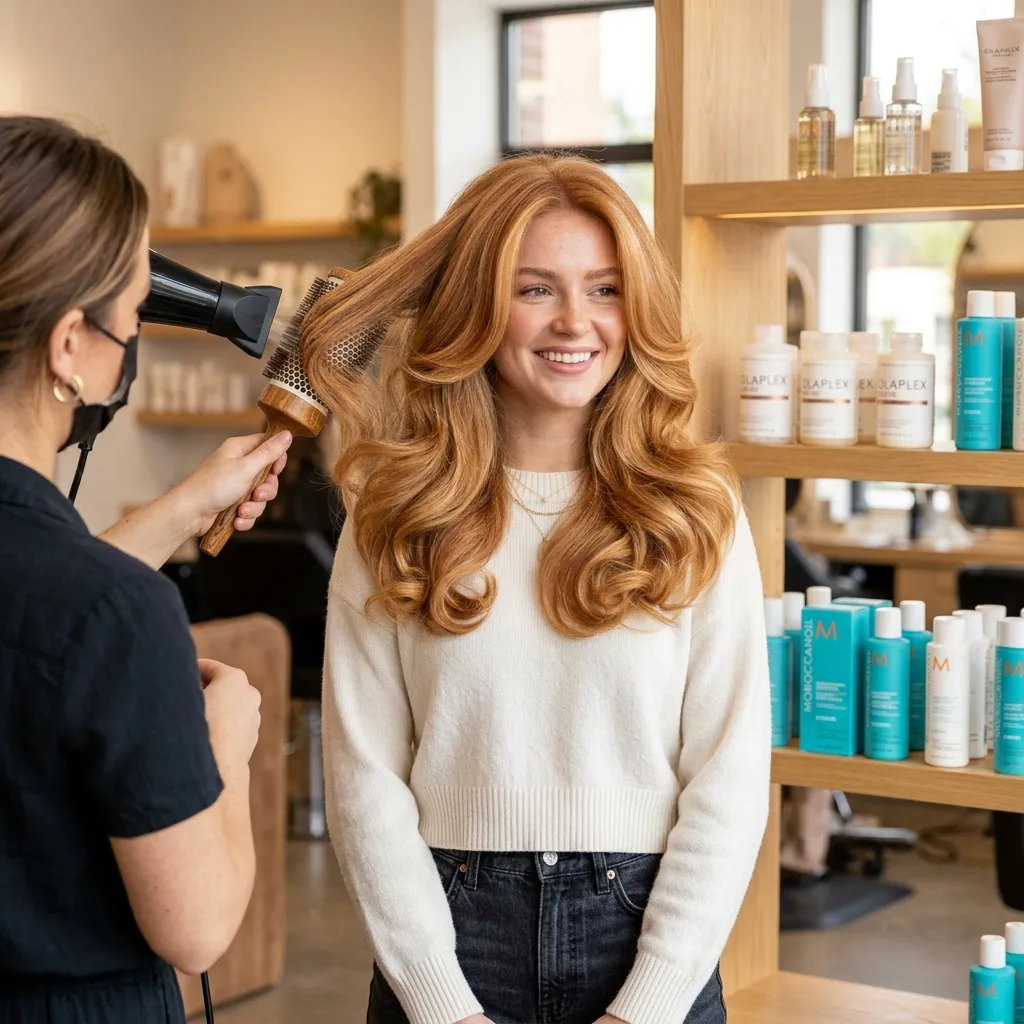
Vibe: Full and radiant, a round-brush blowout lifts the roots and pushes every painted section outward into view.
Why it works: A voluminous blowout uses a round brush to lift hair away from the scalp specifically at the root while curling the ends either under or outward, which measurably increases the overall surface area of hair exposed to ambient light compared to hair that simply lies flat against the head. Since balayage lightener is applied to the surface of sections rather than saturating every strand all the way through, maximizing that surface exposure through added volume directly increases how much of the painted color is visible at any given moment, rather than leaving a portion of it tucked underneath flatter, unlifted hair.
How to get it: Rough-dry hair to roughly 80 percent dry, then use a large round brush, at least 2 inches in diameter, to lift sections at the root, holding the dryer pointed downward along the hair shaft to smooth the cuticle while curling the ends under or out depending on preference. Finish with a light-hold volumizing spray applied at the roots only, choosing between Living Proof Full Root Lift Spray, Oribe Maximista Thickening Spray, or Bumble and bumble Thickening Spray, and avoid the mid-lengths entirely to prevent weighing down the curl the blowout just created.
Shop the Look
| Product |
|---|
| 2-inch ceramic round brush |
| Root-lift volumizing spray |
| Ionic blow dryer with concentrator nozzle |
| Heat protectant spray |
| Flexible-hold finishing spray |
18. Curtain Bangs and Strawberry Balayage Pairing
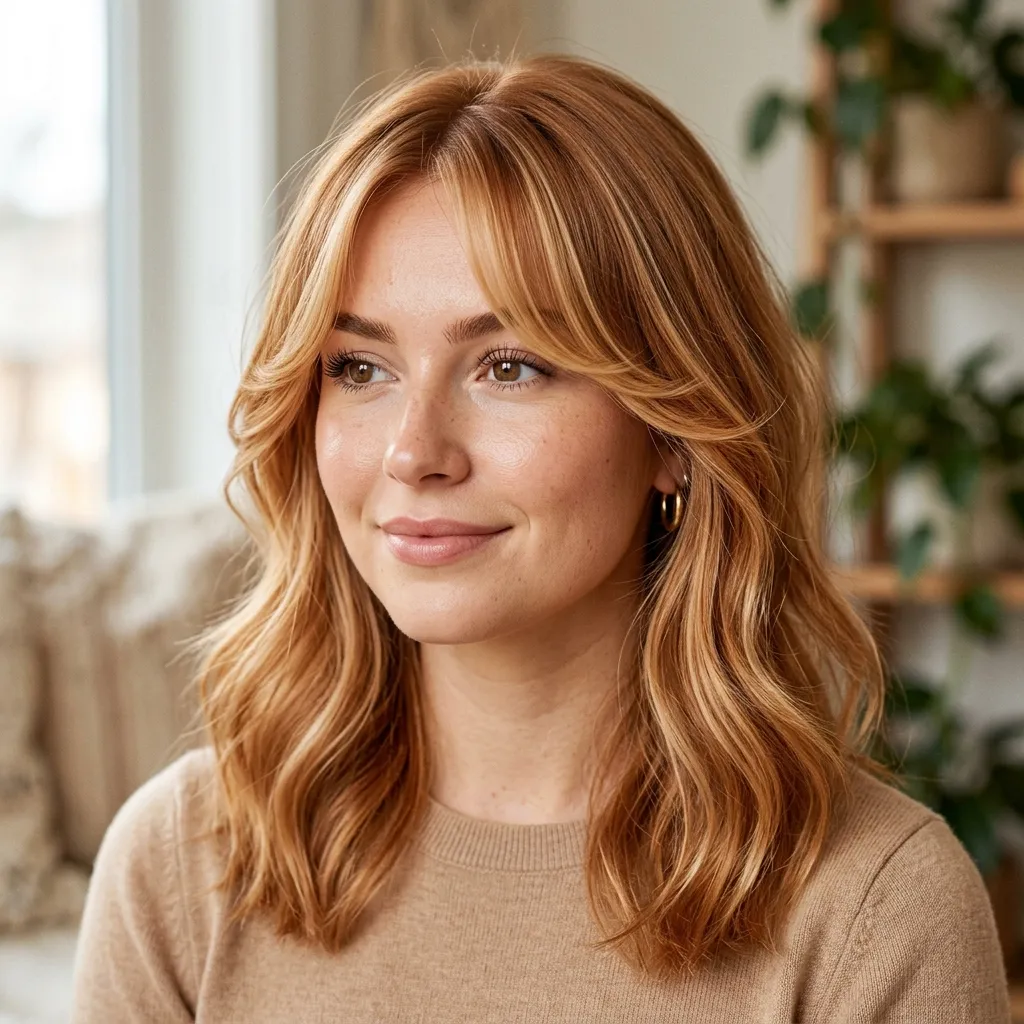
Vibe: Airy and face-framing, curtain bangs split naturally around the face, doubling the pieces that catch light directly on the cheekbones.
Why it works: Curtain bangs are cut with a center part effectively built into the fringe itself, parting into two soft, angled pieces that fall along the cheekbones rather than crossing straight over the forehead the way a traditional blunt fringe does, which means they occupy exactly the same zone where money-piece balayage is typically concentrated in the first place.
How to get it: Ask for curtain bangs cut to somewhere between cheekbone and chin length with a slight internal layer to help them blend into the rest of the face-framing pieces, then have the colorist extend the balayage painting directly into the bangs themselves rather than leaving them as a solid, unlightened section separate from the rest of the color work. Style with a small round brush, curling the bang pieces outward and away from the face to show off the full length of the painted section, and finish with a lightweight hairspray, choosing between R+Co Foreplay Curl Defining Spray, Oribe Free Spirit Flex Spray, or a similarly soft-hold formula, to hold the shape without stiffness.
Shop the Look
| Product |
|---|
| Small round brush for bang styling |
| Lightweight heat protectant spray |
| Flexible-hold hairspray for bang control |
| Shine serum for finishing |
| Mini curling iron for bang tips |
19. Slicked-Back Low Bun Styling
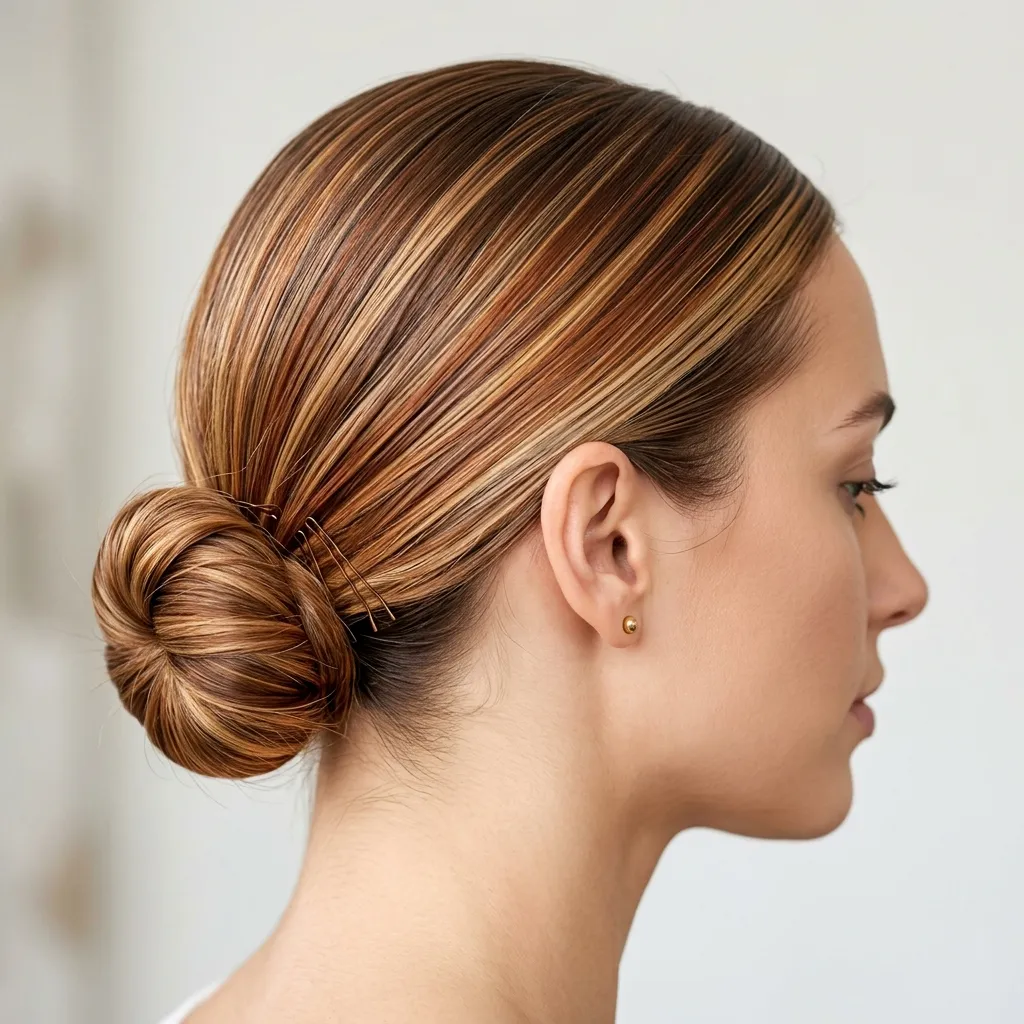
Vibe: Polished and grounded, every painted strand compresses into a single visible surface when hair is slicked flat.
Why it works: Slicking hair back removes essentially all volume and texture from the style, which flattens every strand into a single, unified plane where color variation genuinely becomes the only remaining source of visual interest in the entire look. This turns out to function almost like a stress test for balayage placement itself: badly placed or poorly blended highlights show up as harsh, obvious stripes once hair is slicked, while well-executed, properly hand-painted balayage continues to read as smooth, graduated warmth even under maximum compression, precisely because the technique was designed from the start to avoid the hard lines that would fail this particular test.
How to get it: Apply a strong-hold gel, choosing between Bumble and bumble Thickening Dryspun Finish, Kevin Murphy Hair.Resort Spray for texture with hold, or a straightforward edge-control gel, from roots to ends, comb through with a fine-tooth comb to eliminate any bumps or unevenness, and secure into a low bun at the nape with bobby pins matched to your hair’s warm tone. Smooth flyaways with a boar bristle brush dipped lightly in gel rather than applying additional product directly onto the hair itself, which tends to create buildup rather than the intended sleekness.
💡 Quick Win: Keep a travel-size tin of strong-hold pomade in your bag, a slicked bun can rescue a humid, frizzy day in under two minutes and still shows off the balayage clearly.
Shop the Look
| Product |
|---|
| Strong-hold styling gel |
| Fine-tooth comb for slicking |
| Bobby pins in a warm bronze tone |
| Boar bristle edge-control brush |
| Shine spray for polished finish |
20. Statement Hair Pins for Special Occasions
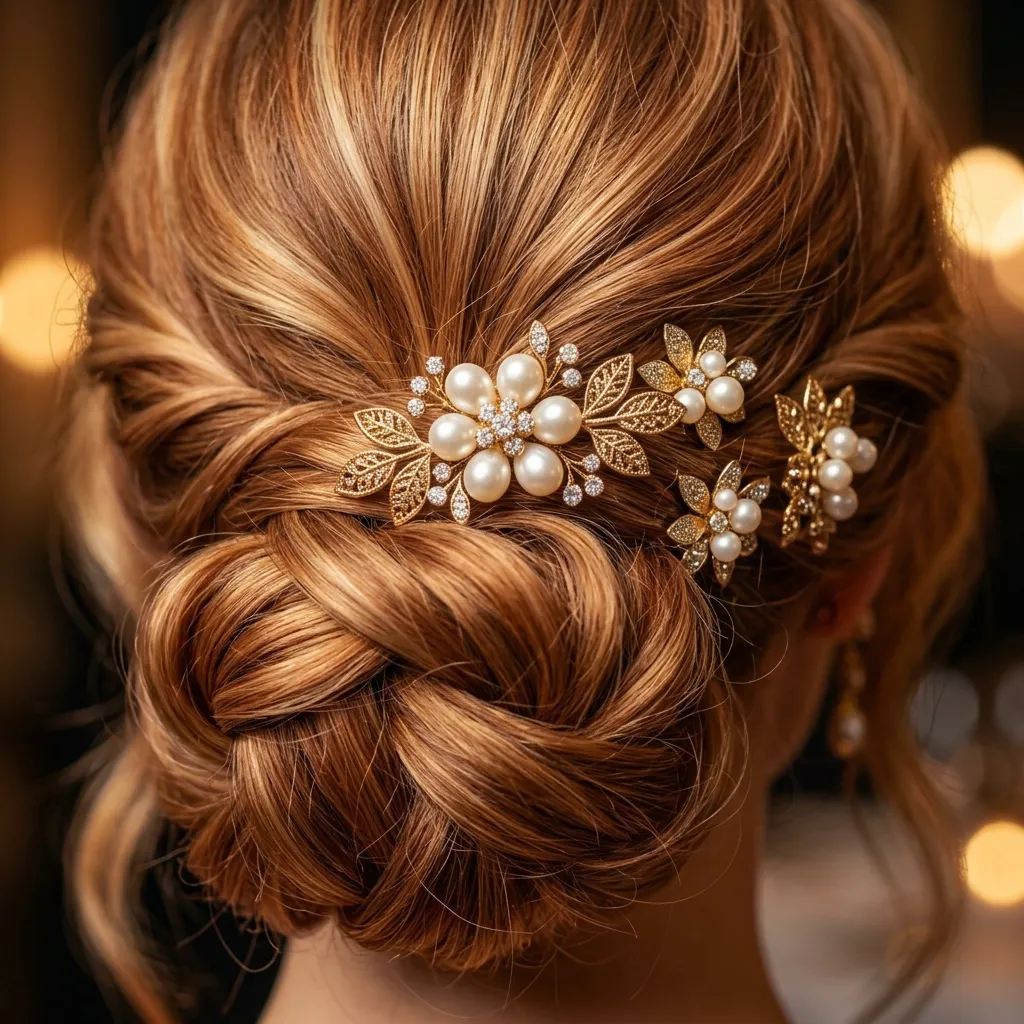
Vibe: Romantic and dressed-up, decorative pins scattered through an updo turn the balayage into the main event.
Why it works: Decorative pins placed strategically through an updo function in a way that’s genuinely similar to spotlighting in photography, each pin draws the eye directly to the exact strand it’s pinned into, so positioning them near the most concentrated balayage pieces effectively highlights the color a second time over, layered on top of whatever visual work the lightener already accomplished on its own.
How to get it: Build a loose, textured updo, a low twisted bun or a half-up braid both work well as a base, and place 3 to 5 decorative pins along the crown and face-framing sections specifically, rather than distributing them evenly across the whole style where their spotlighting effect gets diluted. Choose pins in gold, pearl, or amber tones to stay firmly within the same warm color family as the balayage itself, and consider mixing pin sizes, one or two slightly larger statement pins near the crown paired with several smaller ones scattered through the face-framing area, for a more layered, less uniform finish.
Shop the Look
| Product |
|---|
| Gold and pearl decorative hair pin set |
| Amber-toned crystal hair pins |
| Texturizing spray for updo grip |
| Bobby pins for securing the base |
| Shine-boosting finishing spray |
21. Strawberry Vanilla Ombré Balayage
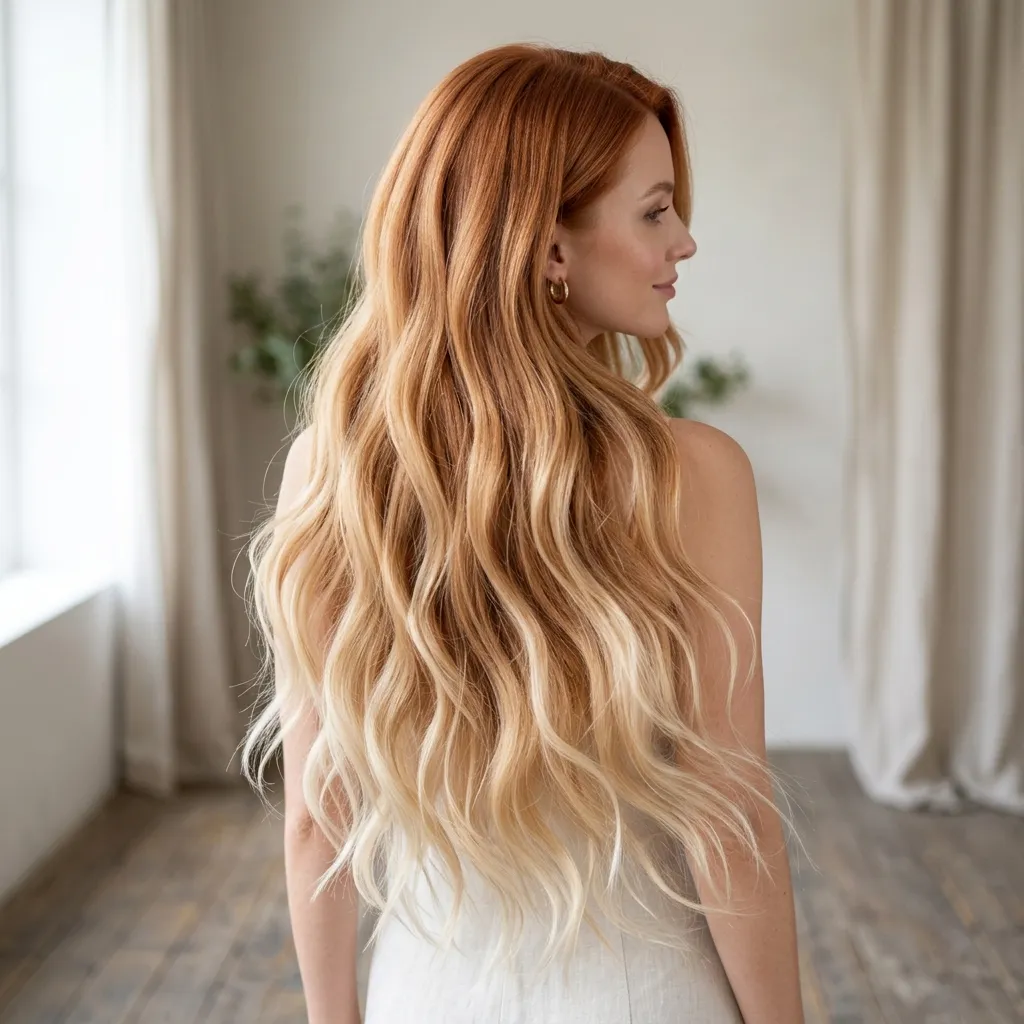
Vibe: Luminous is the word here: a gradual fade from warm root to pale, creamy strawberry ends.
Why it works: Strawberry vanilla combines ombré’s gradual, root-to-end lightening progression with balayage’s freehand painting technique, deliberately avoiding ombré’s traditional harder dip-dye line, which together produces a considerably softer, more gradual color shift than either technique would achieve entirely on its own.
The “vanilla” element of the name refers specifically to a pale, near-platinum strawberry tone reserved for the very ends, achieved by lightening those particular sections further than the rest of the balayage placement, a process that requires additional processing time and is genuinely best suited to hair that’s already had at least one prior lightening service, attempting this level of lift on fully virgin dark hair in a single sitting carries a real risk of excessive damage and breakage.
How to get it: This is genuinely a multi-session technique, and treating it as one is part of doing it correctly. Ask your colorist to build toward the vanilla ends gradually across two or three separate appointments spaced six to eight weeks apart rather than attempting maximum lift in a single visit, which reduces the risk of breakage significantly and gives the hair time to recover its condition between sessions. Use a bond-building treatment at home weekly during the lightening process, choosing between Olaplex No.3, K18 Leave-In Molecular Repair Hair Mask, or Redken Acidic Bonding Concentrate, to maintain strand integrity through the multiple rounds of lifting required to reach a genuinely pale vanilla tone at the ends.
Shop the Look
| Product |
|---|
| Olaplex No.3 Hair Perfector bond treatment |
| Deep conditioning hair mask for lightened ends |
| Leave-in protein treatment |
| Silk pillowcase for reduced breakage |
| Heat protectant spray with bond-building formula |
22. Textured Lob with Piece-y Ends
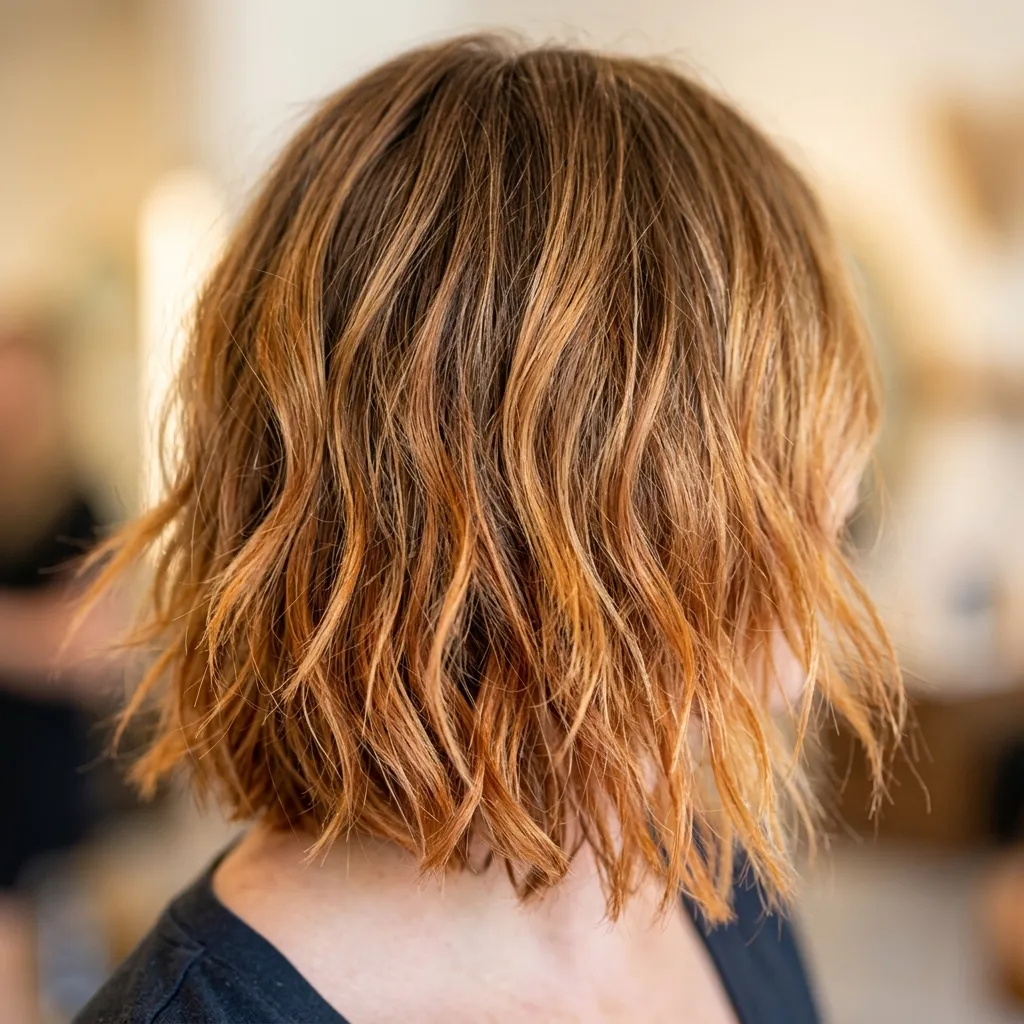
Vibe: Choppy and warm, a lob with texturized ends gives every strand a slightly different length, scattering the copper unevenly on purpose.
Why it works: Point-cutting or texturizing the ends of a lob, a long bob, removes small, irregular amounts of hair from each individual section rather than cutting one clean, uniform line straight across, which creates dozens of genuinely different micro-lengths within what is otherwise the same overall haircut.
Balayage painted onto texturized ends catches unevenly across those micro-lengths, producing a scattered, sun-bleached effect rather than the smooth, continuous gradient a blunt cut naturally produces, this is essentially the same underlying mechanism described earlier in the shag cut entry, applied here to a mid-length rather than a short cut.
How to get it: Ask for a lob cut at roughly collarbone length with the ends texturized using either point-cutting or a razor, rather than blunt shears straight across, so the tips carry genuine, built-in irregularity before any color is even applied to them. Style with a texturizing spray worked only into the ends while scrunching gently upward, choosing between Bumble and bumble Surf Spray, Oribe Maximista Thickening Spray, or a simple sea salt formula, to emphasize the piece-y, undone shape rather than smoothing it out.
Shop the Look
| Product |
|---|
| Texturizing spray for piece-y styling |
| Sea salt spray for scrunched texture |
| Lightweight curl cream for ends |
| Flexible-hold texture paste |
| Shine mist for finishing |
23. Layered Lob with Money Piece
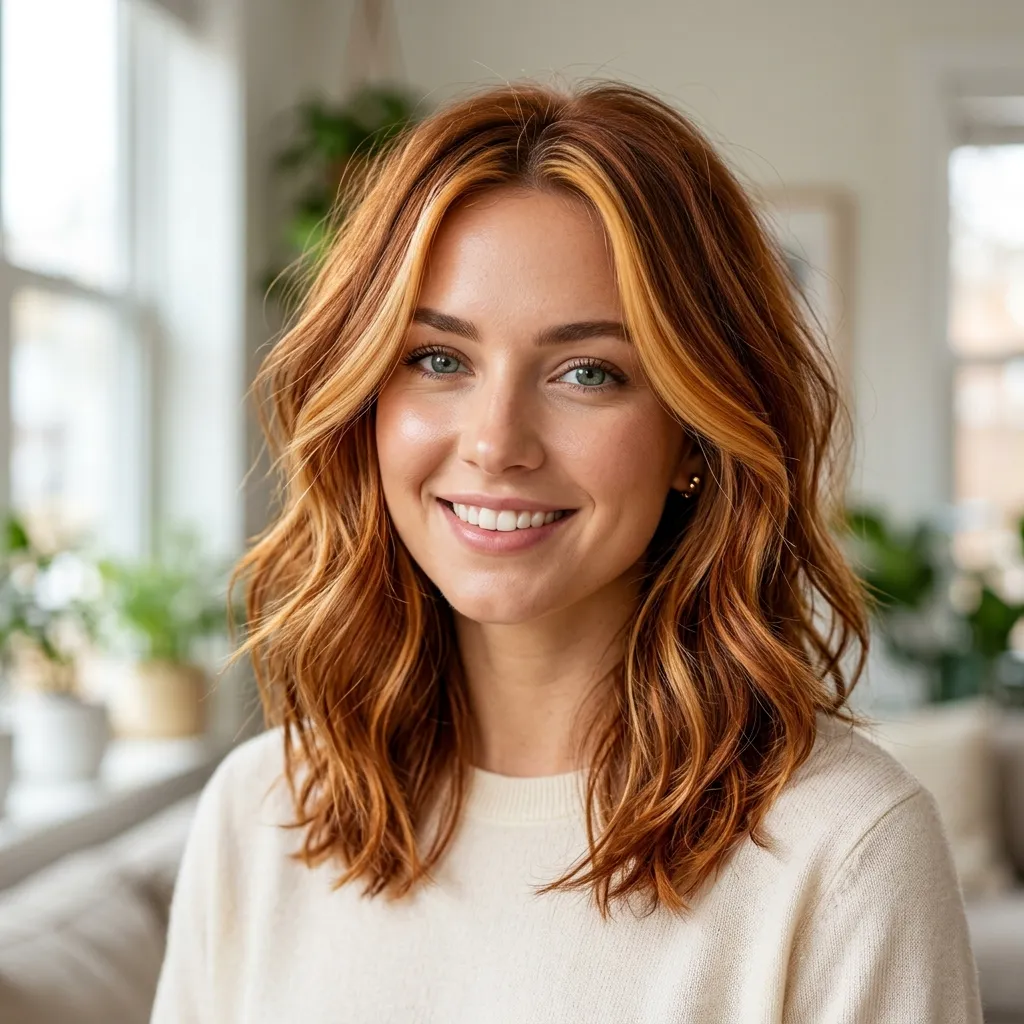
Vibe: Bright and framed, layers plus a concentrated money piece give this cut two separate sources of dimension working together.
Why it works: Combining internal layering with a dedicated money piece means the color is genuinely doing two distinct jobs at once rather than relying on a single mechanism: the layering creates depth through varying strand lengths throughout the cut, while the money piece independently adds concentrated brightness specifically at the face, where it will be seen first regardless of how the rest of the hair is styled that day.
How to get it: Request long layers cut throughout the full lob length, paired with two extra-light painted sections directly framing the face, ideally a shade lighter than the rest of the balayage rather than matching it exactly. Ask your colorist to blend the money piece slightly softer at the root than a typical face-framing highlight would be, so it reads as connected to the rest of the layers rather than as a separate, visually disconnected block of color sitting on top of an otherwise unrelated cut.
Shop the Look
| Product |
|---|
| Layered-cut styling cream |
| Root-smudging brush for blending |
| Lightweight finishing oil |
| Heat protectant spray |
| Volumizing mousse for layered texture |
24. Heatless Overnight Waves for Balayage Definition
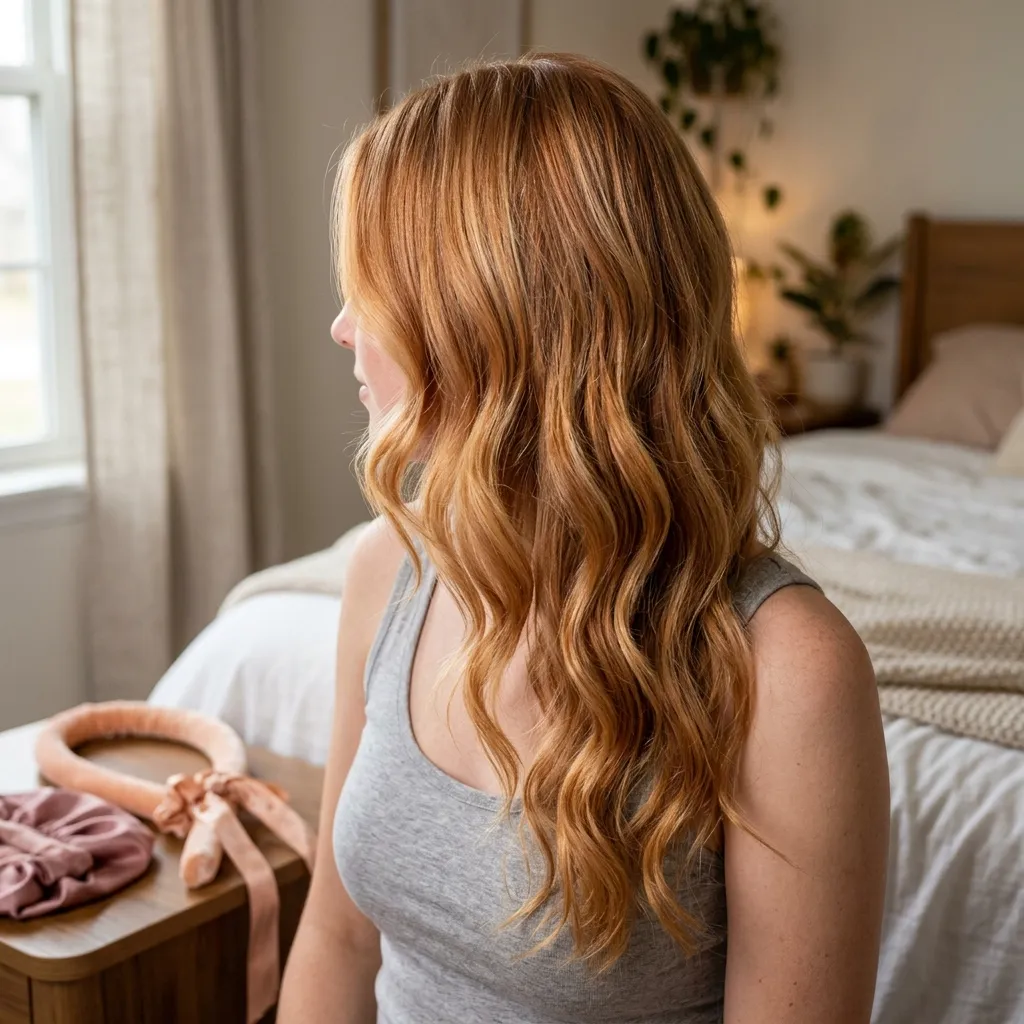
Vibe: Soft and low-effort, waking up to loose waves means the balayage is already doing its job before you’ve touched a single hot tool.
Why it works: Heatless waving methods, like wrapping damp hair around a foam or fabric rod overnight, create essentially the same wave-based light-catching effect described earlier in the beachy wave entry, but without the cuticle damage that repeated heat exposure causes to the hair over time.
This distinction matters specifically for balayage-treated hair, since the lightened sections are already meaningfully more porous and more heat-sensitive than the untouched natural base color, which means reducing heat frequency specifically on those particular strands genuinely helps preserve both the tone’s vibrancy and the hair’s overall structural integrity over months of regular styling.
How to get it: On damp hair, apply a leave-in cream, then wrap roughly 2-inch sections around a heatless curling rod set, choosing between silicone rods, fabric-covered foam rods, or a simple heatless curling headband, and secure at the crown before sleeping in it overnight, unraveling everything the following morning. Scrunch gently with a small amount of curl cream, either DevaCurl SuperCream or a similar lightweight formula, to break up the wave pattern into something looser and more naturally textured rather than leaving it in the tighter spiral shape it comes out in.
Shop the Look
| Product |
|---|
| Heatless curling rod set |
| Leave-in curl cream |
| Silk or satin bonnet for overnight protection |
| Lightweight curl-defining gel |
| Wide-tooth comb for gentle detangling |
25. Round Face Framing Placement
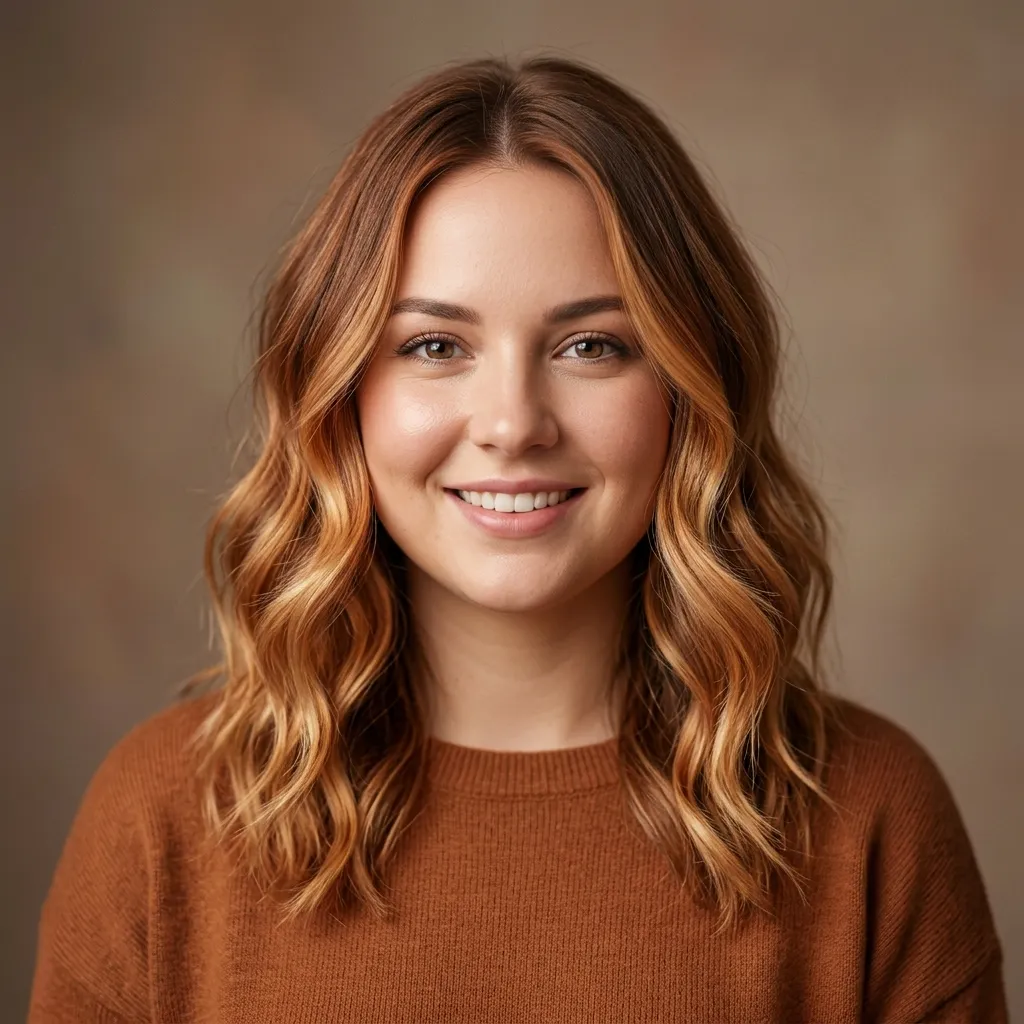
Vibe: Softening and warm, placement here is chosen specifically to add visual length rather than width.
Why it works: For round face shapes, colorists typically avoid placing the very brightest balayage pieces directly at the widest point of the cheek, since bright color naturally draws the eye and would end up emphasizing exactly the width a round face is already working with; instead, the lightest pieces are painted starting slightly below the cheekbone and extending down toward the chin and beyond, which creates a vertical pull that visually elongates the face rather than widening it further.
How to get it: When booking, specifically ask your colorist for “vertical placement” or request that they concentrate the lightest balayage pieces from chin length downward rather than starting at the cheekbone, which is the more common default placement most colorists use without being asked otherwise. Avoid requesting heavy, wide money pieces directly at cheek level, since these will actively work against the elongating effect this specific placement is designed to create, and pair the color with layers that also end at or below the jaw to reinforce the same vertical line the color placement is already establishing.
Shop the Look
| Product |
|---|
| Face-framing layered cut styling guide reference |
| Lightweight volumizing mousse for length emphasis |
| Vertical-set curling iron for elongated waves |
| Heat protectant spray |
| Shine serum for finishing |
26. Copper Root Melt into Golden Ends
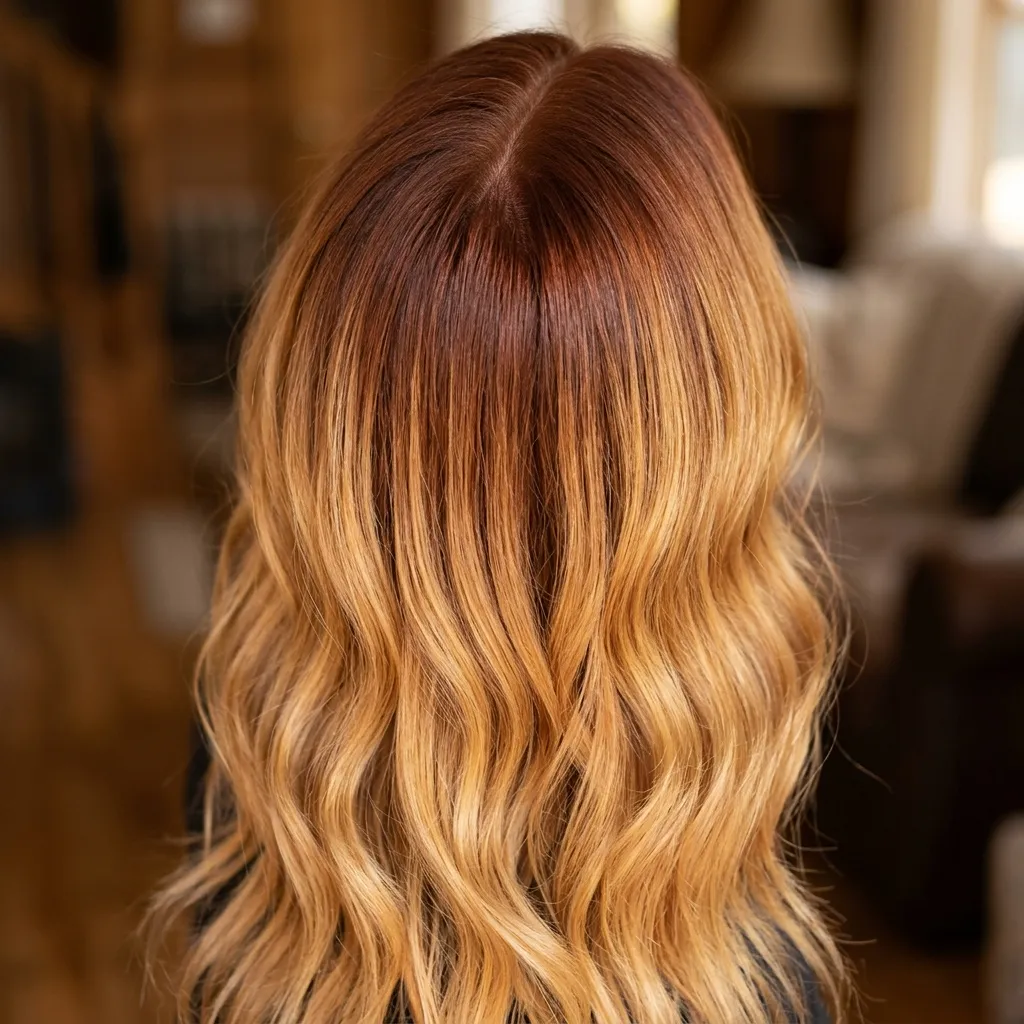
Vibe: Rich and grounded, the root doesn’t disappear here, it transitions, giving the whole look a lived-in warmth from scalp to tip.
Why it works: A root melt blends the natural root color directly into the lightened lengths using a soft, low-lift gloss applied close to the scalp, rather than simply leaving a stark, untouched line between the natural roots and the painted balayage below them. This technique specifically uses a copper-toned root gloss rather than a neutral or ash one, so even the “un-lightened” root area carries genuine warmth, which means the overall transition from root to golden ends reads as continuous and intentional rather than as two entirely separate color zones that happen to meet somewhere on the same head.
How to get it: Ask specifically for a “copper root melt” or “root smudge with warm gloss,” where the colorist applies a copper-toned demi-permanent formula with a soft brush in a diffused, smudged motion right at the root, blending it upward into the already-lightened lengths rather than applying it as a separate, distinct step. This is meaningfully different from simply “not touching the roots” during a service, it’s an active glossing step that adds roughly 20 extra minutes at the chair but genuinely adds several weeks to the amount of time before regrowth becomes visibly obvious.
Shop the Look
| Product |
|---|
| Root touch-up powder in a warm copper shade |
| Color-depositing root spray |
| Glossing treatment for at-home root refresh |
| Dry shampoo with tinted formula |
| Root-lift spray for blended volume |
27. Air-Dry Wavy Balayage for Low-Effort Shine
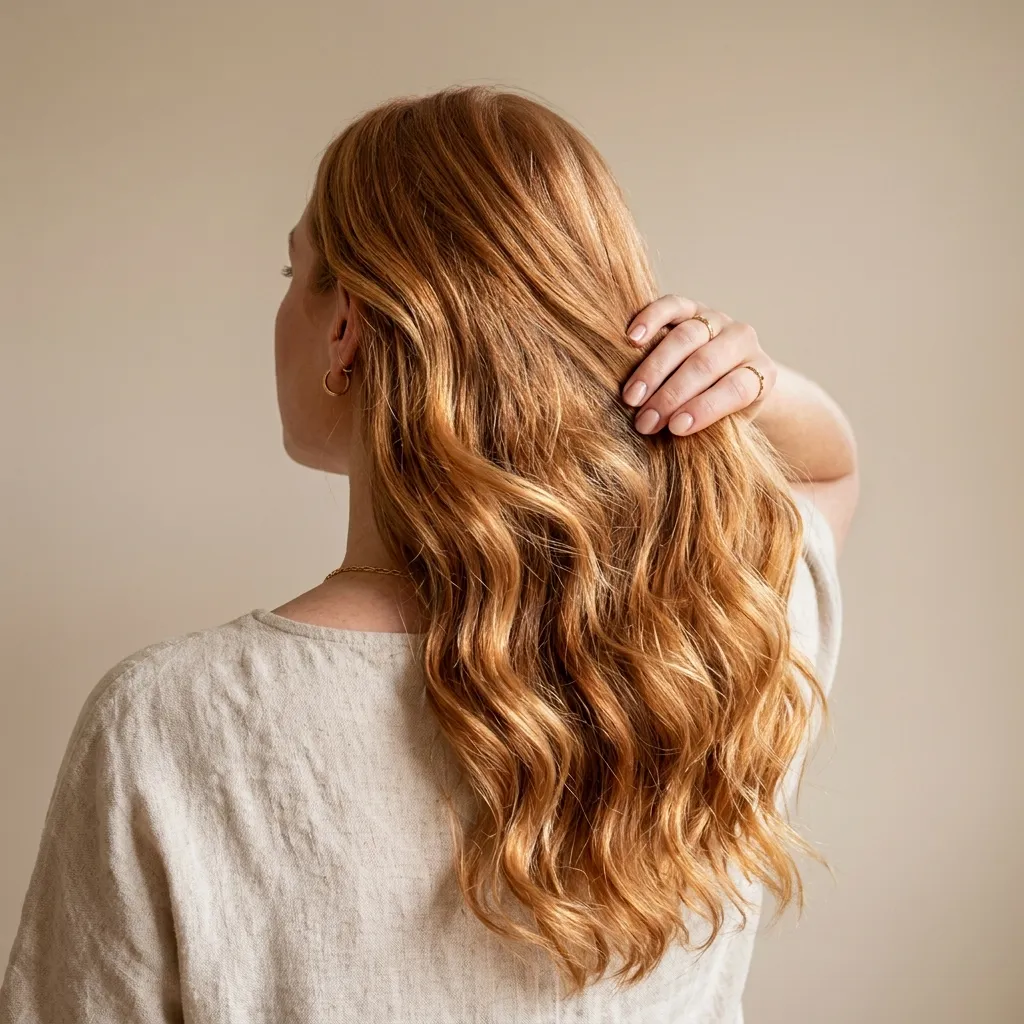
Vibe: Relaxed and glossy, letting hair dry naturally shows the balayage exactly as it grows, waves and all.
Why it works: Air-drying preserves both the hair’s natural wave pattern and its cuticle structure far more effectively than heat styling does, and an undisturbed cuticle reflects light more evenly across its surface, which is part of why air-dried balayage often looks noticeably shinier in direct sunlight than heat-styled hair does, despite requiring zero styling tools or product beyond a leave-in cream.
The natural wave pattern also distributes the visibility of the balayage lightener unevenly in a way that closely mimics exactly how hair would look if it had genuinely been lightened by real, ongoing sun exposure, which is, after all, the entire visual reference balayage was originally created to imitate in the first place.
How to get it: Apply a lightweight curl cream to damp hair, choosing between DevaCurl SuperCream, a leave-in mousse, or Ouidad Advanced Climate Control Heat and Humidity Gel, scrunch upward from the ends toward the roots to encourage the natural wave pattern to form correctly, and let it dry completely undisturbed rather than touching or re-scrunching it partway through the drying process. Avoid brushing once it’s dry, finger-comb only, to prevent breaking up the wave pattern and creating frizz in place of definition, which is the single most common mistake people make with this otherwise genuinely no-effort styling approach.
Shop the Look
| Product |
|---|
| Lightweight leave-in curl cream |
| Diffuser attachment for gentle air-assisted drying |
| Anti-frizz finishing serum |
| Microfiber hair towel |
| Flexible-hold curl-enhancing mousse |
28. Low-Maintenance Root Smudge Balayage
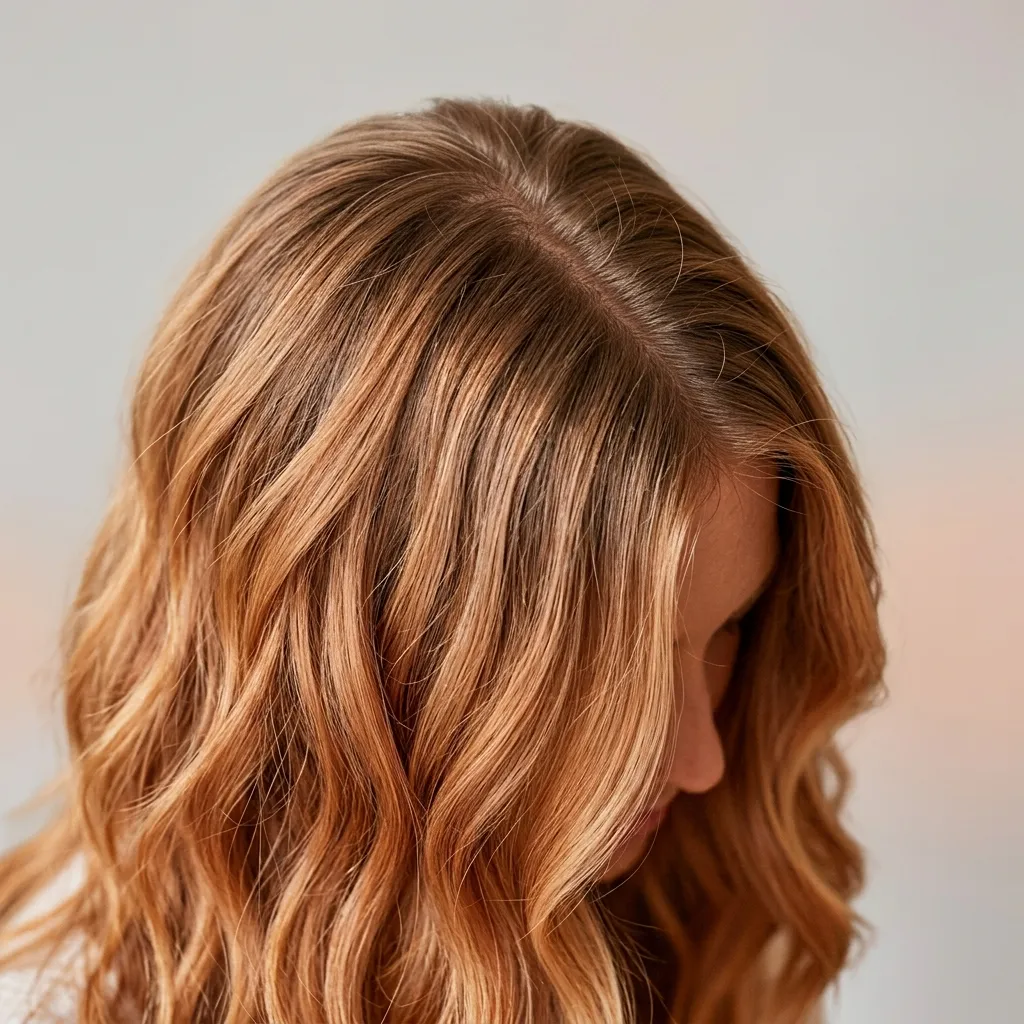
Vibe: Easy and warm, this version is built specifically to stretch the time between salon appointments as long as possible.
Why it works: A root smudge, a soft, diffused application of color right at the root that blends into the natural base rather than creating any hard line whatsoever, is genuinely the single biggest factor in how long a balayage service can go without needing a touch-up, because it’s specifically the root line itself, not the highlight further down the hair, that makes color growth look obvious and unfinished.
Combining a root smudge with balayage that starts lower down the shaft, rather than beginning highlights close to the scalp the way a more brightness-focused service would, means new growth simply extends the already-smudged area rather than creating a fresh, visible gap between processed and unprocessed hair.
How to get it: Specifically request “low-maintenance” or “grow-out-friendly” balayage placement, where lightener starts a few inches below the root rather than close to the scalp, combined with a root smudge in a shade close to your own natural color rather than a lighter contrast tone. This combination can realistically stretch salon visits to every 12 to 16 weeks instead of the standard 8 to 10 weeks, since there’s no hard root line to grow out awkwardly in the interim, which for many people is the deciding factor in choosing this placement over a brighter, higher-maintenance alternative.
Shop the Look
| Product |
|---|
| Root touch-up spray matched to natural base |
| Color-safe dry shampoo |
| Glossing treatment for root blending |
| Leave-in conditioner for grow-out softness |
| Heat protectant spray |
29. Square Face Softening Placement
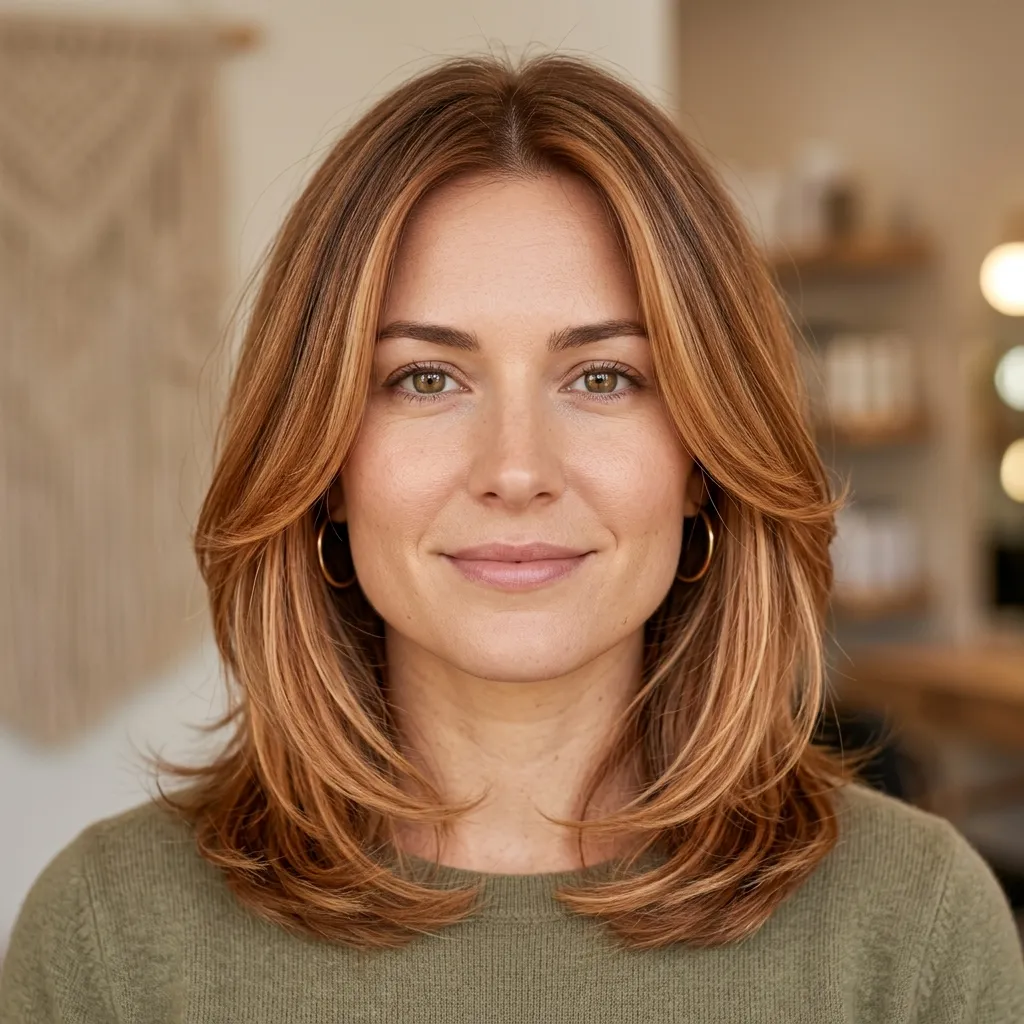
Vibe: Soft and rounded, this placement uses color, not a haircut, to take the edge off a strong jawline.
Why it works: For square face shapes, colorists often place the softest, most gradual balayage pieces directly at jaw level and slightly above it, using a diffused, low-contrast application rather than the crisp, high-contrast money piece typically used for other face shapes, because sharp color lines placed right at the jaw can end up emphasizing the shape’s already-prominent angles rather than softening them.
Softer, more blended color concentrated at that specific zone creates a visual gradient that draws the eye gently away from the hard corner of the jaw, working in a similar way to how face-framing layers cut on an angle also soften the same feature through cut alone.
How to get it: Ask your colorist for “soft, diffused” balayage specifically at and just above the jawline, avoiding a hard-edged money piece in that exact zone, and request a slightly heavier blending technique, meaning a wider transition zone between light and dark, than a standard placement would typically use elsewhere on the head. Pair the color with soft, rounded layers ending at or just below the jaw to reinforce the same softening effect the color placement is already working to create, rather than cutting a blunt line that would counteract it.
Shop the Look
| Product |
|---|
| Soft-hold volumizing mousse for rounded layers |
| Round brush for jaw-level curl shaping |
| Heat protectant spray |
| Shine serum for finishing |
| Texturizing cream for soft, blended ends |
30. Budget-Friendly At-Home Toning Routine Between Salon Visits
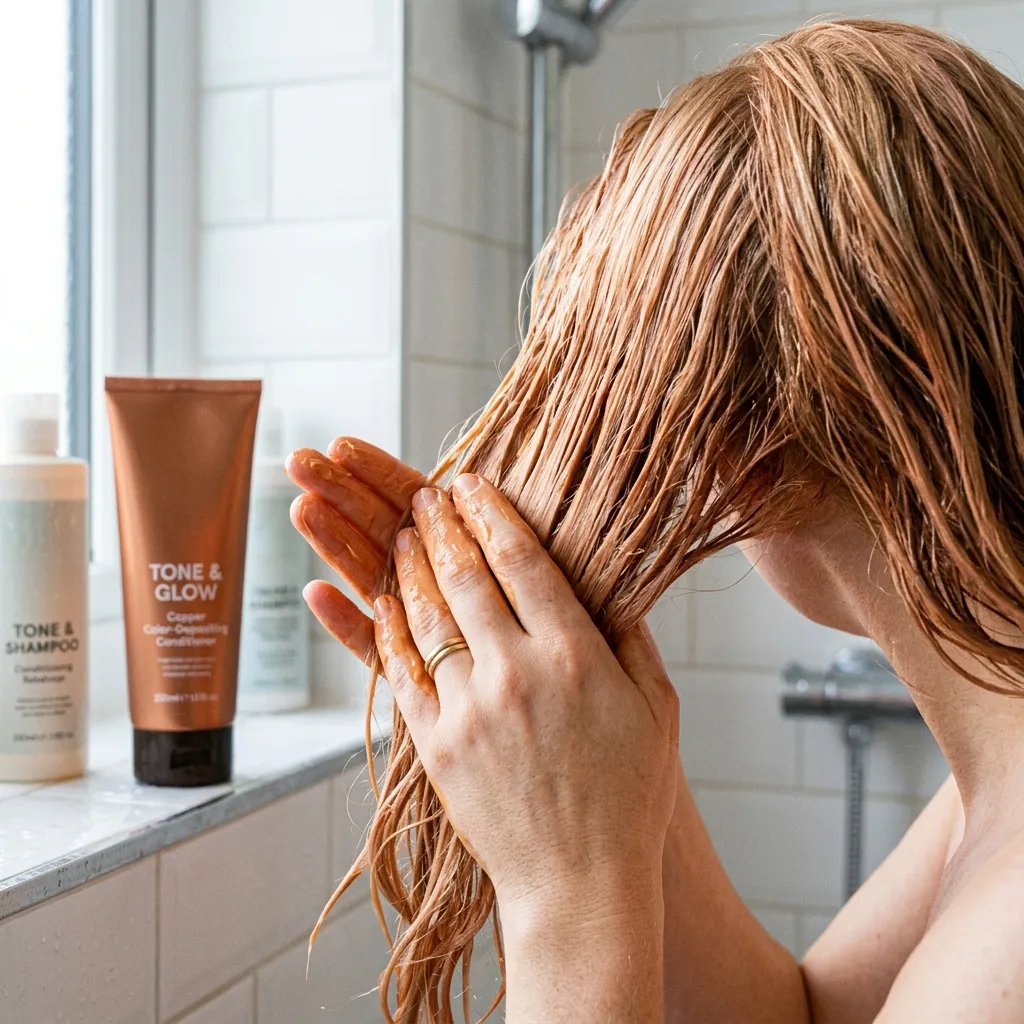
Vibe: Grounded and manageable, this is the maintenance routine that keeps copper from turning brassy without another salon trip.
Why it works: Copper and strawberry tones fade noticeably faster than neutral blondes do, because red and orange pigment molecules are physically larger than the molecules that make up most other hair color pigments and therefore wash out of the hair shaft more quickly with each shampoo, a well-documented property in hair color chemistry that colorists factor into every warm-tone formula they mix.
Left completely untreated between visits, this fade typically shifts strawberry blonde toward a duller, more orange-yellow brassiness within roughly four to six weeks, which is exactly why a consistent at-home toning routine, maintained steadily rather than attempted only right before the next salon visit, is what actually preserves the intended tone for the longest stretch of time.
How to get it: Alternate a color-depositing conditioner in a copper or rose-gold shade, choosing between Kevin Murphy Colour.Me, Overtone Copper Chocolate, or dpHUE Gloss+ in a warm shade, with your regular sulfate-free shampoo two to three times weekly, rather than using a pigmented product on every single wash, which can build up over time and eventually turn the color muddy instead of keeping it clean and warm. Budget roughly $25 to $35 per bottle, which typically lasts six to eight weeks of regular use, a genuinely small fraction of the cost of an unplanned emergency toner appointment booked specifically because brassiness got out of hand between visits.
Shop the Look
| Product |
|---|
| Copper or rose-gold color-depositing conditioner |
| Sulfate-free shampoo for color-treated hair |
| Weekly deep conditioning hair mask |
| UV protectant leave-in spray |
| Cool-water shower filter to slow color fade |
How to Start Your Strawberry Blonde Balayage Transformation
The single best first move is booking a consultation focused specifically on a root melt and money piece rather than jumping straight to a full-head balayage service, and this isn’t just a budget-conscious suggestion, it’s genuinely the smartest sequencing available. This smaller, face-framing service anchors the entire look, costs meaningfully less than a full-head appointment, and gives you a completely real, in-person preview of how copper and gold actually read against your specific base color, skin undertone, and everyday lighting before you commit to the bigger, more expensive, and more time-intensive session. Colorists frequently see clients who went straight for the full transformation regret not testing the tone first, since a formula that looks right on a color wheel or a reference photo doesn’t always read the same way against an individual’s actual hair and skin. Starting small also means any adjustment needed, warmer, cooler, more concentrated, more diffused, can be made at the next appointment with real information rather than guesswork.
The most common mistake people make with this style is going too warm too fast on a base that already carries more natural gold or brass than they realize, which pushes the finished result toward an unintended orange rather than the soft, considered copper they actually wanted. This tends to happen most often on hair that’s naturally medium-to-dark blonde or light brown with warm undertones already present, since adding more copper pigment on top of an already-warm base compounds the effect rather than balancing it the way it would on a cooler or more neutral starting color. The fix is straightforward and worth insisting on: ask your colorist to test the exact formula on a small, hidden section first, ideally an underneath piece near the nape, and lean toward a rose gold or apricot formula rather than straight copper if your natural hair already runs warm, since those formulas are specifically built to soften rather than intensify existing warmth.
Three specific items under $50 that make an immediate, noticeable difference in how the finished color performs day to day: a bottle of Kevin Murphy Colour.Me color-depositing conditioner in the copper shade, which runs around $38 and directly slows brassy fade between salon visits; a genuine silk pillowcase, around $25, which reduces the color fade caused by nightly friction against cotton fibers, a factor most people don’t realize is actively working against their fresh balayage every single night; and a UV protectant hair mist, around $18, which prevents the sun-triggered brassiness that affects warm-toned hair color specifically, since copper and gold pigments are measurably more UV-reactive than cooler tones.
In terms of realistic timing and budget, a face-framing money piece takes about 90 minutes in the chair and runs $80 to $150 depending on your region and salon tier, while a full-head strawberry blonde balayage transformation runs 3 to 5 hours and $200 to $400, with a follow-up gloss or toner appointment recommended six to eight weeks later to maintain the tone before it fades meaningfully. Full color maturity, meaning the point where the tone settles into its most natural, most blended, and most photograph-ready state, typically takes two to three separate salon visits spread across four to six months rather than arriving fully formed after a single appointment, which is worth knowing going in so the process doesn’t feel slower or more expensive than expected.
Frequently Asked Questions About Strawberry Blonde Balayage Hair Color
What’s the difference between strawberry blonde balayage and regular blonde balayage?
Strawberry blonde balayage is toned specifically with copper, gold, and rose-toned glosses rather than the ash or neutral glosses that regular blonde balayage typically relies on, which keeps warm, red-adjacent pigment clearly visible in the finished result instead of actively neutralizing it the way a standard blonde formula would. It also typically starts from a base that already has some natural red or gold pigment present in the hair, whereas regular blonde balayage can realistically start from nearly any base color and is deliberately corrected toward cool or neutral tones during the toning stage regardless of what warmth was already there. The two techniques share the exact same freehand painting method and application process at the salon, but the color formulas and the final visible result are genuinely distinct from one another, one reads coppery and warm in every kind of light, the other reads cool or neutral specifically because that’s the intended outcome the formula was built to achieve. Clients switching from a regular blonde balayage to strawberry blonde should expect at least one full toning session dedicated purely to shifting the existing tone rather than simply adding warmth on top of what’s already there.
What is the best color to pair with strawberry blonde balayage?
Copper gold, rose gold, honey blonde, and apricot cream are the four most common pairing tones used within strawberry blonde balayage itself, usually applied together as a gradient running from a slightly darker root toward a lighter, warmer end rather than as a single flat tone throughout. Redken Shades EQ formulas like 08CG for copper gold and 7RR for rose gold are two of the most frequently used professional formulas colorists reach for specifically to achieve these tones on already-lightened sections, alongside Wella Color Charm Gloss options in similar warm families. It’s worth actively avoiding ash or platinum toners in this context, since those formulas are specifically engineered to cancel out red and gold pigment, which is the exact warm undertone this entire style depends on to read as strawberry blonde rather than as a generic cool blonde that happens to share the same lightening process. If brassiness becomes a concern over time, the fix is a controlled copper or rose-gold refresh rather than an ash toner, which would fight the color rather than maintain it.
How much does strawberry blonde balayage typically cost?
A face-framing money piece runs roughly $80 to $150 in most markets, while a full-head strawberry blonde balayage service typically costs $200 to $400 depending on hair length, hair density, and salon location, with major metro areas and higher-end salons often landing at the top end of that range or occasionally above it. A follow-up toner or gloss refresh, generally recommended every six to eight weeks to keep the copper tone from fading into brass, usually adds an additional $40 to $75 per visit on top of the initial service cost. Budgeting realistically for at least one gloss refresh between full balayage appointments is genuinely worth factoring into the overall cost from the start, since it keeps the tone looking fresh without requiring a full, more expensive re-application of the entire balayage service every time the color begins to soften.
Does strawberry blonde balayage work on curly or textured hair?
Yes, though the application method changes meaningfully to accommodate the curl pattern. Colorists use a “curl-by-curl” or “dry curl” painting technique that applies lightener directly to stretched, dry curls rather than the wet, sectioned approach commonly used on straight hair, so the finished color placement lands exactly where the curl pattern will naturally showcase it once the hair springs back into its resting shape. This particular placement approach follows the outer curve of each individual curl, which creates a spiraling, genuinely dimensional highlight effect that’s unique to textured hair and simply isn’t achievable through the straight-line sectioning method used on straight or wavy hair. Curl-specific stylists, or salons that specifically advertise textured-hair expertise, typically produce the most accurate and most flattering placement for this particular hair type, and it’s worth seeking one out specifically rather than assuming any colorist can translate straight-hair balayage technique directly onto curls without adjustment.
What is the most requested strawberry blonde balayage placement?
The “money piece,” meaning two to three face-framing sections painted noticeably lighter than the rest of the hair, is by a wide margin the single most requested placement, since it delivers maximum visible impact for the shortest possible salon appointment and the lowest overall cost, typically 60 to 90 minutes and $80 to $150 depending on the salon. It also functions as the easiest and lowest-risk entry point for people trying strawberry blonde for the very first time, since it commits only roughly 15 to 20 percent of the total hair to lightening rather than the much larger commitment a full-head service represents, both in terms of cost and in terms of hair health. Most colorists genuinely recommend starting here specifically, then deciding afterward, once the client has lived with the color for a few weeks, whether to expand into a fuller balayage placement at a later appointment rather than committing to the full service before knowing how the tone reads against their skin and in their everyday styling.
Ready to Create Your Dream Strawberry Blonde Balayage?
From copper money pieces and rose gold glosses to shag cuts, heatless waves, and low-maintenance root smudges, these 30 ideas cover the full range of color depth, texture, cut, and styling technique this shade can genuinely offer, and none of them require starting at the most dramatic, most expensive version of the look. You don’t need to book a full-head transformation to begin, a single face-framing money piece is a completely legitimate, budget-friendly first step, and it’s honestly the smartest way to test whether copper or rose gold actually suits your skin and your everyday styling before committing to anything larger.
Today, the most concrete action you can take is booking a consultation and bringing two or three specific reference photos from this list so your colorist can build a formula around your exact base tone rather than guessing at what “strawberry blonde” means to you in the abstract. There’s something quietly grounding about wearing a color that looks like it was earned outdoors rather than applied in a chair, warm, a little sun-worn, never trying too hard, and that’s really the entire emotional promise of this style once it settles in. Save your favorites from this list now, so when you sit down in the chair, you’re not searching your camera roll mid-appointment, you already know exactly which copper you’re chasing and why it’s the right one for you.