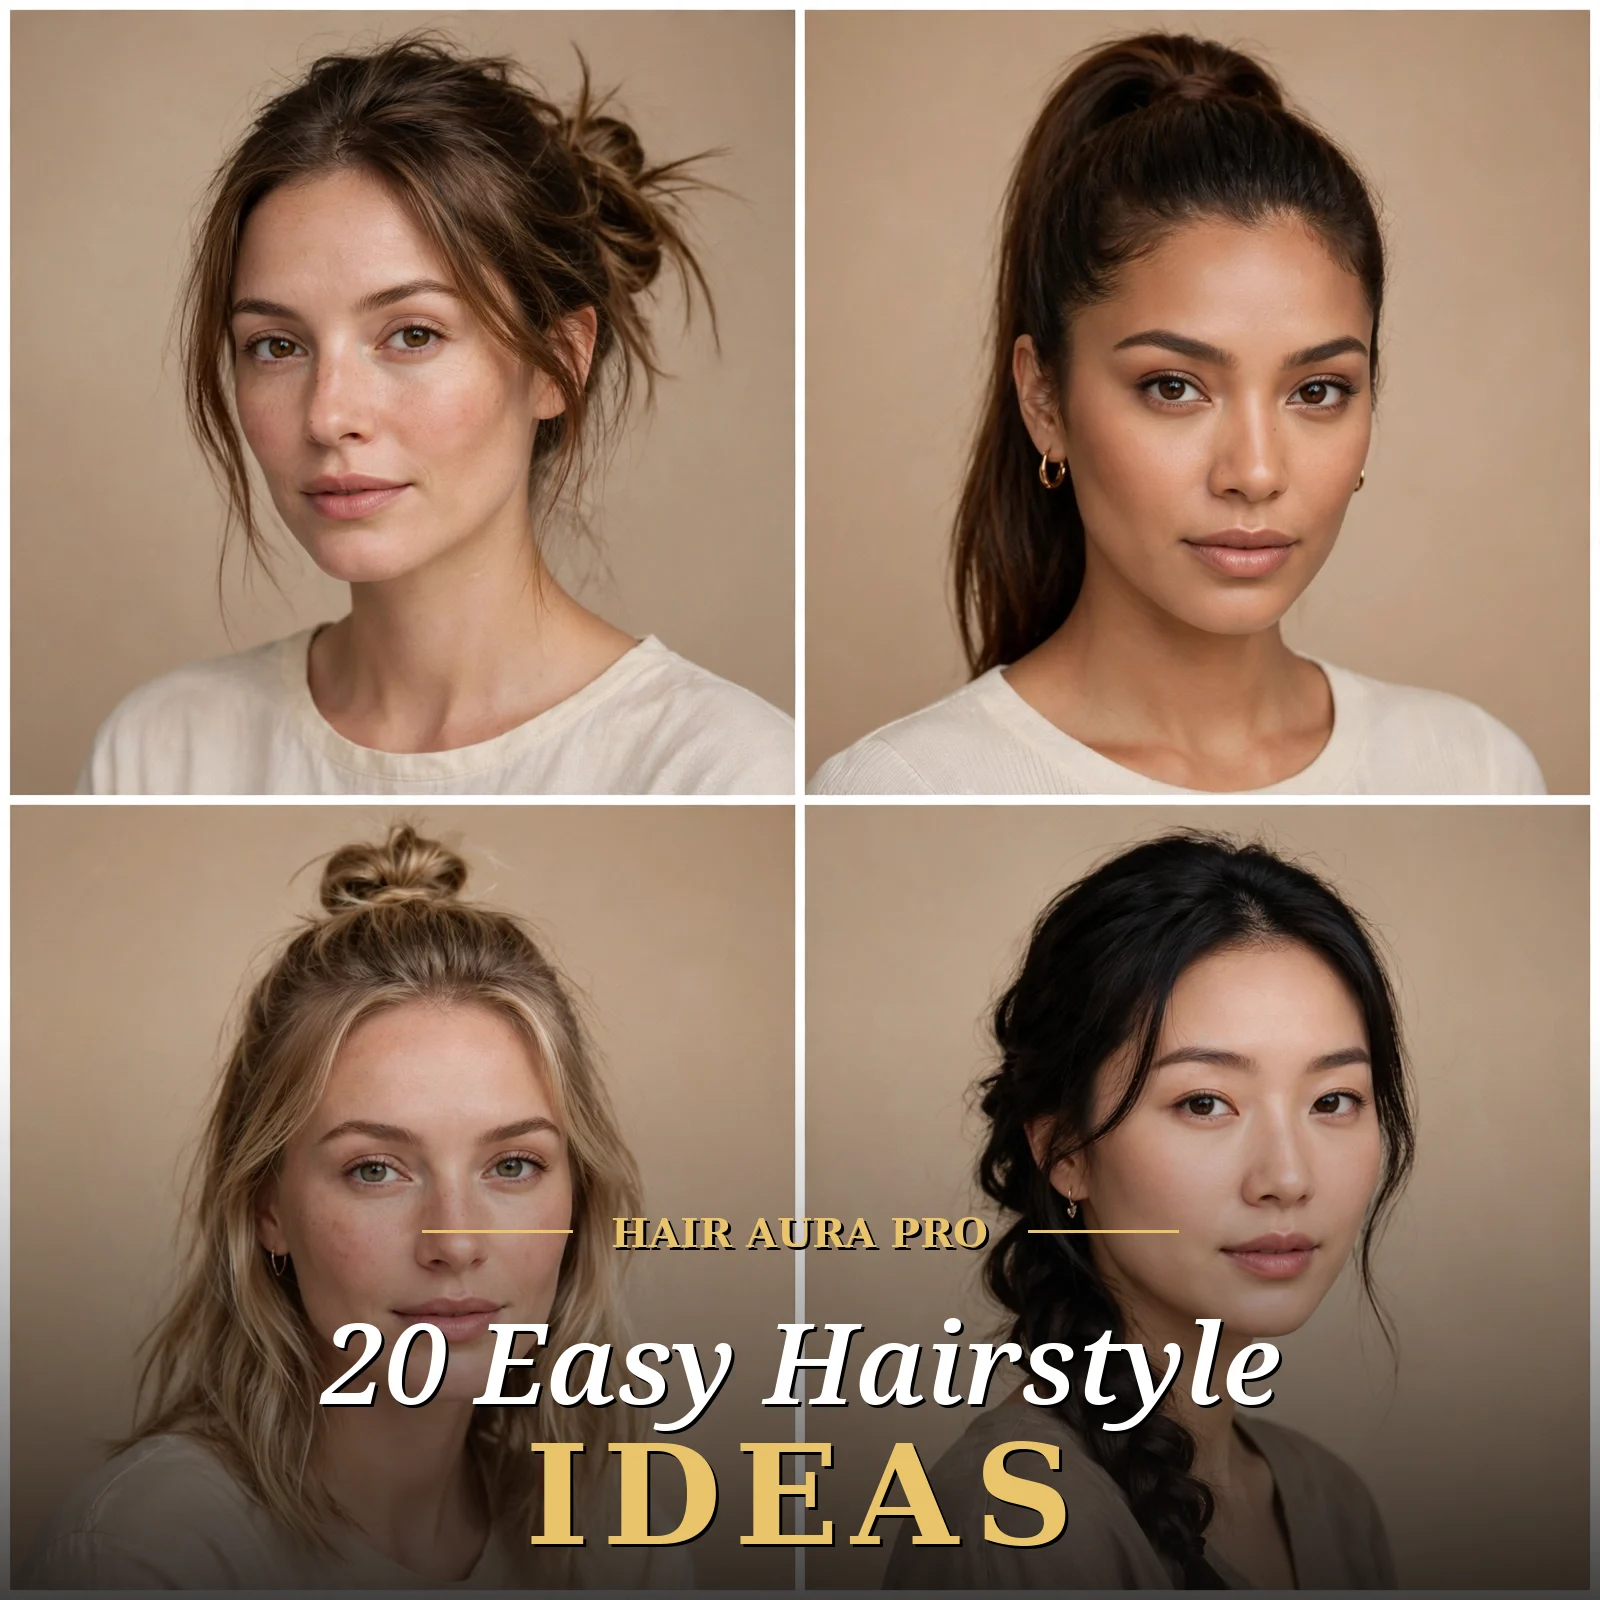
20 Easy Hairstyle Ideas Worth Trying This Year

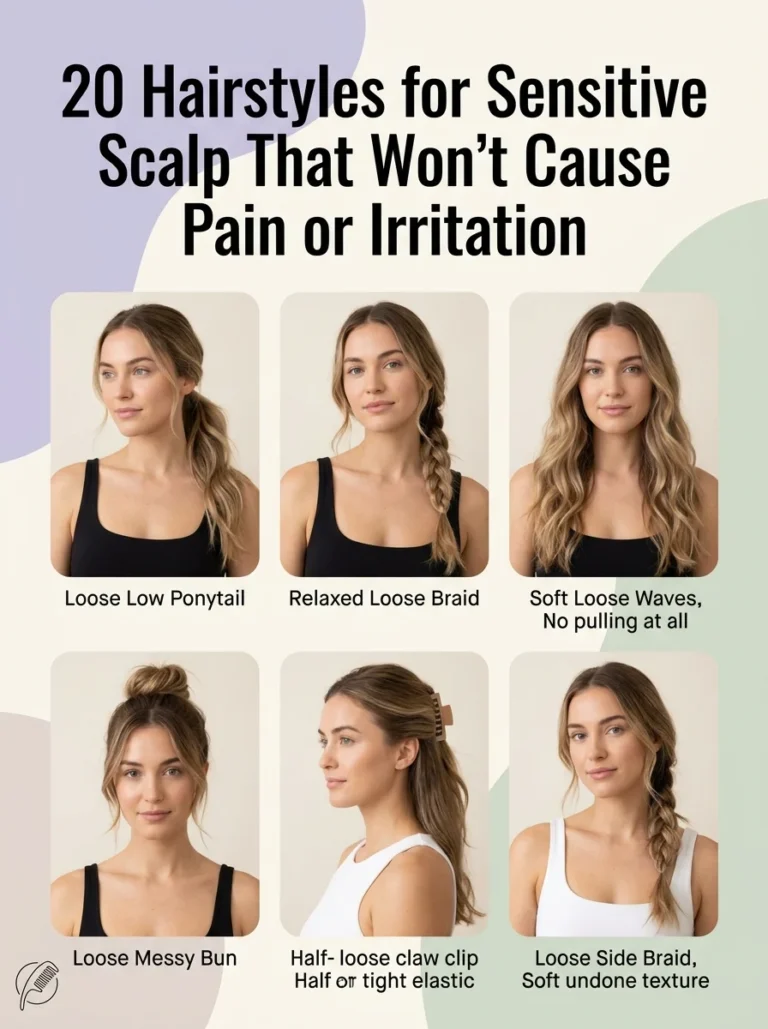
An easy hairstyle is any look you can create in under ten minutes with tools you already own: a brush, an elastic, and a few pins, with no salon visit and no advanced technique required.
Think of the relief of a Tuesday morning when your hair looks intentional by 8:05, the bun sitting exactly right, the braid lying flat, not a single strand staging a rebellion. These styles are built for real life: school runs, gym sessions, video calls, and the days between washes when your hair has ideas of its own.
Below are twenty easy hairstyle ideas that take minutes, not hours, each with the exact steps, the one trick that makes it look polished, and the products that keep it in place all day.
Why Easy Hairstyles Work So Well
Easy hairstyles work because they respect how hair actually behaves on a normal day. Most of these styles use your hair's natural texture, the slight grip of day-old hair, and gravity itself as styling partners rather than fighting them with heat and product. A bun twisted from second-day hair holds better than one built on freshly washed silk, and a braid done on slightly textured hair stays put without a can of hairspray.
The second reason is muscle memory. Every style in this list uses movements your hands already know: twisting, wrapping, pinning, braiding the basic three-strand plait. Once you have done a style twice, your fingers remember it, which means the third time takes half as long. That is the real difference between a style you pin on a board and a style you actually wear.
Preparation beats technique. Nearly every polished-looking easy style starts with the same quiet prep: a light mist of texture spray or dry shampoo at the roots, a quick detangle, and hair that is not freshly slippery. Five minutes of prep turns a style that falls apart by lunch into one that survives the whole day.
These styles are also kind to your hair. Because they rely on elastics, pins, and clips instead of daily heat, they reduce the breakage that comes from straighteners and curling irons. Your hair gets healthier the more you wear them, which makes every future style easier too.
| Style at a Glance | Details |
|---|---|
| Philosophy | Ten minutes or less, tools you already own, and your hair's natural texture doing half the work. |
| Key Tools | Snag-free elastics, bobby pins, a claw clip, texture spray, and a brush or wide-tooth comb. |
| Finishing Details | A wrapped elastic, a tucked end, or a pulled-out face-framing piece that makes simple look deliberate. |
20 Easy Hairstyles to Try This Year
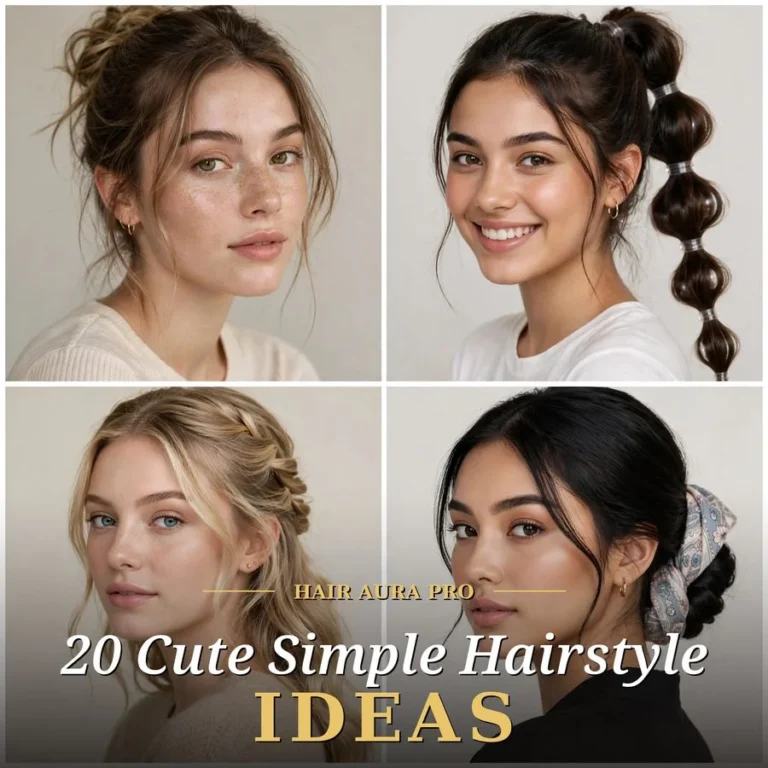
1. The Classic Messy Bun
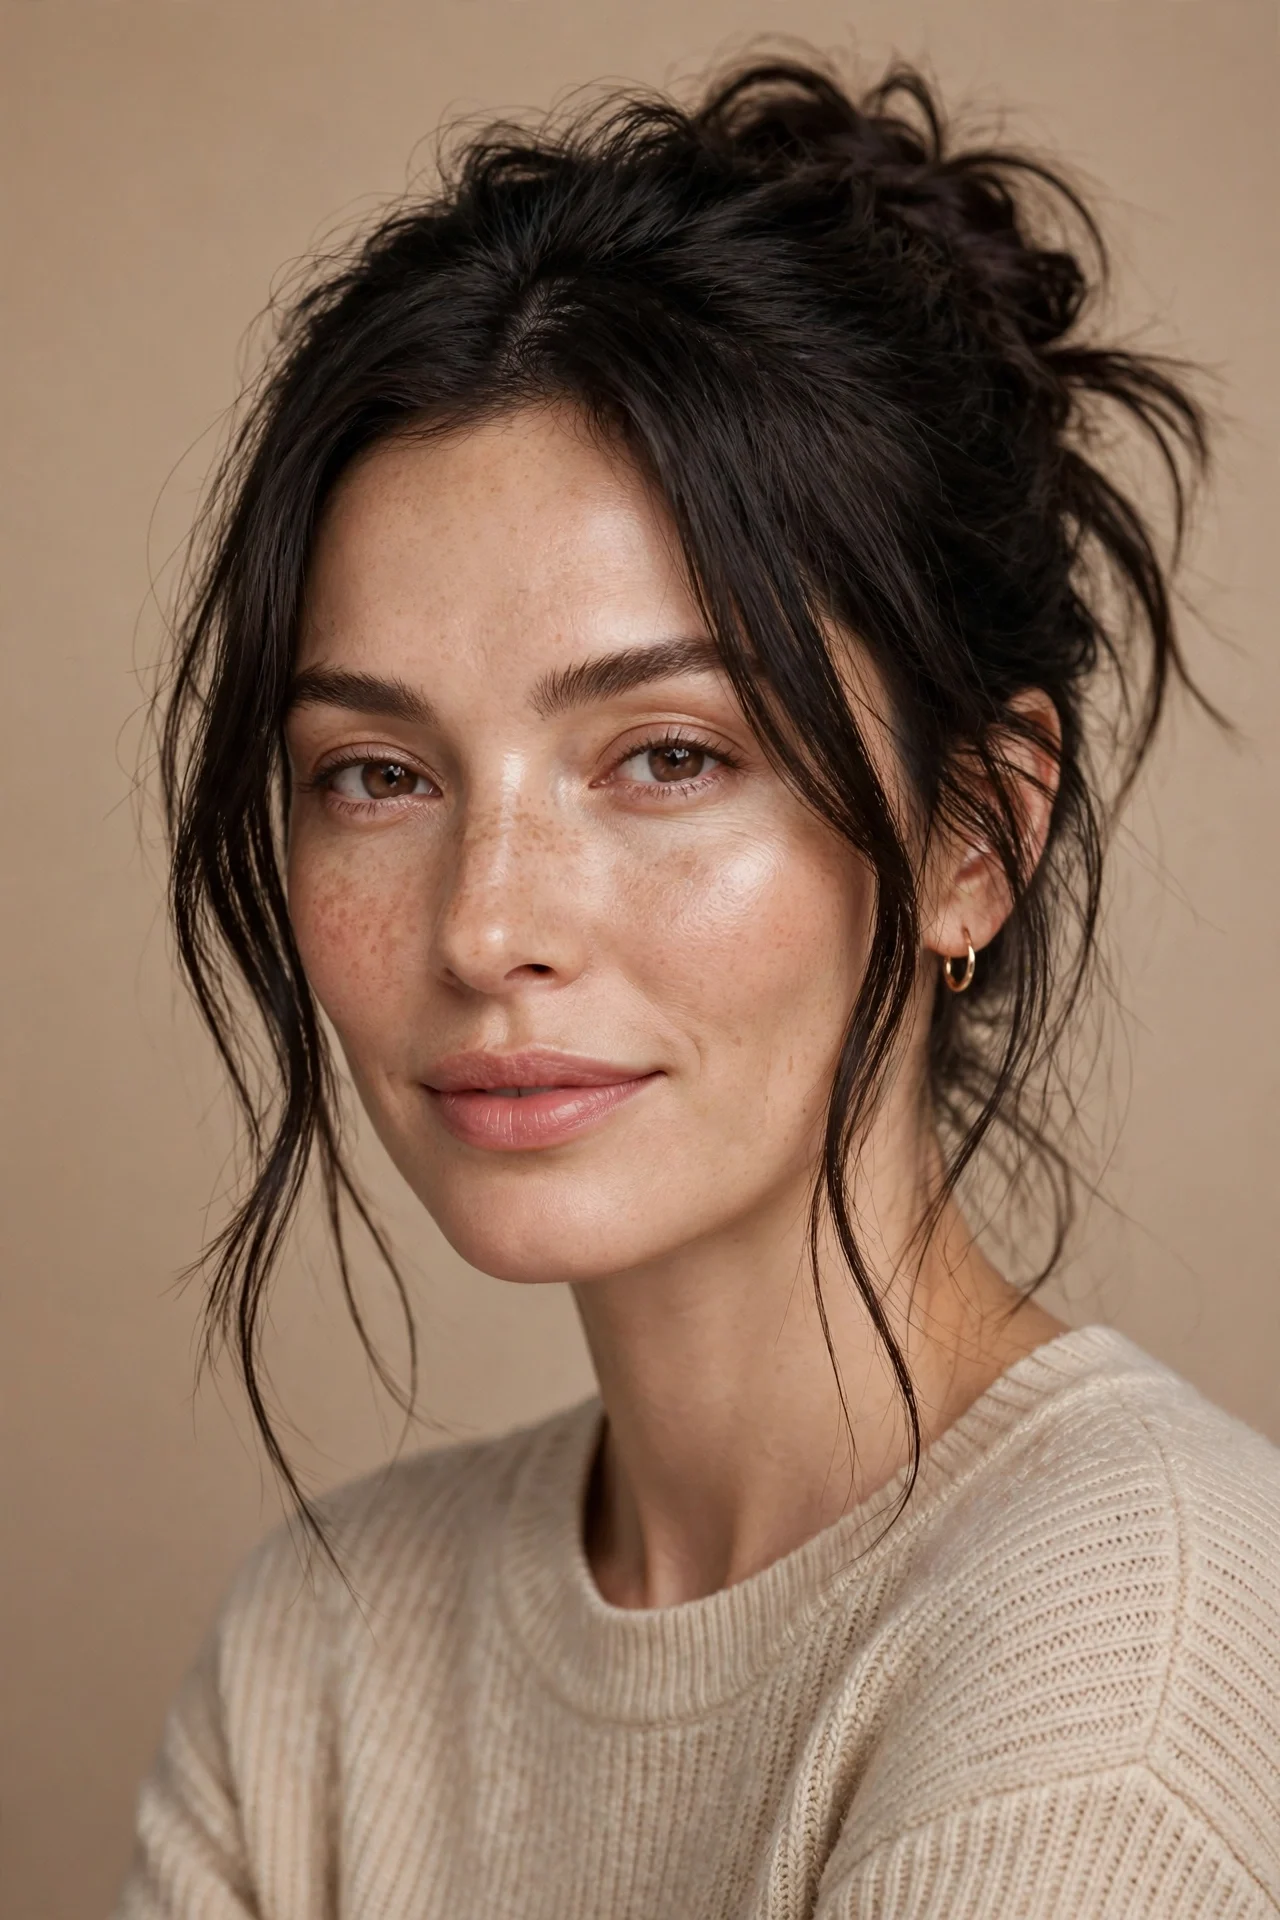
Vibe: Carefree, cool, and always in style.
Why it works: The messy bun works because it turns imperfection into the whole point. Loosely twisted and pinned, it creates soft volume and texture that looks intentional without requiring precision, which makes it the most forgiving style on this list. It suits every hair length from lob to long, and it actually improves on second- or third-day hair, when natural oils give it the grip a fresh wash cannot.
How to get it: Gather your hair into a high ponytail without smoothing it perfectly, twist the tail loosely, and wrap it around the base, pinning as you go. Pull out a few face-framing pieces and gently tug the bun wider with your fingertips for fullness. Finish with a light mist of flexible-hold hairspray, keeping the nozzle at arm's length so the style stays soft.
Shop the Look
- Snag-free fabric hair elastics
- Flexible-hold hairspray
- U-shaped hair pins for secure pinning
- Texturizing spray for extra grip
- Satin scrunchie for a softer bun base
2. The High Ponytail
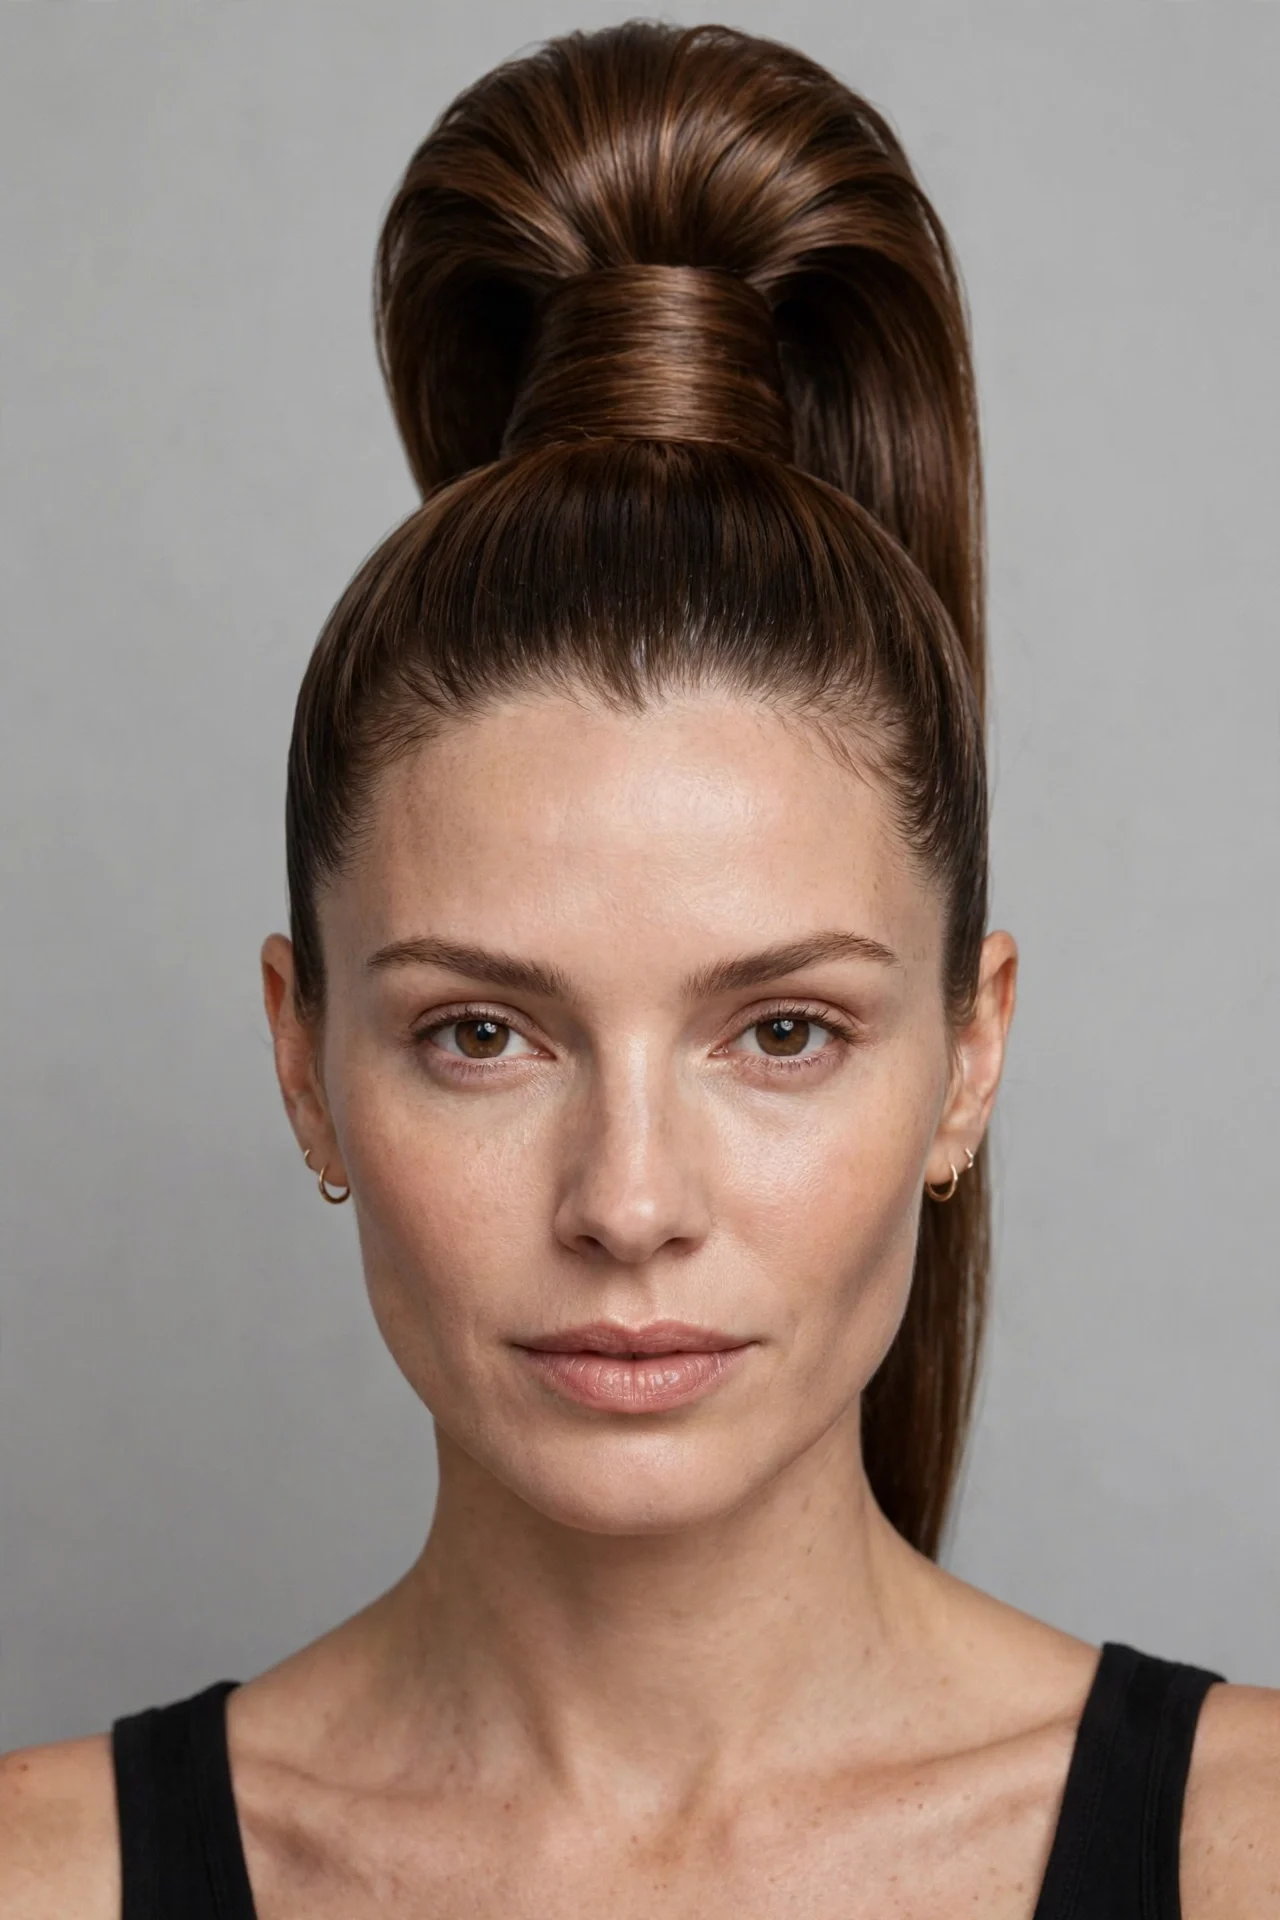
Vibe: Sporty, sharp, and instantly polished.
Why it works: The high ponytail works because it does three things at once: it lifts your features, keeps every strand out of your face, and reads as put-together with almost zero effort. Positioned at the crown, it creates the illusion of longer, thicker hair, since the eye follows the ponytail's full length. It is the fastest route from bedhead to presentable, and it survives workouts, commutes, and windy days without complaint.
How to get it: Flip your head upside down and brush all your hair toward the crown, gathering it with both hands. Secure with a strong elastic, then take a small strand from underneath and wrap it around the base, pinning it underneath to hide the elastic. Smooth the crown with a dab of gel on a soft brush for a sleek finish, or leave it slightly textured for a casual feel.
💡 Quick Win: Place two bobby pins vertically under the ponytail base, pushing upward; they act like a shelf that keeps the tail lifted all day.
Shop the Look
- Strong-hold hair elastics
- Smoothing gel for the crown
- Soft-bristle smoothing brush
- Bobby pins in your hair color
- Anti-frizz serum for the tail
3. The Half-Up Topknot
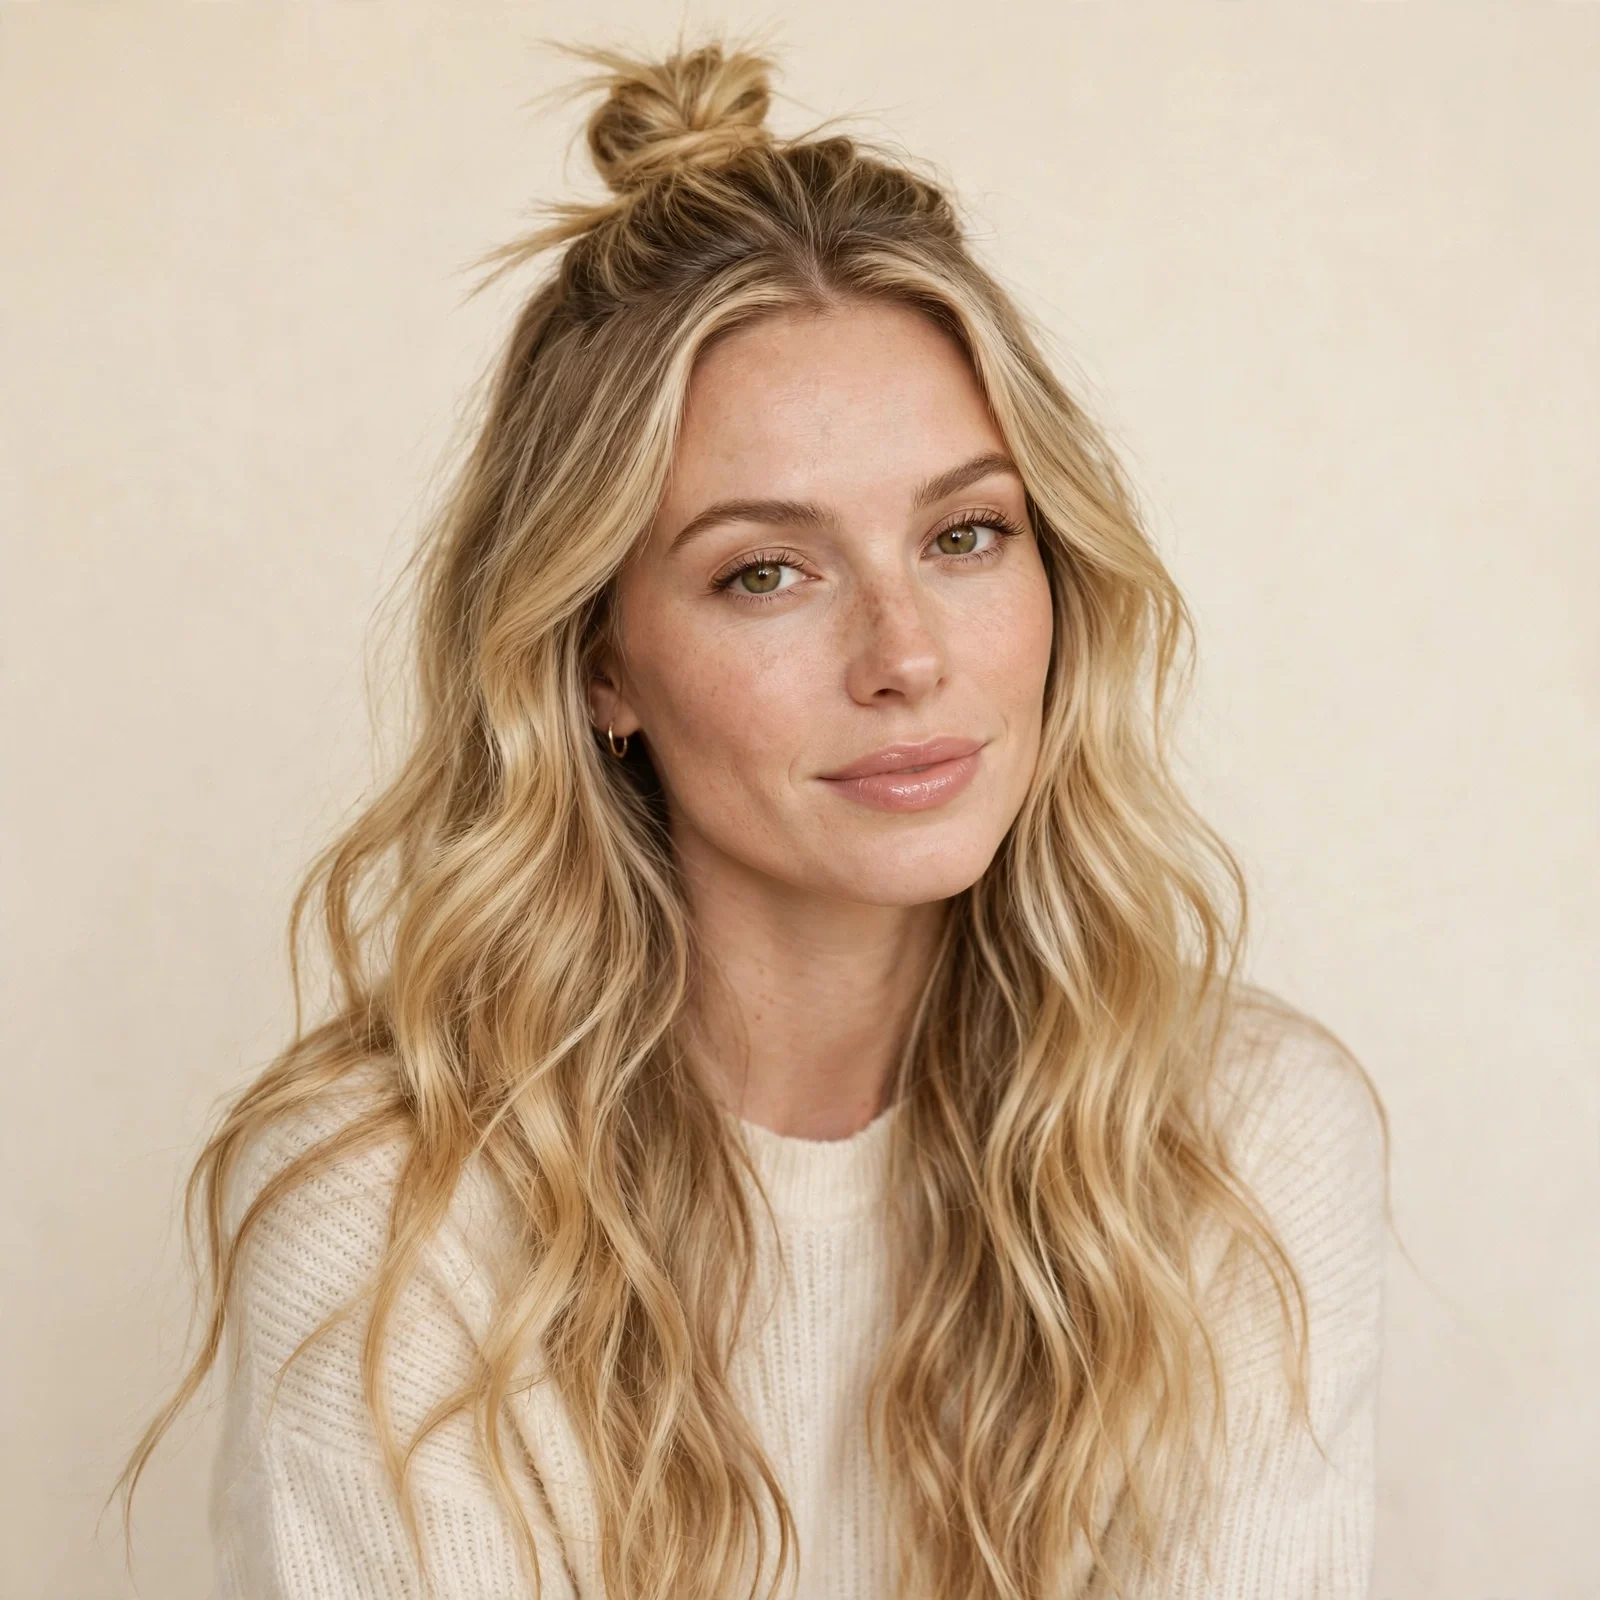
Vibe: Cute, playful, and effortlessly trendy.
Why it works: The half-up topknot works because it gives you the best of both lengths: the top section stays out of your face while the rest of your hair flows free. The little bun on top adds height and interest that a plain half-up style lacks, and it takes genuinely less than two minutes. It flatters wavy and curly textures especially well, since the loose lengths show off your natural pattern while the knot keeps things tidy.
How to get it: Section off the top third of your hair from temple to temple and gather it at the crown. Twist it into a small bun and secure with an elastic or pins, leaving the ends tucked or sticking out for a messier feel. Loosen the knot slightly with your fingers and pull a few strands free around your face to soften the look.
Shop the Look
- Mini clear elastics for the knot
- Dry shampoo for root volume
- Small claw clip as a bun alternative
- Lightweight texture spray
- Decorative pins for dressing it up
4. The Low Twisted Bun
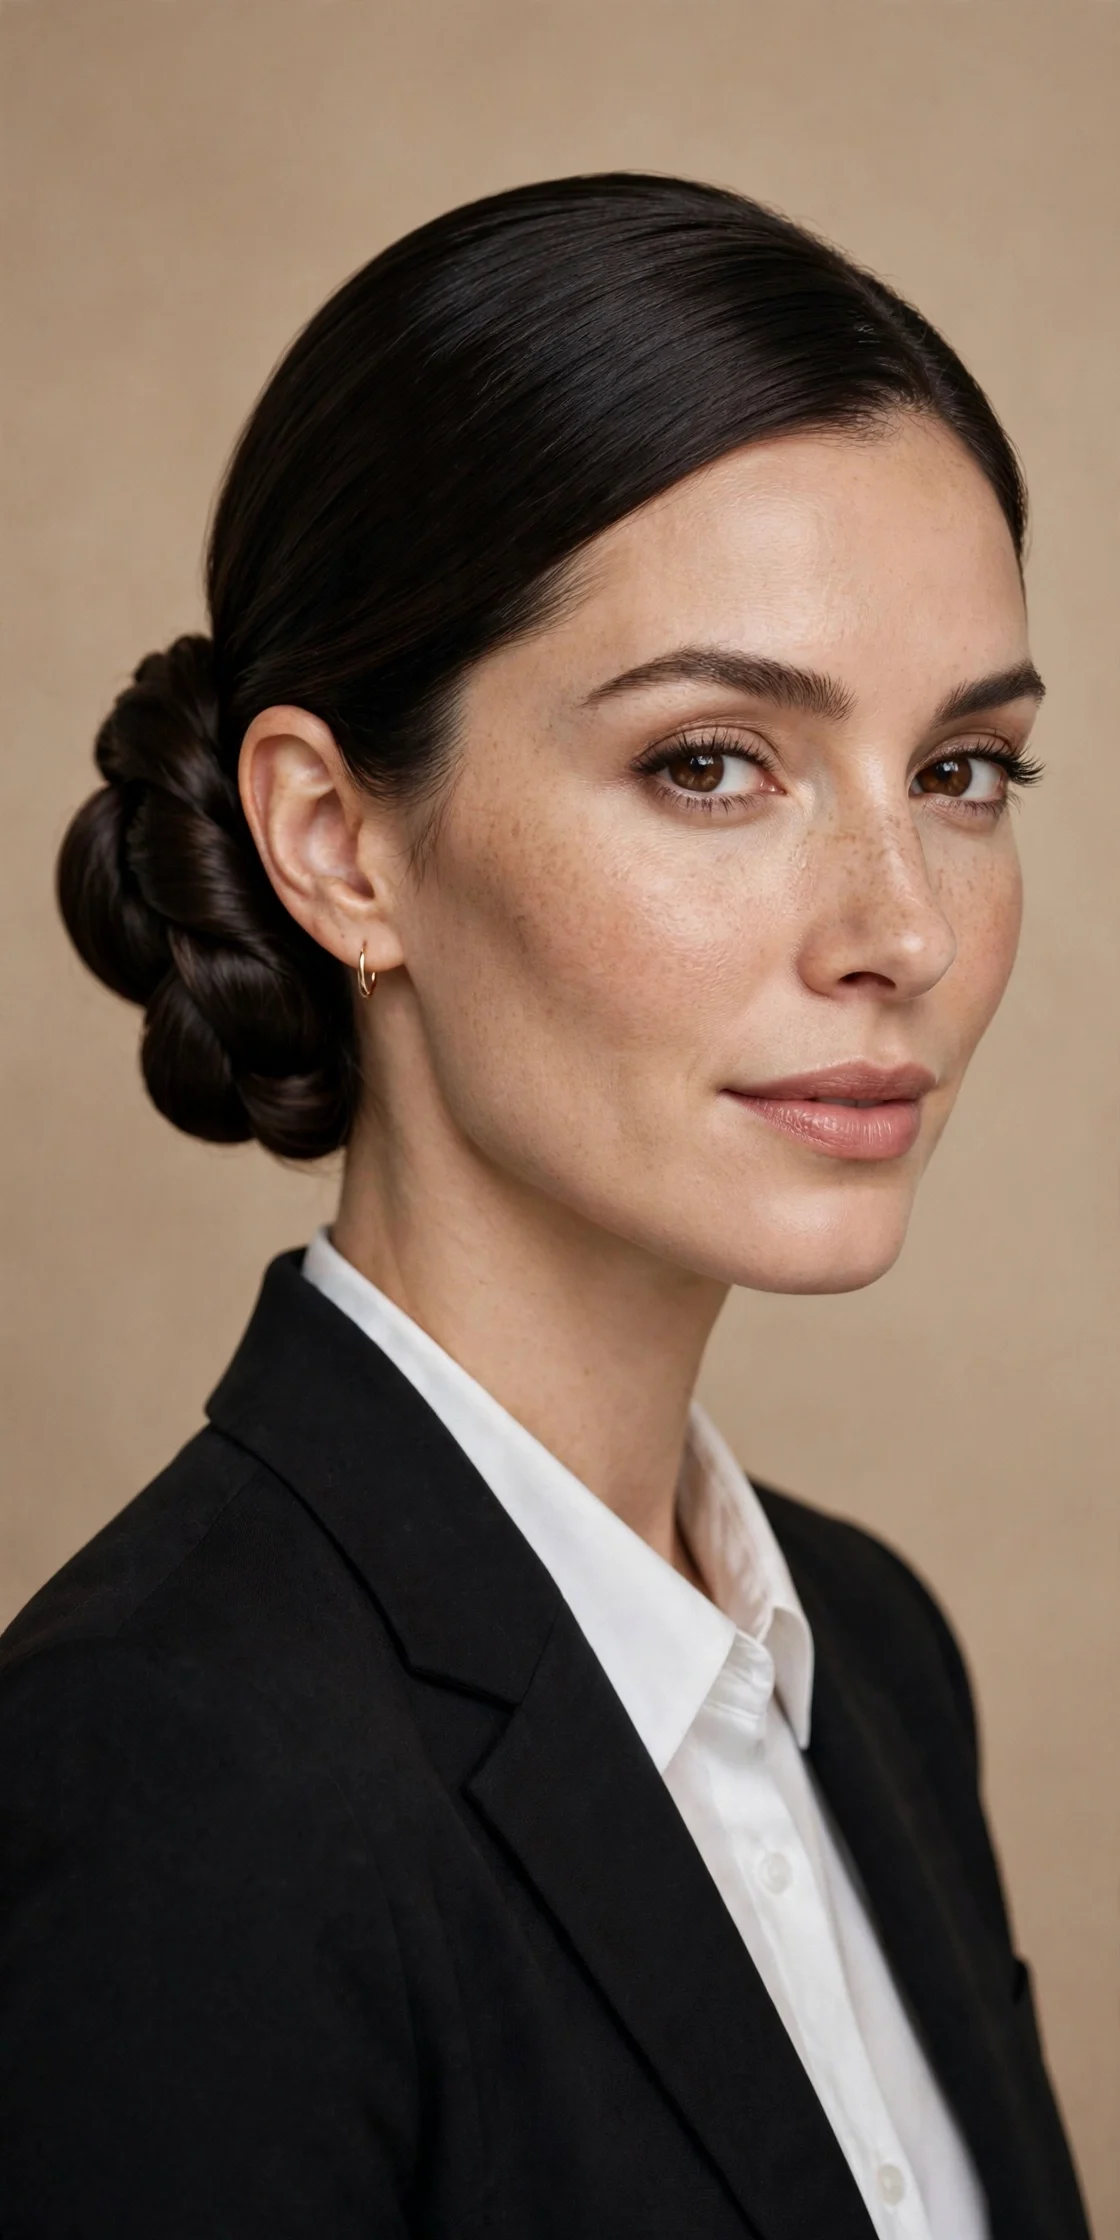
Vibe: Elegant, calm, and quietly professional.
Why it works: The low twisted bun works because it borrows the polish of a chignon without any of the fuss. Twisting the hair before wrapping it creates natural, rope-like texture that looks far more intricate than the two minutes it takes, and sitting at the nape it suits offices, interviews, and formal events. It is also remarkably secure: the twist locks the hair against itself, so it holds through a full workday with minimal pins.
How to get it: Part your hair down the middle or on the side, then gather it low at the nape. Divide the ponytail into two sections, twist each one, then twist them around each other and coil the rope into a bun, pinning as you go. Tuck the ends underneath and smooth any flyaways with a pea-sized amount of smoothing cream.
💡 Quick Win: Mist the finished bun with a strong-hold hairspray, then press a clean mascara spoolie over flyaways for a glassy, controlled finish.
Shop the Look
- Strong-hold hairspray
- Smoothing cream for flyaways
- U-shaped pins for the coil
- Clean mascara spoolie for finishing
- Silk scarf for wrapping on humid days
5. The Braided Ponytail
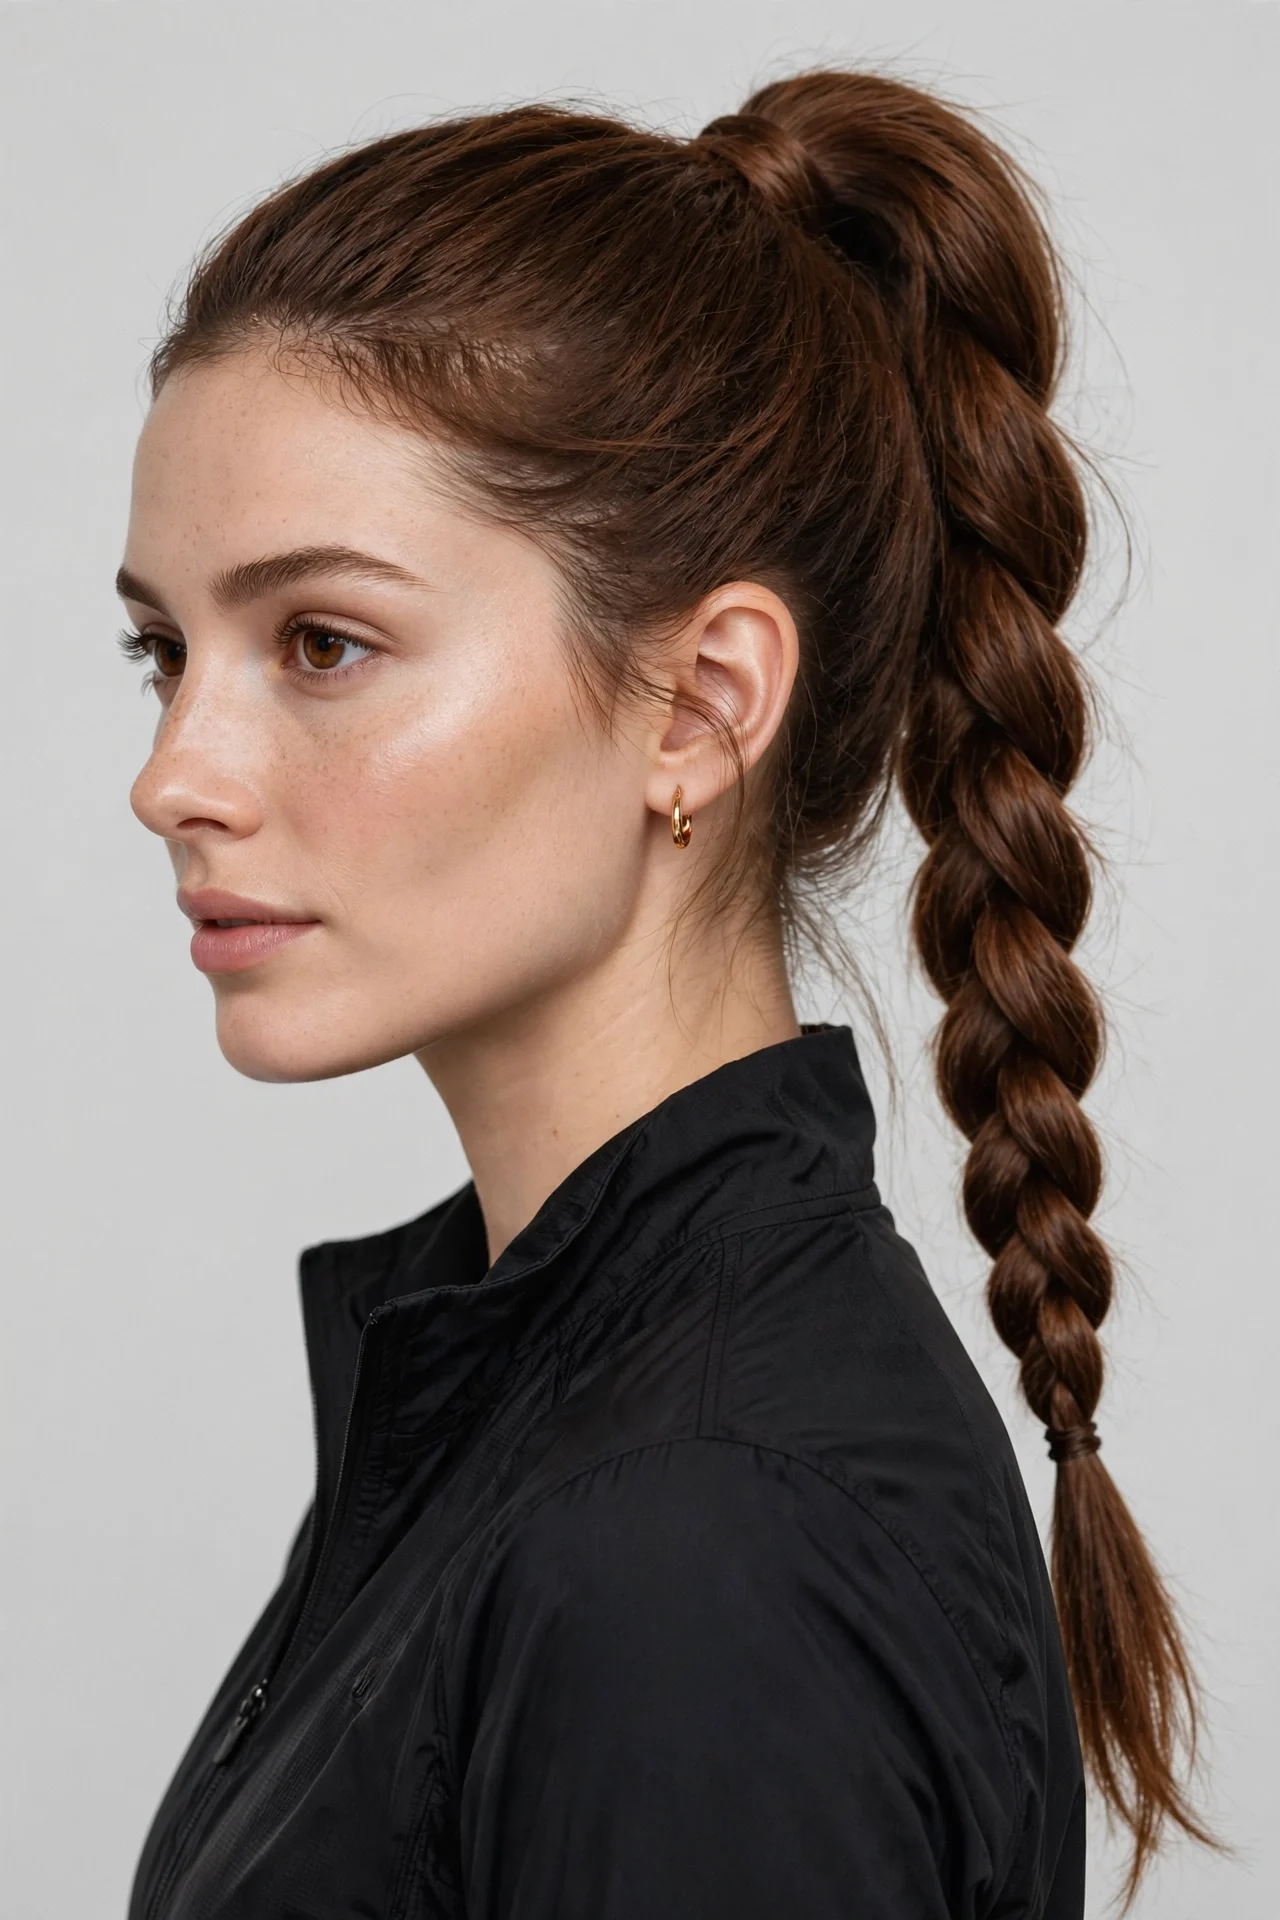
Vibe: Fun, sporty, and full of energy.
Why it works: The braided ponytail works because it upgrades the plainest style in the book with one extra step. The braid adds texture and visual interest that keeps the ponytail from looking flat, and it keeps long hair completely contained, which makes it ideal for workouts, travel days, and windy weather. It also protects the ends from tangling, so you arrive with smoother hair than a loose ponytail would leave you.
How to get it: Secure your hair in a mid-height or high ponytail, then divide the tail into three sections and braid to the ends, fastening with a small elastic. Gently tug each braid loop outward to widen it, which makes the braid look thicker and more relaxed. For extra polish, wrap a strand around the top elastic before you start braiding.
Shop the Look
- Small clear elastics for the braid end
- Leave-in conditioner to prevent tangles
- Wide-tooth comb for pre-braid detangling
- Shine spray for the finished braid
- Sweat-wicking headband for workouts
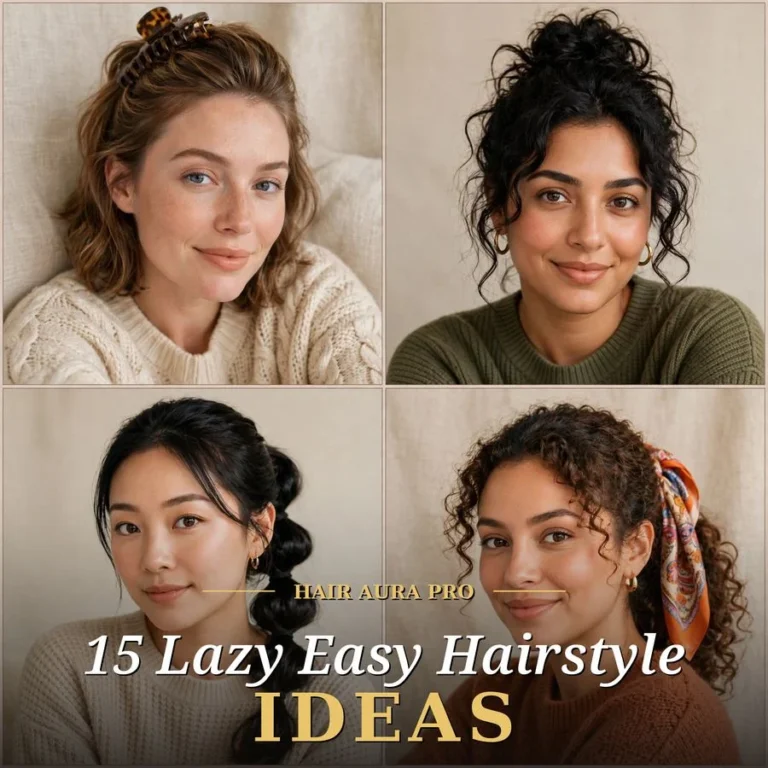
6. The Claw Clip Updo
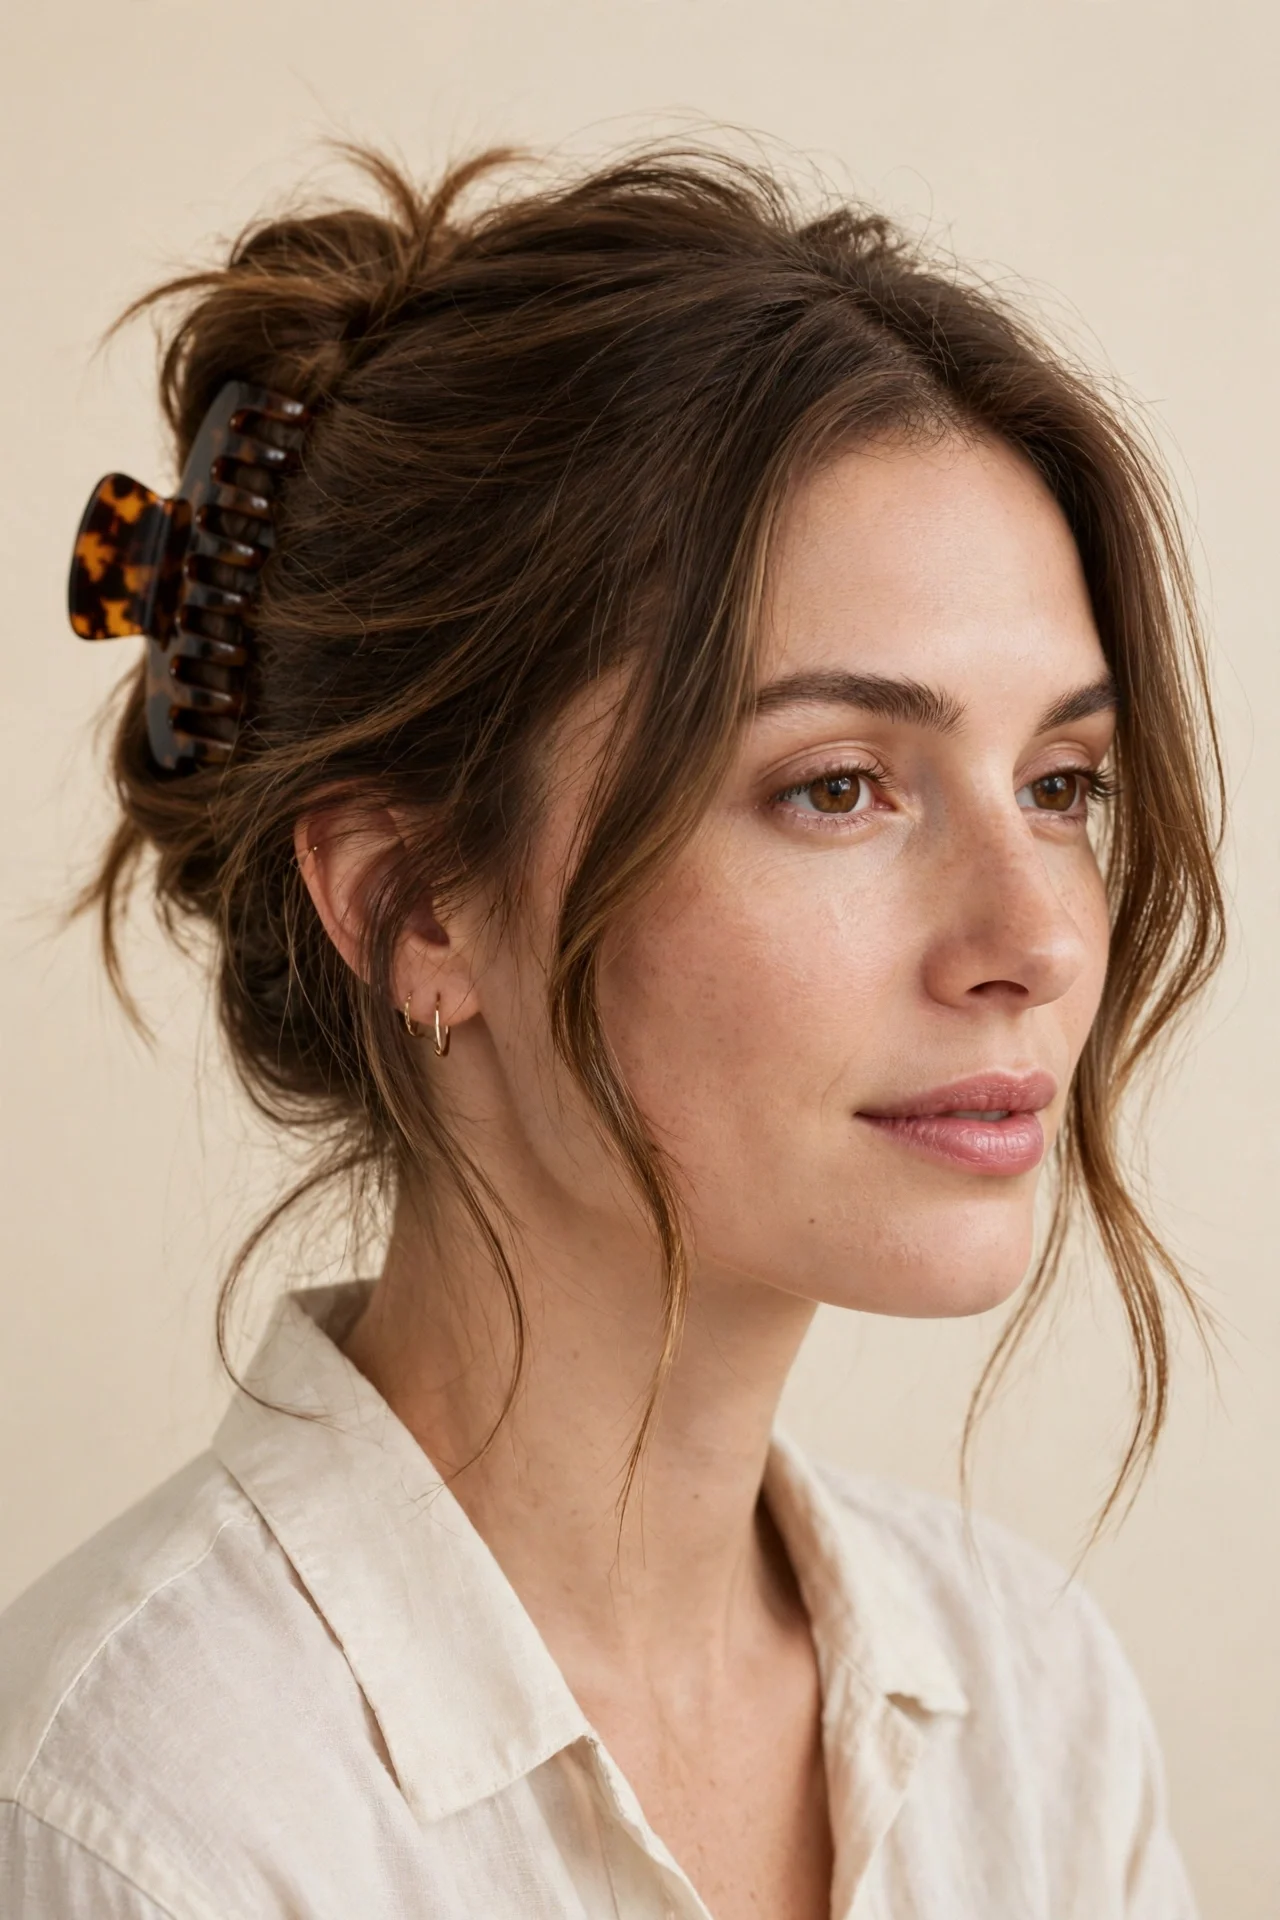
Vibe: Chic, French-girl, and back in a big way.
Why it works: The claw clip updo works because it is genuinely the fastest updo that exists: twist, clip, done. The large clip distributes the weight of your hair evenly, which means no tension headaches and no dented ponytail crease later. It suits medium to long hair best, and the twisted shape it creates looks deliberately elegant, like a French twist's relaxed cousin.
How to get it: Gather your hair as if making a low ponytail, twist the whole length upward, and fold it against the back of your head. Open a large claw clip over the twist and clamp it shut, letting the ends fan out over the top of the clip or tucking them in for a neater look. Pull out a few face-framing pieces to finish.
💡 Quick Win: Twist slightly to one side instead of straight up; the asymmetry makes the clip sit more securely and looks more styled.
Shop the Look
- Large tortoiseshell claw clip
- Medium claw clip for finer hair
- Texture spray for grip before clipping
- Bobby pins for reinforcing the twist
- Silk pillowcase to avoid next-day creases
7. The Bubble Ponytail
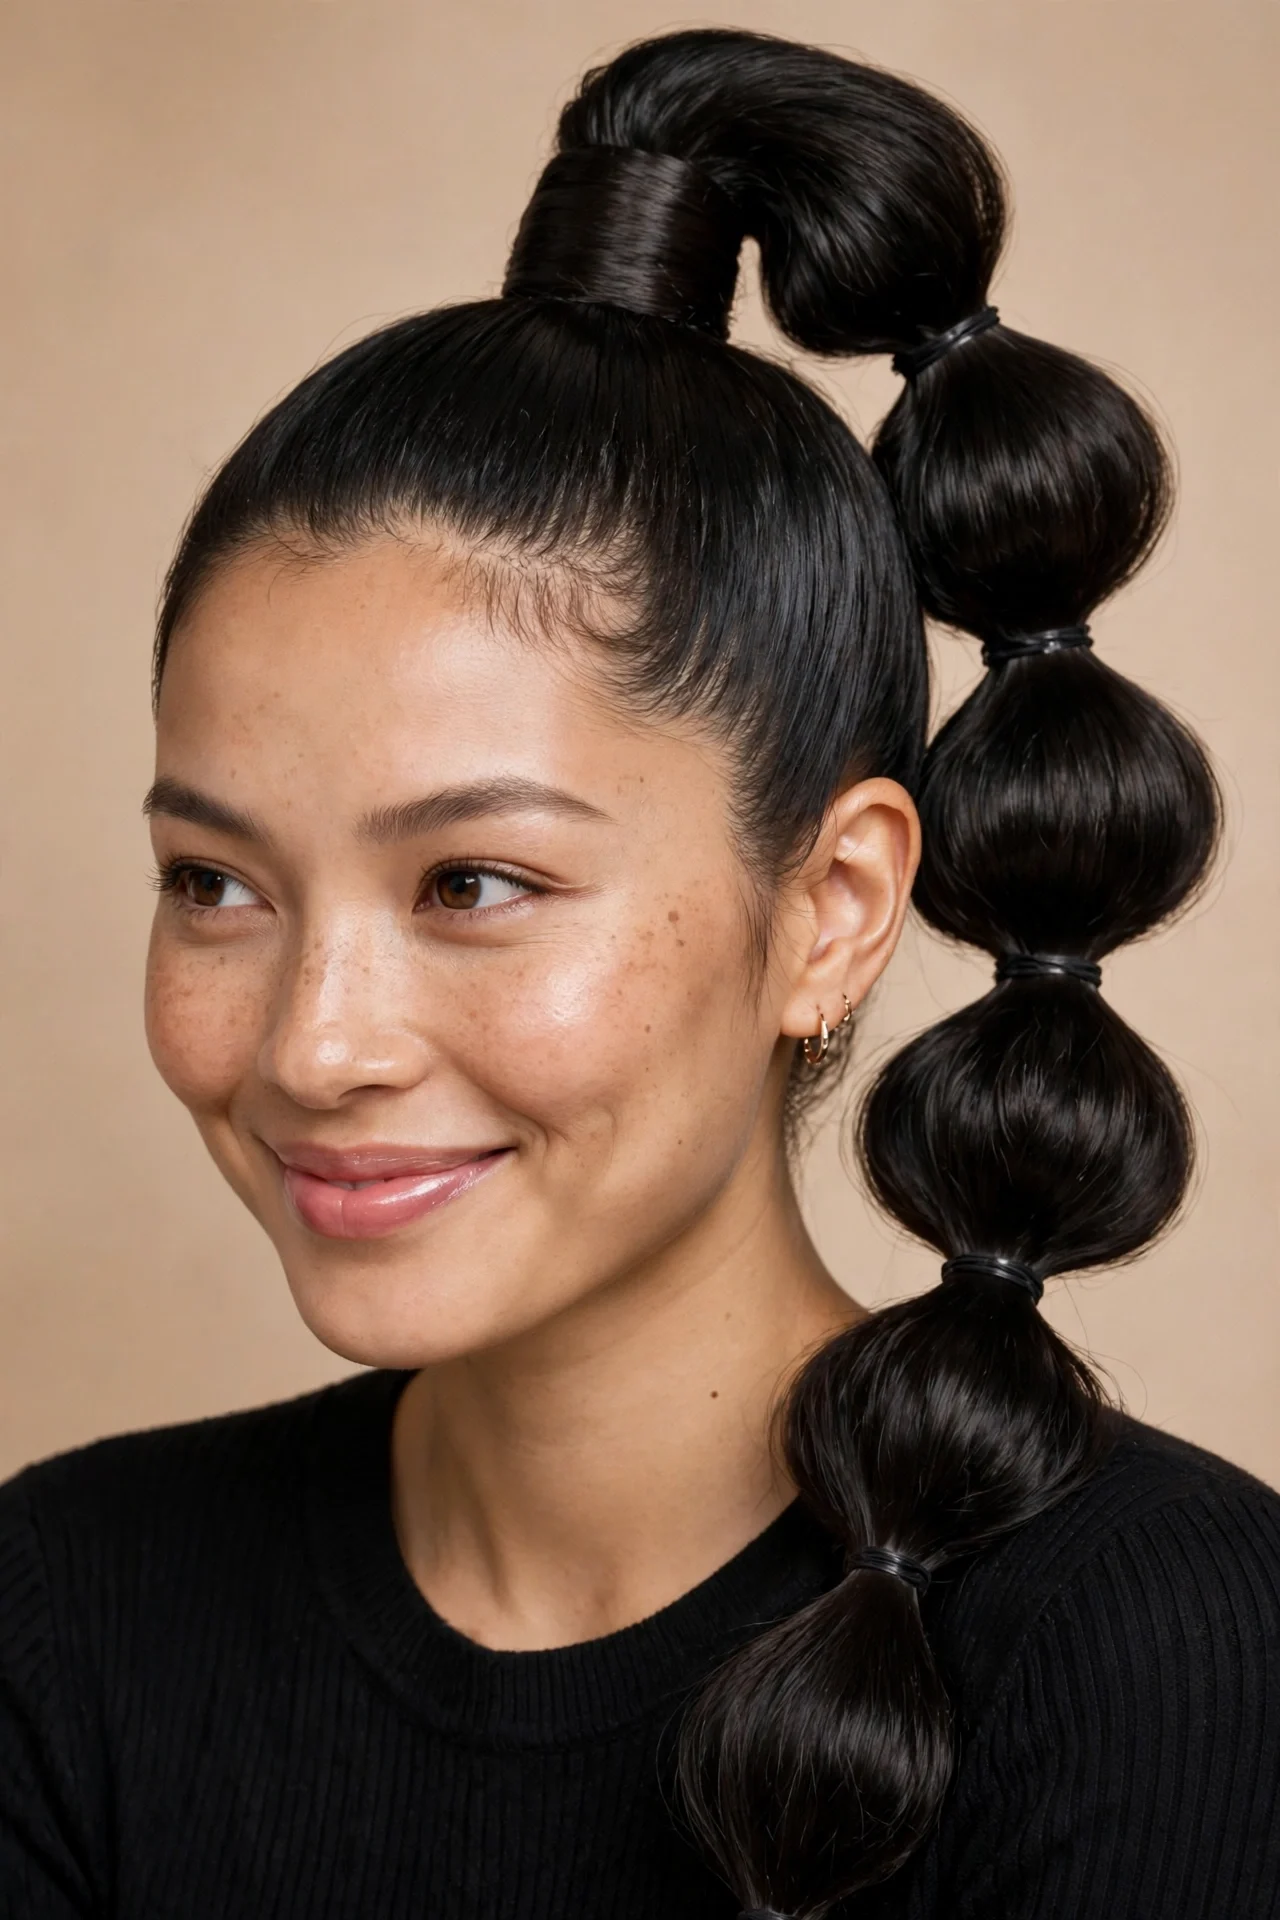
Vibe: Playful, trendy, and full of personality.
Why it works: The bubble ponytail works because it turns a basic ponytail into a statement with nothing but extra elastics. Each sectioned bubble adds volume and shape, making even fine hair look thick and full, and the segmented look photographs beautifully for social media. It is also practical: the extra elastics keep the ponytail from swinging into your face, which makes it a favorite for festivals and long days out.
How to get it: Secure a high ponytail, then add elastics every two to three inches down the tail. Gently tug each section outward to puff it into a rounded bubble, working from the top down so the shape stays even. For a softer look, wrap a small strand of hair around each elastic and pin it underneath.
💡 Quick Win: Use elastics that match your hair color exactly; the bubbles read as one continuous style instead of a segmented ponytail.
Shop the Look
- Pack of small color-matched elastics
- Teasing comb for puffing each bubble
- Light-hold hairspray for the sections
- Shine serum for a glossy finish
- Decorative elastic covers for events
8. The Slicked-Back Low Bun
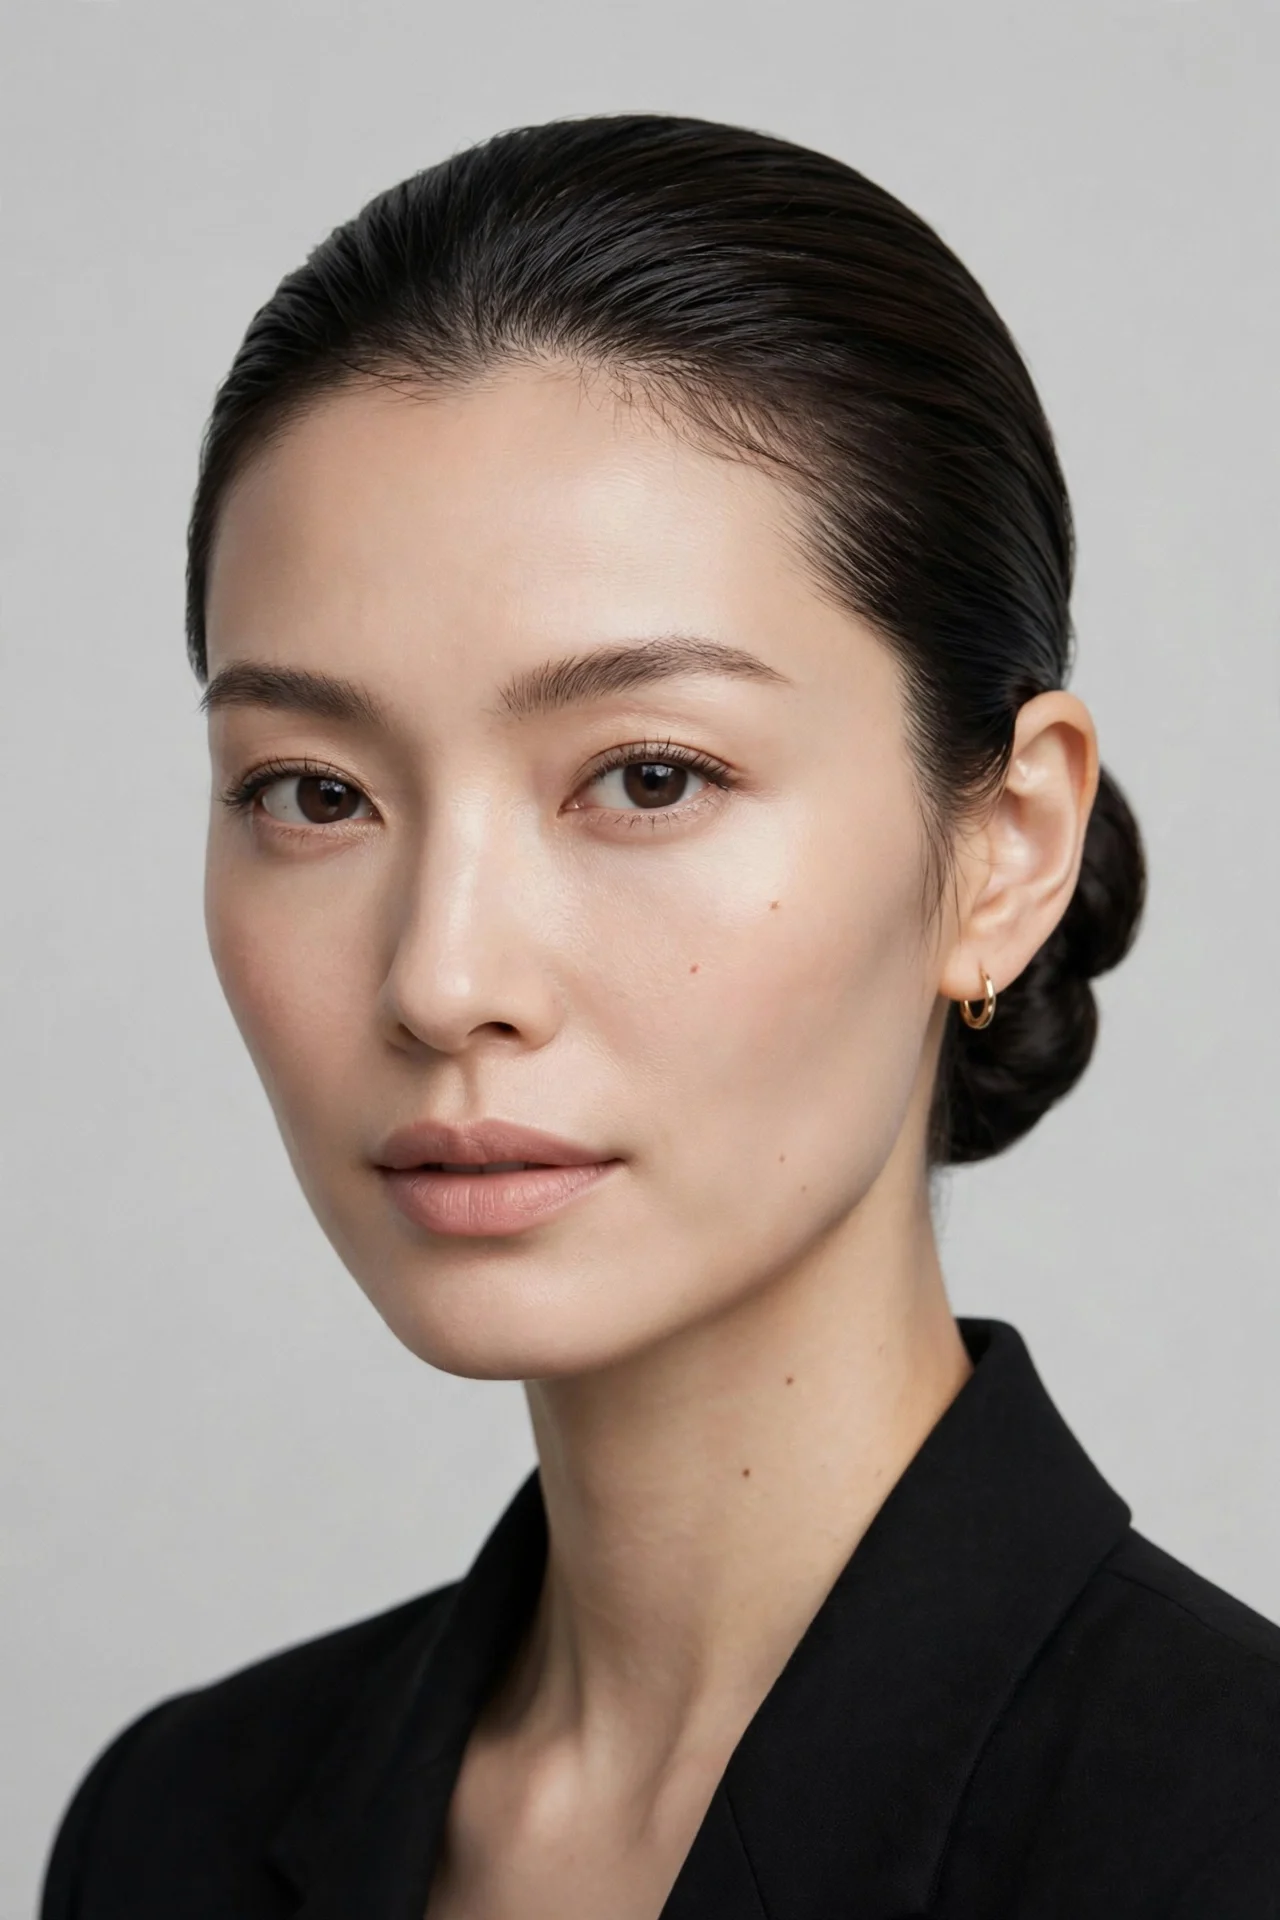
Vibe: Sleek, powerful, and boardroom-ready.
Why it works: The slicked-back low bun works because it borrows the clean-girl aesthetic that dominates social media: every strand controlled, every line deliberate. Smoothing the hair back creates a sculpted look that reads as expensive and intentional, and the low bun keeps it professional rather than severe. It is also the best style on this list for taming frizz on humid days, since the gel seals the cuticle flat.
How to get it: Apply a generous amount of strong-hold gel to damp or dry hair and brush everything straight back with a soft-bristle brush. Gather into a low ponytail at the nape, twist the tail into a compact bun, and pin it flat against your head. Smooth the crown once more with the brush and a light mist of hairspray, pressing down any remaining flyaways with your palms.
💡 Quick Win: Run a clean, dry toothbrush misted with hairspray along your hairline; it tames baby hairs more precisely than any brush.
Shop the Look
- Strong-hold styling gel
- Soft-bristle smoothing brush
- Edge-control brush for the hairline
- High-shine finishing spray
- Snag-free elastic for the base
9. The Half-Up Twist
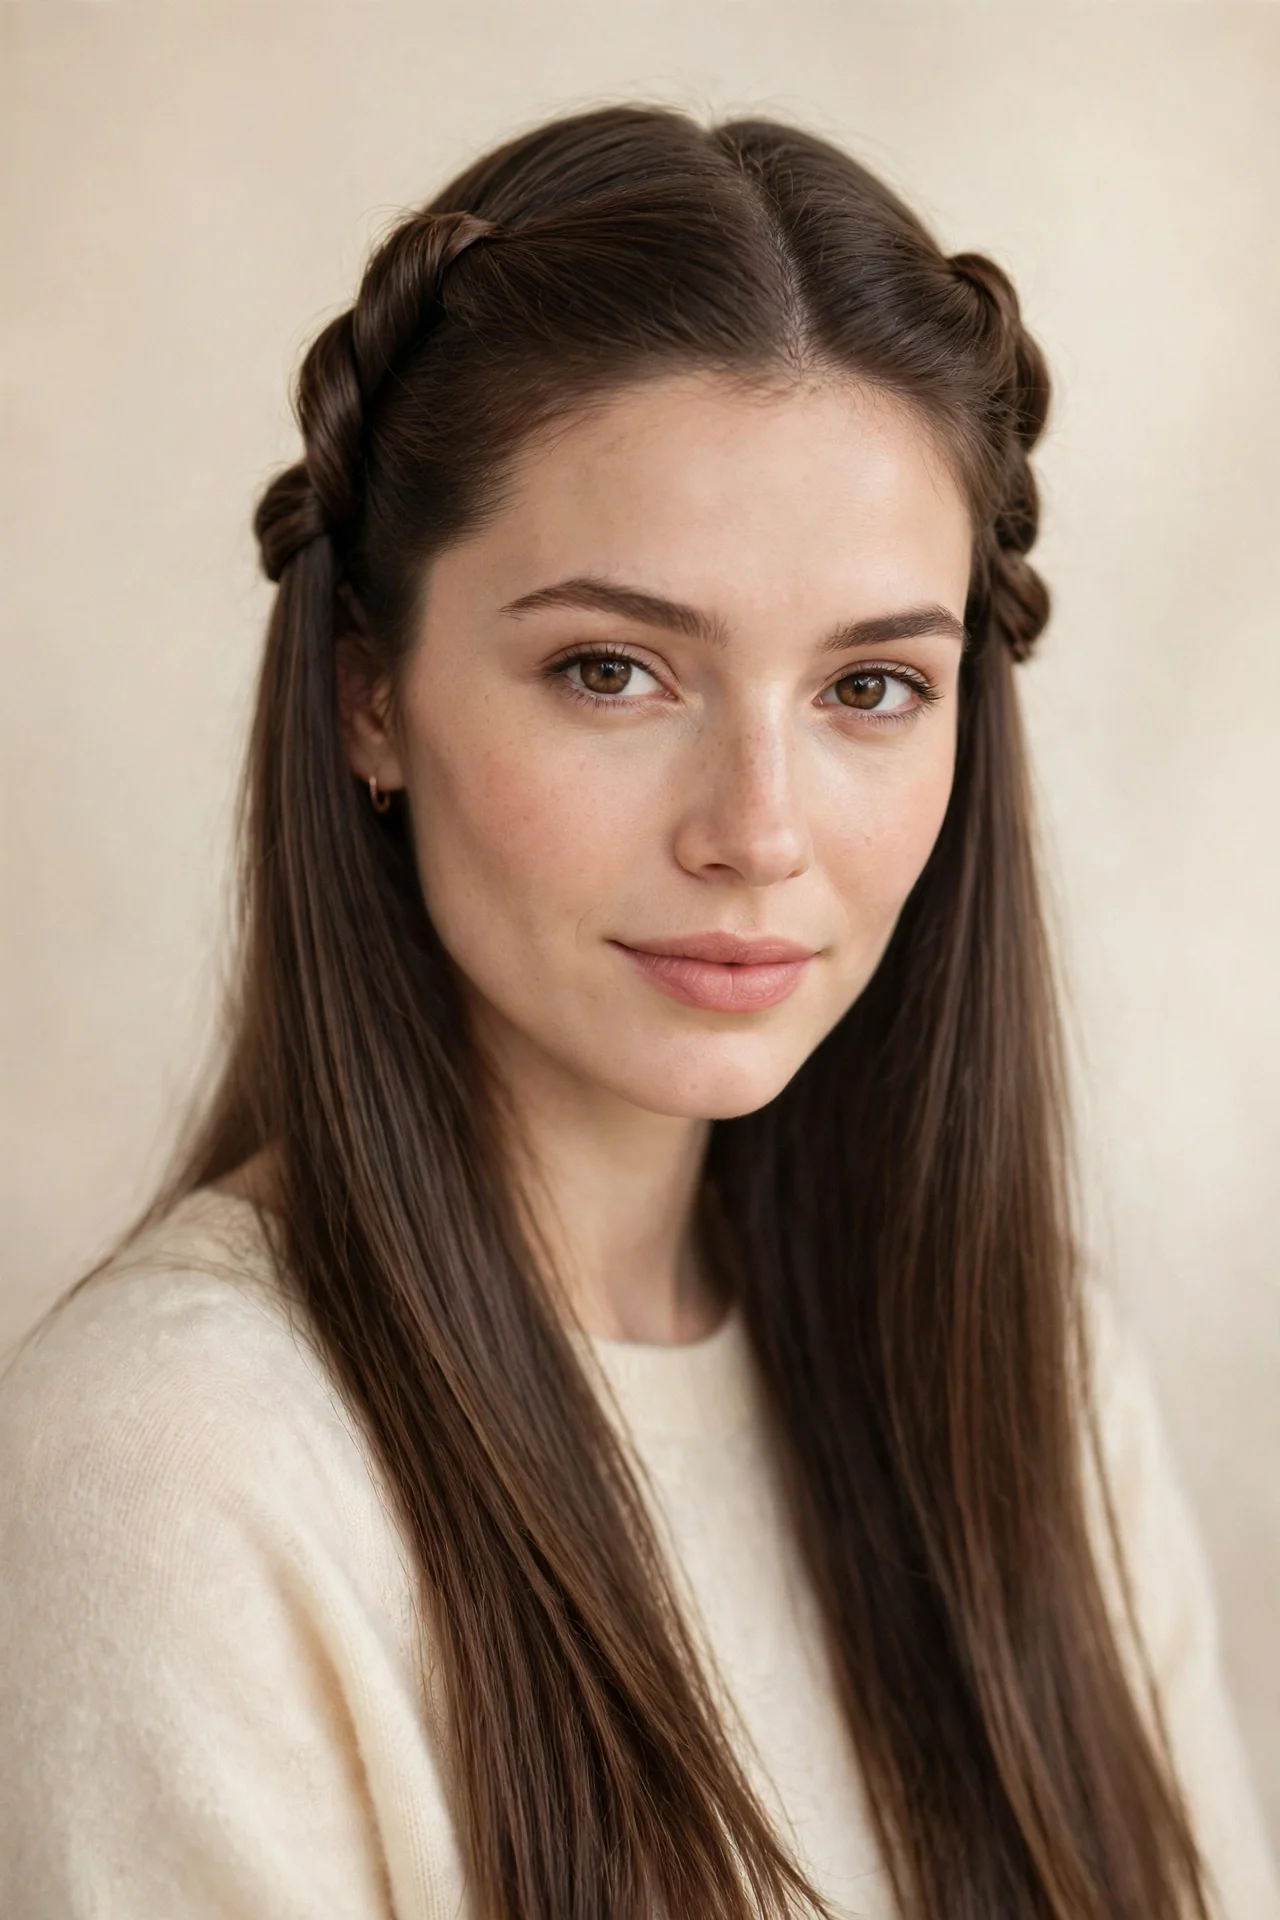
Vibe: Romantic, soft, and quietly pretty.
Why it works: The half-up twist works because it keeps hair out of your face while showing off your length, and the twisted sections add just enough detail to look styled. Unlike a plain half ponytail, the twists create texture that catches the light, which makes the whole style look more deliberate. It suits straight, wavy, and curly hair equally, since the twist adapts to whatever texture you have.
How to get it: Take a two-inch section from each temple and twist them backward toward the crown. Cross the two twists over each other and secure with a small elastic or a decorative clip, then gently loosen the twists with your fingertips for softness. Leave the rest of your hair down, and curl or wave the ends if you want extra polish.
Shop the Look
- Small clear elastics
- Decorative hair clip or barrette
- Light-hold hairspray
- Heat protectant for curling the ends
- Shine serum for the loose lengths
10. The Scarf Braid
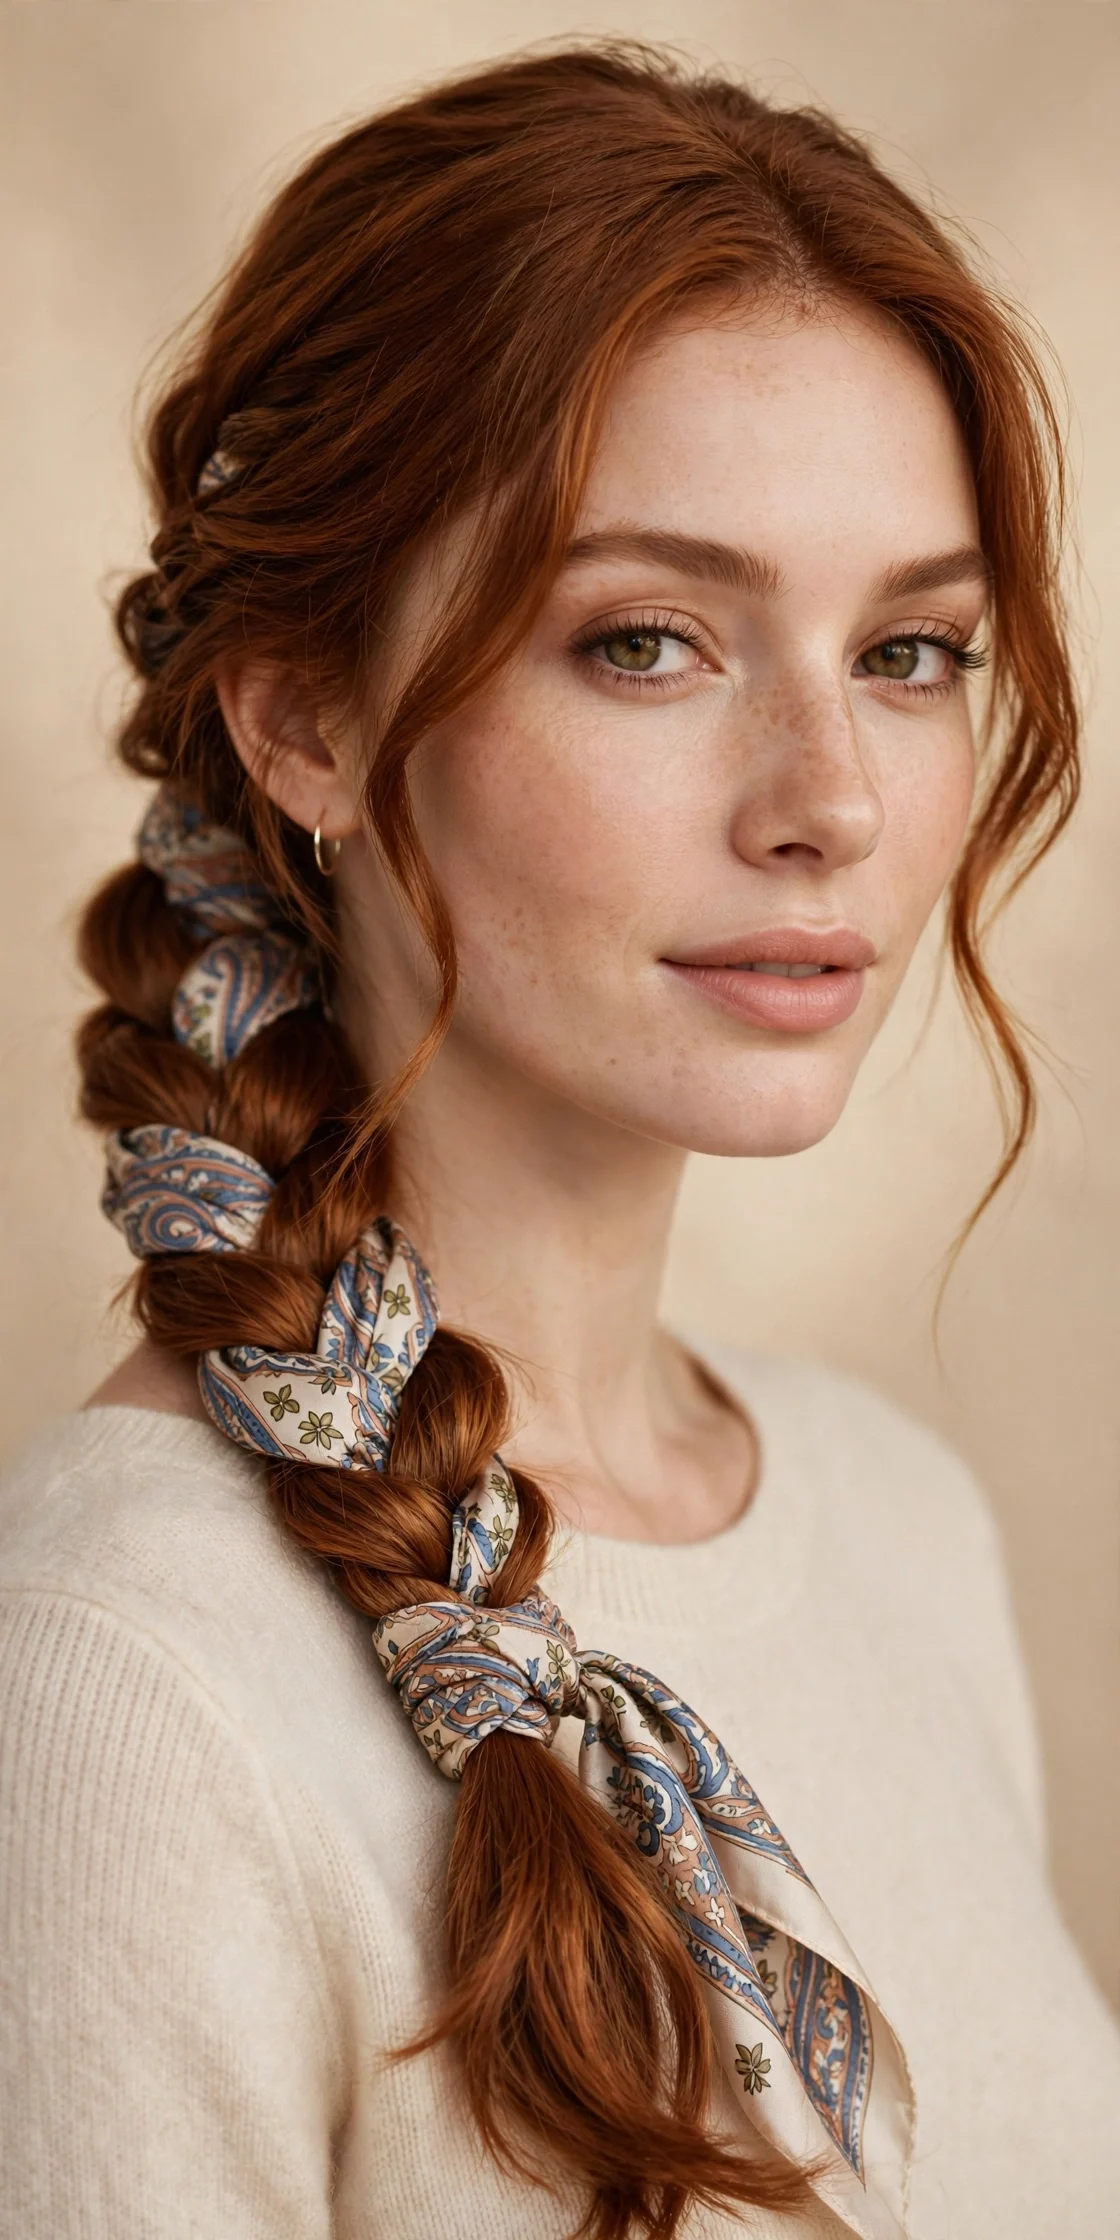
Vibe: Feminine, charming, and full of color.
Why it works: The scarf braid works because the silk scarf does double duty: it acts as one of the braid strands and as a built-in accessory. The pop of color and pattern elevates a simple braid into something that looks styled for an occasion, and the scarf's texture helps the braid grip better than hair alone. It is an easy way to add personality to a plain outfit without changing anything else.
How to get it: Tie a slim silk scarf around the base of a low ponytail so it hangs with the tail. Divide the ponytail into two sections plus the scarf as the third strand, and braid all the way down, securing with a small elastic. Gently tug the braid loops wider and let the scarf ends hang loose or tie them into a small bow.
💡 Quick Win: Choose a scarf with colors that pick up something in your outfit; the coordination makes the whole look feel intentional.
Shop the Look
- Slim silk or satin scarves
- Small clear elastics
- Texturizing spray for braid grip
- Soft-hold hairspray
- Silk scrunchie for the ponytail base
11. The Waterfall Braid
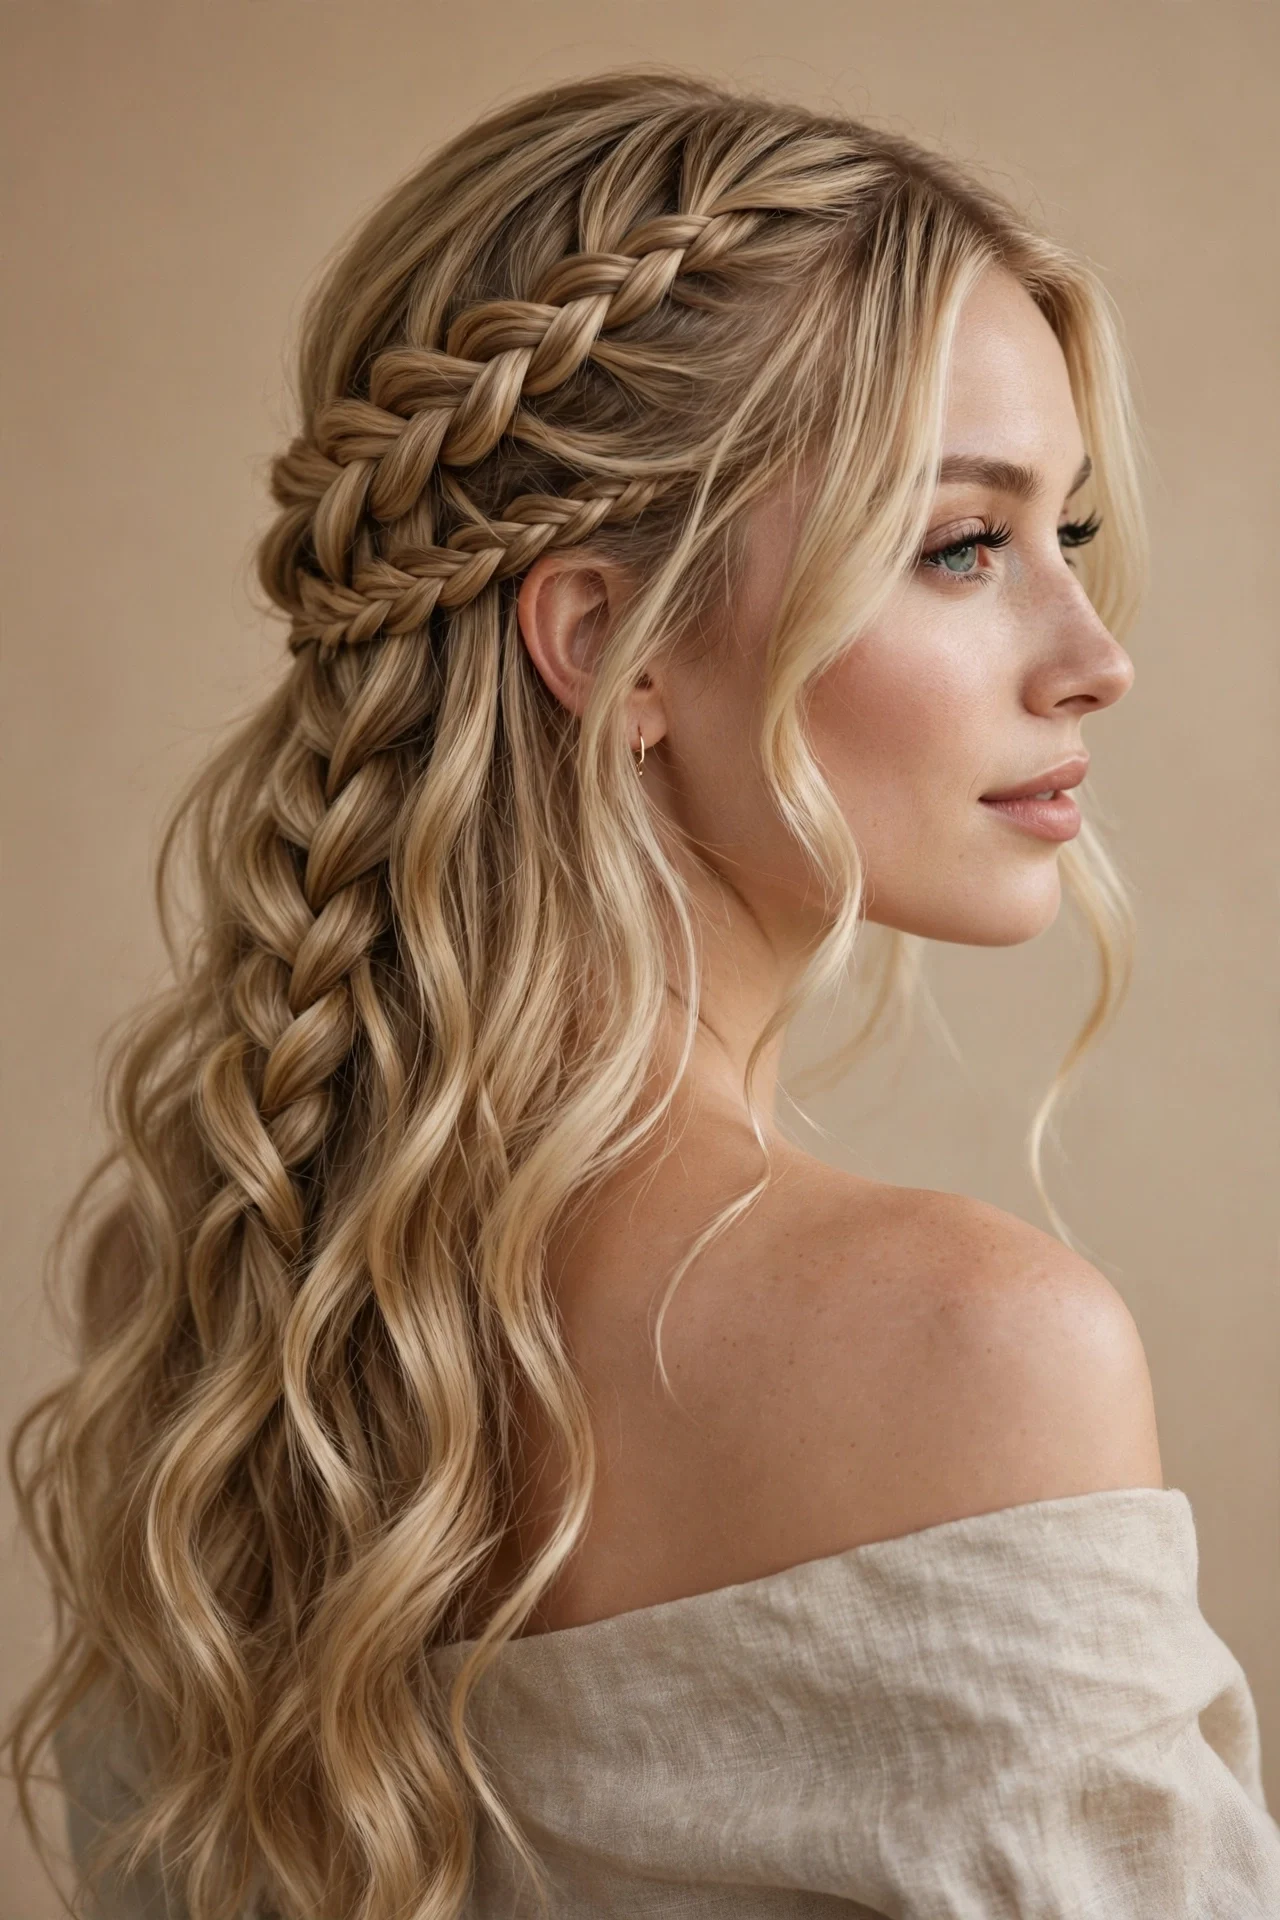
Vibe: Dreamy, intricate, and occasion-worthy.
Why it works: The waterfall braid works because it looks far more complex than it is: strands cascade through the braid like water over rocks, creating a woven effect that draws compliments every time. It frames the face beautifully and works as an accent across the crown or as a full style on longer hair. Despite its fancy appearance, it uses only the basic three-strand braid motion with one dropped strand per twist.
How to get it: Take a section near your temple and begin a regular three-strand braid, but drop the bottom strand with each twist and pick up a new section of hair in its place. Work across the back of your head, keeping the tension even, and secure the end behind your ear with pins. Mirror the braid on the other side and pin both together for a complete look.
💡 Quick Win: Practice the dropping motion on a table with three ribbons first; your fingers learn the rhythm in minutes without arm fatigue.
Shop the Look
- Bobby pins that match your hair
- Light-hold styling cream
- Rat-tail comb for clean sections
- Flexible-hold hairspray
- Small mirror for checking the back
12. The Pinned-Back Middle Part
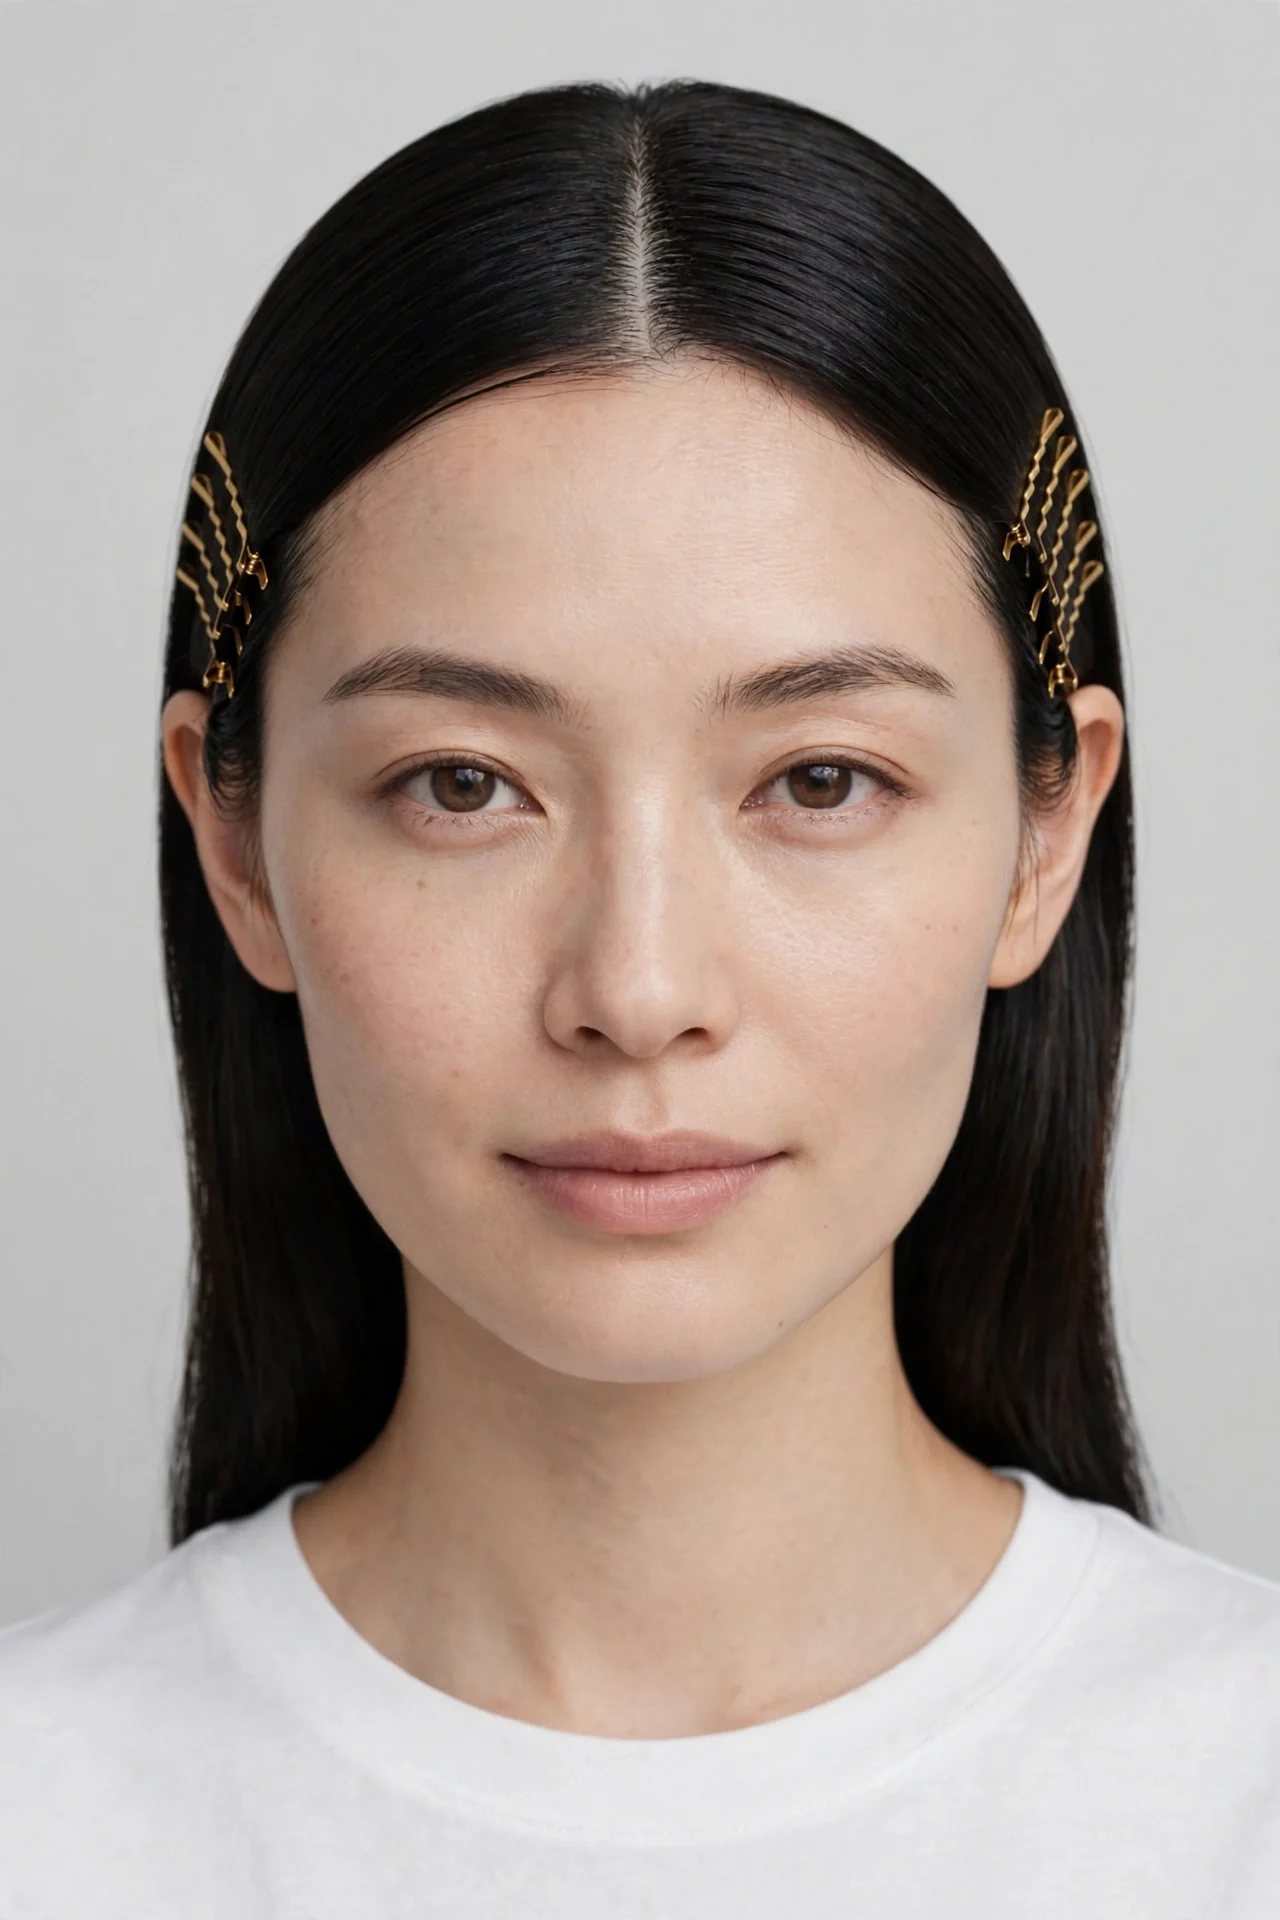
Vibe: Minimal, modern, and effortlessly cool.
Why it works: The pinned-back middle part works because it achieves a styled look with literally no elastic and no heat. Two bobby pins on each side of a center part create clean, graphic lines that read as deliberate and fashion-forward, and the style takes under sixty seconds. It is the perfect answer for the days when your hair will not cooperate but you still need to look like you tried.
How to get it: Create a clean center part with a comb, then smooth each side back behind your ears. Slide two bobby pins on each side just above the ear, crossing them in an X for extra hold, and choose pins in gold or a contrasting color if you want them to be a feature. Mist lightly with hairspray to keep everything in place.
Shop the Look
- Gold or decorative bobby pins
- Rat-tail comb for a sharp part
- Light-hold hairspray
- Smoothing serum for the lengths
- Mini flat iron for touch-ups
13. The Low Side Ponytail
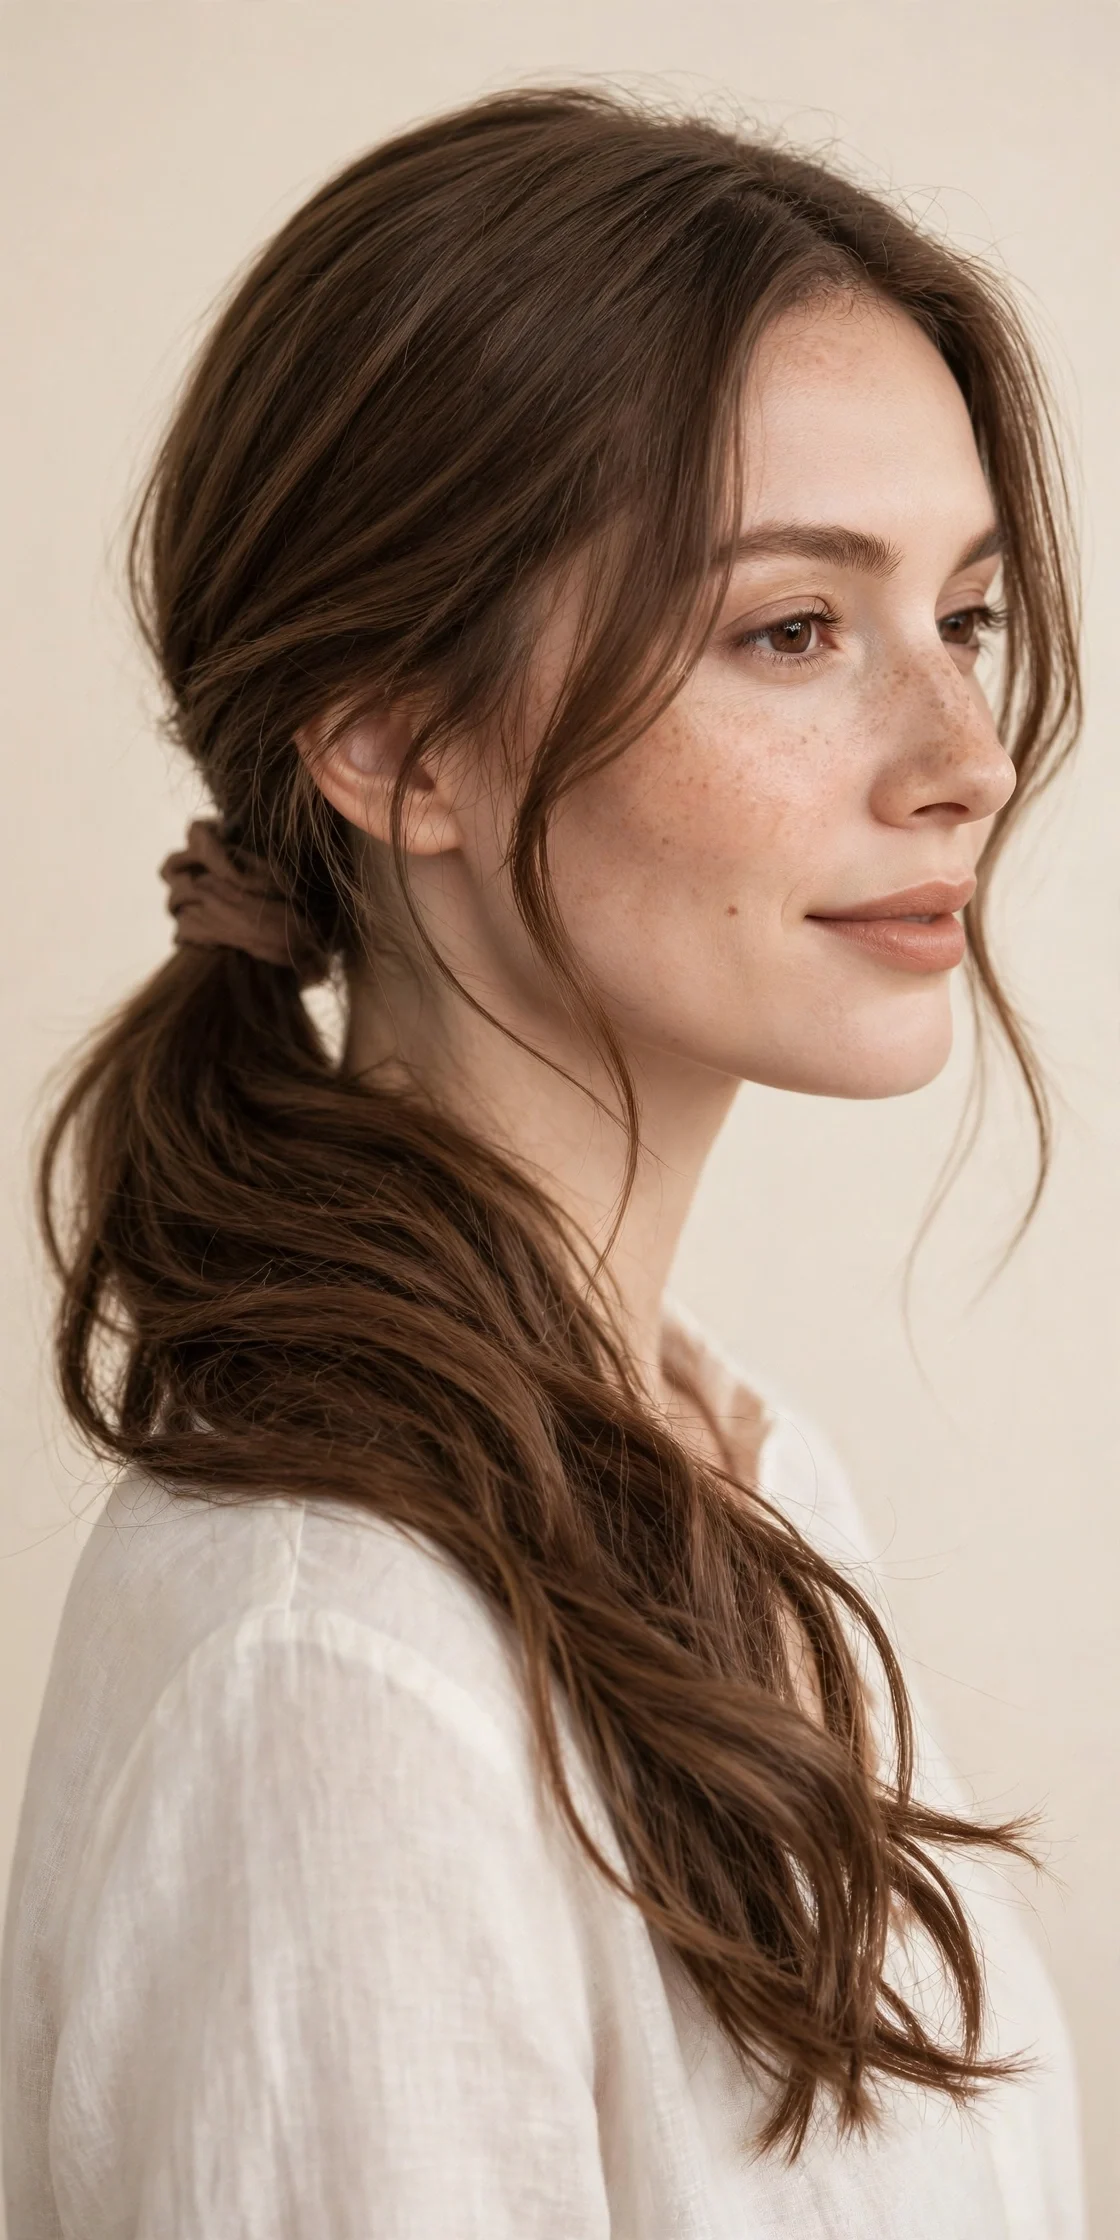
Vibe: Soft, romantic, and red-carpet adjacent.
Why it works: The low side ponytail works because draping the hair over one shoulder creates an elegant asymmetry that flatters the neckline and collarbone. It reads as softer and more romantic than a centered ponytail, which makes it a natural choice for date nights and events, yet it takes the same two minutes as any ponytail. Loose waves or curls in the tail add the movement that makes this style shine.
How to get it: Sweep all your hair to one side, letting it fall naturally over your shoulder, and secure it low behind the ear with an elastic. Wrap a strand of hair around the elastic and pin it underneath for a polished finish. Loosen a few pieces around your face and mist with a flexible-hold spray.
💡 Quick Win: Curl just the ponytail, not the crown, with a large-barrel iron; the contrast between smooth roots and wavy ends looks expensive.
Shop the Look
- Large-barrel curling iron
- Heat protectant spray
- Fabric-covered elastics
- Flexible-hold hairspray
- Shine-enhancing serum
14. The Twisted Crown
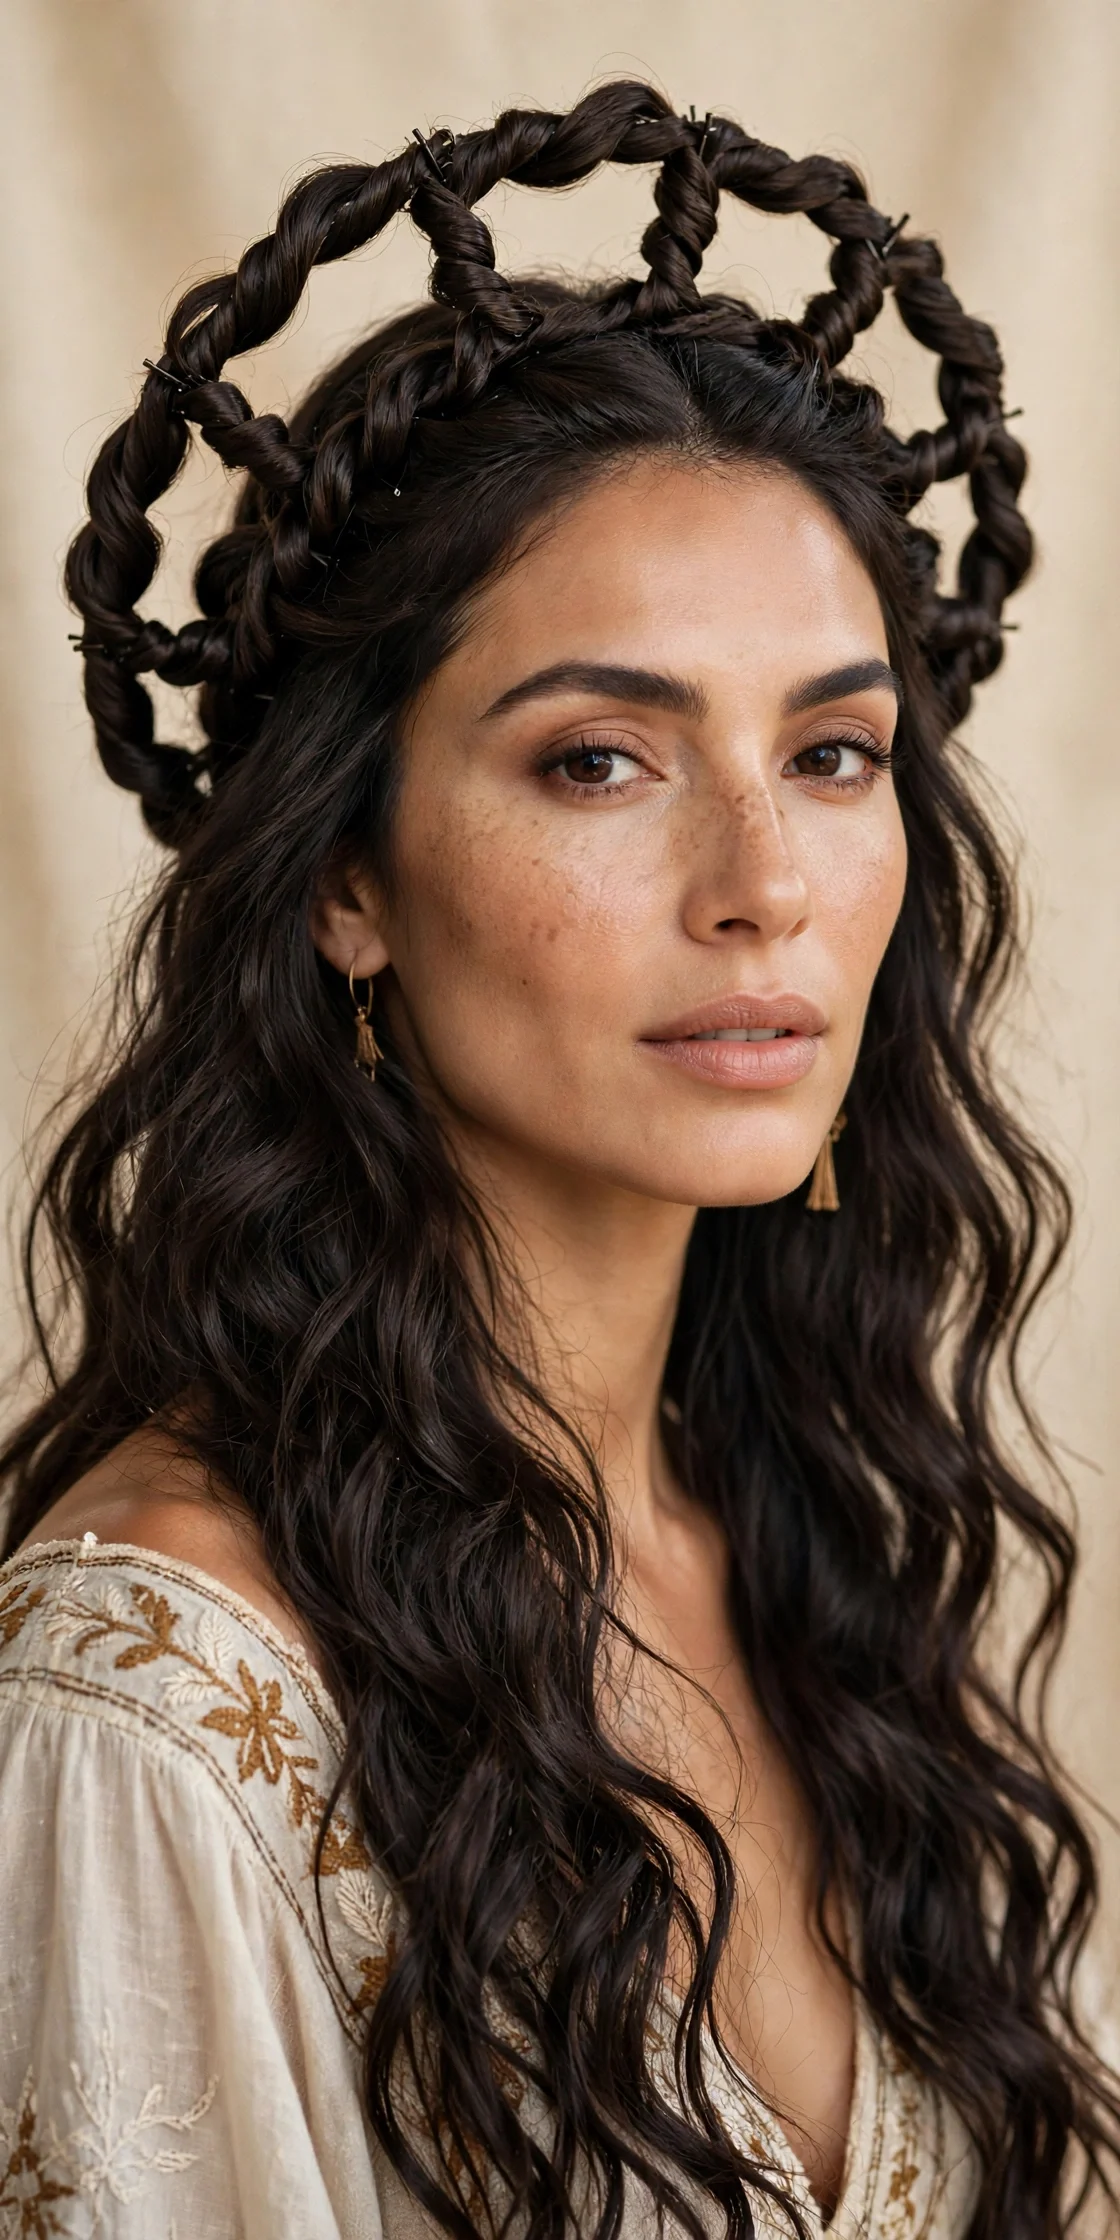
Vibe: Bohemian, regal, and made for golden hour.
Why it works: The twisted crown works because it creates a halo effect that looks like a professional updo but uses only twisting and pinning. Sections twisted back from each temple and pinned around the crown frame the face like a headband made of your own hair, while the remaining length flows free. It stays secure through wind and movement, which makes it a favorite for outdoor events and photos.
How to get it: Part your hair down the middle and take a thick section from each side near the temples. Twist each section back along the hairline, adding a little more hair as you go, and pin them together at the back of the crown with crossed bobby pins. Let the rest of your hair fall loose, and gently loosen the twists for a softer, more romantic finish.
💡 Quick Win: Hide each pin by sliding it under the twist rather than over it; the crown looks seamless and the pins disappear completely.
Shop the Look
- Bobby pins in your hair color
- Texturizing spray for twist grip
- Small clear elastics
- Soft-hold hairspray
- Flower pins for a wedding-ready version
15. The Bandana Updo
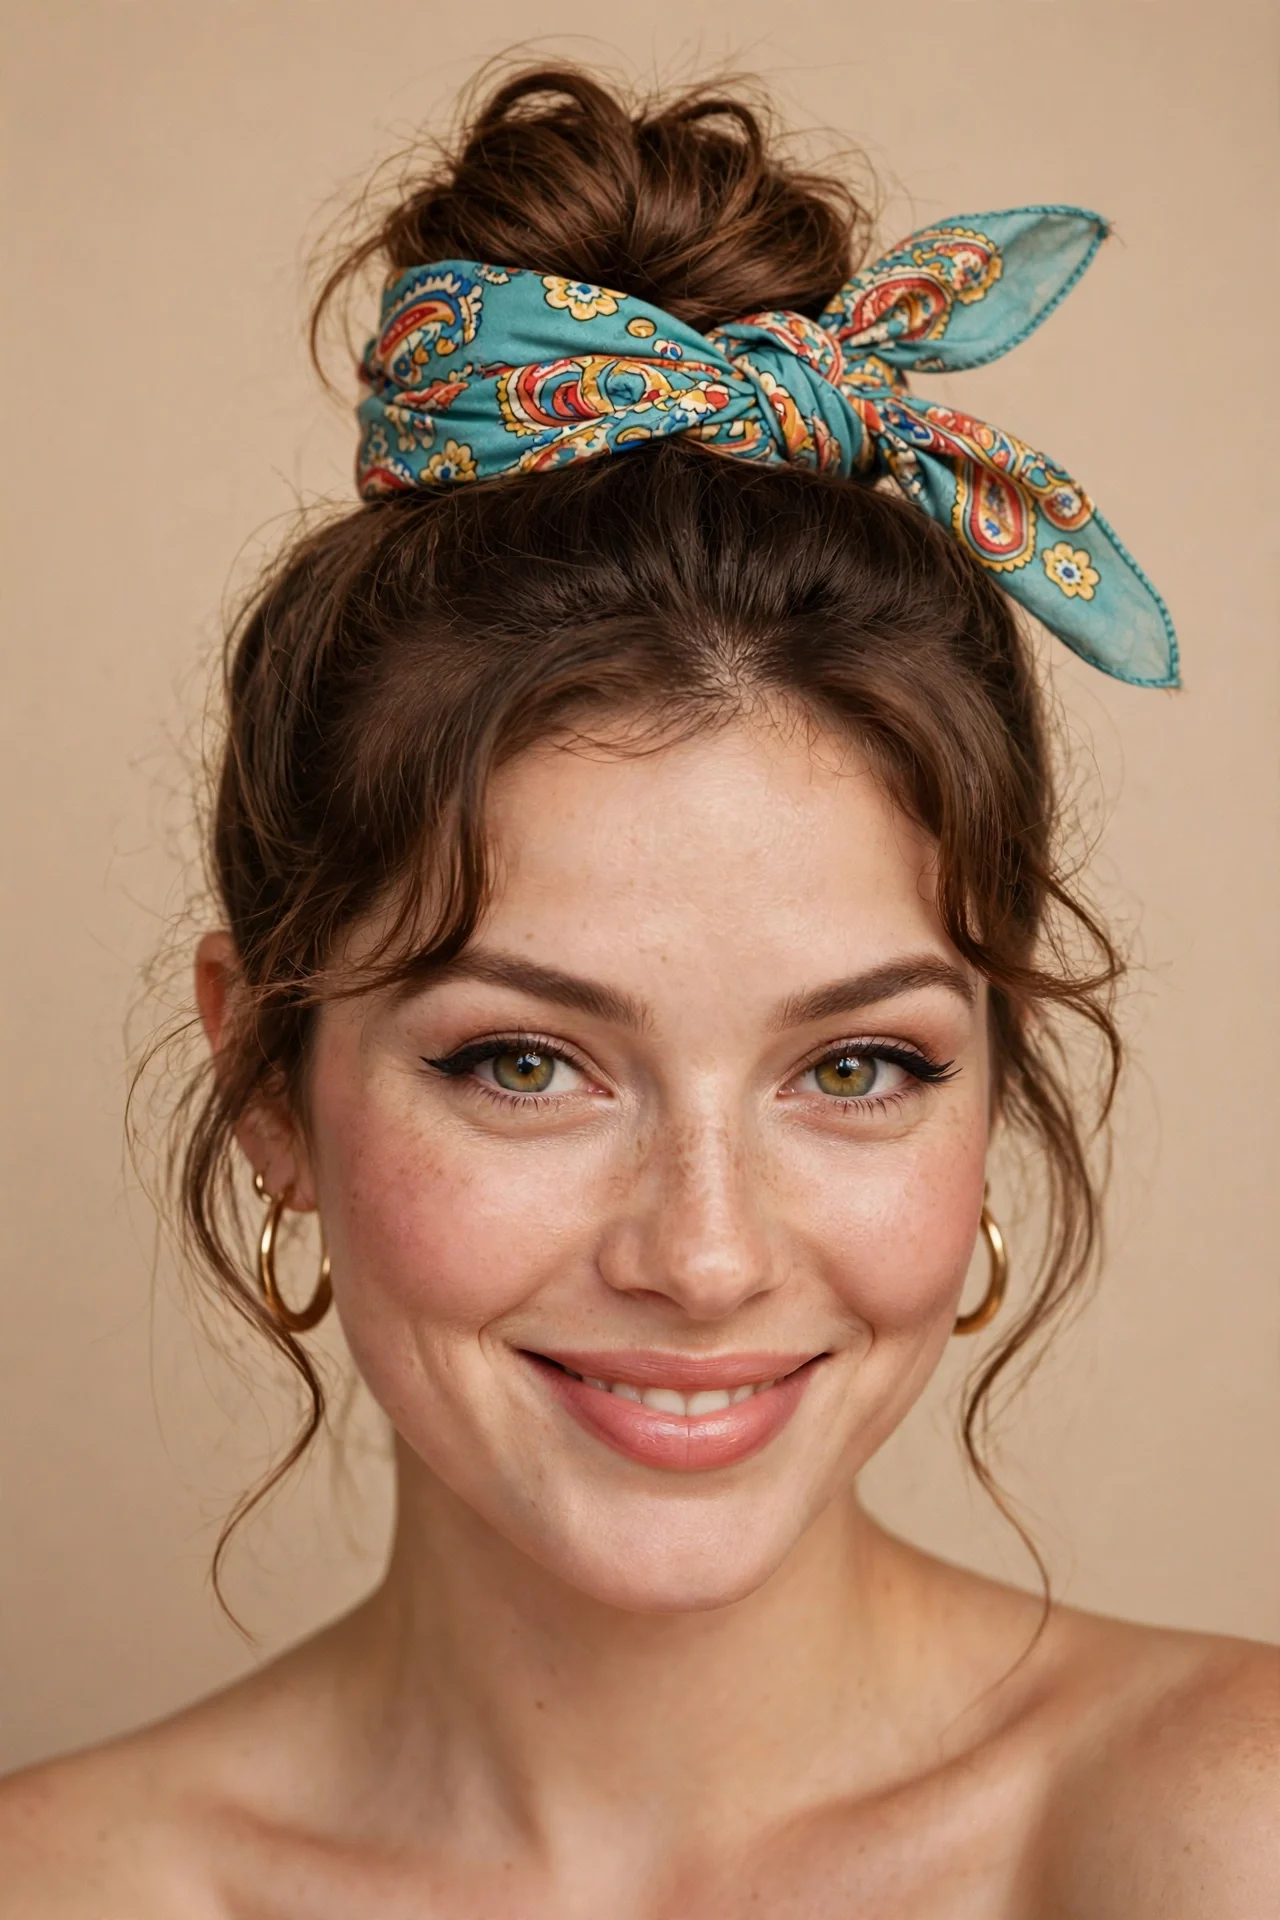
Vibe: Retro, playful, and full of personality.
Why it works: The bandana updo works because the accessory does the heavy lifting: a colorful bandana tied around a simple bun or twist instantly creates a finished, vintage-inspired look. It is also the ultimate disguise for unwashed hair, since the bandana covers the roots where oil shows first. The style takes three minutes and works on every hair texture, from pin-straight to coily.
How to get it: Gather your hair into a high bun, a low twist, or even just a ponytail, securing it however you like. Fold a bandana into a wide band and tie it around your head, knotting it at the top or the nape depending on your mood. Tuck any loose ends of the bandana under the knot and pull out a few face-framing pieces.
Shop the Look
- Cotton bandanas in assorted prints
- Dry shampoo for the roots
- Snag-free elastics
- Bobby pins for securing the knot
- Flexible-hold hairspray
16. Double Dutch Braids
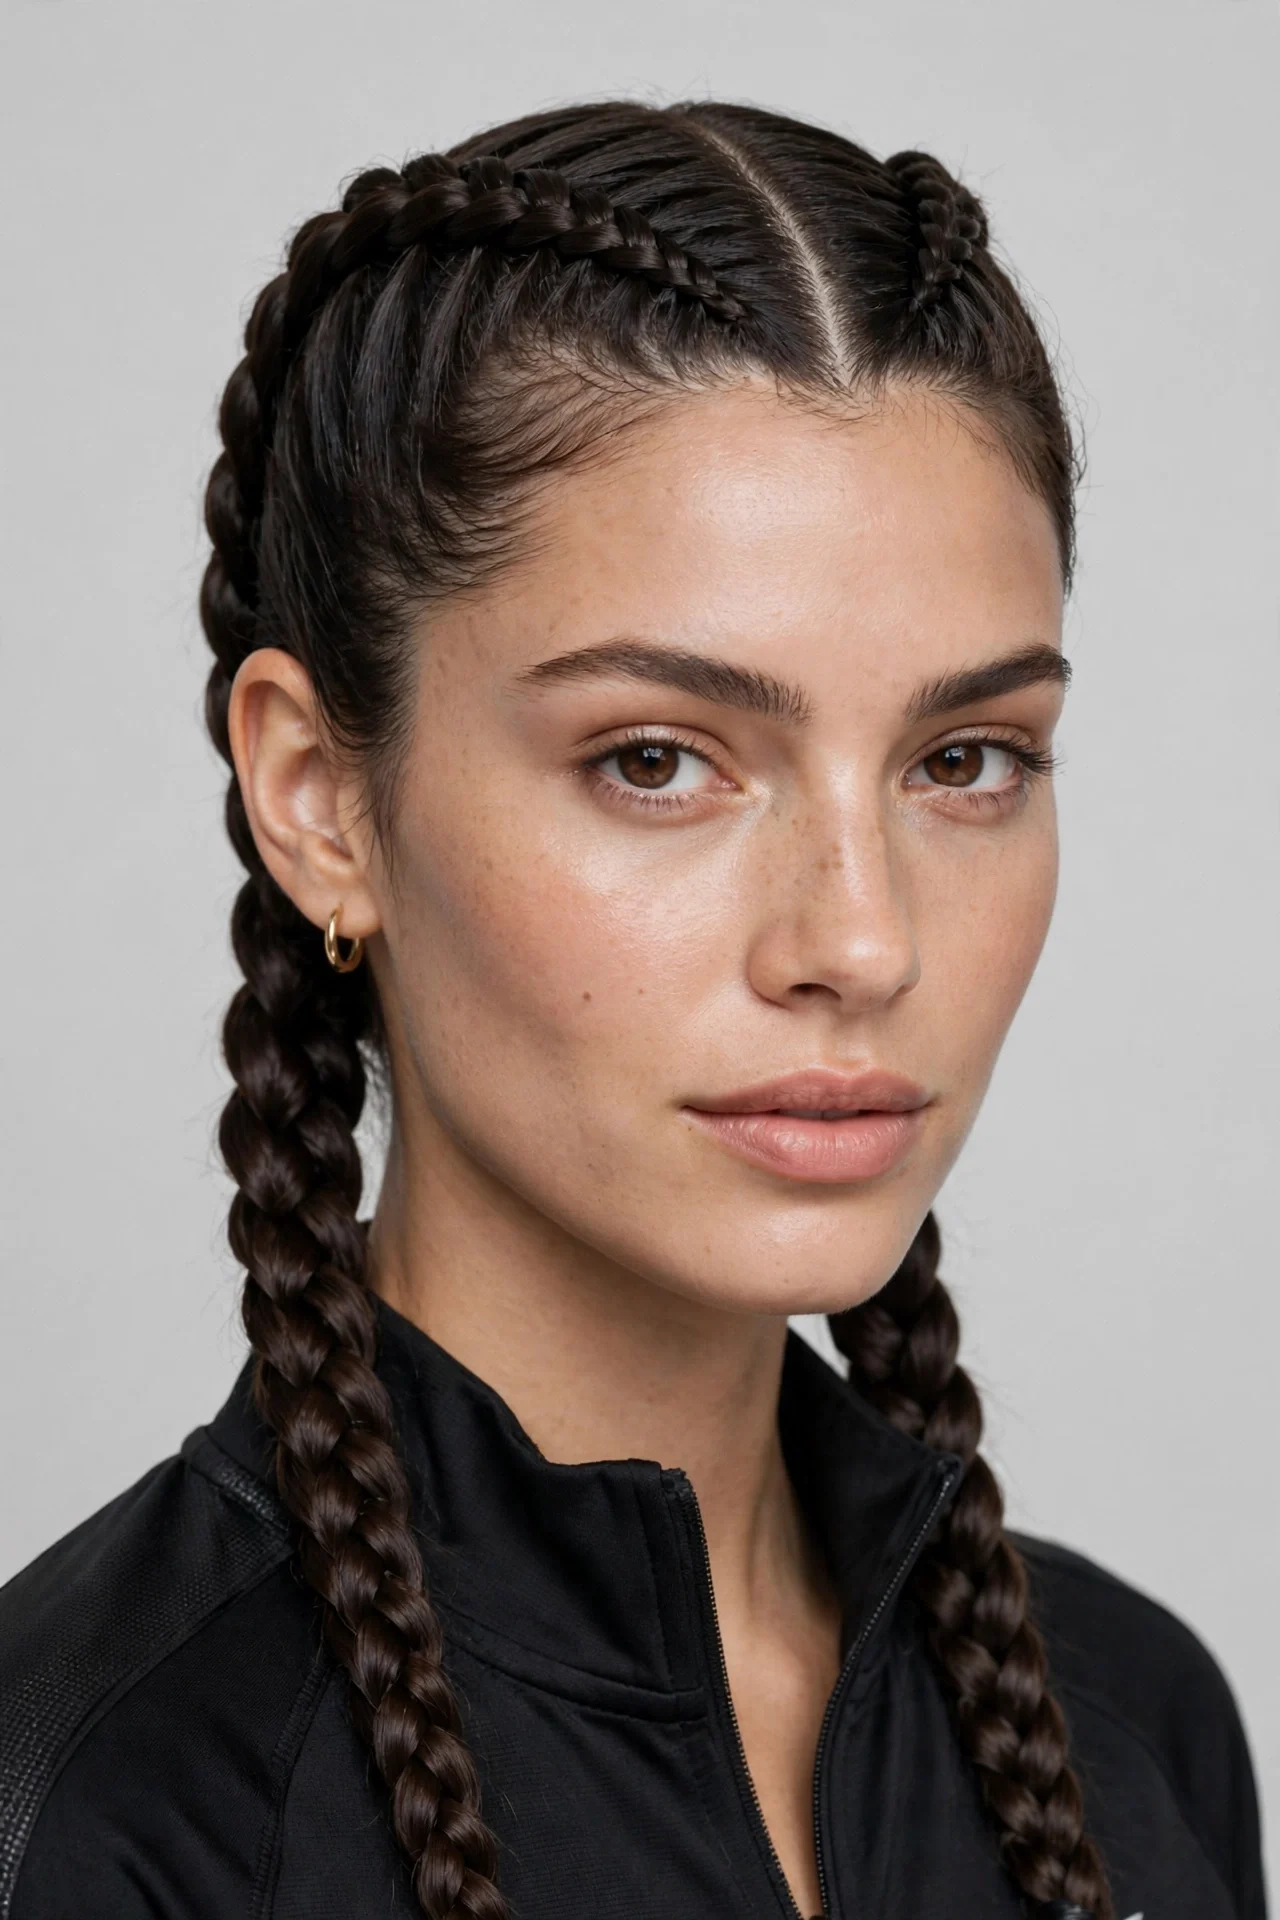
Vibe: Sporty, bold, and built to last.
Why it works: Double Dutch braids work because the inverted braiding technique makes the plaits sit on top of the hair, creating crisp, three-dimensional definition that holds for days. They keep every strand contained through workouts, sleep, and travel, and they double as a heatless wave method: take them out in the morning and you get perfect crimped texture. They are the hardest-working style on this list.
How to get it: Part your hair down the middle into two sections. On each side, begin a Dutch braid at the hairline, crossing the outer strands under the middle instead of over, and add hair as you work toward the nape. Braid the remaining tail to the ends and secure with elastics, then gently tug the braid edges wider for fullness.
💡 Quick Win: Braid slightly damp hair with a dab of styling cream; the braids set smoother and the resulting waves last twice as long.
Shop the Look
- Styling cream for smooth braiding
- Rat-tail comb for a clean center part
- Small elastics for the braid ends
- Edge-control gel for the hairline
- Satin bonnet for overnight wear
17. The Rope-Braid Ponytail
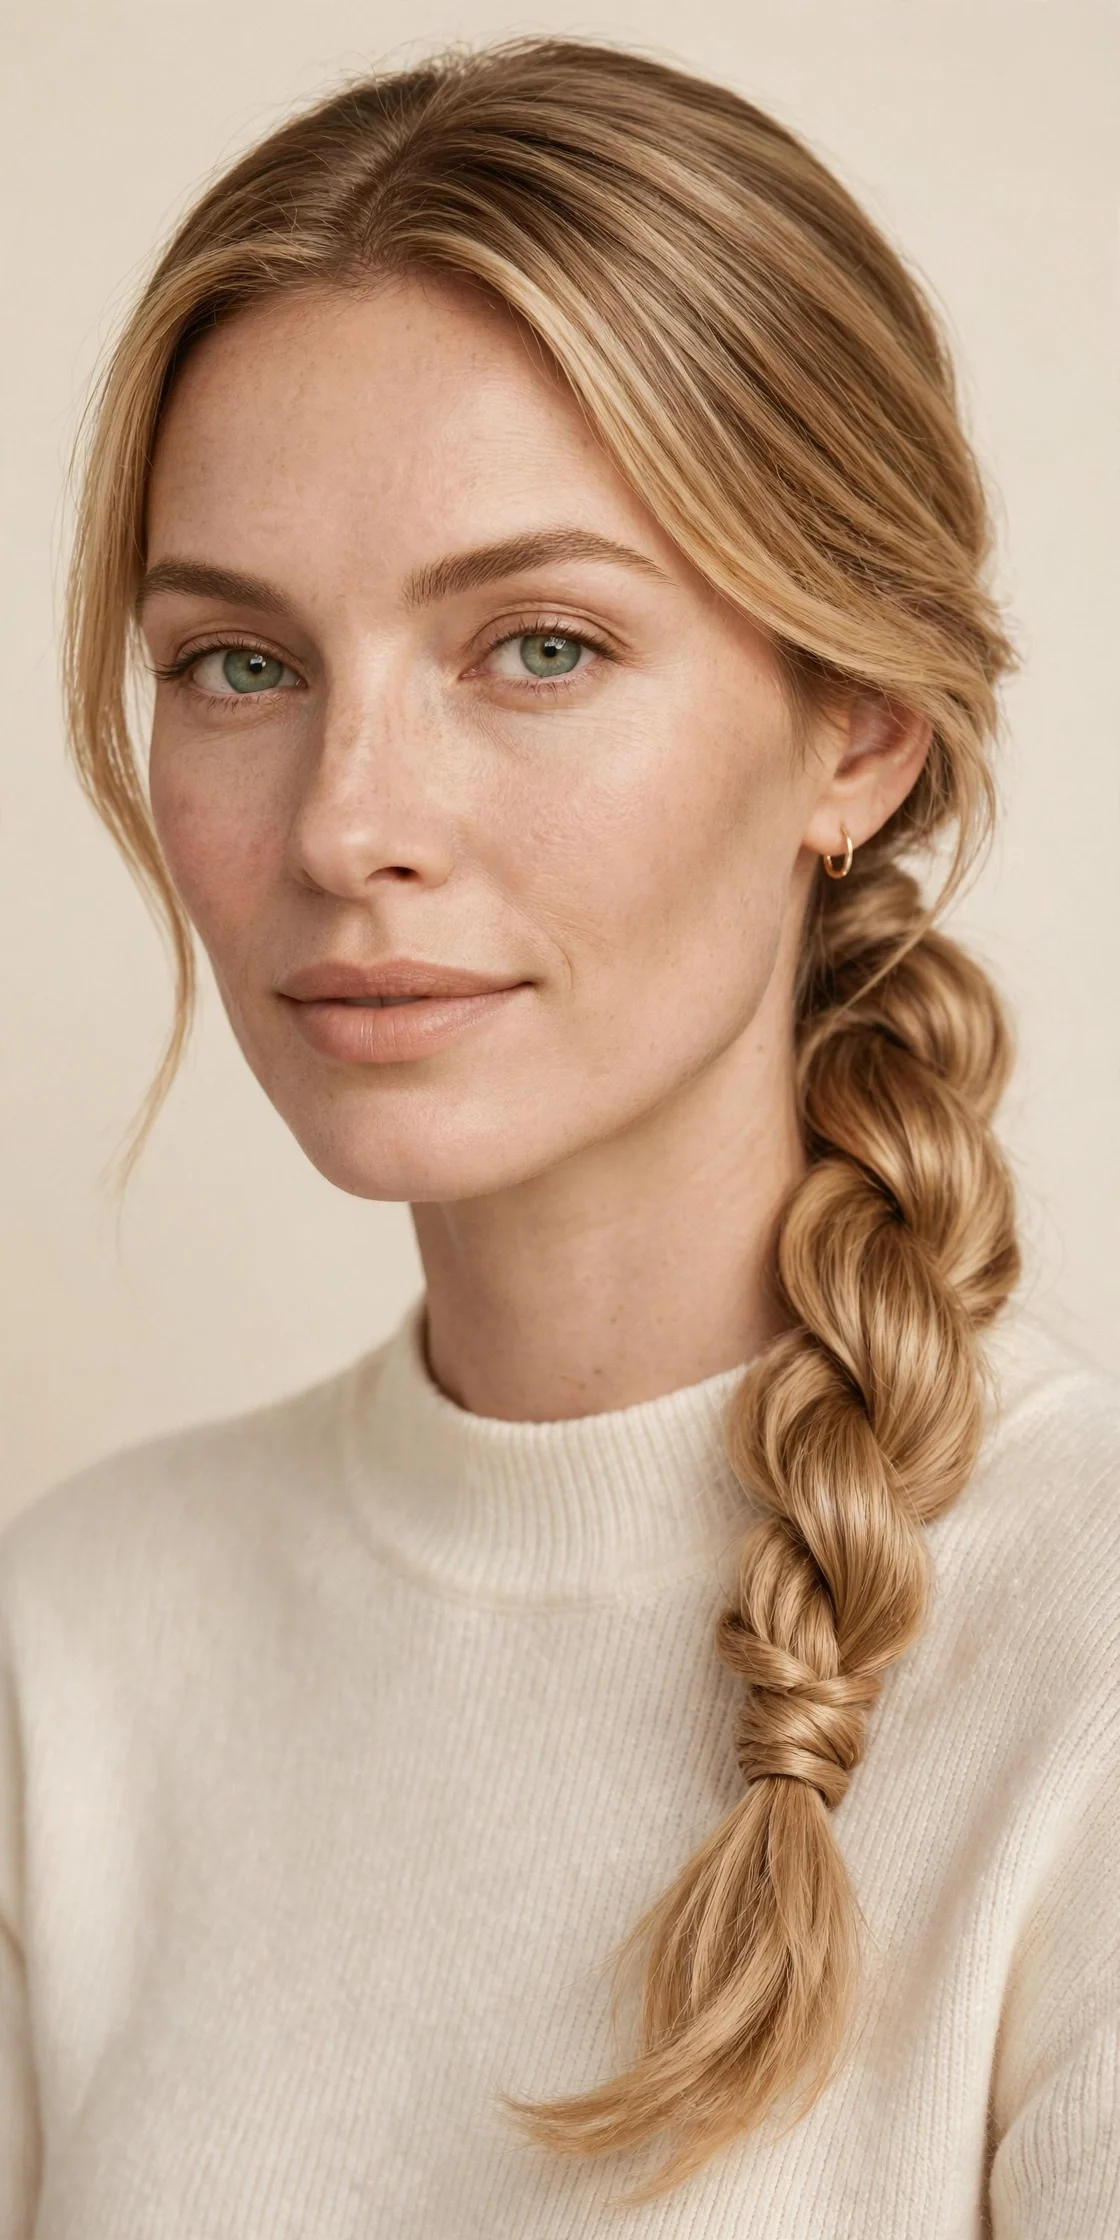
Vibe: Sleek, sculptural, and quietly striking.
Why it works: The rope-braid ponytail works because the two-strand twist creates a spiraled, rope-like texture that looks far more refined than a regular three-strand braid. It is also faster to do and less prone to loosening, since the twist locks against itself. On medium to long hair it reads as polished and intentional, which makes it a strong choice for workdays when a plain ponytail feels too casual.
How to get it: Secure a low or mid-height ponytail and divide the tail into two equal sections. Twist each section in the same direction, then twist the two twisted sections around each other in the opposite direction, which locks the rope in place. Secure the end with a small elastic and smooth the surface with a drop of serum.
💡 Quick Win: After securing the end, hold the elastic and slide the other hand up the rope to tighten it; the twist cinches into a perfectly even spiral.
Shop the Look
- Smoothing serum for the rope surface
- Small clear elastics
- Boar-bristle brush for a sleek base
- Light-hold hairspray
- Silk scrunchie for a softer base
18. The Wrapped Low Ponytail
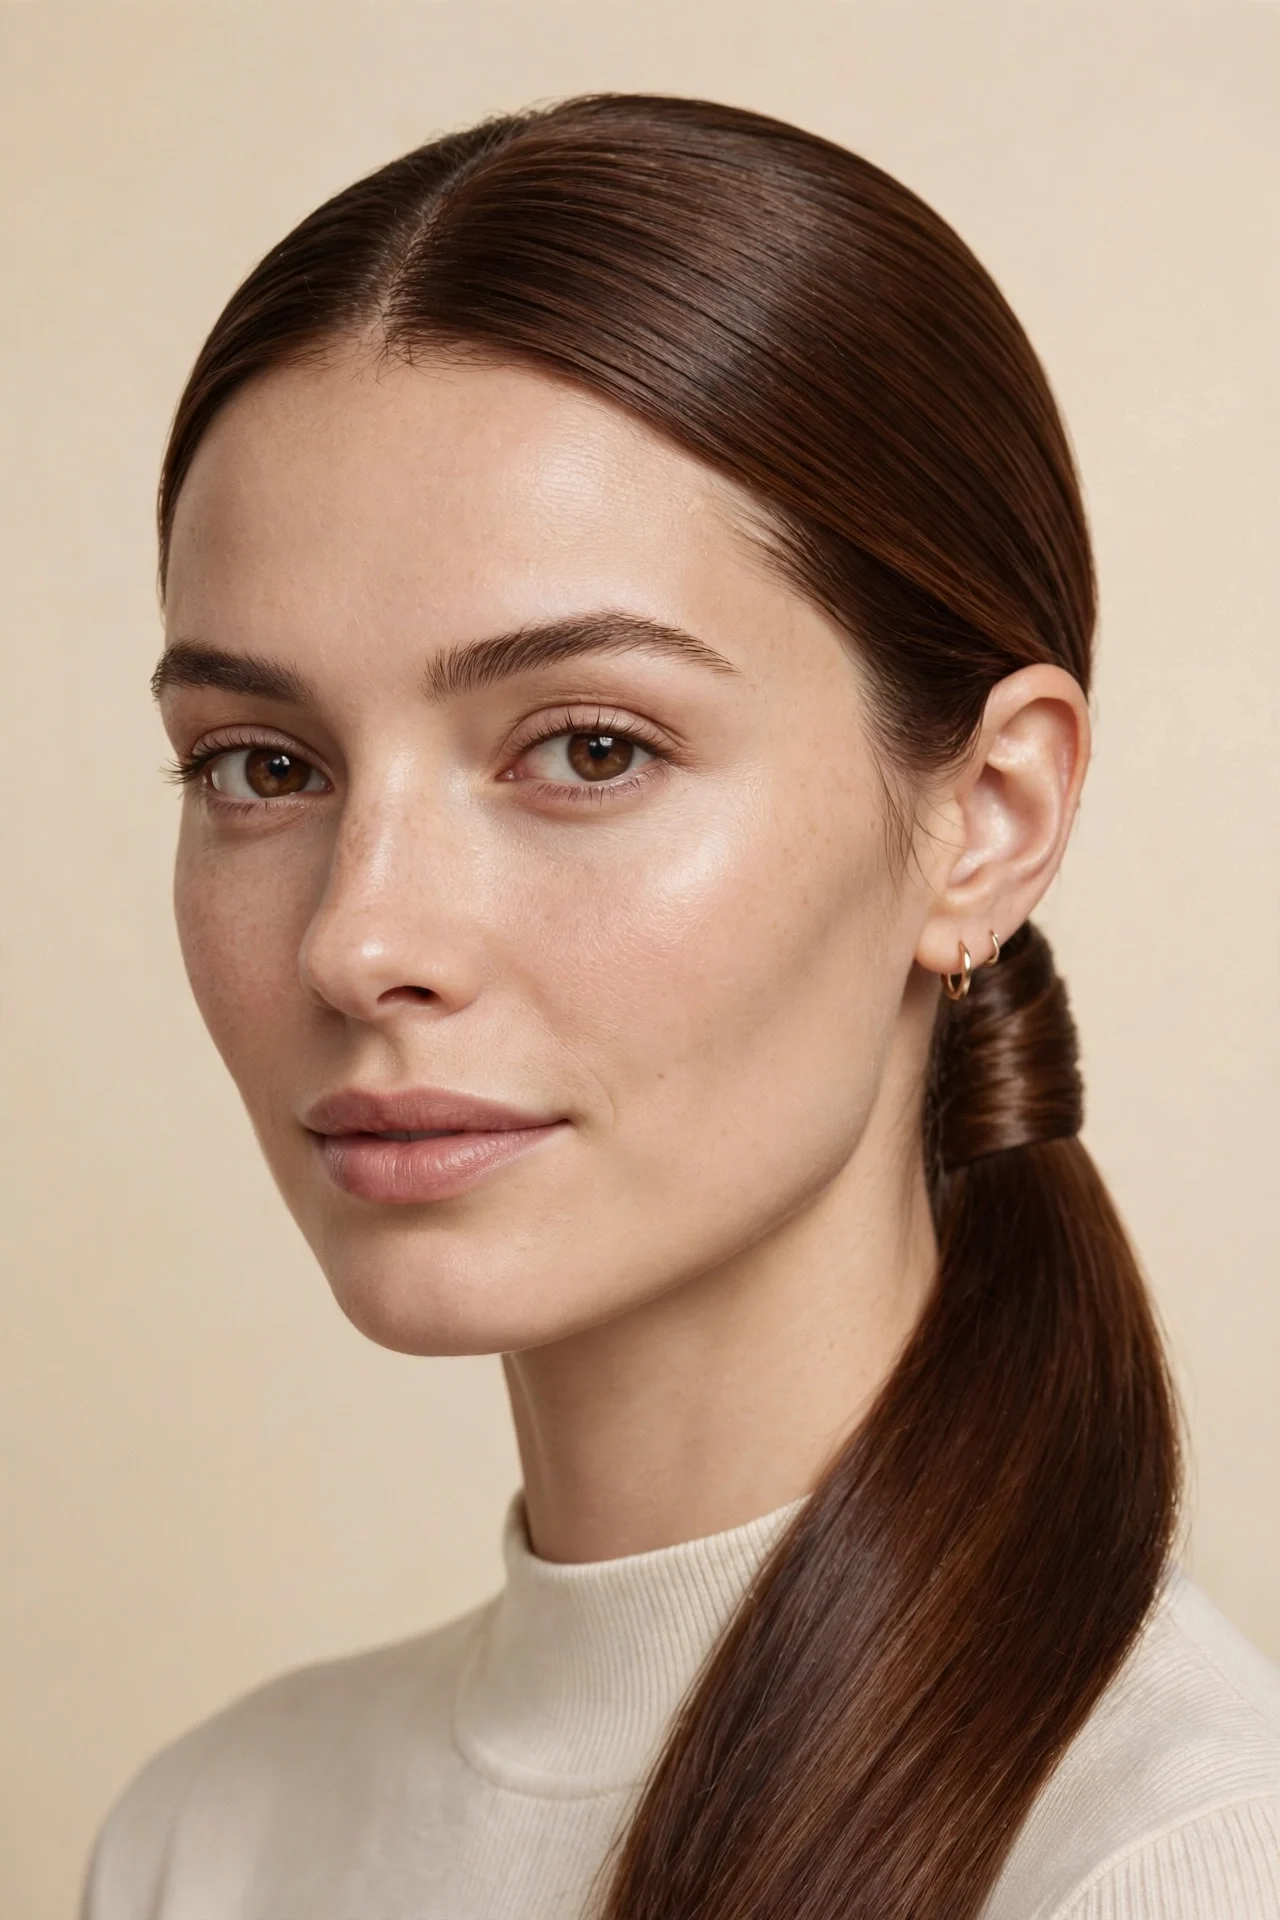
Vibe: Polished, minimal, and timeless.
Why it works: The wrapped low ponytail works because hiding the elastic is the single fastest way to make a ponytail look expensive. The wrapped strand creates a seamless, continuous line from crown to tail that reads as deliberate styling rather than a rushed morning fix. It suits every occasion from the office to a wedding, and the technique takes ten seconds once you know it.
How to get it: Secure a low ponytail at the nape with an elastic, keeping the crown smooth. Take a half-inch strand from underneath the ponytail, wrap it neatly around the elastic base two or three times, and pin the end underneath with a bobby pin. Smooth the tail with serum and mist lightly with hairspray.
Shop the Look
- Bobby pins that match your hair
- Shine serum for the tail
- Soft-bristle brush for smoothing
- Snag-free elastics
- Flexible-hold hairspray
19. The Headband Tuck
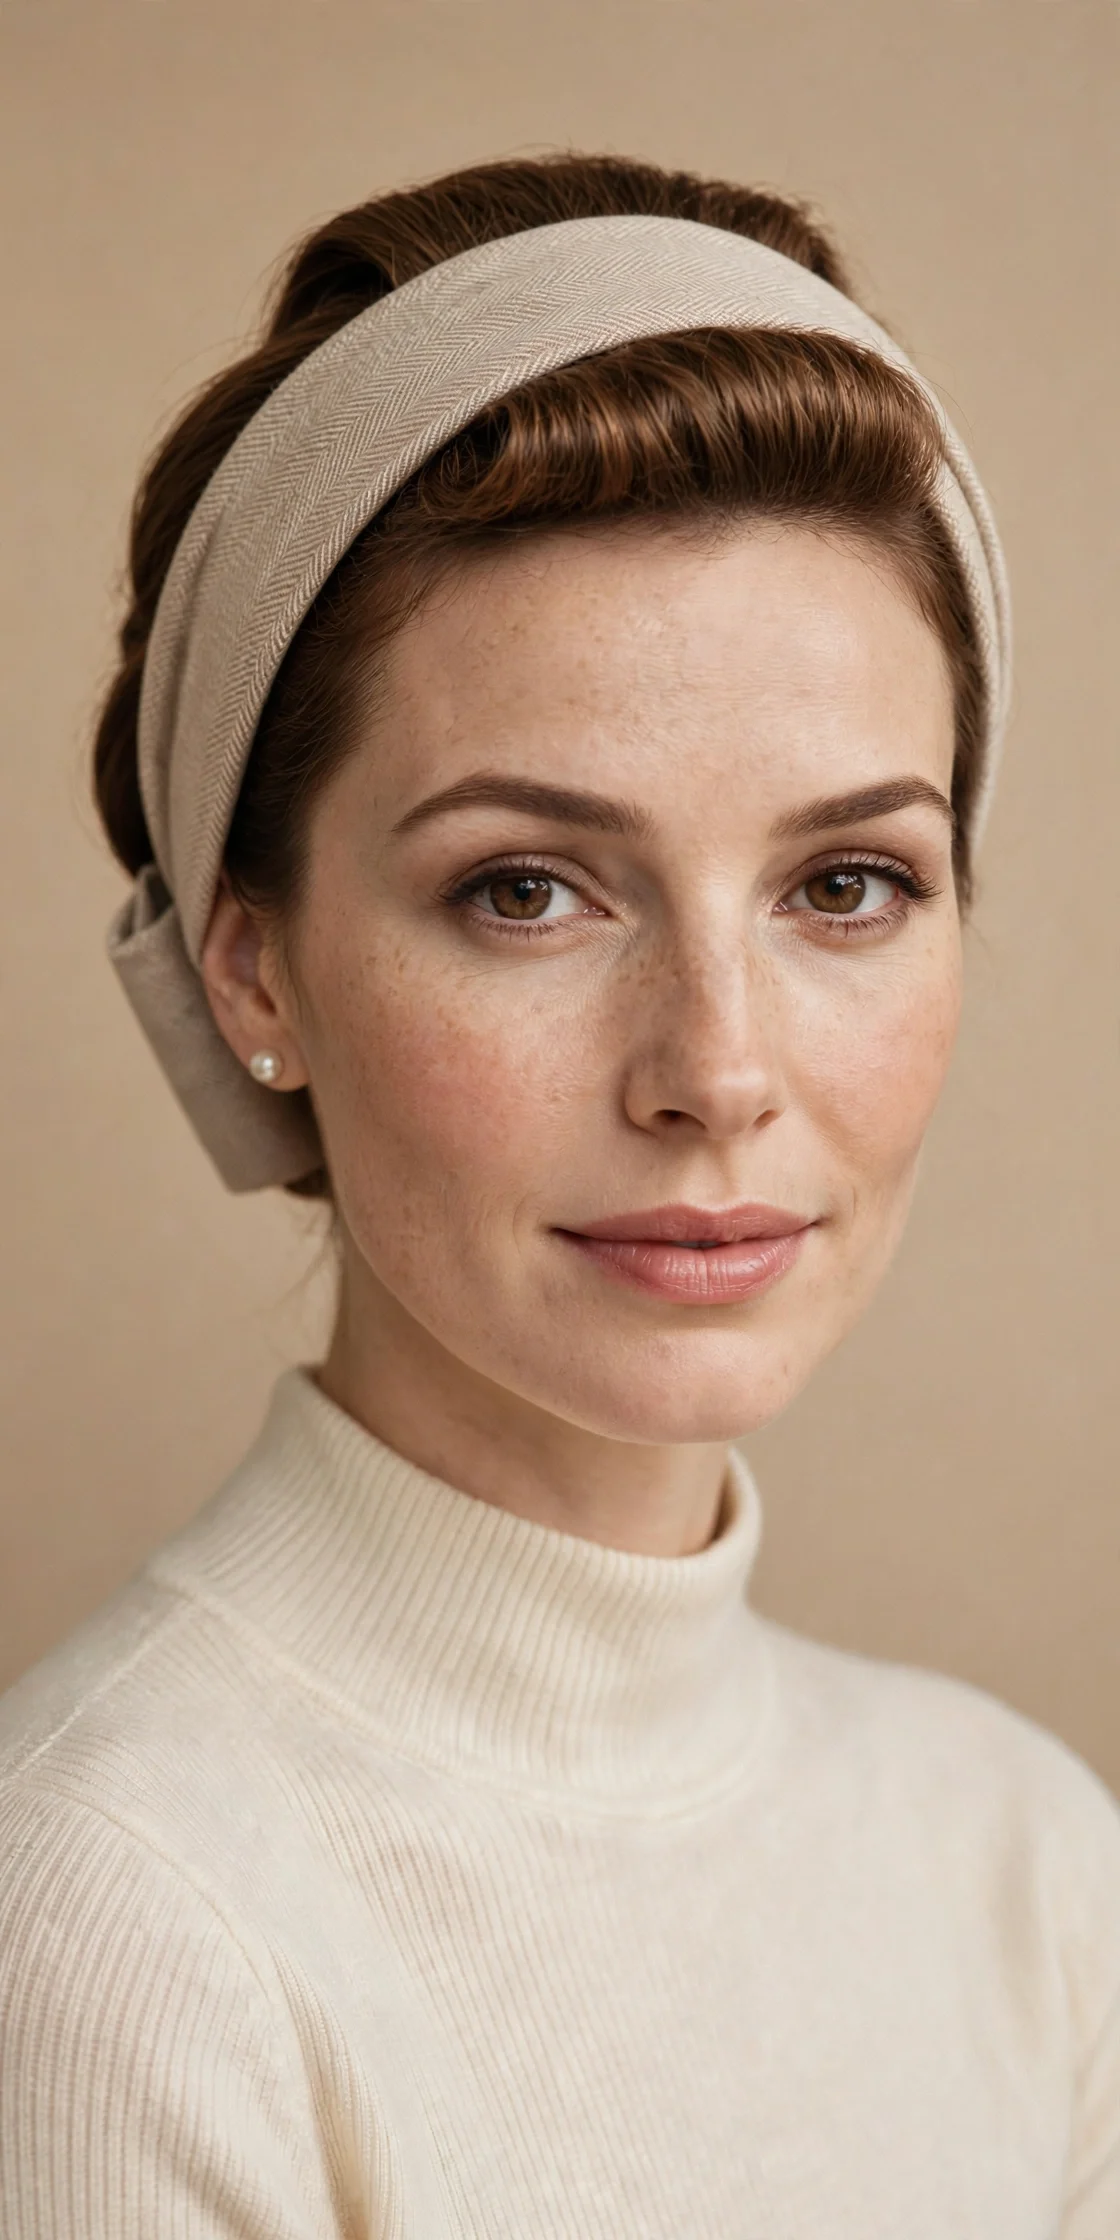
Vibe: Vintage, sweet, and surprisingly easy.
Why it works: The headband tuck works because it creates a faux bob or faux updo with zero cutting and zero pins visible. Tucking the lengths up under an elastic headband produces a rolled, vintage-inspired shape that looks like a professional set, and it works beautifully on second-day hair that has enough texture to stay tucked. It is the best style on this list for faking short hair without commitment.
How to get it: Place a stretchy fabric headband over your hair like a crown, sitting across the forehead and around the back. Starting at the front, take sections of hair and tuck them up and over the band, working around to the back until all the length is rolled in. Adjust the roll for evenness and pull out a few soft pieces around the face.
💡 Quick Win: Choose a headband with a velvet or textured underside; the grip keeps the tuck secure without a single pin.
Shop the Look
- Wide fabric headbands
- Texturizing spray for tuck grip
- Bobby pins for stubborn sections
- Light-hold hairspray
- Dry shampoo for root freshness
20. The Sleek Side-Part Ponytail
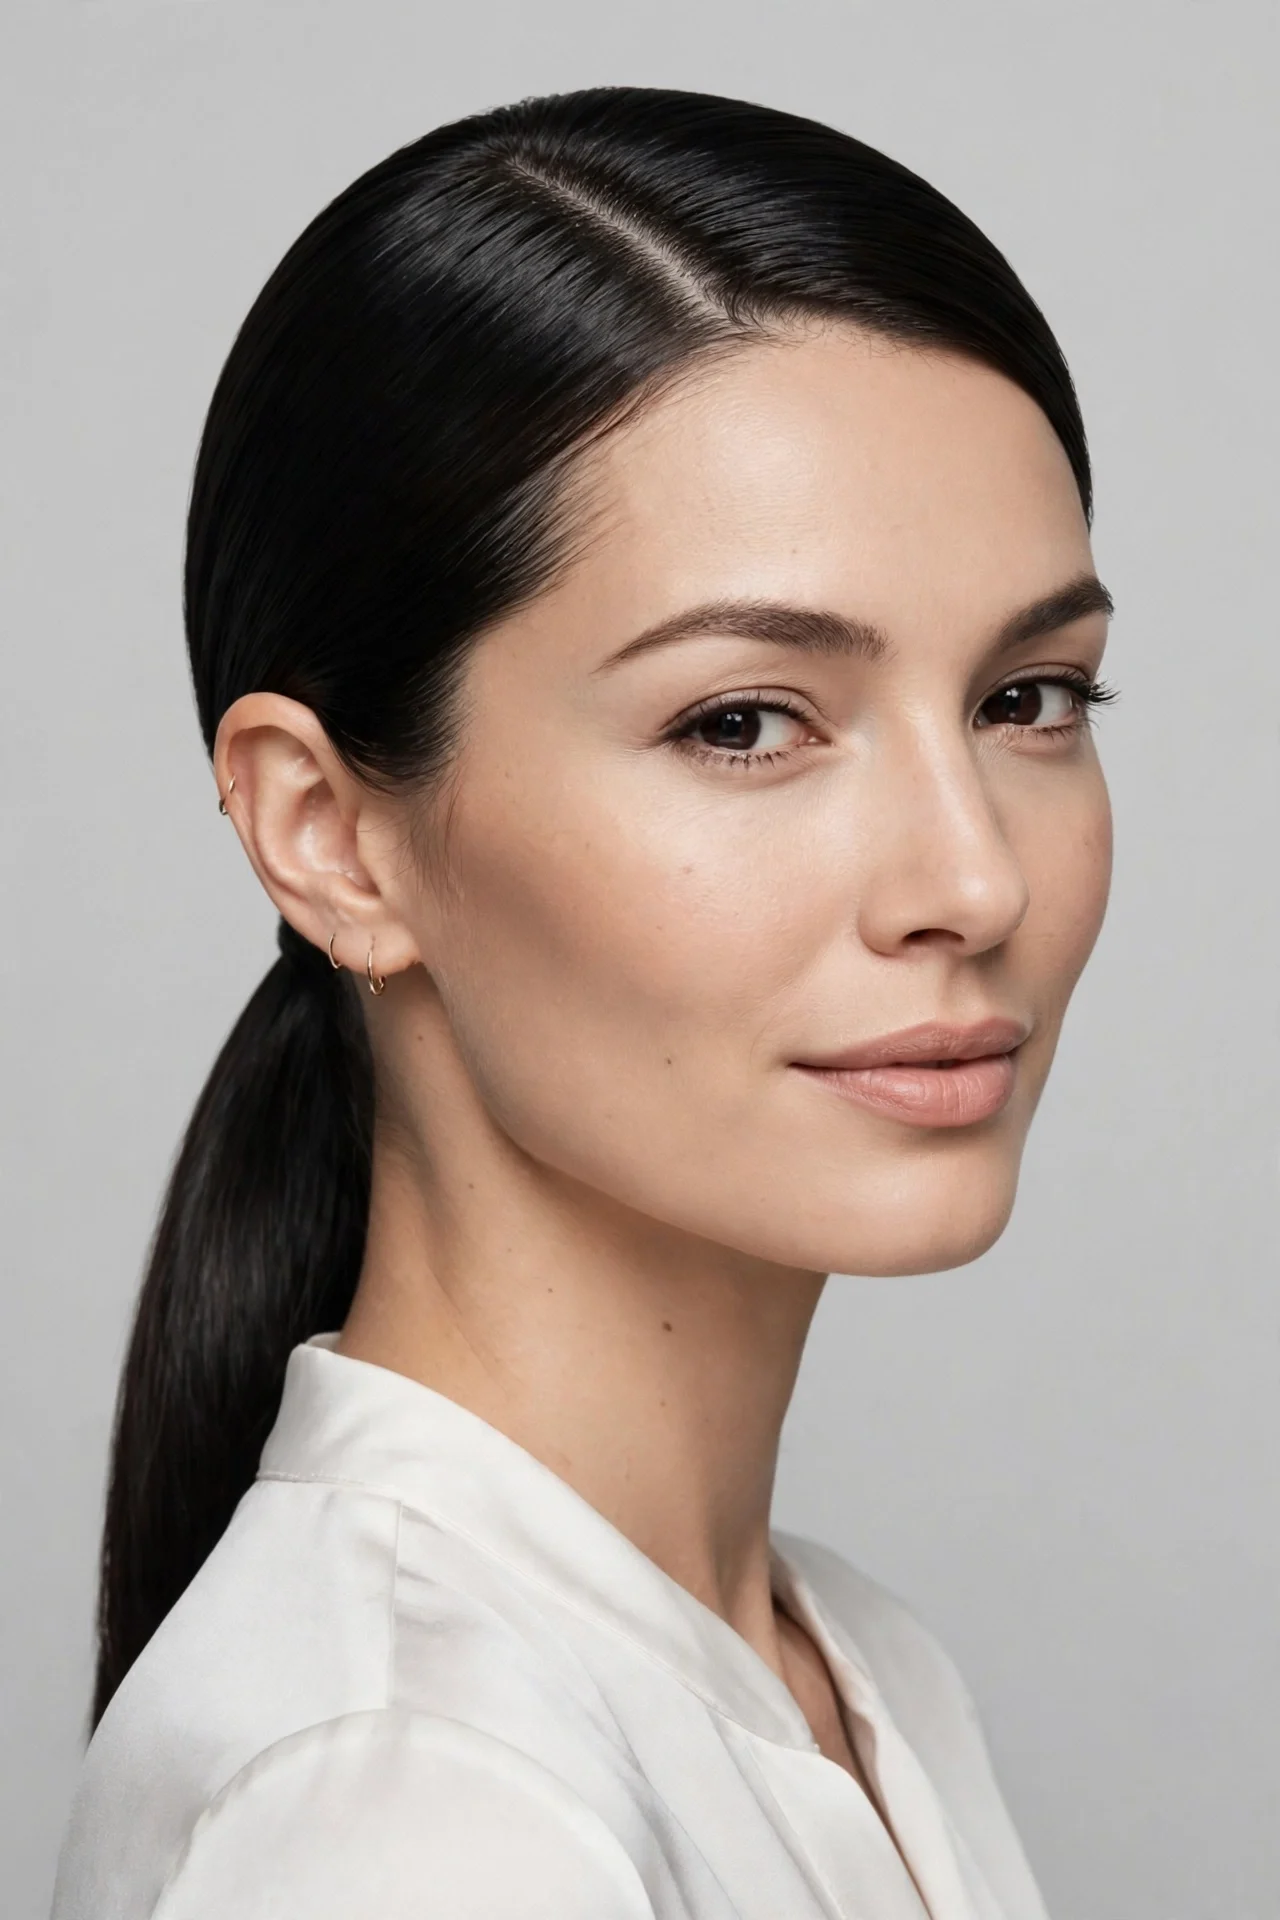
Vibe: Glossy, dramatic, and red-carpet sleek.
Why it works: The sleek side-part ponytail works because the deep side part adds instant drama and volume at the crown, while the smooth, glossy lengths keep the whole look refined. It is the evening version of the everyday ponytail: same two-minute base, but the sharp parting and glassy finish make it event-ready. The asymmetry flatters most face shapes by drawing the eye diagonally across the face.
How to get it: Create a deep side part with a comb, roughly above the arch of your brow, and smooth all the hair back and to one side. Gather into a low ponytail behind the ear on the fuller side and secure with an elastic. Flat-iron the tail for a glassy finish, wrap a strand around the base, and mist with shine spray.
💡 Quick Win: Apply a drop of shine serum to the tail, then run the flat iron over it once more; the heat seals the serum in for a mirror-like finish.
Shop the Look
- Ceramic flat iron for glassy lengths
- Heat protectant spray
- Shine spray for the finish
- Rat-tail comb for the deep part
- Strong-hold elastics
How to Start Your Easy-Hairstyle Routine
Start by building a small styling kit and keeping it in one place: snag-free elastics, bobby pins in your hair color, one large claw clip, a travel texture spray, and a brush. Having everything in a single pouch removes the friction that makes you default to the same ponytail every day, and the whole kit costs less than a single salon blowout.
The most common mistake is starting with freshly washed, slippery hair. Most easy styles grip best on day-old hair, so plan wash days around your style calendar, or fake the grip with dry shampoo and texture spray at the roots before you begin. Ten seconds of prep is the difference between a style that holds and one that slides out by ten.
On a budget, the essentials are a good brush, a pack of fabric elastics, bobby pins, and one multitasking product like a texture spray, which together cost under $30. Drugstore versions of all of these perform nearly identically to luxury ones for everyday styles, so spend your money on the brush, not the spray.
If you would rather have a professional do it, a salon styling appointment or blowout typically runs $35 to $75, and many salons offer quick updo services for events in the $50 to $100 range. For daily wear, though, these styles are designed to be yours: fifteen minutes of practice on a weekend is worth more than any appointment.
Frequently Asked Questions About Easy Hairstyles
What is the easiest hairstyle for beginners?
The easiest hairstyle for beginners is the low ponytail or the messy bun, because both use only gathering and twisting motions your hands already know. Start with the messy bun: it is designed to look imperfect, so there is no wrong way to do it, and it takes under two minutes. Once that feels automatic, move on to the half-up topknot and the claw clip updo, which add only one new motion each.
How can I make my hairstyle last all day?
Start with texture: styles hold far better on day-old hair or hair prepped with dry shampoo and texture spray than on freshly washed, slippery hair. Use elastics that grip without snagging, anchor buns and twists with U-shaped pins instead of relying on the elastic alone, and finish with a light mist of flexible-hold hairspray. For updos, crossing two bobby pins in an X locks sections together much more securely than a single pin.
What are some easy hairstyles for short hair?
For short hair, the pinned-back middle part, the headband tuck, and the half-up twist all work beautifully at bob length and above. Small claw clips can gather the top section into a mini twist, and a deep side part with the smaller side pinned back creates instant polish. Texture spray is your best friend at short lengths, since it gives the grip that longer hair gets from weight.
How do I do a messy bun that actually looks good?
The secret to a good messy bun is controlled messiness: gather the hair loosely rather than smoothing it, twist and wrap it around the base, and pin it where it naturally wants to sit instead of forcing symmetry. Then pull the bun gently wider with your fingertips and free a few face-framing pieces. The finishing step matters most, so mist with flexible-hold spray from arm's length to freeze the texture without stiffness.
Can easy hairstyles work for formal events?
Absolutely. The low twisted bun, the wrapped low ponytail, and the twisted crown all read as formal when finished with smoothing products and a strong-hold spray, and they are the same techniques stylists use for event updos. The difference between everyday and formal is in the finish: sleeker partings, hidden elastics, tucked ends, and one polished accessory like a gold pin or silk scarf.
Ready to Make Mornings Easier?
Mornings do not have to be a battle between your alarm and your reflection. Pick one style from this list, practice it once on a lazy Sunday, and watch it become your new five-minute default.
Pin your favorite look now so it is waiting on your board the next time you need it.
Related Reads
- 15 Quick Work Hairstyles for Busy Mornings
- 12 Five-Minute Braids for Beginners
- 18 Claw Clip Hairstyles Worth Trying
- 10 Heatless Hairstyles for Healthier Hair