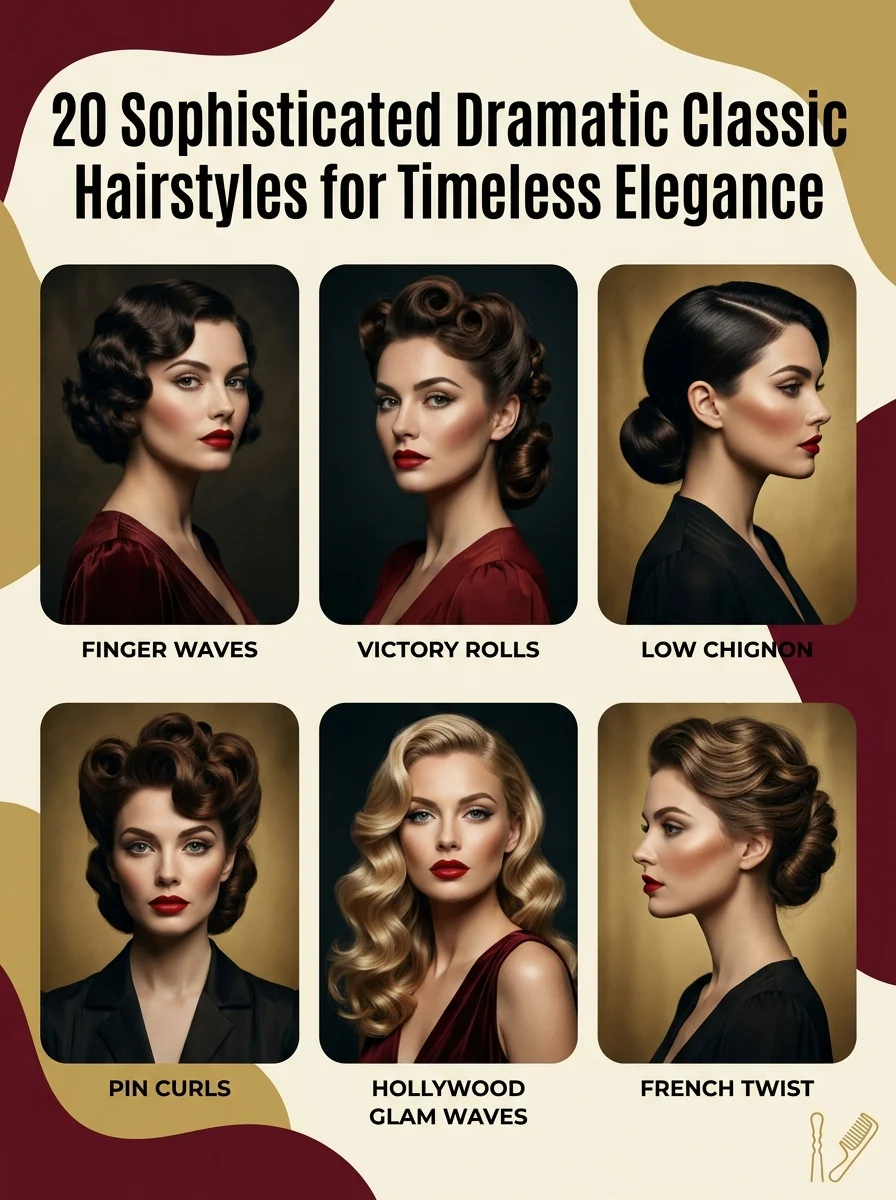
20 Sophisticated Dramatic Classic Hairstyles for Timeless Elegance

Dramatic classic hairstyles are structured, high-shine looks (finger waves, victory rolls, sculpted chignons, glossy blowouts) built on the studio-glamour techniques of Old Hollywood, engineered for maximum visual impact rather than undone, casual texture. This article gives you 20 specific, buildable dramatic classic hairstyles, covering color, cut, setting technique, updos, and honest adaptations for fine or shorter hair.
The style carries a particular kind of confidence: nothing about it apologizes for being noticed. Light moves across a well-set finger wave like it’s moving across polished wood, catching, sliding, holding its shape from every angle. There’s a stillness to a sculpted chignon that a loose bun can’t touch, and a glossy, mirror-shine blowout has a kind of quiet authority that no undone texture spray can fake. Here are 20 ideas worth saving, and stealing.
Why Dramatic Classic Hairstyles Work So Well
Dramatic classic hairstyles trace directly to the studio-system glamour of 1930s to 1950s Hollywood, engineered by film hairstylists (Sydney Guilaroff at MGM most famously, alongside contemporaries like Nellie Manley at 20th Century Fox) to read clearly from thirty feet away under hot tungsten studio lighting.
That production-driven origin explains the style’s defining trait: every element, from the wave pattern to the shine level to the symmetry of the part, was engineered for visual impact under harsh lighting rather than the soft, undone texture that defines more casual vintage-inspired looks popularized decades later.
The look is trending again as red-carpet stylists lean back into structure after nearly a decade of “effortless beach wave” dominance dating to the early 2010s, and as TikTok’s “old money” and coastal-glam aesthetics pull hair styling back toward polish, gloss, and visible technique over undone texture. Search interest for “finger waves tutorial” and “Old Hollywood hair” has climbed steadily on Pinterest over the past two years, with wedding and formal-event searches driving a particularly sharp increase each spring.
Style at a Glance
| Element | Detail |
| Philosophy | Structure and shine over undone texture. Glamour engineered to be seen from a distance |
| Key Techniques | Finger waving, pin curling, hot-roller setting, backcombing, chignon sculpting |
| Color Palette | Patent-leather black, deep espresso brunette, warm auburn, platinum blonde |
20 Dramatic Classic Hairstyle Ideas
1. Deep Espresso Brunette with a Single Statement White Streak
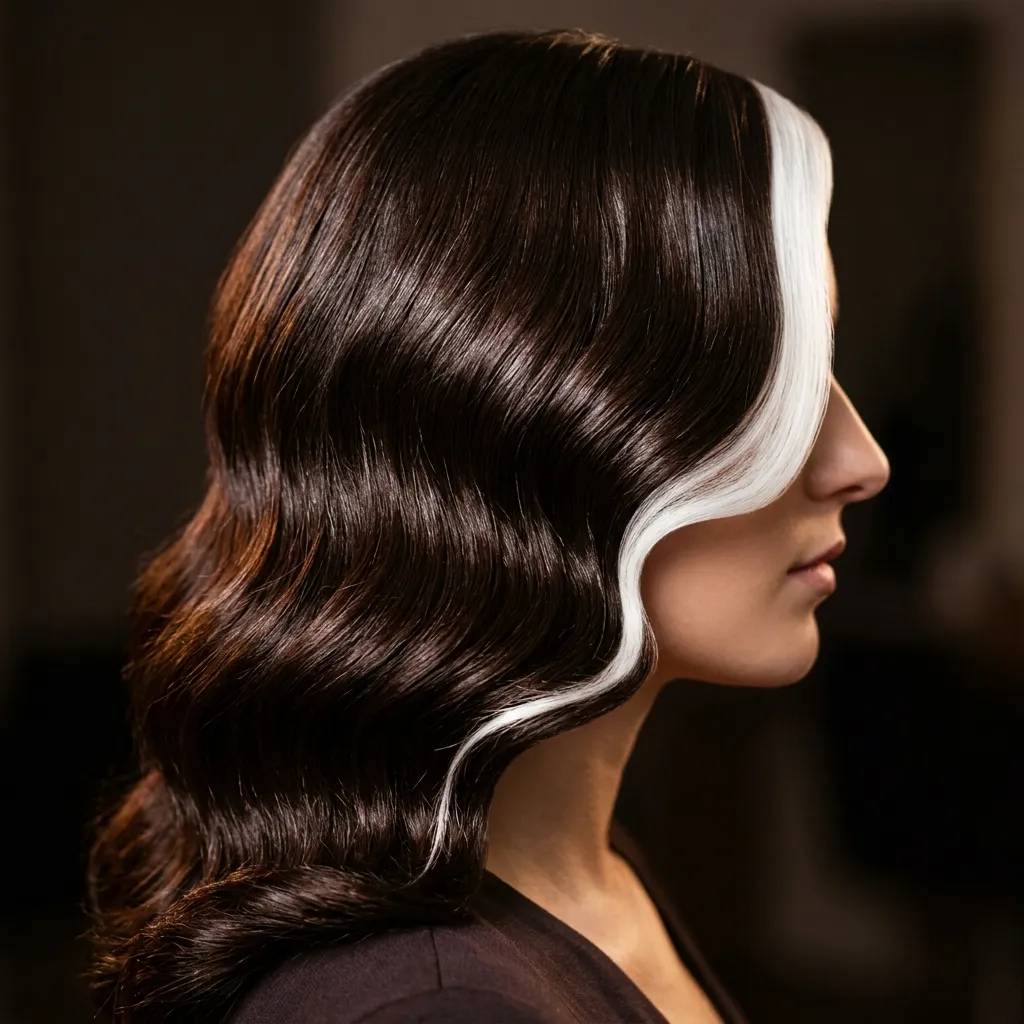
Vibe: Bold and cinematic. One streak doing the work of an entire color change.
Why it works: A single white or platinum streak against a deep espresso base uses maximum tonal contrast in the smallest possible area, which is why it reads as dramatic without requiring an all-over color commitment or the upkeep that comes with it. The streak’s placement directly at the face-framing section, rather than buried mid-scalp is what makes it a genuine focal point instead of an accident, since it sits exactly where the eye naturally lands first when looking at a face.
How to get it: Ask your colorist for a single half-inch panel bleached to a clean platinum and toned white using a violet-based toner to cancel any yellow undertone, positioned along your natural part line, while keeping the rest of your hair a rich espresso gloss achieved with a level 3-4 demi-permanent brown.
💡 Quick Win: A temporary white hair color mascara or root-touch-up wand, available at most drugstores for under $10, lets you test the streak’s placement and width for a single event before committing to a permanent bleach service.
Shop The Look
| Product |
| Temporary white hair color touch-up wand |
| High-gloss finishing hair serum |
| Ceramic flat iron for smoothing |
| Root comb fine tooth |
| Strong-hold shine hairspray |
2. Old Hollywood Finger Waves: A Dramatic Classic Hairstyle Staple
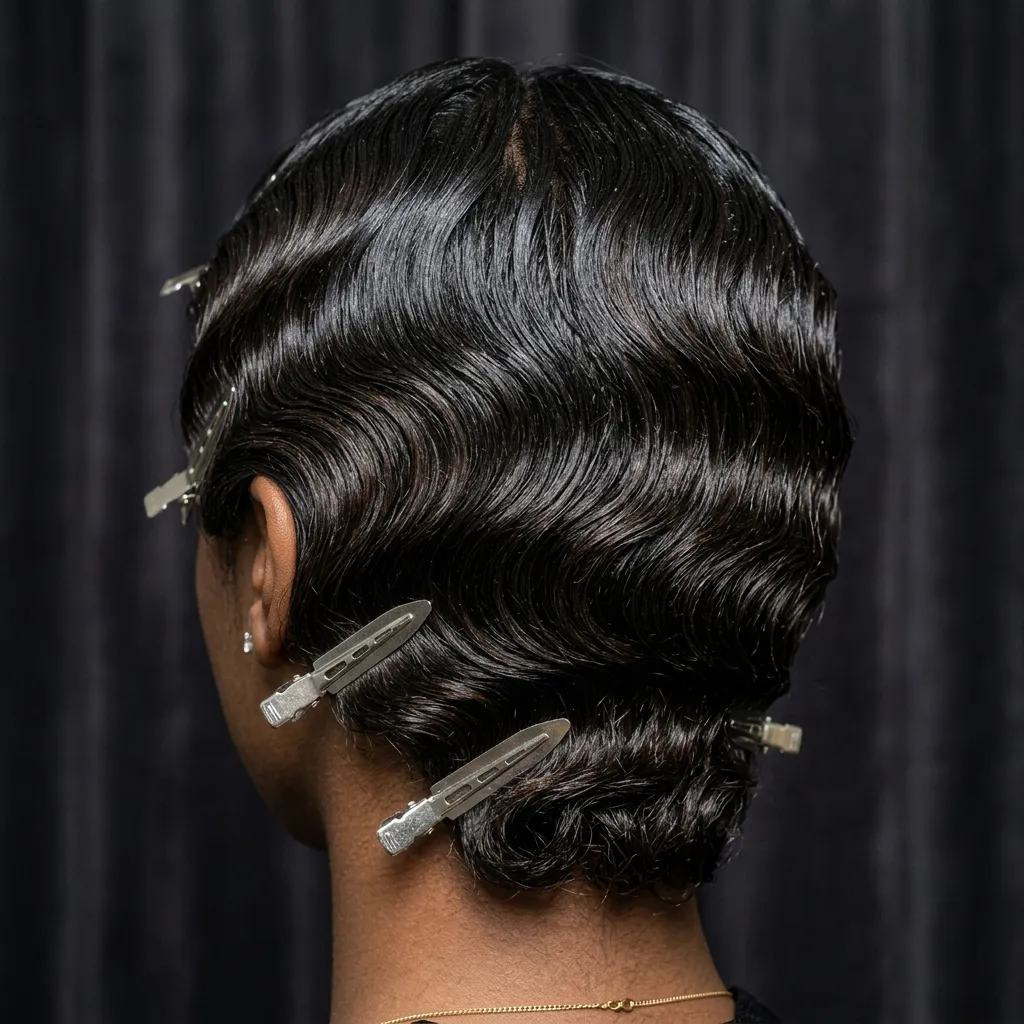
Vibe: Polished and precise. Waves so exact they look carved rather than styled.
Why it works: Finger waves rely on setting the hair wet with a strong-hold gel into S-shaped ridges pinned flat with duckbill clips until fully dry. The technique creates a wave pattern that sits flush against the head rather than lifting off it, which is what gives the style its sculpted, almost architectural quality compared to a looser curling-iron wave that stands away from the scalp. The technique dates to the 1920s, when it was developed partly as a workaround for the era’s bobbed cuts, which were too short for the marcel waving irons then in fashion the finger wave used only the fingers, a comb, and setting product, which is also why it remains one of the few vintage techniques that requires no heat tool at all.
How to get it: Apply a firm-hold setting gel (Eco Style Olive Oil gel or Design Essentials Wave gel both hold well through a full evening) to damp hair, use a fine-tooth comb to push the hair into S-shaped ridges roughly one to one-and-a-half inches apart, and pin each wave flat with duckbill clips until completely dry. Rushing the drying time with heat will collapse the ridge definition.
Shop The Look
| Product |
| Firm-hold finger wave setting gel |
| Metal duckbill wave clips set |
| Fine-tooth styling comb |
| Wide hair setting net |
| Edge brush for smoothing baby hairs |
3. Deep Side Part Waves Sculpted with a Cold-Wave Set
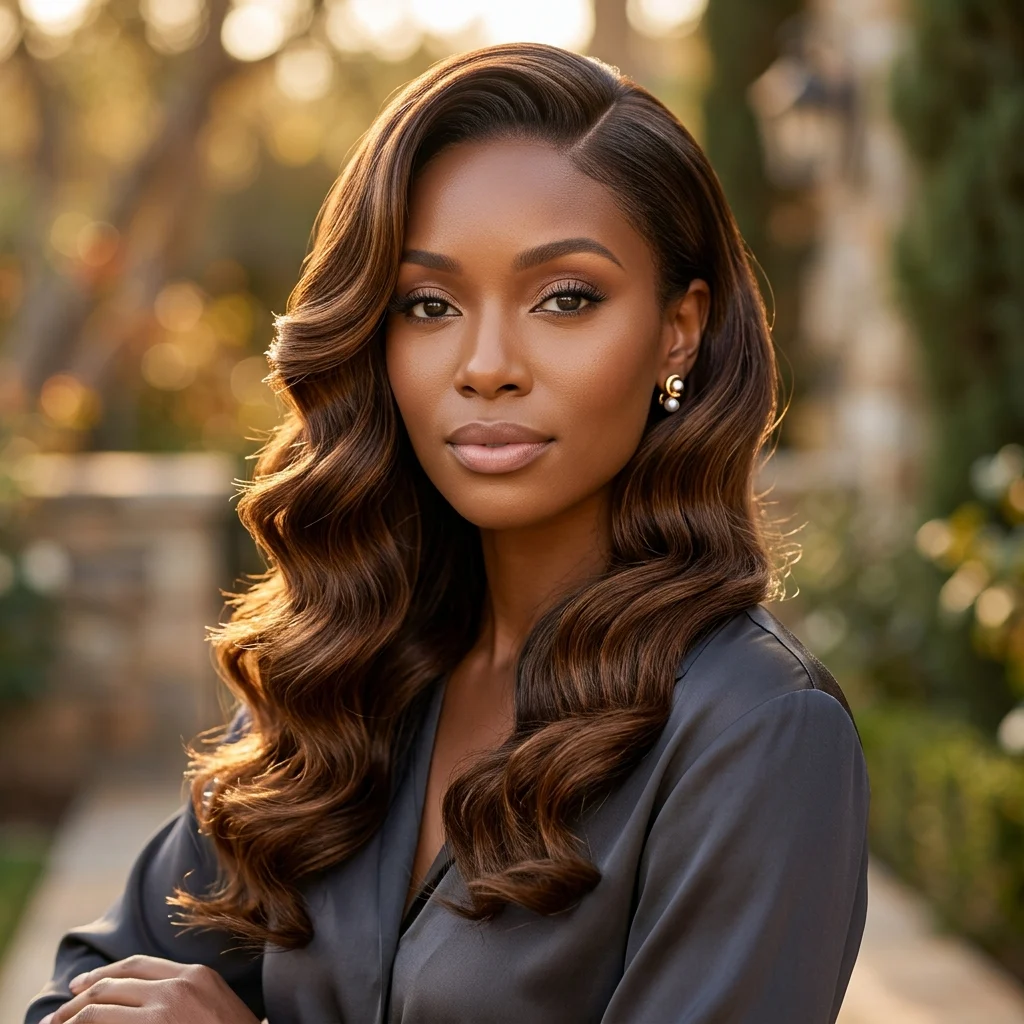
Vibe: Elegant and sculpted. A wave pattern that moves like liquid but holds like sculpture.
Why it works: The cold-wave setting technique uses pin curls set in alternating directions along a deep side part, which creates rolling, dimensional waves rather than the uniform ridges of a finger wave, a texture-layering principle, where varied curl direction produces genuine visual depth instead of a flat, repetitive pattern.
How to get it: Set damp hair in pin curls alternating clockwise and counterclockwise down the head, following a deep side part with roughly 70/30 weight distribution, then brush out gently once fully dry using a boar-bristle brush to blend the individual ridges into soft, connected waves rather than leaving visible separate curls.
💡 Quick Win: Sleeping in the pin curl set overnight, secured under a silk scarf to prevent friction breakage, gives the waves considerably more time to hold their shape than attempting a same-day set-and-dry.
Shop The Look
| Product |
| Metal pin curl clips set |
| Boar bristle smoothing brush |
| Silk hair wrap scarf |
| Setting lotion alcohol-free |
| Wide-barrel curling iron backup |
4. Long Cascading Curls with Old Hollywood Length
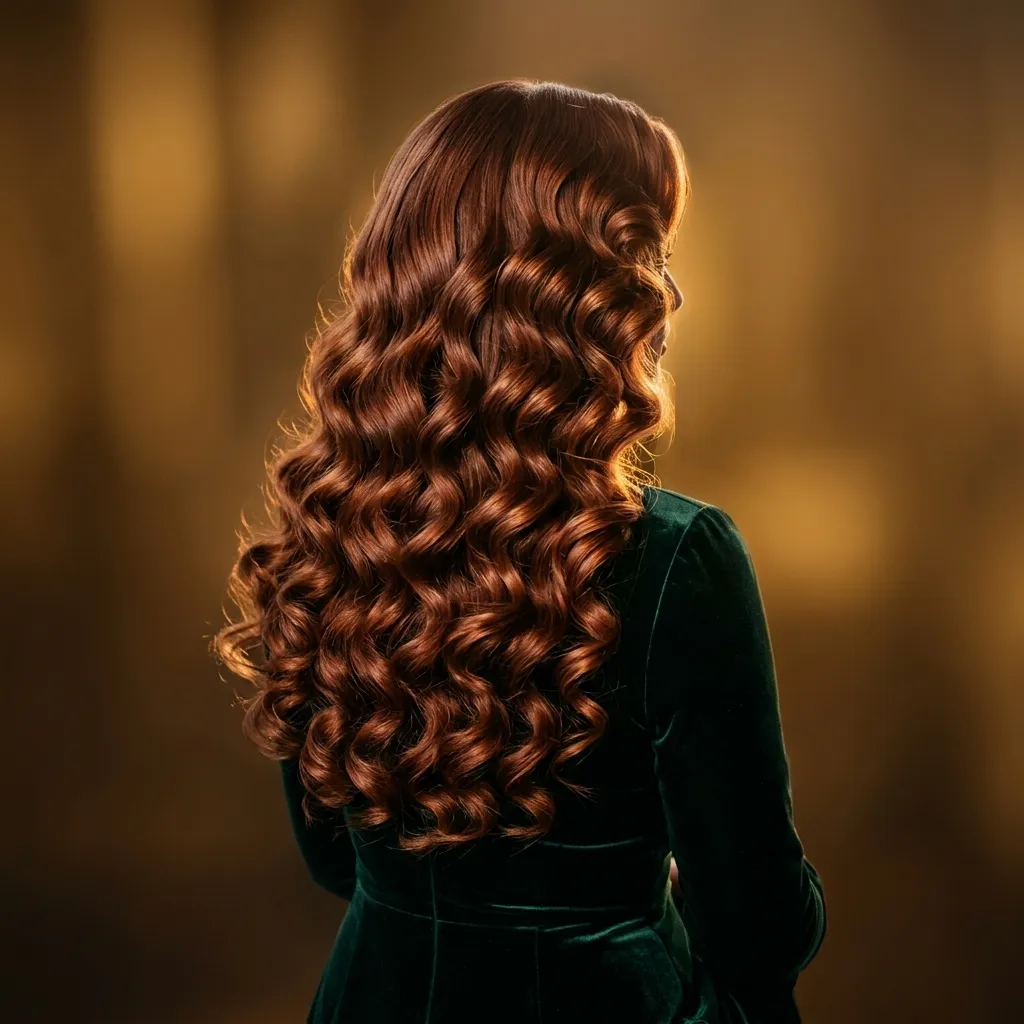
Vibe: Rich and romantic, length given enough room to actually move.
Why it works: Long, uncut length is what allows a dramatic curl set to cascade rather than bounce close to the head, a proportion principle, since the visual weight of the curls needs sufficient length below the crown to create the rolling, waterfall movement associated with this specific vintage style, rather than the tighter, shorter curl pattern that reads as more contemporary. The uniform curl size throughout, rather than the varied sizing common in modern “undone” curl styling, is the other key differentiator, since consistent barrel size across every section is what makes the cascade read as considered rather than casual.
How to get it: Set hair on large-barrel hot rollers (one-and-a-half to two inches) from mid-length to ends only, leaving the roots smooth against the scalp for volume without frizz, then brush out gently with a paddle brush once fully cooled to blend the individual curls into a single, connected cascading shape.
Shop The Look
| Product |
| Large barrel hot rollers set |
| Heat protectant spray |
| Paddle brush wide |
| Glossing hair oil serum |
| Long bristle round brush |
5. Jeweled Headband Anchoring a Retro Updo
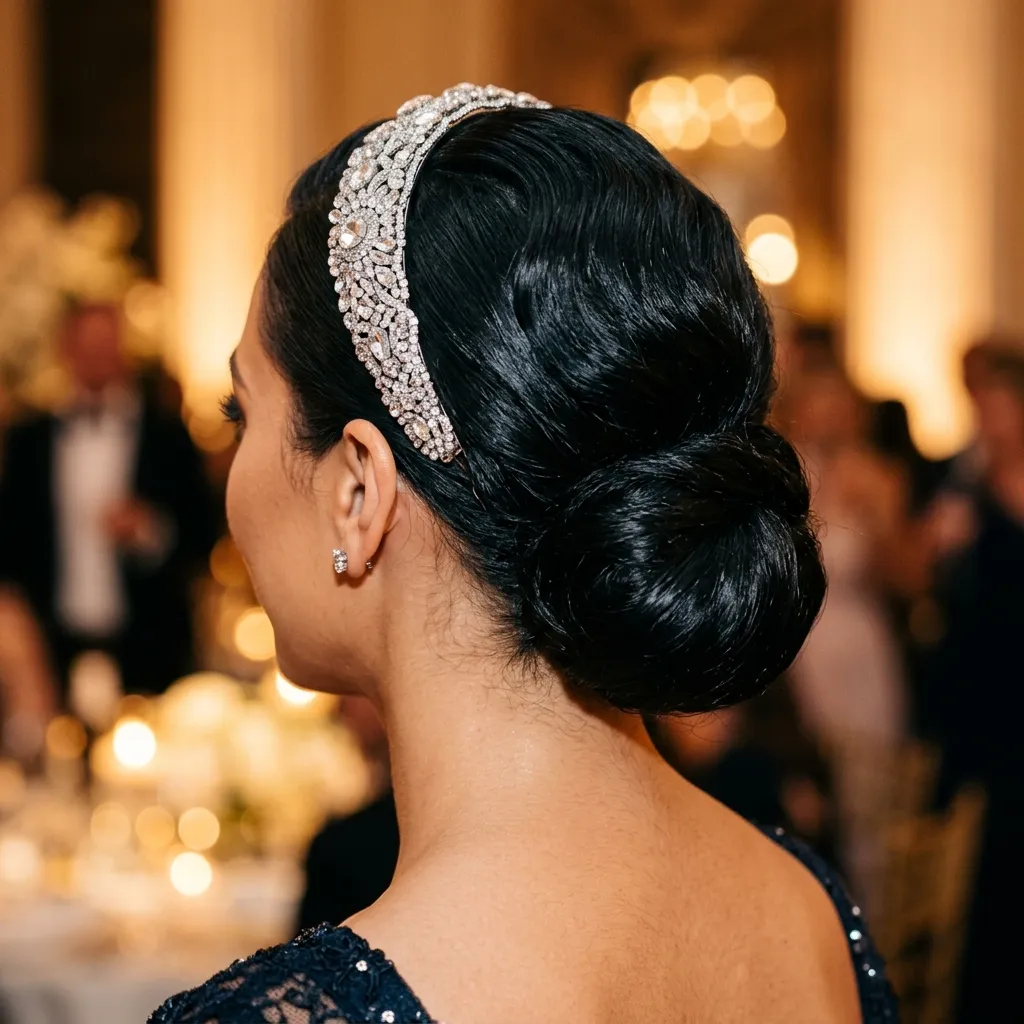
Vibe: Glamorous and celebratory. An accessory doing half the styling work.
Why it works: A structured jeweled headband gives the eye a fixed anchor point at the crown, which lets the rest of the hair be pulled back simply and cleanly without needing an elaborate updo underneath it. The visual drama comes almost entirely from the accessory’s contrast against the hair rather than from complex setting technique, which makes this one of the fastest routes to a dramatic classic look for someone without finger-wave or victory-roll experience yet. Rhinestone and crystal headbands were a genuine 1930s-40s accessory staple, not a modern reinterpretation, which is why the pairing with sleek pulled-back hair reads as authentically period rather than costume-like.
How to get it: Smooth hair back into a low, simple bun or ponytail using a strong-hold gel to eliminate flyaways, then position a rhinestone or crystal headband about an inch back from the hairline, tucking any loose ends underneath the band to keep the overall silhouette clean and uninterrupted.
💡 Quick Win: A $15-20 crystal headband from a costume jewelry retailer creates essentially the same visual effect as a designer version costing several times more. The sparkle reads identically at any conversational or photographic distance.
Shop The Look
| Product |
| Crystal rhinestone headband |
| Strong-hold smoothing gel |
| Bobby pin set clear |
| Shine spray finishing |
| Satin-lined hair tie |
6. Jet Black Glossed to a Patent-Leather Shine
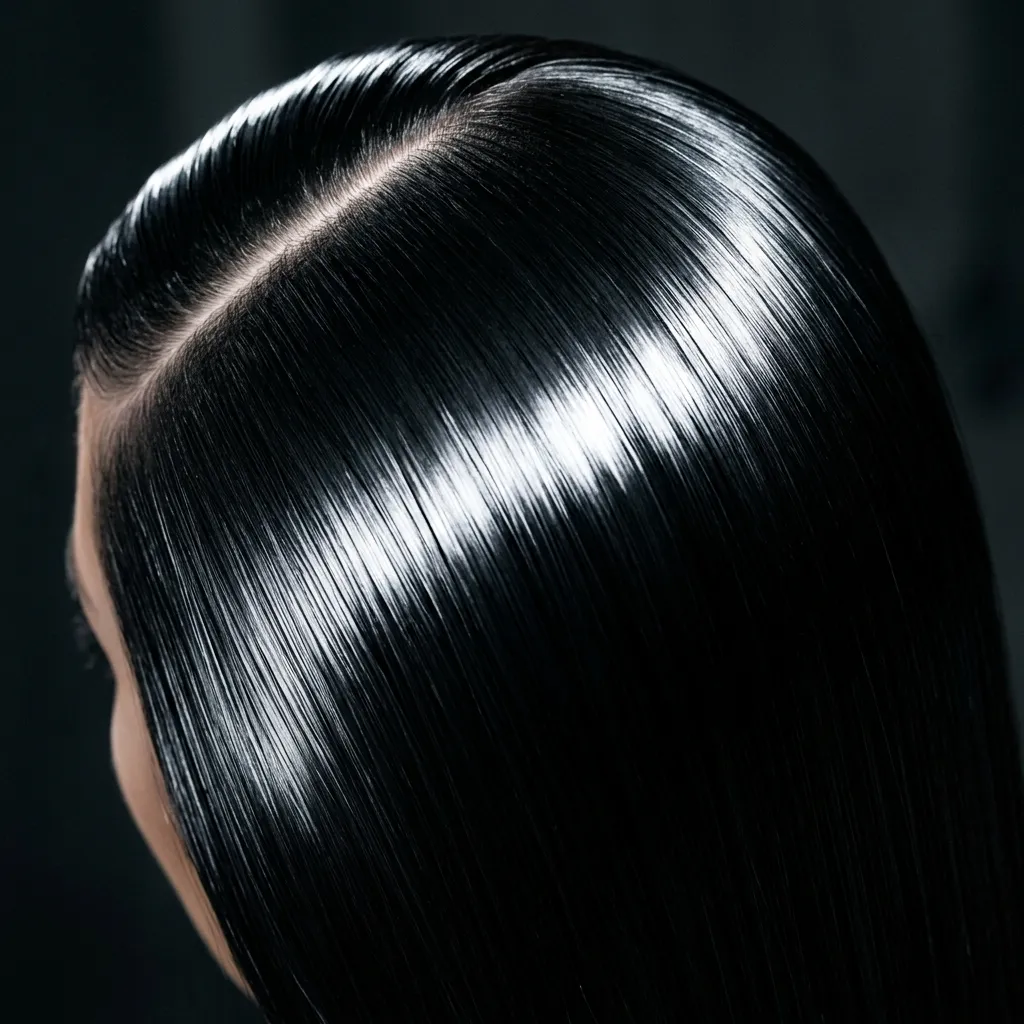
Vibe: Sleek and reflective. Hair that behaves like polished glass.
Why it works: Extreme gloss on a jet black base maximizes light reflection across the entire surface of the hair: a light-behavior principle where the smoother and darker the surface, the more dramatically it catches and bounces light, producing the mirror-like shine associated with the most photographed dramatic classic looks, from studio glamour portraits to modern red-carpet styling. Black hair specifically shows this effect more clearly than any other base color, since there’s no competing warmth or tonal variation to soften or scatter the reflected light.
How to get it: Apply a clear glossing treatment, a demi-permanent gloss with no added pigment, after your regular color service to seal the hair cuticle flat, then finish styling with a lightweight glossing oil rather than a matte-finish product, since even a small amount of matte styling cream will visibly dull the reflective effect.
Shop The Look
| Product |
| Clear glossing hair treatment |
| Lightweight shine serum |
| Ceramic flat iron high heat |
| Silicone-free glossing oil |
| Anti-frizz finishing spray |
7. Blunt Classic Bob with a Razor-Sharp Precision Edge
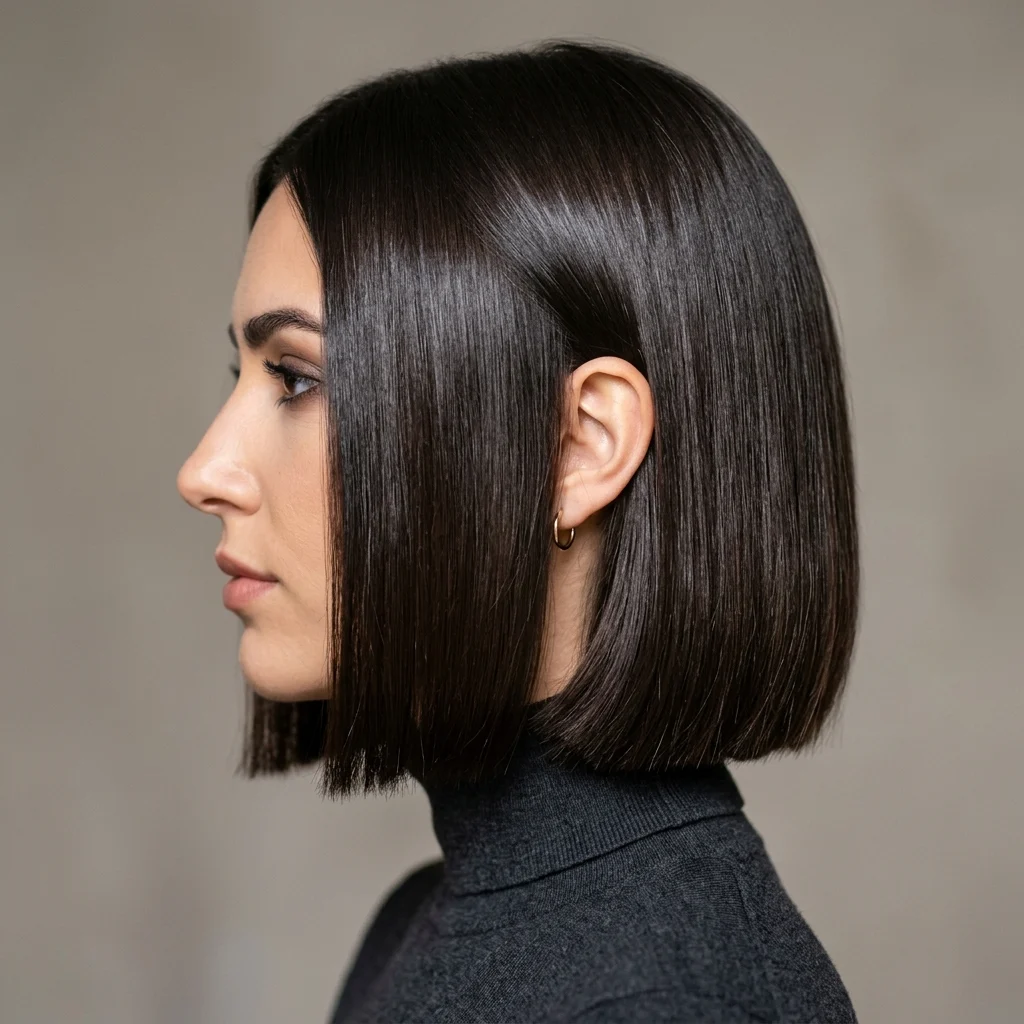
Vibe: Precise and confident. A line so clean it reads from across the room.
Why it works: A blunt, one-length bob cut with shears rather than a razor produces a dense, weighted edge that catches light uniformly along its entire length, a texture principle, since a single dense line of hair behaves visually differently from a softly layered edge, holding its geometric shape rather than dissolving into movement as the hair swings. This specific cut, sitting at or just above the jawline, is closely associated with Louise Brooks’ iconic 1920s styling and remains the reference point most stylists use when a client asks for a “classic dramatic bob” today.
How to get it: Request a one-length blunt cut with sharp, point-free shears (never a razor, which softens and thins the edge) cut dry for maximum precision, sitting at or just above the jawline, the length most closely associated with the style’s most iconic reference points.
💡 Quick Win: A ceramic flat iron pass along the very ends only, not the whole length, sharpens the blunt line further for special occasions without needing a fresh cut in between salon visits.
Shop The Look
| Product |
| Ceramic flat iron narrow plate |
| Heat protectant styling cream |
| Smoothing shine serum |
| Fine-tooth precision comb |
| Firm-hold finishing spray |
8. Glossy Pin-Straight Center Part with Razor-Sharp Symmetry
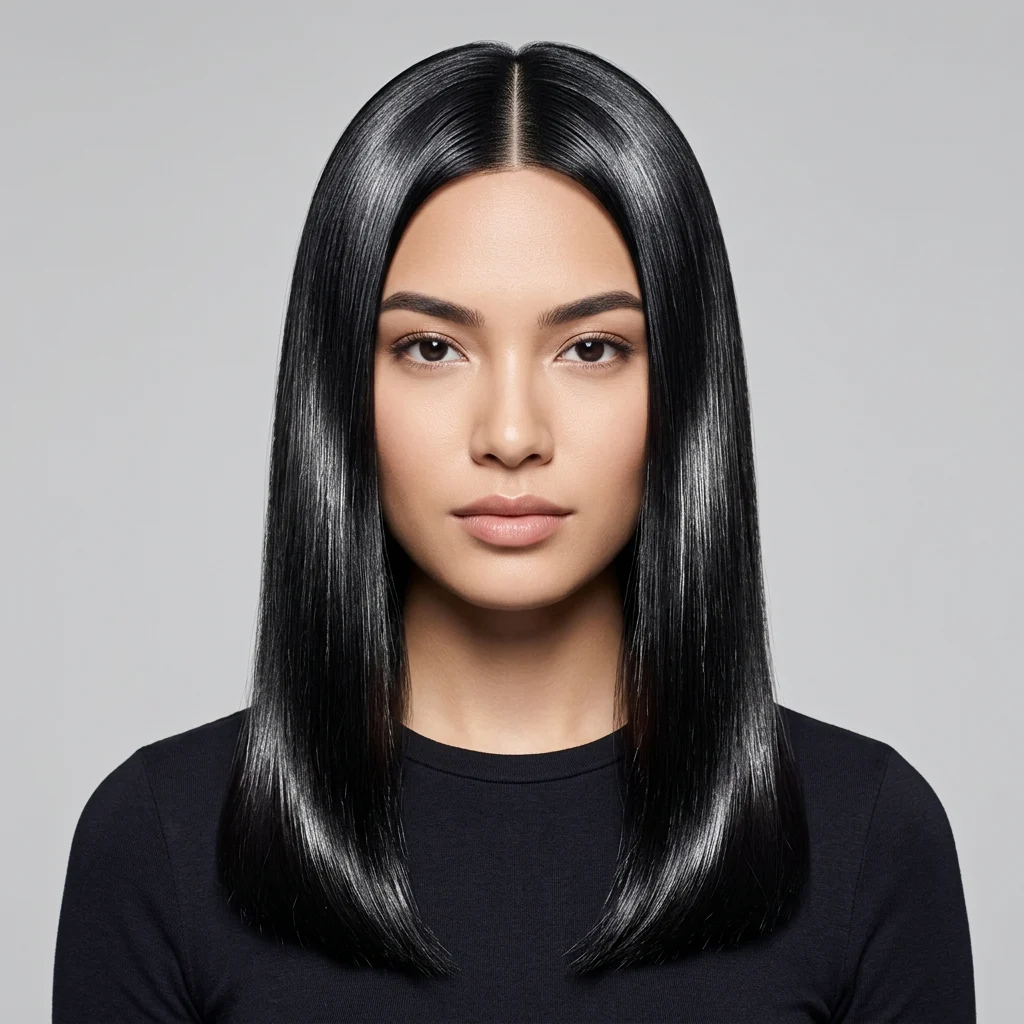
Vibe: Sleek and symmetrical, precision as the entire style statement.
Why it works: A dead-center part relies entirely on symmetry as its organizing principle, unlike the asymmetric drama of a deep side part. Any unevenness in the part line or the fall of hair on either side becomes immediately visible against a pin-straight, high-shine finish, which is exactly why this style reads as so deliberately precise when it’s executed correctly and so obviously off when it isn’t. It’s a more contemporary interpretation of dramatic classic styling than the wave-based looks, closer to 1990s minimalist glamour than 1930s studio hair, but it belongs firmly in the same shine-first philosophy.
How to get it: Section hair with a fine-tooth comb using the natural bridge of your nose as your guide, then flat-iron each side in identical sections working from root to end, which guarantees both sides fall with matching weight and length rather than drifting off-center as you style.
Shop The Look
| Product |
| Fine-tooth parting comb |
| High-heat ceramic flat iron |
| Silicone smoothing serum |
| Flexible-hold finishing spray |
| Anti-static styling brush |
9. Classic Chin-Length Pageboy with Under-Curled Ends
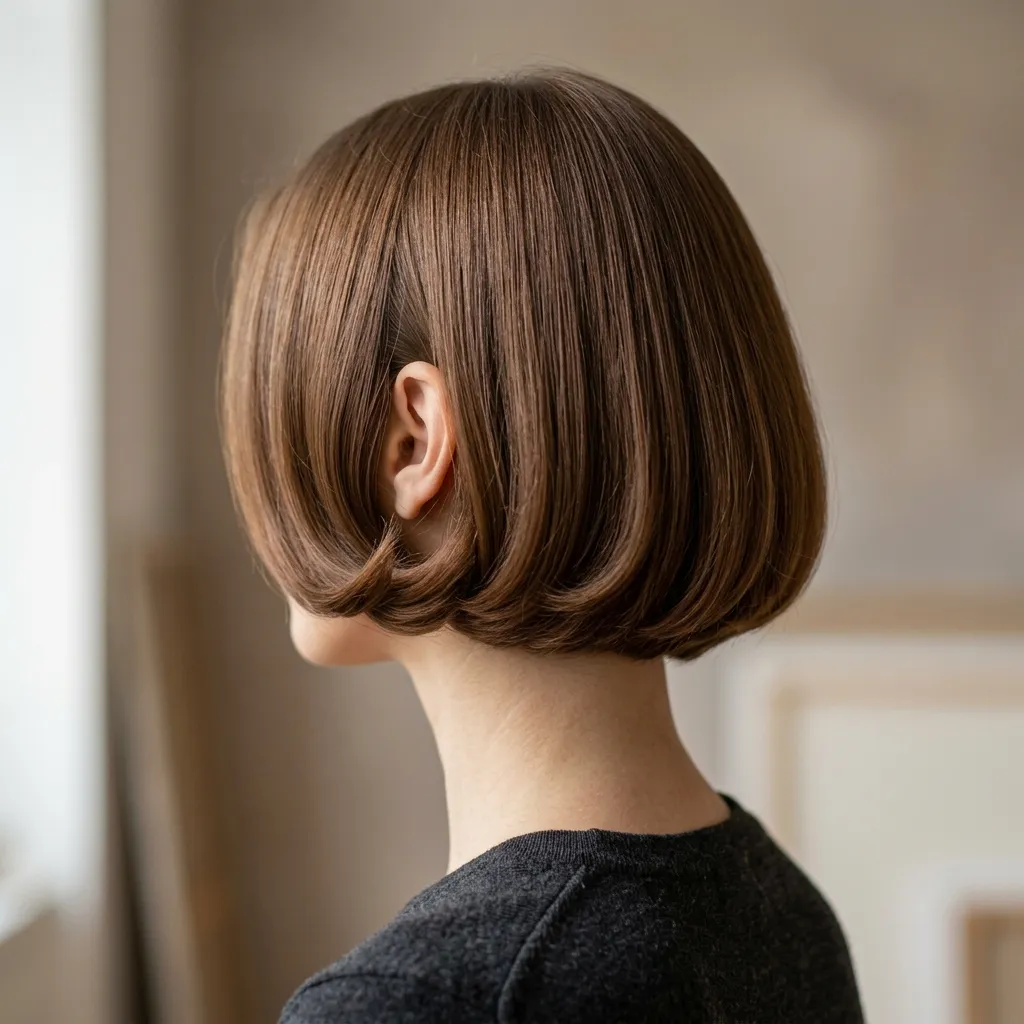
Vibe: Neat and timeless. A rounded shape that reads as classic in any decade.
Why it works: Curling the ends under rather than out or away from the face creates a rounded, self-contained silhouette that echoes the head’s natural shape, a proportion principle where the hairstyle’s outer edge mirrors rather than contrasts the face, producing the soft, contained look associated with the pageboy’s most flattering execution throughout its many decades of popularity, from 1950s suburban glamour through its various revivals since.
How to get it: Blow-dry hair smooth with a round brush, pulling the ends under and inward as you dry section by section, then set the shape with a small-barrel curling iron rotated inward at the very ends only, which reinforces the under-curl without adding unwanted curl through the rest of the length.
💡 Quick Win: Velcro rollers placed at the ends only and left in for ten minutes while you finish your makeup create essentially the same under-curl result without using any heat tool at all.
Shop The Look
| Product |
| Round brush medium barrel |
| Small barrel curling iron |
| Velcro rollers set |
| Blow-dry heat protectant |
| Light-hold finishing spray |
10. Silk Turban Wrap for Instant Old-World Glamour
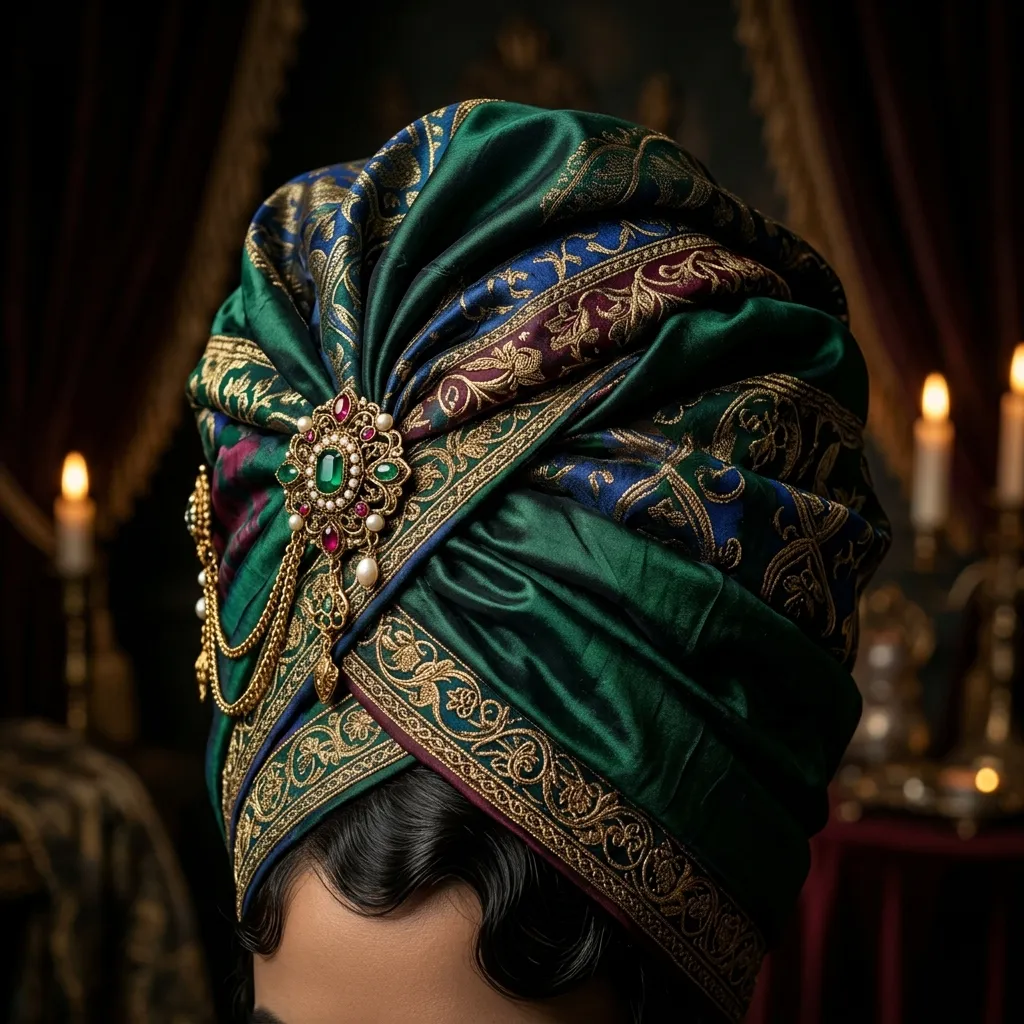
Vibe: Opulent and dramatic. Fabric doing the work of an elaborate updo.
Why it works: A structured silk turban wrap conceals the hair entirely, which shifts the visual drama to fabric drape and color rather than curl or wave pattern a material-substitution principle, trading hair texture for fabric texture while keeping the same high-glamour visual register the rest of this category relies on.
How to get it: Smooth all hair back and secure flat with pins, then wrap a large silk square starting at the nape and moving forward, tucking and pinning the fabric ends at the crown to create a structured, sculptural silhouette rather than a loose, casual wrap that shifts throughout the evening.
Shop The Look
| Product |
| Large silk head wrap scarf |
| Decorative fabric pin brooch |
| Strong-hold smoothing gel |
| Bobby pin set matte black |
| Silk-lined headband base |
11. Warm Auburn Waves with a Sculpted Widow’s Peak
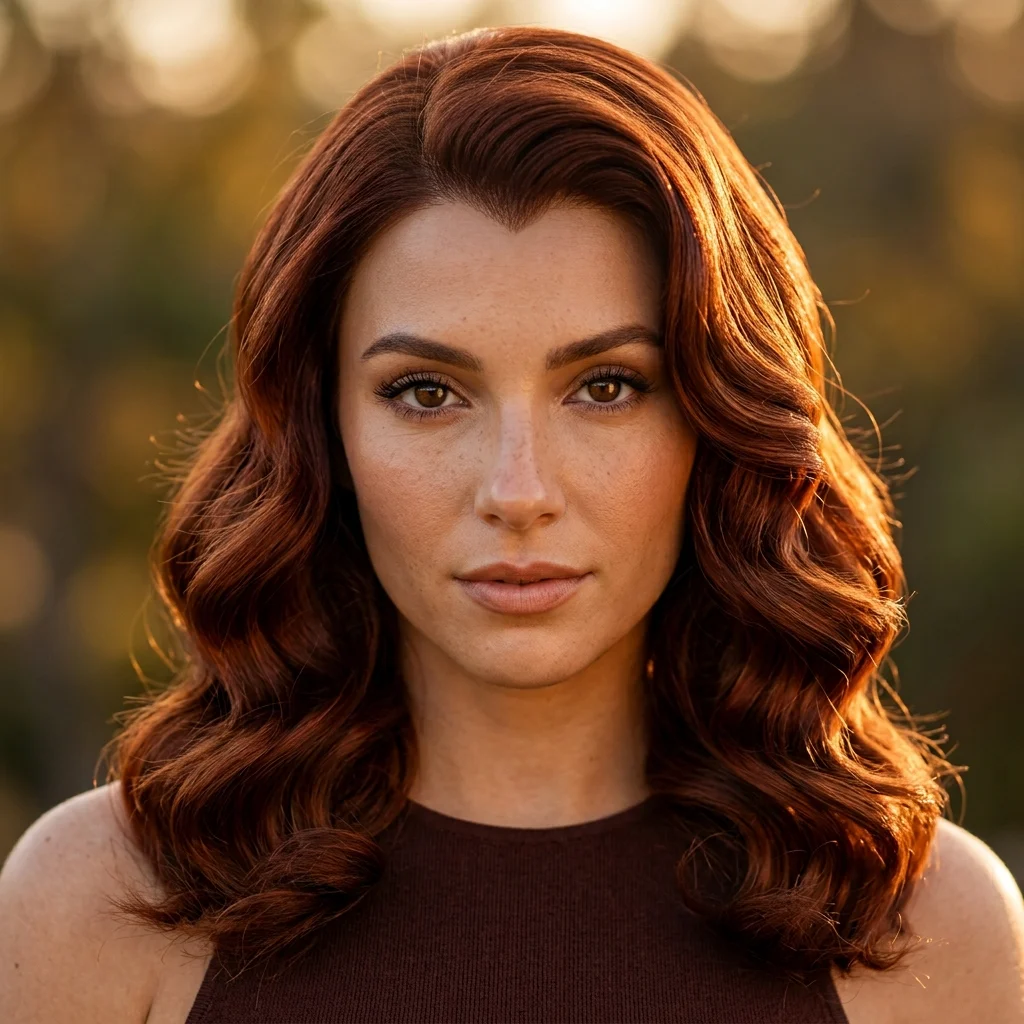
Vibe: Rich and architectural, a hairline shaped as deliberately as the color underneath it.
Why it works: Sculpting a defined widow’s peak at the hairline with strong-hold gel creates a fixed geometric point that frames the entire face, and pairing it with warm auburn tones adds color depth that a flat, single-tone brunette wouldn’t provide: the combination of a shaped hairline and rich, warm color reinforces the same dramatic, deliberate quality throughout the whole look rather than letting either element carry the drama alone.
How to get it: Use a fine-tooth comb and strong-hold gel to sculpt the center hairline into a defined V-point before setting the rest of your hair in waves, keeping the gel application light everywhere except the hairline itself to avoid an overly stiff, unnaturally flat overall finish.
💡 Quick Win: A demi-permanent auburn gloss, no bleach required if you’re already brunette, adds this warm dimension in under 30 minutes at most salons, making it one of the fastest color changes on this entire list.
Shop The Look
| Product |
| Strong-hold edge sculpting gel |
| Fine-tooth edge comb |
| Auburn demi-permanent gloss kit |
| Glossing color-safe shampoo |
| Copper-tone shine spray |
12. Voluminous Victory Rolls Framing the Crown
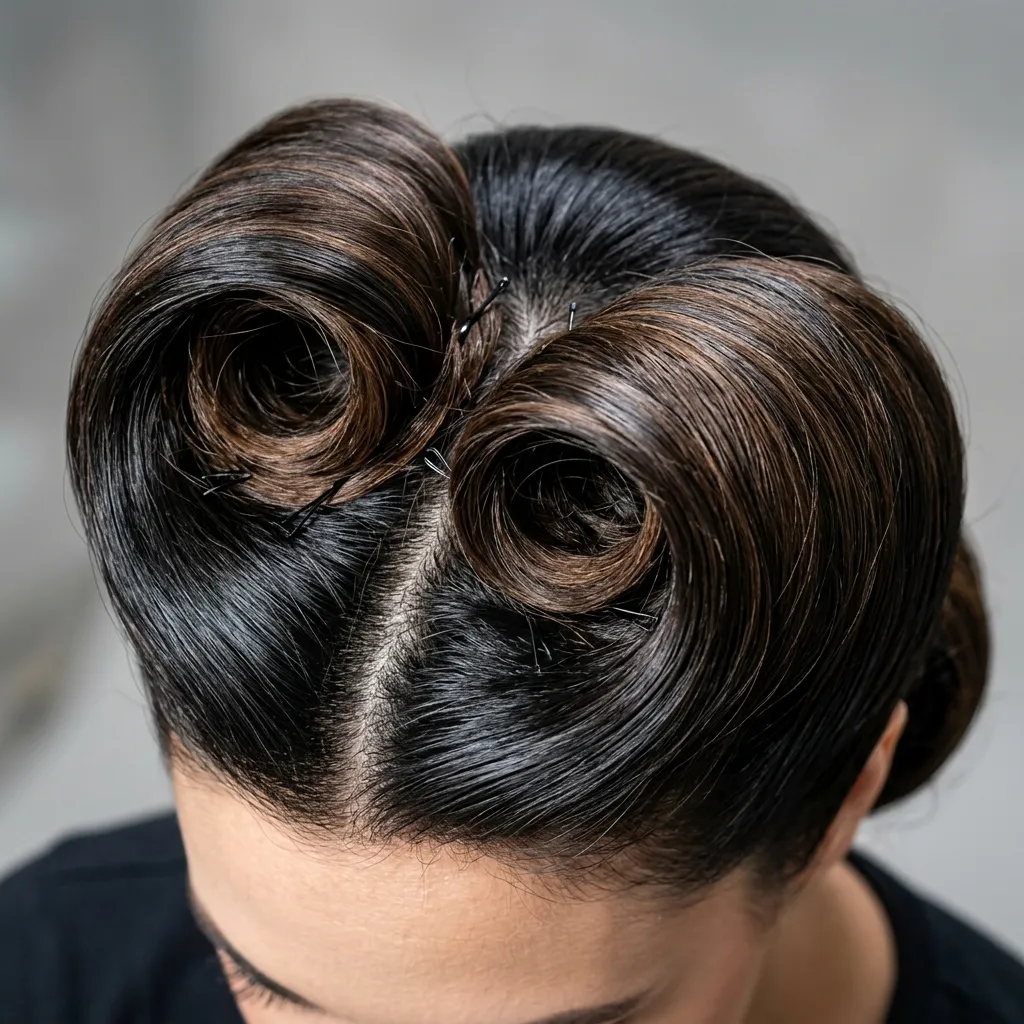
Vibe: Bold and celebratory, curls rolled up and pinned like a crown.
Why it works: Victory rolls are constructed by rolling sections of hair around themselves toward the scalp rather than away from it, which builds height and visible structure at the crown: a volume principle where the roll’s internal architecture, not added product or backcombing, creates the lift, distinguishing it from a simple teased or backcombed volume technique. The style takes its name directly from World War II-era iconography, the rolled shape echoed the victory rolls performed by fighter pilots, which explains both its name and its association with the era’s most morale-driven, deliberately celebratory styling.
How to get it: Section hair at the crown into two-inch panels, wrap each panel around two fingers rolling toward the scalp until it forms a tight cylindrical roll, pin the roll flat against the head, and repeat symmetrically on both sides before securing the entire structure with strong-hold hairspray.
Shop The Look
| Product |
| Bobby pin set extra strength |
| Teasing comb fine tooth |
| Strong-hold volumizing hairspray |
| Volumizing root mousse |
| Hair rolling foam cushions |
13. Sculpted Chignon Low at the Nape A Dramatic Classic Hairstyle for Black-Tie Nights
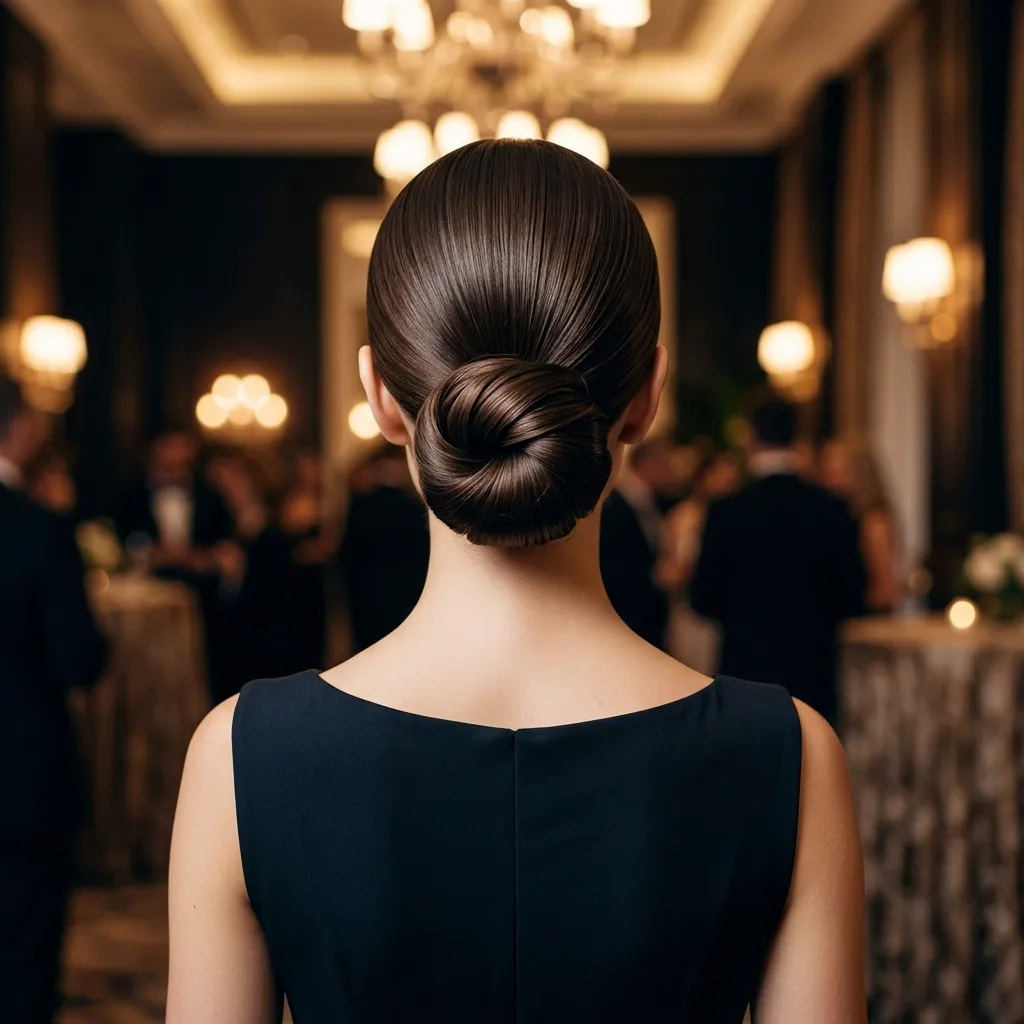
Vibe: Formal and composed, a shape built for standing still under chandeliers.
Why it works: Positioning the chignon low at the nape rather than high at the crown creates a longer, more elongated neckline silhouette: a proportion principle specific to formal updos, where the placement of the bun changes the entire visual line of the head and shoulders together, not just the hair itself. This low placement is the specific detail that separates a chignon from a simple bun in most professional stylists’ vocabulary, and it’s the version most consistently seen at formal events precisely because it flatters a wider range of neck lengths and dress necklines than a high bun does.
How to get it: Smooth hair into a low ponytail at the nape, twist the length into a tight coil, and pin the coil flat against the head in a spiral, tucking the very end underneath before securing with several U-shaped pins hidden within the coil rather than visible on its surface.
💡 Quick Win: A hair donut or bun-shaping tool underneath the twist adds structure and makes the coil far easier to pin evenly on a first attempt, particularly useful for hair that’s too fine to hold its own shape without support.
Shop The Look
| Product |
| Bun-shaping foam donut |
| U-shaped hair pins set |
| Smoothing edge control gel |
| Finishing shine spray |
| Decorative hairpin accent |
14. Dramatic Full-Length Waves Cut Blunt at the Collarbone
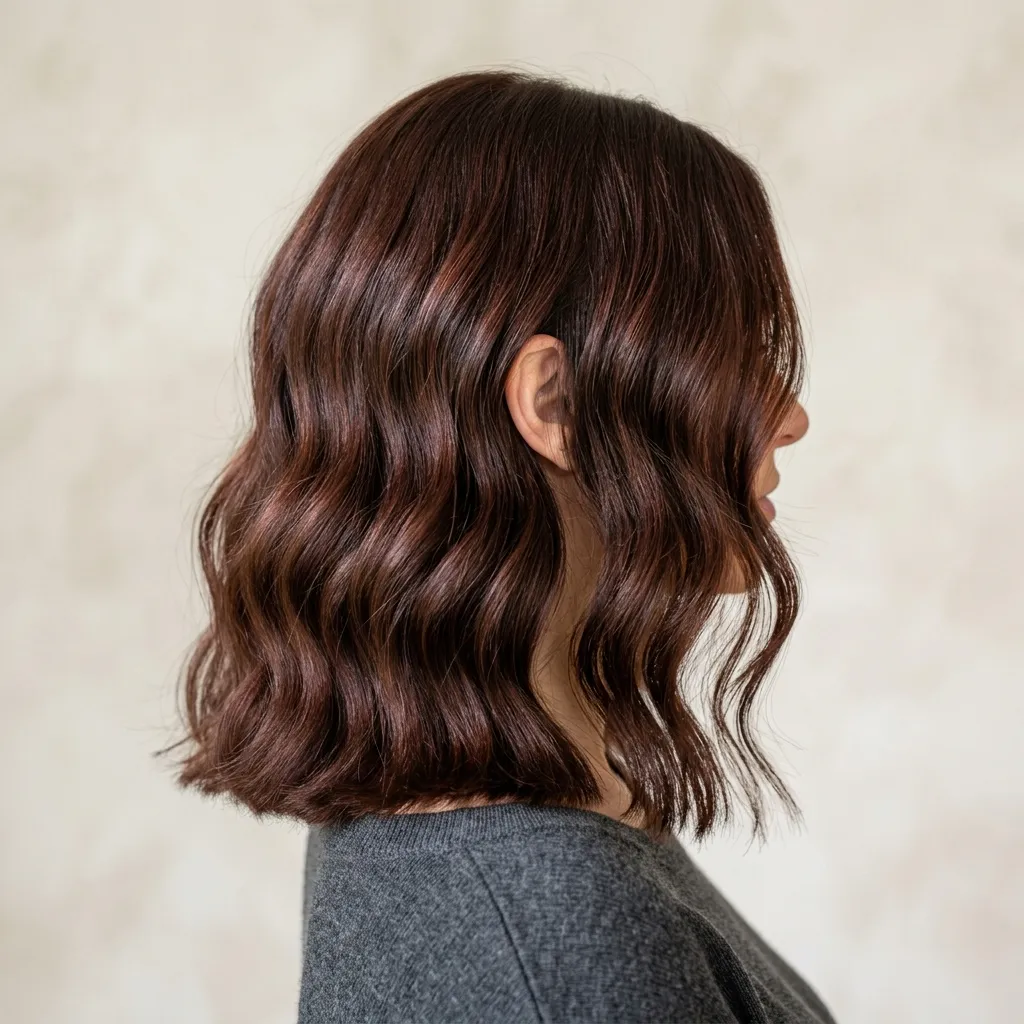
Vibe: Bold and grounded, waves with a hard stop instead of a soft taper.
Why it works: Cutting the length blunt rather than layering it keeps maximum density concentrated at the collarbone, which is what gives dramatic waves their characteristic weight and rolling movement. Layered ends would thin out that visual mass and soften the wave pattern into something closer to beachy texture than structured glamour, undermining the exact effect this cut is meant to achieve.
How to get it: Request a one-length cut with no internal layering at collarbone length, then set the entire length on large-barrel hot rollers to create uniform waves that stop in a single clean, weighted line rather than tapering off unevenly at different lengths.
Shop The Look
| Product |
| Large barrel hot roller set |
| Weightless glossing serum |
| Wide-tooth detangling comb |
| Heat protectant spray |
| Firm-hold finishing hairspray |
15. Oversized Pearl Hairpins Securing a French Twist
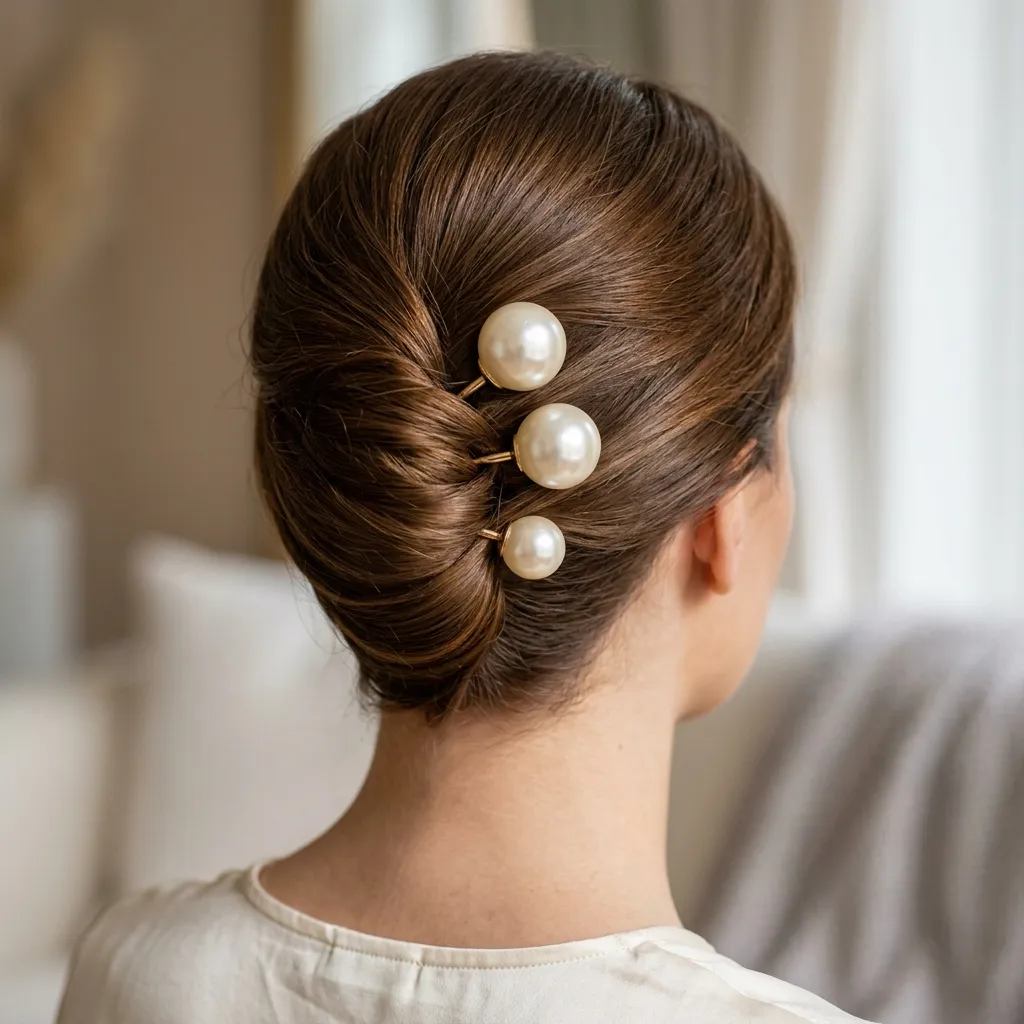
Vibe: Refined and luminous, pins that double as jewelry.
Why it works: Using large, visible pearl pins rather than hidden bobby pins turns a functional necessity into a decorative accessory, adding a layer of texture contrast smooth pearl against smooth hair that a plain twist secured invisibly wouldn’t offer.
How to get it: Smooth hair to one side vertically along the back of the head, fold the length inward to form the twist, and secure the seam with three to five oversized pearl-topped pins spaced evenly down the twist rather than clustered at one point, which keeps the decorative effect balanced along the full length of the seam.
Shop The Look
| Product |
| Oversized pearl hairpin set |
| Smoothing styling cream |
| Fine-tooth back-combing comb |
| Firm-hold hairspray |
| Anti-frizz shine drops |
16. Platinum Blonde Finger Waves for Maximum Contrast
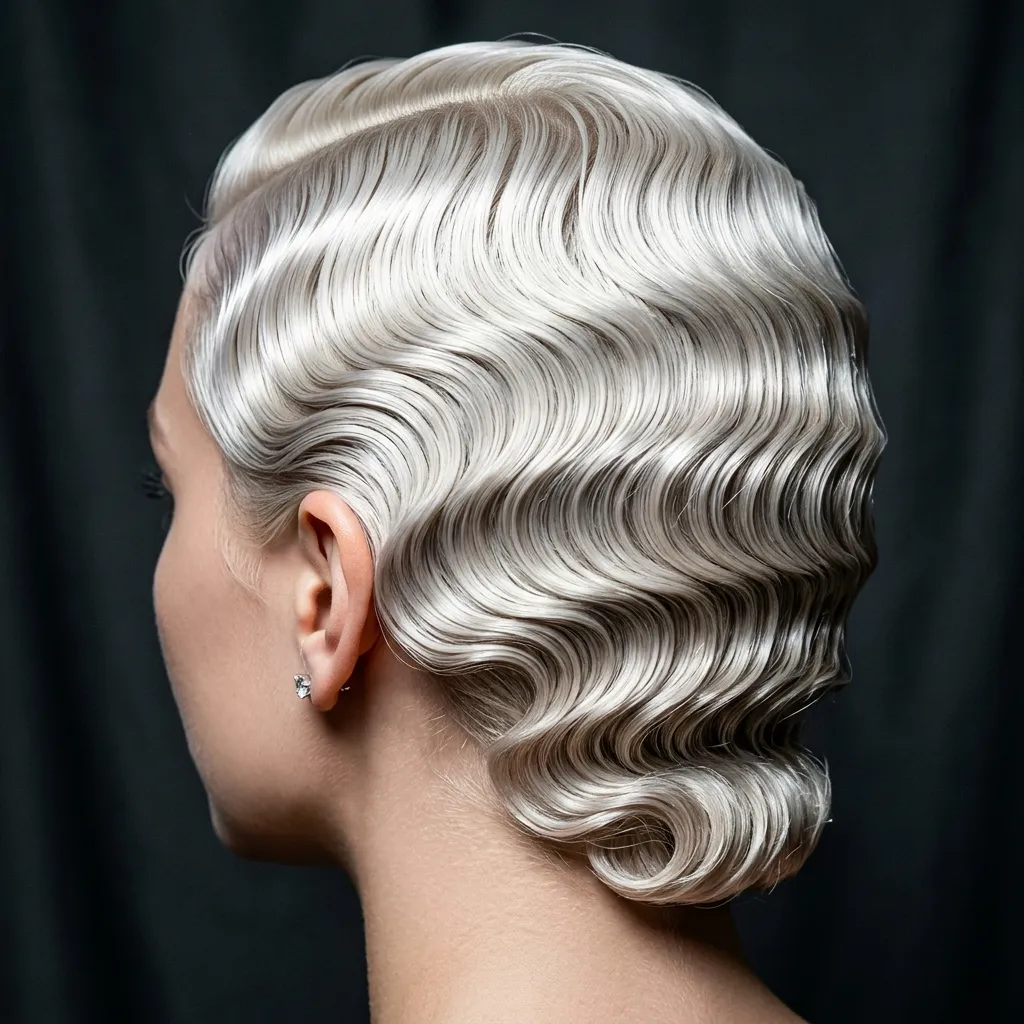
Vibe: Bold and luminous, a color and technique pairing built for contrast.
Why it works: Platinum blonde amplifies the visible ridge-and-valley structure of a finger wave far more than a dark base does, since the lighter color reflects more light along every curve of the wave pattern: a light-behavior principle, where color choice directly changes how visible a texture technique reads at a distance, which is why platinum-blonde finger waves photograph so distinctly compared to the same technique on brunette or black hair.
How to get it: Have your colorist lift hair to a clean, ash-free platinum level 10 with a violet-based toner that neutralizes any yellow undertone left from the lightening process, then set the finger waves using the standard technique. The setting method is identical to idea two, but the color choice alone changes the drama level significantly.
💡 Quick Win: A purple-pigmented toning shampoo used weekly keeps platinum tones from turning brassy between salon visits, preserving the crisp, high-contrast finish this specific look depends on.
Shop The Look
| Product |
| Purple toning shampoo platinum |
| Bond-repair hair treatment mask |
| Firm-hold wave setting gel |
| Metal duckbill clips set |
| Silver-tone finishing spray |
17. Sleek Glass-Hair Blowout with Mirror Shine
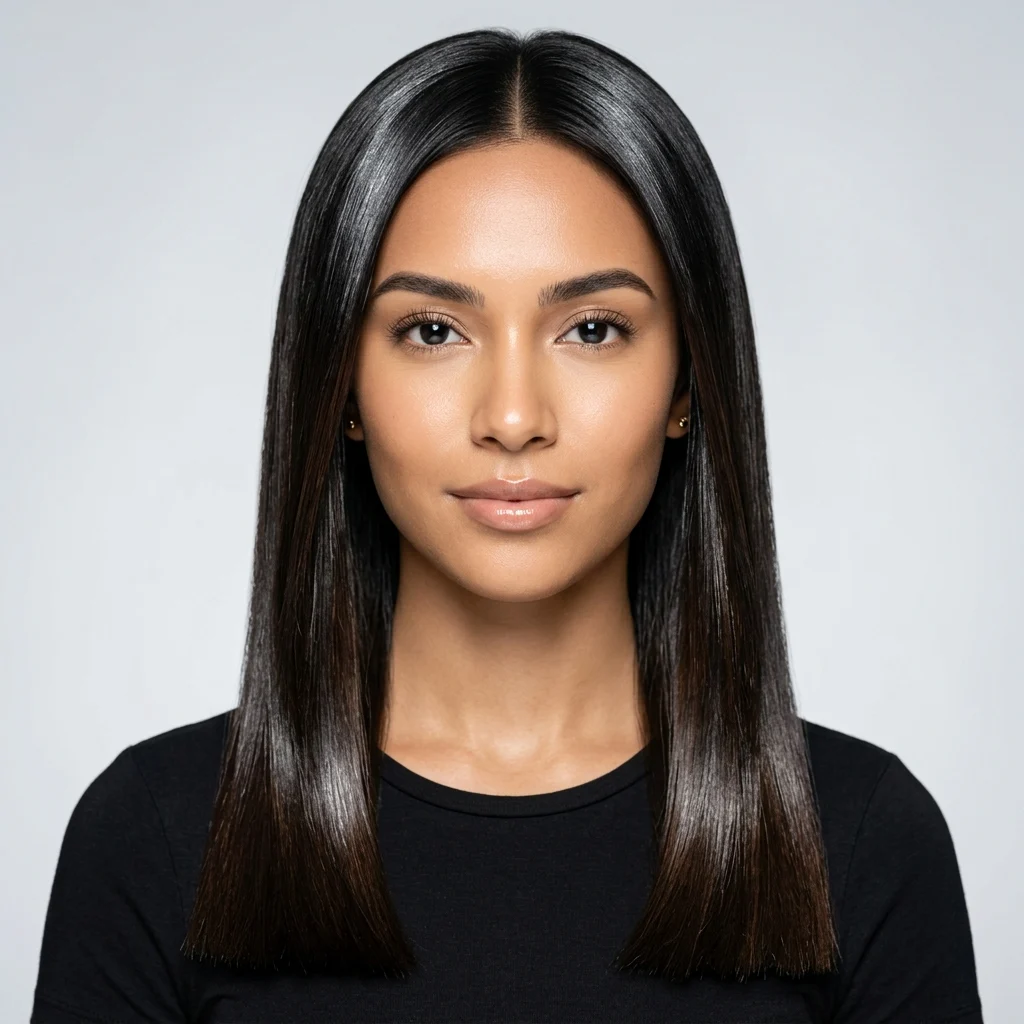
Vibe: Sleek and luminous. Hair styled to look almost liquid.
Why it works: The “glass hair” blowout relies on flattening the hair cuticle as completely as possible using a round brush and cold-shot air at the finish, which maximizes light reflection across a perfectly smooth surface. The same light-behavior principle as the patent-leather black look in idea six, applied here through blow-drying technique rather than color choice, which makes it achievable on any base color rather than requiring black or very dark hair specifically.
How to get it: Blow-dry in small sections with a boar-bristle round brush, pulling each section taut and following immediately with a two-second blast of cold air before releasing, which seals the cuticle flat and locks in the shine before the section has a chance to relax back into its natural texture.
Shop The Look
| Product |
| Boar bristle round brush |
| Ionic ceramic blow dryer |
| Heat protectant shine spray |
| Smoothing glossing cream |
| Flat paddle brush finishing |
18. Hot-Roller Set Curls Brushed to a Soft Cloud
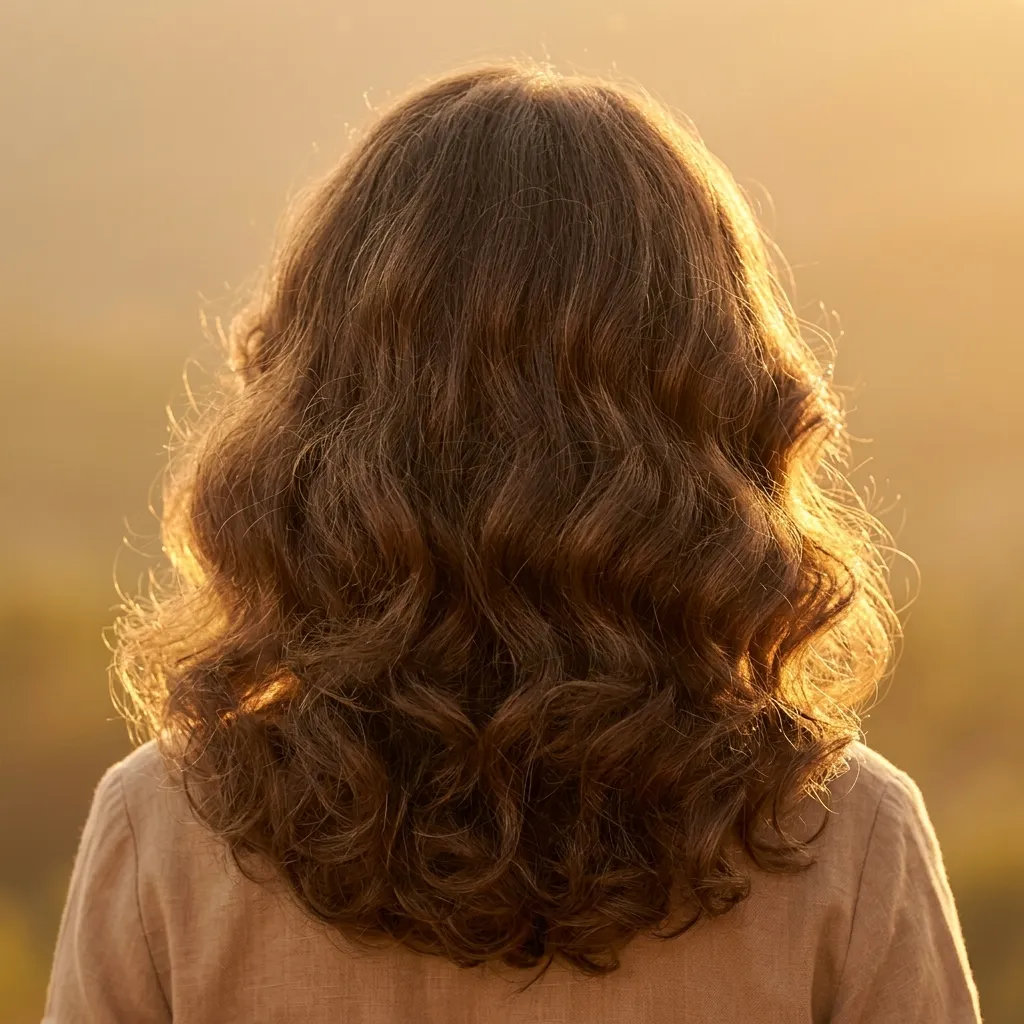
Vibe: Soft and voluminous, curls brushed out until they merge into one shape.
Why it works: Brushing out a hot-roller set with a boar-bristle brush breaks individual curls into a single, unified rounded silhouette rather than leaving them as separate ringlets: a texture-blending principle where thorough, repeated brushing trades curl definition for overall volume and shape, which is the specific effect this particular dramatic classic style depends on, distinct from the defined-ringlet approach used in idea four.
How to get it: Set hair on medium hot rollers throughout, let cool completely for at least fifteen minutes before removing, removing rollers too early is the single most common reason this style falls flat within an hour, then brush firmly and repeatedly from roots to ends until the individual curls merge into one rounded, cloud-like shape.
Shop The Look
| Product |
| Medium barrel hot roller set |
| Boar bristle brushing brush |
| Volumizing setting mousse |
| Heat protectant styling spray |
| Firm-hold finishing hairspray |
19. Sleek High Beehive: The Boldest Dramatic Classic Hairstyle of All
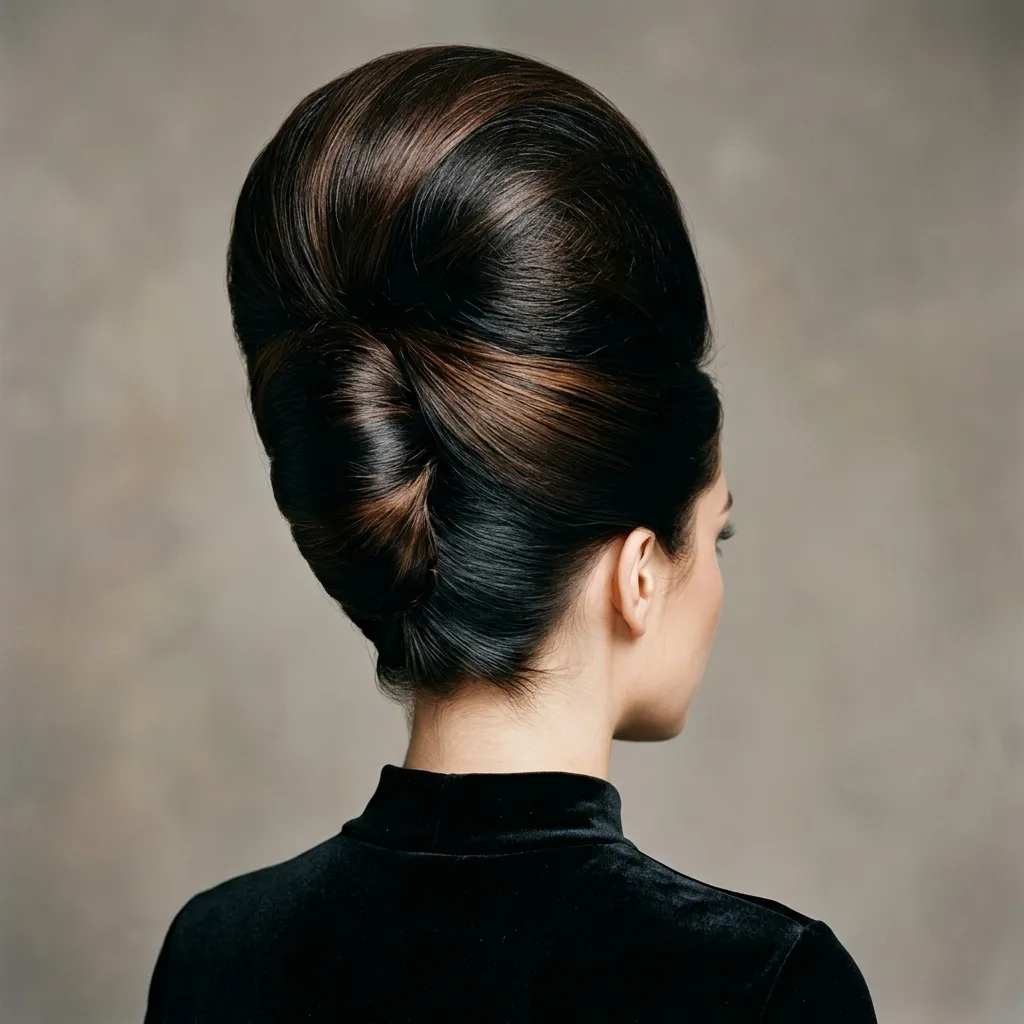
Vibe: Bold and theatrical, height as the entire visual statement.
Why it works: The beehive builds volume through backcombing at the crown and then smooths a thin outer layer of hair over the teased structure. A layering principle where the visible surface is structurally separate from the interior, letting the style achieve extreme height while still reading as smooth and polished rather than messy.
How to get it: Backcomb one-inch sections at the crown thoroughly with a fine-tooth teasing comb, mold the teased volume into a rounded shape with your hands, then smooth a thin top layer of unteased hair over the entire structure and pin it underneath at the nape so the teasing itself stays completely hidden.
💡 Quick Win: A dedicated hair-teasing comb with a rat-tail end, rather than a regular comb, creates significantly more backcombed volume per section, meaning fewer sections and considerably less time spent building the structure overall.
Shop The Look
| Product |
| Rat-tail teasing comb |
| Extra-strong hold teasing spray |
| Bobby pin set extra long |
| Volumizing texture powder |
| Firm-hold finishing hairspray |
20. Modified Finger Waves for Fine, Lower-Density Hair
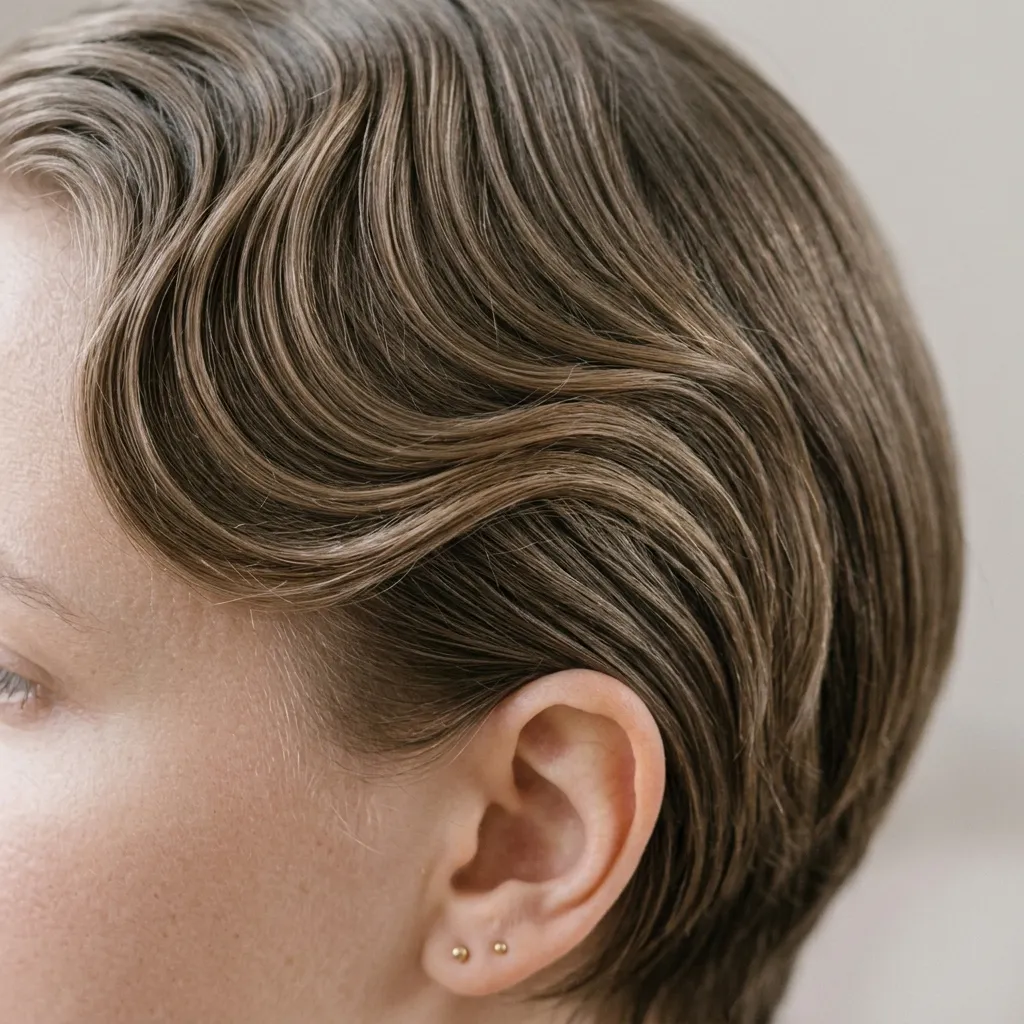
Vibe: Delicate and refined, the same drama, built at a scale fine hair can actually hold.
Why it works: Fine or lower-density hair can’t hold the deep, exaggerated ridges of a classic finger wave without looking flat or falling out within an hour, so shortening the wave pattern’s amplitude shallower ridges spaced slightly closer together keeps the technique proportional to the hair’s actual density instead of forcing a scale it physically can’t support. This is the same density-first adaptation logic that applies across most structured vintage styling: the technique doesn’t change, but its scale has to.
How to get it: Use a volumizing setting mousse instead of a firm-hold gel to avoid weighing fine hair down further, and set shallower, closer-together S-waves rather than the deep, wide ridges used on thicker hair, pinning each wave for a shorter set time to prevent the finished style from looking limp by evening.
💡 Quick Win: A texturizing powder worked into the roots before setting gives fine hair enough grip for the wave pattern to hold through a full evening without needing a heavier styling product overall.
Shop The Look
| Product |
| Volumizing setting mousse |
| Texturizing root powder |
| Lightweight duckbill clips |
| Fine-tooth wave comb |
| Flexible-hold finishing spray |
How to Start Your Dramatic Classic Hairstyle Transformation
Your single first move is booking a gloss treatment (not a color change, specifically a clear or lightly tinted demi-permanent gloss) at your next salon visit. This one step is the foundation every dramatic classic look depends on, because the style’s entire visual language is built on shine and light reflection, and no amount of careful setting technique will read as dramatic on dull, porous, or previously color-damaged hair. A gloss seals the cuticle flat before you ever pick up a curling iron or setting gel, and most salons can add it to an existing appointment for $30-60 without booking a separate visit.
The most common mistake beginners make is using texturizing or matte-finish products designed for undone, beachy waves on a style that needs the opposite effect entirely. A matte sea-salt spray or texturizing paste actively fights the smooth, reflective finish these styles depend on, flattening shine and adding a slightly gritty texture that reads as casual rather than polished: swap it for a glossing serum or shine spray, and the same wave pattern will read as considerably more dramatic and intentional without changing the setting technique itself in any way.
Three specific items under $50 that create immediate impact: a bottle of firm-hold setting gel like Design Essentials Wave gel ($8–12); a set of metal duckbill wave clips ($10–15, look for a pack of at least twelve), and a lightweight glossing hair serum such as Moroccanoil Treatment Light ($15–25 for a travel size, which is plenty for testing the technique before committing to full size).
A full styling learning curve (from your first attempted finger wave to a consistently even, symmetrical set) realistically takes three to five practice sessions spread over a few weeks, since the muscle memory for even ridge placement takes repetition to build. A single dramatic look for one specific event can absolutely be achieved in an afternoon with no prior practice, especially the headband or turban-based ideas; building the confidence and speed to do a full finger wave or victory roll set on your own takes longer, so start practicing at least two weeks before any occasion that genuinely matters.
Frequently Asked Questions About Dramatic Classic Hairstyles
What’s the difference between dramatic classic hairstyles and vintage boho waves?
Dramatic classic hairstyles are sculpted and set to hold a fixed shape (finger waves, victory rolls, chignons) built for maximum shine and structure using gels, cold-wave techniques, and firm-hold products applied while hair is damp or wet. Vintage boho waves, by contrast, are looser and more textured, styled with a curling iron on dry hair and finished with a matte texturizing spray to look intentionally undone rather than precisely held. Both draw loosely from mid-century inspiration in terms of silhouette, but the classic style prioritizes precision and gloss, while the boho style prioritizes movement, softness, and a lower-maintenance day-to-day wearability.
What hair colors work best with dramatic classic hairstyles?
High-contrast, high-shine colors read best on camera and in person: patent-leather jet black, deep espresso brunette, warm auburn, and platinum blonde all amplify the wave and curl patterns central to this style far more than muted or ashy tones do. A glossing treatment matters just as much as the base color itself, since a matte, dull finish undercuts the dramatic effect regardless of how flattering the shade is on its own. Platinum blonde specifically shows off finger wave ridges more dramatically than darker tones because it reflects considerably more light along each curve of the wave pattern.
How much does it cost to get a dramatic classic hairstyle done professionally?
A professional finger wave or victory roll set for a single event typically costs $60 to $150 at a salon, depending on hair length, density, and your region, while a full color and gloss service to prepare the hair beforehand runs an additional $80 to $200. Learning to do the styles yourself requires an upfront tool investment of roughly $50 to $100 for setting gel, duckbill clips, hot rollers, and a quality curling iron, which typically pays for itself after two or three home styling sessions compared to booking a salon appointment for each individual event.
Do dramatic classic hairstyles work on short or fine hair?
Finger waves and pin curls work well on hair as short as a chin-length bob since the technique is built entirely on the hair’s surface rather than requiring extra length. This is actually closer to how the technique was originally worn in the 1920s and ’30s than the longer cascading versions. Chignons, beehives, and cascading curl looks need more length or added volume to execute properly, so fine or shorter hair should prioritize the wave and shine-based techniques first.
What’s the most iconic element of dramatic classic hairstyles?
The finger wave is widely considered the single most recognizable technique in this category, historically associated most strongly with 1920s and 1930s Hollywood glamour and developed originally as a no-heat workaround for the era’s shorter bobbed cuts. It remains the most searched dramatic classic hairstyle term on Pinterest and TikTok tutorials today, particularly around wedding and prom season each year.
Ready to Create Your Dramatic Classic Hairstyle?
These 20 ideas cover the full range of what dramatic classic hairstyles can be from color choices like a single white streak or platinum-blonde contrast to structural techniques like victory rolls and a Margaret Vinci Heldt-style beehive to accessory-led looks like a jeweled headband or wartime-inspired silk turban wrap. You don’t need to master the beehive this week; a single, well-set finger wave on a blunt bob is a complete, legitimate starting point on its own, and the setting technique only gets faster and more even with practice.
Final Thoughts
Today’s specific action: pick up a firm-hold setting gel and a set of duckbill clips, and practice one section of finger waves on dry hair before your next event so the technique feels familiar rather than rushed when it actually counts. Once you’ve got the set down, you’ll carry a kind of composed, unbothered confidence that no undone wave can quite replicate hair that looks considered, not accidental. Save the look that matches your hair’s length and density here, so you’re working from a clear, specific reference the next time you reach for the setting gel.