
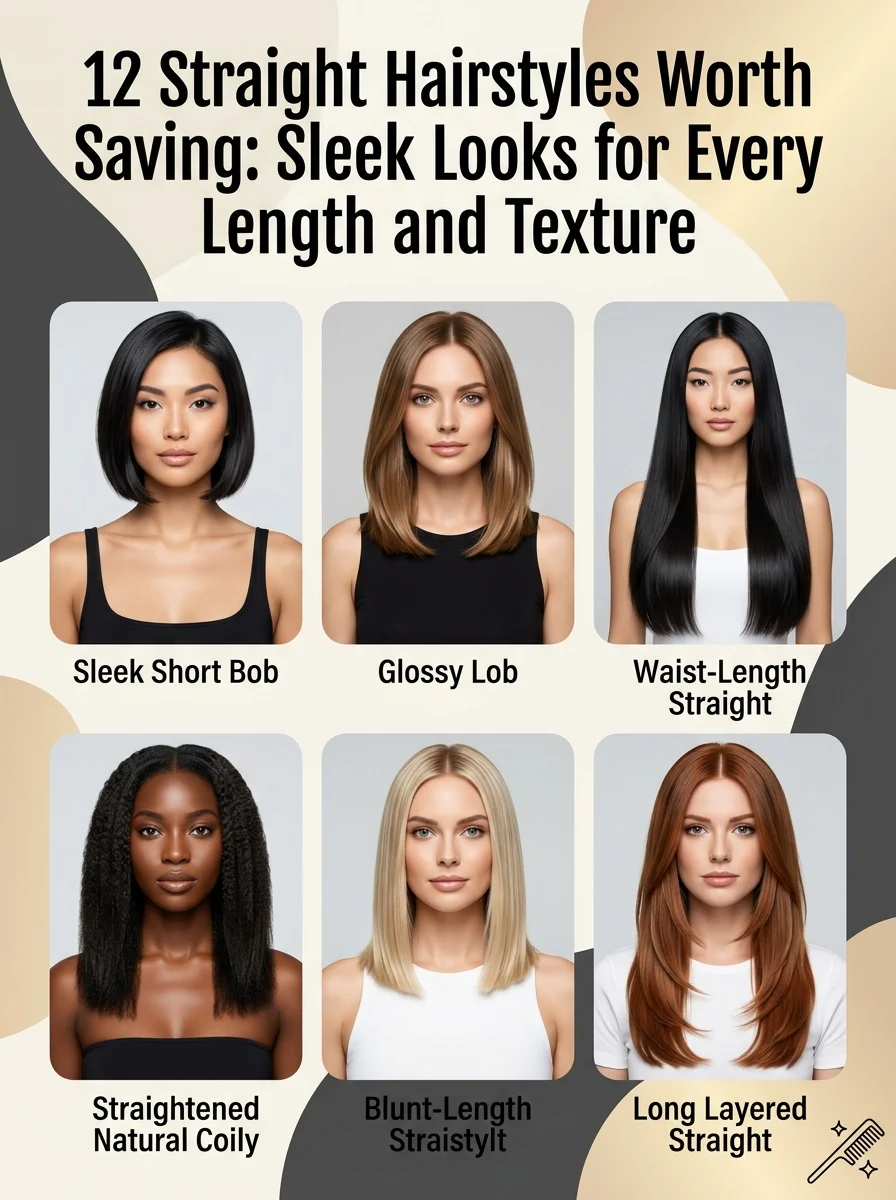
12 Straight Hairstyles Worth Saving: Sleek Looks for Every Length and Texture

Straight hairstyles are looks built around a smooth, flat hair shaft with little to no natural bend: achieved through cutting, blow-drying, flat-ironing, or chemical straightening rather than curl or wave patterns. This guide covers 12 straight hairstyles worth trying, from glass-hair blowouts to face-framing bobs, each with the exact tool, technique, and product behind it.
Straight hair, done well, feels deliberate. The kind of sleekness that reads as controlled rather than flat. It can feel luminous and light-catching, like a blunt-cut bob under studio light, or it can feel hushed and grounded, like a low sleek ponytail pulled tight at the nape. The common thread across every straight style is precision: straight hair shows every uneven line, every stray flyaway, in a way that texture and curl can hide. Here are 12 ideas worth saving, and stealing.
Why Straight Hairstyles Work So Well
Straight hairstyles draw from two very different technical traditions. One is the mechanical smoothing tradition (flat-ironing, blow-drying with a round brush, and hot-air styling tools like the Dyson Airstrait) which temporarily rearranges the hair’s hydrogen bonds under heat to lie flat, and reverts with humidity or washing. The other is the chemical tradition, Japanese thermal reconditioning and keratin treatments, which permanently or semi-permanently breaks and reforms the hair’s disulfide bonds, producing straightness that survives washing and humidity. Most modern straight hairstyles rely on the mechanical route, since it’s reversible and lower-commitment, but the distinction changes how long a style actually lasts.
I’ve noticed that the materials and tools people ask about most are surprisingly specific. A true “glass hair” finish depends on ceramic or titanium flat-iron plates run at 350–380°F for fine hair and up to 420°F for coarse or curly-to-straight hair, paired with a heat protectant like Kenra Platinum Blow-Dry Spray or Living Proof Triple Bond Complex. Silk presses on textured hair typically use a blow-dry cream (Mielle Organics or ORS Olive Oil) applied section by section before flat-ironing, which is what produces shine without over-drying tightly coiled strands. Straight bobs and lobs rely on precision cutting more than product. The cut itself is the styling tool.
In my experience, search interest in low-maintenance straight styles has risen alongside two real trends: heat-tool technology has genuinely improved, with tools like the ghd Platinum+ and Dyson Corrale using lower, more consistent heat with less strand damage, making sleek styling more achievable for daily wear. At the same time, “your natural texture, just smoothed” looks have overtaken heavily processed, mirror-flat styles, mirroring a broader shift toward hair health over aggressive heat styling.
Style at a Glance
| Element | Detail |
| Philosophy | Precision and shine over volume, controlled smoothness, not flat by accident |
| Key Techniques | Flat-ironing, round-brush blowouts, silk pressing, precision cutting |
| Key Tools | Ceramic/titanium flat iron, boar-bristle round brush, Dyson Airstrait |
| Key Products | Heat protectant spray, lightweight shine serum, root-lifting mousse |
12 Straight Hairstyles Worth Saving
1. Glass Hair Straight Blowout
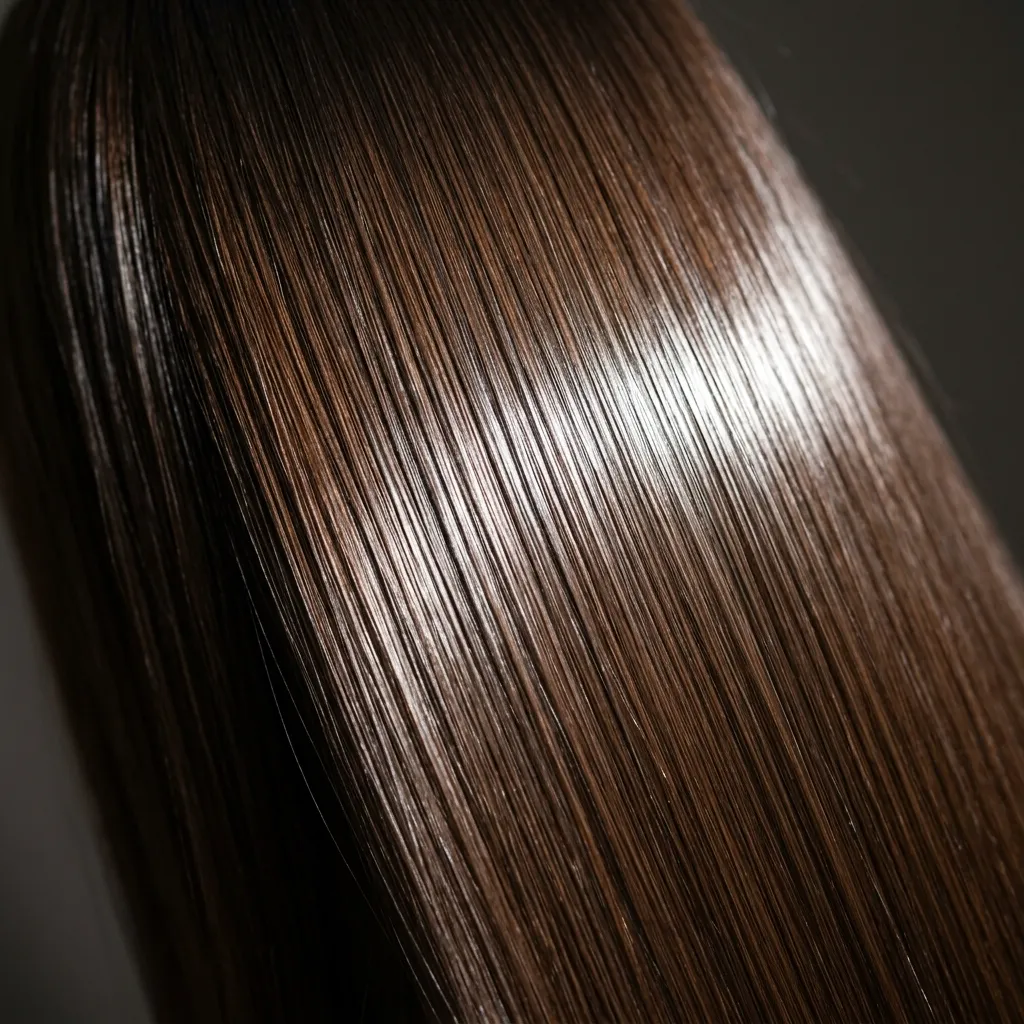
- Creates a mirror-like shine visible even at a distance
- Works on nearly any length past chin-level
- Pairs well with any base hair color
- Ideal for special occasions or a fresh weekly reset
Vibe: Luminous, the kind of shine that looks retouched even when it isn’t.
Why it works: A closed, flat cuticle reflects light in one consistent direction, which is what produces the mirror-like “glass hair” effect a raised or porous cuticle scatters light in multiple directions and reads as dull by comparison. I’ve noticed the blowout technique matters as much as the product: pulling hair taut with a boar-bristle round brush while directing airflow downward along the cuticle is what actually seals the shaft flat.
How to get it: Blow-dry with the nozzle pointed down the hair shaft, section by section, using a boar-bristle round brush for tension, then finish with two to three passes of a 1-inch ceramic flat iron at 370°F. Apply a lightweight glossing serum only after the hair has fully cooled: in my experience, heat-styling over oil causes the product to bake in and look greasy instead of glassy. Among straight hairstyles, this one gets requested most often for its photograph-ready finish.
💡 Quick Win: A cold-air finishing pass from your blow dryer after straightening closes the cuticle further and adds shine in under 30 seconds.
Shop The Look
| Product |
| Ceramic 1-inch flat iron dual voltage |
| Boar bristle round brush large barrel |
| Lightweight glossing hair serum |
| Ionic blow dryer with concentrator nozzle |
| Heat protectant spray fine mist |
Also try: Idea #12 (Ultra-Sleek High-Shine Ponytail) for the same glass finish pulled back.
2. Blunt Bob Cut
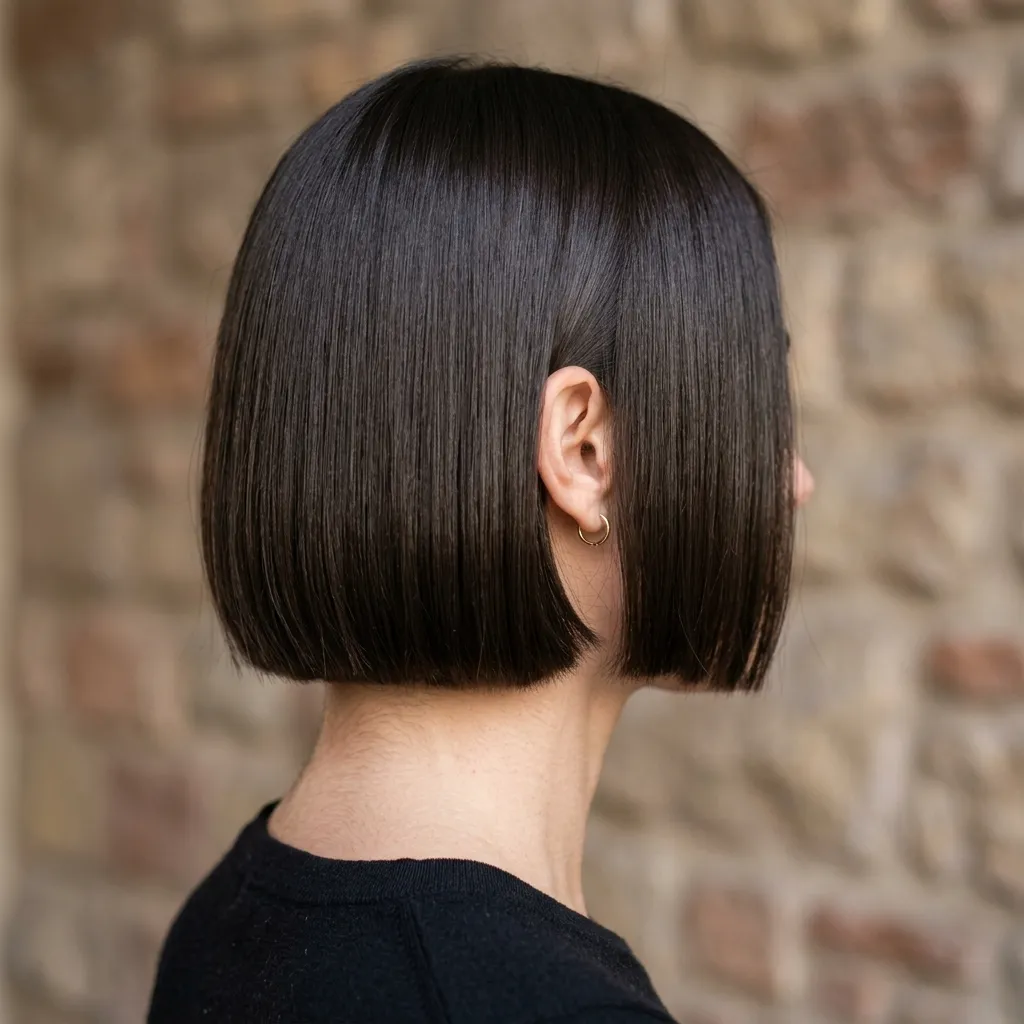
- Adds visual density without extra length
- Requires minimal daily styling once cut correctly
- Suits fine hair especially well
- Works for round, oval, and heart face shapes
Vibe: Sharp and precise, a hard geometric line rather than a soft taper.
Why it works: A blunt cut removes all graduated layering, so every strand ends at exactly the same length this creates maximum visual weight at the perimeter, a principle stylists call the “weight line,” which is what makes blunt bobs look thicker and glossier than layered cuts of the same actual density.
How to get it: Ask your stylist specifically for a “blunt, one-length cut with no internal layering,” and confirm the length lands at or just below the jawline, where the weight-line effect is most pronounced. I’ve noticed it’s best cut dry rather than wet if your hair has any natural texture, since wet-cutting can shift where the blunt line falls once hair dries and shrinks slightly. This is one of the most requested straight hairstyles for anyone wanting low daily upkeep.
Shop The Look
| Product |
| Precision cutting shears salon grade |
| Sectioning clips flat metal |
| Weightless smoothing cream bob styling |
| Small round brush 1-inch barrel |
| Anti-humidity finishing spray |
3. Center-Parted Sleek Lob
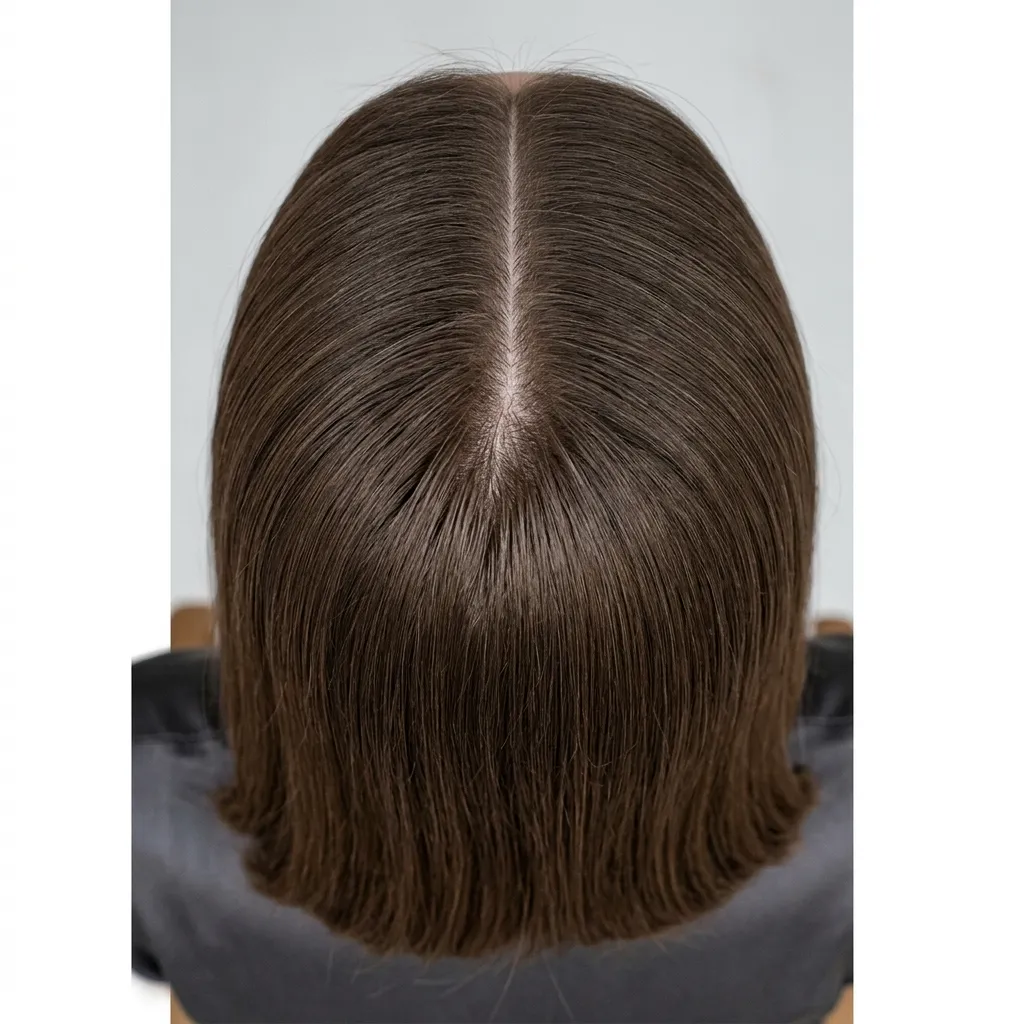
- Balances facial proportions symmetrically
- Suits shoulder-to-collarbone lengths best
- Easy to maintain with a fine-tooth comb
- Photographs cleanly from any angle
Vibe: Calm and symmetrical, the kind of part that makes a whole face look balanced.
Why it works: A center part divides the head into two visually equal halves, which is a proportion principle symmetry reads as calm and orderly, while an off-center part introduces asymmetric visual weight. In my experience, on straight hair specifically, a center part shows the part line itself clearly, so precision in the parting (a fine-tooth comb, not fingers) makes a visible difference in how polished the style looks.
How to get it: Use a rat-tail comb to section a perfectly straight center part from hairline to crown before blow-drying, and dry each side downward and slightly outward with a paddle brush to keep the fall symmetrical. This works best on a lob length, since a center part on very long hair can visually narrow the face more than intended.
💡 Quick Win: A small dab of edge-control gel run along the part line with a toothbrush keeps flyaways from breaking the crisp line through the day.
Shop The Look
| Product |
| Rat tail comb fine tooth metal |
| Paddle brush wooden handle |
| Edge control gel small tube |
| Flat iron for touch-ups mini |
| Smoothing pomade lightweight |
4. Silk Press for Textured Hair
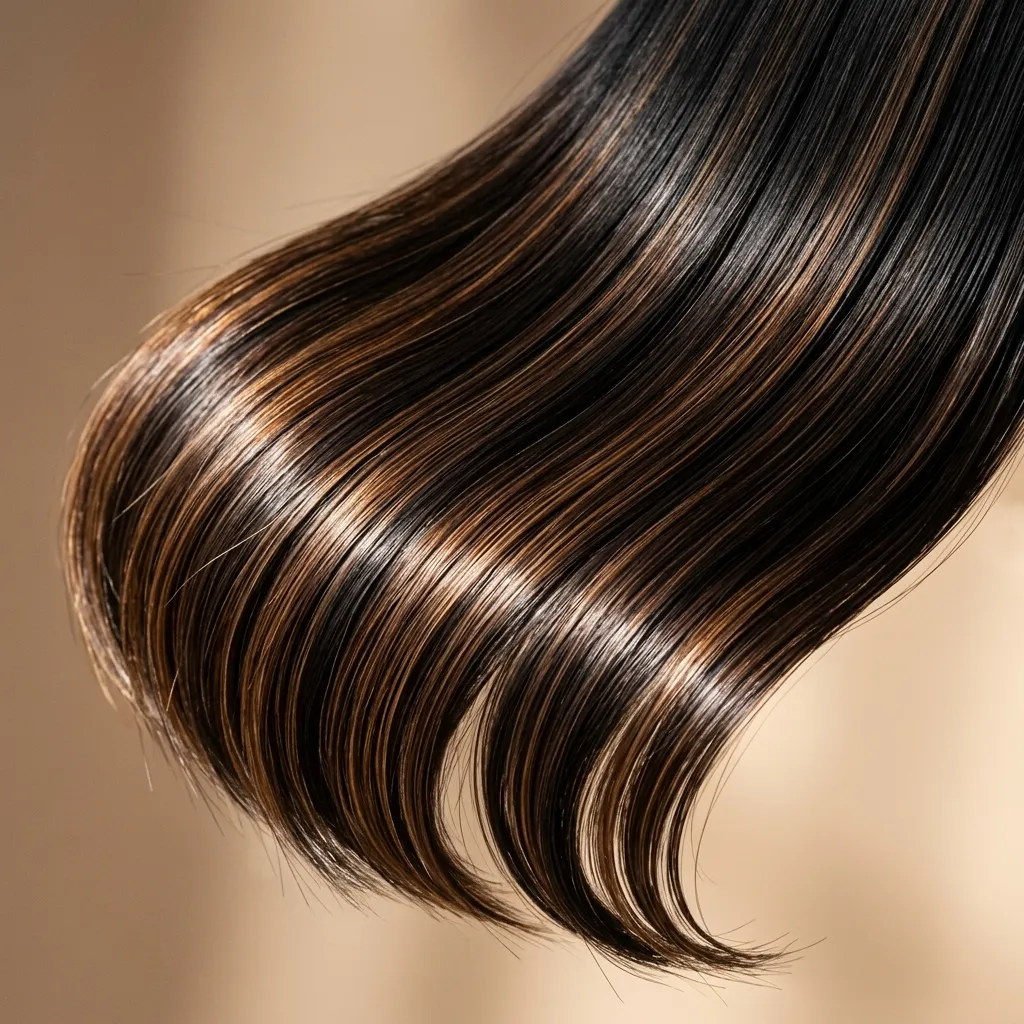
- Preserves hair health better than repeated flat-ironing alone
- Delivers salon-level shine on coily or curly textures
- Lasts 1–2 weeks with proper wrapping
- Reverts to natural texture with a wash, no commitment
Vibe: Smooth and radiant, straight hair that still bounces with movement.
Why it works: A silk press differs from a standard flat-iron straightening because it starts with a thorough wash-and-blow-dry using tension, which is what allows tightly coiled hair to reach true straightness without over-processing the cuticle. I’ve noticed the technique relies on stretching the hair fully during the blow-dry stage so the flat iron afterward only needs to seal, not do all the straightening work.
How to get it: Wash and deep-condition first, then blow-dry in small sections using a fine-tooth comb attachment, pulling each section taut from root to end. Finish with a single flat-iron pass per section at 370–400°F using a lightweight blow-dry cream underneath, like Mielle Organics Pomegranate & Honey. Among straight hairstyles for textured hair, this is consistently the most requested for its balance of shine and hair health.
Shop The Look
| Product |
| Blow dryer comb attachment |
| Heat protectant cream textured hair |
| Wide barrel flat iron 1.5-inch |
| Satin bonnet for overnight preservation |
| Edge brush with rat tail handle |
5. Rhinestone Clip Face-Framing Pieces
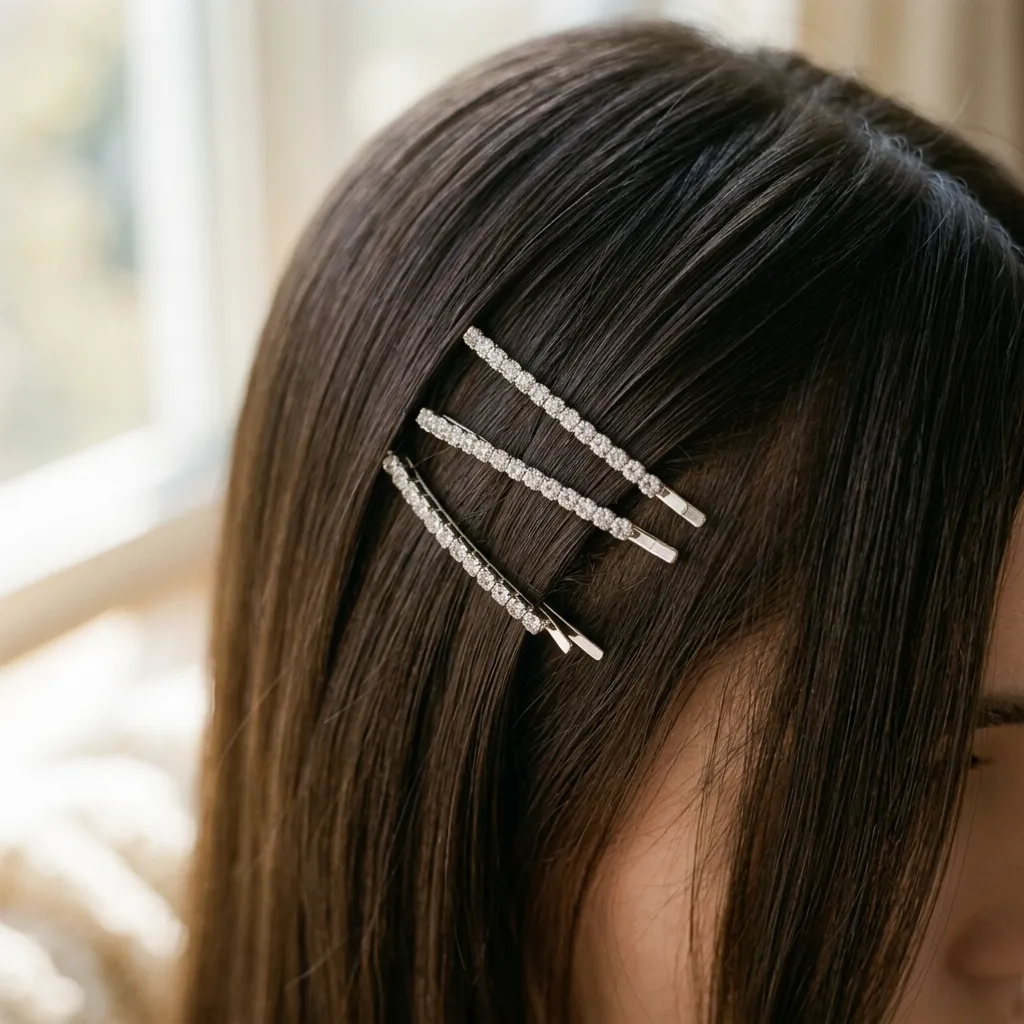
- Adds a focal point without any cutting or color change
- Costs under $15 for a full clip set
- Works on any straight length past the chin
- Easy to remove for a fully plain look when needed
Vibe: Delicate and a little playful, a small detail that changes the whole read of a plain straight style.
Why it works: A cluster of small clips placed asymmetrically along one side breaks the visual monotony of a perfectly flat, single-length style, adding a focal point without disrupting the overall sleekness. In my experience, this one deliberate irregularity is what makes the surrounding uniformity look intentional rather than plain.
How to get it: Clip two to three small rhinestone snap clips in an asymmetric cluster on one side, roughly an inch above the ear, rather than placing them symmetrically or in a straight row. Keep the rest of the style fully sleek and undecorated so the clips remain the single focal point.
💡 Quick Win: Mixed metallic clips (a few silver, one gold) in the same cluster reads more intentional and expensive than a matched uniform set.
Shop The Look
| Product |
| Rhinestone snap hair clips set |
| Mixed metallic hair clip pack |
| Small metal snap clips gold |
| Hair clip storage tray velvet |
| Shine spray for clipped sections |
6. Long Layered Straight Hair

- Prevents heavy, shapeless ends on very long hair
- Adds movement without sacrificing overall length
- Frames the face softly at the cheekbone
- Grows out gracefully between trims
Vibe: Flowing and light, straight hair that still has visible movement rather than hanging static.
Why it works: Long layers cut at varying lengths, rather than one uniform blunt line, redistribute weight so the ends move independently the opposite design principle from a blunt bob, trading maximum shine for movement. I’ve noticed that on hair past mid-back, some layering is often necessary anyway, since fully blunt ends can look heavy and shapeless without any layered structure.
How to get it: Ask your stylist for “long face-framing layers starting at the cheekbone,” which keeps the bulk of the length intact while introducing movement around the face. Avoid requesting layers “throughout” without a starting point, in my experience, vague layering requests are the most common cause of choppy, uneven results.
Shop The Look
| Product |
| Lightweight texturizing spray long hair |
| Large barrel flat iron 2-inch |
| Volumizing root mousse |
| Wide-tooth detangling comb |
| Shine-boosting hair oil drops |
7. Sleek Low Ponytail
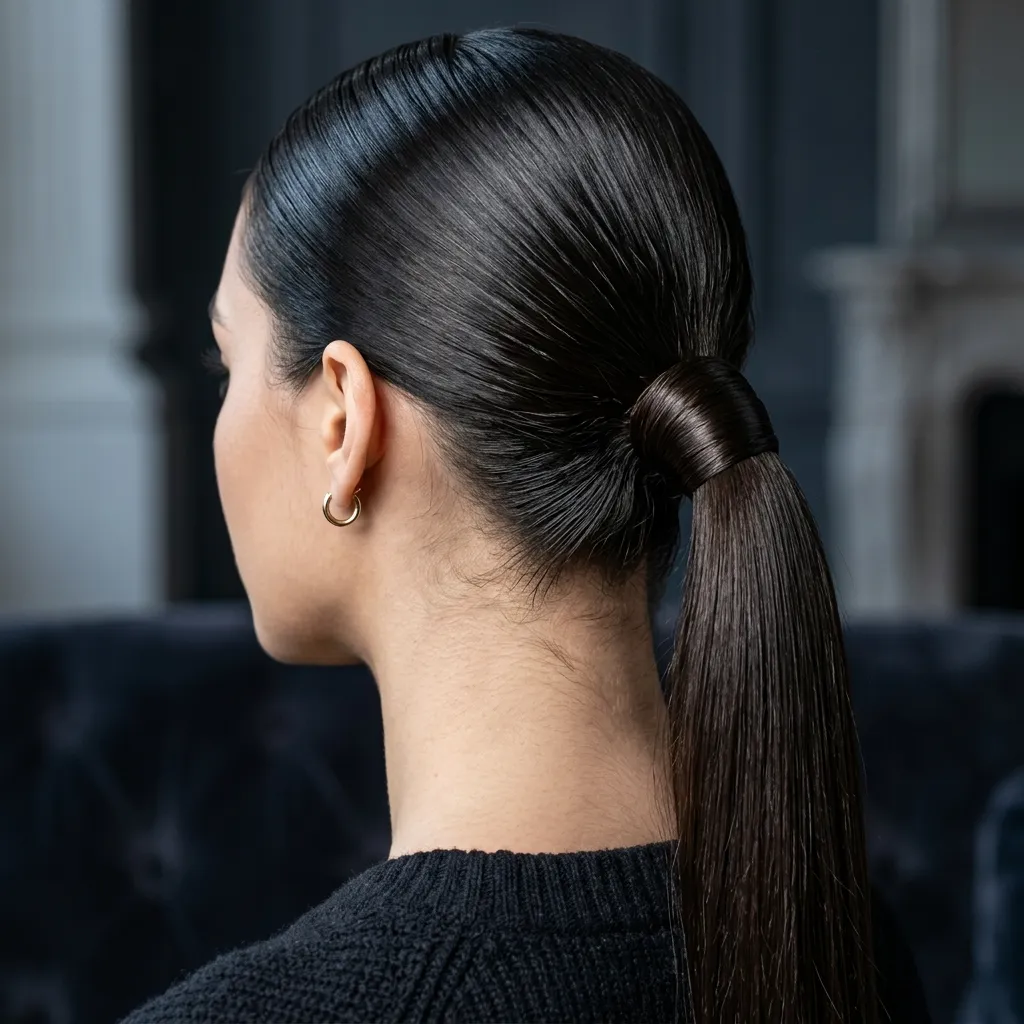
- Takes under 10 minutes to achieve
- Elongates the neck and opens up the jawline
- Works for both casual days and formal events
- Requires no heat styling tools at all
Vibe: Hushed and controlled, hair pulled back with nothing left to move.
Why it works: A low ponytail concentrates all visual weight at the nape rather than distributing it across the shoulders, which is a negative-space principle pulling hair fully off the face opens up sightlines to the neck and jawline. I’ve noticed this makes the whole silhouette read as more architectural and less soft than the same hair worn down.
How to get it: Smooth roots flat with a small amount of gel applied with a fine-tooth comb before securing a low ponytail with a clear elastic, then wrap a one-inch section of hair around the base to hide the elastic entirely, securing the wrapped piece with a bobby pin underneath. Among no-heat straight hairstyles, this remains a daily favorite.
💡 Quick Win: A toothbrush with a small amount of hairspray is the fastest way to smooth stray baby hairs along the hairline without adding heavy product to the rest of the pony.
Shop The Look
| Product |
| Clear hair elastics thin |
| Edge control gel with brush |
| Smoothing gel wand flyaway tool |
| Bobby pins matte finish pack |
| Shine spray for sleek ponytail |
8. Side-Swept Deep Part
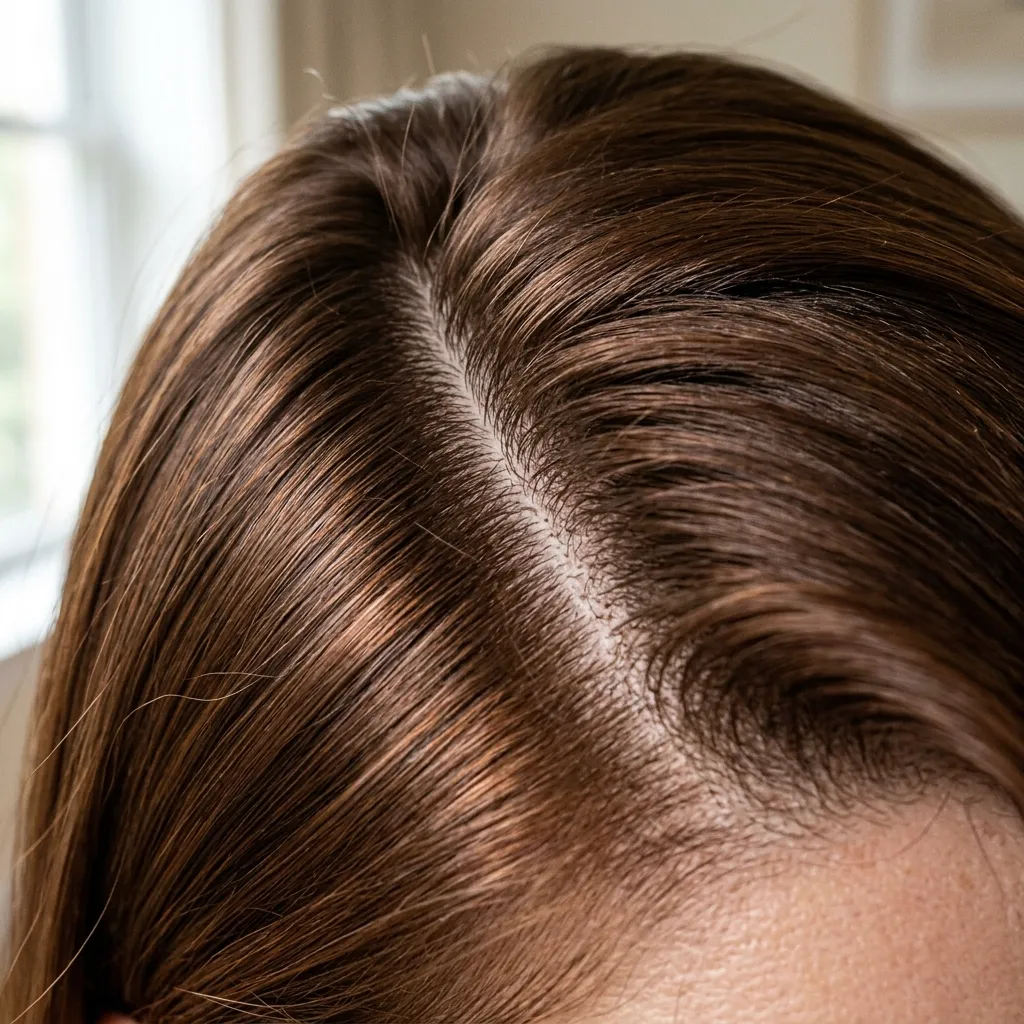
- Softens angular or square face shapes
- Adds asymmetry to an otherwise plain straight style
- Works well when growing out bangs
- Requires only a comb and a few pins
Vibe: Soft and asymmetric, a diagonal line that pulls the eye across the face rather than straight down it.
Why it works: A deep side part shifts most of the hair volume to one side, creating intentional asymmetry that can visually soften angular face shapes. In my experience, this works on the same visual-weight principle as a center part, but deliberately unbalanced, which reads as more relaxed and less severe.
How to get it: Part hair on a diagonal starting well above the outer corner of the eyebrow. A true deep part should leave roughly 70–80% of the hair on one side. Blow-dry the heavier side downward and slightly forward across the forehead to maintain the sweep once finished.
Shop The Look
| Product |
| Fine tooth comb for deep parting |
| Round brush for forward sweep styling |
| Texturizing pomade light hold |
| Anti-frizz serum forehead-safe |
| Bobby pins for securing sweep |
9. Straight Pixie Crop
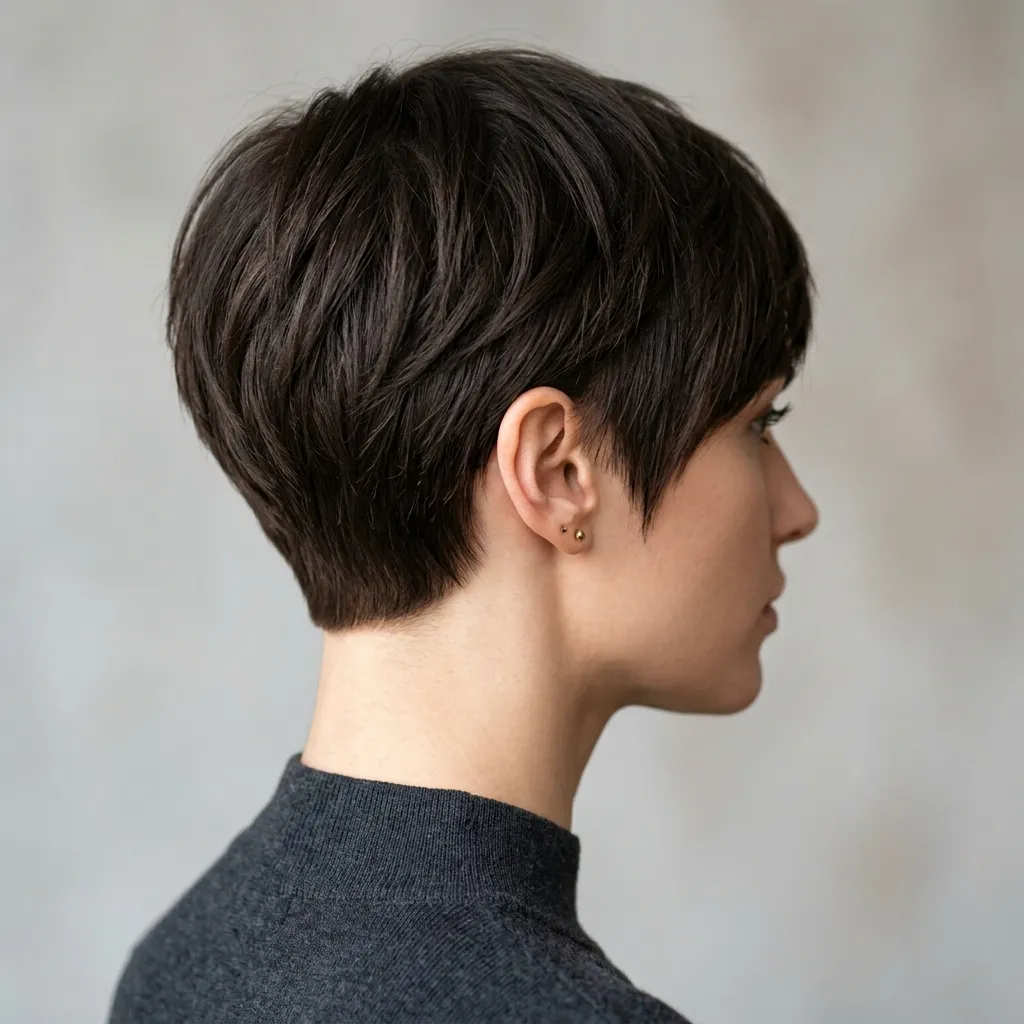
- Delivers maximum precision with minimal daily effort
- Suits fine hair that struggles to hold volume long
- Needs a trim every 3–4 weeks to stay sharp
- Works especially well in hot, humid climates
Vibe: Sharp and confident, a style with nowhere for imprecision to hide.
Why it works: Very short straight hair has almost no length to conceal an uneven cutting line, which means the haircut itself not styling product does nearly all of the visual work. I’ve noticed this is why pixie cuts need more frequent trims than longer styles: even a quarter-inch of uneven regrowth is immediately visible at this length.
How to get it: Request texture only at the crown (point-cutting or razor work) while keeping the nape and sides cut close and blunt. This contrast is what keeps a short pixie from reading as flat. A small amount of matte clay worked only into the crown adds separation without weighing down the short length.
💡 Quick Win: A travel-size flat iron with narrow 1/2-inch plates lets you touch up short, tight sections in seconds without needing a full restyle.
Shop The Look
| Product |
| Mini flat iron narrow plates |
| Matte texturizing clay small tin |
| Precision clippers for nape line |
| Small round detail brush |
| Lightweight finishing wax pixie |
10. Silk Ribbon Half-Up Style
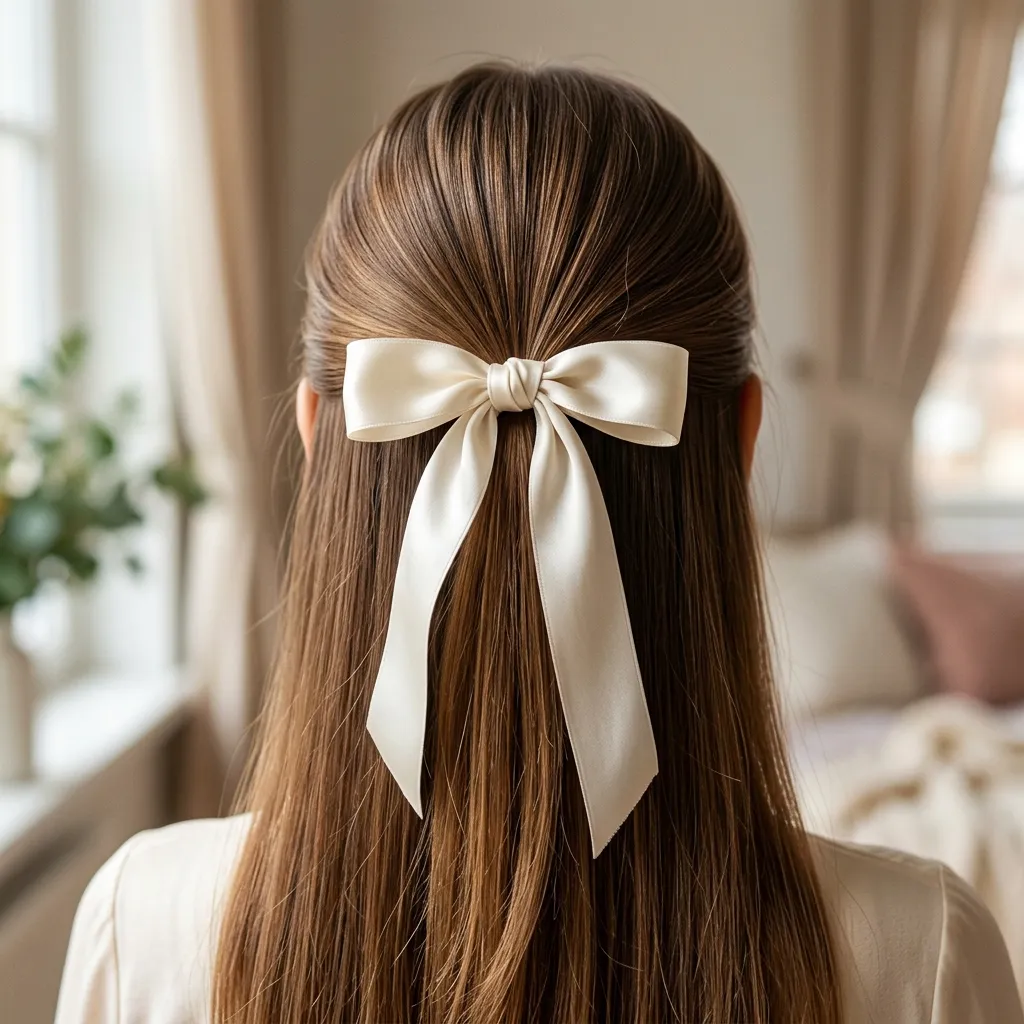
- Balances structure and softness in one style
- Costs under $10 in ribbon for endless color options
- Suits both casual and dressed-up occasions
- Adds a focal point without any heat styling
Vibe: Soft and a little romantic, structure at the crown with movement left loose below.
Why it works: A half-up style splits visual weight between a controlled upper section and loose lower length, balancing the architectural quality of an updo with the softness of hair worn down. I’ve noticed the ribbon adds a focal point exactly where the pulled-back section meets the loose section, drawing the eye there intentionally.
How to get it: Section hair from temple to temple across the crown, secure with a small elastic, then tie a silk ribbon (not satin or polyester, which slip and won’t hold a crisp bow shape) directly over the elastic in a simple bow. Leave the lower section fully straight and unstyled for contrast.
Shop The Look
| Product |
| Silk ribbon spool wide |
| Small clear elastics for base |
| Smoothing brush for crown section |
| Shine serum for loose lengths |
| Bobby pins for ribbon security |
11. Flat-Iron Blended Waves-to-Straight
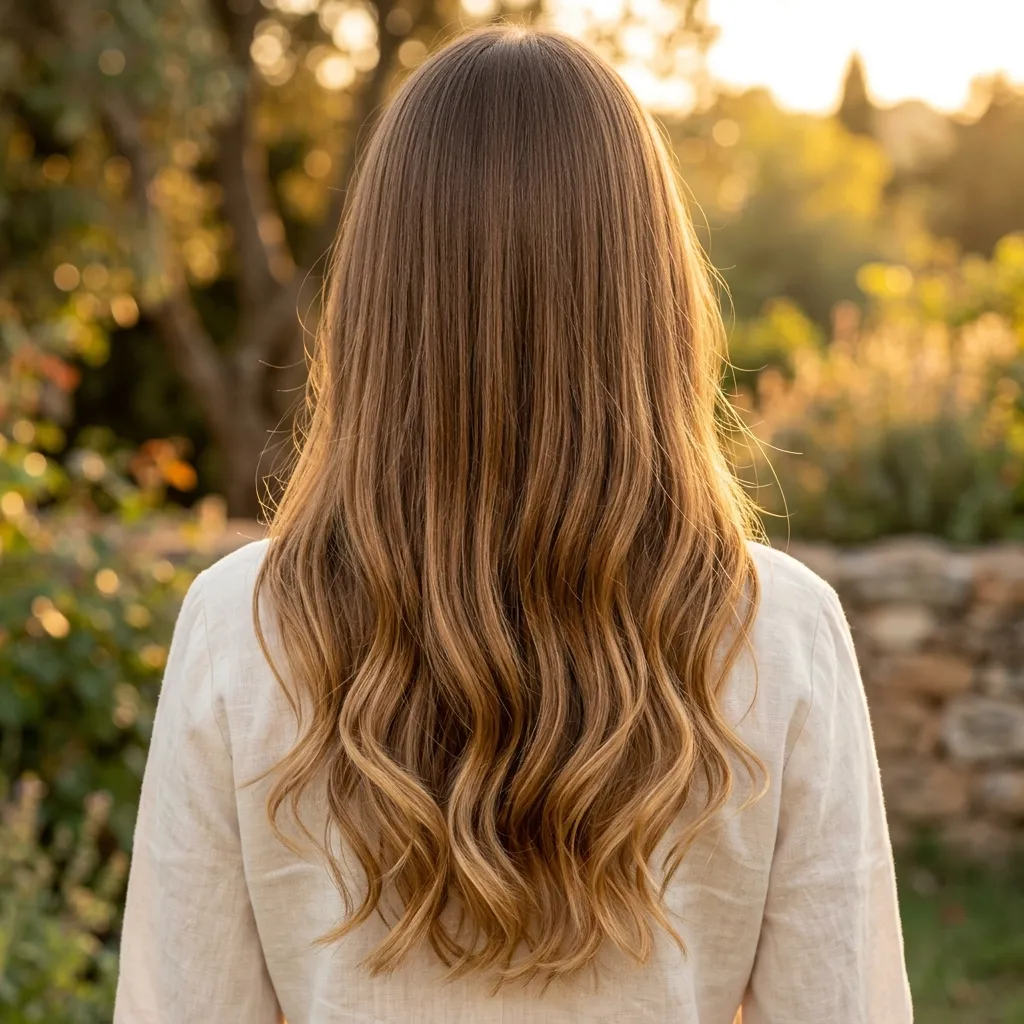
- Avoids the flatness of an all-straight look
- Adds texture only where it’s needed, at the ends
- Works with one flat iron, no separate curling tool
- Suits medium to long lengths best
Vibe: Relaxed and natural, straight through most of the length with a soft bend only at the very ends.
Why it works: Keeping the flat iron straight through the roots and mid-lengths, then rotating the iron a quarter-turn only for the last two inches, creates a texture gradient rather than a uniform curl or a uniform straight line. In my experience, this gradation avoids the flatness of an all-straight style while stopping short of a full curled look.
How to get it: Flat-iron each section straight down to about two inches from the end, then rotate your wrist a quarter turn and hold for two to three seconds before releasing, which bends only the tip. Do this consistently on every section for an even gradient rather than random bends. This is one of the more versatile straight hairstyles for anyone who wants texture without full commitment to curls.
💡 Quick Win: Running your fingers through the bent ends once they’ve cooled (never while still hot) loosens the bend into a softer, less uniform texture.
Shop The Look
| Product |
| Flat iron rounded edge tips |
| Texturizing salt spray light |
| Heat protectant lightweight mist |
| Wide-tooth comb for sectioning |
| Flexible hold hairspray |
12. Ultra-Sleek High-Shine Ponytail
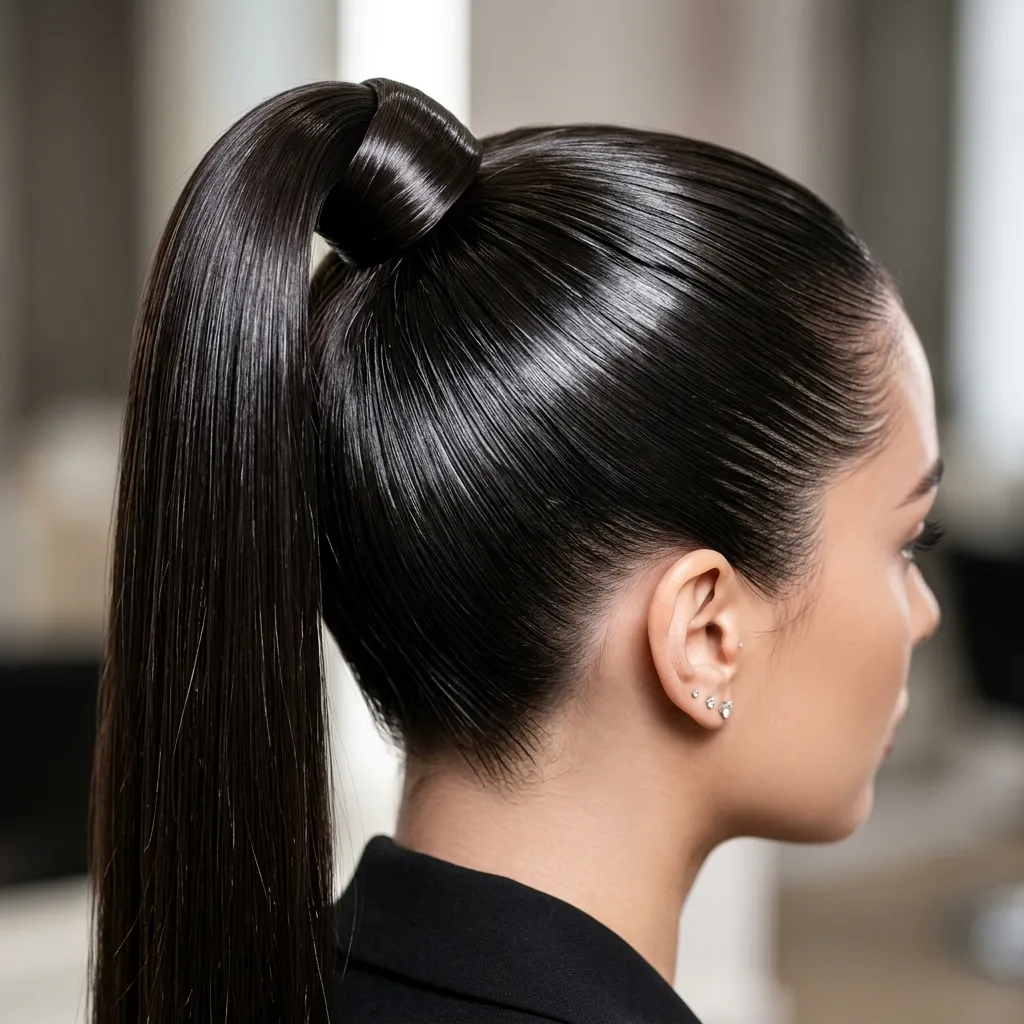
- Elongates the neck for a runway-ready silhouette
- Holds all day with the right strong-hold gel
- Suits any length past the shoulder
- Photographs exceptionally well under any lighting
Vibe: Sleek and high-fashion, hair pulled tight enough to look almost lacquered.
Why it works: Slicking roots flat with gel before securing a high ponytail eliminates the small texture gaps that normally scatter light across the scalp, producing the near-lacquered finish associated with runway ponytails. I’ve noticed positioning the ponytail at true crown height, not lower, also elongates the neck visually, a proportion effect that changes the whole silhouette.
How to get it: Apply a strong-hold gel directly with a fine-tooth comb from root to crown before pulling hair into a ponytail at the highest point of the head. Wrap a section of hair around the base entirely, securing the tail with a bobby pin tucked underneath, so no elastic is visible anywhere. Among straight hairstyles built for photos, this one consistently performs best.
Shop The Look
| Product |
| High shine strong hold gel |
| Fine tooth comb for slicking |
| Thin hair elastics matte |
| Edge brush with rat tail tip |
| Shine spray finishing mist |
How to Start Your Straight Hairstyle Routine
Your single first move should be investing in one genuinely good ceramic or titanium flat iron with adjustable heat settings, rather than a cheap uniform-heat iron. A quality iron (something in the ghd, Chi, or Bio Ionic range) distributes heat evenly across the plate, which is the actual difference between a smooth, shiny result and a strand that looks straight but feels dry and brittle. Every other technique on this list depends on that even heat distribution working correctly.
The most common mistake is straightening hair that’s still damp rather than fully dry. Running a flat iron over damp sections causes the water inside the hair shaft to boil, which damages the internal protein structure and leaves hair frizzier and more porous over time. The fix is blow-drying to 100% dry, checking with your hand at the roots, before any flat iron ever touches the hair.
Three items under $50 that create real impact immediately: a travel-size heat protectant spray ($12–18, Kenra or TRESemmé), a boar-bristle round brush in a 2-inch barrel ($15–25), and a set of matte bobby pins in a brunette or black finish ($6–10).
A full switch to a consistent straight-hair routine takes about two to three wash cycles to settle into a rhythm you’re comfortable with. A basic starter kit runs $60–120; a full professional-grade setup with a quality iron and blow dryer runs $200–400. A single sleek blowout is a weekend achievement; genuinely healthy, damage-free straight styling as a long-term habit takes a few months of consistent heat-protectant use to show in hair condition.
Frequently Asked Questions About Straight Hairstyles
What’s the difference between a silk press and a regular flat iron straightening?
A silk press starts with a full wash, deep condition, and tension blow-dry using a comb attachment before any flat iron touches the hair, which is what allows very coiled or curly hair to reach true straightness without over-processing. A regular flat-iron straightening skips or shortens that blow-dry stretching step, which works fine on hair that’s already fairly straight but under-straightens tightly coiled textures. Silk presses typically last 1–2 weeks before reverting with humidity, compared to just a day or two for a quick flat-iron touch-up on curly hair.
What hair color looks best with sleek straight styles?
Deep, glossy tones (cold brew brunette, jet black, or a rich espresso) tend to photograph best with straight styles specifically because flat, light-reflecting hair shows off gloss more dramatically than it shows off dimension or highlights. Lighter or heavily highlighted hair still works well straight, but the shine effect reads less dramatically since there’s less uniform surface to reflect light evenly. A clear glossing treatment, regardless of your base color, boosts the light-reflecting effect that makes any straight style look more polished.
How much does it cost to maintain straight hairstyles?
A basic at-home setup (flat iron, heat protectant, round brush) runs $60–150 as a one-time cost. Professional blowouts at a salon typically cost $35–75 per visit, while a silk press for textured hair usually runs $65–120 depending on length and salon. A keratin or Japanese thermal straightening treatment, which lasts several months, typically costs $200–500 depending on hair length and the salon’s pricing tier.
Do straight hairstyles work on curly or coily natural hair?
Yes, through techniques like the silk press or a standard blowout-and-flat-iron combination, both of which temporarily smooth the hair shaft without permanently altering the curl pattern. The hair will revert to its natural texture with washing or high humidity, which is actually a benefit for anyone who wants to alternate between straight and natural styles without commitment. Heat protectant is non-negotiable on curly-to-straight transitions specifically, since curlier hair textures are generally more porous and more prone to heat damage.
What’s the most requested straight hairstyle right now?
The blunt, one-length bob or lob remains the most consistently requested straight cut, largely because it photographs well and requires comparatively low daily styling effort once cut correctly. Close behind it is the “glass hair” glossy blowout on long hair, driven by improved at-home heat-tool technology like the Dyson Airstrait making salon-level shine more achievable without a flat iron at all. Both trends point toward the same underlying preference: shine and precision over heavy processing or dramatic length changes.
Conclusion
These 12 straight hairstyles show how a single technique (a blunt cut, a ribbon, a slicked-back gel finish) can completely change how sleek hair reads day to day. I’ve seen how small changes, like swapping a center part for a deep side part or adding a rhinestone clip cluster, can shift a whole look without any commitment to scissors or color.
You don’t need to overhaul your whole routine in one visit, starting with one better heat-protectant habit or a single new part is a legitimate, worthwhile place to begin. Book a trim this week specifically to remove split ends, since damaged ends are the single biggest thing standing between flat-ironed hair and true glass-hair shine. Whichever style you choose, the payoff is hair that feels controlled and finished rather than fought into place.
Save this post on Pinterest for your next salon appointment, and share it with anyone who’s been debating a fresh blunt bob.

One Comment