
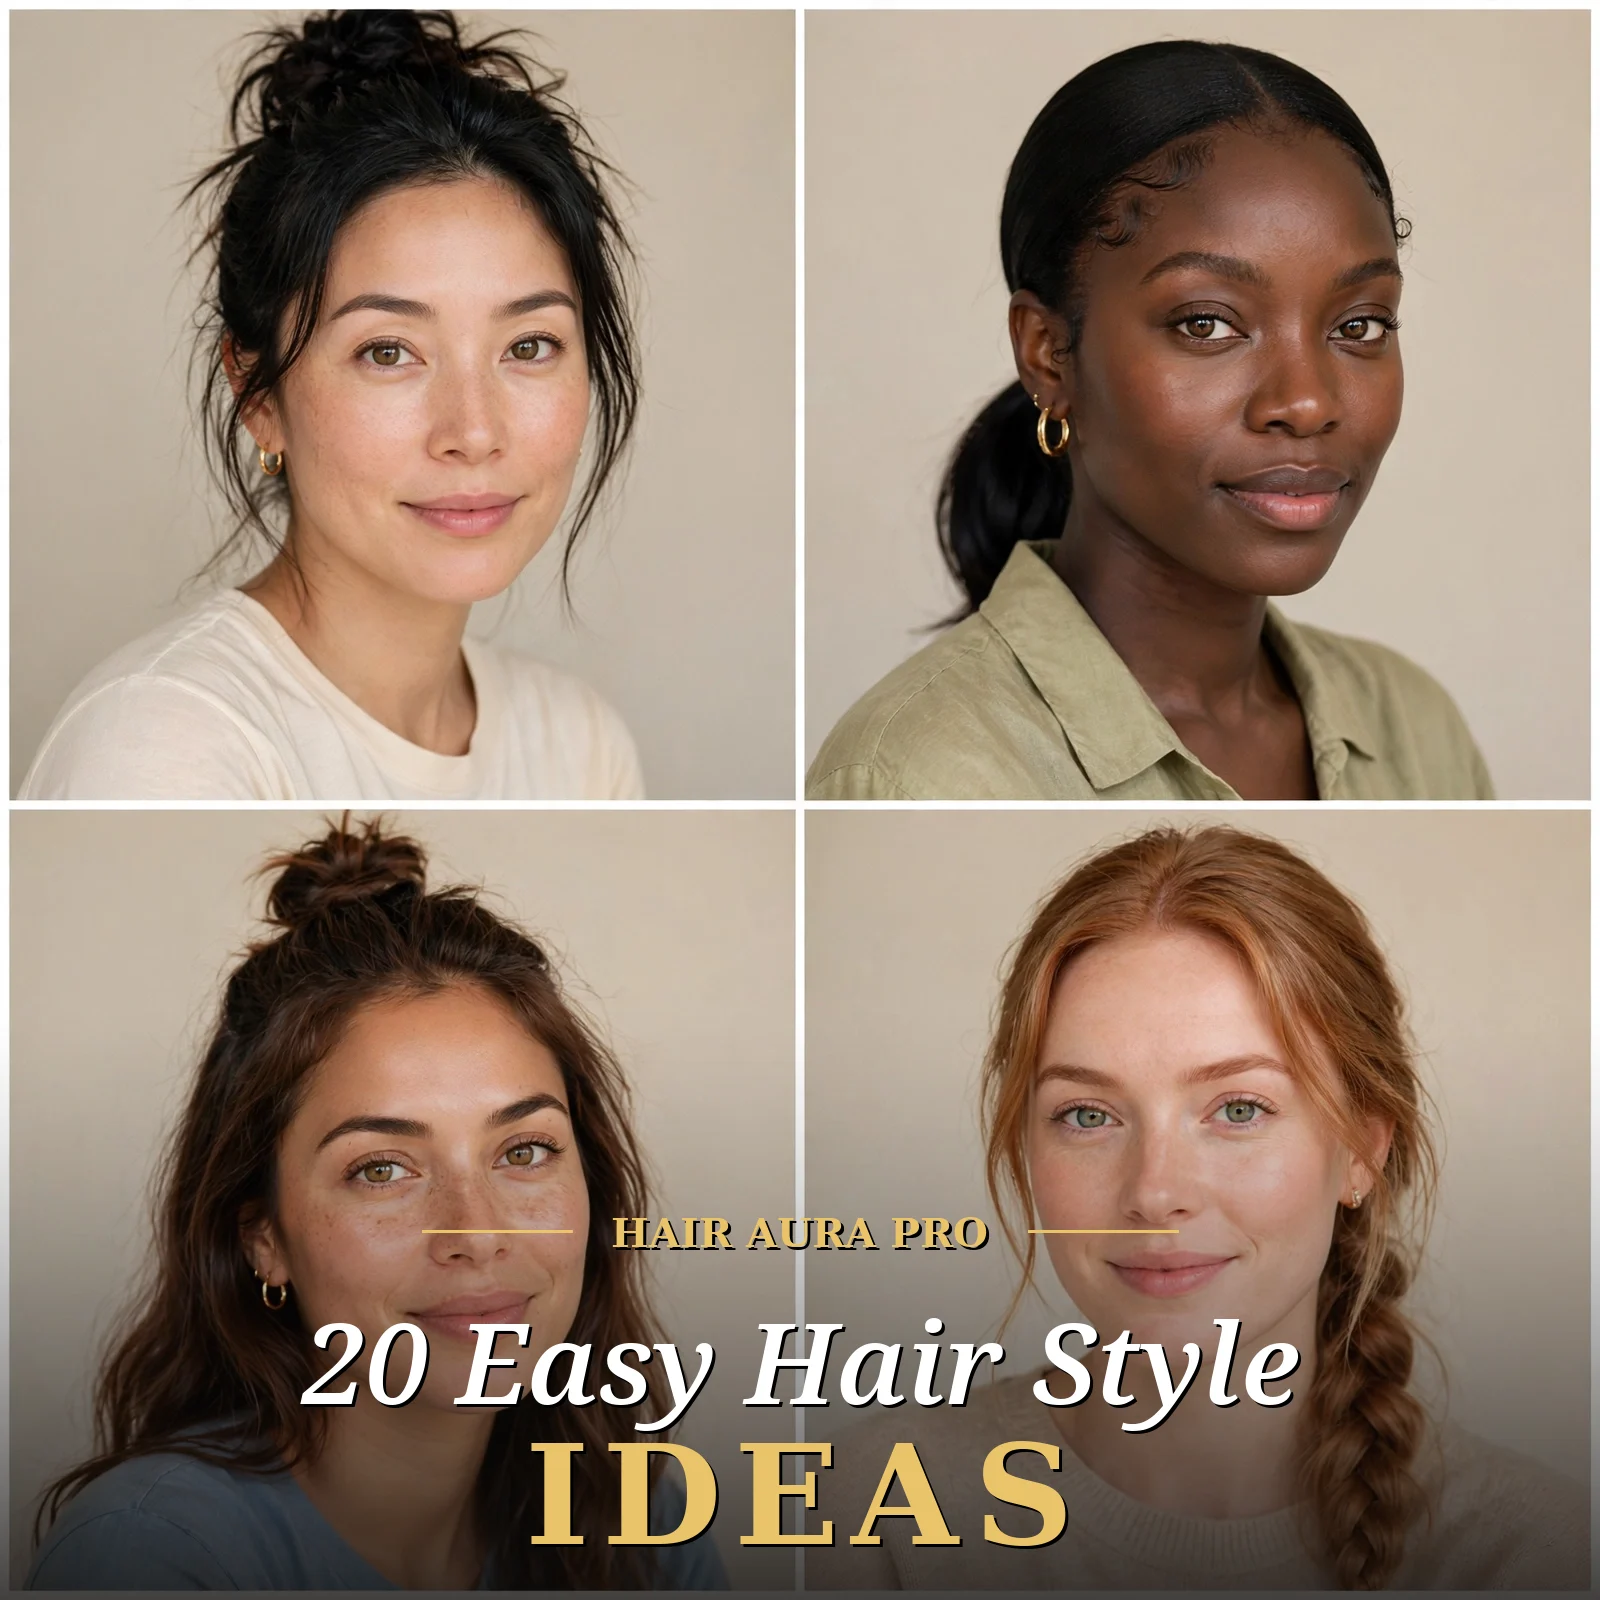
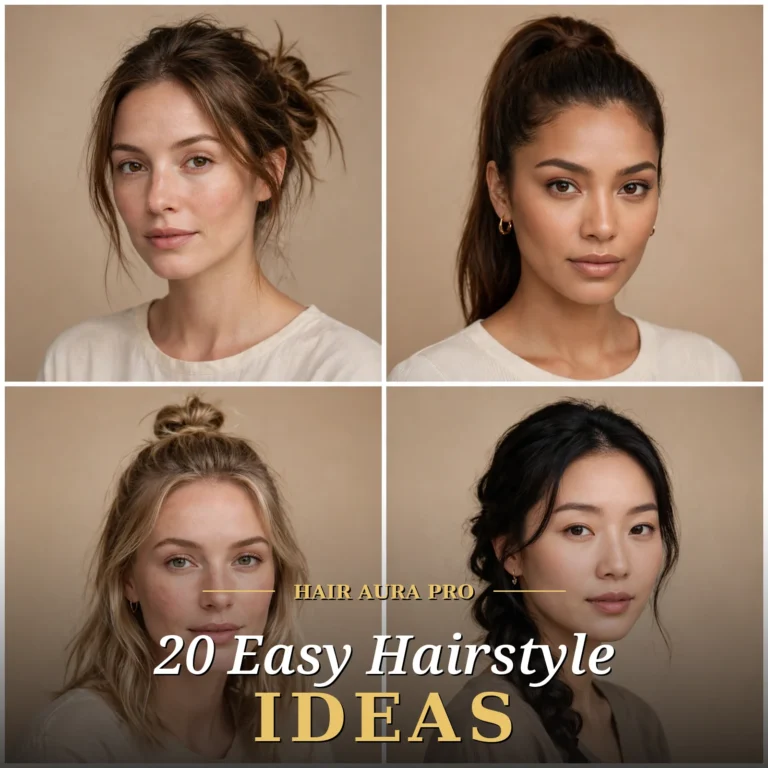
20 Easy Hair Style Ideas That Actually Work

An easy hairstyle is any look you can put together in roughly ten minutes or less, with tools you already own – an elastic, a few pins, a claw clip, maybe a scarf. No hot-tool marathon, no thirty-step tutorial, no salon appointment required. The style should look intentional from every angle, survive a full day of moving, and be repeatable tomorrow without a mirror rehearsal.
Think of the quiet satisfaction of pulling your hair into a perfect low knot while the coffee brews, the ends falling exactly where they should. Picture sleek strands that catch the morning light in the hallway mirror, a twist that holds through school drop-off and the last Zoom call, a braid that looks even better a little rumpled. These are the looks that turn a rushed morning into a good-hair morning.
Below you will find twenty of my favorite easy styles, sorted from polished to playful, each with a full how-to and the small details that make them look like they took longer than they did.
20 Easy Hair Style Ideas That Actually Work
In This Guide
- 1. The Five-Minute Messy Bun
- 2. The Glass-Hair Low Ponytail
- 3. The Half-Up Top Knot
- 4. The Side Dutch Braid
- 5. The Twisted French Roll
- 6. The Claw-Clip Volume Twist
- 7. The Low Braided Bun
- 8. The Bubble Ponytail
- 9. The Silk-Scarf Wrapped Ponytail
- 10. The Rope-Twist High Ponytail
- 11. The Sleek Tucked-Under Bob
- 12. The Half-Up Waterfall Twist
- 13. The Fishtail Side Braid
- 14. The Double Mini Buns
- 15. The Slicked-Back Wet-Effect Bun
- 16. The Low Side-Part Pony
- 17. The Headband Tuck
- 18. The Knotted Low Chignon
- 19. The Curly Pineapple Updo
- 20. The Loose Milkmaid Crown
Why Easy Hair Styles Work So Well
Easy hairstyles win because they are engineered around real life. A style that depends on twenty bobby pins and fresh blowout volume is a style that will fall apart by lunch. The looks in this guide lean on structure rather than effort: a tight twist, a low anchor point, a texture-friendly finish. When the mechanics are sound, your hair cooperates instead of fighting you.
They also flatter because simplicity reads as confidence. A clean part, a smooth crown, one deliberate detail – a scarf, a face-framing piece, a glossy finish – will always look more put-together than five half-finished ideas fighting for attention. Stylists call this restraint, and it is the reason the same five-minute bun can carry you from a dentist appointment to dinner.
Finally, easy styles protect your hair. Every skipped round of high-heat styling is a skipped dose of damage. Twist-based updos, braids, and clip-held looks keep ends tucked and strands off your shoulders, which means less friction, fewer tangles, and hair that actually grows.
The trick is matching the technique to your texture. Fine hair needs grip (a little dry texture spray before you start changes everything), thick hair needs sectioning so the style does not collapse under its own weight, and curly hair needs styles that work with the curl pattern instead of pressing it flat.
| Approach | When to Use It | Time Needed |
|---|---|---|
| Twist and pin | Second-day hair, medium to long lengths | 3-5 minutes |
| Elastic + accessory | Fine or slippery hair, rushed mornings | 2-4 minutes |
| Single braid | Thick hair, active days | 4-8 minutes |
| Clip and tuck | Bobs and lobs, no-heat days | 3-6 minutes |
| Heatless polish | Straight hair, evening plans | 5-10 minutes |
20 Easy Hair Style Ideas That Actually Work
1. The Five-Minute Messy Bun
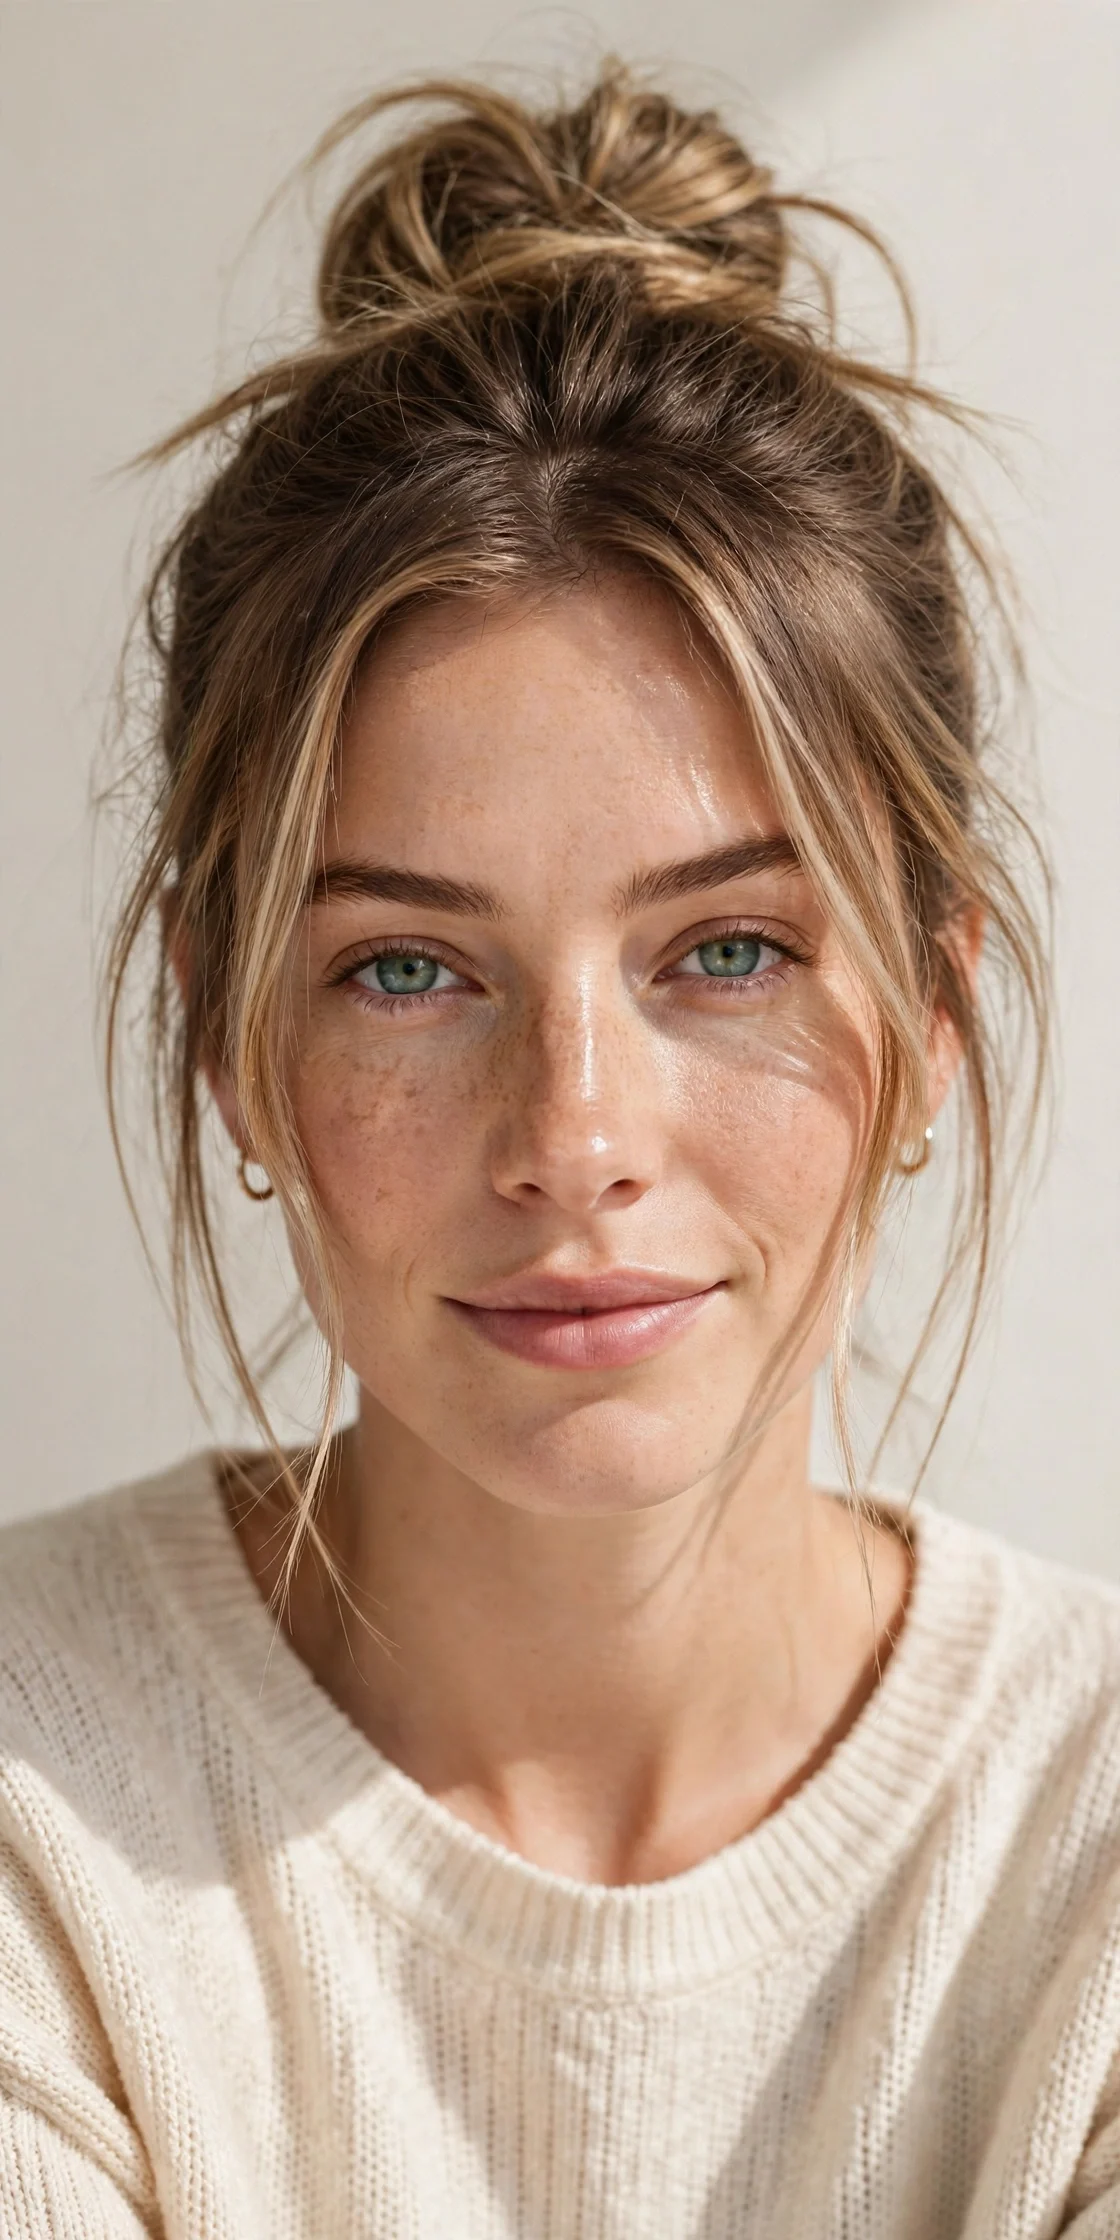
Vibe: Sunday-morning coffee run, somehow already photogenic.
Why it works: The messy bun flatters because controlled imperfection reads as effortless. Pulling hair up high lengthens the face, and the loose pieces around the hairline soften sharp features while hiding the fact that you did not wash your hair today. It works on every texture: straight hair gets a soft pillowy shape, waves get extra body, and curls get a gorgeous halo of volume.
How to get it: Flip your head upside down and gather everything into a high ponytail – the flip gives instant root lift. Twist the tail loosely around its base, pin as you go, and let a few pieces escape on purpose. Ask your stylist for long, barely-there layers around the crown if you want the bun to look intentionally airy rather than just messy.
Shop the Look
| Shop the Look |
|---|
| Extra-large snag-free hair elastics, pack of 24 |
| Dry texture spray for grit and volume |
| Matte bobby pins matched to hair color |
| Flexible-hold hairspray with brushable finish |
| Silk scrunchie for overnight bun prepping |
2. The Glass-Hair Low Ponytail
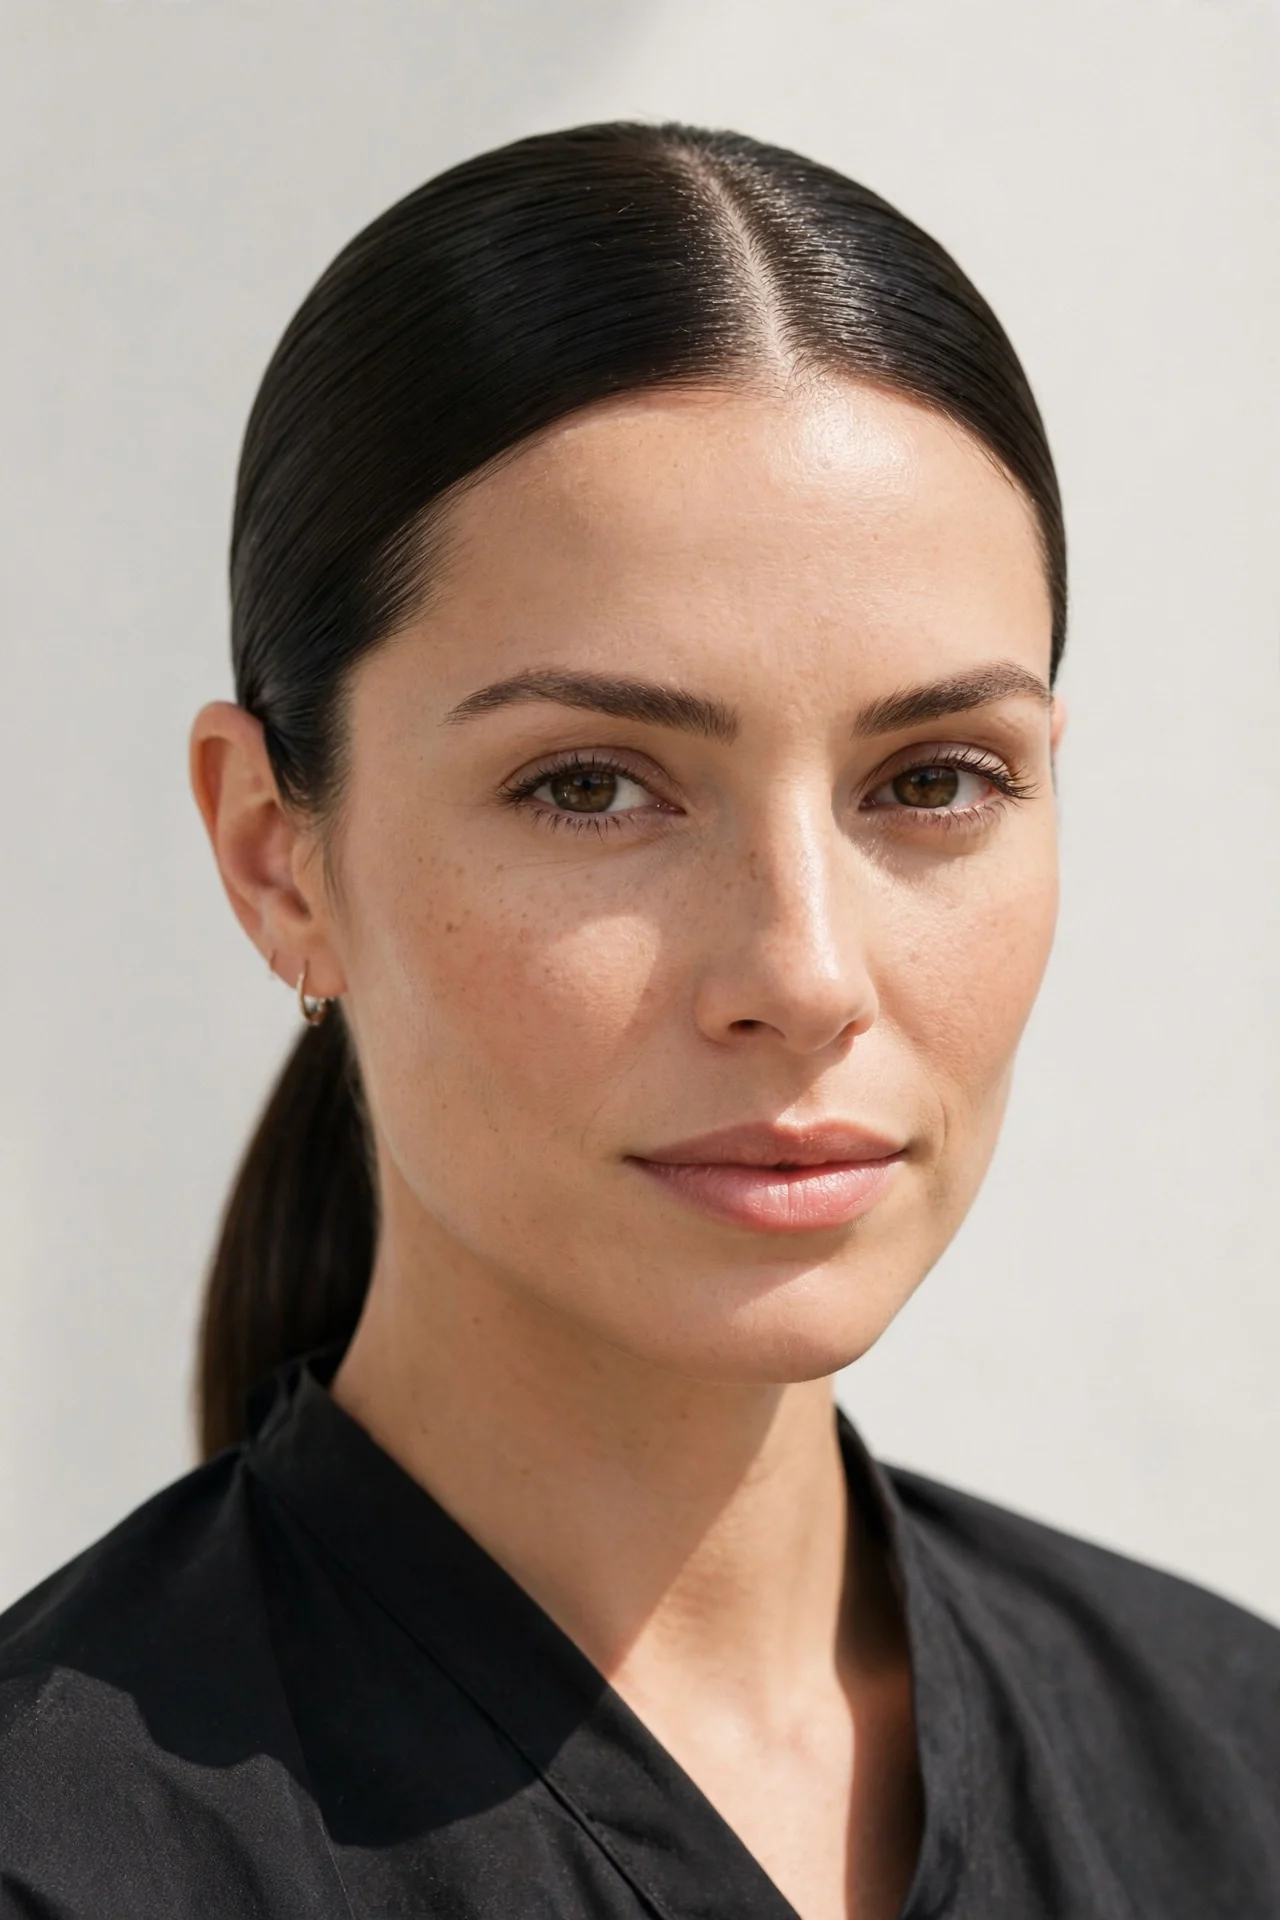
Vibe: Boardroom polish with a mirror finish.
Why it works: A low ponytail worn glass-smooth reads expensive because there is nowhere for frizz to hide. The shine reflects light evenly, which photographs beautifully and makes fine hair look thicker. Because the silhouette is so clean, it suits everything from blazers to silk dresses, and it takes exactly as long as a regular ponytail once your smoothing routine is dialed in.
How to get it: Blow-dry with a paddle brush or flat-iron in sections, smoothing each pass fully. Part down the center or in a sharp side part, brush everything back to the nape, and secure with a covered elastic. Ask your stylist for a gloss treatment between cuts – it fills the cuticle so light bounces evenly instead of scattering on dull patches.
Quick Win: Wrap a thin section of hair around the elastic and pin it underneath. The covered band is what separates salon ponytails from hurried ones.
Shop the Look
| Shop the Look |
|---|
| Lightweight smoothing serum for frizz control |
| Natural-bristle paddle brush for sleek blowouts |
| Snag-free seamless hair elastics, pack of 20 |
| Shine-enhancing finishing mist, non-greasy formula |
| Fine-tooth tail comb for precision parting |
3. The Half-Up Top Knot
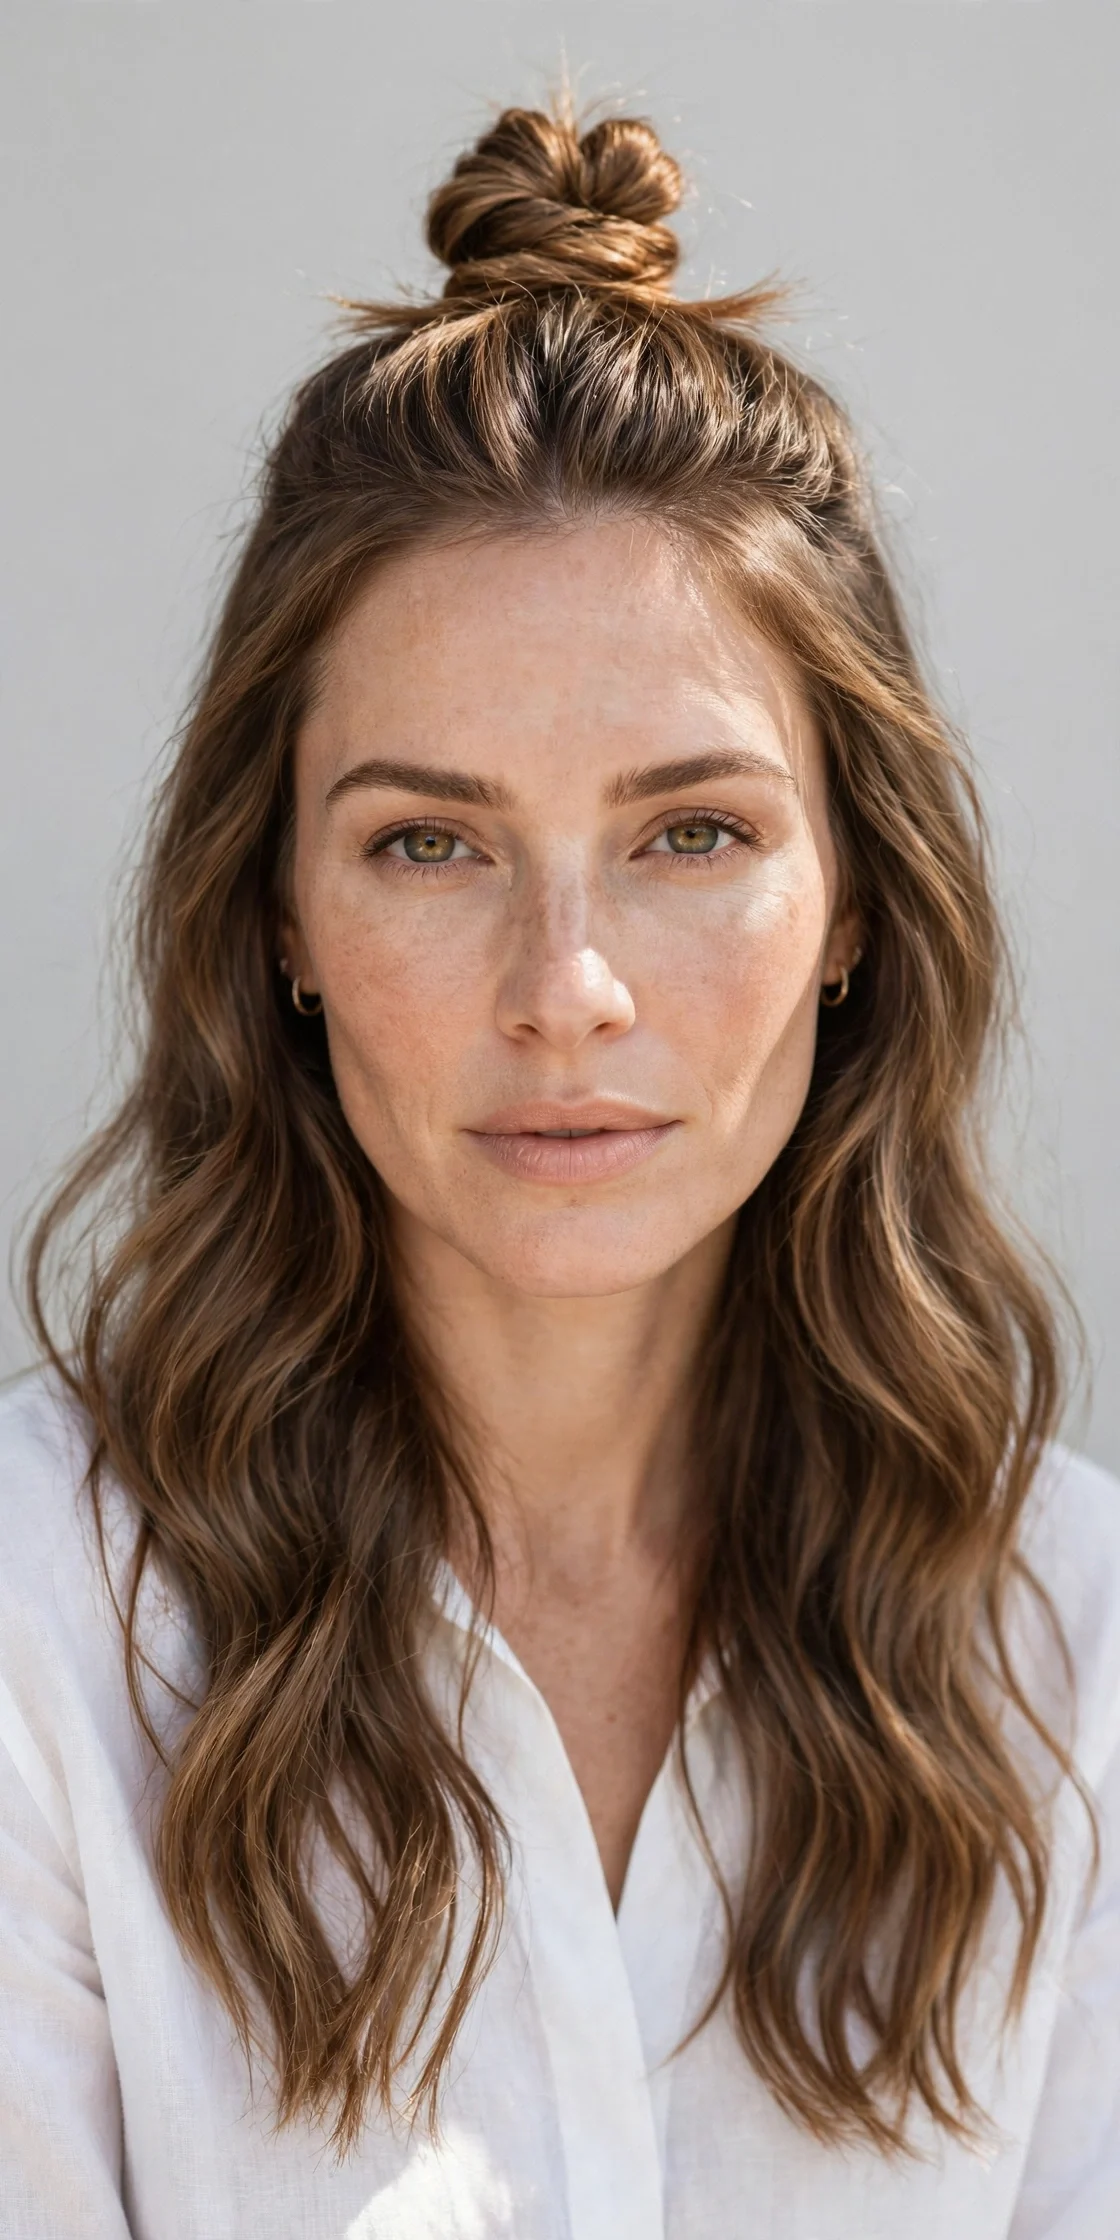
Vibe: Cool without trying – the weekend uniform.
Why it works: Half-up styles give you the face-framing lift of an updo with the softness of worn-down hair. Pulling the top section into a knot adds height at the crown, which balances rounder face shapes and shortens a long forehead. It is also the fastest route to looking styled when the bottom half of your hair is still yesterday's waves.
How to get it: Section off the top third of your hair from temple to temple, twist it into a small bun, and pin. Leave the knot slightly loose – tug the edges for that lived-in fullness. Ask your stylist to keep the front pieces a touch longer than the rest so they frame your cheekbones when they fall.
Also view: [INTERNAL:half up half down hairstyles]
Shop the Look
| Shop the Look |
|---|
| Mini clear elastics for knot foundations |
| Dry texture spray for grip before styling |
| U-shaped hair pins for secure buns |
| Flexible-hold hairspray, brushable finish |
| Wide-tooth comb for gentle sectioning |
4. The Side Dutch Braid
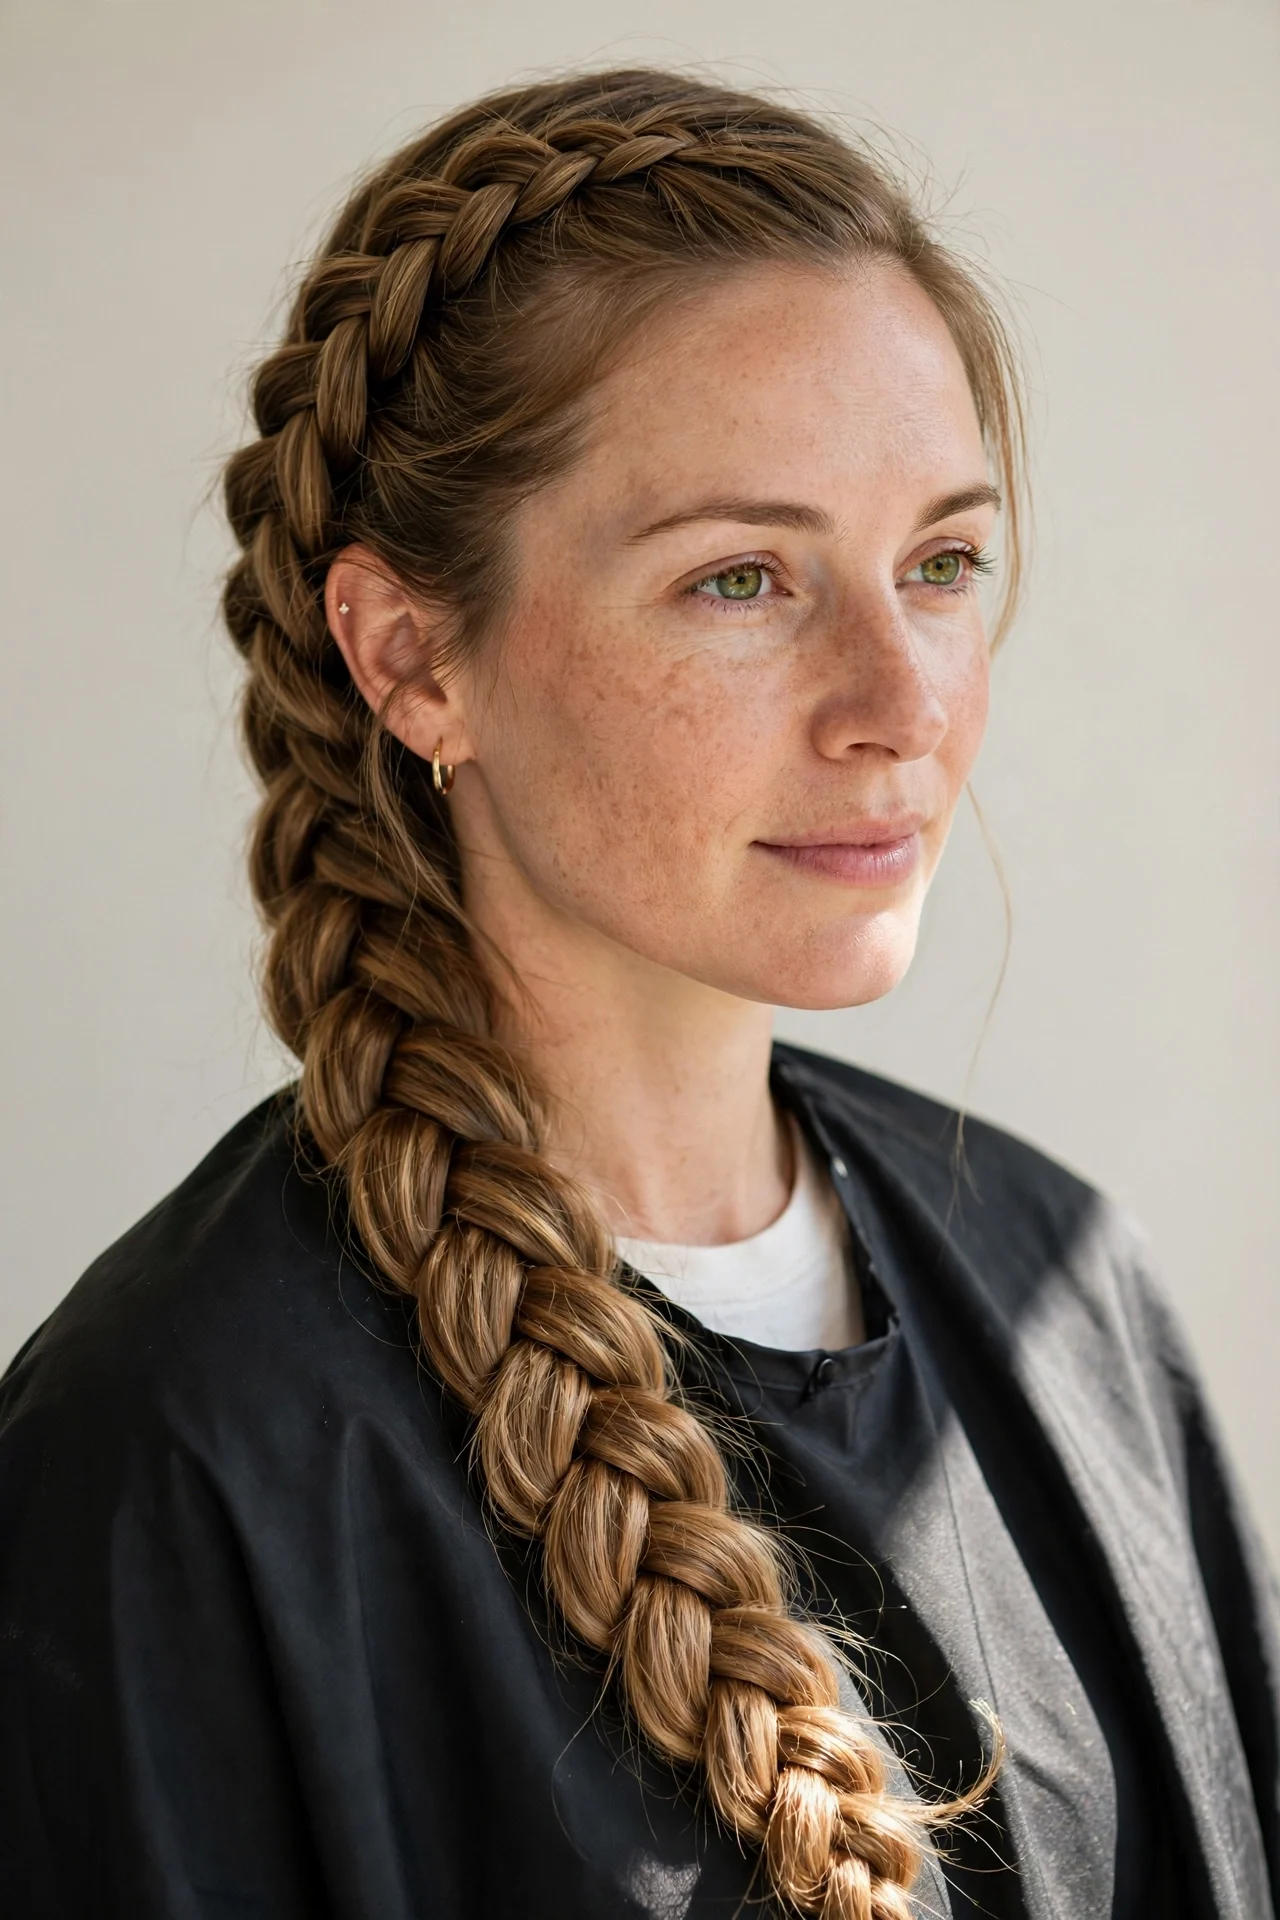
Vibe: Sporty-sweet, with stay-put superpowers.
Why it works: The Dutch braid sits on top of the hair instead of inside it, so the pattern stays visible all day – a real advantage over French braids that can sink and disappear. Worn to one side, it creates a gorgeous diagonal line that draws the eye across the face, and it keeps hair completely off your neck on hot days or during workouts.
How to get it: Sweep all your hair to one side and Dutch-braid from the temple down past the ear, adding sections from the hairline as you go. Once you run out of hair to add, finish as a regular three-strand braid. Ask your stylist to add a few invisible layers at the ends – they stop thick hair from turning the braid into a blunt rope.
Quick Win: Pancake the braid by tugging each loop outward after securing. Instantly doubles the thickness.
Shop the Look
| Shop the Look |
|---|
| Clear mini elastics for braid ends |
| Lightweight styling cream for smooth parting |
| Rat-tail comb for clean braid sections |
| Edge-control gel for sleek hairlines |
| Silk pillowcase to keep braids fresh overnight |
5. The Twisted French Roll
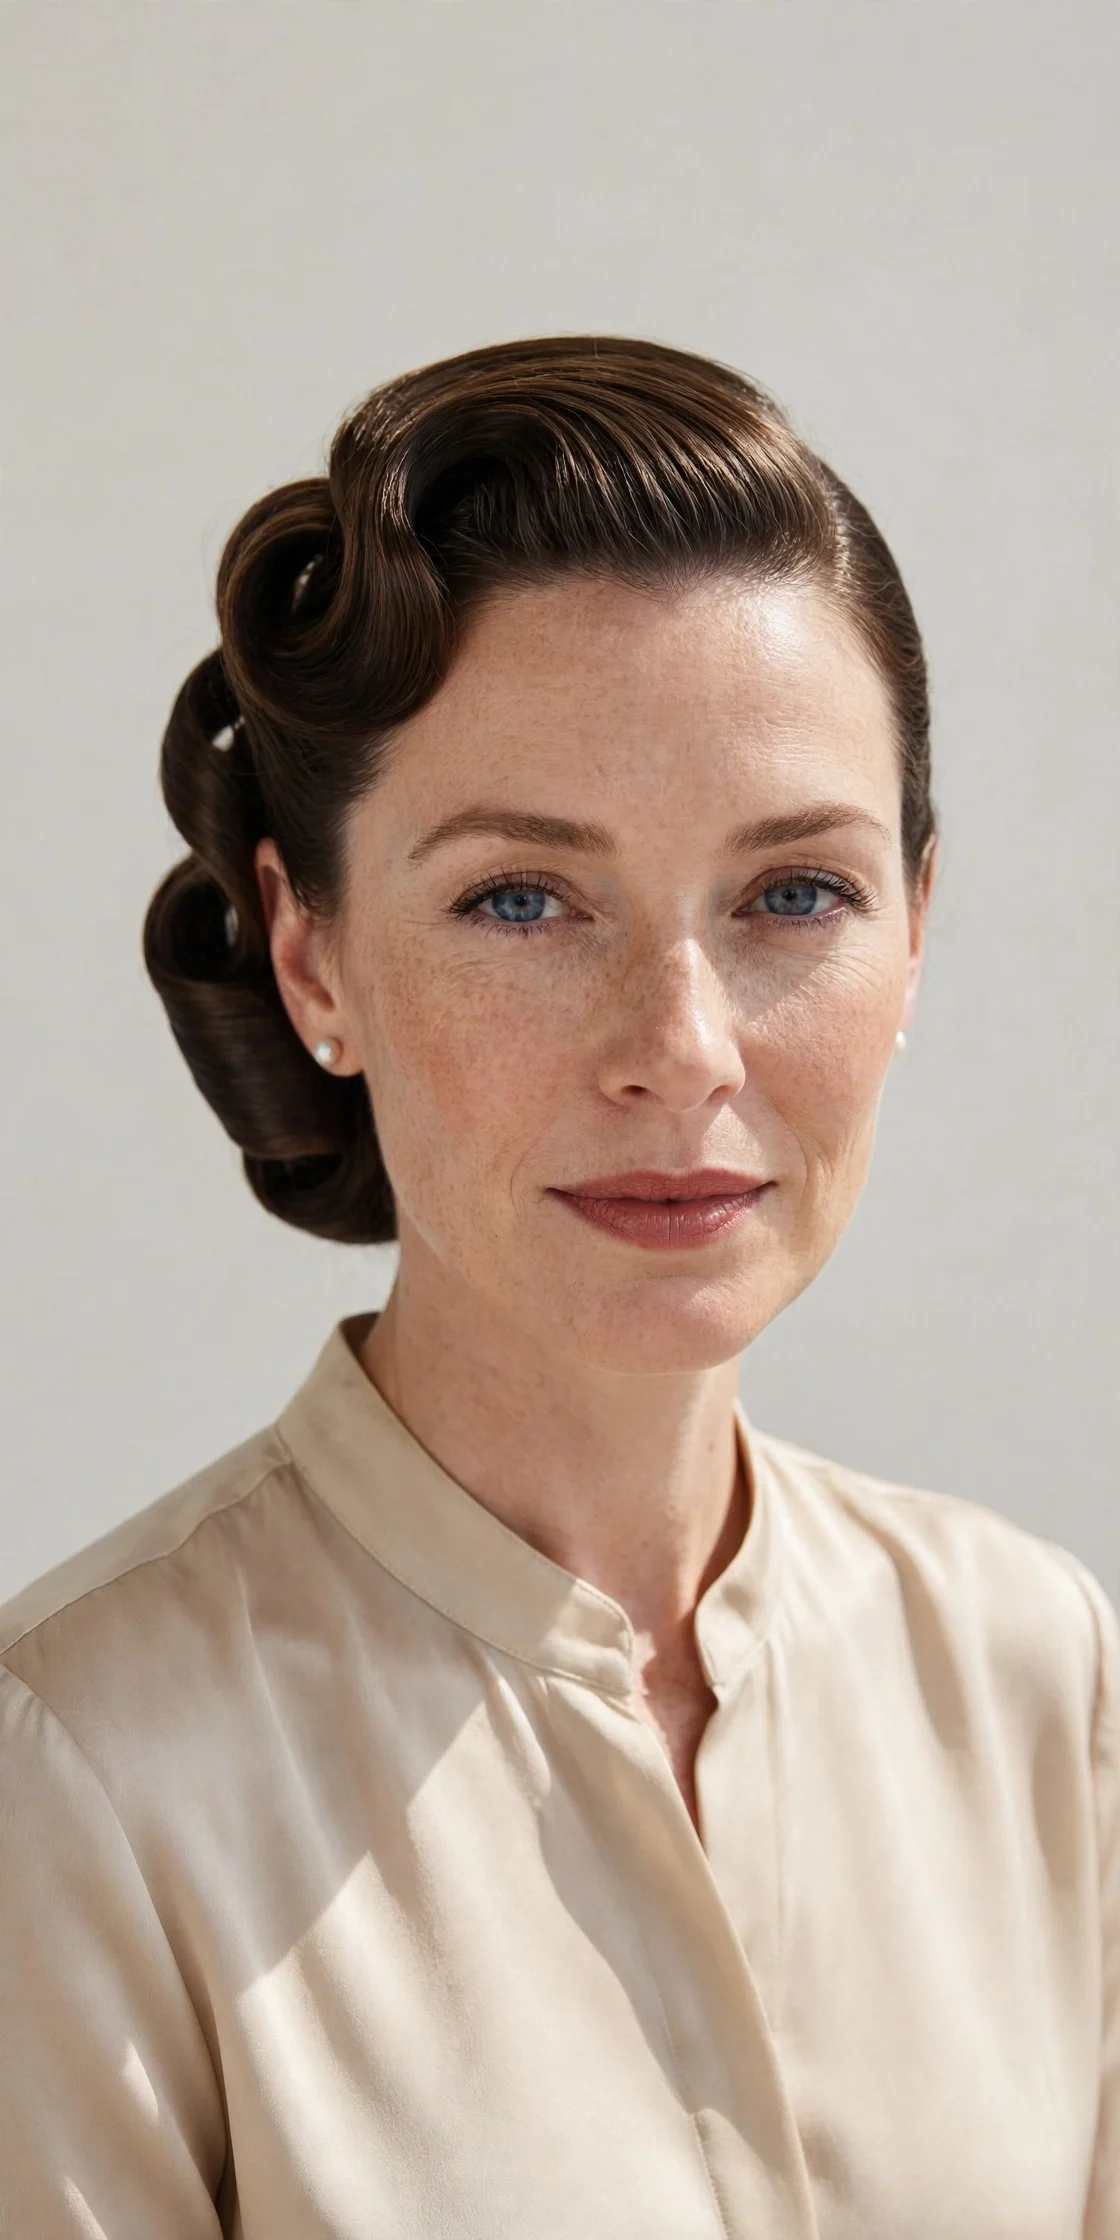
Vibe: Vintage glamour, minus the vintage effort.
Why it works: The French roll has always been an event hairstyle, but the twisted version – loose, slightly undone – works for dinner dates and office days alike. Rolling the hair inward creates a vertical line that elongates the neck, and the twist texture adds grip, so it holds far better than the slick, pinned original on fine hair.
How to get it: Sweep all hair to one side, hold it taut, and roll it inward against your head, tucking the ends under. Pin vertically along the roll every inch or so. Ask your stylist for a blunt or slightly layered cut – blunt ends tuck under cleanly and keep the roll compact.
Shop the Look
| Shop the Look |
|---|
| Jumbo bobby pins for secure updo hold |
| Strong-hold hairspray, humidity-resistant formula |
| Smoothing brush for pre-roll polish |
| Hair stick for a modern French-roll twist |
| Travel-size hairspray for touch-ups |
6. The Claw-Clip Volume Twist
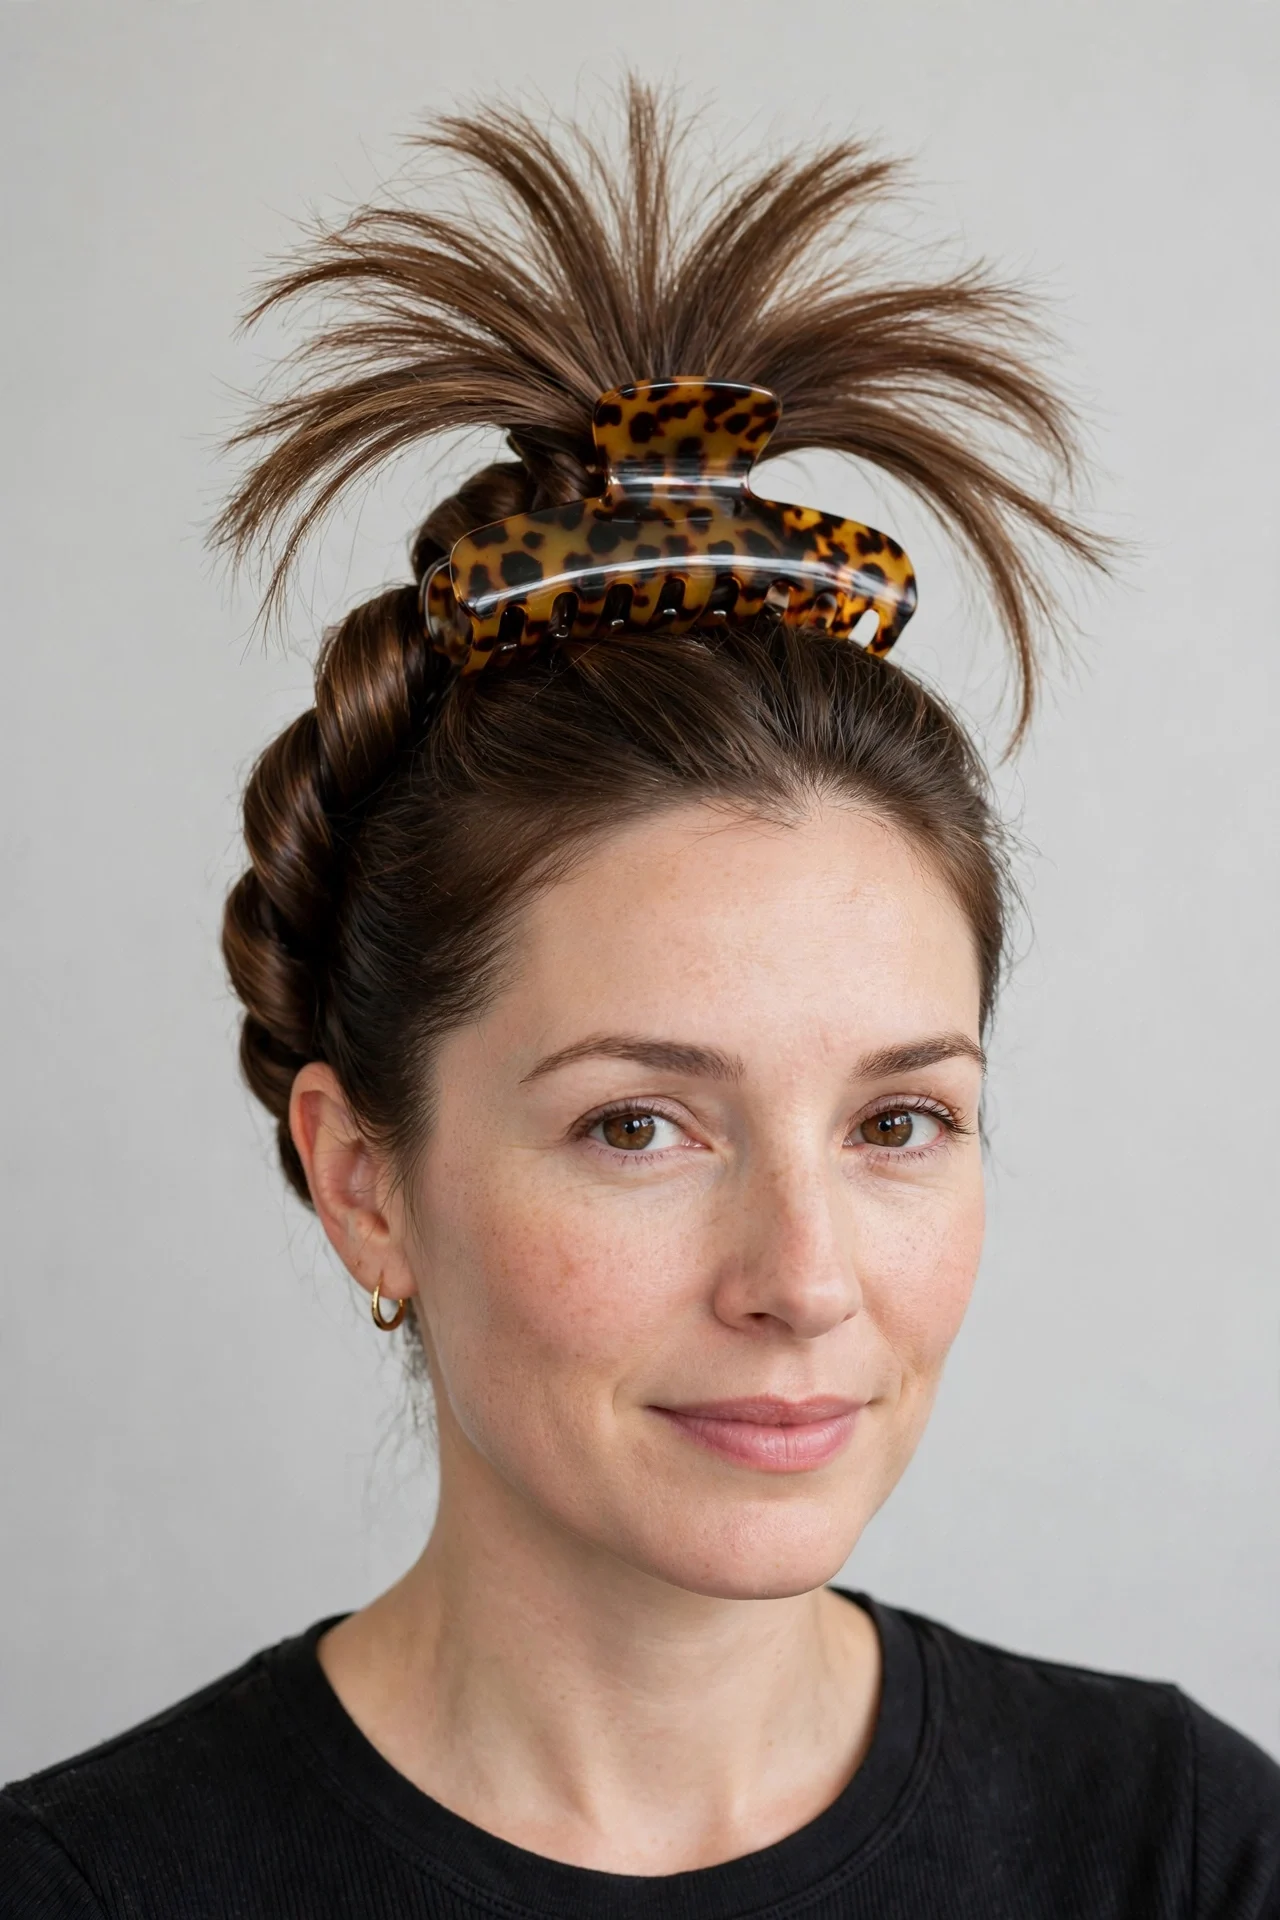
Vibe: Effortless Parisian, straight from the pharmacy aisle.
Why it works: The claw clip is having a well-earned comeback because it solves the central problem of updos: tension. Elastics pull and crease; a claw clip distributes the weight across a wide grip, so the style stays comfortable for twelve hours. The twist it creates gives instant crown volume, and the clip itself reads as a deliberate accessory rather than a shortcut.
How to get it: Gather hair at the back as if for a low pony, twist it upward against your head, fold the ends over, and clamp the claw clip over the fold. Let the ends fan out over the top. Ask your stylist about invisible long layers – they keep the twist from going bulky at the sides while adding movement to the folded ends.
Quick Win: Choose a clip two shades darker than your hair for a seamless look, or go tortoiseshell for an intentional accessory moment.
Shop the Look
| Shop the Look |
|---|
| Large matte claw clip, strong-hold spring |
| Medium claw clip for half-up styles |
| Volumizing root powder for lift |
| Texturizing spray for twist grip |
| Silk scrunchie for heatless pre-wave |
7. The Low Braided Bun
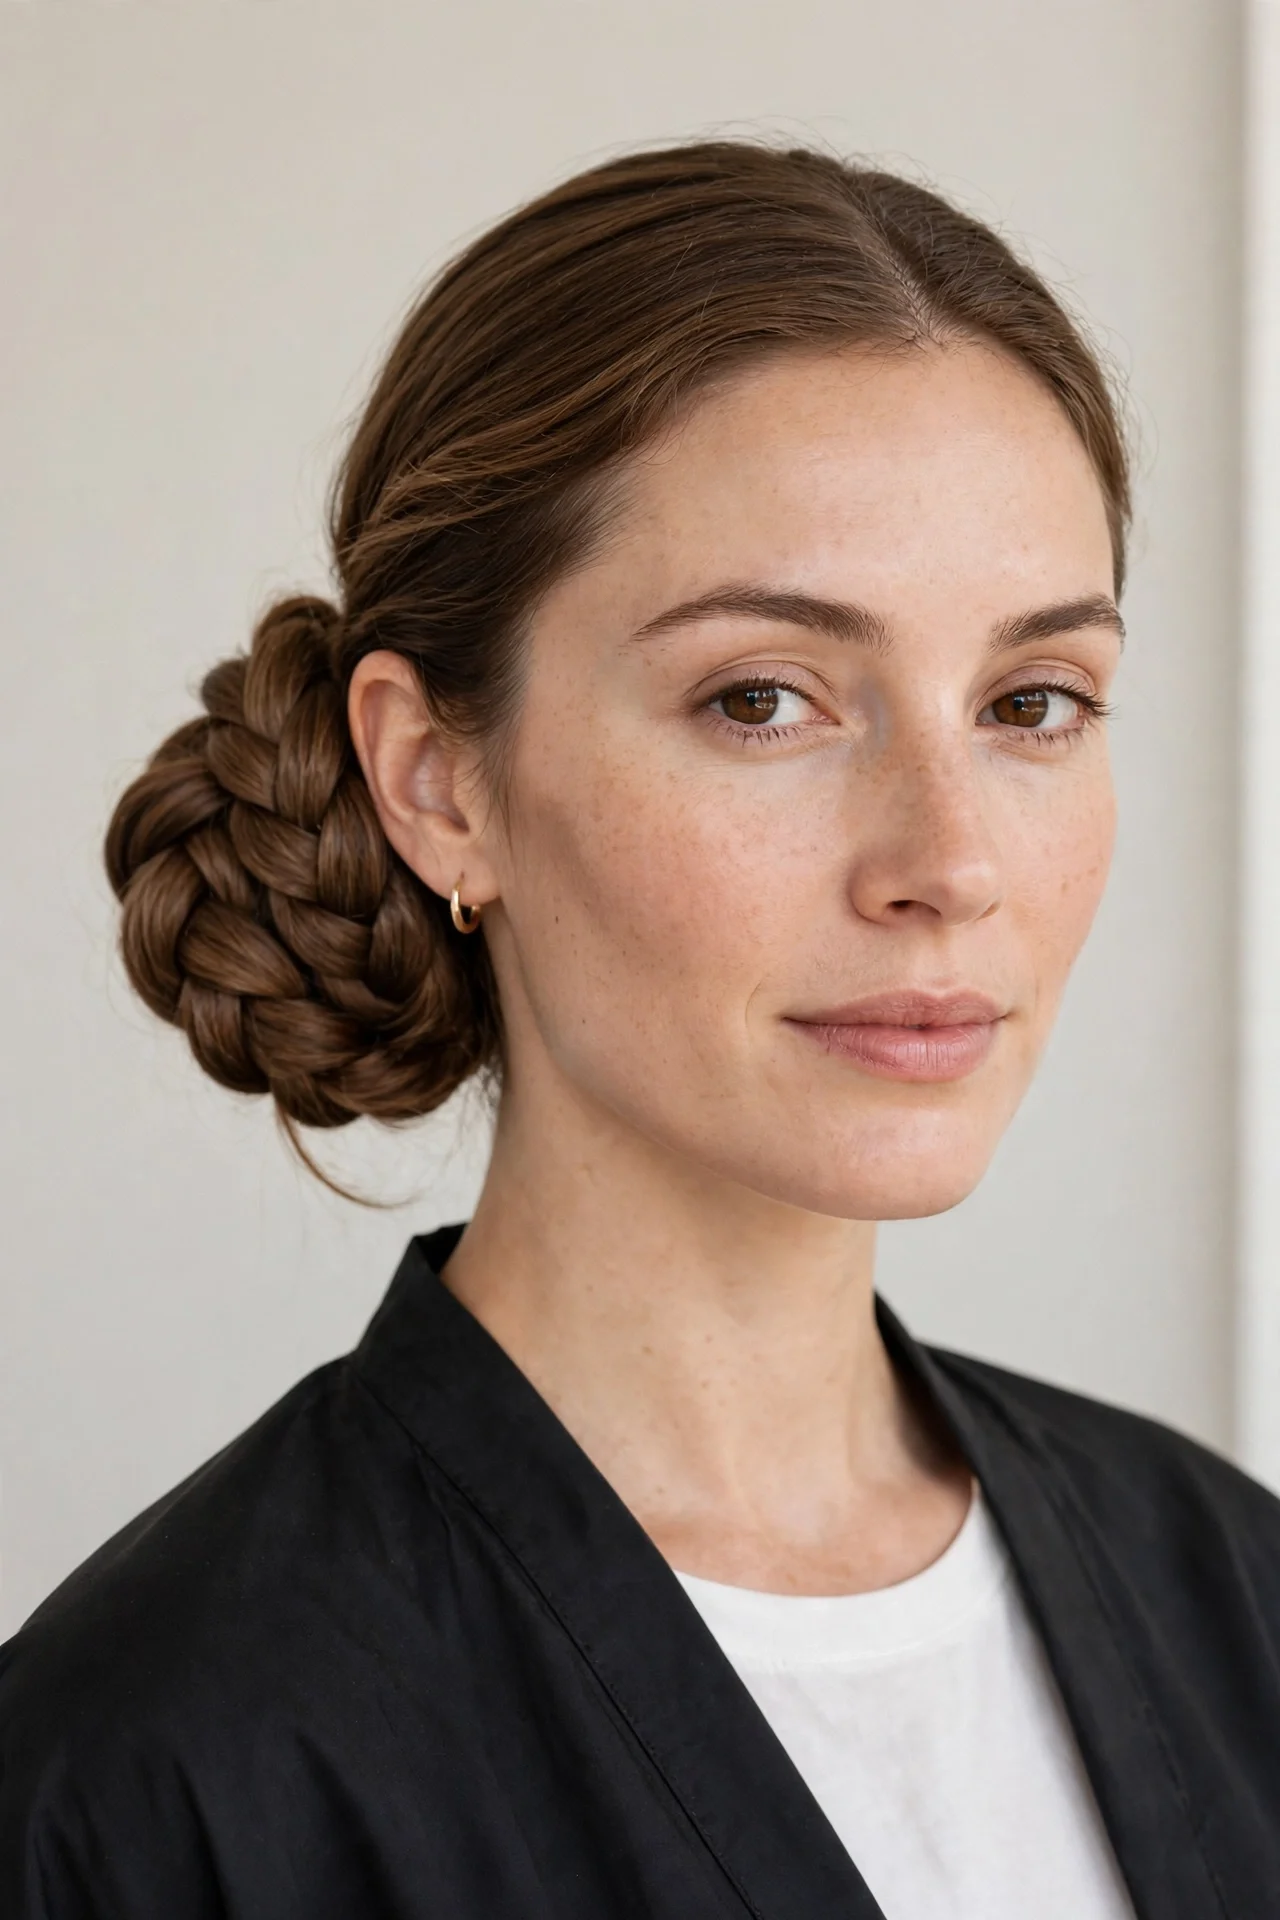
Vibe: Wedding-guest ready on a weekday budget.
Why it works: Braid-then-bun styling gives you two textures in one look: the woven detail of the braid and the sculpted calm of the bun. Sitting at the nape, it is perfectly balanced with statement earrings and open necklines. It also lasts – braided sections grip each other, so the style survives wind, humidity, and long commutes better than any smooth chignon.
How to get it: Braid your hair into a low three-strand braid, then coil the braid into a flat bun at the nape and pin around the edges. For extra dimension, pancake the braid before coiling. Ask your stylist for a few face-framing tendrils cut in – they keep the look soft when the bun itself is structured.
Also view: [INTERNAL:braided bun hairstyles]
Shop the Look
| Shop the Look |
|---|
| Soft-finish flexible hairspray |
| Matte bobby pins matched to hair color |
| Shine serum for braid smoothness |
| Snag-free hair elastics, pack of 20 |
| Boar-bristle smoothing brush |
8. The Bubble Ponytail
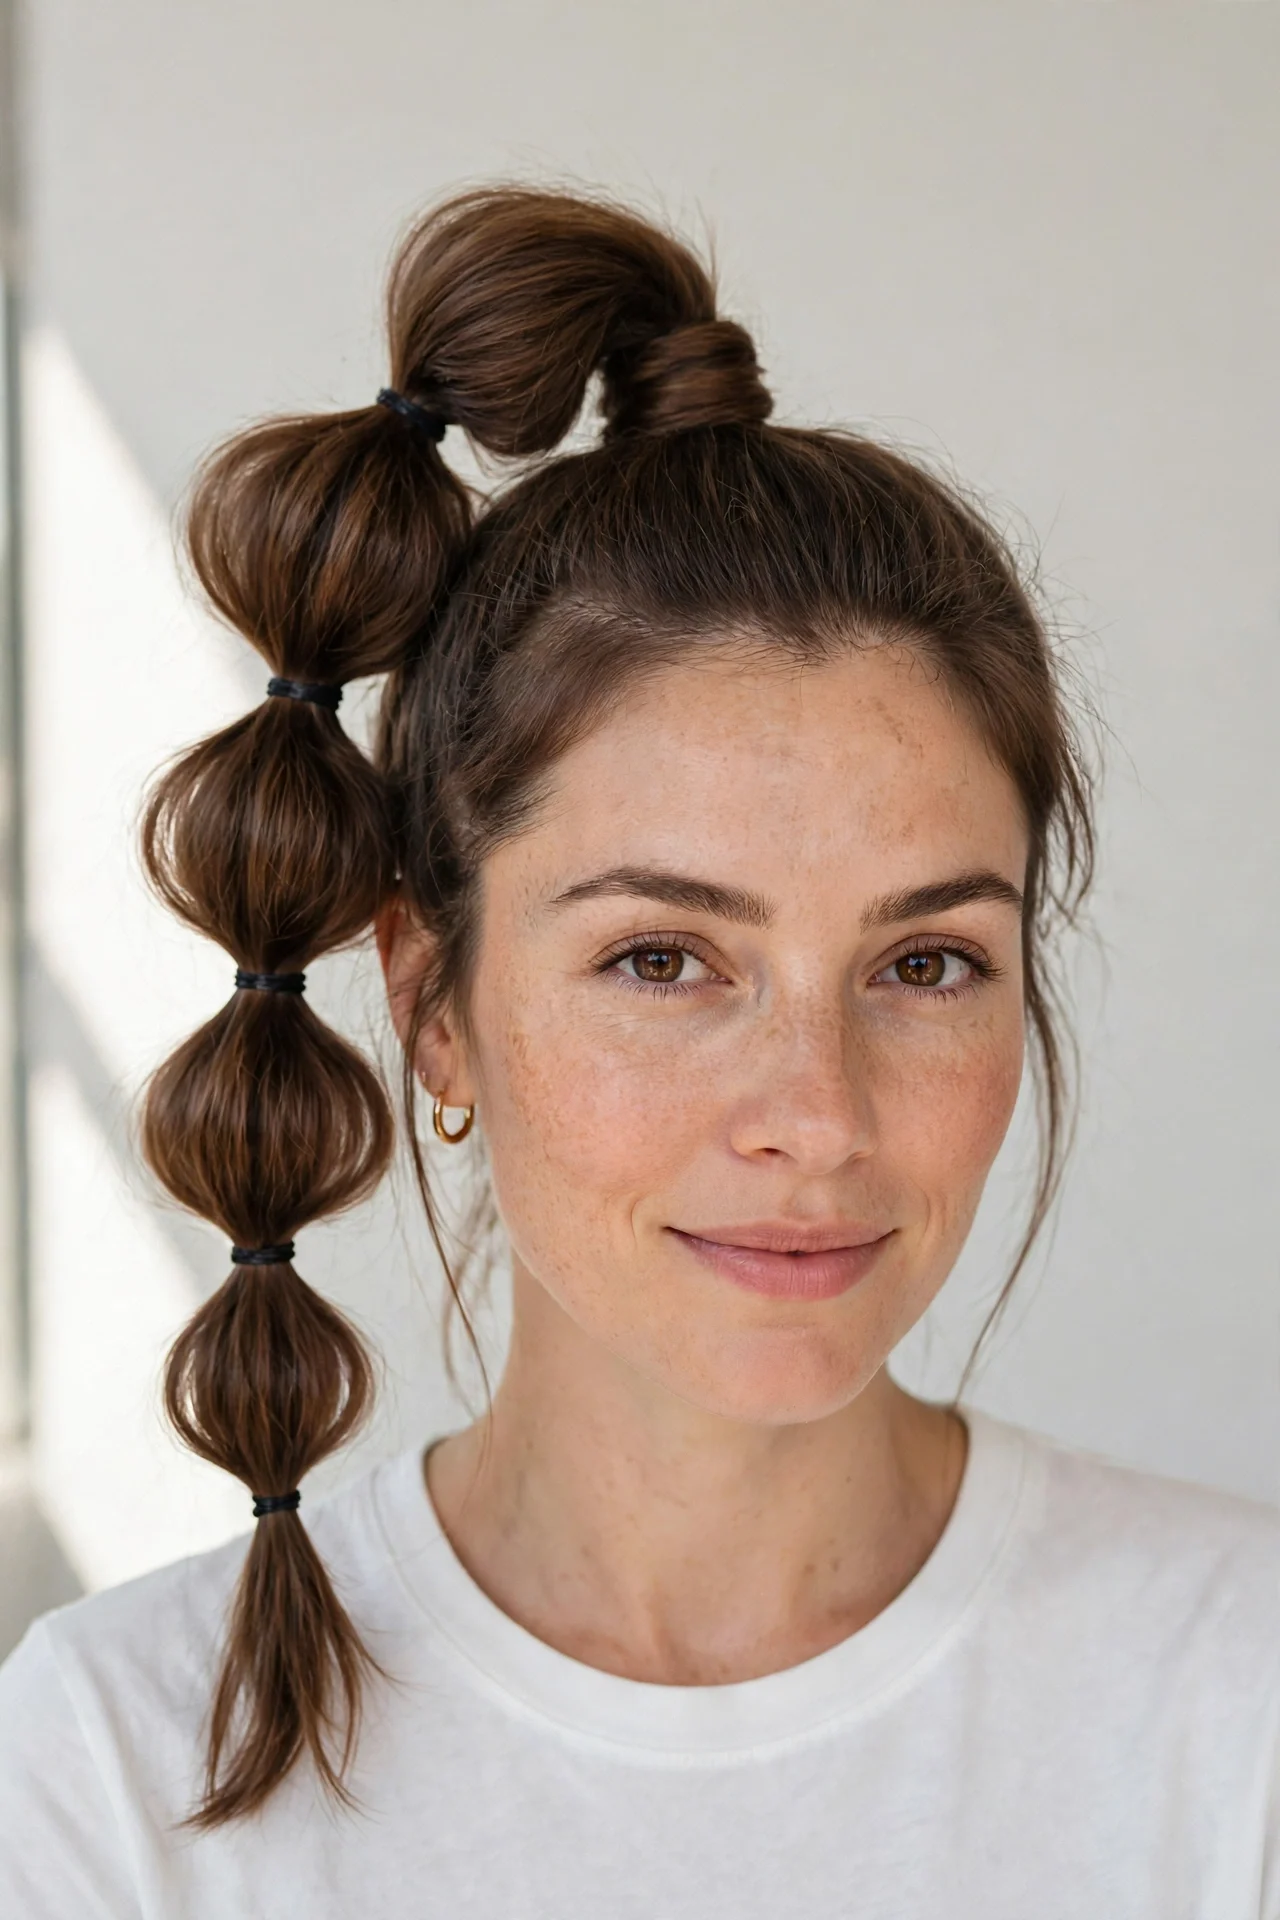
Vibe: Playful volume that photographs like a dream.
Why it works: The bubble pony is pure optical illusion: evenly spaced elastics turn one ponytail into a chain of rounded sections that look far thicker than your actual hair. It flatters long faces because the width sits at the sides, and it keeps every strand contained, which makes it a genuinely practical choice for travel days and outdoor events.
How to get it: Secure a high or mid ponytail, then add elastics every two inches down the length, puffing each section outward with your fingers. Match elastic color to your hair so the bands disappear. Ask your stylist for blunt-cut ends – a clean edge makes each bubble round out instead of tapering to a point.
Quick Win: Tease each section lightly before adding the next elastic; the backcombing is invisible inside the bubble but triples the fullness.
Shop the Look
| Shop the Look |
|---|
| Thin clear elastics for bubble sections |
| Volumizing mousse for pre-style body |
| Teasing comb for hidden backcombing |
| Flexible-hold hairspray for shape |
| Smoothing serum for a polished base |
9. The Silk-Scarf Wrapped Ponytail
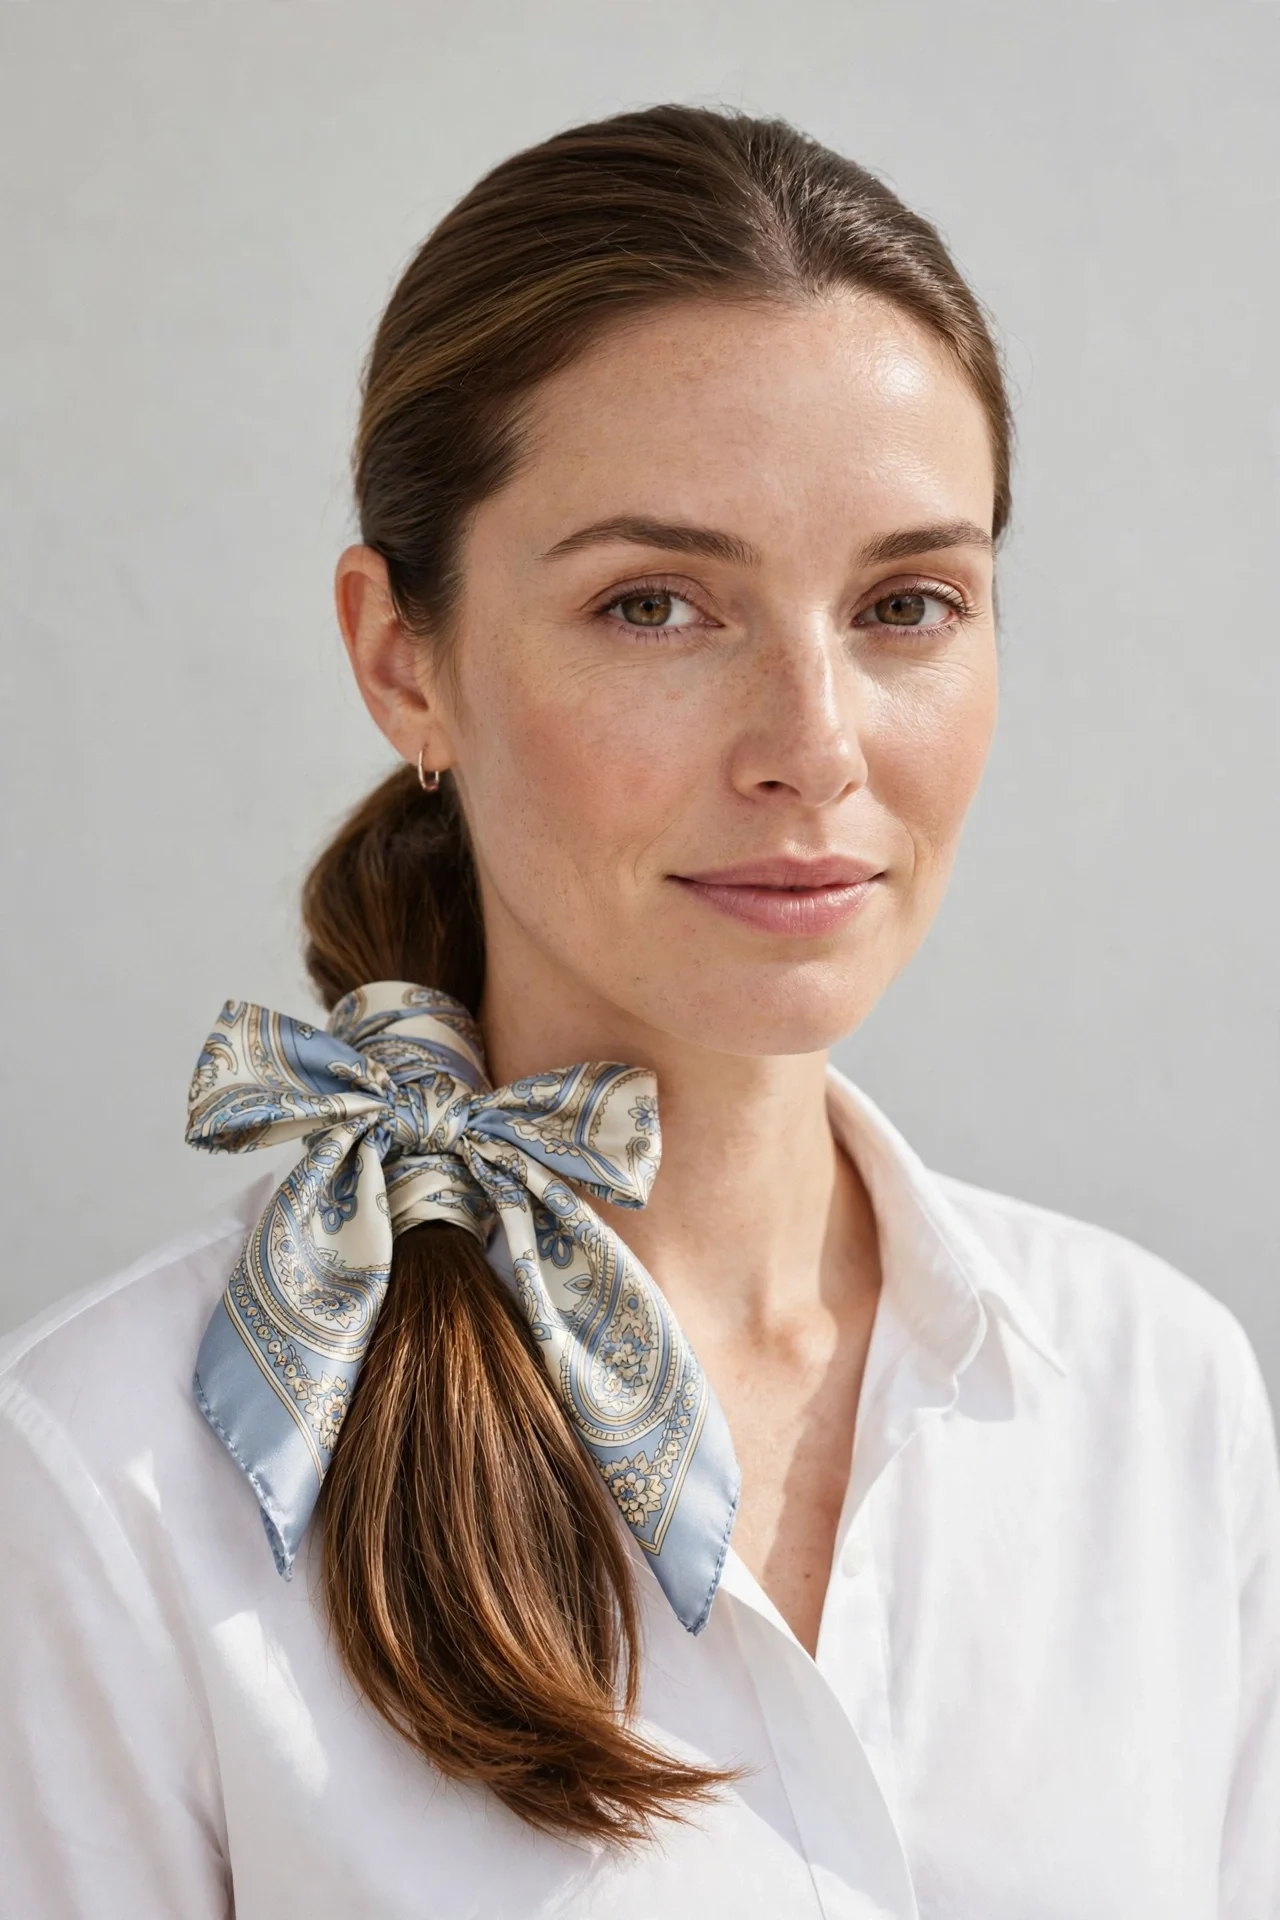
Vibe: One accessory away from a completely new hairstyle.
Why it works: A scarf does the styling work your hair cannot do alone: it adds color, pattern, and a finished edge to the simplest base. Wrapped around a ponytail, it covers the elastic, adds width at the base so fine hair looks fuller, and turns a gym ponytail into an intentional outfit. No other five-dollar accessory delivers this much change.
How to get it: Make your usual ponytail, fold a square scarf into a long band, wrap it around the base twice, and tie it in a bow or knot with the ends hanging. Let a few strands fall loose for softness. Ask your stylist nothing at all – this one is pure accessory magic on any cut.
Shop the Look
| Shop the Look |
|---|
| Square silk-touch hair scarf, assorted prints |
| Long skinny scarf for ponytail wrapping |
| Mini clear elastics as scarf anchors |
| Flexible-hold hairspray for flyaways |
| Soft-bristle smoothing brush |
10. The Rope-Twist High Ponytail
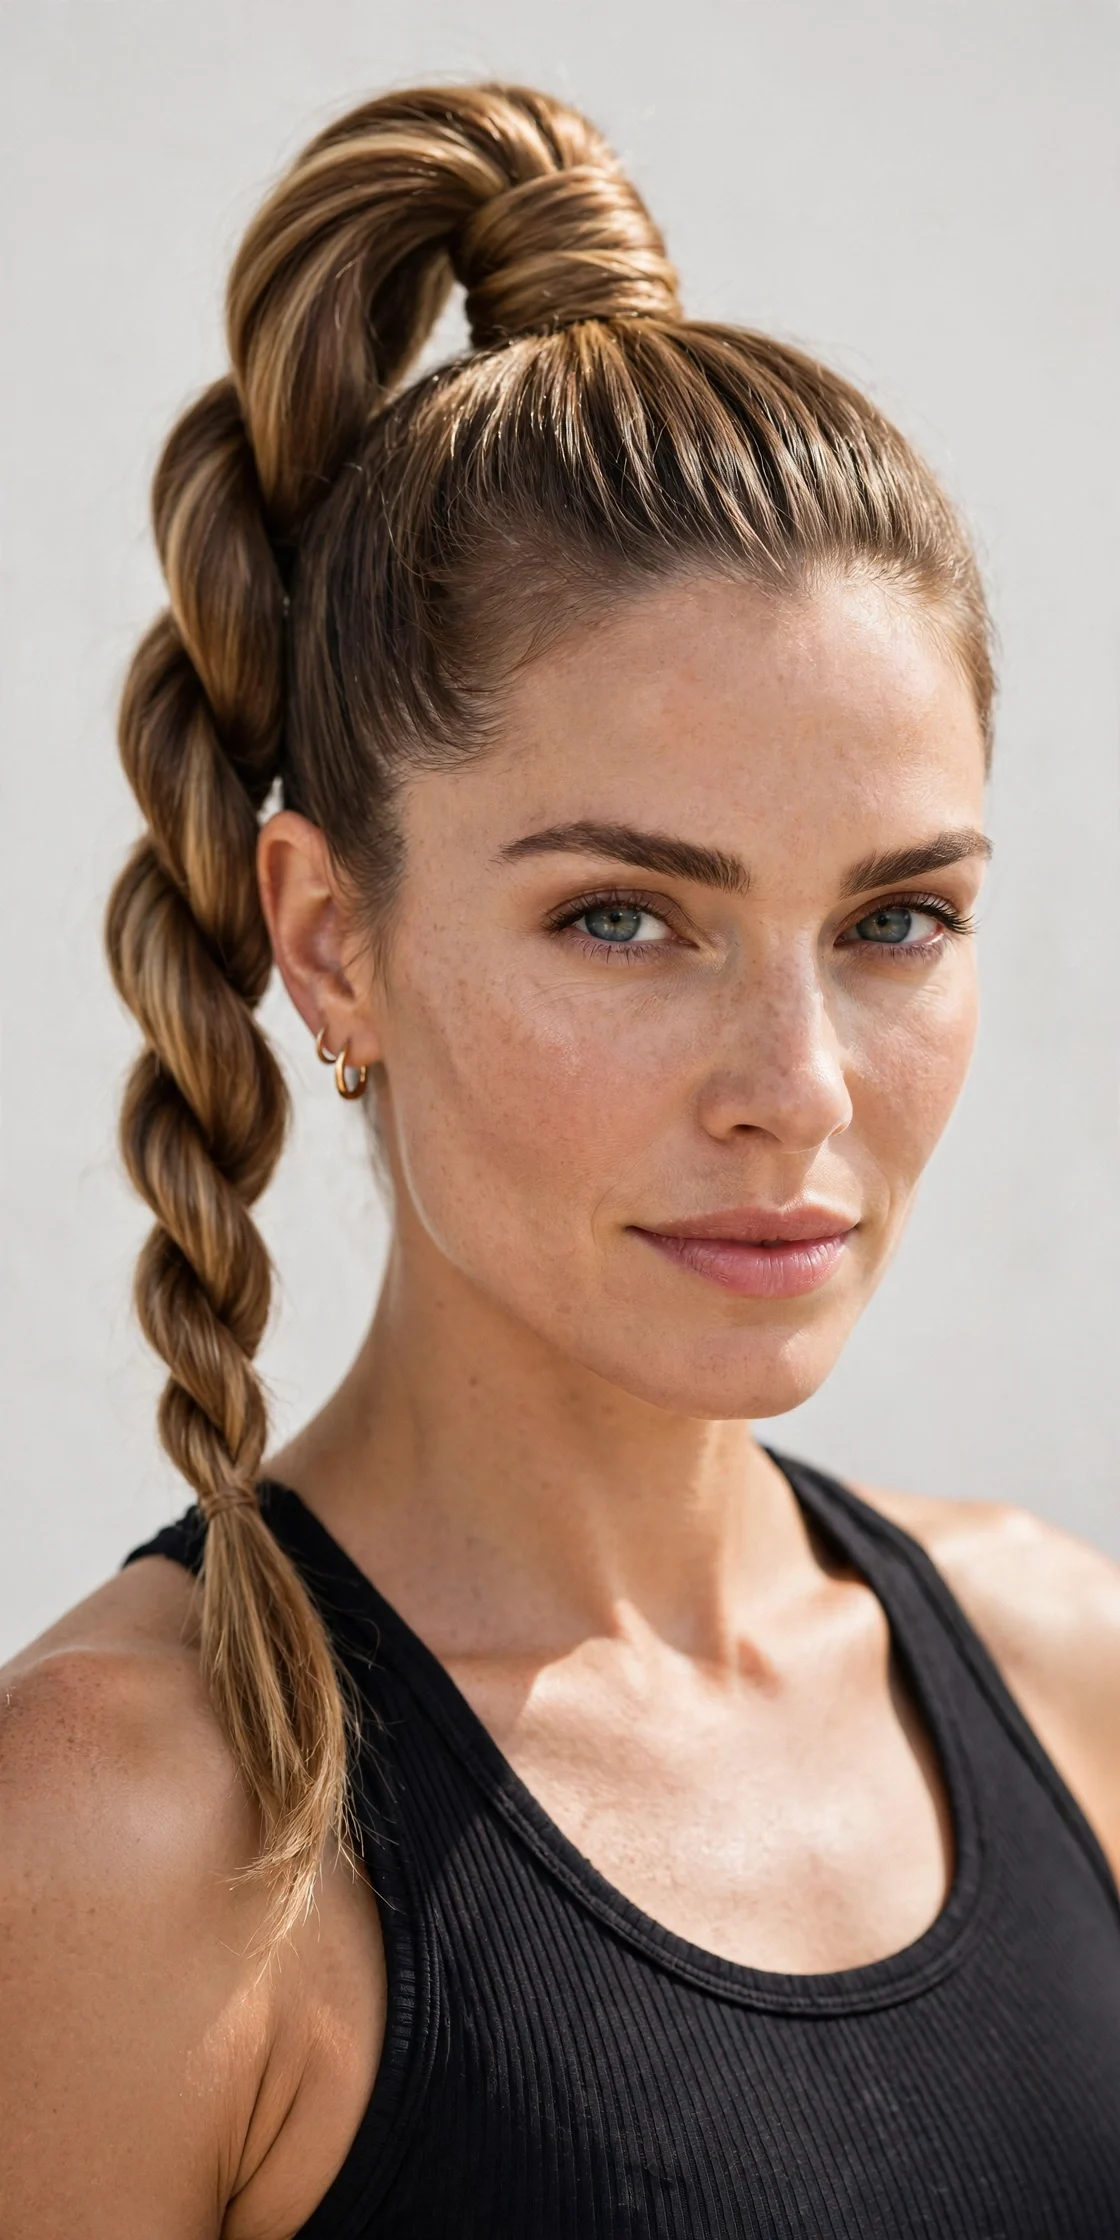
Vibe: Athletic energy, elevated.
Why it works: A rope twist looks more intricate than a plain ponytail but is mechanically simpler than any braid: two sections twisted in opposite directions cannot unravel the way a three-strand braid can. Worn high, it lifts the whole face, and the twisted texture catches light in a way that makes even single-process color look dimensional.
How to get it: Pull hair into a high ponytail and split it into two equal sections. Twist each section clockwise, then twist the two sections counter-clockwise around each other, and secure the end. Ask your stylist to thin the very ends slightly – bulky ends make the twist flare instead of lying smooth.
Quick Win: Rub a pea-sized amount of pomade between your palms and smooth it down the finished twist; the shine sells the whole look.
Shop the Look
| Shop the Look |
|---|
| Medium-hold pomade for twist definition |
| Firm-hold hair elastic for high ponies |
| Anti-frizz finishing cream |
| Fine-mist hairspray for flyaways |
| Scalp-stimulating brush for smooth roots |
11. The Sleek Tucked-Under Bob
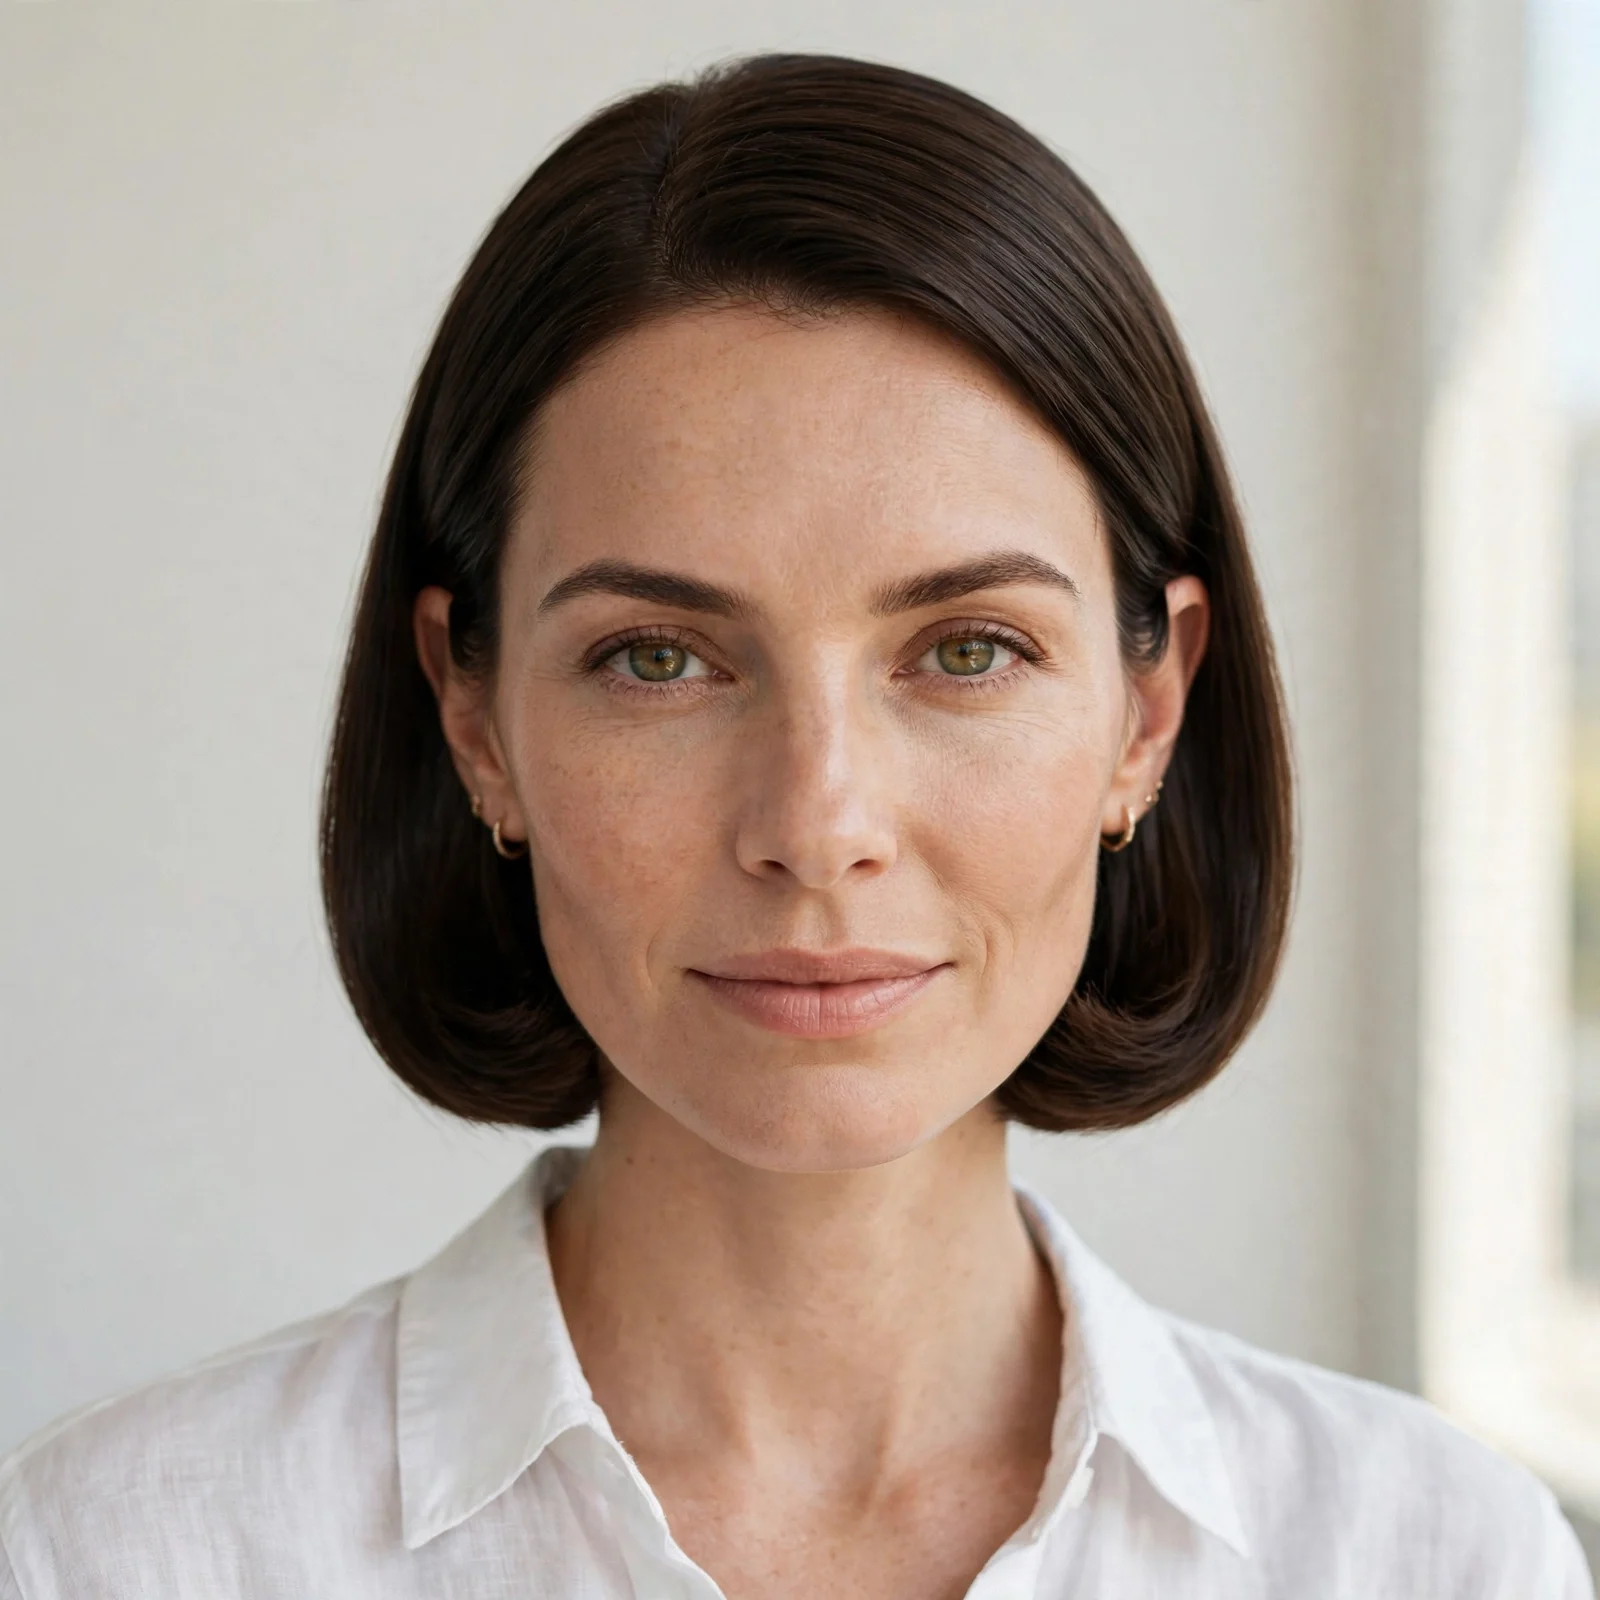
Vibe: Old-money polish, zero hot tools.
Why it works: Tucking bob-length hair behind the ears and under at the ends creates a curved, sculpted line that reads far more refined than the same bob worn loose. The ear tuck shows off earrings and bone structure, while the under-turn gives fine hair a thicker-looking hemline. It is the easiest way to make a growing-out cut look deliberate.
How to get it: Smooth hair with a serum, tuck both sides behind your ears, and use a round brush or flat iron to curl the ends under. Finish with a cool shot from the dryer to lock the curve. Ask your stylist for a clean, blunt perimeter – the tuck-and-turn only works when the ends form one continuous line.
Also view: [INTERNAL:bob hairstyles]
Shop the Look
| Shop the Look |
|---|
| Heat-protectant smoothing serum |
| Round brush for under-turned ends |
| Lightweight flat iron with rounded edges |
| Anti-humidity finishing spray |
| Fine-tooth comb for tuck precision |
12. The Half-Up Waterfall Twist
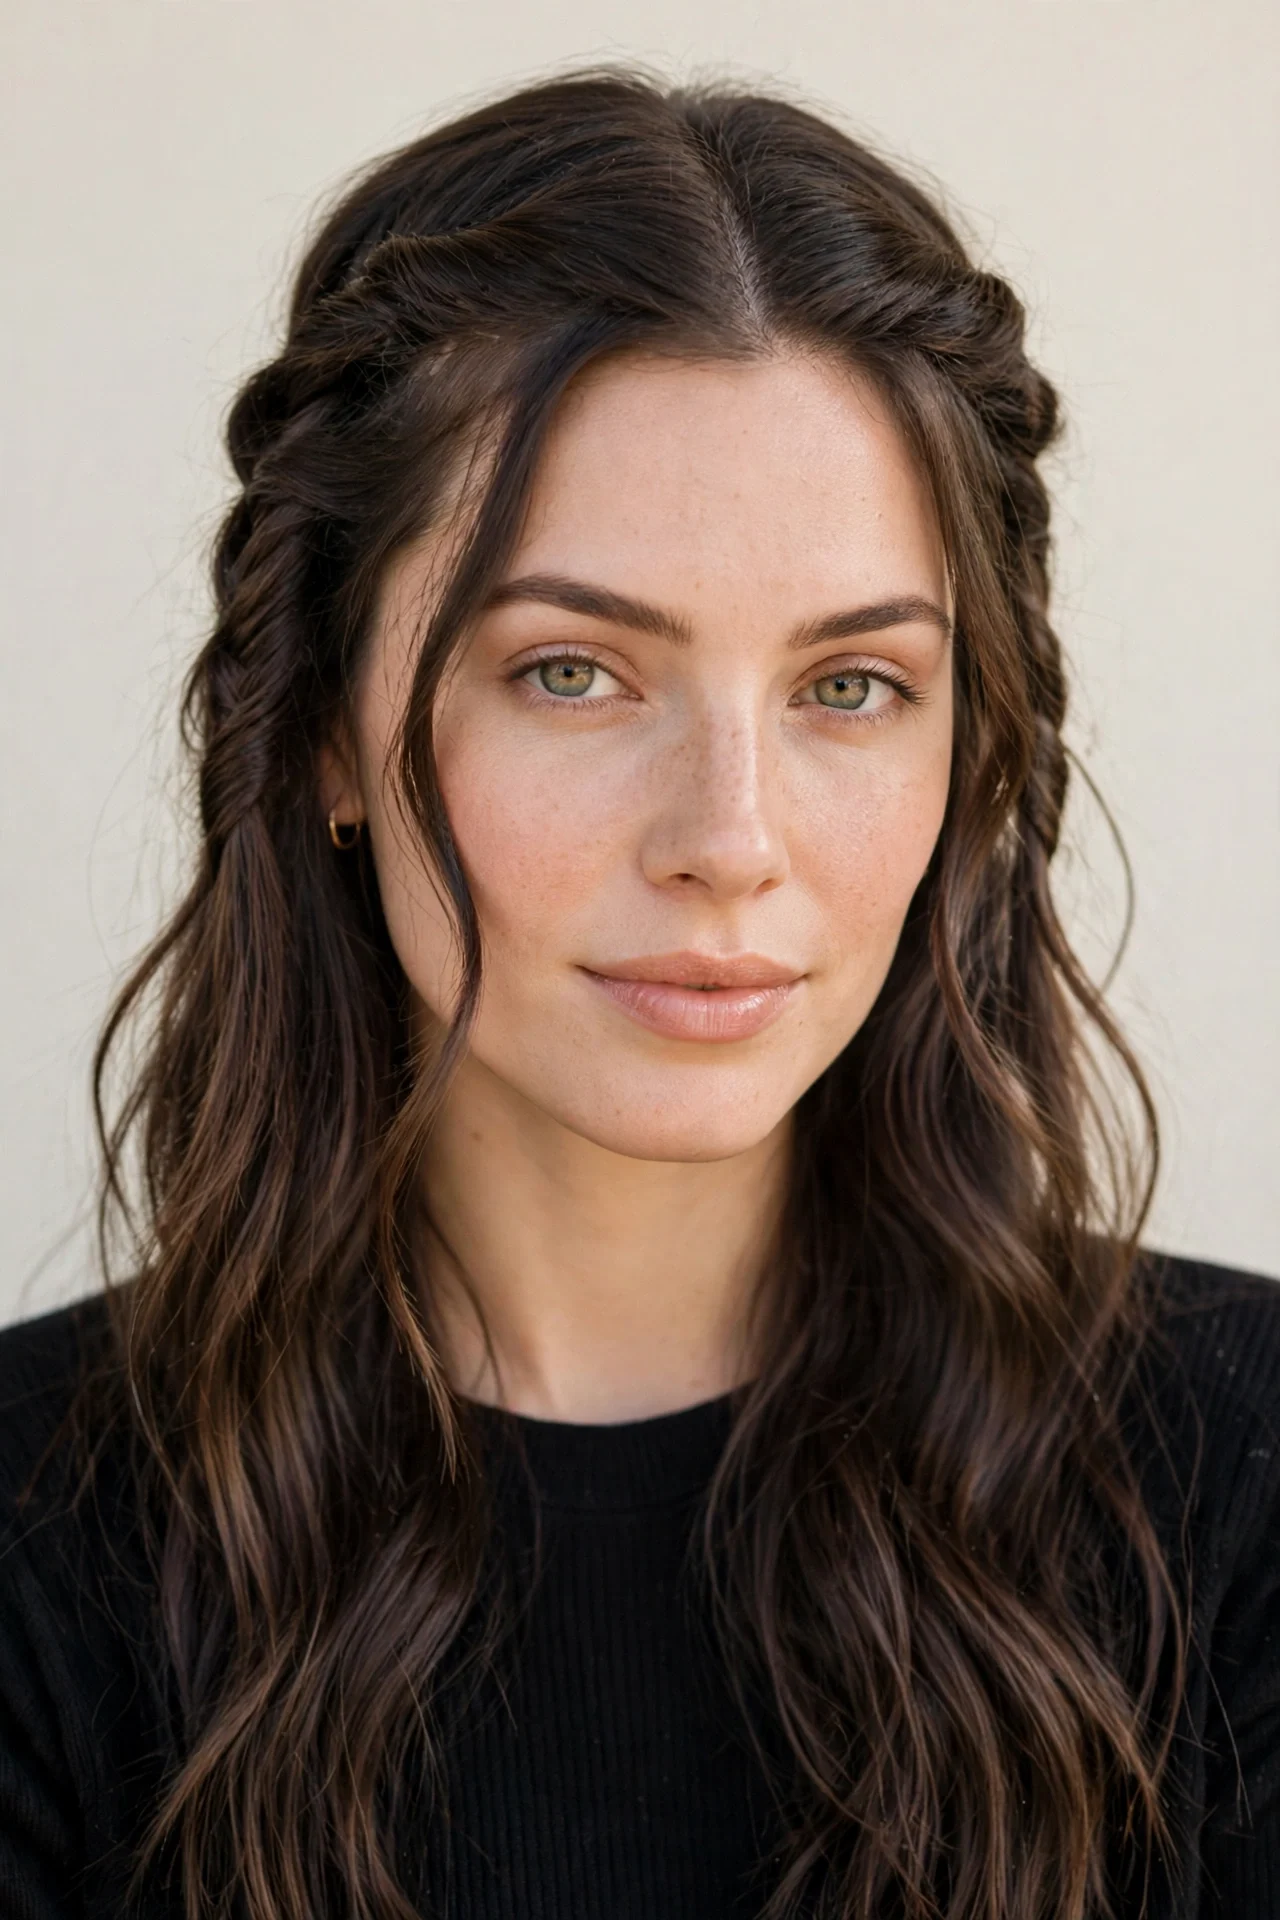
Vibe: Romantic detail that takes four minutes flat.
Why it works: The waterfall twist borrows the magic of a waterfall braid – sections cascading through a horizontal twist – without requiring actual braiding skill. It frames the face on both sides, adds movement to straight hair, and photographs beautifully from behind, which is why it dominates event photos. The twist also keeps hair out of your face without a full updo.
How to get it: Take a section from each temple, twist them toward the back, and join them with a clear elastic. Then pull small strands from above through the twist so they cascade down. Ask your stylist for subtle balayage or face-framing highlights – the color variation makes every cascading piece pop.
Quick Win: Curl the cascading pieces with a one-inch iron before you twist; defined waves make the waterfall effect obvious instead of subtle.
Shop the Look
| Shop the Look |
|---|
| Clear mini elastics for twist joins |
| One-inch curling iron for cascading pieces |
| Lightweight mousse for wave hold |
| Shine mist for twist definition |
| Tail comb for clean sections |
13. The Fishtail Side Braid
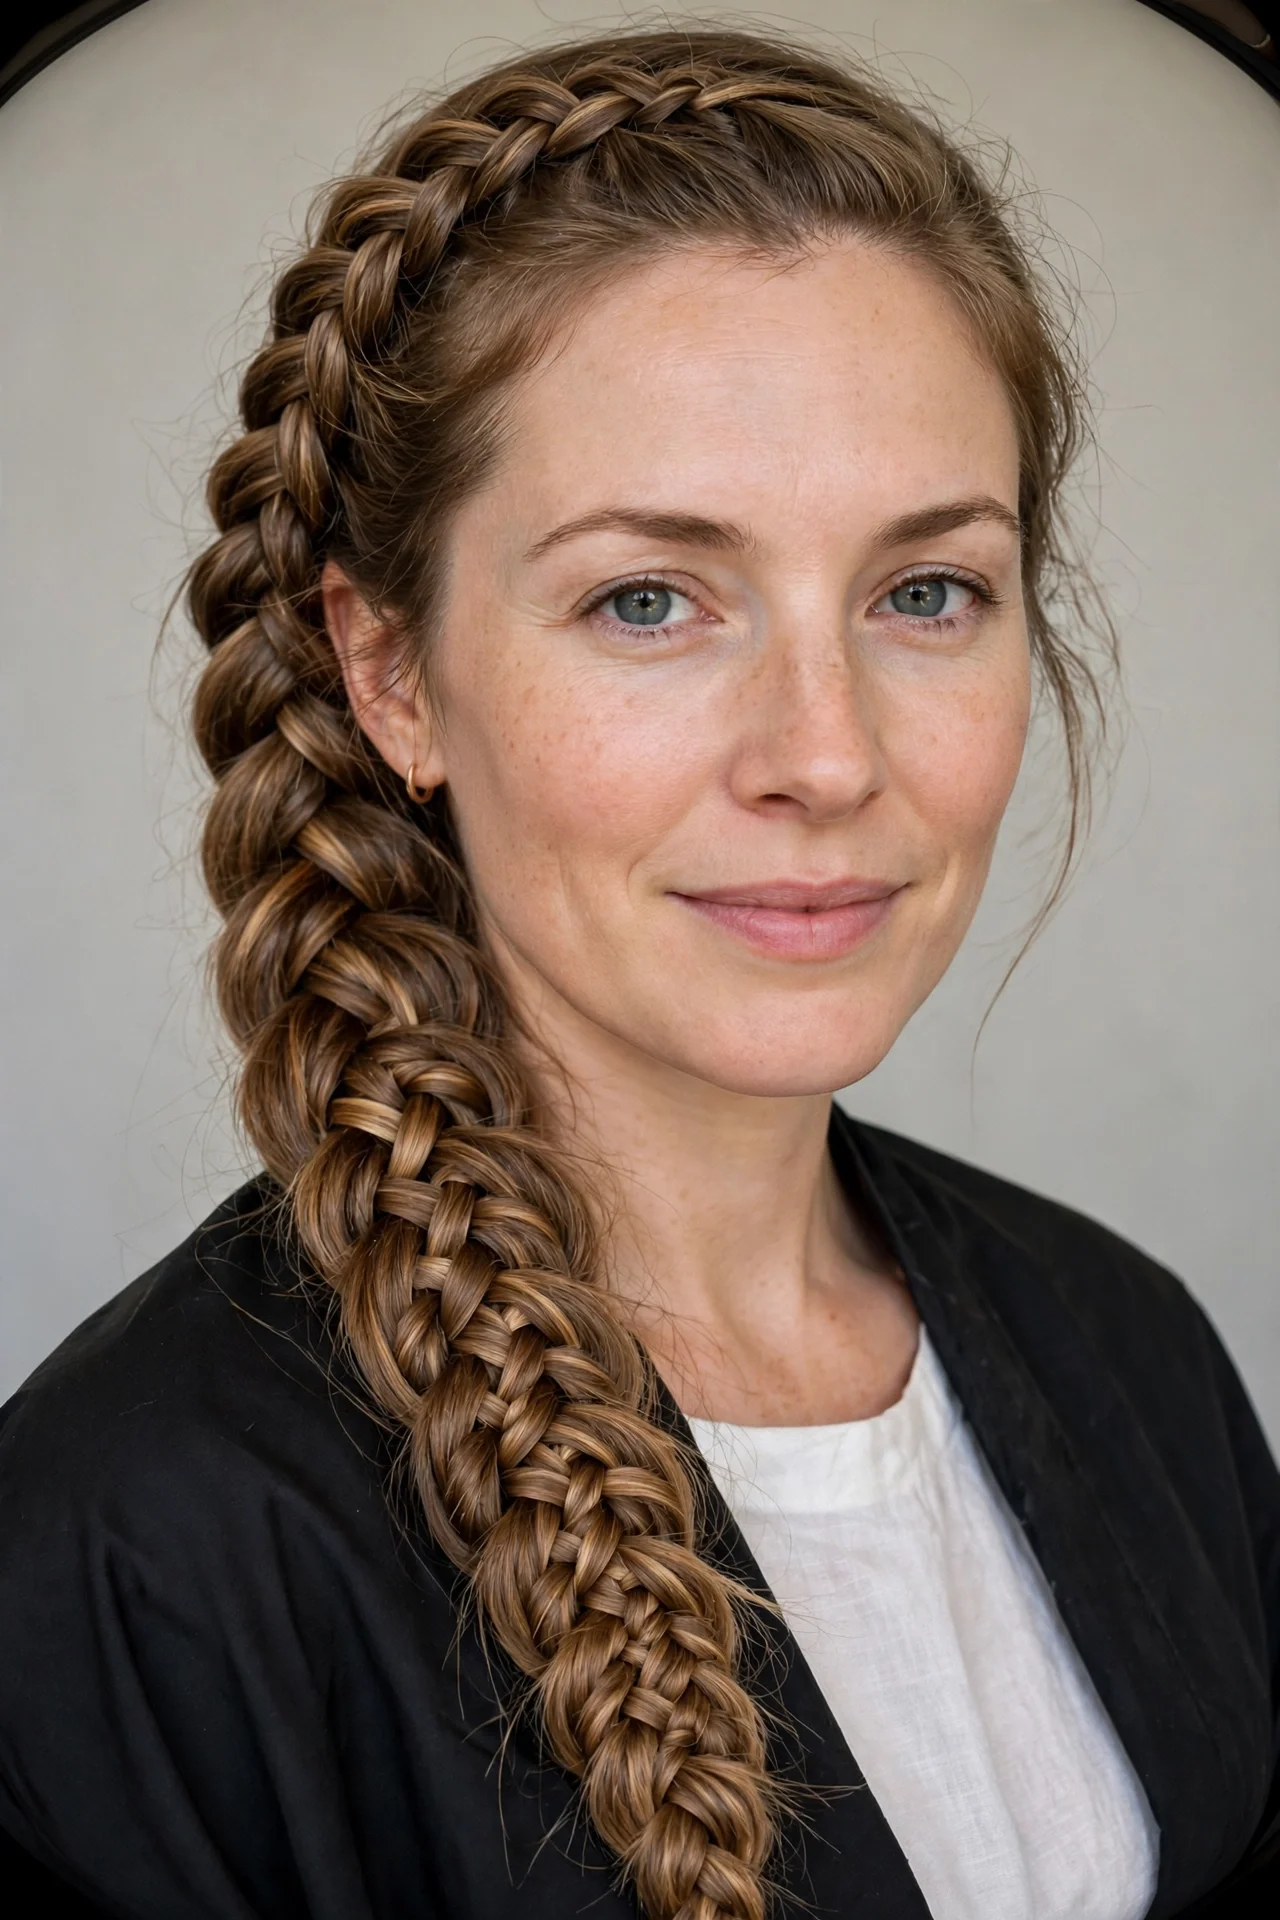
Vibe: Boho texture with main-character energy.
Why it works: The fishtail's tiny alternating sections create the most detailed-looking braid of any technique, so it reads as a statement even worn casually. Draped over one shoulder, it shows off length and color variation – highlights and balayage look spectacular in fishtail texture. It also holds better than a standard braid on layered hair because the small sections trap flyaways.
How to get it: Sweep hair over one shoulder, split into two sections, and cross thin pieces from the outside of each section to the inside of the other, working down. Pancake the finished braid for fullness. Ask your stylist for long layers through the mid-lengths – they give the fishtail its signature piece-y, textured edge.
Shop the Look
| Shop the Look |
|---|
| Texturizing powder for braid grip |
| Clear elastics for fishtail ends |
| Lightweight hair oil for smooth pieces |
| Flexible-hold hairspray |
| Wide-tooth comb for pre-braid detangling |
14. The Double Mini Buns
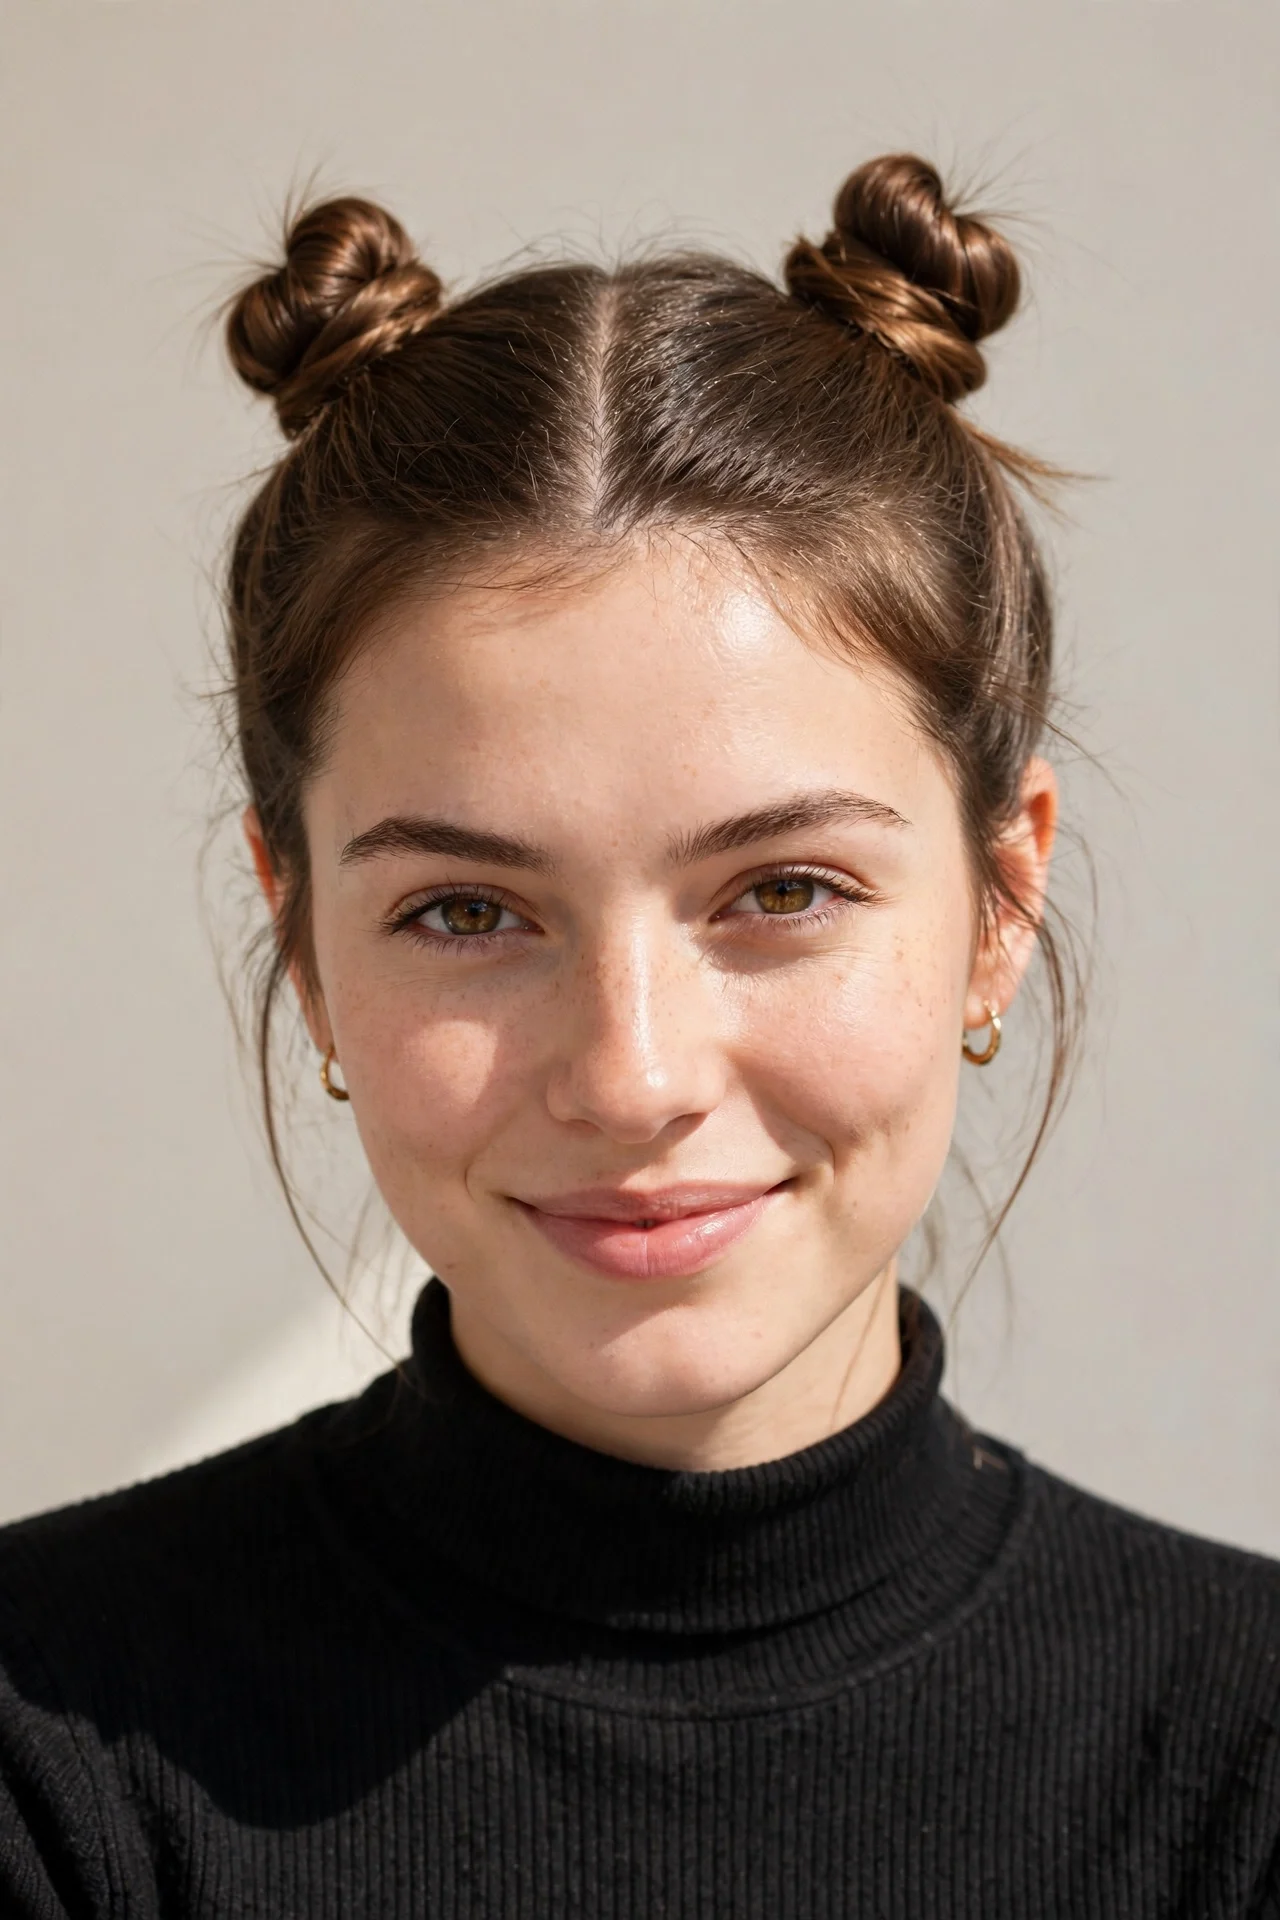
Vibe: Festival fun, office-appropriate when done right.
Why it works: Two small buns sit higher and wider than one, which creates symmetry and draws attention upward – a flattering trick for petite faces. Keeping the buns small and neat (not oversized and cartoonish) makes the style read playful rather than childish, and the parted, sectioned base keeps everything tidy through a full day.
How to get it: Part hair down the middle, make a high ponytail on each side, twist each into a small bun, and pin. Keep the crown smooth by brushing each section before twisting. Ask your stylist to keep the top layers long enough to reach the buns comfortably – too-short layers are what make this style fall apart.
Quick Win: Use a center part and brush each half upward before securing; the clean part is what keeps this looking chic instead of chaotic.
Shop the Look
| Shop the Look |
|---|
| Small snag-free elastics for mini buns |
| Strong-hold gel for smooth parting |
| Mini claw clips as bun alternatives |
| Edge brush for sleek edges |
| Travel hairspray for touch-ups |
15. The Slicked-Back Wet-Effect Bun
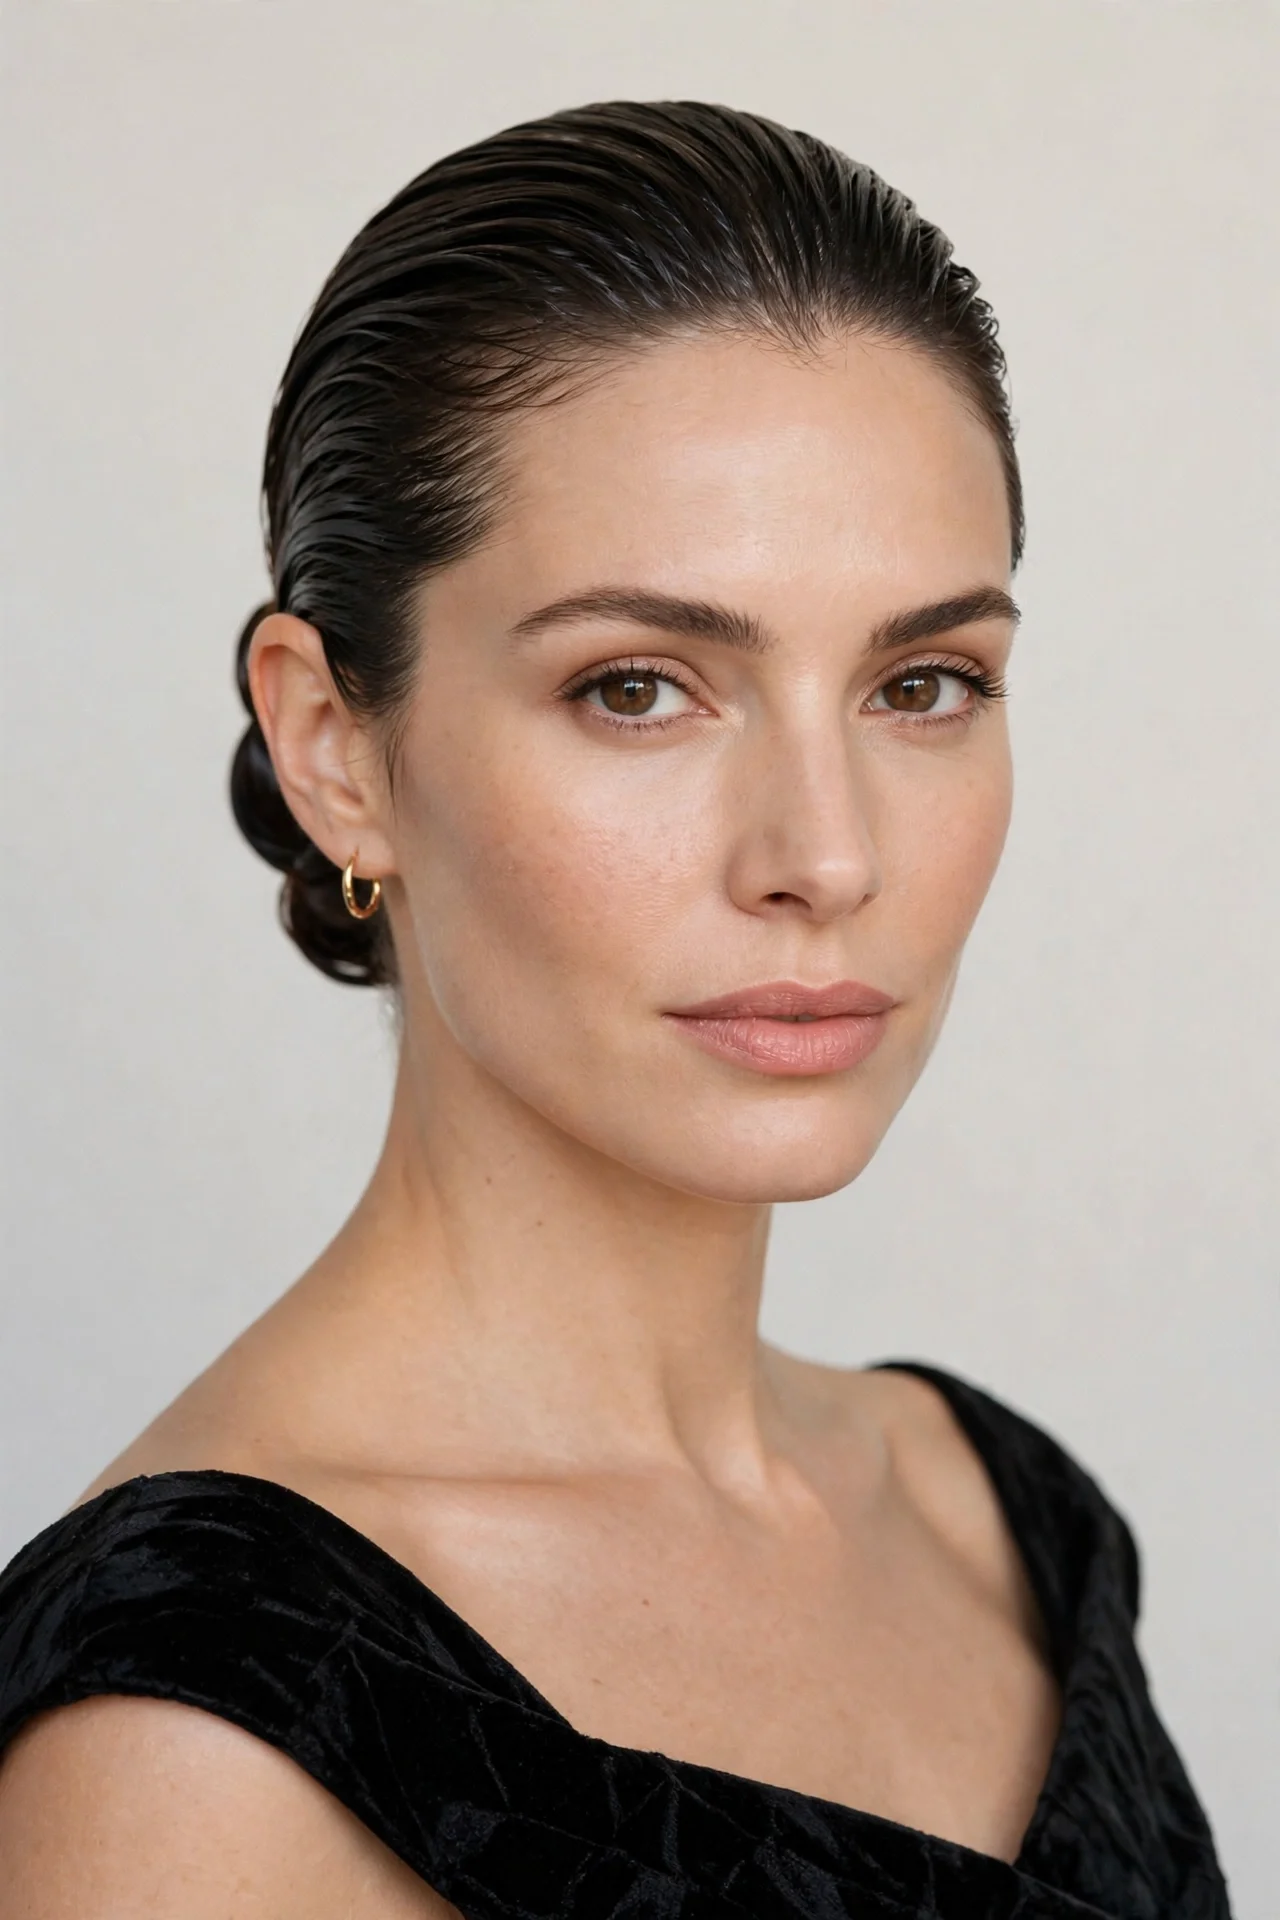
Vibe: Runway gloss, straight off the red carpet.
Why it works: The wet look is one of the only styles that actually benefits from product heaviness: gel creates the glossy, combed-back finish that defines it. Pulled into a low bun, it becomes wearable and elegant rather than editorial-extreme. It is also a gift for humid days, because the gel seals the cuticle and prevents frizz from forming in the first place.
How to get it: Work a generous amount of strong-hold gel through damp or dry hair, comb it straight back with a fine-tooth comb, twist into a low bun, and smooth the crown flat. Ask your stylist for a mid-length or long cut with minimal layers – the slicked finish needs enough length to look sleek, not spiky.
Also view: [INTERNAL:slicked back hairstyles]
Shop the Look
| Shop the Look |
|---|
| Strong-hold wet-look styling gel |
| Fine-tooth comb for sleek combing |
| High-shine pomade for the bun |
| Humidity-blocking hairspray |
| Silk scarf for setting the sleek finish |
16. The Low Side-Part Pony
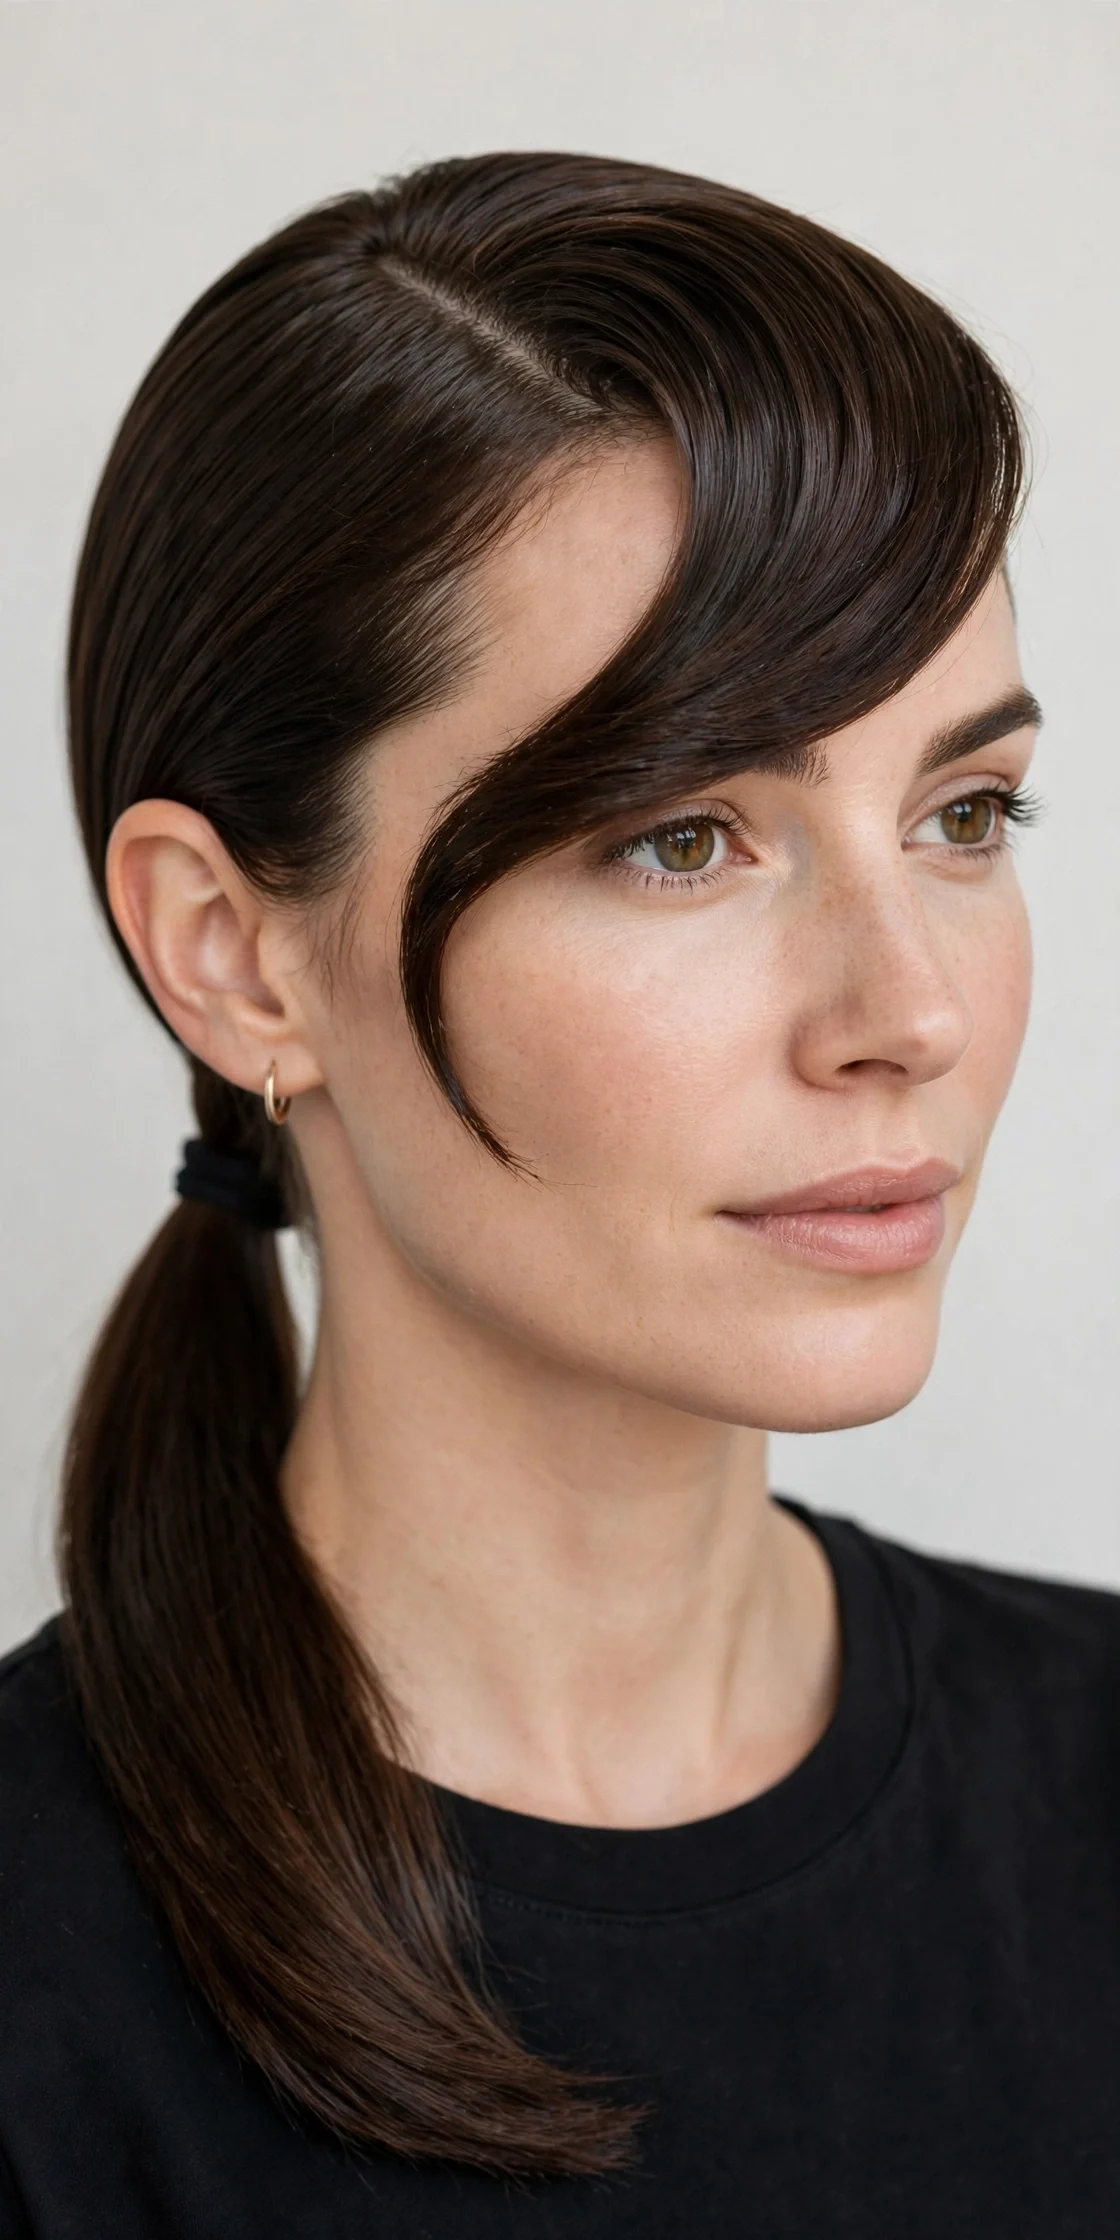
Vibe: Quiet luxury in ponytail form.
Why it works: A deep side part changes the entire geometry of a ponytail: the sweep across the forehead adds drama, the asymmetry flatters angular faces, and the low placement at the nape keeps it grown-up. It is the ponytail you wear when you want to look like you have a personal stylist and a schedule full of important lunches.
How to get it: Create a deep side part with a tail comb, smooth everything toward the opposite nape, and secure low. Tame the part with a touch of pomade so it stays crisp. Ask your stylist for a long, sweeping fringe or face-framing layers – the side-swept piece is the whole point of the look.
Quick Win: Mist the brush, not the hair, with hairspray before smoothing; you get control without a crunchy finish.
Shop the Look
| Shop the Look |
|---|
| Tail comb for deep side parts |
| Lightweight pomade for part control |
| Snag-free seamless elastics |
| Smoothing serum for glassy length |
| Fine-mist flexible hairspray |
17. The Headband Tuck
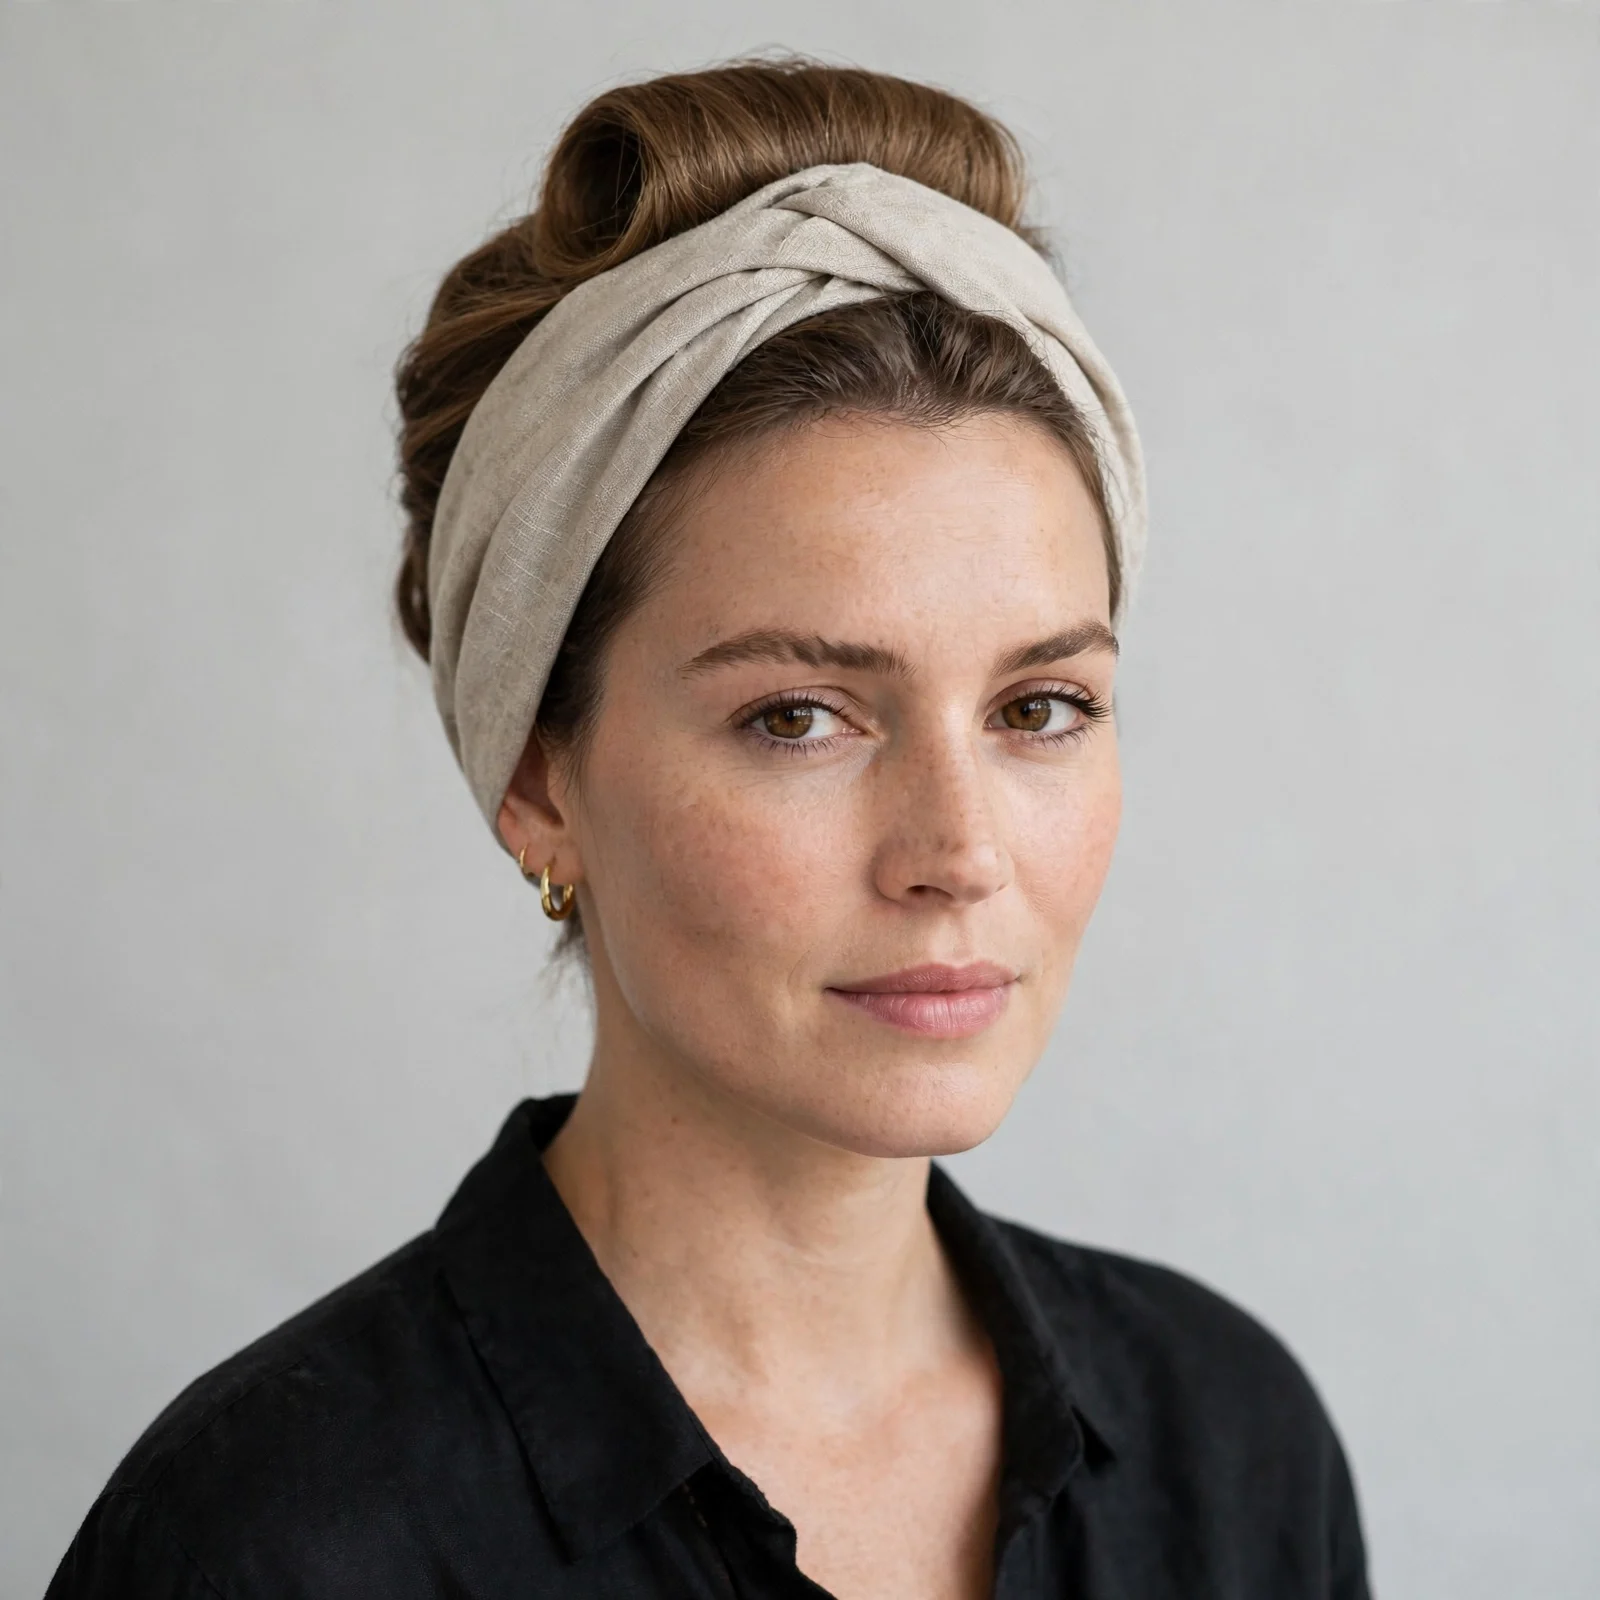
Vibe: Greek-goddess energy, modernized.
Why it works: Tucking hair up and around a headband creates a faux updo that requires zero pins and zero braiding. The rolled tuck gives beautiful, even fullness all the way around the head – something most ponytail updos cannot do – and the headband itself adds the accessory element. It is brilliant for growing-out bangs and awkward in-between lengths.
How to get it: Slide on an elastic headband, then take sections of hair and roll them up and over the band, tucking the ends in as you go around. Fluff the top for volume. Ask your stylist for nothing specific – this style works on literally any length past the chin.
Shop the Look
| Shop the Look |
|---|
| Wide elastic headband, non-slip grip |
| Padded velvet headband for evening |
| Texturizing spray for tuck hold |
| Bobby pins for tucking stubborn ends |
| Shine mist for the rolled finish |
18. The Knotted Low Chignon
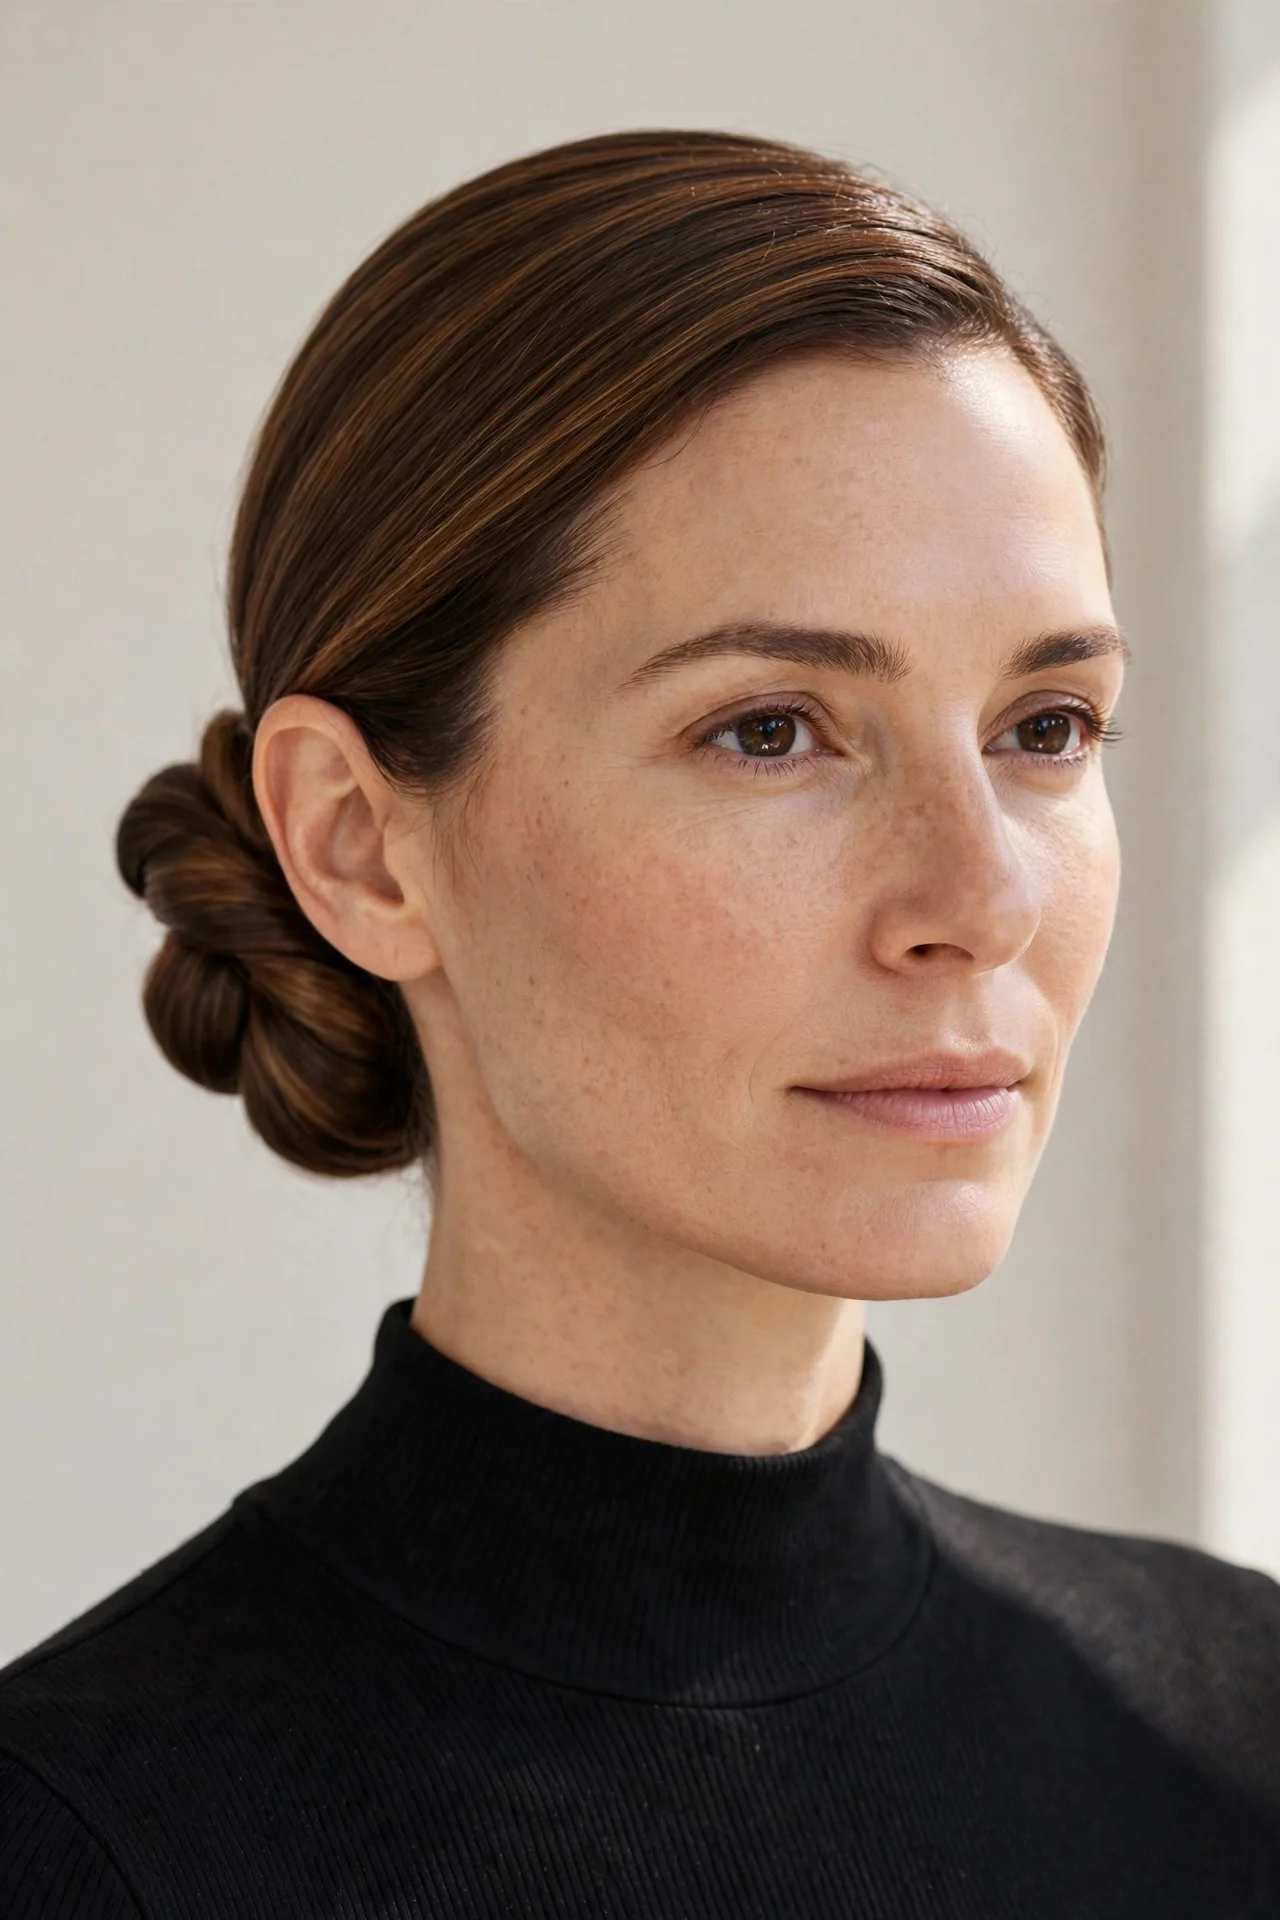
Vibe: Minimalist sculpture, made of hair.
Why it works: Knotting hair instead of twisting it creates a chignon with genuine architectural interest – the knot reads as a deliberate design element rather than just gathered hair. Sitting low, it keeps the silhouette elegant and neck-baring, and the knot structure grips itself, so it needs fewer pins than a classic chignon and holds better on slippery, fine hair.
How to get it: Pull hair into a low ponytail, split the tail in two, tie the two sections in a simple overhand knot, then wrap the ends around and pin. Repeat the knot once more if your length allows. Ask your stylist for one-length ends with no heavy layering – clean ends make the knot look crisp instead of fuzzy.
Quick Win: Spray the knot with texturizing spray before you tie it; the grit keeps the knot from loosening through the day.
Also view: [INTERNAL:low bun hairstyles]
Shop the Look
| Shop the Look |
|---|
| Texturizing spray for knot grip |
| U-shaped pins for chignon security |
| Flexible-hold hairspray |
| Smoothing cream for a polished base |
| Silk hair tie to prevent creases |
19. The Curly Pineapple Updo
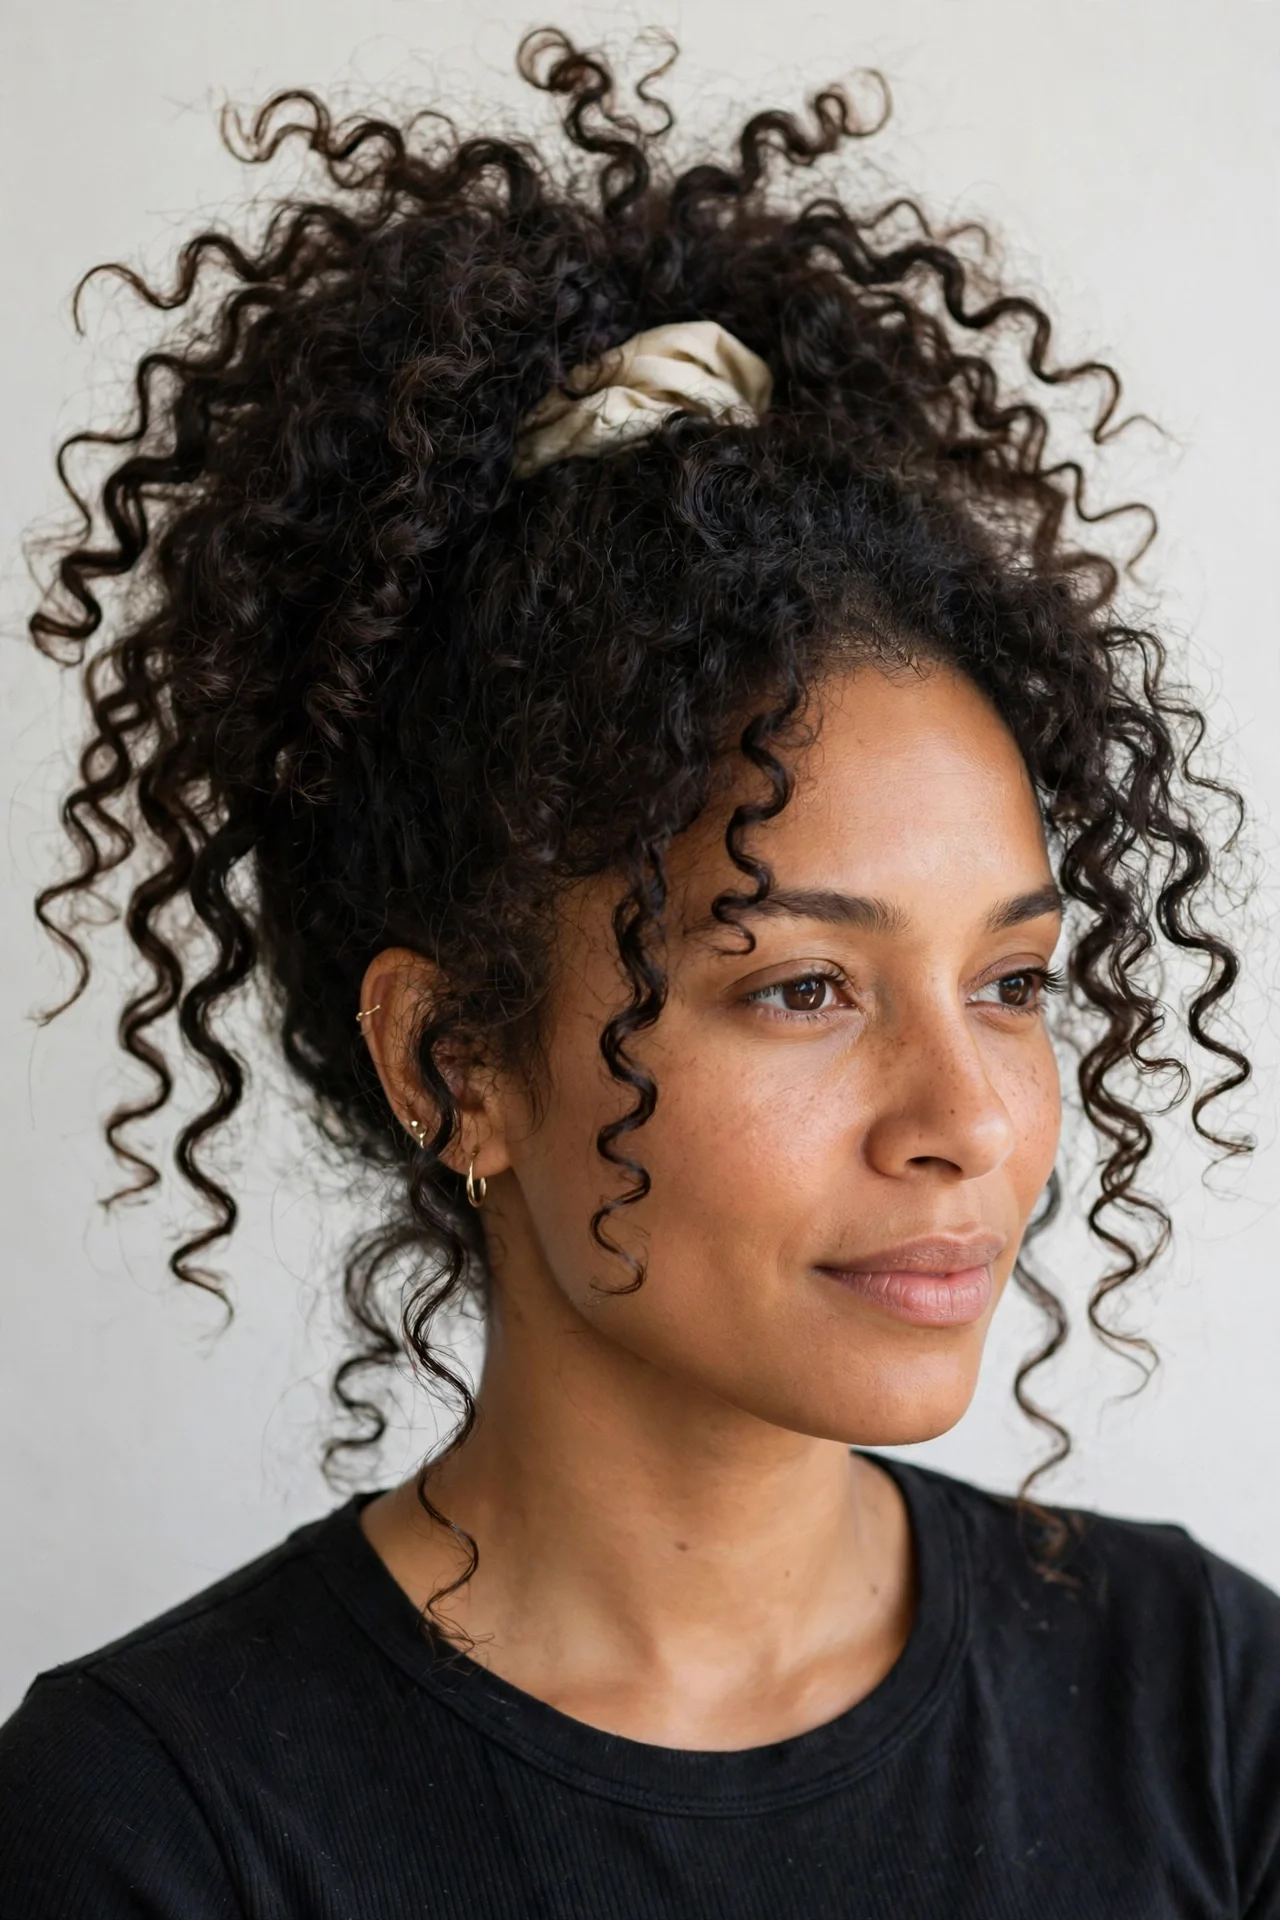
Vibe: Curls on full display, gravity-defying.
Why it works: The pineapple – gathering curls into a high, loose ponytail – is the rare updo designed specifically for curly and coily hair. It preserves curl definition by keeping the pattern uncrushed, shows off volume at the crown where curls look their best, and doubles as the go-to overnight protection method, which means your daytime style and nighttime routine are finally the same thing.
How to get it: Flip your head forward, gather curls loosely at the very top of your head, and secure with a silk scrunchie – loose is key, so the curls are not stretched. Arrange the falling curls with your fingers. Ask your stylist for a rounded curly cut with the weight balanced at the crown; the pineapple only works when the curls have somewhere to fall.
Shop the Look
| Shop the Look |
|---|
| Silk scrunchies, extra-large size |
| Curl-defining cream for day-two refresh |
| Wide-tooth comb for curl-safe gathering |
| Lightweight curl refresher mist |
| Satin bonnet for overnight protection |
20. The Loose Milkmaid Crown
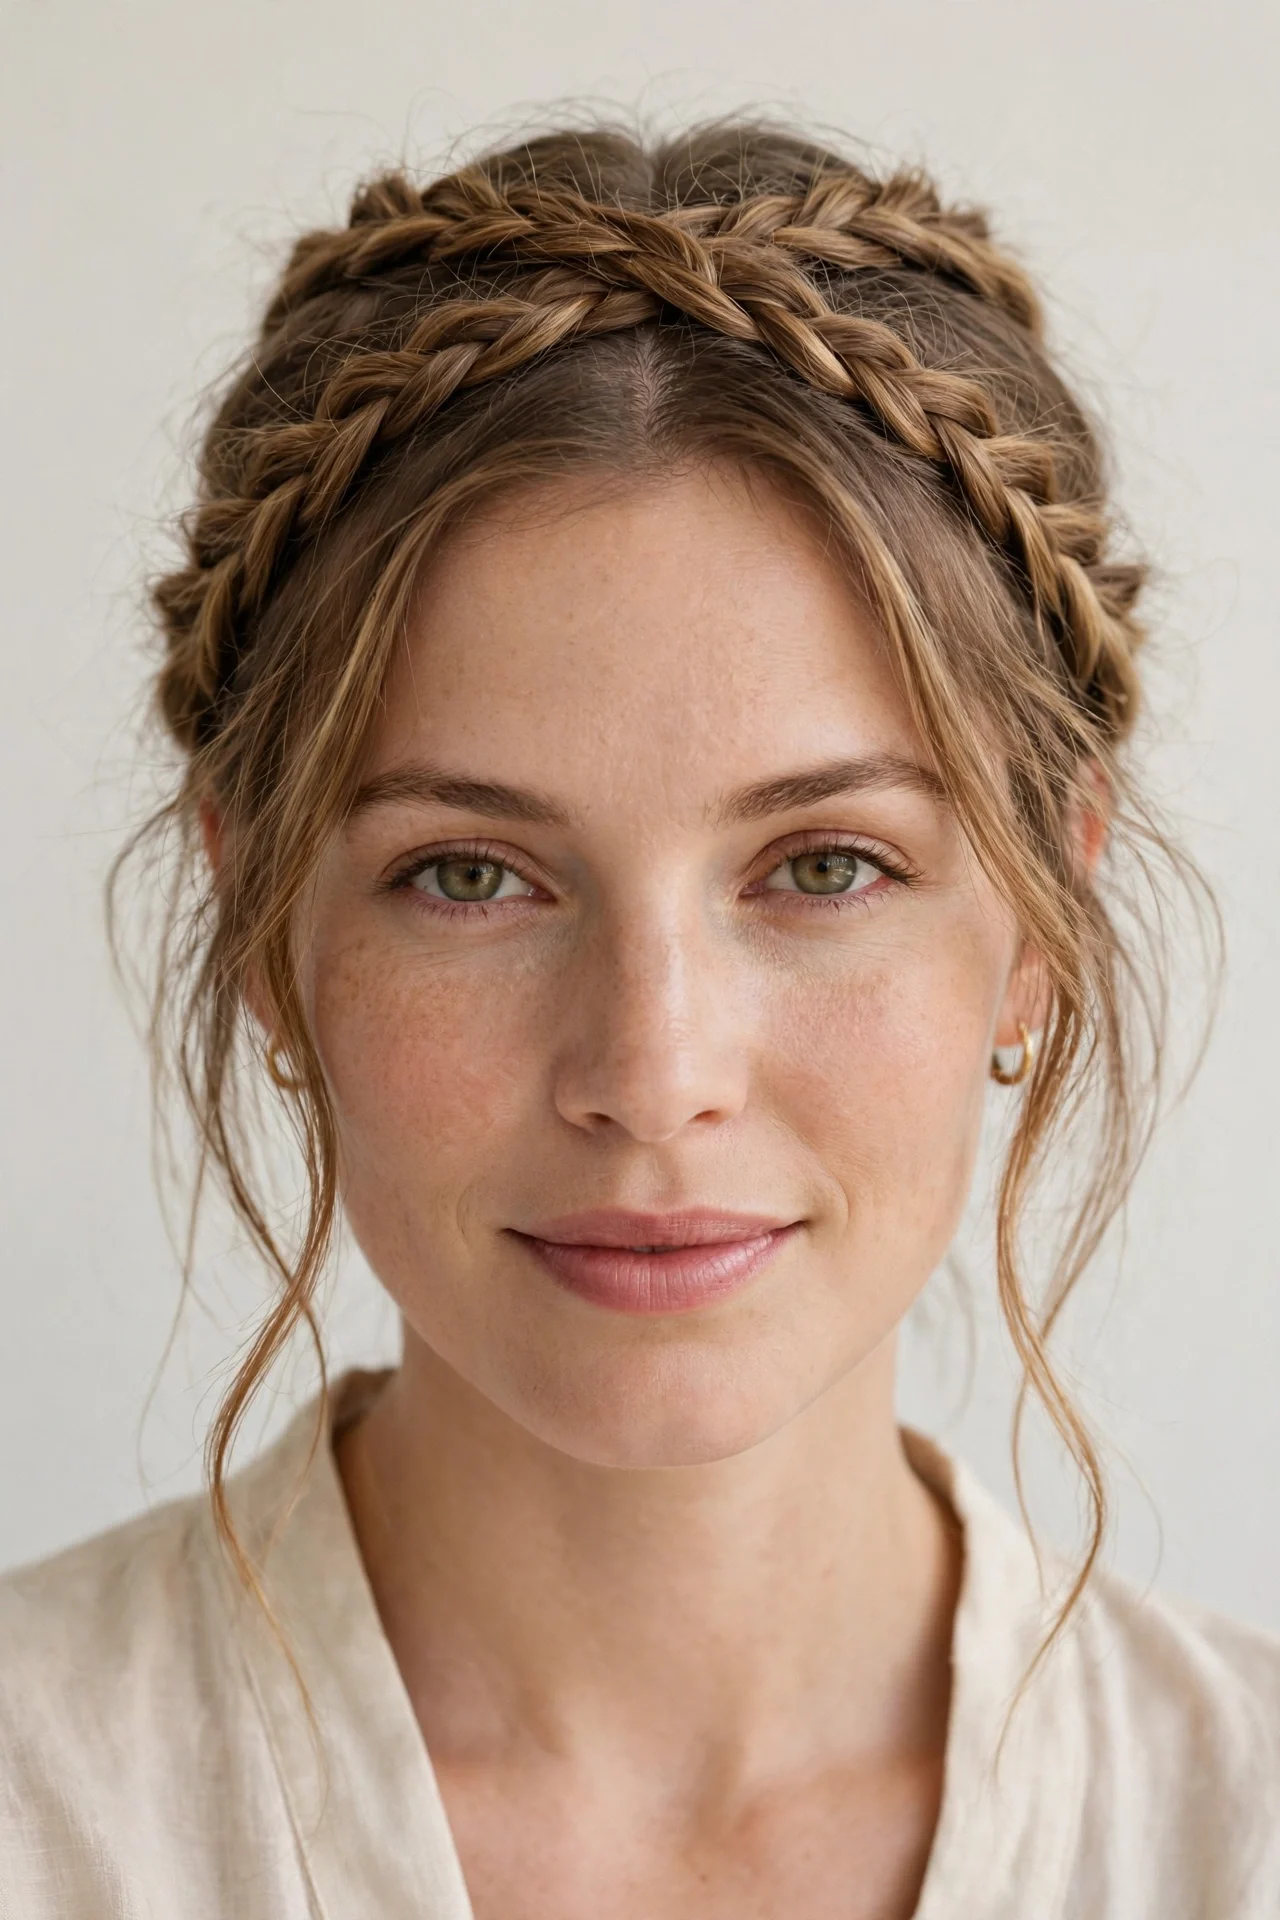
Vibe: Storybook romance, wearable every day.
Why it works: Two braids crossed over the crown create a headband made entirely of your own hair – no accessories, no pins visible, just continuous woven texture circling the head. Worn loose and pancaked, it has a soft, romantic feel that suits weddings and garden parties, but it is also practically indestructible: the style is anchored all the way around, so nothing slips.
How to get it: Part down the middle, braid each side into a three-strand braid, pull each braid up and over the top of your head, and pin the ends under the opposite braid. Pancake the braids before crossing for a fuller crown. Ask your stylist to keep your ends healthy and trimmed – frayed ends unravel in braids and ruin the smooth crown line.
Quick Win: Start the braids slightly behind the hairline rather than at it; the set-back placement looks modern instead of costume-y.
Shop the Look
| Shop the Look |
|---|
| Clear mini elastics for braid ends |
| Texturizing spray for braid fullness |
| Jumbo bobby pins for crown anchoring |
| Flexible-hold hairspray |
| Boar-bristle brush for smooth braiding |
How to Start Your Easy Hair Style Transformation
Start with a honest inventory of your mornings. Time yourself for a week: how many minutes can you actually give your hair before the day starts pulling? Then pick three styles from this guide that fit inside that window and practice each one twice on a relaxed evening. Book a consultation with your stylist and bring two or three reference photos of the styles you loved most – a good stylist can adjust your cut (longer face-framing pieces, cleaner ends, strategic layers) so those exact styles fall into place faster.
The most common mistake is choosing styles for the hair you wish you had instead of the hair you have. A glass-smooth low ponytail will fight you every morning if your hair is naturally coarse and high-porosity, while a textured messy bun will collapse by 10 a.m. on baby-fine strands. Match the technique to your texture using the table above, and build your rotation around the styles that work with your hair's natural behavior rather than against it.
You do not need a full product overhaul. A starter kit covers every style in this guide: one flexible hairspray, one texturizing spray, a smoothing serum, snag-free elastics, matte bobby pins, one claw clip, and a silk scarf. That is under fifty dollars at most drugstores and handles all twenty looks. Add tools only when a specific style keeps failing – if your buns always slip, buy better pins before you buy a new iron.
If you want a cut that makes easy styling easier, tell your stylist exactly that. A low-maintenance cut – clean perimeter, long layers, face-framing pieces – typically costs the same as any salon haircut ($60 to $150 depending on your market) and pays for itself in saved mornings. Skip the precision bobs and razor-sharp shags unless you genuinely enjoy styling; the best easy-style haircut is one that looks good air-dried and forgives a rushed finish.
Frequently Asked Questions About Easy Hair Styles
What is the easiest hairstyle for complete beginners?
The low ponytail, upgraded. If you can gather your hair and add an elastic, you can do every polished variation in this guide – the difference is only in the finishing: wrapping a strand around the elastic, smoothing with serum, and choosing a low placement at the nape instead of a mid-head pony. Practice the glass-hair low ponytail first; once the smoothing and wrapping feel automatic, twist-based styles like the knotted chignon and French roll will click much faster.
How do I make easy hairstyles last all day?
Structure beats product. Anchor every style low or high (never in the soft middle zone where gravity wins), build on second-day hair or add texture spray for grip, and pin against the direction of pull – bobby pins hold best when they cross each other in an X. For fine hair, tease the base lightly before gathering; for thick hair, work in two sections instead of one so the weight is distributed. A light mist of flexible hairspray as the final step seals everything without stiffness.
Which easy hairstyles work best for fine, thin hair?
Styles that manufacture fullness: the bubble ponytail, pancaked braids, the knotted chignon, and anything with a teased base. Avoid heavy, smooth styles that press hair flat against the head, and skip top knots that expose a sparse hairline. Dry texture spray is non-negotiable for fine hair – it gives every strand grip so elastics and pins actually hold, and it adds the matte fullness that fine hair lacks naturally.
Can I do these hairstyles on short hair or bobs?
Many of them, yes. The claw-clip twist, headband tuck, tucked-under bob, half-up top knot, and double mini buns all work beautifully on chin-to-shoulder lengths. The trick with short hair is using smaller tools – mini claw clips, small elastics – and accepting half-up versions of full updos. Braid-based styles need at least shoulder length to work, so save the fishtail and milkmaid crown for when your hair grows out.
How do I protect my hair while wearing updos every day?
Rotate your anchor points – never pull the same tight ponytail in the same spot two days running, or the breakage line becomes permanent. Switch between elastics, claw clips, and pins through the week, and choose snag-free, seamless elastics over rubber bands every time. Sleep with hair in a loose silk-scrunchie pineapple or braid, and give your hair one fully-down rest day per week with a deep-conditioning mask.
Your Turn to Shine
Twenty styles, one shared promise: great hair does not have to eat your morning. Pick the three that fit your texture and your schedule, practice them until your hands know the moves, and keep your starter kit where you can reach it half-awake. The best easy hairstyle is simply the one you will actually do – so choose yours, pin your favorites for reference, and give yourself the gift of a good-hair day on demand.
Ready to make it official? Book a consultation with your stylist, bring two or three reference photos from this guide, and ask for a cut that makes your favorite styles fall into place. Then pin your top looks now, so tomorrow morning's decision is already made.
Related Reads
- 25 Quick Hairstyles for Busy Mornings
- 15 Five-Minute Updos for Beginners
- 20 Heatless Hairstyles for Healthy Hair
- 17 Low Maintenance Haircuts for Every Texture

One Comment