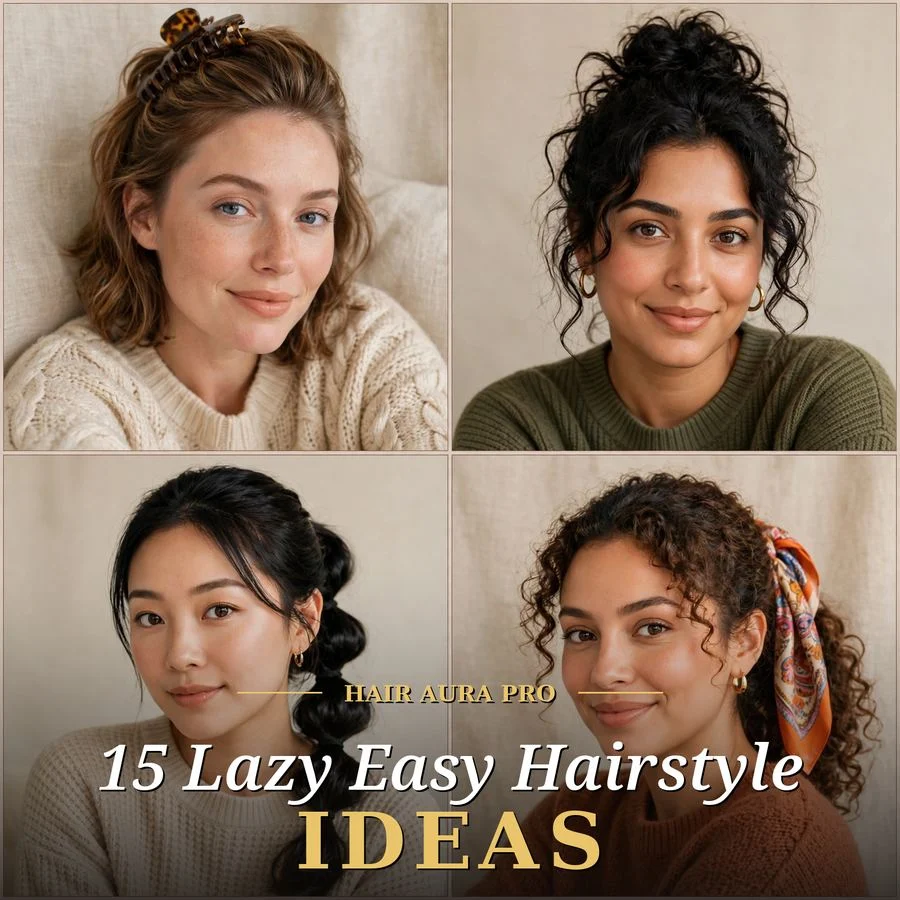
15 Lazy Easy Hairstyle Ideas Worth Saving for Beginners

A lazy easy hairstyle is any look you can build in under ten minutes with beginner-level skill: no complicated braiding patterns, no hot-tool choreography, no sectioning diagram required. If you can twist, clip, or tie, you can do every style in this guide. The goal is hair that looks intentional with the smallest possible effort.
Picture a slow Saturday morning: you twist your hair up into a claw clip while the kettle boils, pull out two soft pieces around your face, and catch your reflection looking effortlessly put-together. No arm ache, no re-dos, no tutorial paused at 0:47. That quiet relief of a hairstyle that simply cooperates is what lazy styling is all about.
Below are 15 beginner-friendly styles, each timed and tested for real mornings, with the small tricks that make them hold.
In This Guide
- Why Lazy Easy Hairstyles Work So Well
- 15 Ways to Wear Lazy Easy Hairstyles
- 1. Claw Clip Twist-Up
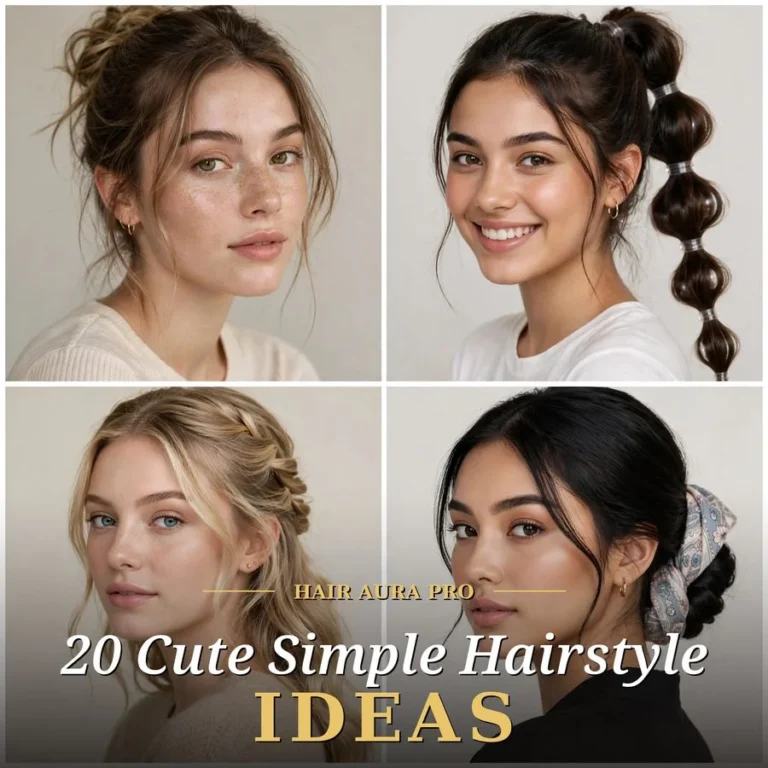
- 2. Lazy Low Bubble Ponytail
- 3. Five-Minute Messy Bun
- 4. Half-Up Mini Claw Clip
- 5. Side-Swept Low Ponytail
- 6. Twist-and-Pin French Twist Lite
- 7. Loose Two-Strand Rope Braid
- 8. Overnight Sock Heatless Curls
- 9. Headband Tuck Roll
- 10. Double Low Space Buns
- 11. Scarf Wrap Ponytail
- 12. Twisted Headband Crown
- 13. Low Chignon Knot
- 14. Braided Crown Lite
- 15. Messy Top Knot with Face-Framing Strands
- How to Start Your Lazy Hairstyle Transformation
- Frequently Asked Questions About Lazy Easy Hairstyles
- Ready to Master the Lazy Hairstyle?
- Related Reads
Why Lazy Easy Hairstyles Work So Well
Lazy hairstyles work because they are designed around how beginners actually style hair. Most tutorials assume a skill you do not have yet: the perfect tension on a French braid, the wrist angle for a curling iron. These looks remove the skill barrier entirely. A twist does not care about your technique. A claw clip does the holding for you. When the mechanics are simple, the result is consistent.
They also work because low manipulation is genuinely good for your hair. Every skipped round of high heat is damage you never inflicted. Twist-based styles and clip-held updos keep your ends tucked away from friction, which means less breakage and fewer split ends over time. Looking after your hair and being lazy turn out to be the same strategy.
The third reason is repeatability. A hairstyle you can only recreate on a good day is not a hairstyle; it is a lottery ticket. Every look in this guide uses two or three steps you can memorize after one try. When a style works on Monday, it works on Friday too, even when you are running late and slightly annoyed.
Finally, simple styles age well through the day. A sleek intricate updo shows every loosened pin by 3 p.m. A messy bun or a twisted clip just looks more relaxed as the hours pass. Lazy styles have nowhere to fall from, which is their secret superpower.
| Style at a Glance | Details |
|---|---|
| Philosophy | Maximum polish for minimum effort and skill |
| Key Materials | Claw clips, soft elastics, bobby pins, silk scarf, fabric headband |
| Key Techniques | Twist, tuck, clip, tie: nothing harder than a basic ponytail |
| Best For | Busy mornings, work-from-home days, errands, second-day hair |
| Time Per Style | 3 to 10 minutes, no practice curve |
| Skill Level | True beginner: if you can tie your shoes, you qualify |
15 Ways to Wear Lazy Easy Hairstyles
1. Claw Clip Twist-Up
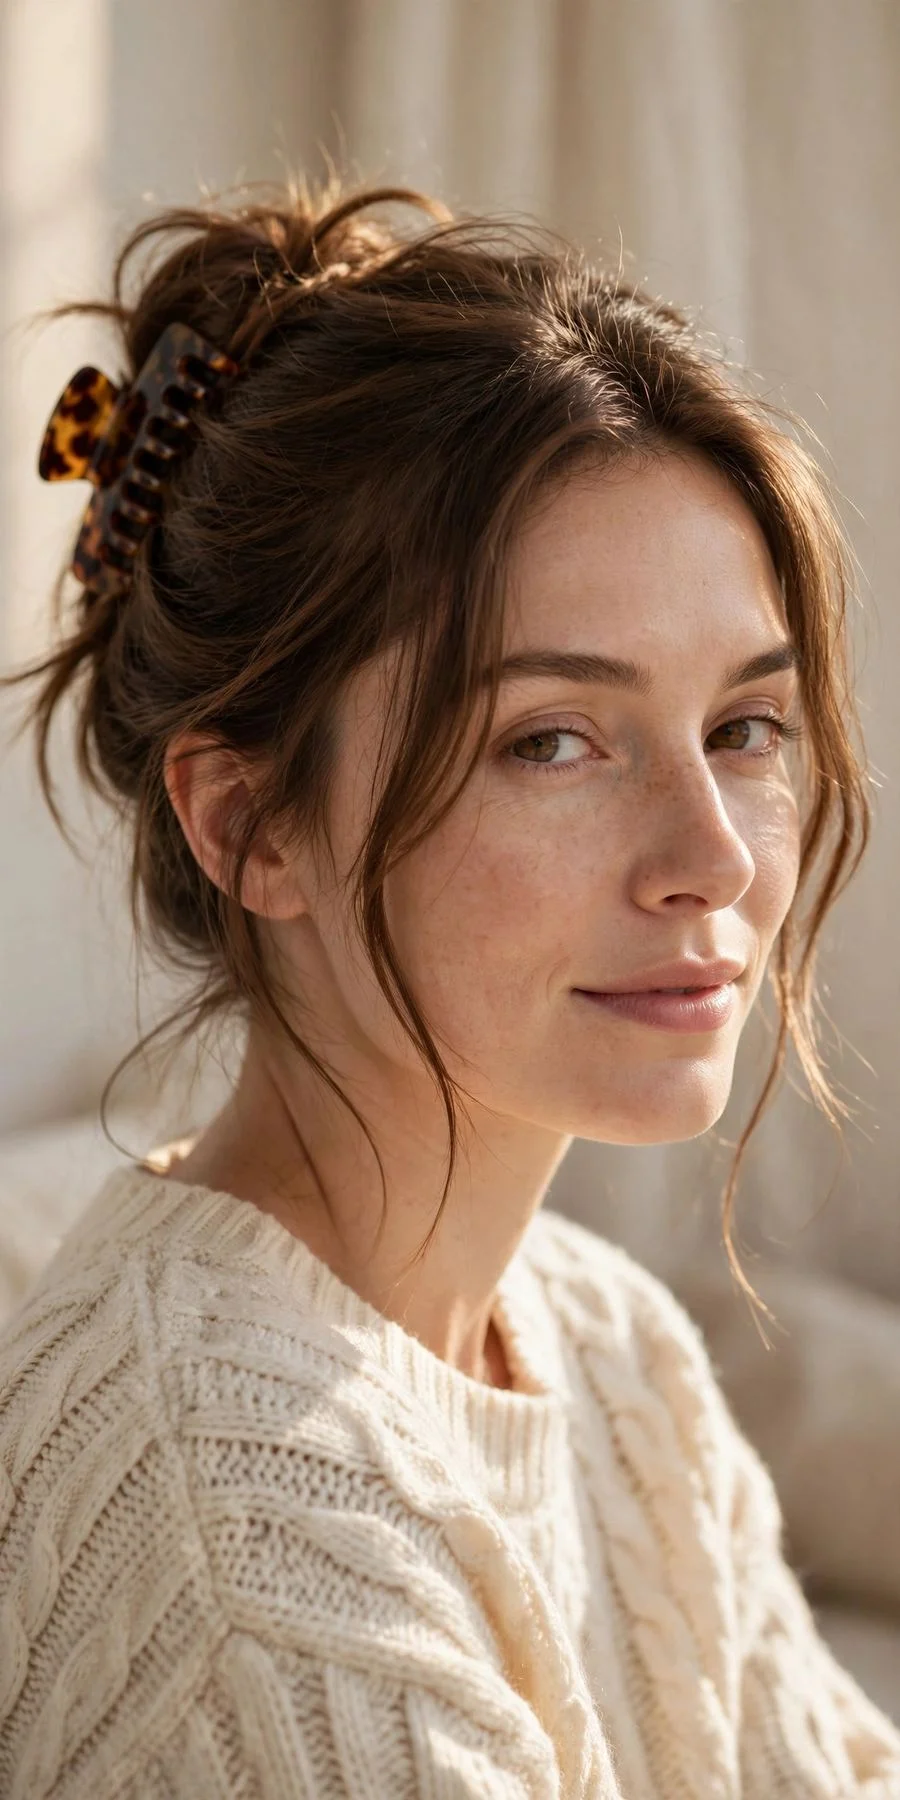
Vibe: Effortless, with a French accent.
Why it works: The claw clip twist is the undisputed queen of lazy styling because the clip does ninety percent of the work. You gather, you twist, you clamp, and the result looks like a deliberate updo instead of a surrender. It keeps every strand off your neck, survives a full workday, and the tortoiseshell pattern reads as an accessory rather than a tool.
How to get it: Gather your hair as if making a low ponytail, then twist the whole length upward against the back of your head. Fold the twist flat and clamp a large claw clip over it, letting the ends fan out over the top of the clip. Pull out two soft pieces around your face. Ask your stylist to point-cut the ends if they poke out too stiffly.
💡 Quick Win: Twist on second-day hair or add a pinch of texture powder first. Slightly grippy hair holds the twist twice as long as freshly washed slippery hair.
Shop the Look
- Large tortoiseshell claw clip, strong hinge
- Volumizing texture powder for grip
- Soft bristle smoothing brush
- Light-hold flexible hairspray
- Silk scrunchie for pre-gathering
2. Lazy Low Bubble Ponytail
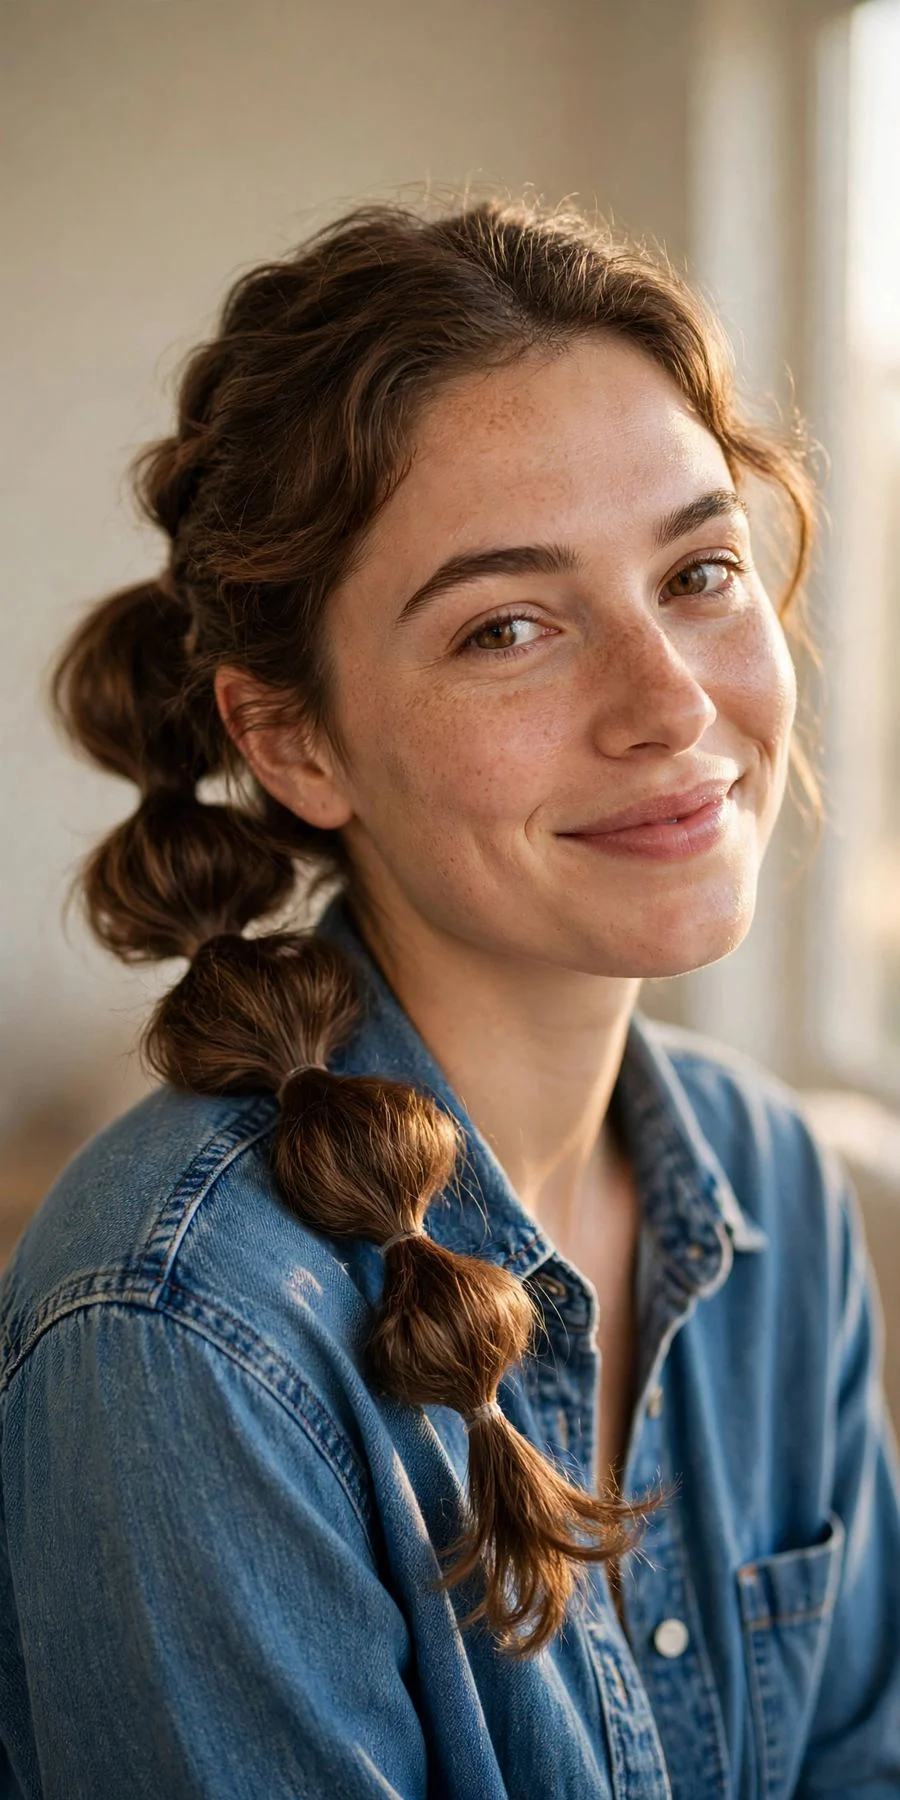
Vibe: Playful, in the easiest way possible.
Why it works: A bubble ponytail turns the most basic style you know into something people compliment. The extra elastics create volume and rhythm down the length, which makes even thin hair look fuller. It takes about ninety seconds, needs zero skill beyond tying elastics, and the bubbles hide a multitude of second-day sins.
How to get it: Pull your hair into a low ponytail and secure it with a soft elastic. Add another elastic every two to three inches down the length, then gently tug each section outward to puff it into a bubble. Keep the spacing even by measuring with your fingers. A ribbon tied at the base dresses it up in five seconds.
Shop the Look
- Seamless soft hair elastics, no-metal
- Clear mini elastics for bubble sections
- Satin ribbon for the base tie
- Smoothing serum for flyaways
- Wide-tooth comb
3. Five-Minute Messy Bun
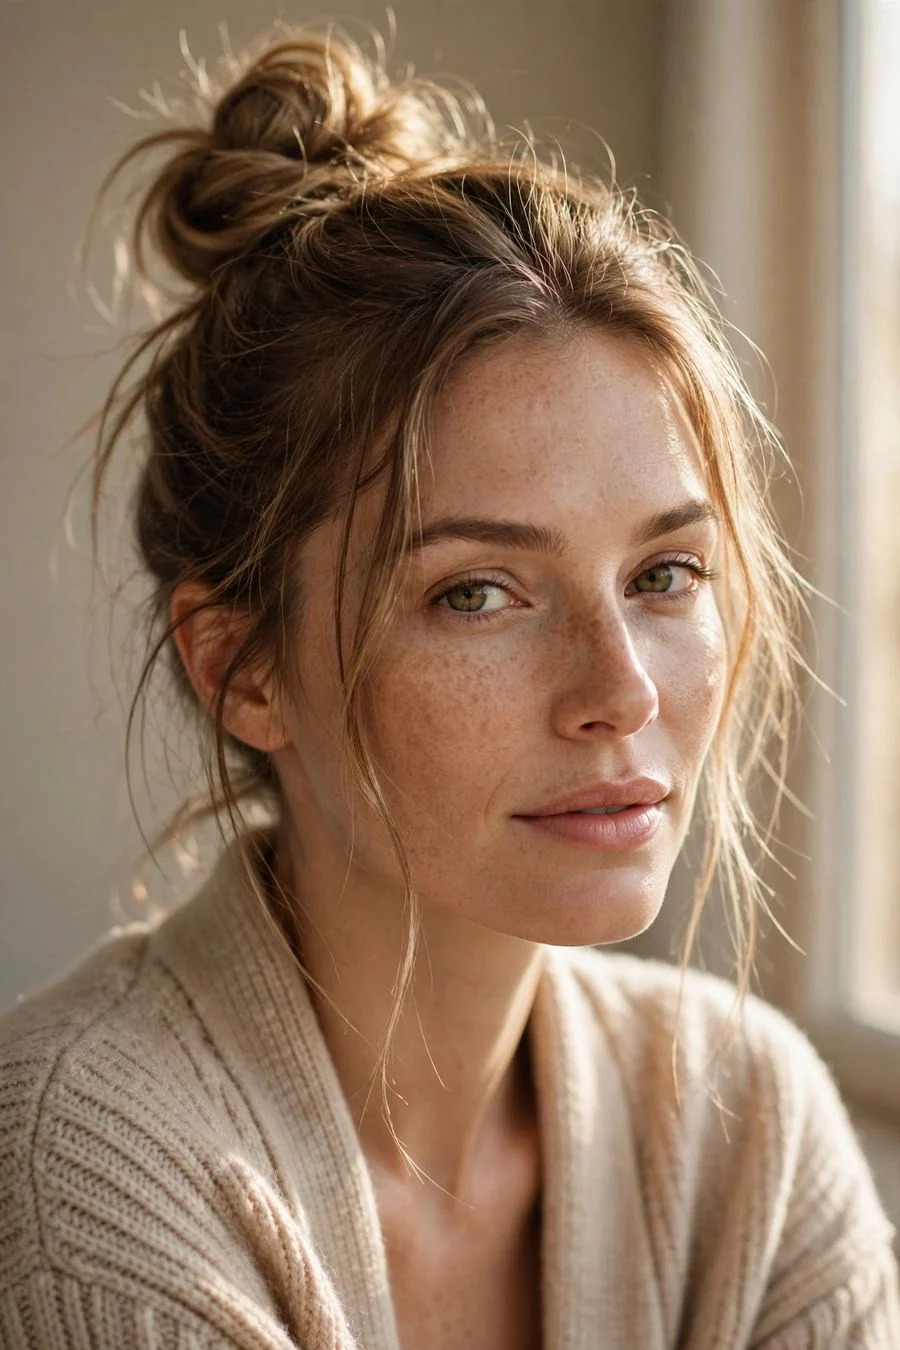
Vibe: Beautifully unbothered.
Why it works: The messy bun endures because imperfection is the entire design brief: the messier it gets, the better it looks. That makes it the most forgiving style a beginner can attempt, since there is no wrong version. A high placement lifts your features and reads energetic, while the loose texture keeps it soft instead of severe.
How to get it: Flip your head forward and gather your hair into a high ponytail, but on the last loop of the elastic, pull only halfway through to form a looped bun. Fan the loop out with your fingers and pin the loose ends wherever they fall. Tug gently at the crown for volume. Ask your stylist for long layers if your bun always looks too small.
💡 Quick Win: Wrap a second elastic or a scrunchie around the base after pinning. The extra anchor stops the bun from sliding down by lunchtime.
Shop the Look
- Thick seamless hair elastics
- Matte black bobby pins, extra long
- Texturizing spray for grip
- Soft scrunchie for the base anchor
- Flexible-hold hairspray
4. Half-Up Mini Claw Clip
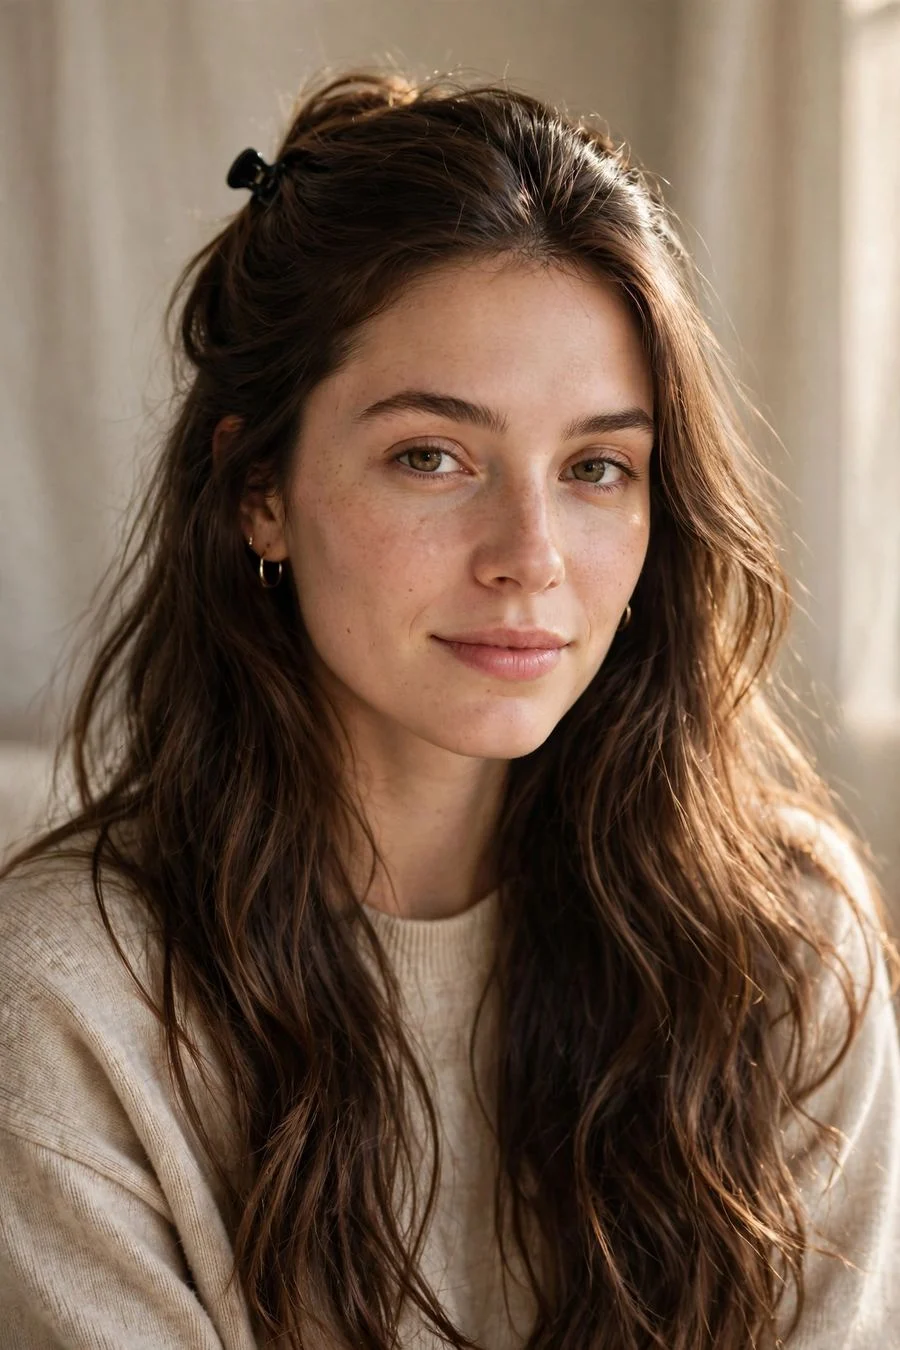
Vibe: Polished, with your length still showing.
Why it works: The half-up clip gives you the face-clearing benefit of an updo while keeping most of your hair down, which is the best of both worlds for beginners. A small claw clip holds the top section without the headache a tight elastic can cause. It works on straight, wavy, and curly hair with no adjustments, which is rare for any hairstyle.
How to get it: Section the top half of your hair from temple to temple and gather it at the back of your crown. Twist it once for a little texture, then clamp a small or medium claw clip over the twist. Let the ends cascade over the clip. Loosen the section slightly above the clip so it does not pull.
Shop the Look
- Small matte claw clips, set of four
- Rattail comb for clean sectioning
- Light-hold hairspray
- Shine serum for the lengths
- Soft paddle brush
5. Side-Swept Low Ponytail
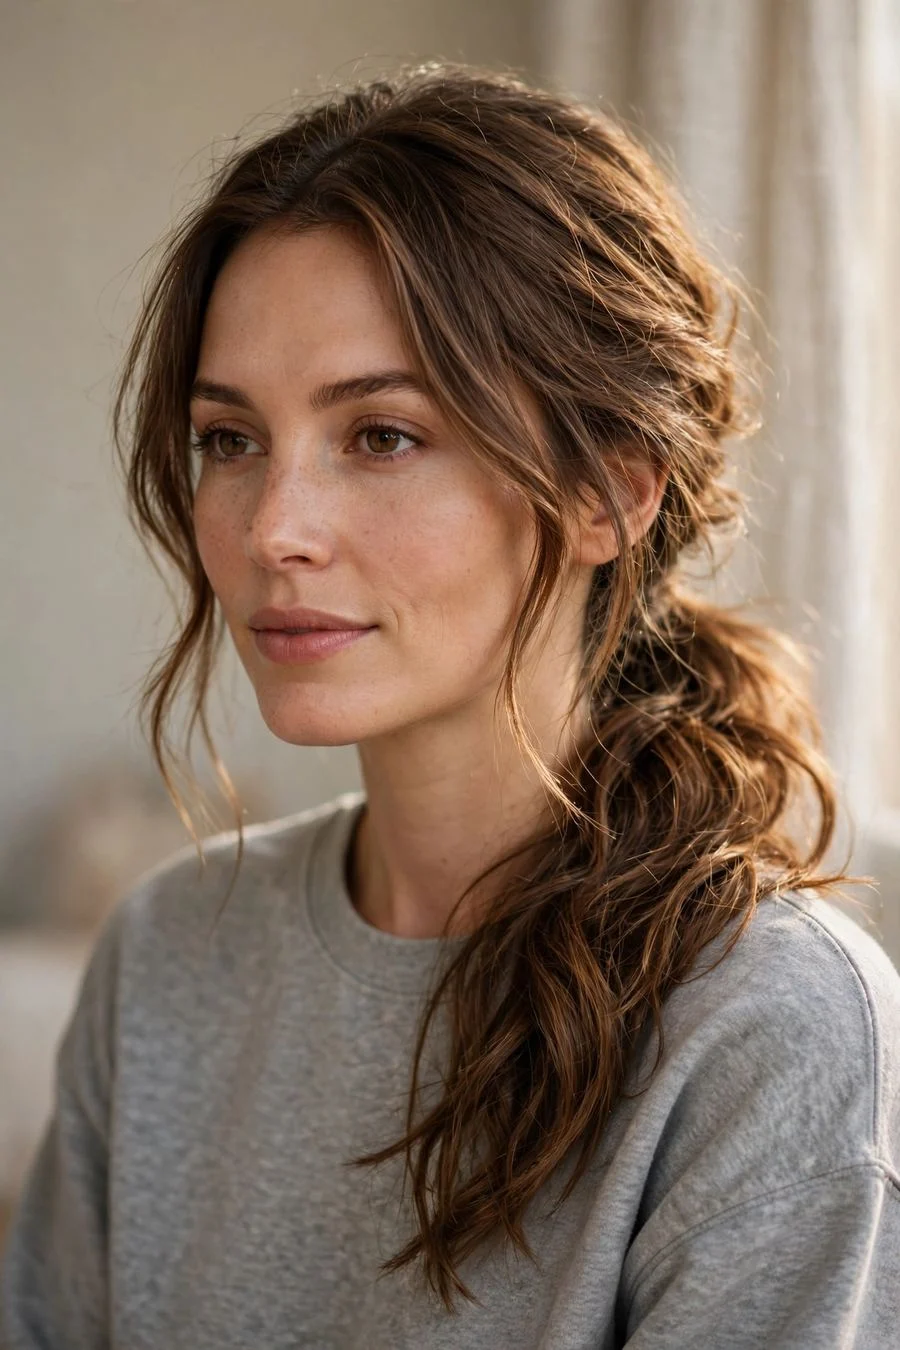
Vibe: Soft romance, zero rehearsal.
Why it works: Sweeping everything to one side breaks the symmetry of a basic ponytail, and asymmetry always reads as styling rather than default. The low placement keeps it relaxed and office-friendly, while the side drape shows off your length and any layers you have. It is the fastest way to look like you tried when you objectively did not.
How to get it: Create a deep side part, then sweep all your hair over one shoulder and secure it low, just behind your ear, with a soft elastic. Loosen the hair above the elastic with your fingertips for softness. Wrap a thin strand around the elastic and pin it underneath to hide the band. A light curl on the ends is optional but lovely.
💡 Quick Win: Secure the ponytail slightly forward, near your jawline rather than behind your ear. The forward placement keeps the sweep from sliding back during the day.
Shop the Look
- Soft fabric-covered elastics
- Slim bobby pins for the wrap
- Lightweight smoothing cream
- Side-part styling comb
- Flexible-hold finishing spray
6. Twist-and-Pin French Twist Lite
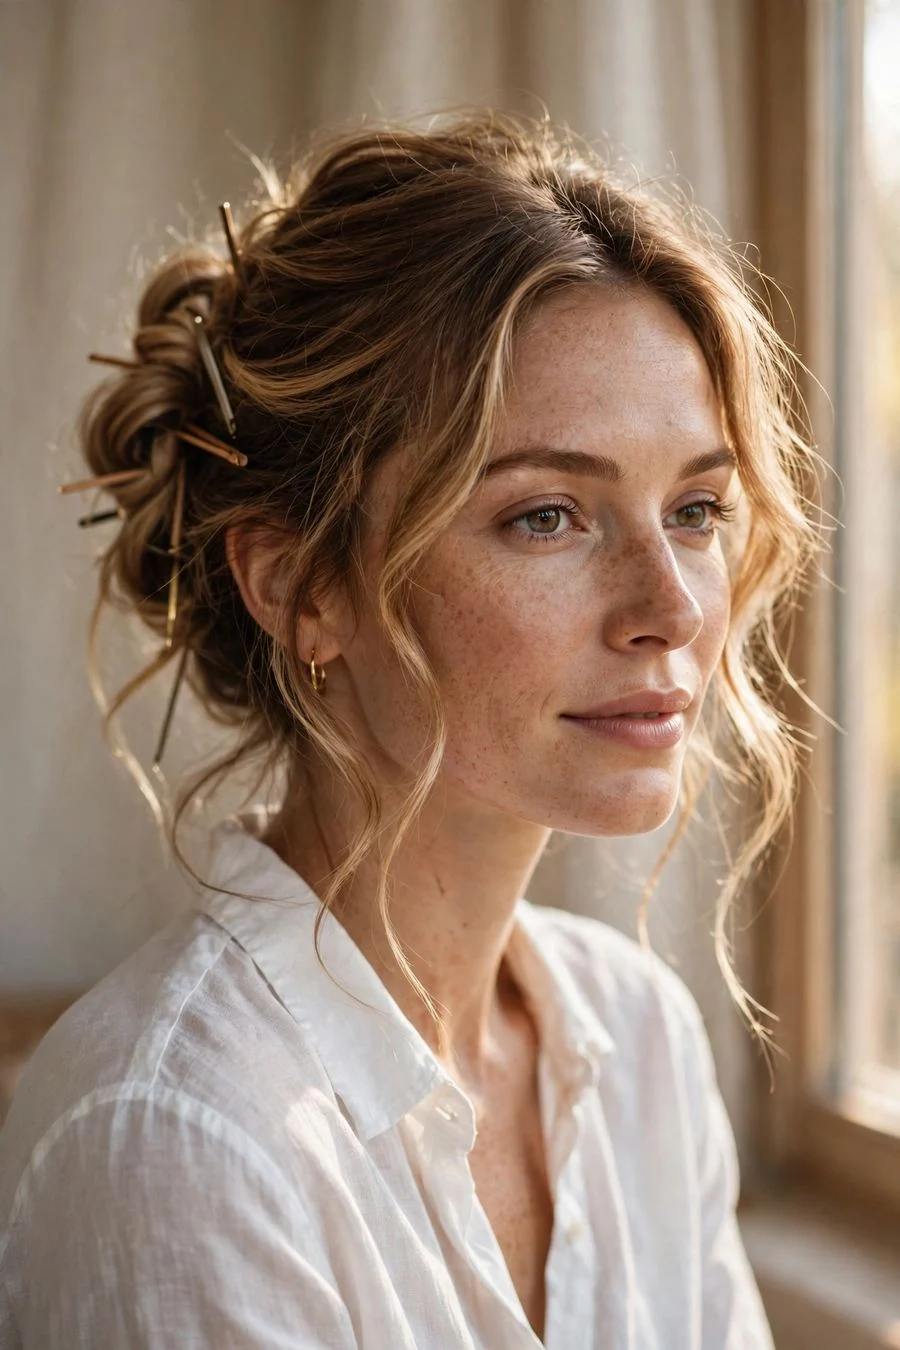
Vibe: Parisian, without the pressure.
Why it works: A real French twist takes practice, but this simplified version captures the elegant vertical roll with a fraction of the technique. The twist creates a beautiful line up the back of your head that looks far more skilled than it is. It is the best lazy option for events where a messy bun would feel too casual.
How to get it: Gather your hair to one side at the nape, then roll it upward and inward against your head, tucking the ends into the roll as you go. Secure the roll with four to six bobby pins placed vertically like a ladder. Do not aim for perfection: a slightly soft roll looks modern, while a stiff one looks dated. Mist lightly with hairspray.
Shop the Look
- Extra-long bobby pins
- Light-hold hairspray
- Smoothing brush for the gather
- Decorative hair pin for dressing up
- Texture spray for grip
7. Loose Two-Strand Rope Braid
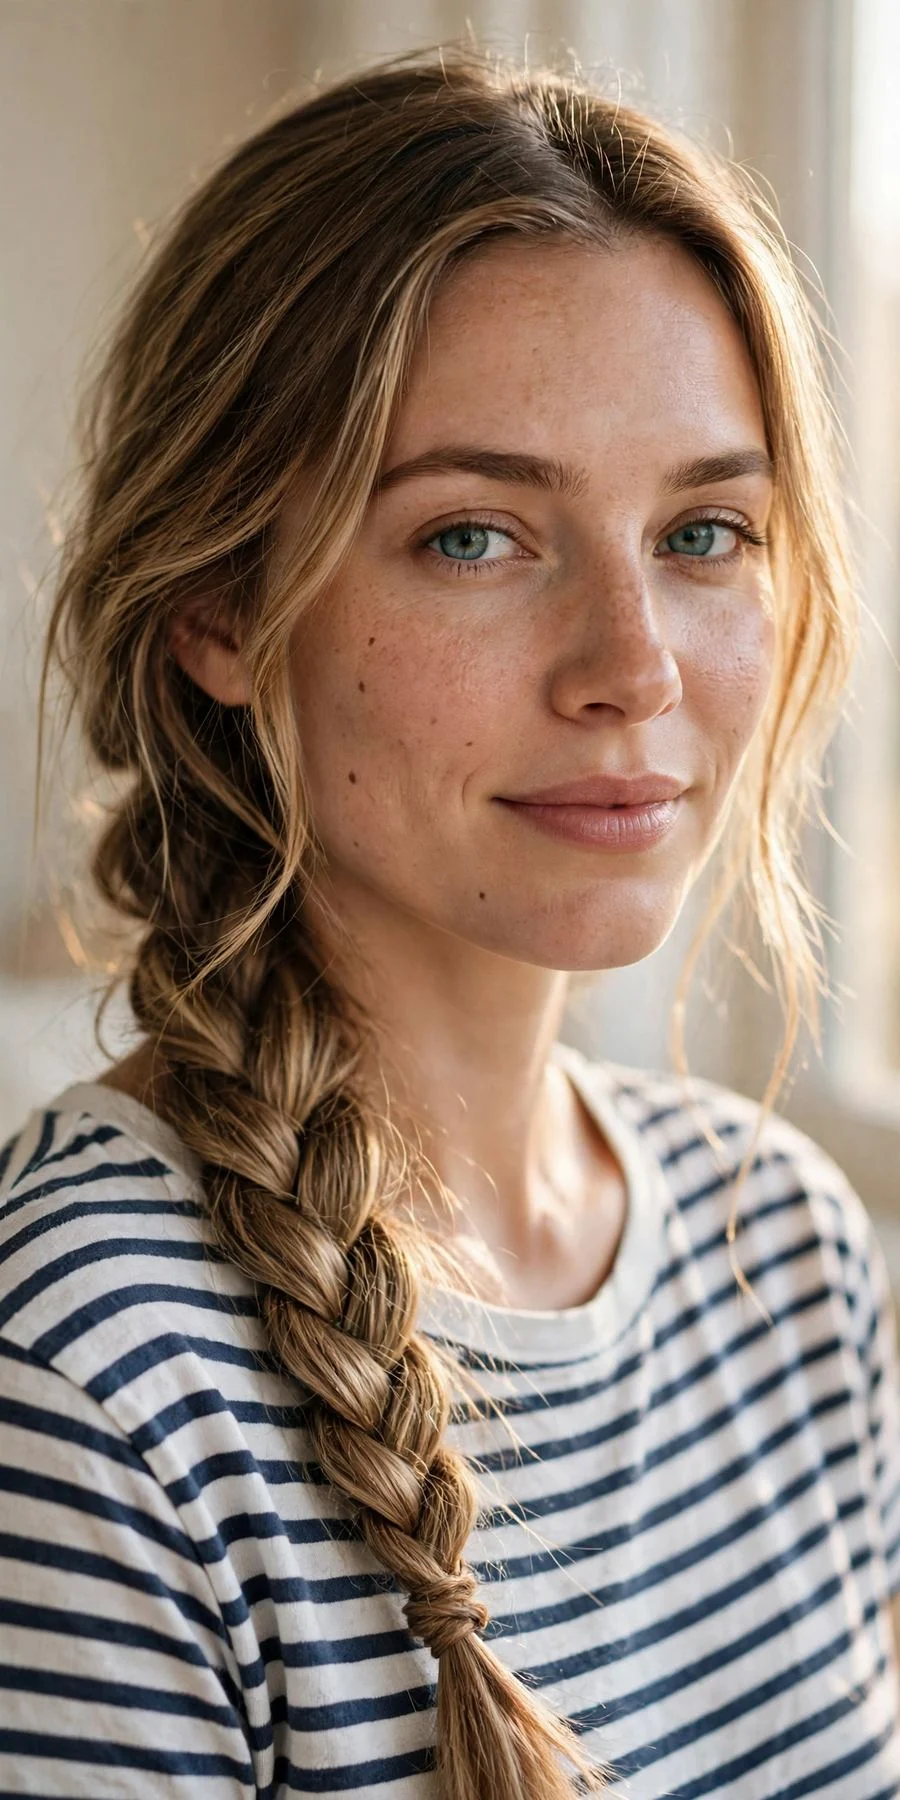
Vibe: Boho, minus the learning curve.
Why it works: A rope braid uses only two strands, which means it is genuinely easier than a regular three-strand braid, yet it looks more intricate. The twisted texture catches light beautifully and the finished braid has a rope-like dimension that photographs well. Draped over one shoulder, it turns unwashed hair into a style statement.
How to get it: Pull your hair over one shoulder and divide it into two equal sections. Twist each section in the same direction, then twist the two twisted sections around each other in the opposite direction. This counter-twist is what locks it. Secure with a small elastic and gently pull the edges wider for a fuller, softer braid.
💡 Quick Win: Rub a pea-sized amount of styling cream between your palms before you start. It tames flyaways and makes the twist sections grip each other.
Shop the Look
- Clear mini elastics
- Light styling cream
- Detangling brush
- Braid sealer wax stick
- Soft-hold hairspray
8. Overnight Sock Heatless Curls
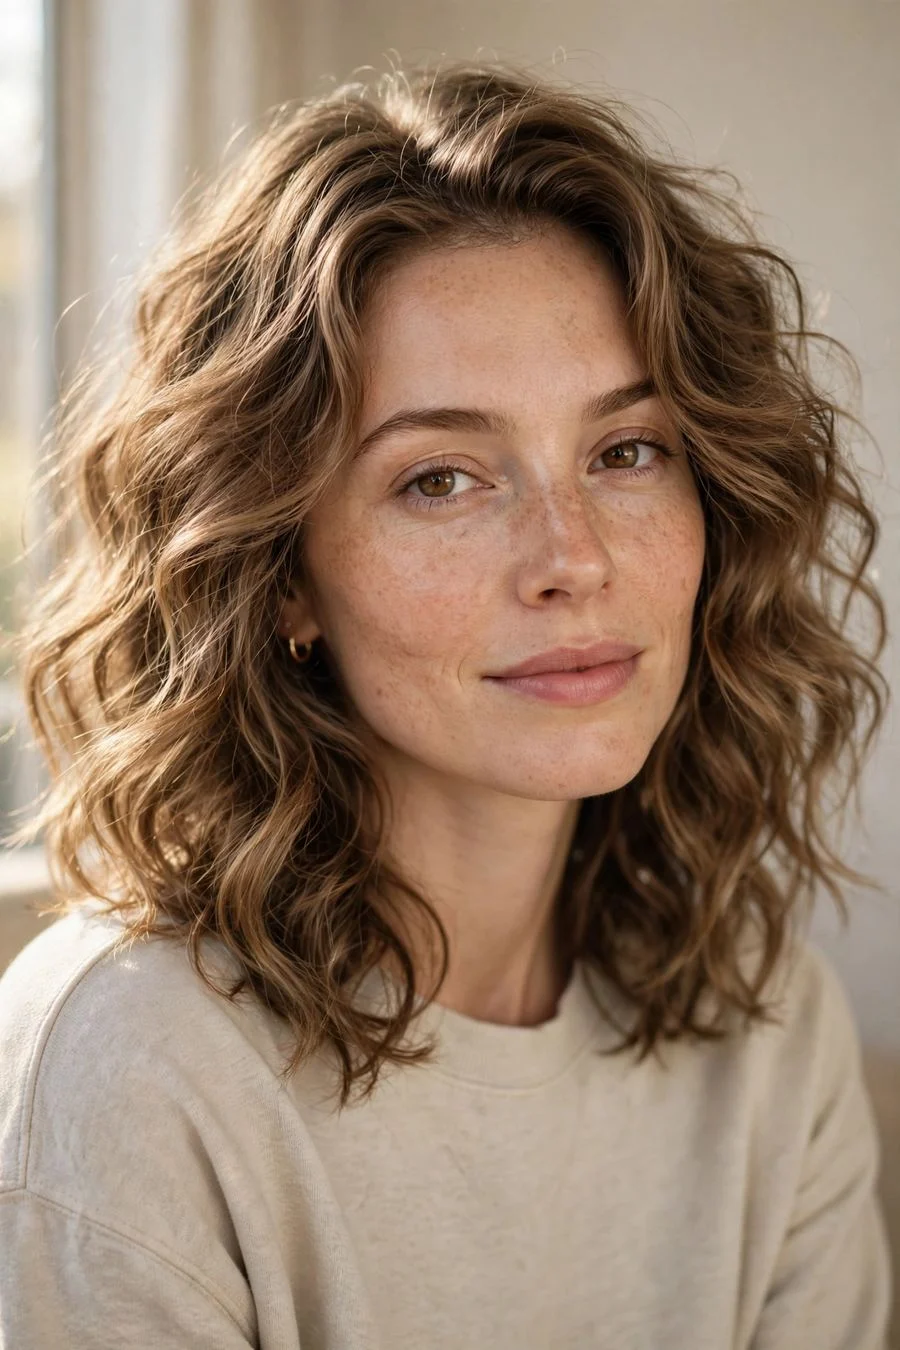
Vibe: Wake up already styled.
Why it works: Heatless curls are the ultimate lazy style because the work happens while you sleep. You go to bed with damp hair wrapped around a sock or robe tie and wake up with soft waves, which means your morning routine drops to about sixty seconds. There is no heat damage at all, so it is the healthiest way to get curls.
How to get it: On nearly-dry hair, split it into two sections and wrap each around a long sock or robe belt, rolling away from your face. Tie the ends and sleep on it, or wear it for at least four hours. Unwrap gently, shake the waves loose with your fingers, and scrunch in a light mousse. Never brush heatless curls; fingers only.
Shop the Look
- Satin heatless curl rod set
- Lightweight curl mousse
- Silk bonnet for sleeping
- Wide-tooth comb for pre-wrapping
- Leave-in conditioning spray
9. Headband Tuck Roll
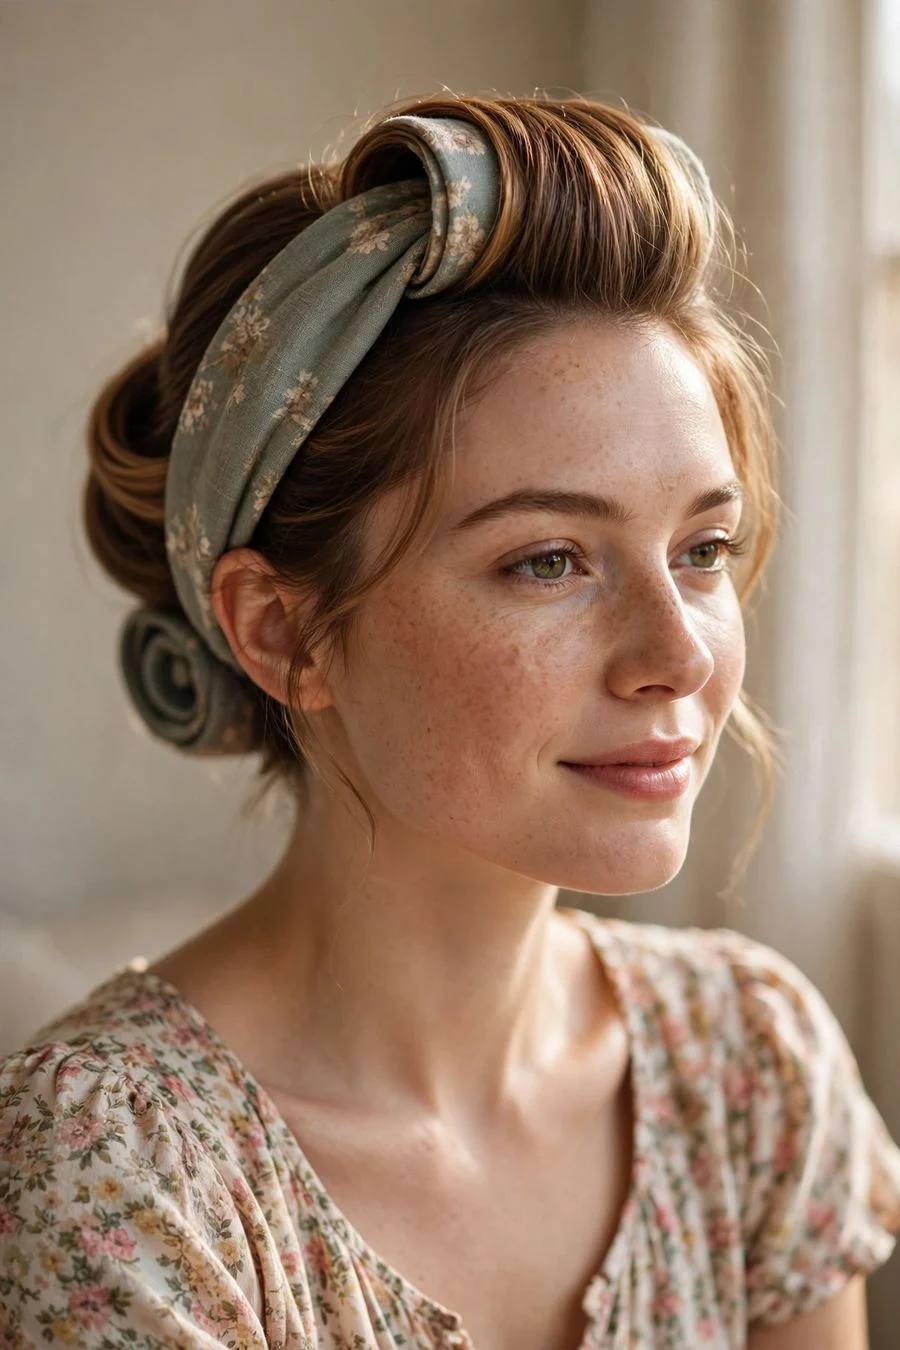
Vibe: Vintage elegance, five minutes flat.
Why it works: Tucking your hair up and around a headband creates a rolled chignon effect with no pins and no skill. The headband does all the structural work while your hair just needs to be tucked. It looks like a deliberate vintage updo, works beautifully on medium to long hair, and a patterned band doubles as your accessory.
How to get it: Place a stretchy fabric headband over your hair like a crown, sitting a couple of inches back from your hairline. Starting at the front, take two-inch sections and tuck them up and over the band, working your way around to the back. Tuck the ends in last. The roll should feel snug but not tight; adjust the band position if it slips.
💡 Quick Win: Choose a headband with a silicone grip strip inside. It anchors the roll through a full day without a single pin.
Shop the Look
- Wide fabric headband with grip strip
- Light-hold hairspray
- Smoothing serum
- Small hand mirror for the back
- Bobby pins, just in case
10. Double Low Space Buns
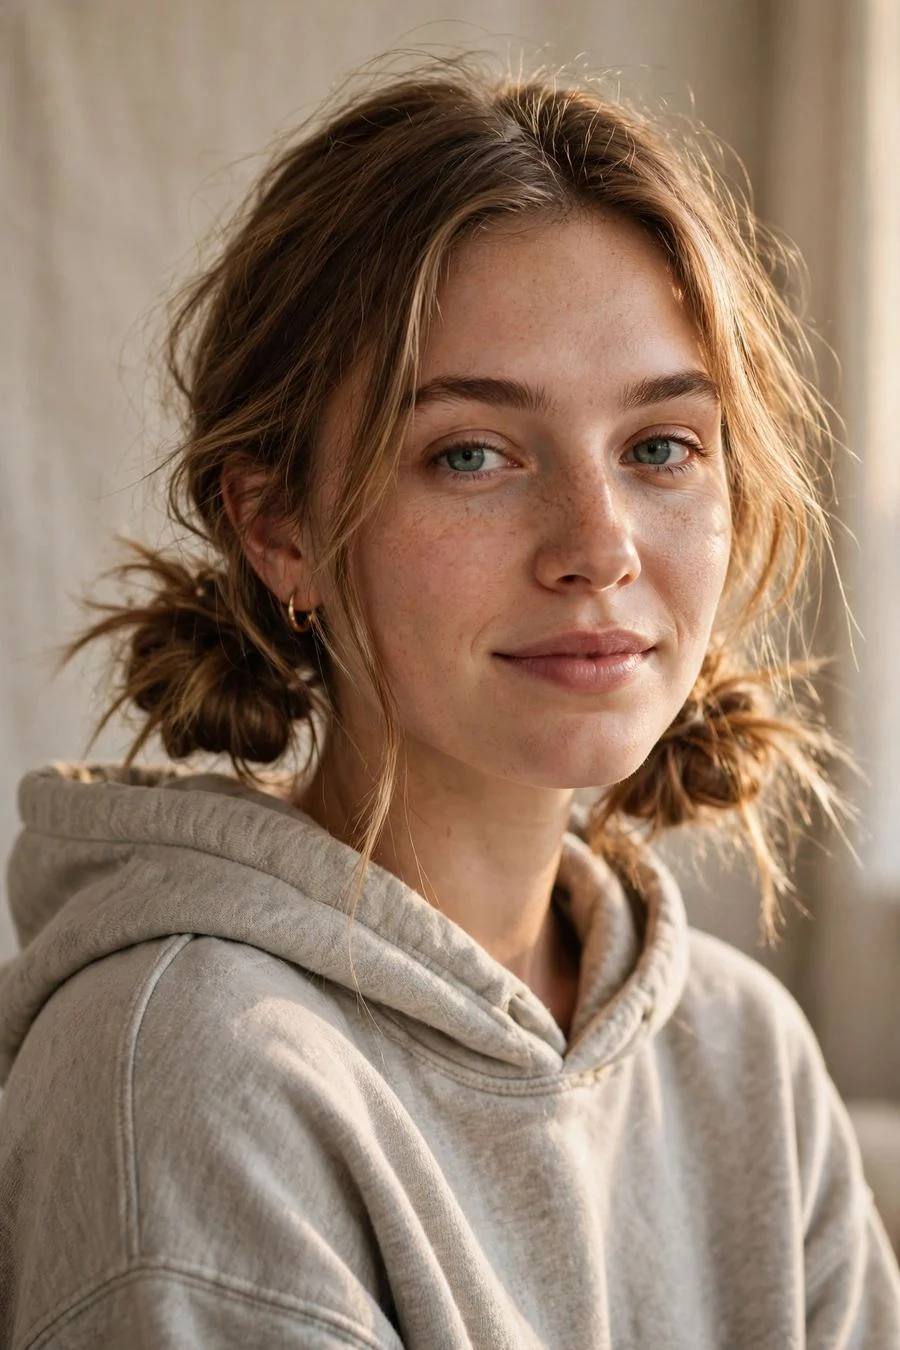
Vibe: Cute, cozy, and completely secure.
Why it works: Two low buns at the nape are more wearable than high space buns for everyday life, but keep all the playful charm. The symmetrical style balances your features and keeps hair fully contained, which makes it ideal for workouts, cleaning days, and windy weather. It also works on shorter hair that cannot manage a single bun.
How to get it: Part your hair down the middle and make two low ponytails at the nape, one on each side. Twist each ponytail around its own base and pin the ends underneath. Keep the buns loose and a little messy for a relaxed feel. Pull out a few face-framing pieces to soften the look.
Shop the Look
- Small seamless elastics
- Mini bobby pins
- Center-part rattail comb
- Texturizing spray
- Light-hold hairspray
11. Scarf Wrap Ponytail
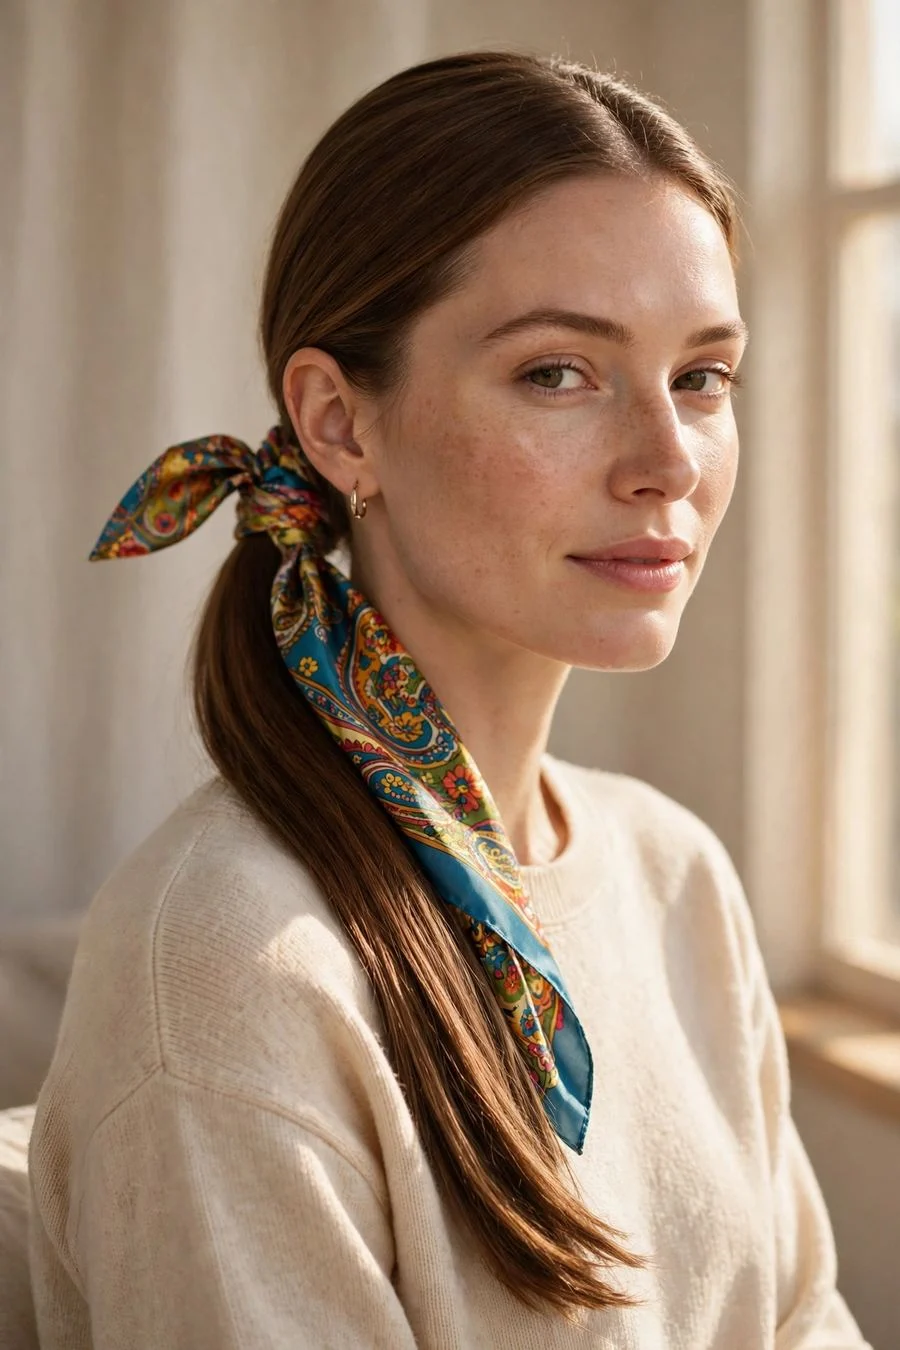
Vibe: One accessory, instant outfit.
Why it works: A silk scarf wrapped around a basic ponytail is the highest style return for the lowest effort on this list. The scarf adds color, pattern, and movement, and it hides the elastic completely, which is the detail that makes ponytails look cheap. It takes thirty extra seconds and makes the simplest style look considered.
How to get it: Secure a low or mid ponytail with an elastic. Fold a square silk scarf into a long band, wrap it around the base of the ponytail twice, and tie it in a bow or a knot with the ends hanging down. Tuck the elastic fully under the wrap. Match the scarf to one color in your outfit for a pulled-together effect.
💡 Quick Win: Use a scarf with a little texture, like crinkled silk, rather than slippery satin. It grips the elastic and stays put without sliding.
Shop the Look
- Square silk hair scarf, patterned
- Strong seamless elastics
- Smoothing anti-frizz serum
- Paddle brush
- Light-hold spray
12. Twisted Headband Crown
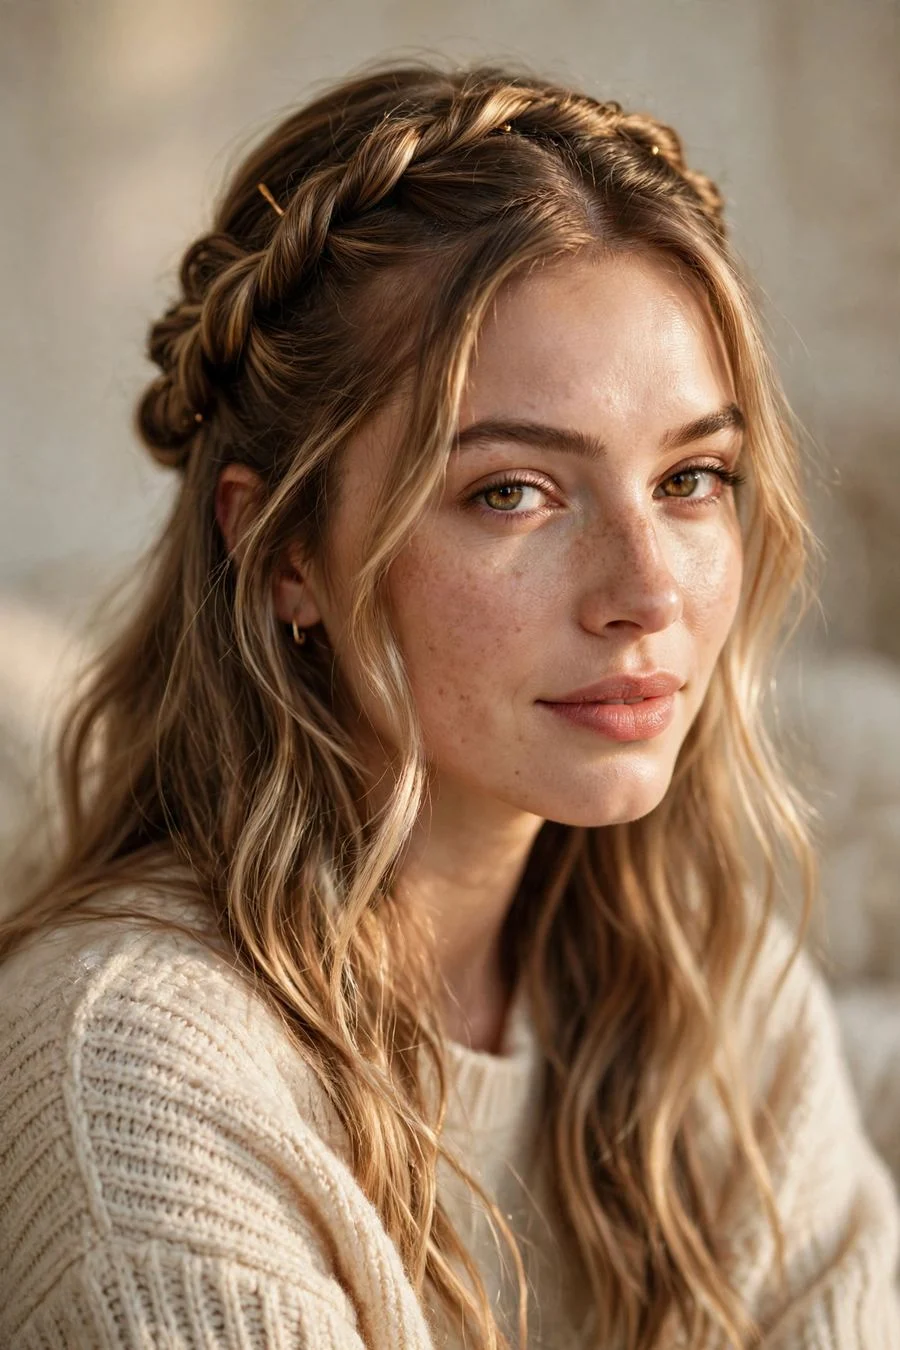
Vibe: A crown you can actually make.
Why it works: Two twisted front sections pinned across the back create the effect of a braided crown with none of the braiding. The twists frame your face, keep hair out of your eyes, and leave the rest of your length flowing. It looks romantic and a little bit bohemian, and it holds up through a full day because twists grip better than loose hair.
How to get it: Take a two-inch section from each temple and twist each one back toward the crown. Cross the two twists over each other at the back of your head and pin them flat with bobby pins in an X shape. Let the remaining hair fall naturally. Gently pull the twists wider with your fingertips for a softer, fuller look.
Shop the Look
- Matte bobby pins
- Light texture spray
- Fine-tooth comb for sectioning
- Shine mist for the lengths
- Flexible-hold hairspray
13. Low Chignon Knot
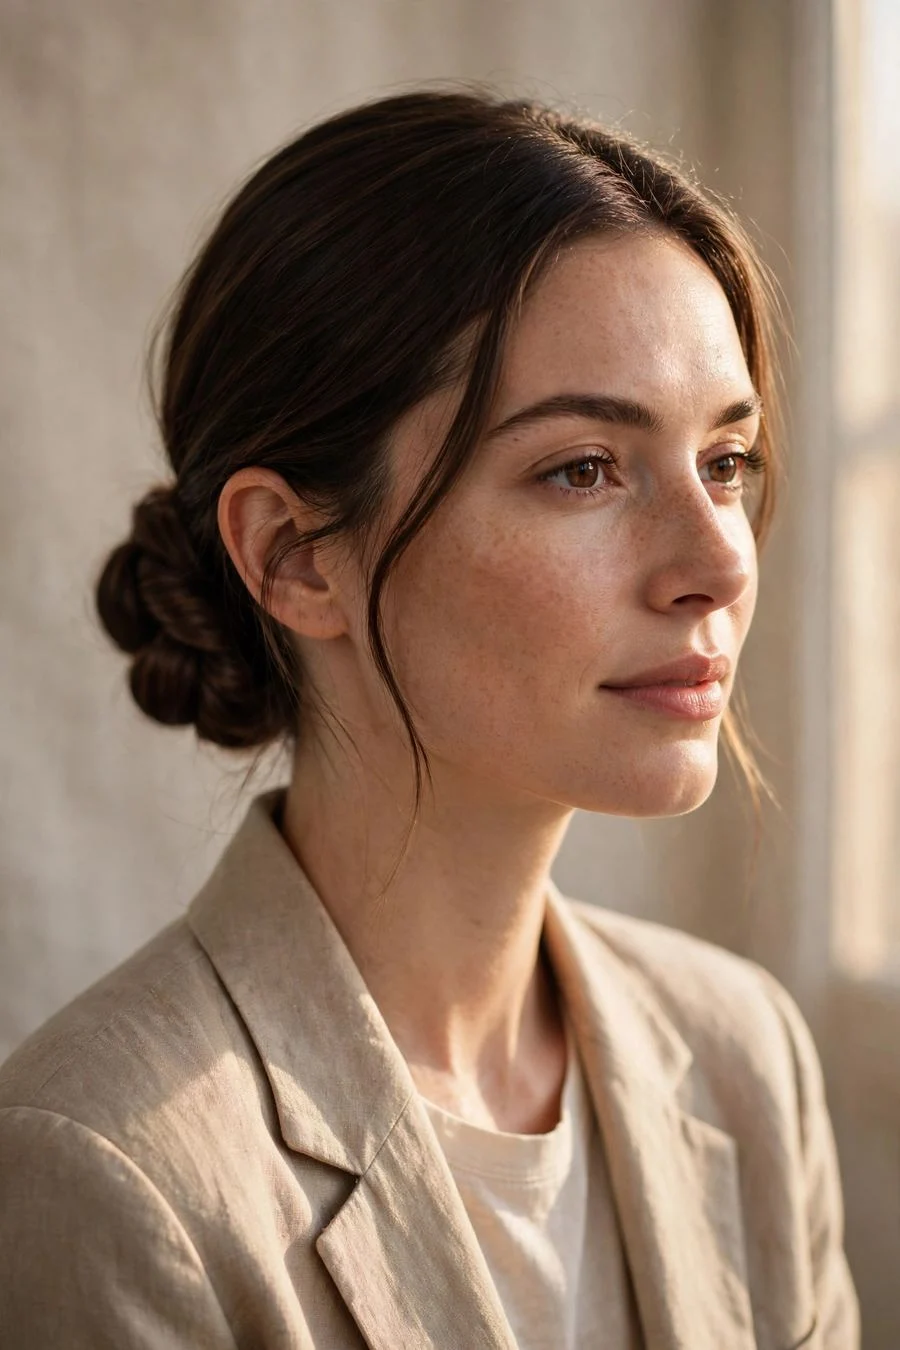
Vibe: Quietly, completely polished.
Why it works: A low knotted chignon is the simplest style that still reads as formal. The knot creates a clean sculptural shape at the nape that works for offices, weddings, and dinners alike. Because everything sits low and close to the head, it is comfortable for all-day wear and survives commutes, meetings, and everything after.
How to get it: Gather your hair into a low ponytail at the nape and secure it loosely. Split the ponytail in two, tie the halves in a simple knot, and tuck the ends under, pinning them flat. For thicker hair, make a second knot on top of the first. Smooth the crown with a brush and finish with a light mist of spray.
💡 Quick Win: Tie the knot slightly off-center for a modern feel. A perfectly centered chignon can look severe; an inch to the side looks relaxed and current.
Shop the Look
- Soft low-tension elastics
- U-shaped hair pins
- Smoothing cream
- Boar bristle brush
- Medium-hold hairspray
14. Braided Crown Lite
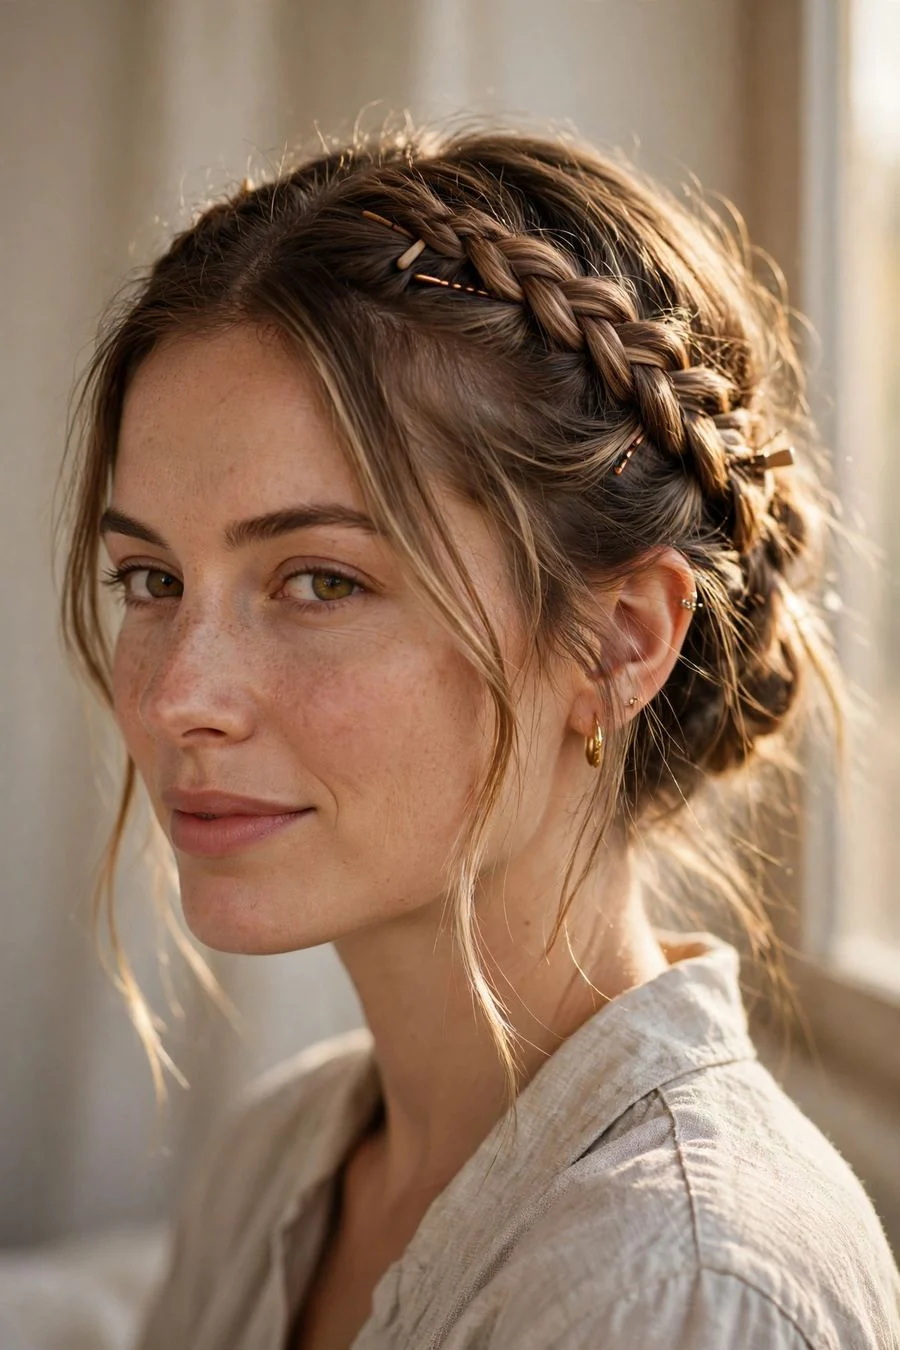
Vibe: Festival hair, beginner edition.
Why it works: Two simple three-strand braids pinned across the head give you the beloved braided-crown look without any Dutch or French technique. Each braid is just a basic plait you learned as a kid, and pinning them up is forgiving because the overlap hides the joins. It is secure, pretty, and keeps every strand off your face.
How to get it: Make two basic three-strand braids, one behind each ear, and secure the ends with clear elastics. Pull one braid up and across the crown and pin it flat, then bring the second braid across in the opposite direction so they overlap. Tuck both ends underneath and pin. Pancake the braids by pulling the edges wider for fullness.
Shop the Look
- Clear mini elastics
- Long bobby pins
- Texturizing powder
- Light-hold braid spray
- Rattail comb
15. Messy Top Knot with Face-Framing Strands
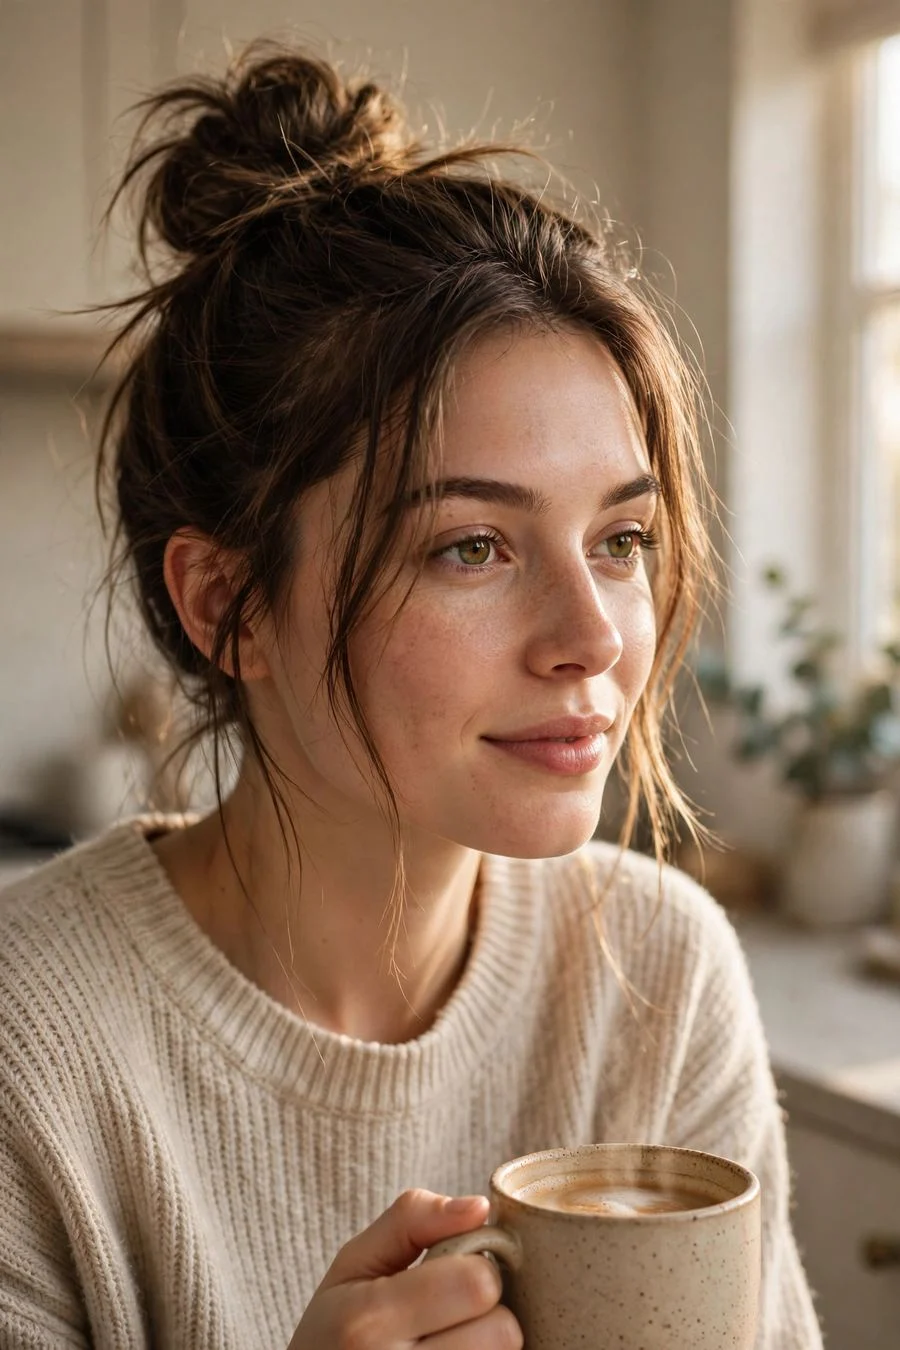
Vibe: The cool-girl uniform.
Why it works: The top knot with loose front pieces is the signature lazy-girl style for a reason: the knot handles the practicality while the face-framing strands handle the beauty. Those soft pieces draw attention to your cheekbones and keep the style from looking harsh. It works on every hair type and takes about three minutes once you have done it twice.
How to get it: Pull your hair into a high ponytail and twist it into a loose knot, pinning as you go. Before you start, leave out two front sections; after the knot is secure, pull them forward and let them fall naturally. Tug the knot wider for volume and loosen the hair at your crown. A quick curl on the front pieces is optional.
💡 Quick Win: Curl just the two face-framing pieces with a quick pass of a straightener, bending them away from your face. Those two pieces carry the whole style.
Shop the Look
- Spiral hair pins for the knot
- Strong ponytail elastic
- Mini straightener for front pieces
- Texture spray
- Light-hold finishing spray
How to Start Your Lazy Hairstyle Transformation
Start with a consultation, even though these styles are simple. Bring two or three reference photos to your stylist and ask for a cut that supports lazy styling: long layers for fuller buns, face-framing pieces for softness, and ends that are healthy enough to hold a twist. The right cut does half the styling work before you even pick up a clip.
The most common beginner mistake is starting with freshly washed, slippery hair. Clean hair has no grip, which is why twists unravel and buns slide. Style on second-day hair whenever possible, or fake the grip with a pinch of texture powder or a light mist of texturizing spray at the roots before you begin. Grip is the invisible ingredient in every style on this list.
On a budget, you need almost nothing new. A pack of seamless elastics, a set of bobby pins, one large claw clip, and a small claw clip cover the entire guide, and all of it costs less than a single salon blowout. The one upgrade worth paying for is quality elastics: cheap ones with metal clasps snag and break hair, while seamless ones do not.
If you want a professional head start, book a single styling lesson instead of a cut. Many stylists offer thirty-minute sessions for 25 to 50 dollars where they teach you three or four styles on your own hair. One lesson on the twist-and-pin technique or the rope braid pays off every morning for years.
Frequently Asked Questions About Lazy Easy Hairstyles
What is the easiest hairstyle for a complete beginner?
The claw clip twist-up is the easiest style that still looks deliberate. You gather your hair, twist it upward, and clamp a large claw clip over it: three moves, no technique, about sixty seconds. It works on most hair lengths past the chin and holds all day. If you can manage a ponytail, you can manage this, and it looks significantly more polished than the ponytail it replaces.
How do I make lazy hairstyles stay in all day?
Grip is everything. Start with second-day hair or add texture powder at the roots, since slightly dirty hair holds styles far better than freshly washed hair. Use the right anchor for the style: spiral pins for buns, a strong-hinge claw clip for twists, seamless elastics for ponytails. Finish with a light mist of flexible-hold spray rather than a helmet of maximum hold, which looks stiff.
Can beginners do these styles on short hair?
Most of them, with small adjustments. Claw clips, half-up styles, headband tucks, and scarf ponytails all work on chin-length hair and longer. Buns and braids need enough length to wrap, so very short hair should lean toward the clip and twist options. Mini claw clips are a short-haired beginner's best friend: they grip sections that elastics cannot hold.
Will these styles damage my hair?
These are among the least damaging styles you can wear. They use no heat, minimal tension, and keep your ends tucked away from friction. The main risks are mechanical: tight elastics with metal clasps can snap strands, and ripping out bobby pins carelessly causes breakage. Use seamless elastics, remove pins gently, and vary your part placement so tension never sits in the same spot daily.
What tools should a beginner buy first?
Start with four things: seamless no-metal elastics, a mixed set of bobby pins, one large claw clip, and a texturizing spray or powder for grip. That kit builds every style in this guide and costs very little. Add a silk scarf and a fabric headband next for the accessory styles. Skip the hot tools entirely until you have mastered these; you may find you never need them.
Ready to Master the Lazy Hairstyle?
Great hair does not require great effort: it requires the right three-minute technique and a cut that cooperates. Pick one style from this guide, try it tomorrow morning, and notice how much calmer your routine feels.
Pin your favorite look now so it is waiting on your next rushed morning, and consider booking a styling lesson to learn the twist-and-pin basics on your own hair. Effortless is a skill, and it is an easy one to learn.
Related Reads
- 20 Easy Hair Style Ideas That Actually Work – https://hairaurapro.com/easy-hair-style-ideas/
- 20 Easy Hairstyle Ideas Worth Trying This Year – https://hairaurapro.com/quick-easy-hairstyle-ideas/
- 20 Easy Work Hairstyles Worth Saving for Busy Mornings – https://hairaurapro.com/easy-work-hairstyle-ideas/
- 25 Long Lasting Hairstyles for Women That Hold for Weeks, Not Days – https://hairaurapro.com/long-lasting-hairstyles-for-women/