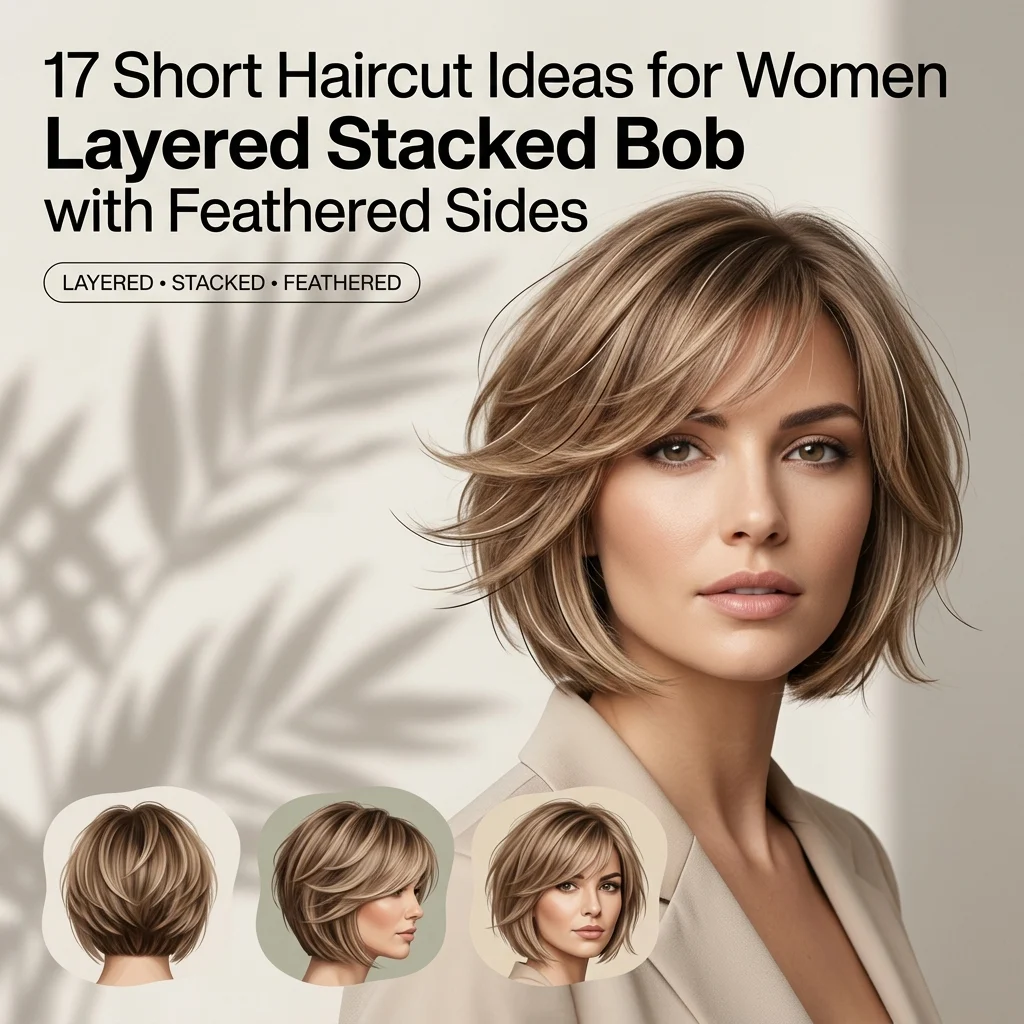
17 Layered Stacked Bob Ideas With Feathered Sides

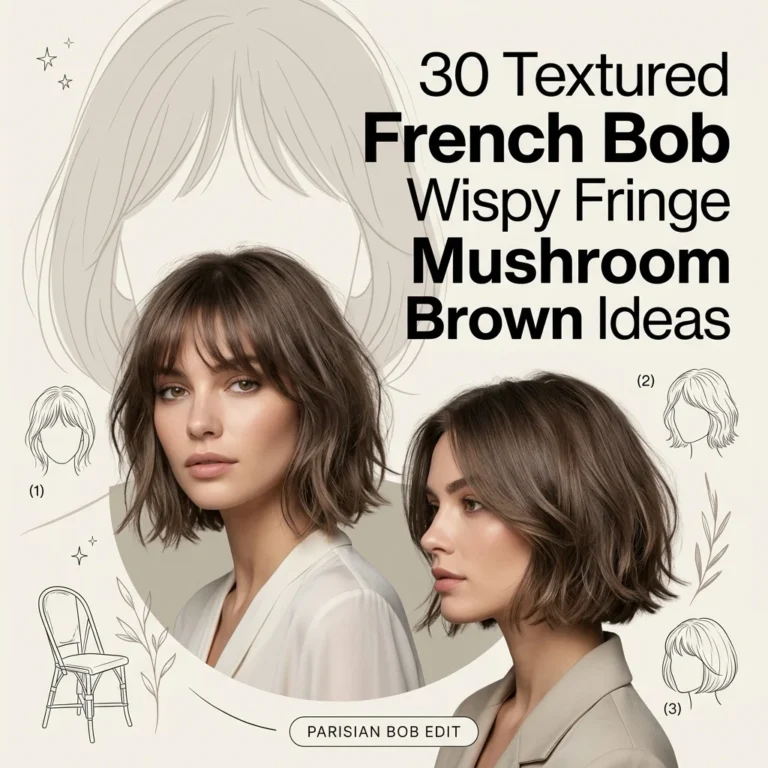
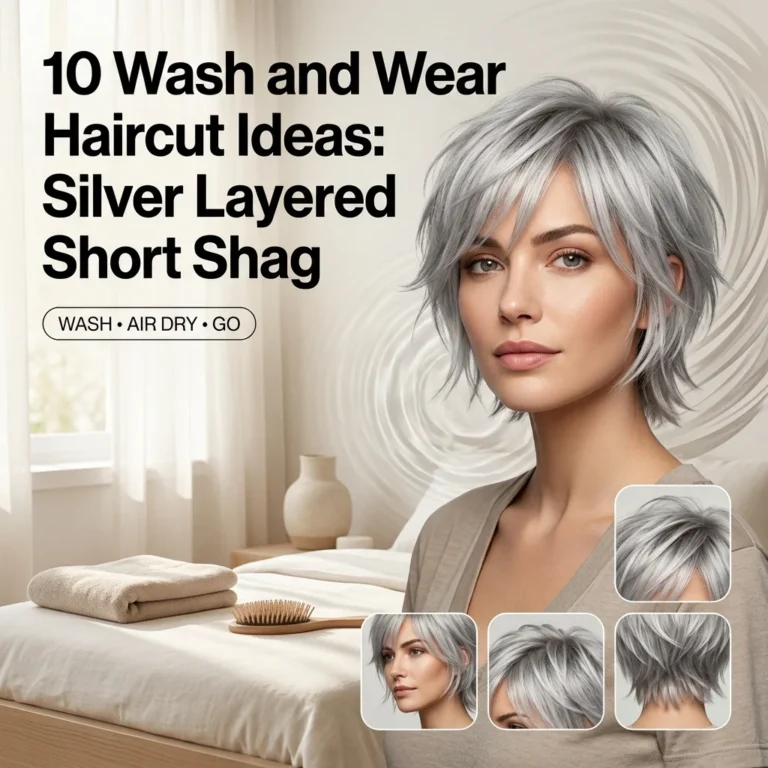
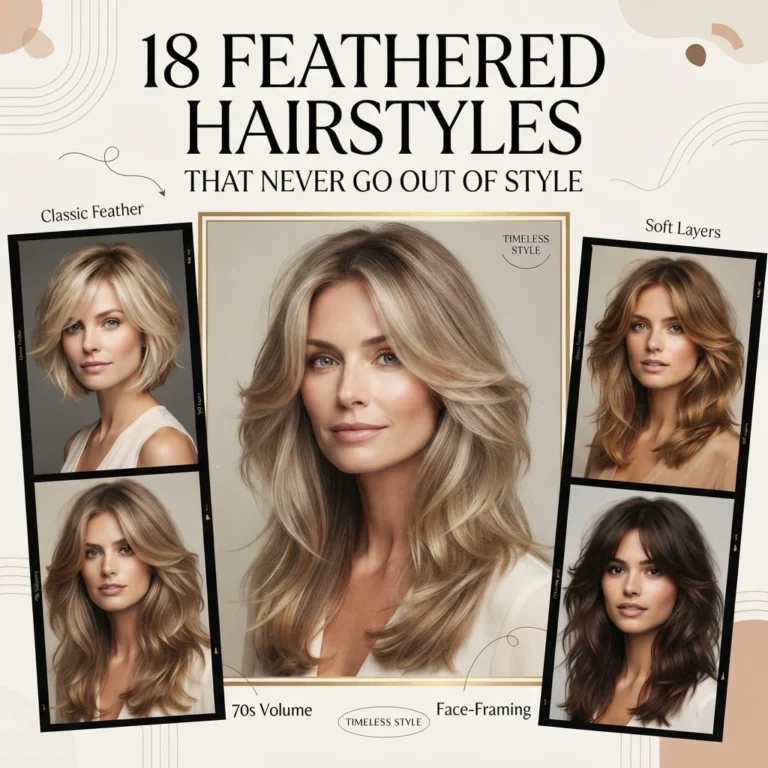
A stacked bob is a short haircut with graduated, layered stacking built into the back for volume, paired with feathered sides that taper and blend softly toward the face. This article gives you 17 layered stacked bob ideas with feathered sides: cut structure, color placement, and styling technique built around this exact silhouette.
Picture a cut that holds its shape from the back and softens the moment it reaches your cheekbone. Structured where it needs to be, feathered where it needs to move. This shape feels precise, confident, a little architectural, the kind of haircut that looks composed from every angle instead of just the front. It reads polished without reading rigid. Here are 17 ideas worth saving, and stealing.
Why Layered Stacked Bob with Feathered Sides Works So Well
What exactly makes a bob “stacked,” and how does that differ from a standard bob? A stacked bob builds graduated layers into the back of the cut, each layer sitting slightly shorter and tighter than the one above it, which creates a rounded, voluminous silhouette at the nape that a standard, single-length bob doesn’t have. This graduation technique traces back to the layered bob revival of the 1990s, when stylists began building deliberate volume into the crown and back rather than leaving a bob’s perimeter uniformly weighted, and it remains distinct from a blunt bob precisely because of this built-in lift.
Core materials here are about finish rather than fabric: think matte-finish styling cream for the stacked layers, glossing serum for shine control on the feathered sides, and a color palette that ranges from warm chestnut and caramel balayage to cooler ash-brown and espresso, depending on the base tone. The feathering technique itself relies on point-cutting and razoring rather than blunt scissor work, which is what allows the sides to taper softly instead of ending in a hard line.
This look is trending because Pinterest search interest in “structured but soft” short haircuts has climbed as more women move away from either extreme (fully blunt, high-maintenance bobs or shapeless, undefined layers) toward a cut that offers definition at the back and movement at the face. It photographs well from behind, which has made it a frequent request paired with reference images from multiple angles.
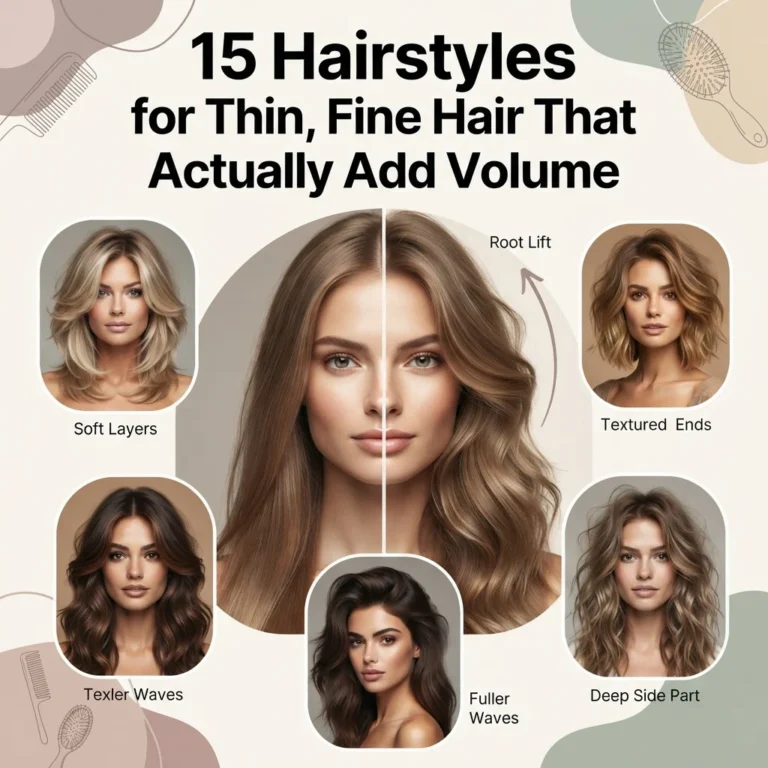
Fine hair benefits significantly from the stacked structure, since the graduated layering at the nape is specifically engineered to build volume where fine strands typically fall flat. The honest limit is very thick or coarse hair, which can make the stacking read bulky rather than sculpted unless the layers are thinned first; ask your stylist to remove weight with thinning shears before stacking begins.
Style at a Glance
| Element | Detail |
|---|---|
| Philosophy | Structured volume at the back, soft movement at the sides |
| Key Techniques | Graduated stacking, razored feathering, point-cut perimeter |
| Key Tones | Warm chestnut, caramel balayage, ash-brown, espresso |
The 17 Looks
1. Foundational Stacked Bob Structure
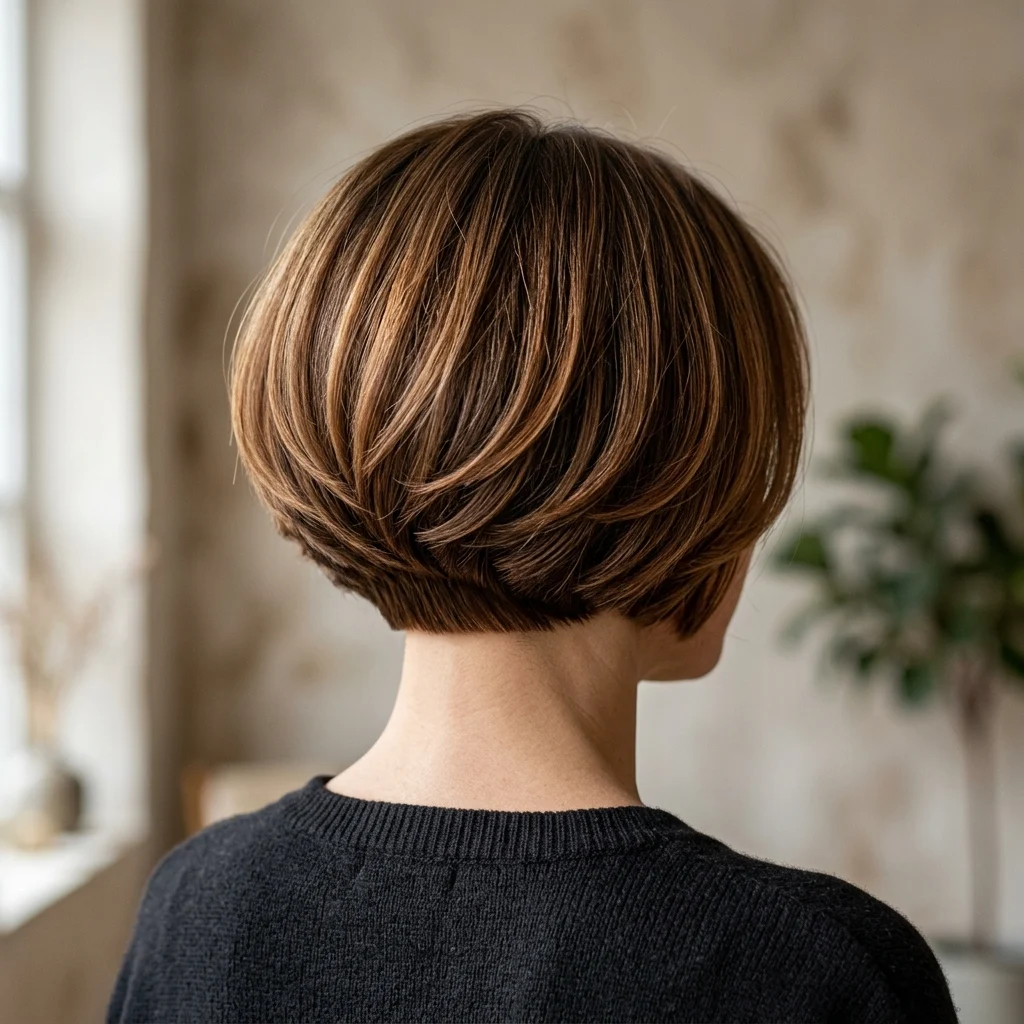
Vibe: Grounded, with a rounded fullness that holds its shape from every angle.
Why it works: The technique principle here is graduated weight distribution: each layer at the nape is cut slightly shorter than the one directly above it, which concentrates weight in tight, rounded bands rather than one flat mass. This graduation is what produces the bob’s signature rounded silhouette from behind, and it’s the structural foundation every feathered-side variation in this list builds on.
How to get it: Ask your stylist for “graduated stacking” specifically, with layers cut no more than a quarter-inch apart at the nape for a tight, defined rounded shape.
💡 Quick Win: Bring a back-view reference photo, since the stacking’s success is judged almost entirely from an angle you can’t easily see in the mirror yourself.
Shop the Look
| Product |
|---|
| Round ceramic brush for stacked volume |
| Firm-hold volumizing mousse |
| Ionic hair dryer with concentrator nozzle |
| Handheld mirror set for checking the back |
| Flexible-hold finishing spray |
2. Face-Framing Balayage Highlights
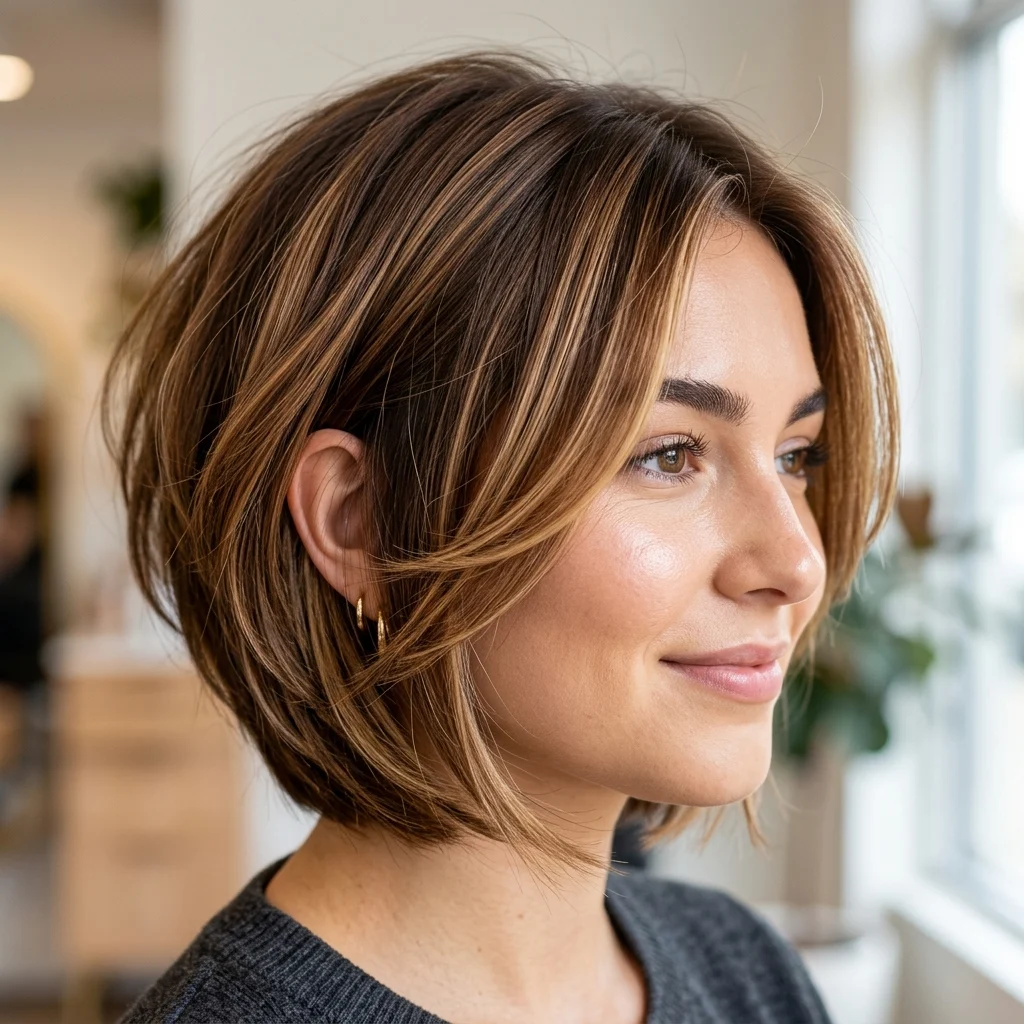
Vibe: Luminous, with warmth concentrated exactly where it flatters most.
Why it works: The color principle is targeted brightness placement: balayage hand-painted only at the front face-framing sections uses contrast strategically, drawing the eye toward the cheekbones and jawline rather than lightening the entire head, which keeps the color commitment, and the maintenance cost, considerably lower than full balayage.
How to get it: Request balayage foils placed only within two inches of the front hairline on both sides, blended two to three shades lighter than your base tone.
Shop the Look
| Product |
|---|
| Bond-building hair mask for lightened strands |
| Illuminating hair gloss for balayage tones |
| Fine-tooth foiling comb |
| Color-safe shampoo for warm tones |
| UV-protectant hair serum |
3. Round-Brush Blowout for Feathered Sides
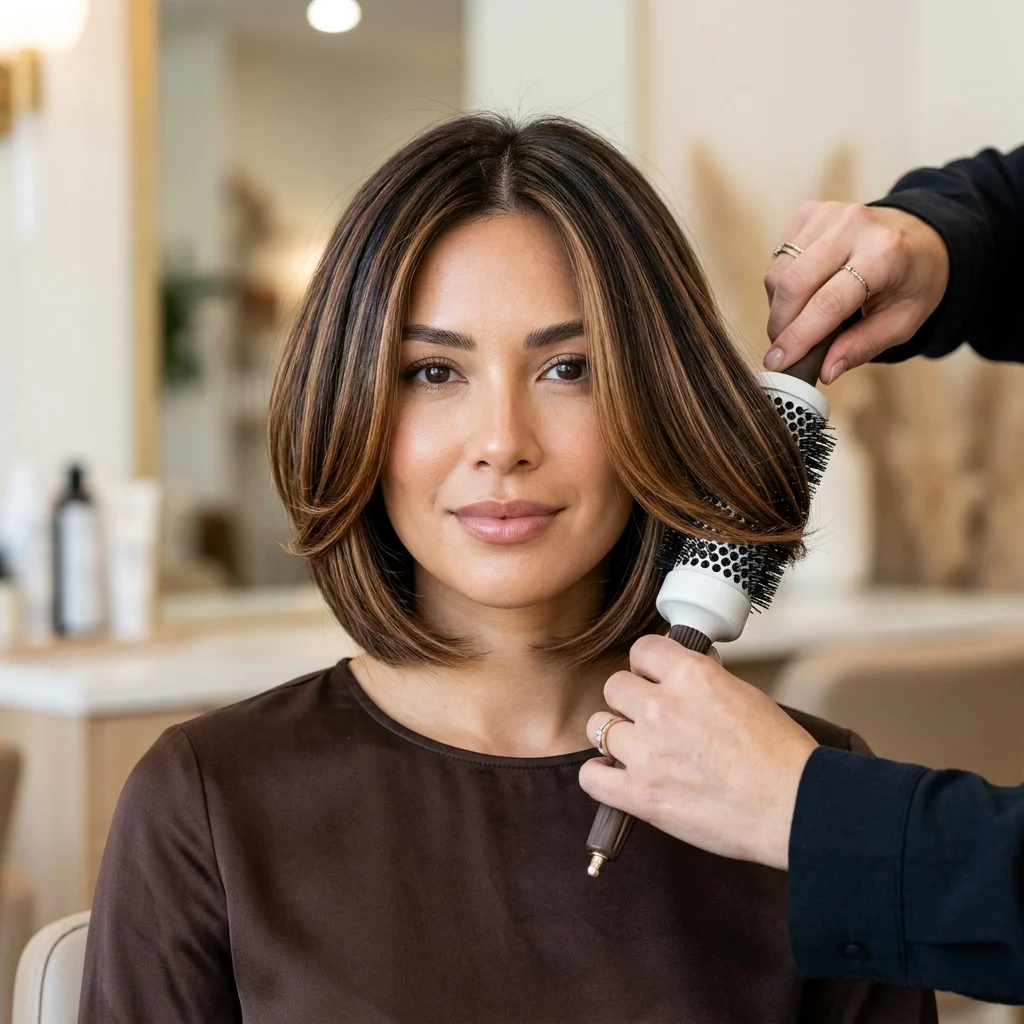
Vibe: Polished, with movement that curves rather than falls flat.
Why it works: The styling principle is tension-and-heat shaping: pulling hair taut around a round brush while applying heat reshapes the hair’s cuticle temporarily into a curve, which is what gives feathered sides their soft, inward-turning finish. A technique that relies on controlled tension, not just heat alone, to hold the shape once it cools.
How to get it: Section the sides into one-inch pieces and roll each fully around a medium round brush, holding the heat for five seconds before releasing to let the shape set as it cools.
Shop the Look
| Product |
|---|
| Medium round brush for feathered curve |
| Ionic hair dryer with diffuser removed |
| Heat protectant spray for blowouts |
| Sectioning clips for controlled blowout |
| Finishing shine spray |
4. Chin-Length Graduated Silhouette
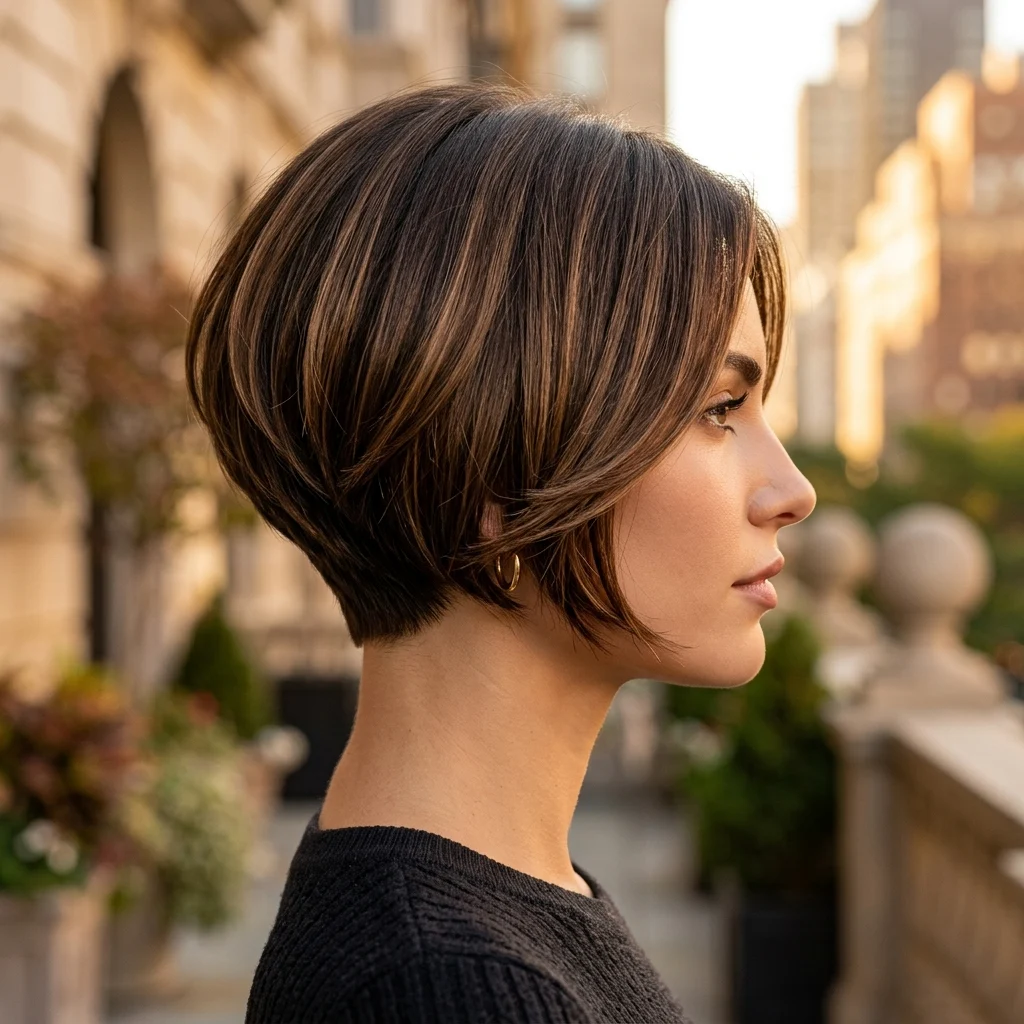
Vibe: Bold, with a silhouette that reads clearly from across a room.
Why it works: The proportion principle is length-to-volume ratio: keeping the overall length at the chin, rather than jaw or shoulder, allows the stacked graduation to remain the most visually dominant feature of the cut, since shorter lengths make the back’s rounded volume read as the shape’s primary characteristic rather than being diluted by additional length.
How to get it: Ask for the perimeter length measured precisely at the chin when hair is dry, with the graduated layers beginning about two inches above the nape.
Shop the Look
| Product |
|---|
| Smoothing balm for chin-length ends |
| Anti-frizz serum for humidity control |
| Flat-edge styling comb for precision partings |
| Round ceramic brush for blow-drying |
| Texturizing spray for the perimeter |
5. Side-Swept Feathered Bangs
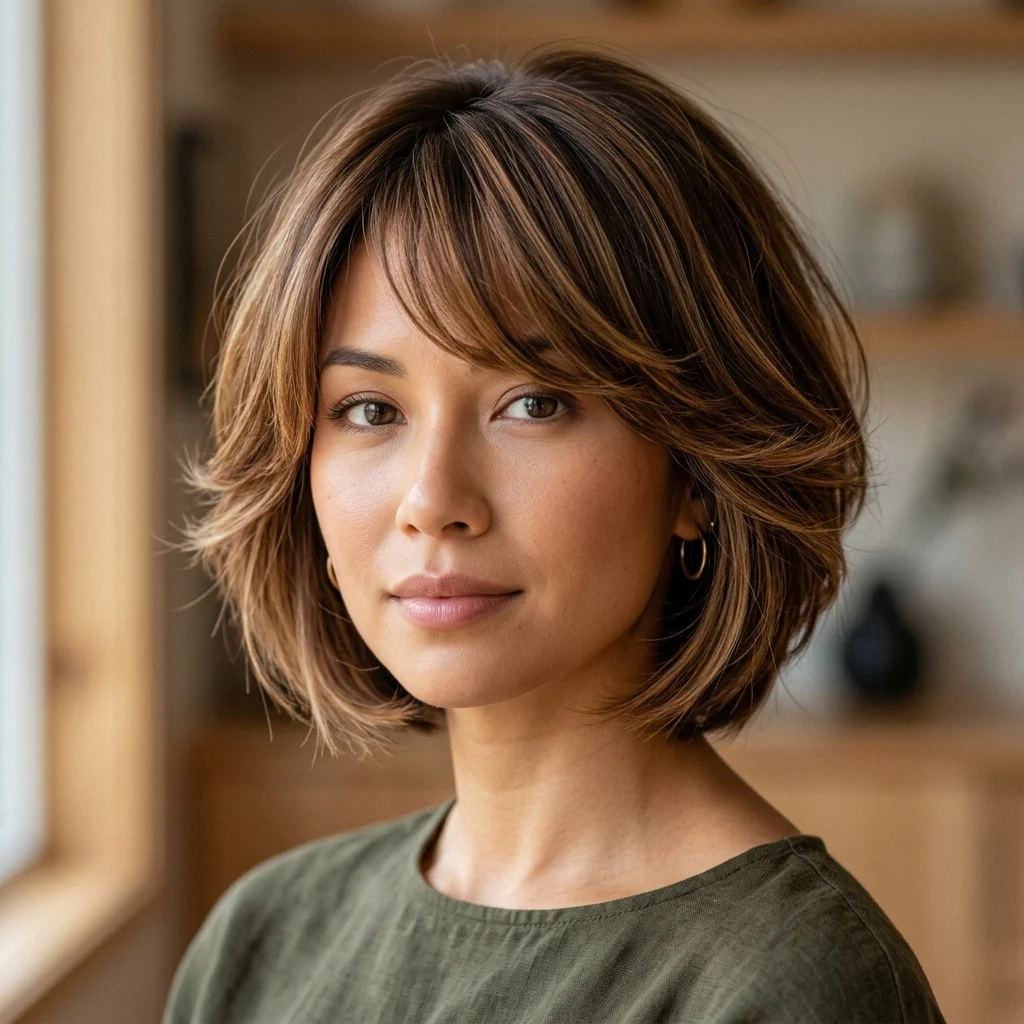
Vibe: Soft, with a fringe that connects seamlessly into the sides instead of standing apart.
Why it works: The technique principle is seamless connection cutting: cutting the bangs at the same feathered angle as the side panels, rather than as a separate blunt section, removes the visual break between “fringe” and “hair” that a traditionally cut bang creates, letting the whole front read as one continuous, feathered shape.
How to get it: Ask your stylist to cut the bangs and the first few inches of the side panels in one continuous point-cutting pass, rather than sectioning the bangs off separately.
💡 Quick Win: A small round brush used only on the bang section during blow-drying keeps this seamless sweep from separating throughout the day.
Shop the Look
| Product |
|---|
| Small round brush for bang styling |
| Lightweight texturizing cream |
| Flexible-hold fringe spray |
| Small sectioning clips |
| Wide-tooth wooden comb |
6. Razored Feathered Side Panels
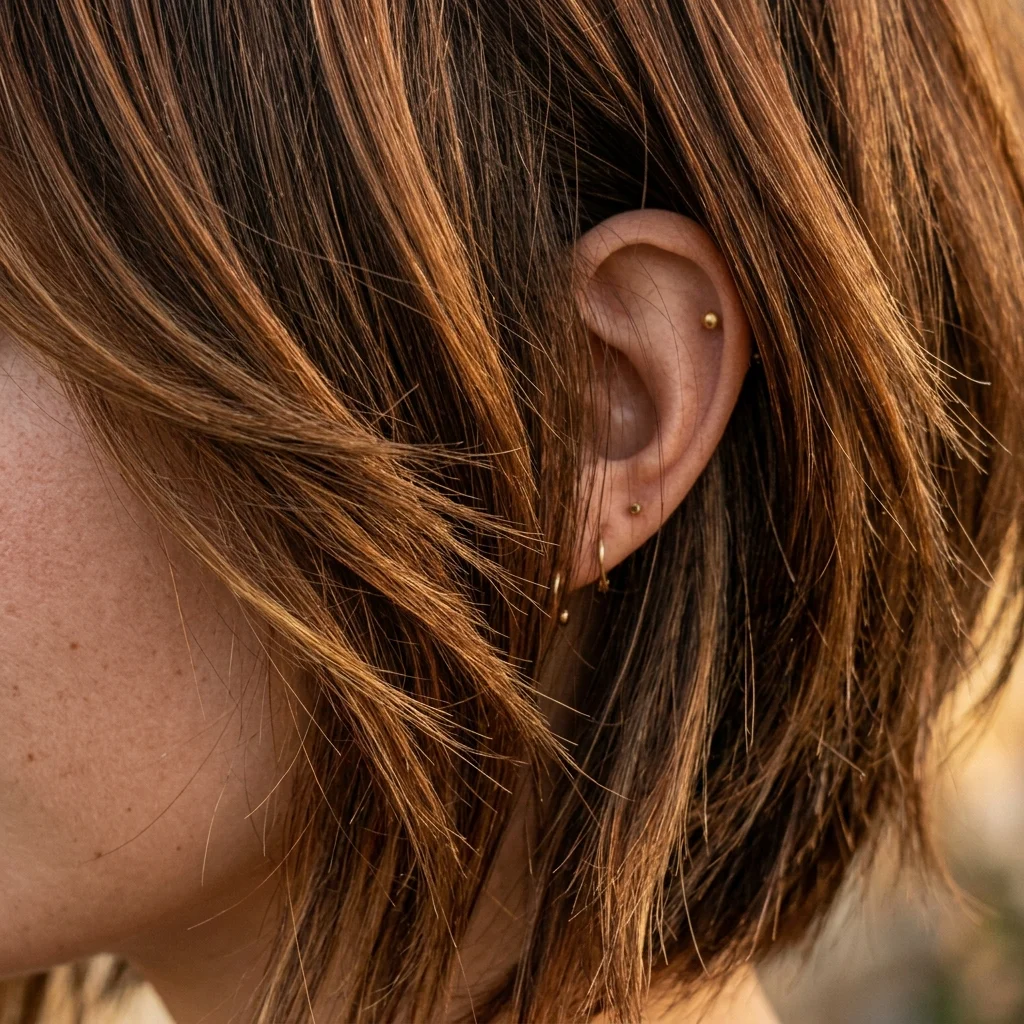
Vibe: Raw, with edges that catch light instead of sitting as one dense line.
Why it works: The cutting principle is uneven weight removal: a razor removes bulk unevenly along each strand’s length, unlike scissors, which cut one consistent line. This is precisely what produces the soft, feathered taper at the sides, since the varied strand lengths blend gradually into the face rather than stopping abruptly.
How to get it: Ask specifically for “razor-cut side panels” rather than “texturized ends,” since razoring removes more visible bulk on coarse or thick hair than scissor texturizing alone.
Shop the Look
| Product |
|---|
| Professional-grade texturizing spray |
| Thinning shears for at-home upkeep |
| Matte finishing paste for piece-y ends |
| Boar bristle brush for smoothing without flattening |
| Shine-enhancing hair oil for coarse texture |
7. Tortoiseshell Multi-Tonal Blend
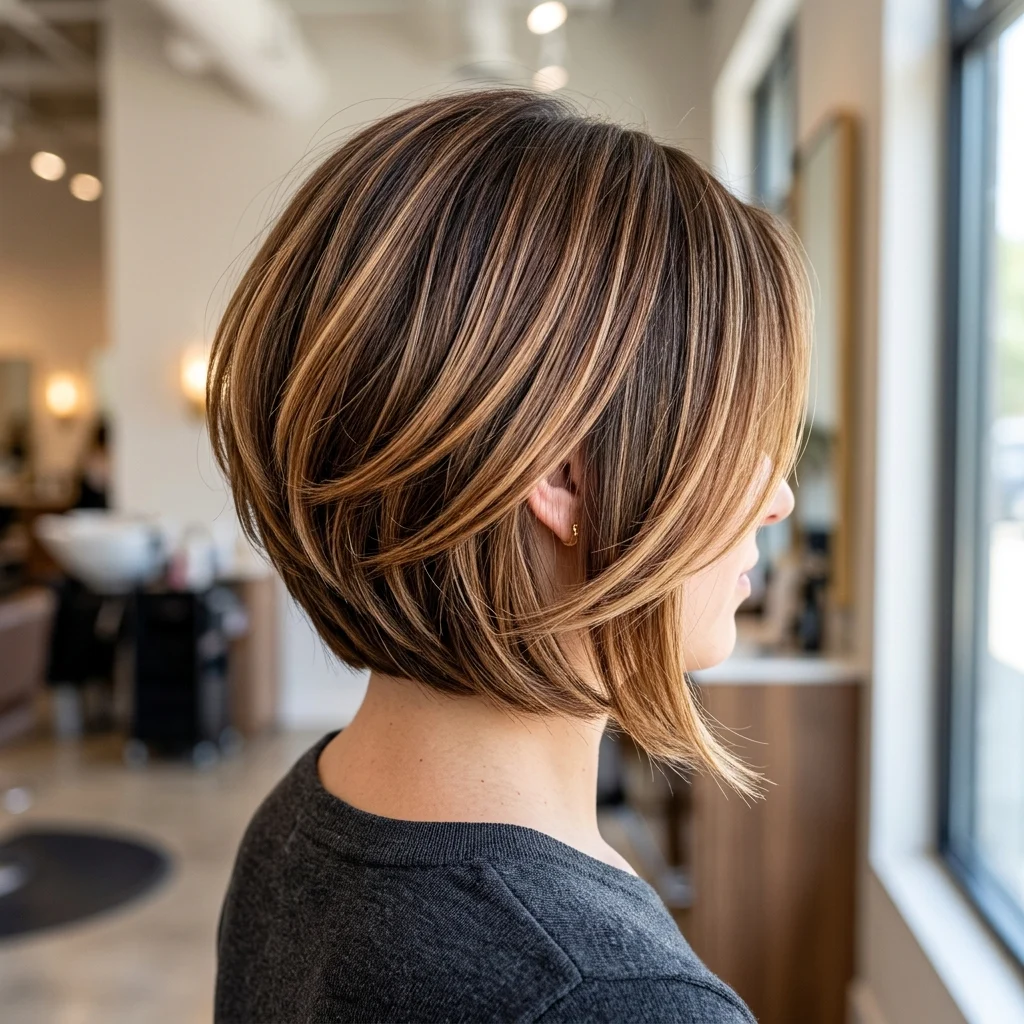
Vibe: Crisp, with warmth layered in shifting bands rather than one flat tone.
Why it works: The color principle is multi-tonal depth building: a tortoiseshell blend combines at least three distinct tones (a deep base, a mid-warm caramel, and a lighter honey accent) woven together rather than applied as separate blocks, which creates the visual depth that a single-process color flattens out entirely.
How to get it: Request a “tortoiseshell” or “tigereye” color service by name, applied in fine, hand-painted sections that alternate between the three tones throughout the mid-lengths and ends.
Shop the Look
| Product |
|---|
| Color-depositing conditioner in warm tones |
| Bond repair spray for multi-tonal color |
| Wide paddle brush for even application |
| Gloss treatment for tonal depth maintenance |
| Heat protectant mist for color-treated hair |
8. Crown Height vs Side Feathering Balance
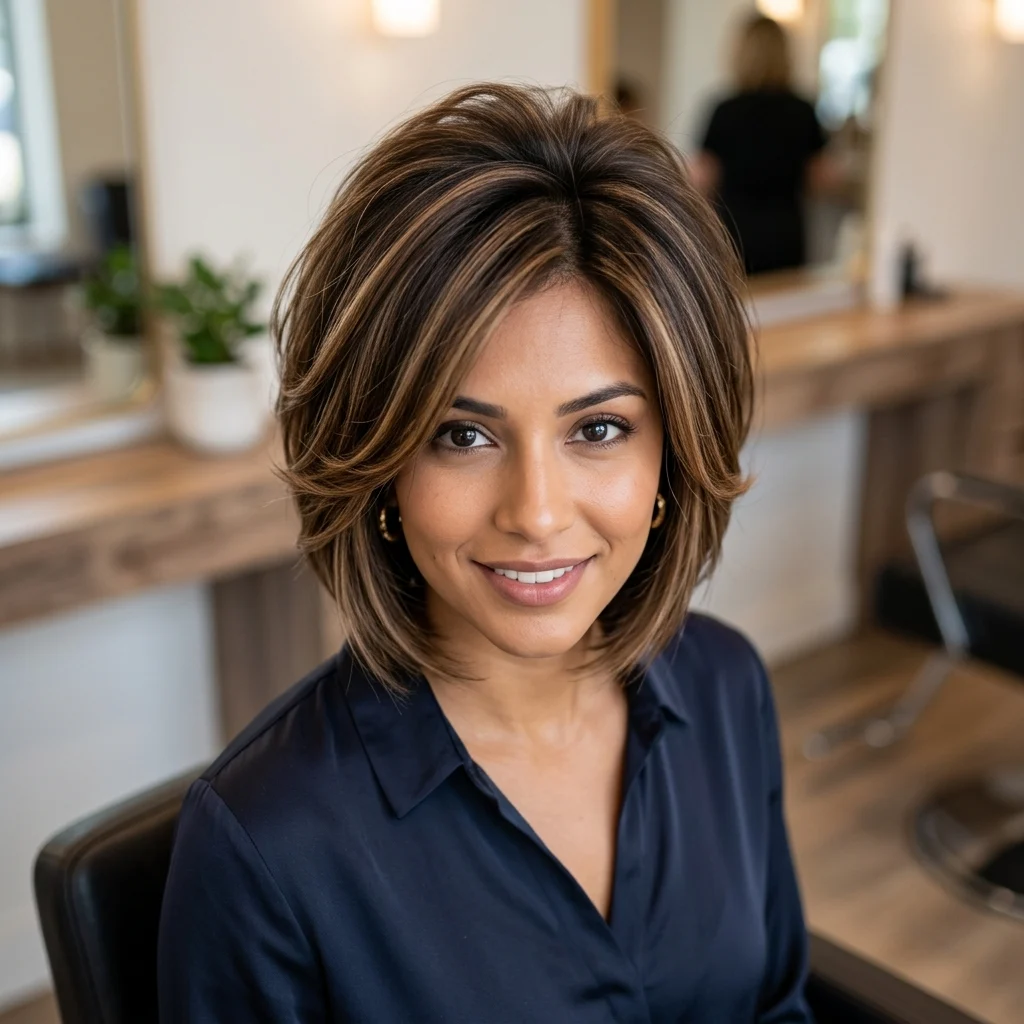
Vibe: Layered, with a clear balance between structure and softness.
Why it works: The layout principle is zone contrast: concentrating volume and height specifically at the crown while keeping the sides feathered and close to the face defines two distinct zones within one cut, the same proportion logic used to keep a strong architectural element from overwhelming the softer details around it.
How to get it: Ask your stylist to backcomb and lift only the crown section during styling, while leaving the side panels smooth and directed inward toward the jaw.
Shop the Look
| Product |
|---|
| Teasing comb for crown lift |
| Root-lifting volumizing spray |
| Firm-hold hairspray for crown structure |
| Small round brush for side smoothing |
| Texturizing powder for crown grip |
9. Diffused Air-Dry Texture for Feathered Ends
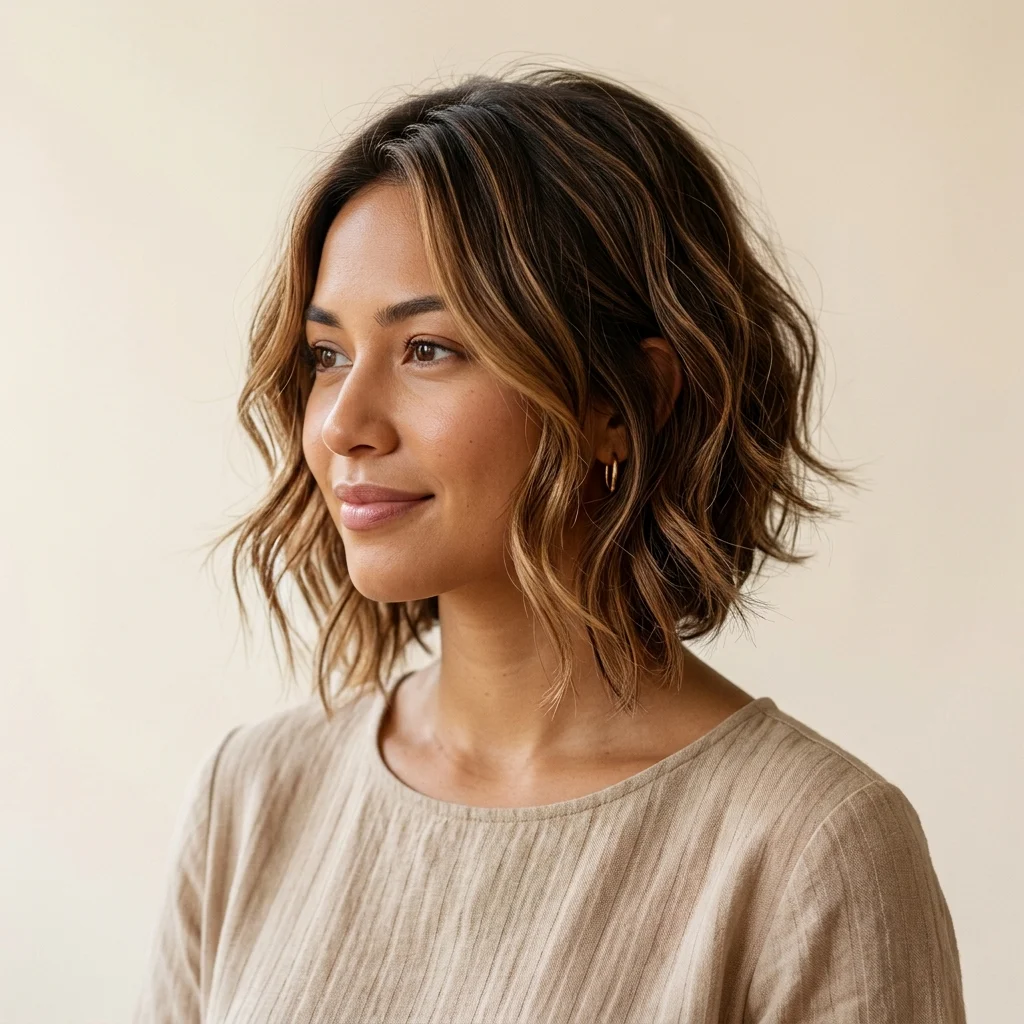
Vibe: Airy, with texture that looks like it happened without any tools at all.
Why it works: The styling principle is heat-diffused wave preservation: a diffuser attachment dries hair with dispersed, gentle airflow rather than concentrated heat, which preserves the natural wave pattern in the feathered ends instead of forcing them straight. The technique that lets this cut work equally well on wavy texture as it does on straight hair styled smooth.
How to get it: Scrunch a curl cream into damp hair, cup sections in the diffuser bowl, and dry on low heat while lifting toward the scalp rather than pulling downward.
💡 Quick Win: A texturizing spray misted only on the ends before diffusing enhances the natural wave without adding extra drying time.
Shop the Look
| Product |
|---|
| Diffuser attachment for hooded or handheld dryers |
| Curl-defining cream for natural texture |
| Sea salt texturizing spray |
| Microfiber hair towel to reduce frizz |
| Anti-frizz leave-in spray |
10. Angled A-Line Stacked Perimeter
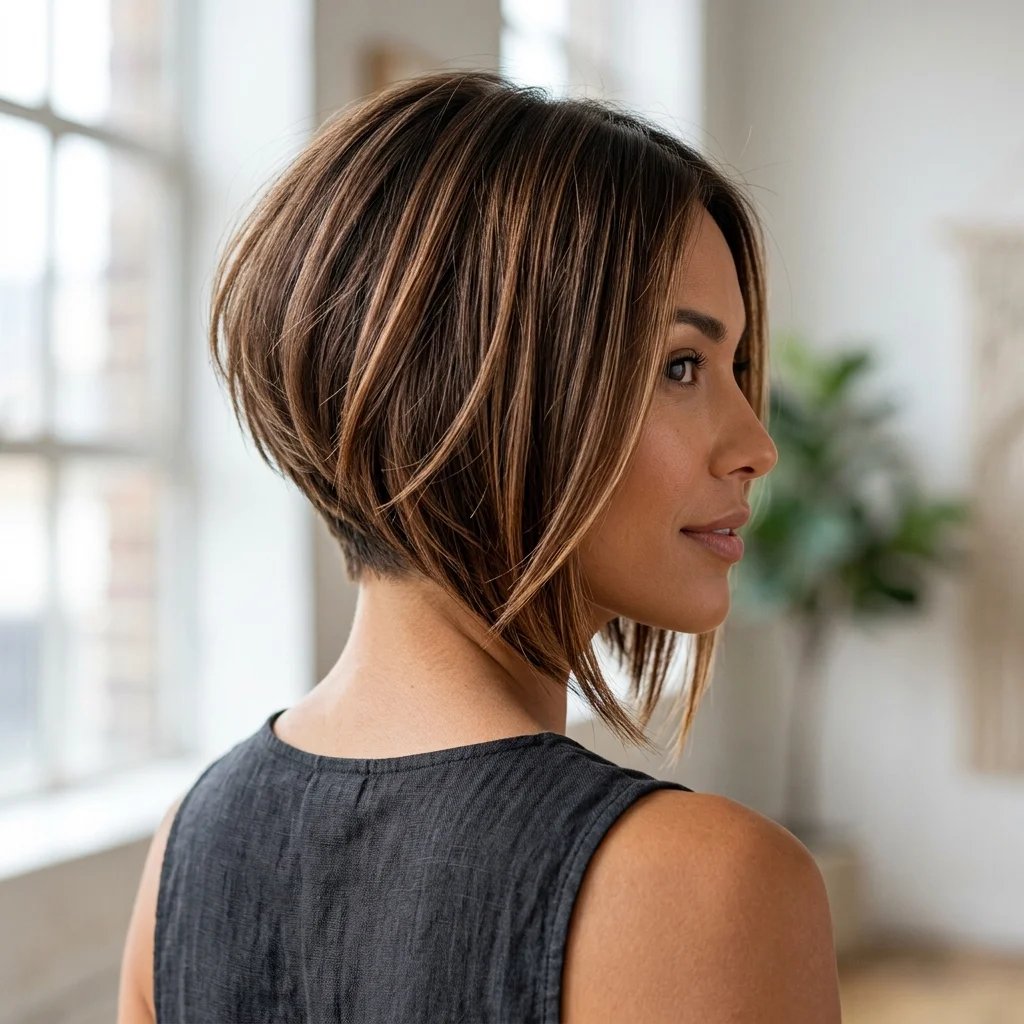
Vibe: Confident, with a clear directional line from back to front.
Why it works: The proportion principle is forward-shifted visual weight: the A-line perimeter is cut shorter at the back and progressively longer toward the front, which shifts visual weight downward and forward, elongating the neckline while the stacked graduation at the shortest point still provides the rounded volume this cut is known for.
How to get it: Ask for at least a one-and-a-half-inch difference between the shortest point at the back and the longest point at the front, blended gradually along the sides.
Shop the Look
| Product |
|---|
| Texturizing spray for defining the angled hemline |
| Neck duster brush for at-home trims |
| Flexible-hold finishing spray |
| Handheld mirror set for checking the back angle |
| Firm-hold pomade for back-of-head control |
11. Root-to-Tip Ombre Fade
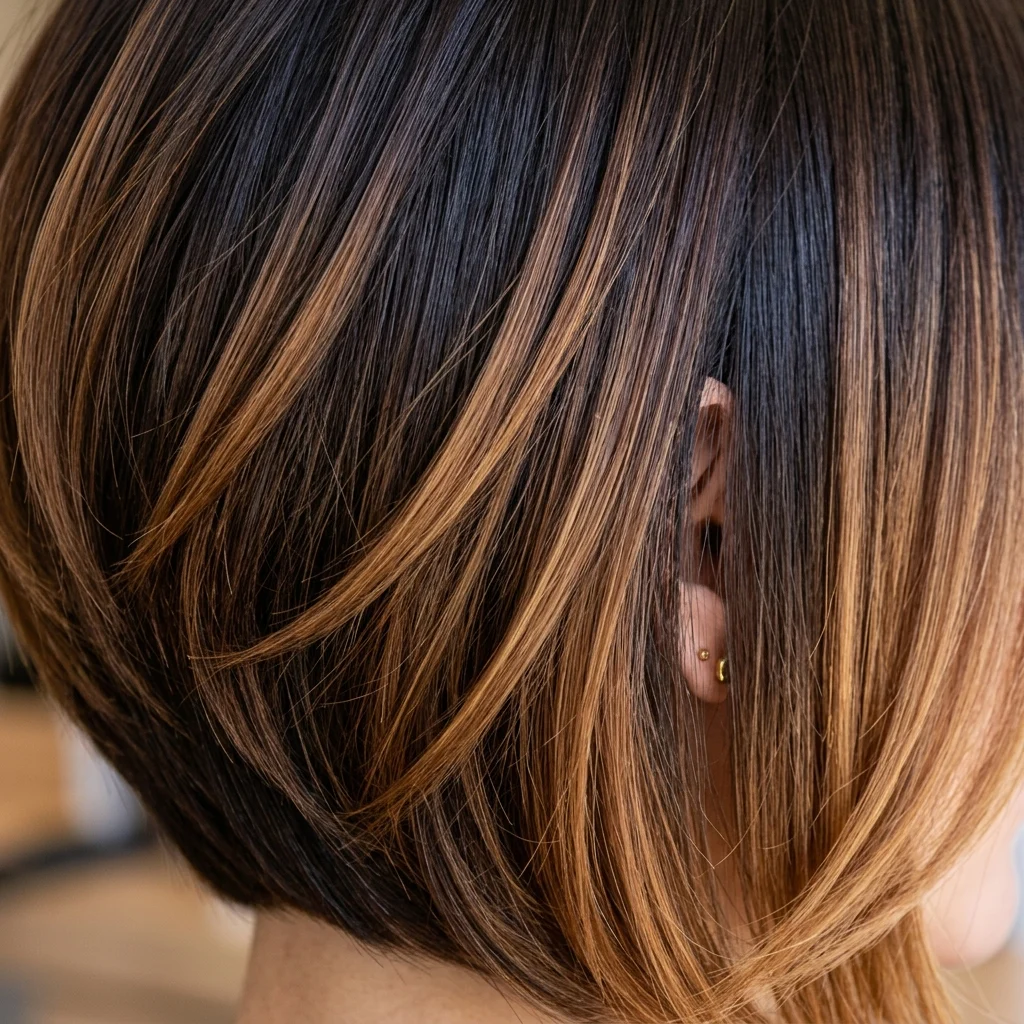
Vibe: Warm, with color that deepens toward the scalp and lightens toward the ends.
Why it works: The color principle is gradient continuity: an ombre fade transitions gradually over several inches rather than at one hard line, which requires the colorist to feather lightener upward in overlapping passes so the eye can’t identify a single point where one tone ends and the next begins.
How to get it: Request an ombre service specifically, applied with a balayage brush in soft, overlapping strokes starting roughly four inches below the root, rather than a foiled dip-dye technique.
Shop the Look
| Product |
|---|
| Color-safe conditioning treatment for ombre |
| Bond-building mask for lightened ends |
| Wide paddle brush for even color application |
| Warmth-boosting glaze for caramel tones |
| Heat protectant spray for color-treated ends |
12. Point-Cut Interior Layers
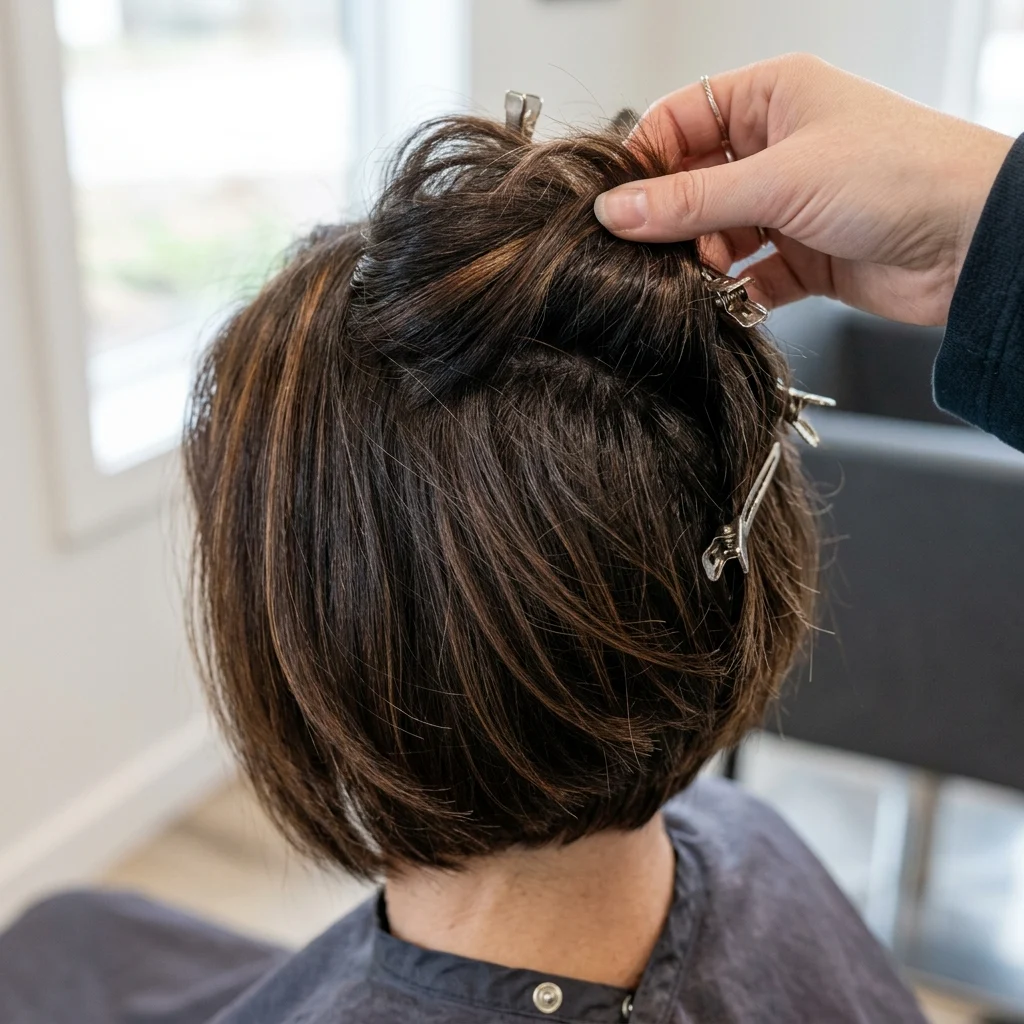
Vibe: Layered, with movement built into the hair’s structure rather than just its surface.
Why it works: The technique principle is internal texture layering: cutting layers within the interior of the bob, held at a 45-degree angle from the head rather than only shaping the visible perimeter, removes weight from beneath the surface, which is what allows the exterior stacking and feathering to move freely instead of sitting as one dense mass.
How to get it: Ask your stylist for “internal point-cutting” specifically, cut section by section with the hair held away from the head rather than combed flat against it.
Shop the Look
| Product |
|---|
| Texturizing shears for at-home layer maintenance |
| Volumizing dry conditioner spray |
| Wide-tooth wooden comb for detangling layers |
| Lightweight leave-in detangling spray |
| Diffuser dryer attachment for enhancing texture |
13. Face-Framing Longer Front Pieces
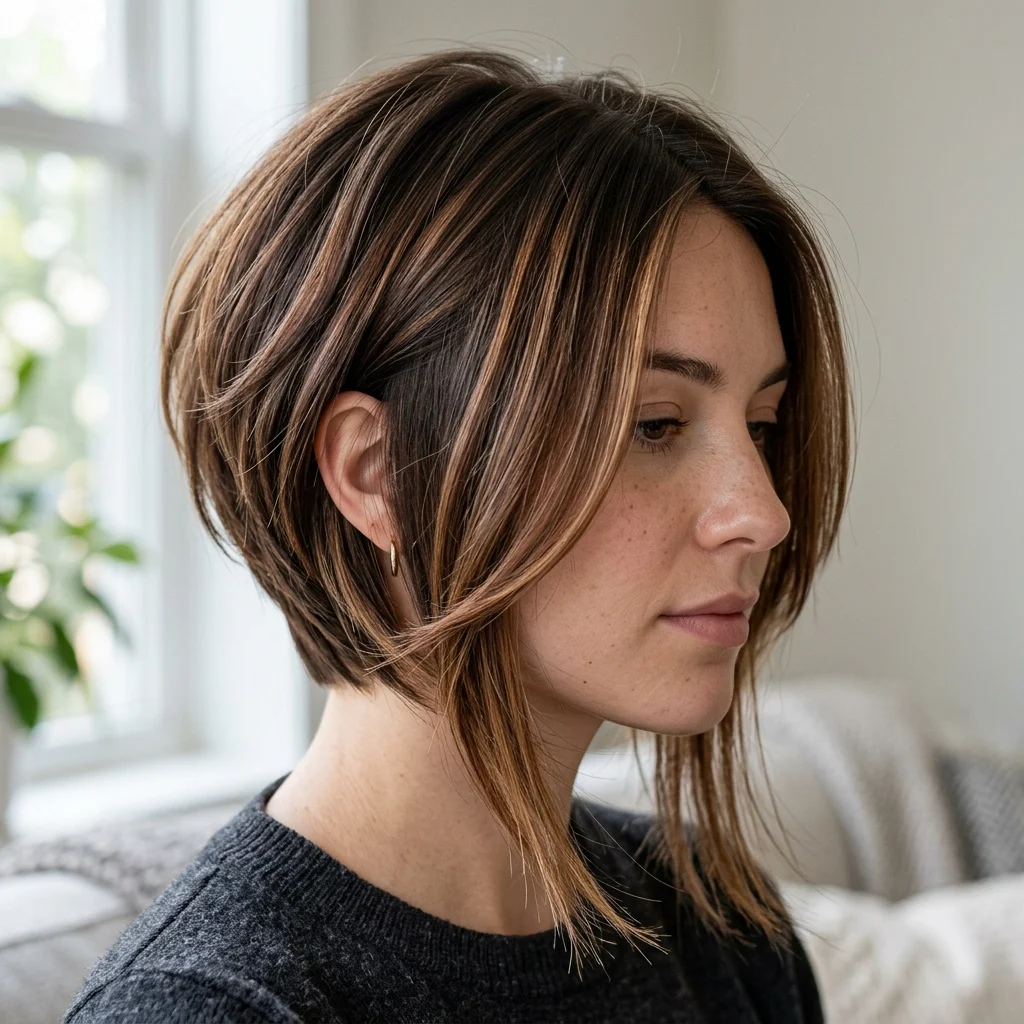
Vibe: Soft, with front pieces that draw the eye gently toward the jawline.
Why it works: The proportion principle is echo framing: longer face-framing pieces that taper from cheekbone to chin follow the natural curve of most jawlines, echoing an existing line rather than cutting across it, which is why this front detail reads as flattering rather than simply “longer hair left at the front.”
How to get it: Ask for face-framing pieces cut one to two inches longer than the rest of the stacked perimeter, starting at cheekbone height and tapering gradually toward the chin.
💡 Quick Win: A lightweight finishing cream applied only to these front pieces keeps them separated from the shorter stacked layers behind them.
Shop the Look
| Product |
|---|
| Lightweight finishing cream for face-framing pieces |
| Mini flat iron for precise front bends |
| Tapered round brush for face-framing styling |
| Detangling leave-in spray |
| Silk hair scarf for overnight shape preservation |
14. Fine Hair Stacked Bob Adaptation
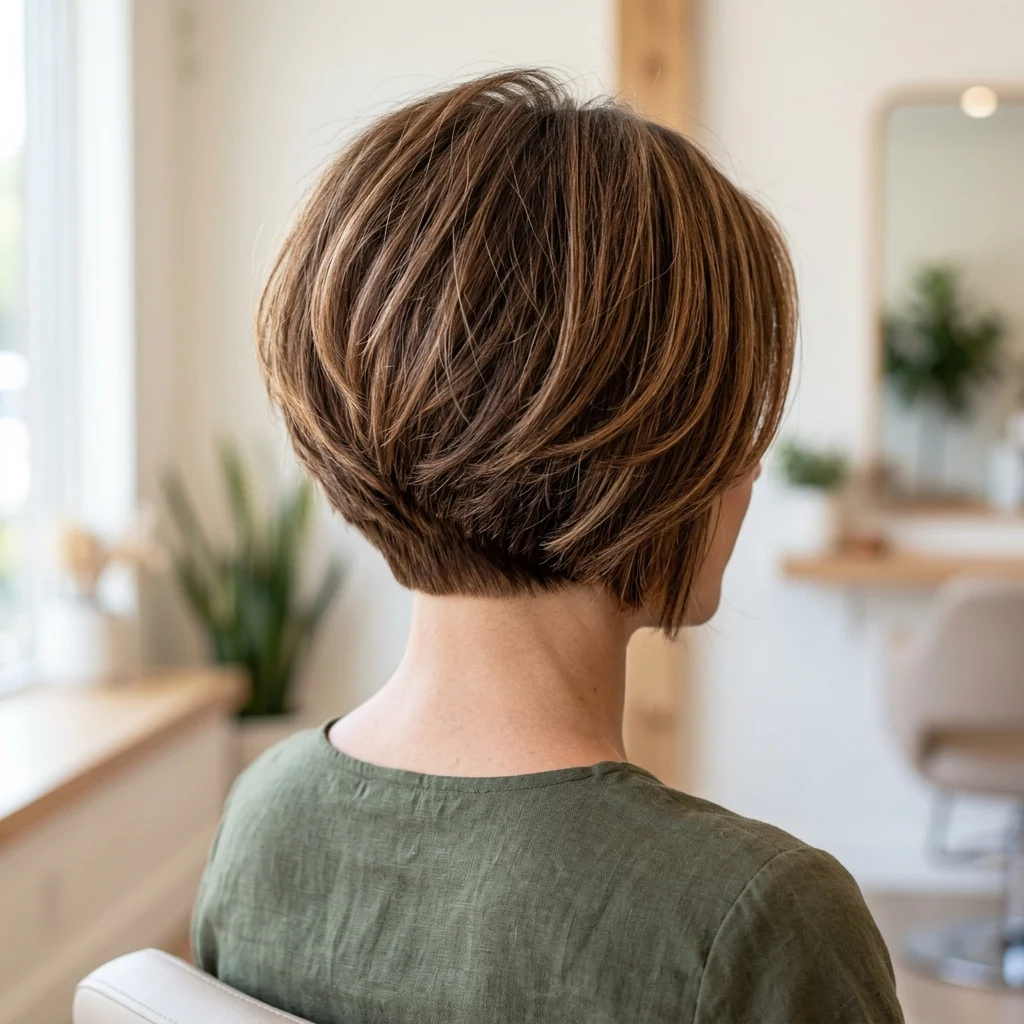
Vibe: Light and lifted, with volume that reads real rather than artificially built.
Why it works: The volume principle is compressed graduation: fine hair holds visible density best when the stacked layers at the nape are cut closer together than usual, an eighth of an inch apart rather than a quarter, since tighter graduation concentrates what little natural weight fine hair has into a smaller, more visually dense area.
How to get it: Ask your stylist to tighten the stacking spacing specifically for fine hair, and blow-dry with a round brush lifting directly from the roots at the nape rather than pulling hair flat.
Shop the Look
| Product |
|---|
| Root-lifting volumizing spray |
| Small round brush for crown lift |
| Dry shampoo with volumizing powder |
| Lightweight mousse for fine hair |
| Clip-in root volumizers for special occasions |
15. Sleek Smooth Finish Option
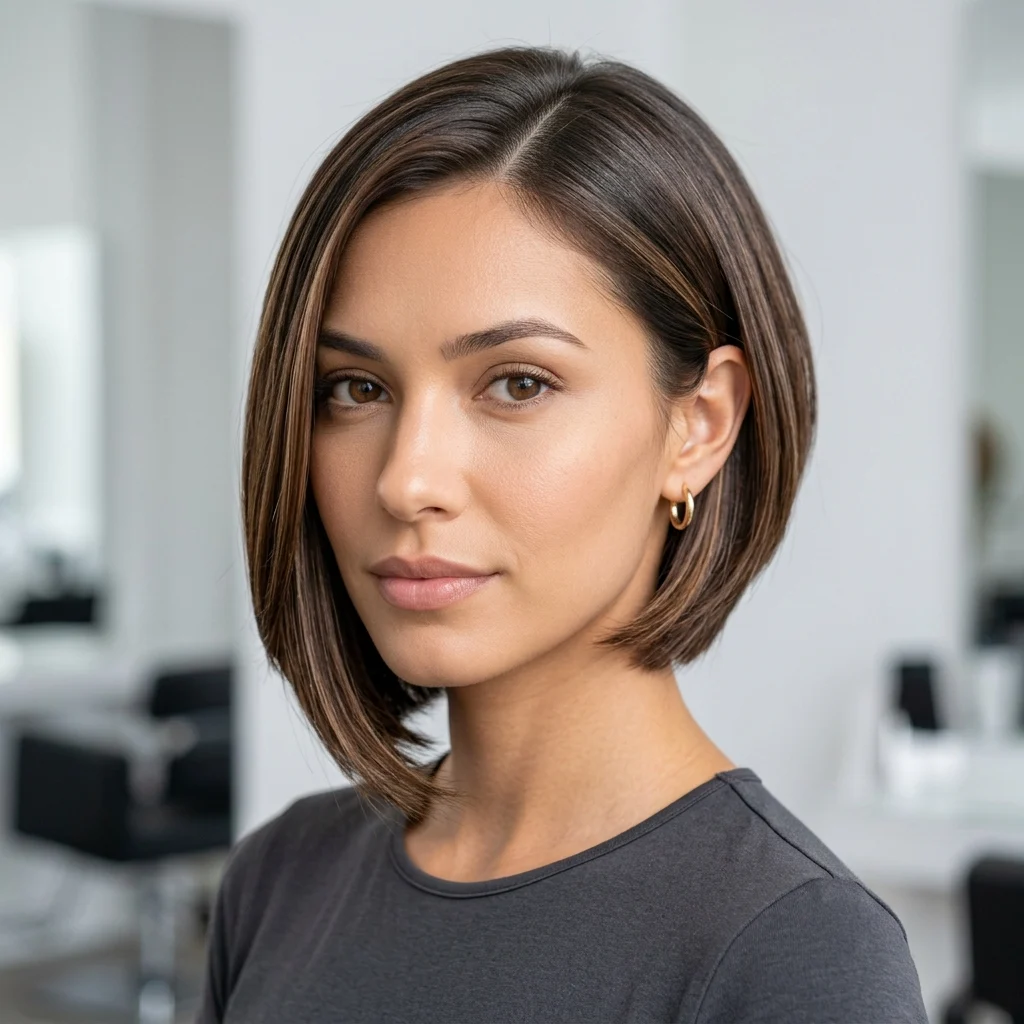
Vibe: Polished, with the feathering present but deliberately toned down.
Why it works: The finishing principle is cuticle sealing for shine: flat-ironing the feathered sides after blow-drying seals the cuticle flat, which increases light reflection and reduces the visible separation between individual feathered strands, producing a smoother, more formal finish than the cut’s natural texture would otherwise show.
How to get it: Flat-iron the sides in one-inch sections after a full blow-dry, using a shine serum beforehand to protect against heat while enhancing the sealed, glossy finish.
Shop the Look
| Product |
|---|
| Flat iron with digital heat control |
| Anti-frizz smoothing serum |
| High-shine finishing spray |
| Heat-resistant styling glove |
| Large round brush for pre-flat-iron blowout |
16. Asymmetric Stacked Bob
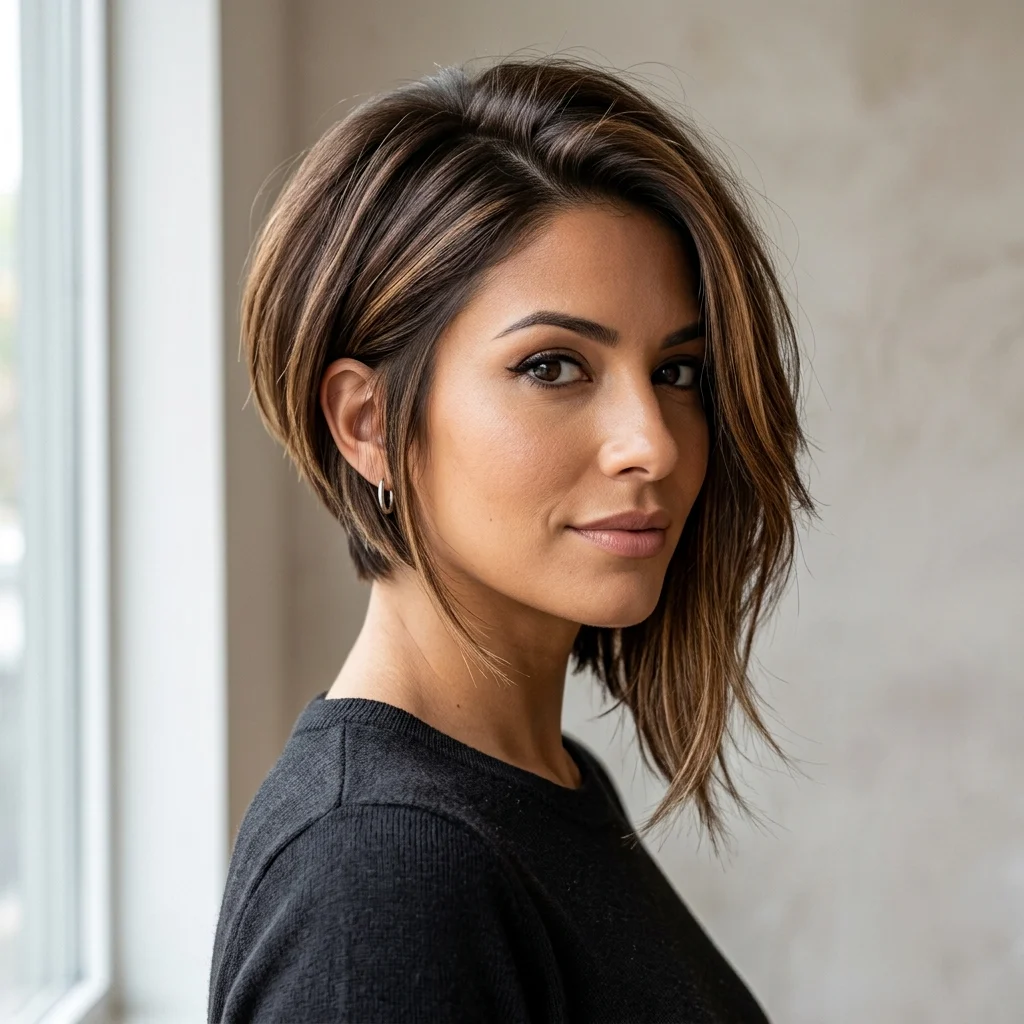
Vibe: Bold, with an off-balance line that keeps the whole shape feeling current.
Why it works: The proportion principle is broken symmetry: cutting one side noticeably longer than the other disrupts the balance a standard stacked bob relies on, creating visual tension that draws the eye diagonally across the face while the stacked back remains structurally consistent, anchoring the asymmetry so it reads as intentional rather than uneven.
How to get it: Ask for a one-and-a-half to two-inch length difference between the two front sections, with the shorter side ending above the jaw and the longer side skimming past it.
Shop the Look
| Product |
|---|
| Texturizing spray for defining asymmetry |
| Small clips for sectioning during styling |
| Flexible-hold hairspray |
| Mini flat iron for precise side pieces |
| Detangling leave-in spray |
17. Feathered Nape Taper
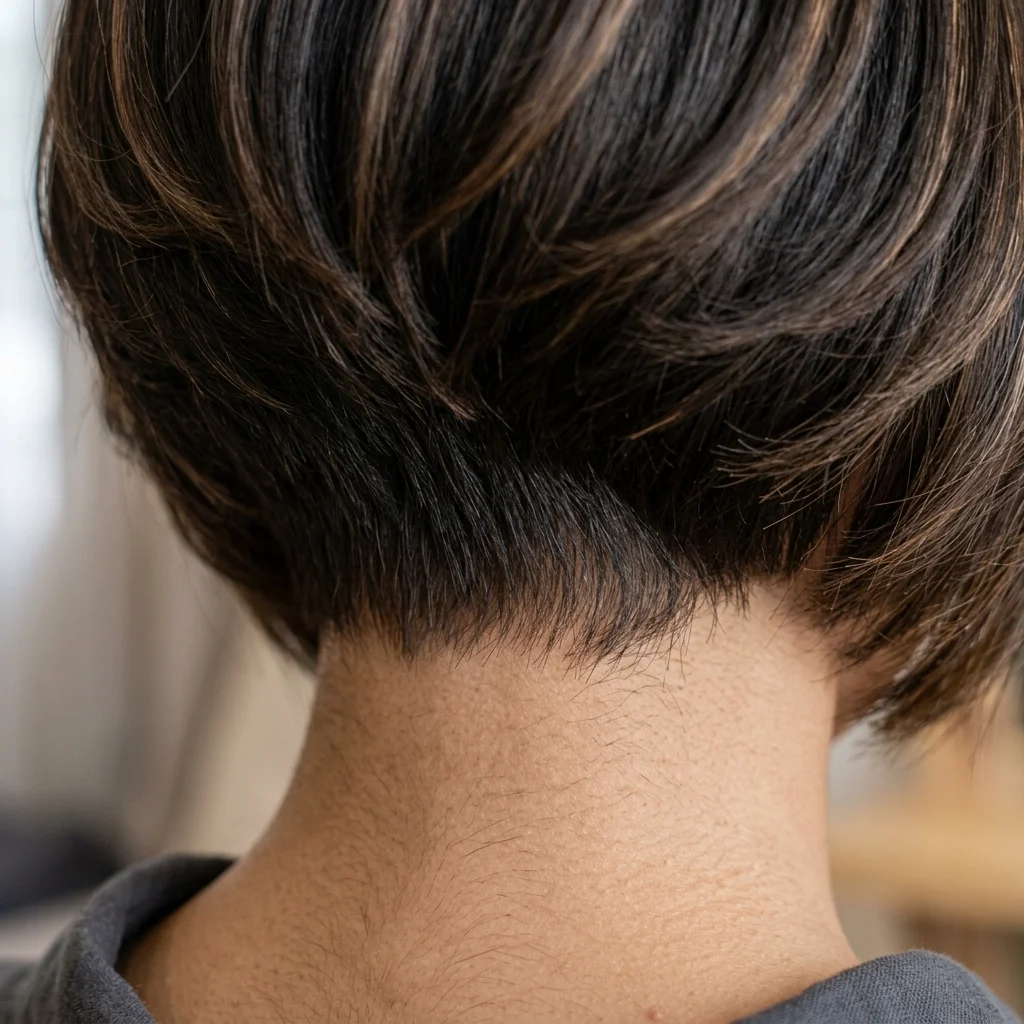
Vibe: Hushed, with an ending that fades rather than stops.
Why it works: The cutting principle is soft termination: point-cutting and razoring the very shortest layers at the nape, rather than clippering a hard line, allows the cut to taper into the neck gradually, which is what keeps the stacked bob’s structured back from reading as severe or overly geometric at its base.
How to get it: Ask your stylist to finish the nape with scissors and a razor rather than clippers, feathering the last half-inch of hair so it fades rather than ends abruptly.
💡 Quick Win: A texturizing powder dusted lightly at the nape before styling keeps this delicate taper from looking flat by the end of the day.
Shop the Look
| Product |
|---|
| Small precision scissors for nape trims |
| Texturizing powder for nape grip |
| Neck brush for post-trim cleanup |
| Boar bristle brush for gentle smoothing |
| Shine-enhancing hair oil for the nape |
How to Start Your Layered Stacked Bob with Feathered Sides Transformation
The single best first move is booking a consultation focused on the back-view stacking, not just the front length. Bring a mirror or ask your stylist to photograph the back mid-cut, since the graduated stacking is the structural foundation the entire silhouette depends on. Getting this right first is what determines whether the feathered sides have the right base to blend into.
The most common mistake is asking for the sides to be heavily thinned without first establishing the stacked structure at the back. This leaves the cut feeling thin and shapeless rather than feathered, since feathering is a finishing technique applied to an already-structured cut, not a substitute for that structure. The fix is sequencing: stacking first, in the same appointment, then feathering applied to the sides once the back’s volume is established.
Three budget entry points under $50: a firm-hold volumizing mousse for enhancing the stacked structure, a lightweight finishing cream for taming face-framing pieces, and a small round brush sized specifically for feathering the sides during blow-dries.
A full cut-and-color transformation typically takes one to two salon visits over two to four weeks. A cut-only starter version runs $50–$90 in a single weekend appointment, while a full balayage or tortoiseshell color transformation costs $150–$350 depending on length and tonal complexity.
Frequently Asked Questions About Layered Stacked Bob with Feathered Sides
What’s the difference between a stacked bob and a regular bob?
A stacked bob builds graduated, layered volume into the back of the cut, with each layer sitting shorter than the one above it, while a regular bob is typically cut at one consistent length throughout the perimeter. This graduation is what gives a stacked bob its rounded, voluminous silhouette from behind, a feature a standard bob doesn’t have. Stylists often recommend stacking specifically for fine or thin hair that needs structural help holding shape.
What hair colors work best with a layered stacked bob and feathered sides?
Warm tones like caramel, chestnut, and honey-blonde balayage complement the feathered sides especially well, since the color placement can echo the movement of the feathering itself. Cooler tones like ash-brown or espresso work best when the stacking is the primary visual feature and the color is meant to stay understated. A tortoiseshell or multi-tonal blend adds the most dimension for hair with a lot of natural movement in the feathered layers.
How much does a stacked bob haircut with feathered sides cost?
A cut alone typically runs $50–$90 depending on region and salon tier, since the graduated stacking technique takes longer than a single-length trim. Adding balayage or a tortoiseshell color service brings the total to $150–$350 for the first full appointment, with maintenance trims every five to seven weeks costing less than the initial visit. Choosing a cut-only appointment first is the most budget-friendly way to test the shape before committing to color.
Does a stacked bob with feathered sides work for curly or wavy hair?
Yes, though curly and wavy textures benefit from slightly longer layers than shown in straight-hair reference photos, since curl shrinkage can pull the stacked graduation shorter once dry. Ask your stylist to cut curly hair dry, in its natural state, so the stacking and feathering are measured against how the curl pattern actually falls rather than its stretched, wet length. The feathered side technique works particularly well on wavy hair, since the natural bend enhances the taper without additional styling.
How often does a stacked bob with feathered sides need to be trimmed?
Plan on a trim every five to seven weeks, since the graduated stacking at the nape grows out faster than the feathered sides and needs regular maintenance to keep the rounded volume from softening into a looser, less defined shape. Skipping trims past eight weeks is the most common reason the stacked structure starts to lose its silhouette. Regular trims also keep the feathered sides at the length needed to blend seamlessly with any face-framing pieces.
Ready to Create Your Layered Stacked Bob with Feathered Sides?
From the graduated stacking at the nape to the tortoiseshell color blend to the soft feathered taper that finishes it all off, these 17 ideas cover cut structure, color placement, and daily styling in equal measure. You don’t need every detail in one visit, starting with just the back-view stacking consultation is a real and complete first step. Book that appointment this week and ask your stylist to photograph the back mid-cut so you can see the structure taking shape before the feathering begins. Once it’s done, you’ll likely feel less like your hair needs constant adjusting and more like it holds its own shape, no matter the angle. Pin your favorite stacking depth and color blend now, so you walk into the salon with the exact structured, feathered look you want.