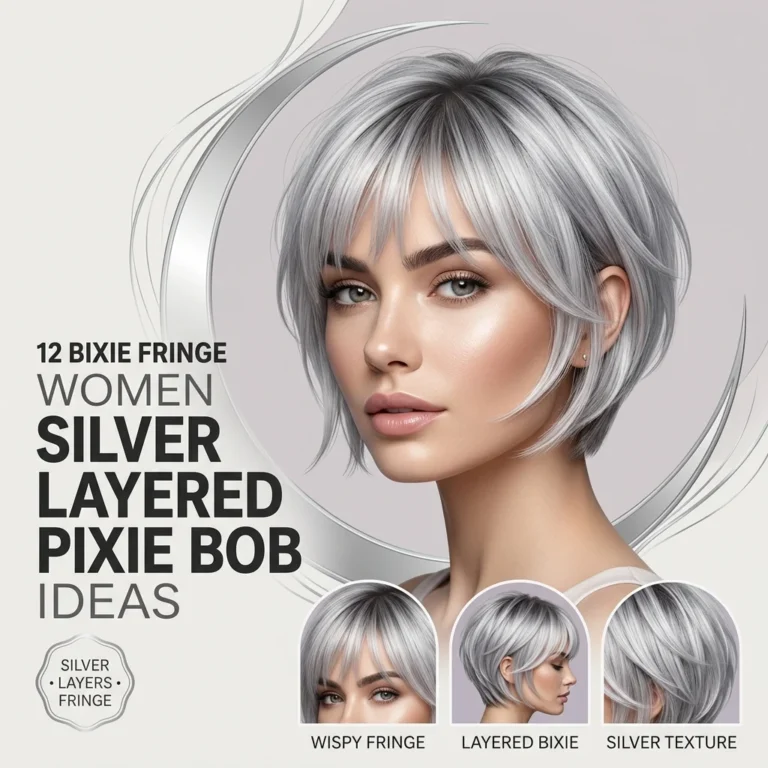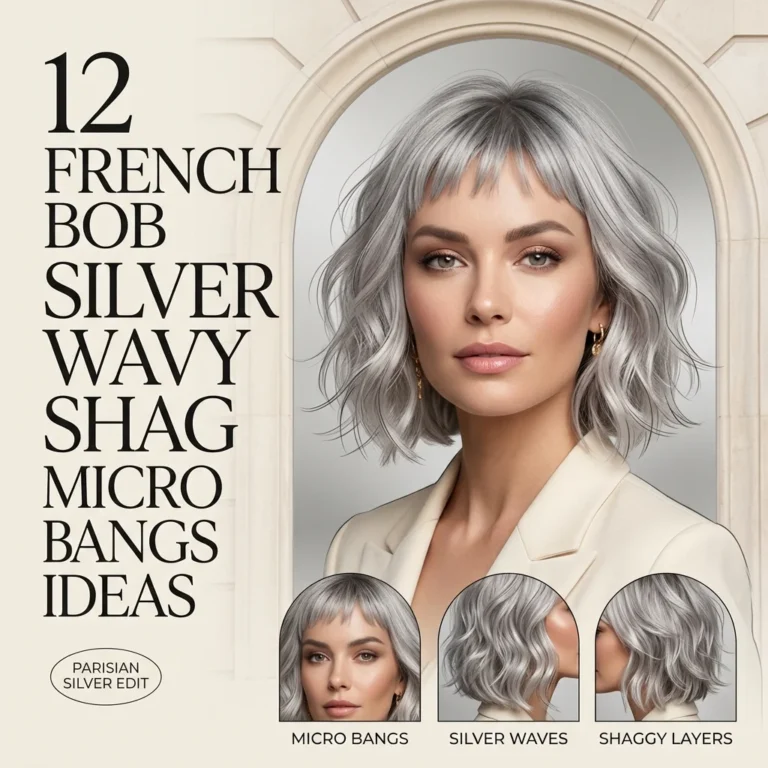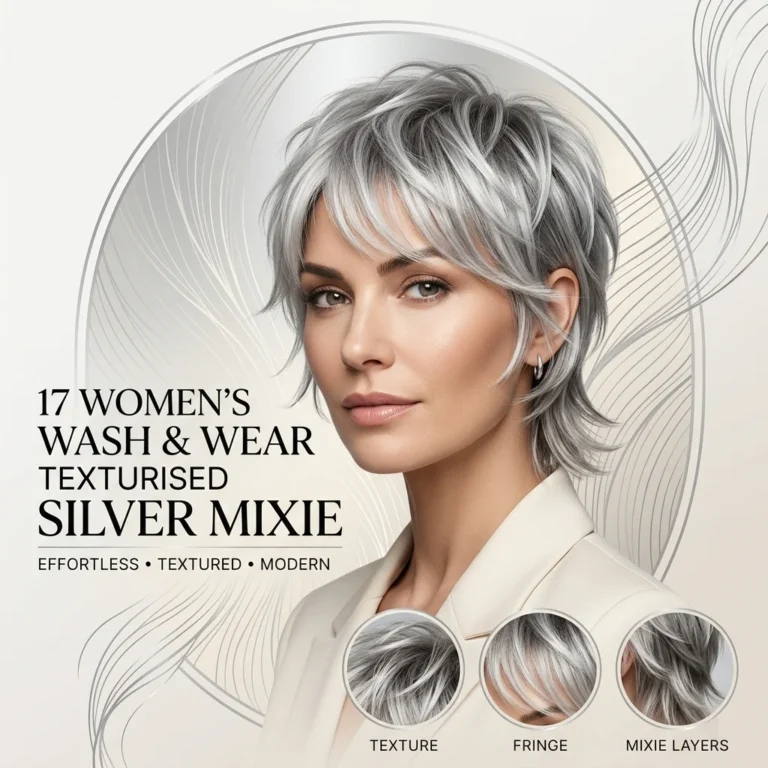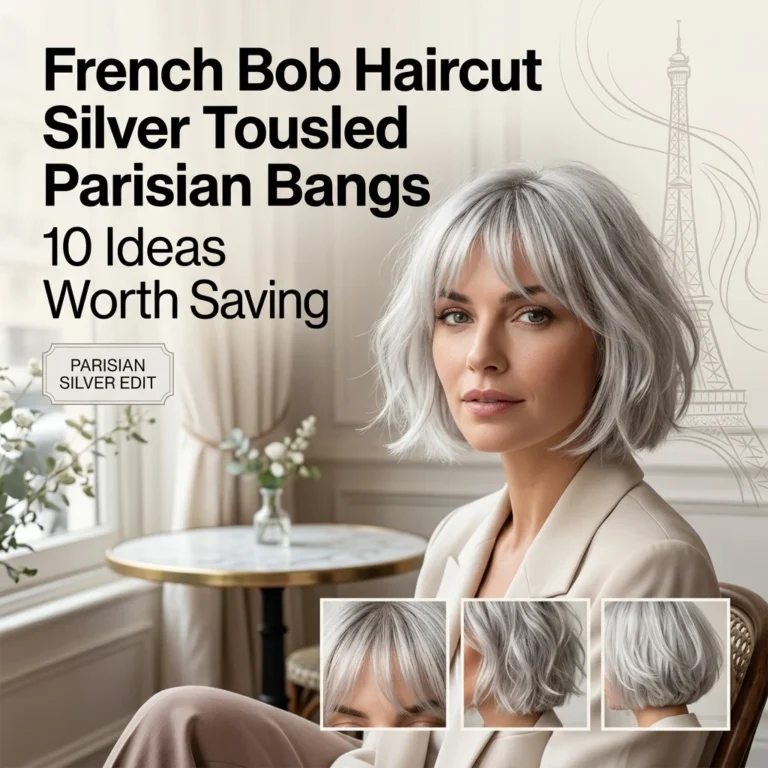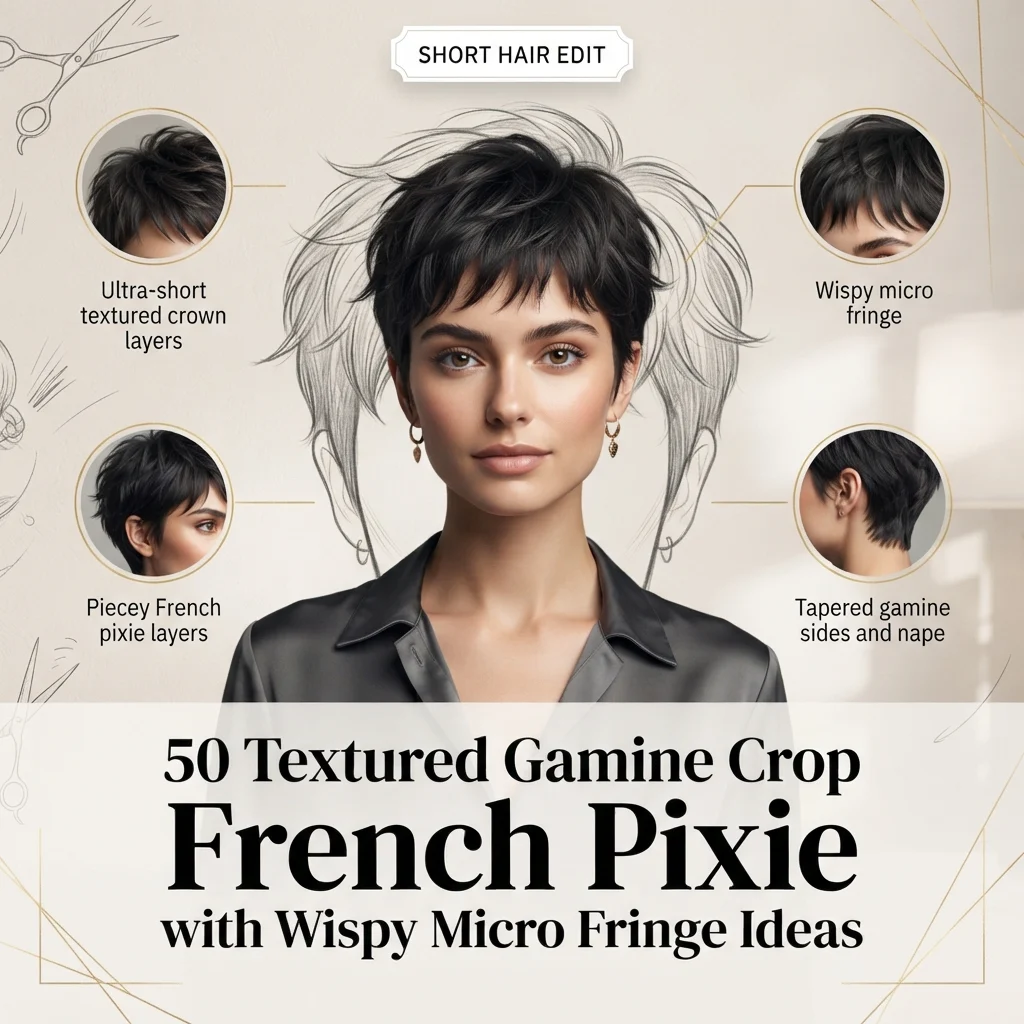
50 Textured Gamine Crop Ideas: French Pixie With Micro Fringe

A textured gamine crop is a short French pixie cut with piecey, razored layers through the crown and a soft, wispy micro fringe grazing the brow. This article gives you 50 distinct ways to wear it, from color and taper choices to fringe shapes and finishing techniques.
The gamine pixie feels sharp yet soft at once, all angles and air, with a fringe that moves instead of sitting flat. It carries a quiet confidence, the kind of cut that looks effortless because every layer is placed with intention. Light catches differently across a textured crown than a smooth one, giving the whole silhouette a lived-in, hand-finished quality. Here are 50 ideas worth saving and stealing.
Why the Textured Gamine Pixie Works So Well
The gamine crop traces back to the French pixie tradition popularized in mid-century Paris, later sharpened by editorial stylists who added razored texture to soften its boyish base. It sits apart from a classic pixie because the crown carries visible, separated pieces rather than a uniform blunt layer, and the micro fringe is cut shorter and wispier than a standard bang. This texture-first approach is what gives the cut its gamine energy: playful, androgynous, and precise.
The signature palette runs through platinum ash, espresso brunette, rose gold, and icy silver, while finishing products lean on matte clay pomade, sea salt texturizing spray, and lightweight sculpting wax. Ends are typically razored or point-cut rather than blunt, which is what creates the piecey, wispy movement through both the crown and the fringe. A gamine crop reads as intentional rather than undone, so the texture is engineered, not accidental.
This cut has surged again as low-maintenance, high-impact styles trend upward, with searches for micro fringe and pixie textures climbing as more people move away from long-hair upkeep. It photographs cleanly for social platforms, since the wispy fringe and cropped nape hold their shape through a full day without a touch-up. The style also pairs naturally with the current appetite for androgynous, editorial-leaning haircuts.
Fine or thin hair actually benefits most from this cut, since short layers create the illusion of density that length alone cannot. The main limitation is upkeep frequency: a gamine crop needs a trim every four to six weeks to keep the taper and fringe sharp, so it suits people willing to commit to that schedule.
Style at a Glance
| Element | Detail |
| Philosophy | Precision texture over uniform length |
| Key Materials | Matte clay pomade, sea salt spray, razor-cut ends |
| Key Colors | Platinum ash, espresso brunette, rose gold, icy silver |
1. Razor-Textured Crown with Wispy Micro Fringe
TEXTURE
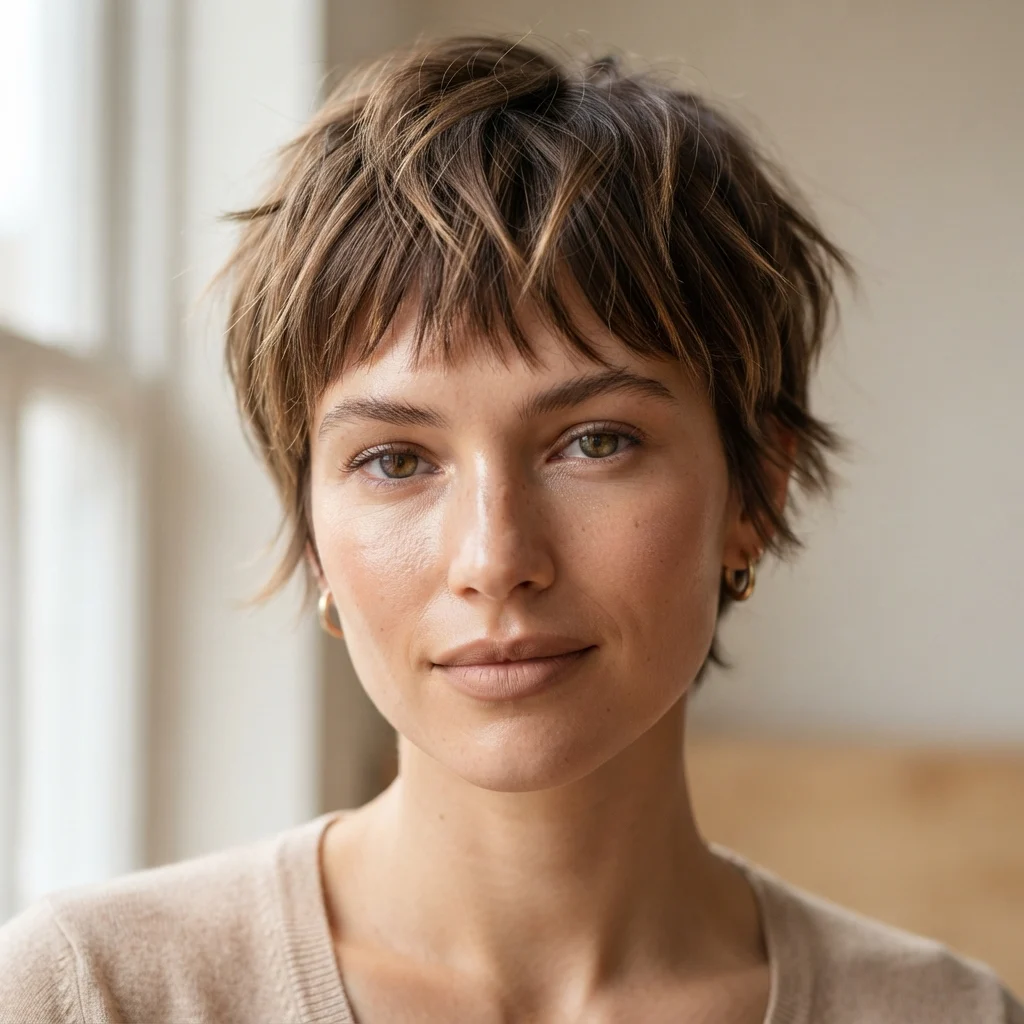
Vibe: This crown feels raw, every strand cut to move independently instead of lying flat.
Why it works: Razoring the ends removes weight from each piece, which lets the crown catch light unevenly and create depth. This is the base texture technique the entire gamine category builds from, relying on contrast between short, choppy pieces and the smoother nape beneath. The visual weight stays concentrated at the crown, which keeps the eye moving upward and elongates the face. Without this foundational razor work, the wispy fringe below would read as disconnected rather than intentional.
How to get it: Ask your stylist for a razor, not scissors, on the top third of the crown only. Request point-cutting on the ends to soften any blunt edges left behind. Work a pea-sized amount of matte clay pomade between your palms before scrunching it upward from the roots. Avoid combing after product application, since combing flattens the separation you just created.
Shop the Look
| Product |
| Matte clay pomade strong hold texturizing paste |
| Precision texturizing shears for home touch-ups |
| Wide-tooth detangling comb for wet hair |
| Round boar bristle brush small barrel |
| Travel-size sea salt spray texturizing mist |
2. Cool Platinum Ash Pixie
COLOR
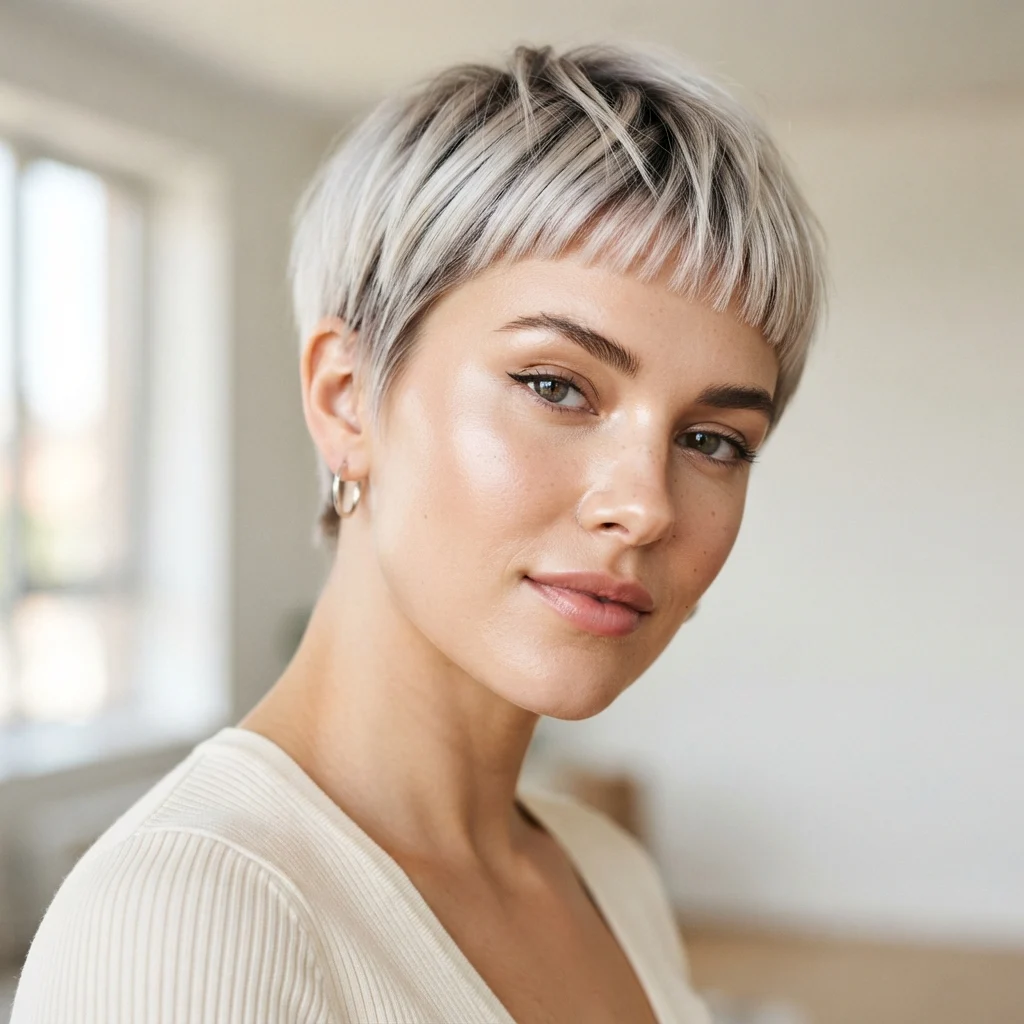
Vibe: The color feels crisp, almost frost-touched against warm skin.
Why it works: Ash tones neutralize the natural warmth that lifted hair tends to carry, which is a color-correction principle stylists use to avoid brassiness. On short hair, this cool cast reads more dramatically because there is less strand length to soften the tone. This color choice also photographs with more clarity under both natural and studio lighting than warmer blondes.
How to get it: Request a toner with blue-violet base pigment immediately after lightening to cancel yellow undertones. Use a purple-pigmented shampoo once weekly to maintain the ash cast between salon visits. Keep heat styling under 300 degrees Fahrenheit to protect the lifted strands from further damage. Schedule a gloss refresh every three weeks, since ash fades toward warm faster than most other blonde tones.
💡 Quick Win: A single-use purple toning mask applied for ten minutes after washing can reset a fading ash tone without a salon trip.
Shop the Look
| Product |
| Purple pigmented toning shampoo for blondes |
| Bond-repair leave-in treatment spray |
| Heat protectant spray for fine hair |
| Silver toning hair mask deep conditioning |
| Ceramic flat iron dual voltage small barrel |
3. Curtain-Split Micro Fringe
FRINGE STYLE

Vibe: This fringe feels open, framing rather than covering the face.
Why it works: Splitting the fringe at the center shifts visual weight to either side of the face rather than across the forehead, a proportion technique that softens angular jawlines. This works especially well paired with a shorter crown, since the fringe becomes the softest element in an otherwise sharp cut. The parting also gives the style flexibility to shift slightly day to day without losing shape.
How to get it: Have your stylist cut the fringe with a slight point at the center part so it falls open naturally. Use a small round brush while blow-drying to curve each side away from the face. Finish with a dime-sized drop of lightweight sculpting cream rubbed between fingertips, not palms. Reset the part daily with fingers rather than a comb to preserve the feathered edge.
Shop the Look
| Product |
| Small round barrel brush for fringe styling |
| Lightweight sculpting cream flexible hold |
| Mini ionic travel hair dryer |
| Fine-tooth tail comb for precise parting |
| Anti-frizz finishing serum for fringe |
4. Short Disconnected Nape Taper
TAPER & LENGTH
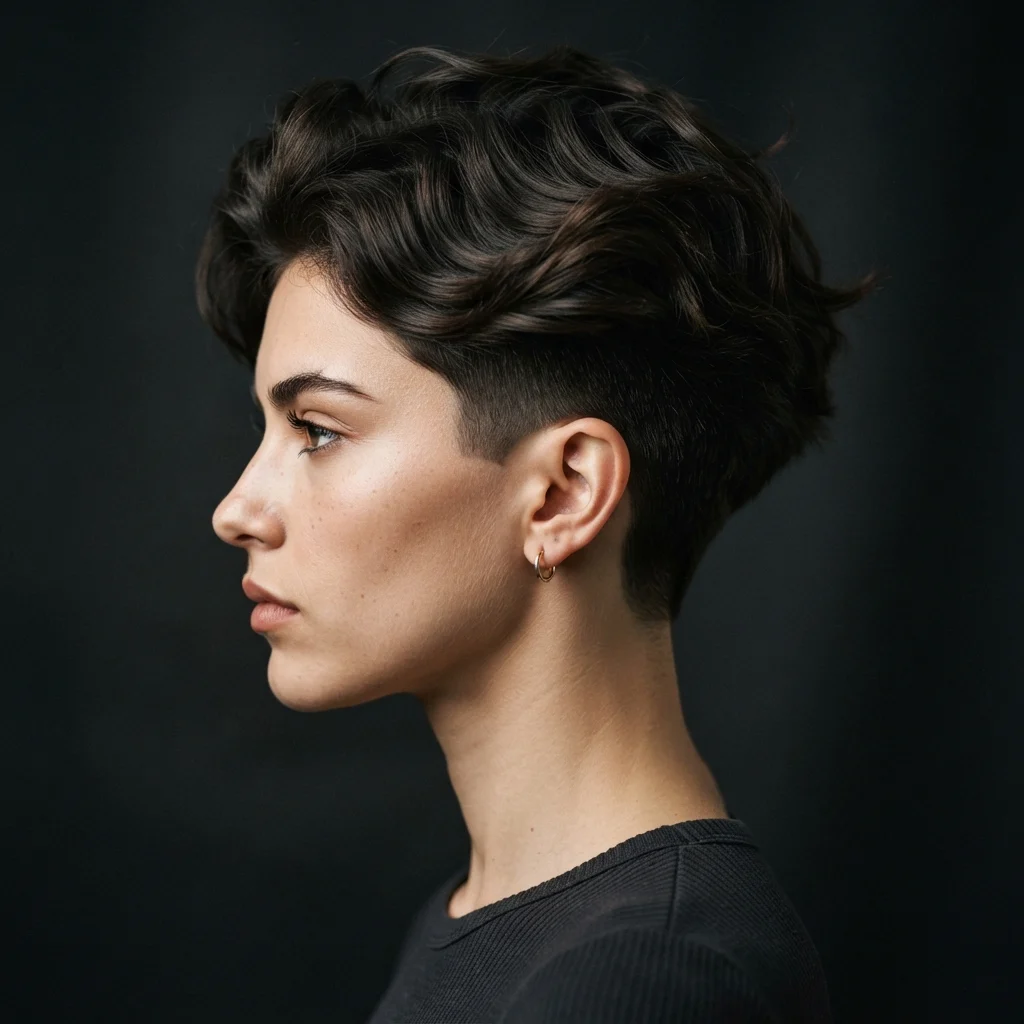
Vibe: The nape feels sculpted, a clean line beneath softer chaos above.
Why it works: Disconnection is a structural cutting technique where the nape length breaks sharply from the crown length instead of blending gradually. This contrast in scale, short and precise below, longer and textured above, is what gives the gamine crop its editorial edge. The hard line at the nape also visually shortens the back of the head, a proportion adjustment useful for longer necks. Without this deliberate break, the crown texture would lose its dramatic effect.
How to get it: Ask specifically for a disconnected nape rather than a graduated one, since the terms produce different results. Request clippers set to a number one or two guard for the nape section only. Keep the disconnection line visible by avoiding product buildup at the neckline. Touch up the nape every three to four weeks even if the crown can wait longer between trims.
Shop the Look
| Product |
| Cordless hair clipper trimmer set |
| Neck duster brush for at-home touch-ups |
| Styling cape with snap closure |
| Precision edge trimmer for hairline |
| Talc-free neck powder for clean finish |
5. Finger-Combed Piecey Finish
STYLING TECHNIQUE
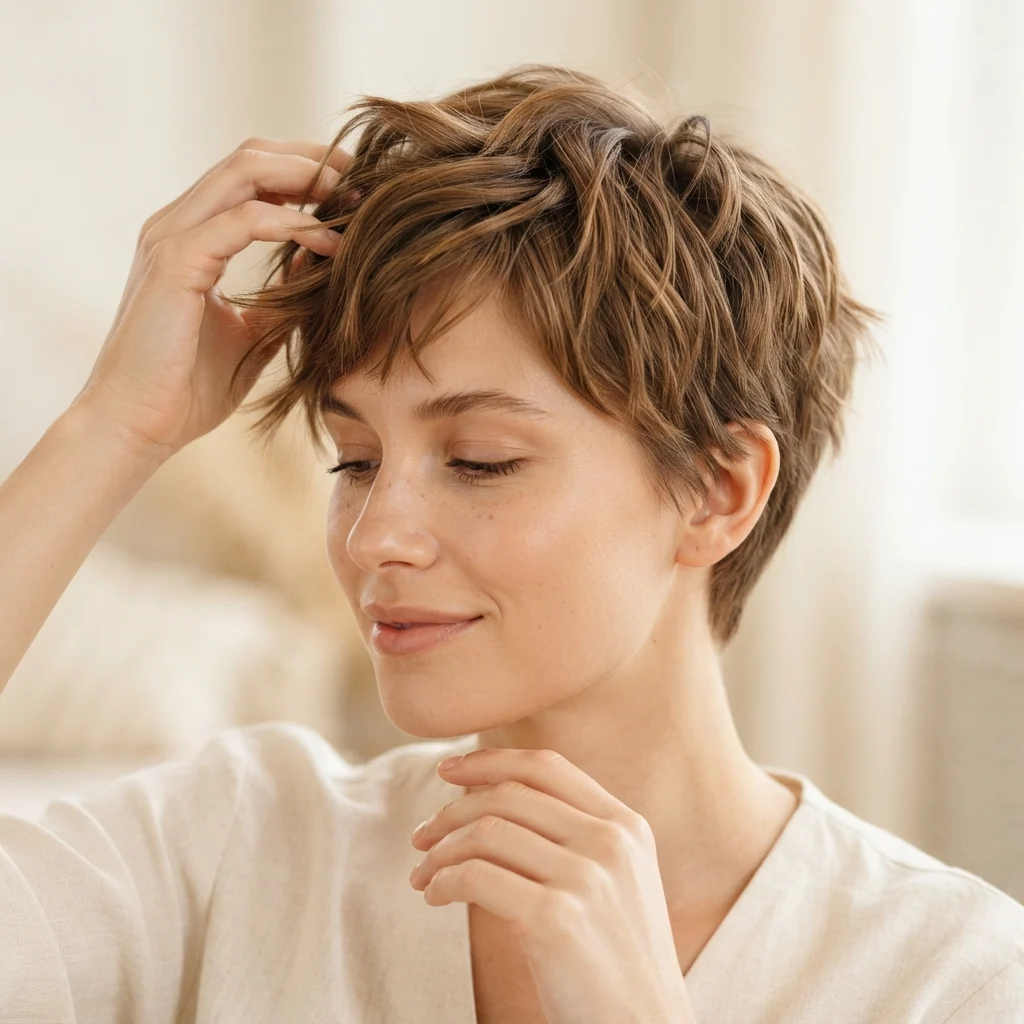
Vibe: This finish feels unhurried, styled by hand rather than tool.
Why it works: Finger-combing relies on tactile control rather than a brush, which preserves the natural separation created by the razor cut instead of smoothing it away. This technique respects the cut’s texture rather than fighting it, a principle stylists call working with the hair’s natural fall. It also distributes product unevenly on purpose, since uniform coverage would flatten the piecey effect. The result looks different each time it is styled, which keeps the cut feeling current rather than routine.
How to get it: Apply a nickel-sized amount of texturizing paste to dry hands before touching the hair, never directly to strands. Lift sections from the root using fingertips only, twisting slightly as you release each piece. Skip the brush entirely for this technique, since bristles will undo the separation. Let hair air-dry partially before styling for more texture grip than fully dry strands allow.
💡 Quick Win: Keep a small tin of texturizing paste in your bag for a midday refresh using just your fingertips.
Shop the Look
| Product |
| Texturizing paste travel tin |
| Dry shampoo powder for root lift |
| Flexible hold finishing spray |
| Silicone hair styling gloves |
| Compact styling mirror for touch-ups |
6. Slim Gold Hair Cuff Accent
ACCESSORY
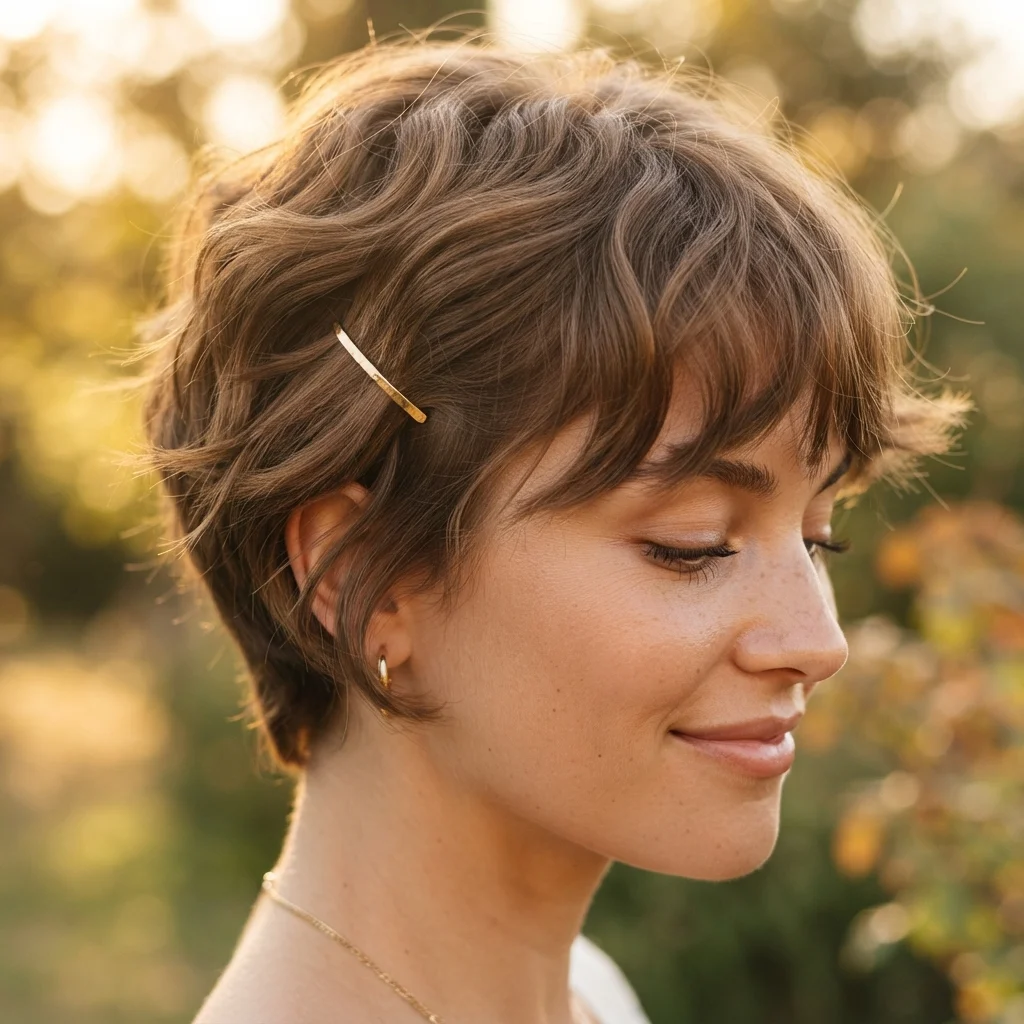
Vibe: The cuff feels like a whispered detail, small but deliberate.
Why it works: A slim metal cuff adds a fixed point of visual interest against the otherwise moving texture of the crop, a principle of contrast between stillness and motion. Because the cut is short, even a small accessory reads clearly rather than getting lost in length. Gold specifically warms up cooler hair colors like ash or silver, balancing the palette. Placement matters more than size here, since one cuff near the temple draws the eye without overwhelming the cut.
How to get it: Choose a cuff sized for a single half-inch section of hair, not a full ponytail clip. Slide it onto a piece near the temple after styling is complete, not before. Twist the section slightly before threading it through to prevent slipping. Reserve this accessory for second-day hair, since freshly washed strands are often too slick to hold the cuff in place.
Shop the Look
| Product |
| Slim gold hair cuff jewelry set |
| Small hair section clip for accessories |
| Texturizing dry wax for grip |
| Mini bobby pins matte gold finish |
| Compact hair accessory storage case |
7. Matte Clay Pomade Definition
MAINTENANCE
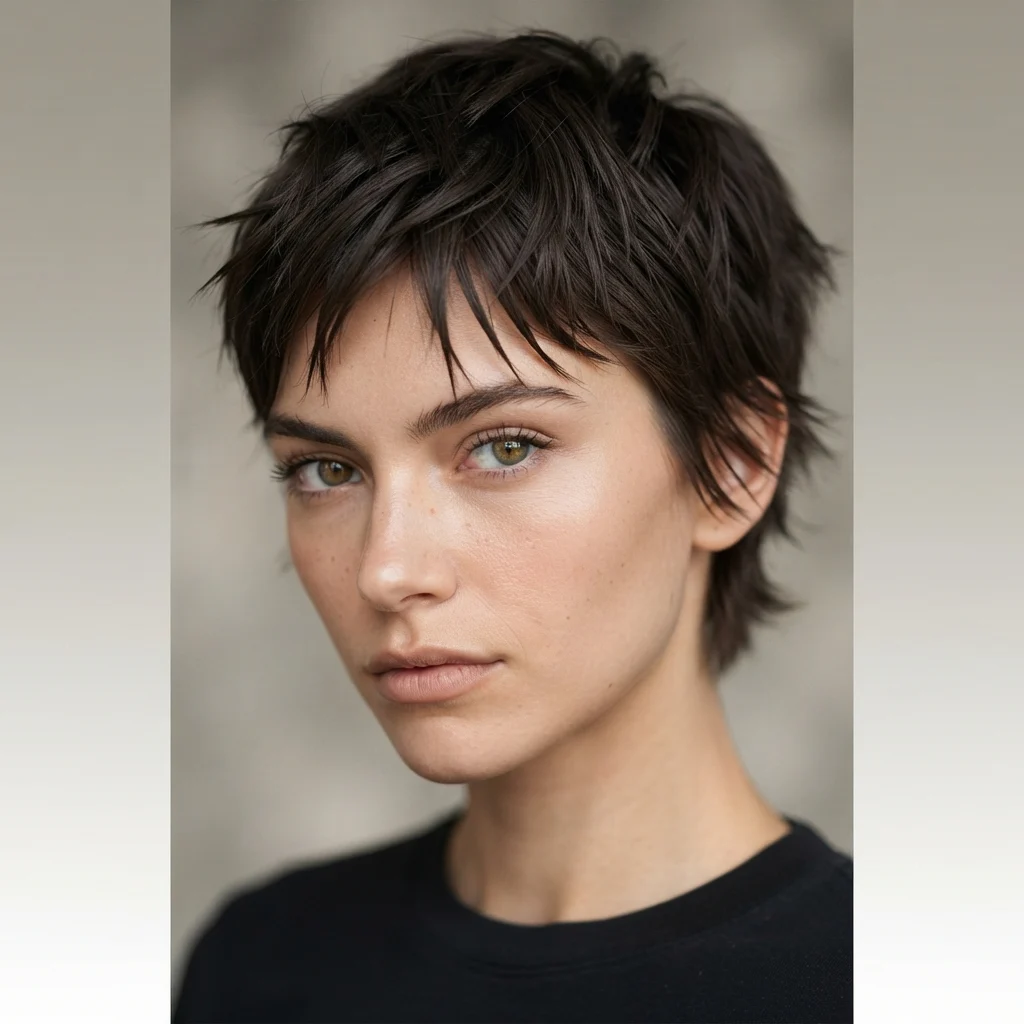
Vibe: This finish feels solid, texture that holds its shape through the day.
Why it works: Clay-based pomades contain kaolin or bentonite clay that absorbs oil rather than adding shine, which is the opposite mechanism of wax or gel. This matte finish suits the gamine crop because shine would flatten the visual texture the cut relies on. Clay also builds hold gradually as it dries, allowing for reshaping throughout the day without a full restyle. This is the maintenance product that keeps the crown’s separation intact from morning until evening.
How to get it: Warm a small amount of clay pomade between your palms until it turns slightly translucent before applying. Work it into damp, not wet, hair for the strongest hold-to-texture ratio. Reapply only to the crown, since the nape rarely needs extra product. Store the pomade tub with the lid tightly sealed, as clay formulas dry out faster than cream-based products.
Shop the Look
| Product |
| Kaolin clay matte pomade tub |
| Wide flat styling comb for application |
| Small mixing palette for product blending |
| Texturizing dry shampoo spray |
| Sealed travel jar for pomade on the go |
8. Feathered Crown Layers
TEXTURE
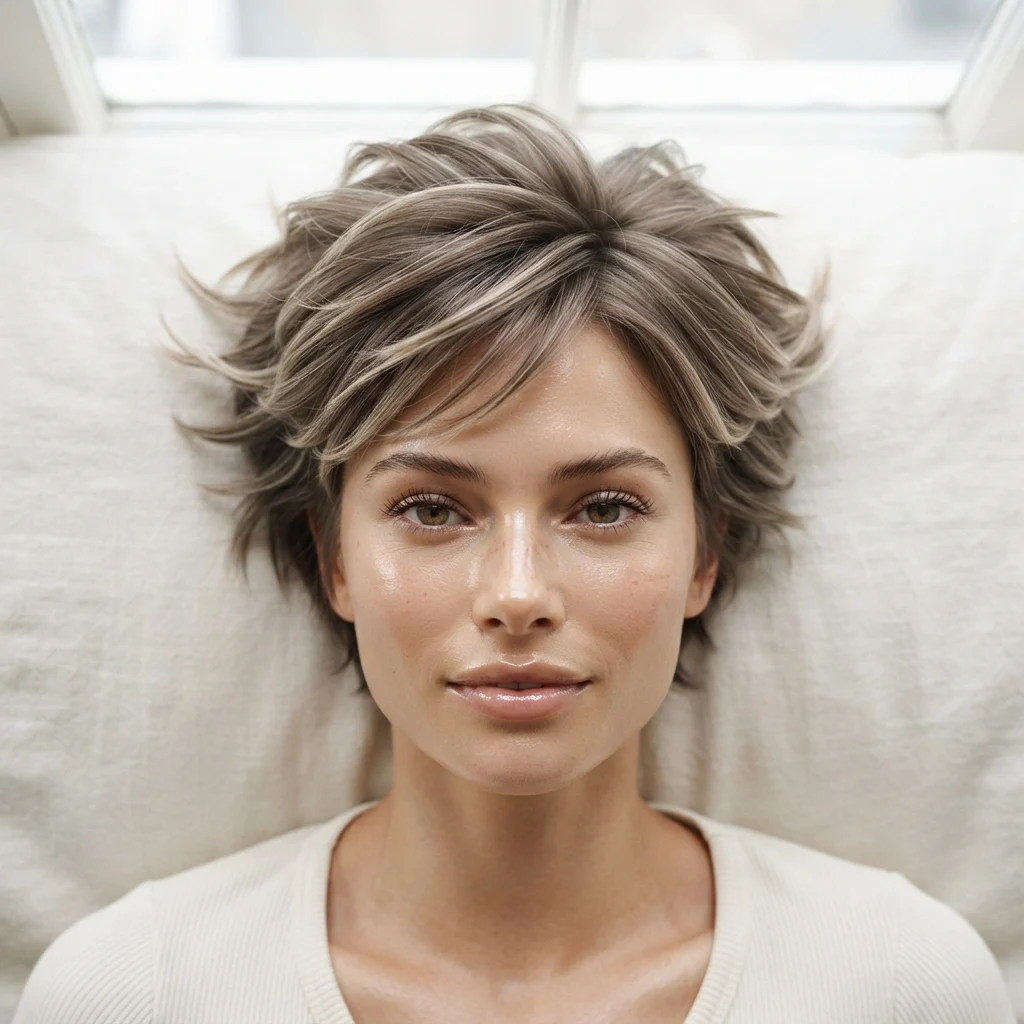
Vibe: This crown feels light, each layer lifting slightly away from the last.
Why it works: Feathering cuts each layer at a sharp diagonal angle rather than straight across, which reduces bulk and encourages the ends to flick outward. On a short cut, feathered layers prevent the crown from reading as a solid block of hair. The technique also allows the style to move more naturally in wind or motion than a heavily product-set look.
How to get it: Request feathered, not blunt, layers throughout the crown during your cut, specifying a diagonal cutting angle. Blow-dry with a diffuser attachment pointed upward from the roots to encourage the natural flick. Apply a lightweight mousse before drying rather than a heavier cream, since feathered ends need less weight to hold shape. Avoid flat-ironing this style, as heat tools will remove the very lift the cut is designed to create.
Shop the Look
| Product |
| Diffuser attachment for blow dryer |
| Lightweight volumizing mousse |
| Wide-tooth pick comb for lift |
| Root-lifting spray for fine hair |
| Anti-humidity finishing mist |
9. Rose Gold Balayage Pixie
COLOR
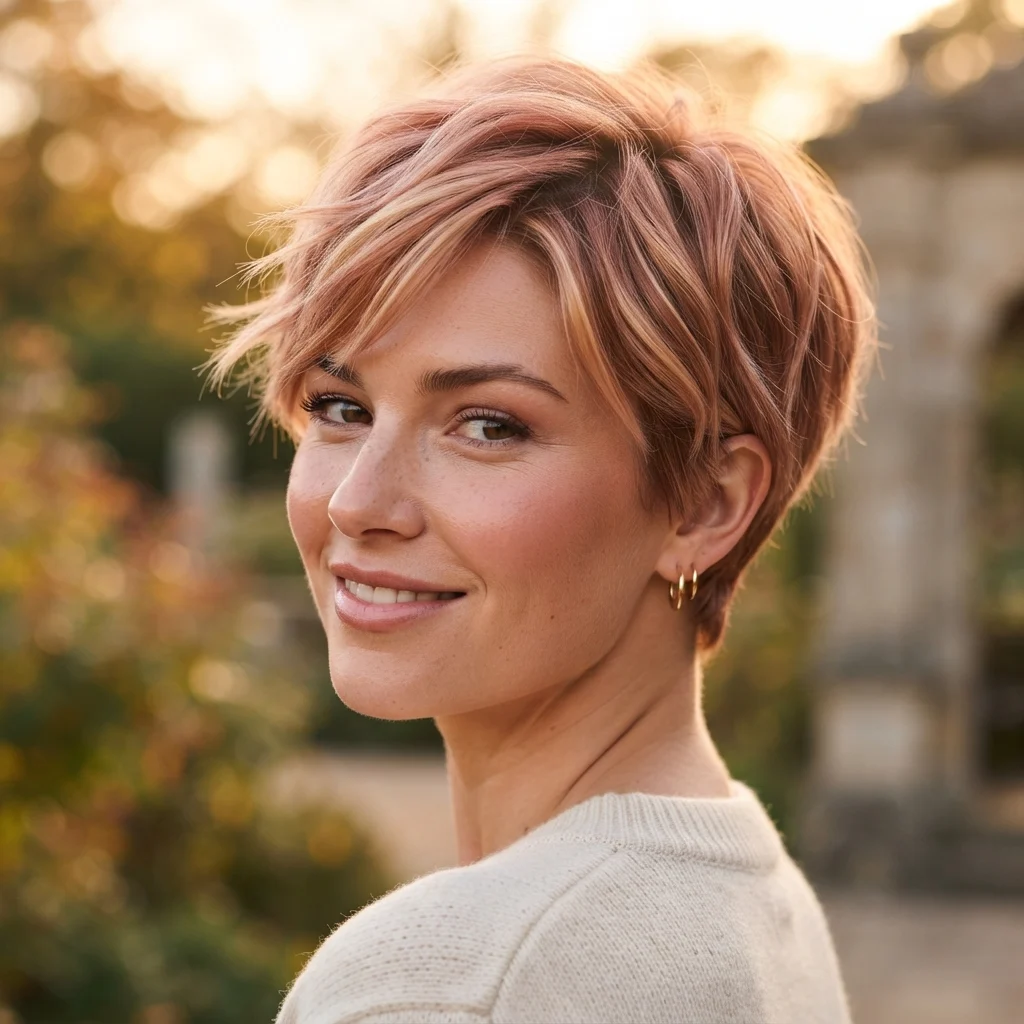
Vibe: This color feels warm, catching a faint rose glow in daylight.
Why it works: Balayage is a hand-painted lightening technique that places color unevenly on purpose, which reads more naturally on short hair than foil highlights spaced at fixed intervals. Because the crown is short, this dimension is visible from nearly every angle rather than hidden under layers of longer hair. The technique also grows out with a soft edge rather than a harsh root line.
How to get it: Request balayage specifically over foils, since the freehand technique is what creates the soft, natural placement. Ask for a rose gold glaze applied over a copper or strawberry blonde base for the truest tone. Use a color-safe shampoo formulated without sulfates to extend the glaze between salon visits. Refresh the glaze every four to five weeks, as rose tones fade faster than most other pastel-adjacent shades.
Shop the Look
| Product |
| Color-safe sulfate-free shampoo and conditioner set |
| Rose gold toning gloss at-home kit |
| UV protection hair spray for color |
| Cool-toned leave-in color depositing mask |
| Wide-tooth comb for color-treated hair |
10. Blunt-Cut Baby Fringe
FRINGE STYLE
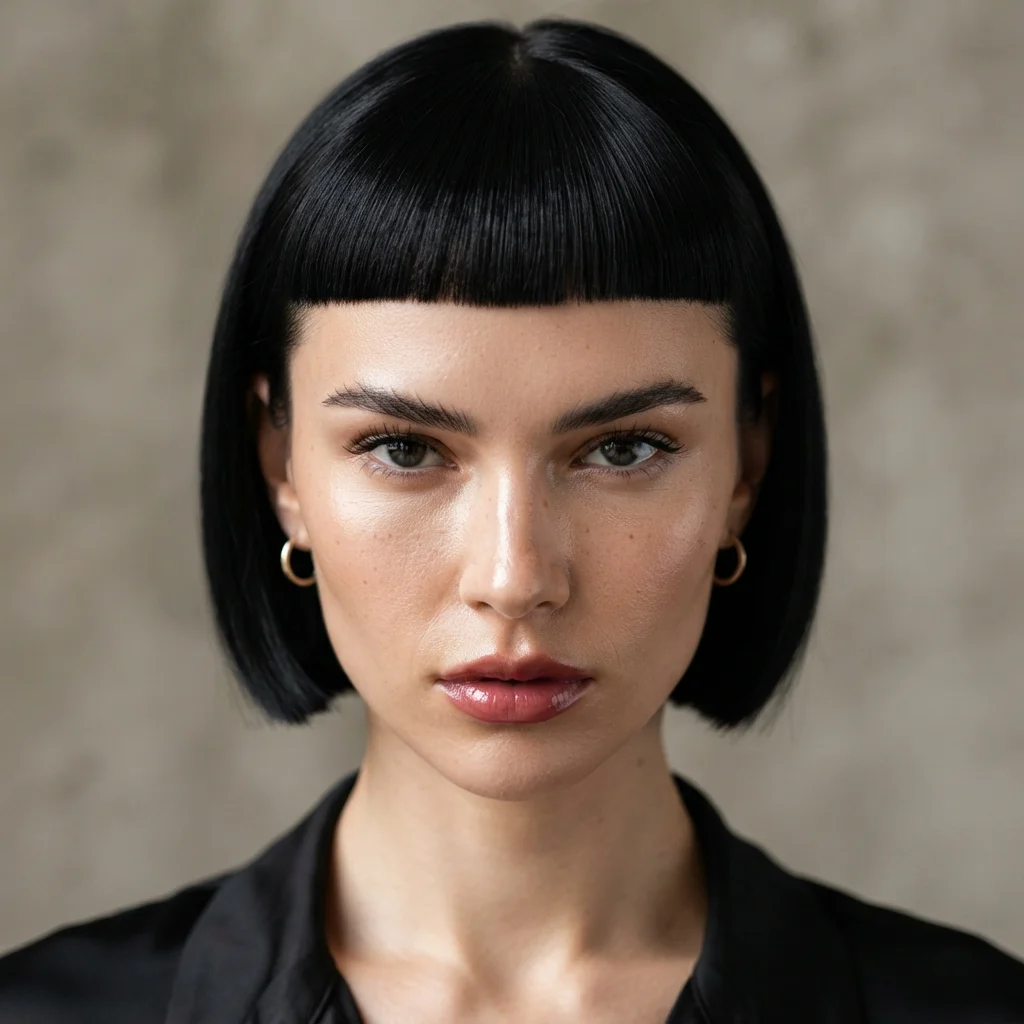
Vibe: This fringe feels bold, a sharp line that commands attention.
Why it works: A blunt baby fringe is cut with scissors rather than a razor, creating a crisp, unbroken edge that contrasts sharply with the textured crown above it. Placing it high, above the natural brow line, shortens the appearance of the forehead. The style requires precise cutting since any unevenness is highly visible at this short length.
How to get it: Ask your stylist to cut this fringe dry, not wet, since hair shrinks upward when it dries and a wet cut often ends up too short. Request the fringe sit no more than an inch above the brow for the classic baby fringe proportion. Trim it yourself every ten to fourteen days using small, sharp cutting shears to maintain the blunt line. Style with minimal product, since this fringe relies on its cut shape rather than texture for impact.
💡 Quick Win: Keep a pair of dedicated fringe-cutting shears at home to maintain the blunt line between salon visits without overpaying for quick trims.
Shop the Look
| Product |
| Small precision fringe-cutting shears |
| Fine-mist water spray bottle |
| Styling cape for at-home trims |
| Handheld magnifying mirror for precision |
| Anti-static finishing spray for fringe |
11. Extended Undercut Taper
TAPER & LENGTH
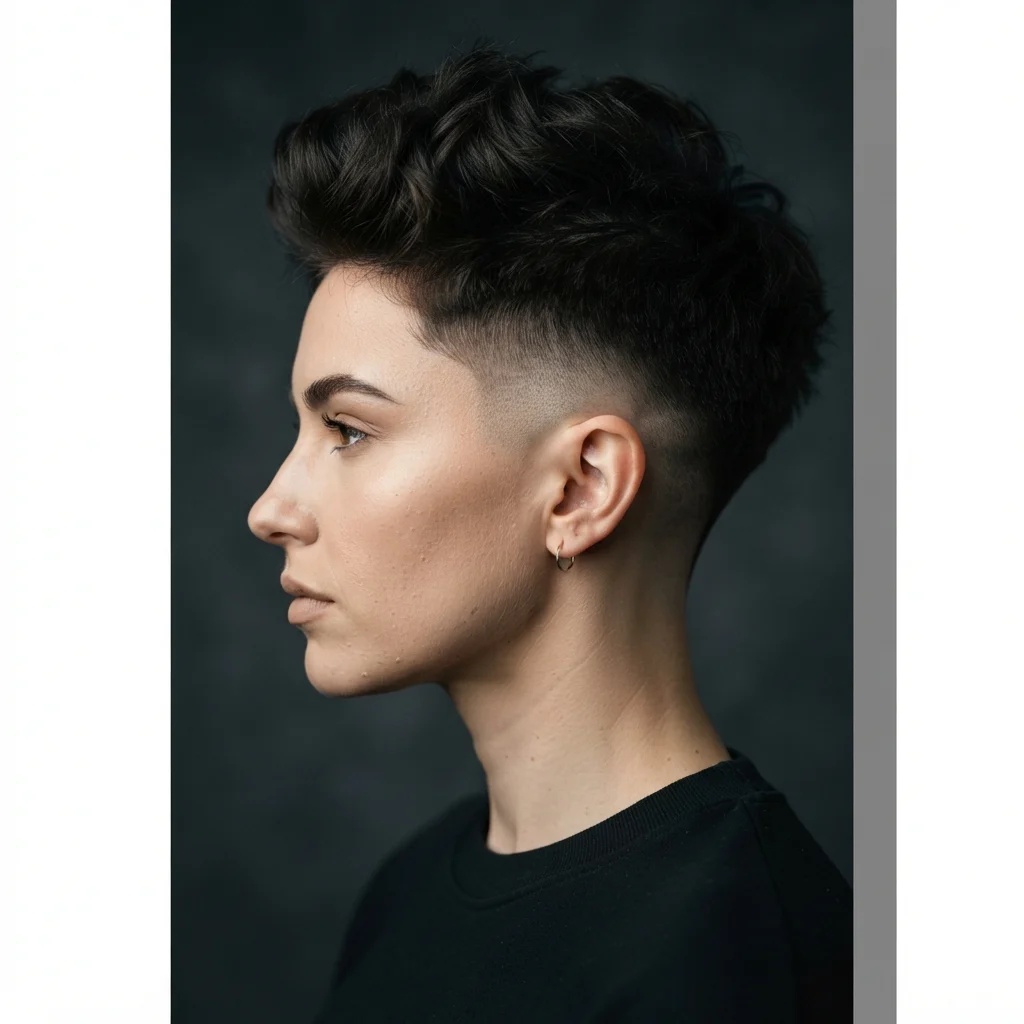
Vibe: This taper feels architectural, structure carved above the ear.
Why it works: Extending the undercut higher than a standard taper shifts more visual weight toward the crown, exaggerating the contrast central to the gamine style. The undercut also reduces bulk at the sides, which keeps the style from reading as heavy despite the texture on top. Because this taper is more dramatic, it requires more frequent upkeep to preserve the line.
How to get it: Specify an undercut that extends at least one inch above the natural hairline for the intended dramatic effect. Request clipper guard sizes stepping down gradually rather than a single abrupt line for a cleaner blend. Book touch-up appointments every two to three weeks, since this taper grows out faster visually than the crown length. Use a small handheld mirror to check the undercut daily, as regrowth here is more noticeable than elsewhere on the head.
Shop the Look
| Product |
| Professional-grade clipper set with guards |
| Handheld dual-sided mirror |
| Neckline edge trimmer |
| Barber cape with adjustable neck closure |
| Aftershave balm for sensitive undercut skin |
12. Blow-Dried Volume Lift
STYLING TECHNIQUE
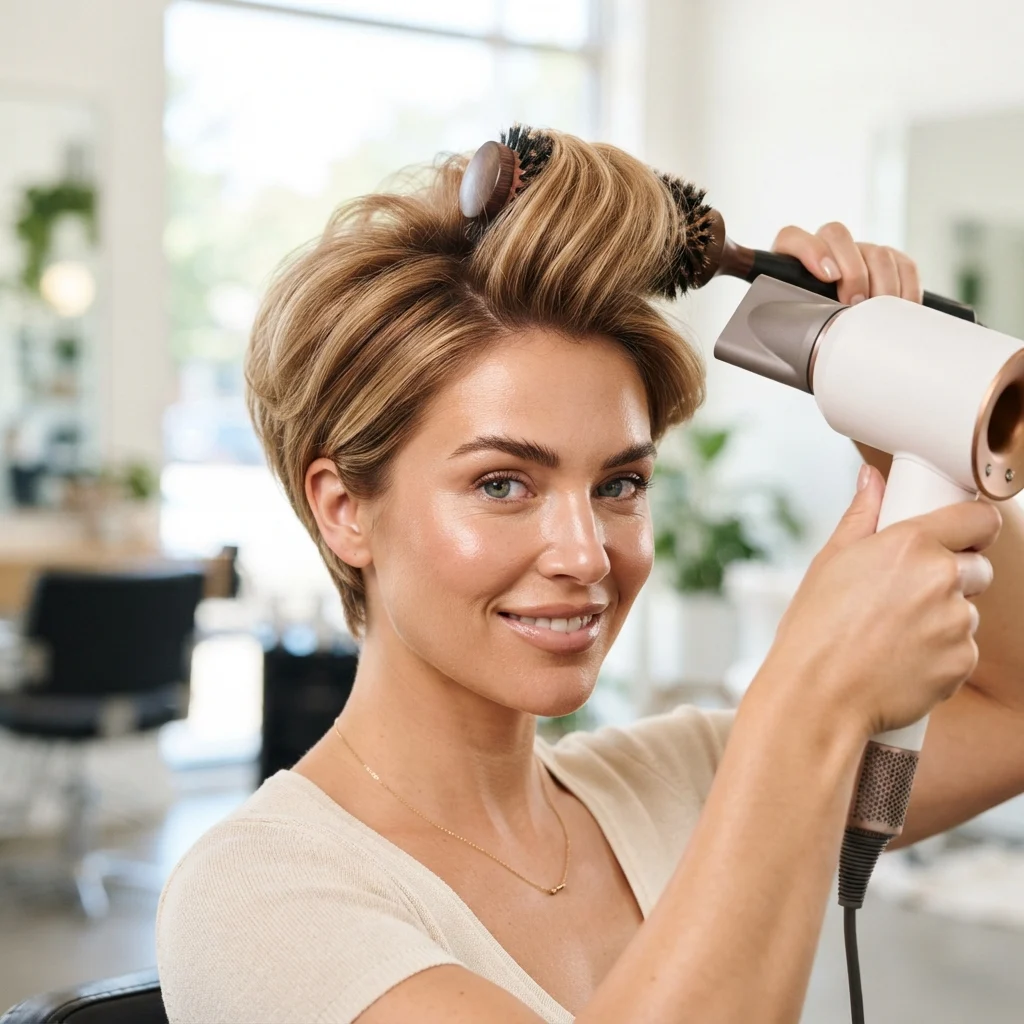
Vibe: This lift feels buoyant, hair rising instead of settling flat.
Why it works: Directing airflow against the direction of hair growth while blow-drying lifts the cuticle at the root, a mechanical technique that builds volume without added product weight. The lift also elongates the crown, making the whole silhouette appear taller. This technique works in tandem with the cut itself, since layered ends move more freely once the base has height.
How to get it: Dry hair upside down for the first two minutes to encourage roots to lift away from the scalp. Switch to a round brush and dry sections upward, holding the dryer at the roots rather than the ends. Finish with a blast of cool air over the entire crown to set the lift in place. Use a volumizing spray at the roots before drying, applied only where lift is needed most.
Shop the Look
| Product |
| High-heat ionic hair dryer with cool shot |
| Small round volumizing brush |
| Root-lift volumizing spray |
| Sectioning clips for blow-drying |
| Heat-protectant volumizing mousse |
13. Pearl Snap Clip Detail
ACCESSORY
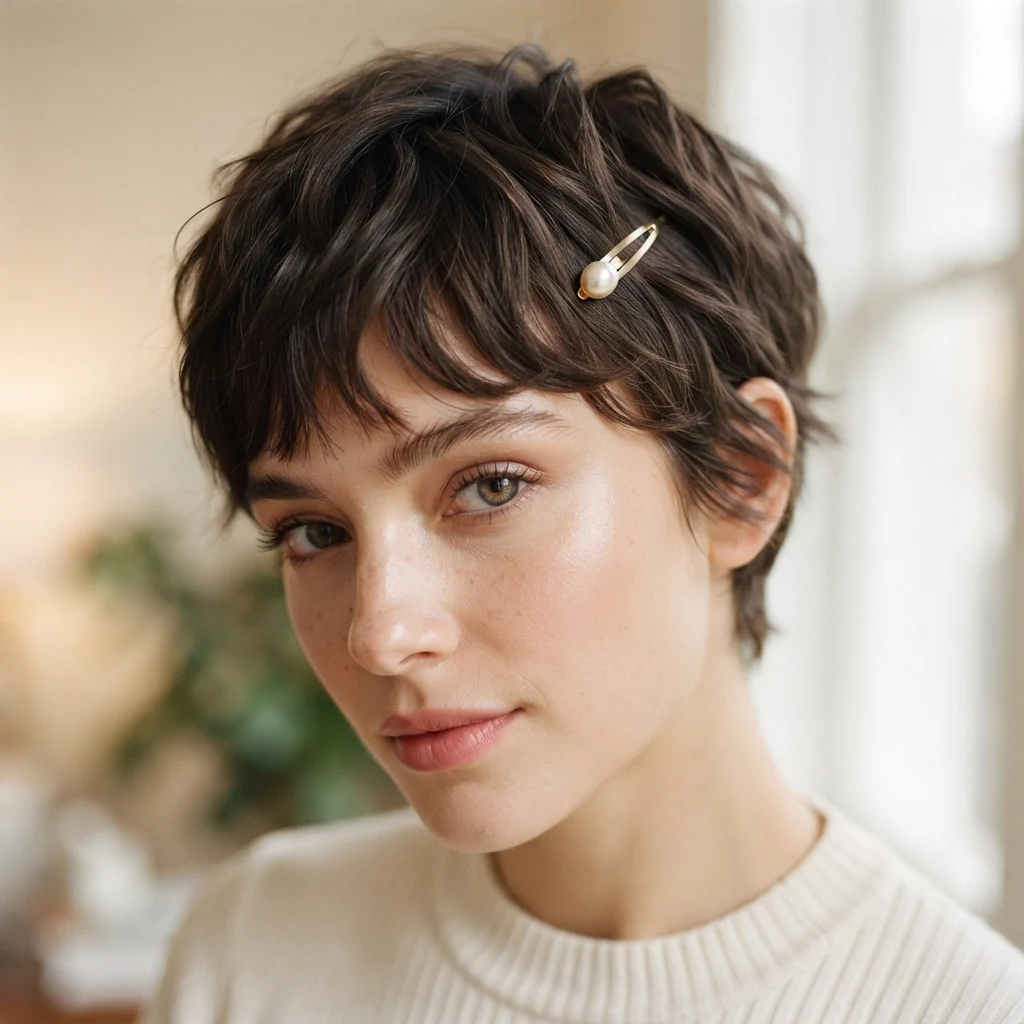
Vibe: This detail feels tender, a soft counterpoint to sharp texture.
Why it works: A small pearl clip introduces a rounded, organic shape against the angular lines of the razored crown, a contrast principle that keeps a sharp cut from feeling severe. Pearl specifically softens both warm and cool hair tones equally, unlike metallic accessories that can clash with certain shades. This accent works especially well for occasions where the cut needs a slightly dressed-up feel.
How to get it: Choose a single small pearl snap clip rather than a cluster for the most gamine-appropriate scale. Place it just above one temple, clipping a small section back and away from the fringe. Angle the clip slightly diagonal rather than straight vertical for a less rigid look. Save this accessory for evening or special-occasion styling rather than daily wear, since it will slip on second-day product buildup.
Shop the Look
| Product |
| Small pearl snap hair clip set |
| Fine-tooth sectioning comb |
| Light-hold setting spray for accessories |
| Anti-slip clip grip pads |
| Compact jewelry pouch for hair accessories |
14. Overnight Silk Bonnet Protection
MAINTENANCE
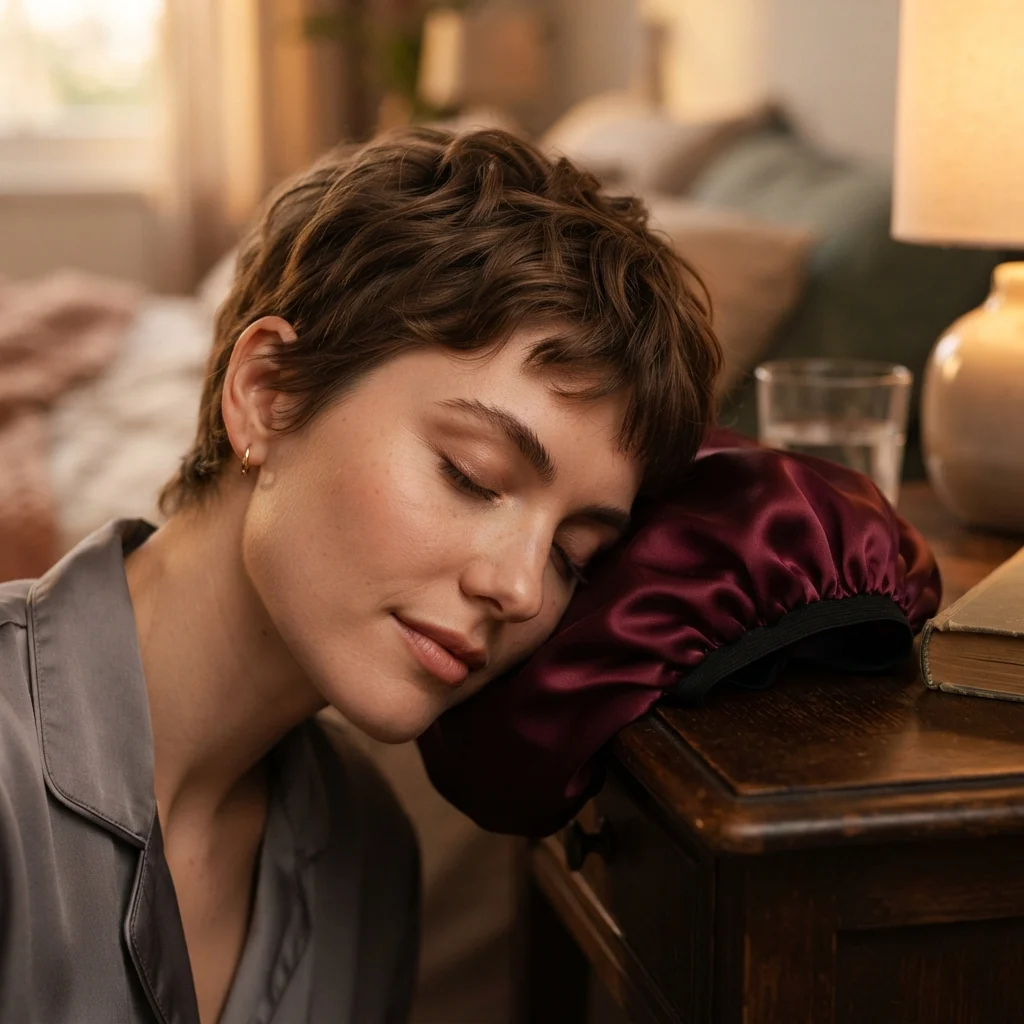
Vibe: This routine feels restorative, protecting shape while you rest.
Why it works: Cotton pillowcases create friction against hair fibers overnight, which can flatten crown texture and frizz the fringe by morning, while silk allows strands to glide instead of catching. Protecting the shape overnight reduces how often product needs reapplying in the morning. This is especially valuable for a cut like the gamine crop, where texture placement takes real effort to recreate from scratch.
How to get it: Choose a mulberry silk or satin bonnet loose enough to avoid compressing the crown while sleeping. Tie hair loosely at the crown with a soft fabric scrunchie before covering, rather than leaving it fully loose under the bonnet. Switch to a silk pillowcase as a backup on nights you skip the bonnet. Reapply a small amount of dry texturizing spray in the morning to reawaken any texture flattened overnight.
Shop the Look
| Product |
| Mulberry silk sleep bonnet adjustable |
| Silk pillowcase standard size |
| Soft fabric scrunchie set small |
| Dry texturizing morning refresh spray |
| Travel silk bonnet pouch |
15. Choppy Fringe-to-Crown Blend
TEXTURE
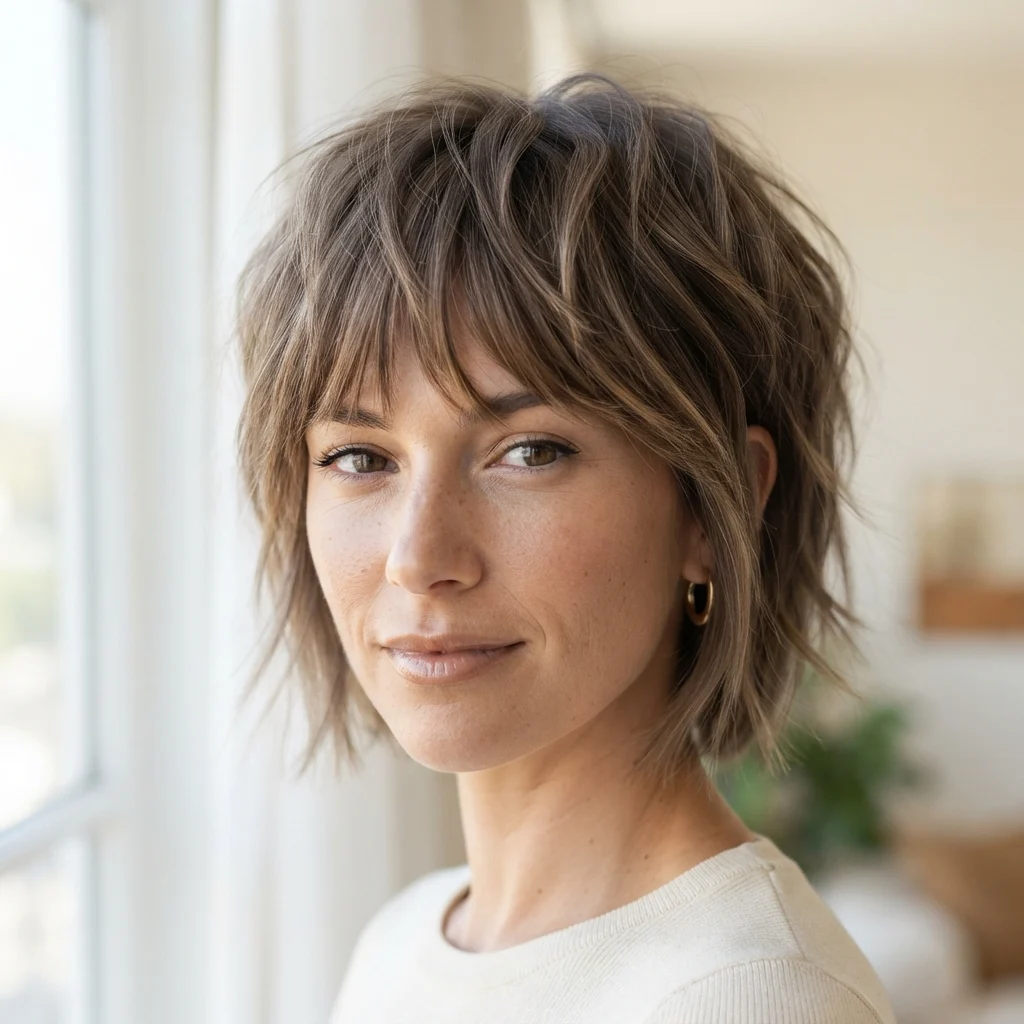
Vibe: This blend feels continuous, one texture flowing into the next.
Why it works: Blending the fringe directly into the crown layers, rather than cutting them as two separate sections, removes the visible seam that often makes short fringes look pasted on. It also gives the style more versatility, since the fringe can be brushed back into the crown entirely on days you want it out of your face. This blend is technically harder to cut than a separated fringe, which is why it is best done by a stylist experienced with pixie work.
How to get it: Ask specifically for a connected fringe-to-crown cut rather than a fringe cut as an isolated section. Request the same razoring depth used on the fringe to continue at least two inches back into the crown. Style by brushing the fringe both forward and back during application to train it toward flexibility. Use a flexible-hold spray rather than a stiff-hold product to preserve the ability to reposition the fringe throughout the day.
Shop the Look
| Product |
| Flexible hold texturizing spray |
| Dual-sided styling comb fine and wide |
| Small vent brush for blending |
| Lightweight styling cream for fringe |
| Travel-size flexible hairspray |
16. Espresso Brunette Base
COLOR
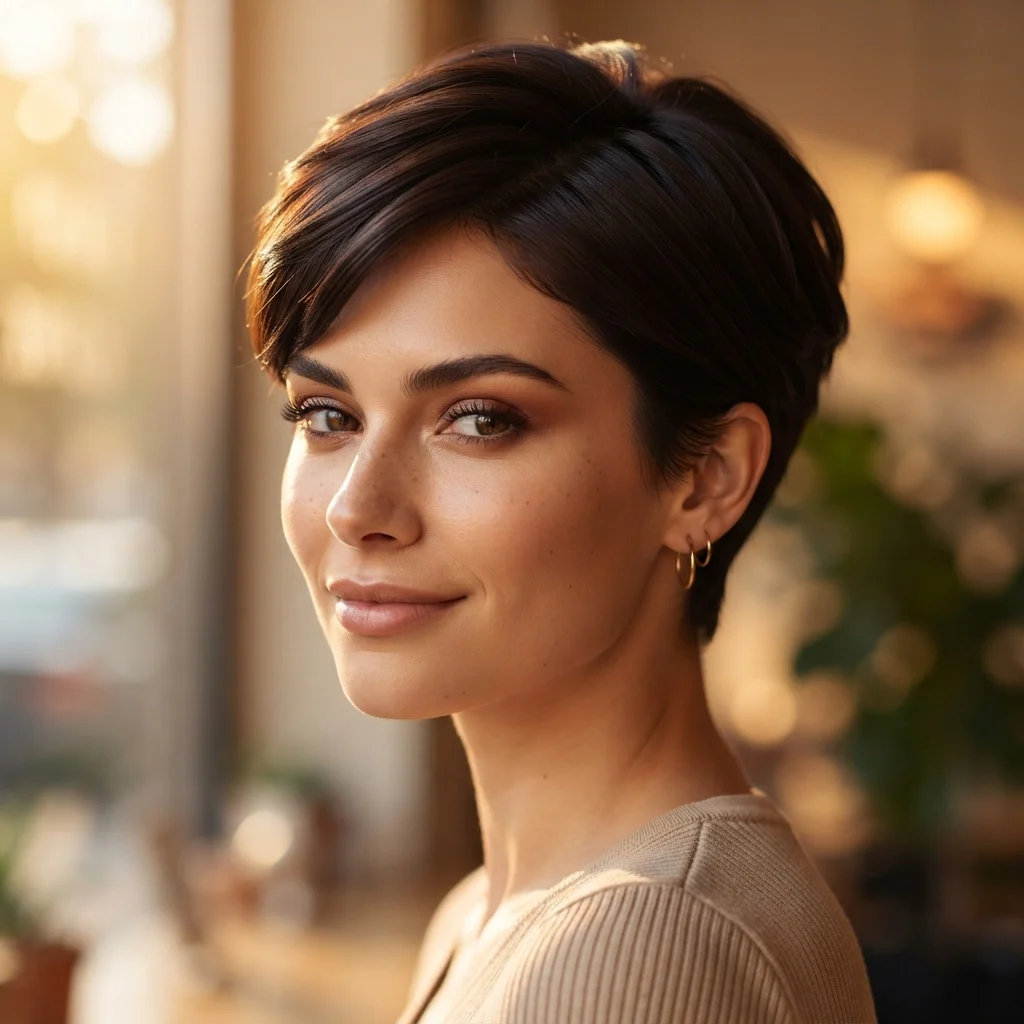
Vibe: This color feels grounded, deep and even from root to tip.
Why it works: A solid espresso base relies on color uniformity rather than dimension, which is a different principle than the highlighted looks elsewhere on this list, letting the cut’s texture carry all the visual interest instead of the color. This base color requires the least maintenance of any option here, since there is no regrowth line to manage. It suits anyone who wants the gamine silhouette without committing to a color-upkeep schedule.
How to get it: Request a permanent espresso brown dye rather than a semi-permanent gloss for the most even, long-lasting base coverage. Ask your colorist to match the shade closely to your natural level to minimize root maintenance over time. Use a color-depositing conditioner in the same espresso tone every third wash to maintain richness. Add a glossing treatment every six to eight weeks purely for shine, since this base does not fade in tone the way lightened colors do.
Shop the Look
| Product |
| Permanent espresso brown at-home dye kit |
| Color-depositing brunette conditioner |
| Glossing shine treatment for dark hair |
| Color-safe shampoo for chemically treated hair |
| Heat protectant spray with shine enhancer |
17. Airy Wispy Side Fringe
FRINGE STYLE
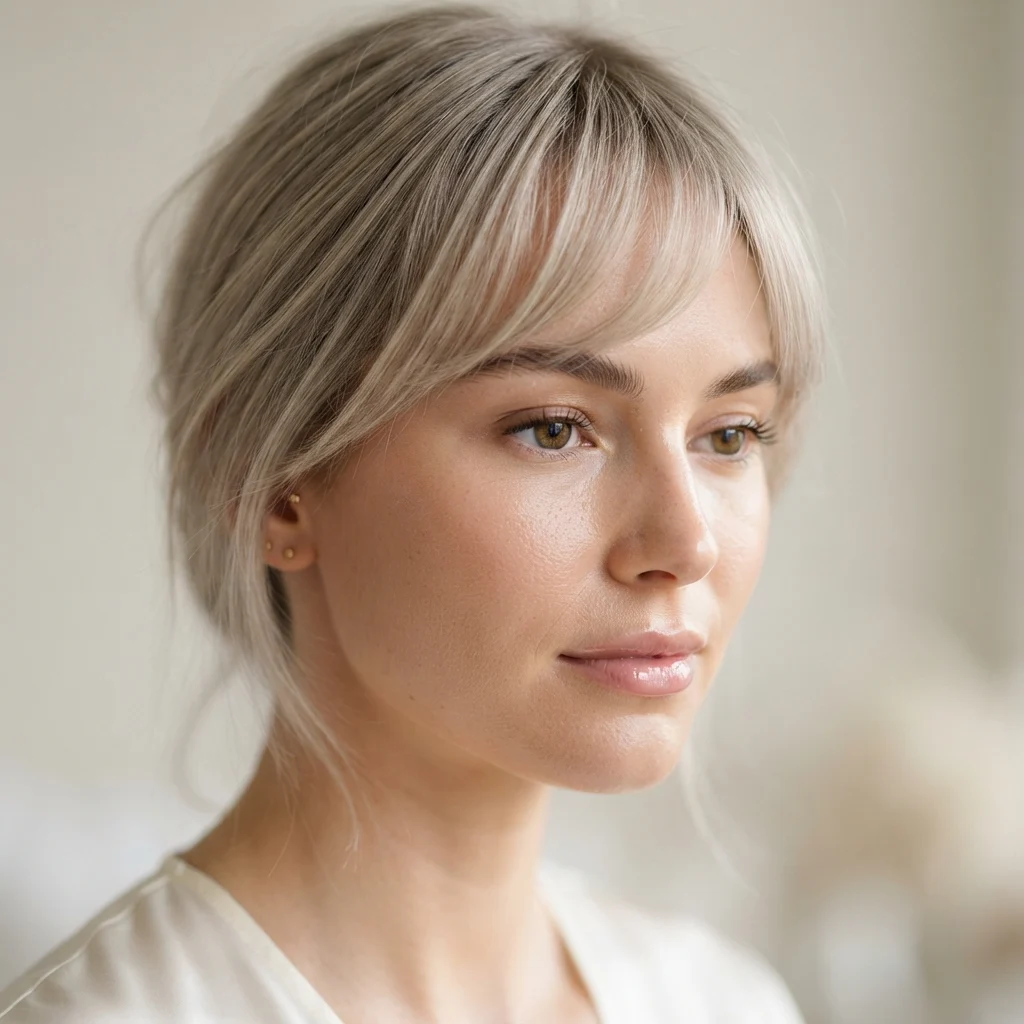
Vibe: This fringe feels light, barely there against the skin.
Why it works: Sweeping the fringe to one side rather than centering it creates asymmetry, a design principle that adds visual interest without requiring any additional cutting complexity. This works particularly well for those transitioning from a longer fringe, since it requires the least amount cut away. The asymmetry also complements the razored crown, since both elements share the same off-center, textured energy.
How to get it: Have thinning shears used sparingly along the fringe to reduce density before styling to the side. Apply a small amount of pomade to fingertips and press, rather than rake, the fringe in the direction you want it to fall. Use a bobby pin hidden beneath the crown layers on days the fringe needs extra hold to stay swept. Reset the direction each morning by blow-drying briefly with a small brush angled toward your preferred side.
Shop the Look
| Product |
| Thinning shears for fringe density |
| Small hidden bobby pins matte finish |
| Lightweight pomade for side styling |
| Compact travel brush small barrel |
| Fine mist finishing spray |
18. Graduated Nape with Long Top
TAPER & LENGTH
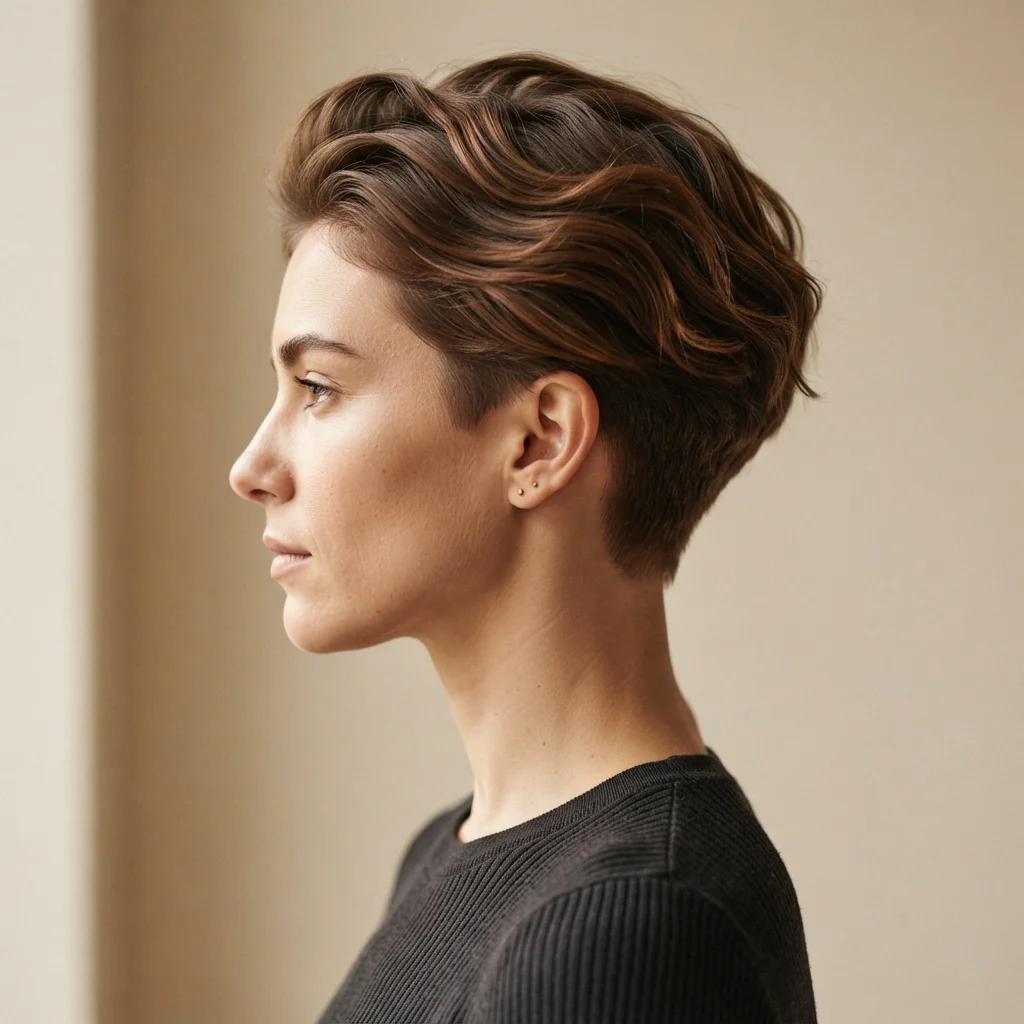
Vibe: This shape feels balanced, softness at the top eased into structure below.
Why it works: A graduated taper blends length gradually rather than disconnecting it sharply, offering a softer alternative to the undercut styles elsewhere on this list. This approach suits those who want the gamine silhouette without the more dramatic contrast of a full disconnection. Graduation is a more forgiving growth pattern too, meaning fewer urgent trims are needed to maintain the shape.
How to get it: Request a graduated taper specifically, noting to your stylist that you want gradual blending rather than a disconnected line. Keep the top section at least three inches long to allow for styling flexibility. Use a comb-over-clipper technique at home for light maintenance between salon visits, if you are experienced with clippers. Schedule full trims every five to six weeks, longer than a disconnected cut requires, since graduation grows out more evenly.
Shop the Look
| Product |
| Comb attachment clipper guide set |
| Texturizing spray for longer crown pieces |
| Wide styling comb for length control |
| Volumizing root spray |
| Flexible hold hairspray for top styling |
19. Wet-Look Slick Styling
STYLING TECHNIQUE
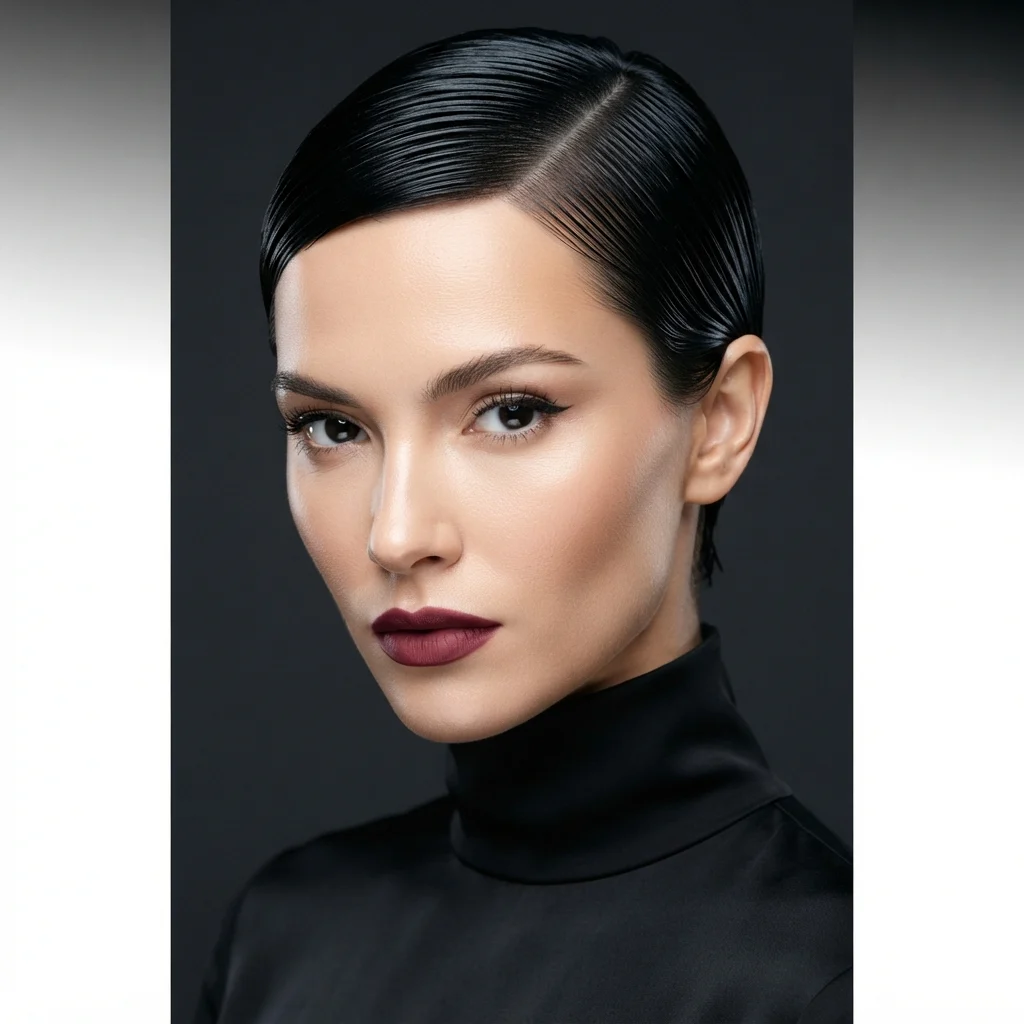
Vibe: This finish feels sharp, glossy control replacing soft texture for a night.
Why it works: A wet-look style trades the cut’s usual matte texture for high shine, using gel to flatten and direct strands instead of separating them, an intentional inversion of the cut’s default styling. The high shine also catches studio or flash lighting differently than matte finishes, making it a strong choice for photographed events. This look requires precise comb work, since any unevenness is highly visible under gloss.
How to get it: Apply a strong-hold, high-shine gel to damp hair, working it through with a fine-tooth comb rather than fingers. Create deliberate comb lines from the part outward while the gel is still wet for definition that holds as it dries. Avoid touching the style once it begins to set, since fingerprints will disrupt the smooth finish. Reserve this technique for special occasions rather than daily wear, since frequent gel use can dry out fine hair over time.
Shop the Look
| Product |
| High-shine strong-hold styling gel |
| Fine-tooth metal comb for wet styling |
| Shine-enhancing finishing spray |
| Wide-tooth detangling comb for prep |
| Clarifying shampoo for gel buildup removal |
20. Thin Silk Headscarf Wrap
ACCESSORY
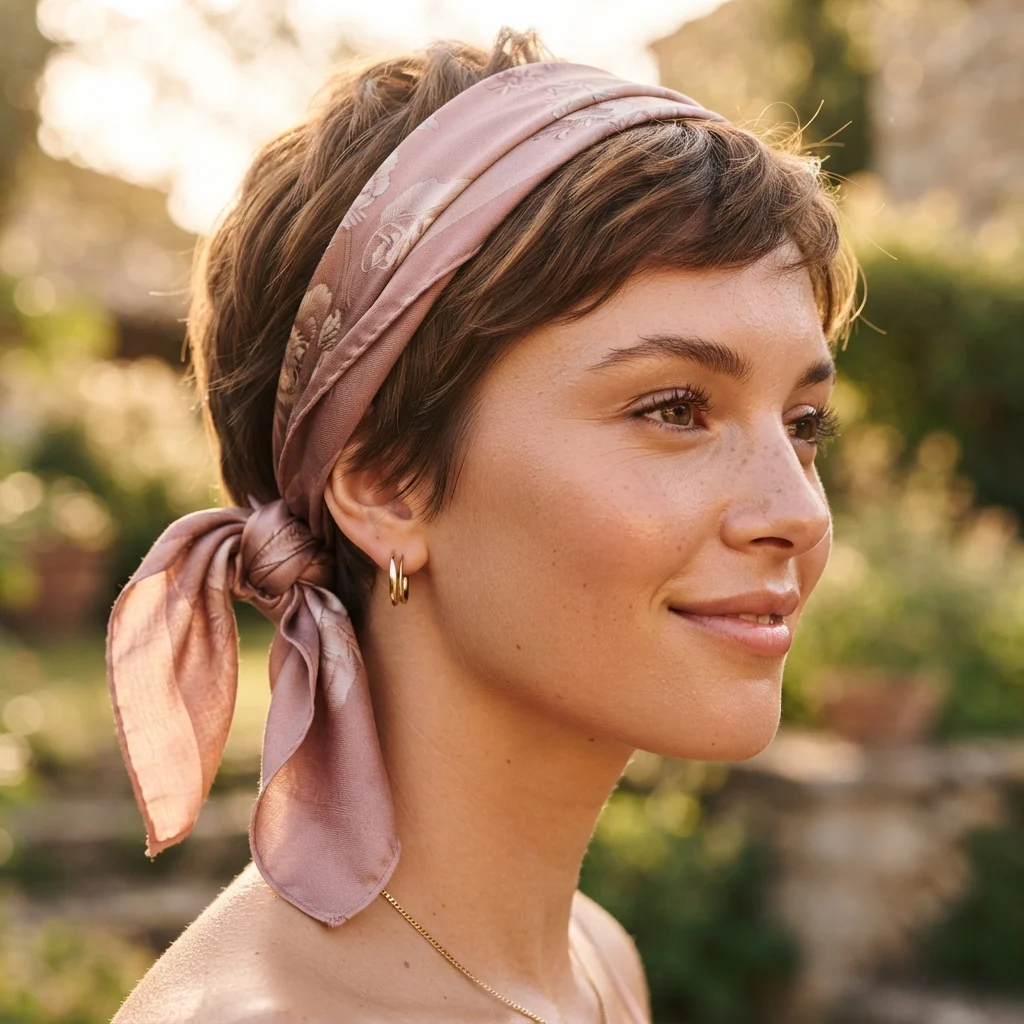
Vibe: This wrap feels vintage, a soft nod to old film glamour.
Why it works: A thin scarf worn along the hairline rather than covering the crown adds a fabric texture contrast against the hair’s natural texture, a layering principle borrowed from styling rather than haircutting. Because the crop is short, the scarf frames the face directly instead of getting lost under longer strands. The knot placement, left or right, mirrors the asymmetry already present in many of these fringe styles.
How to get it: Choose a silk scarf no wider than two inches for a proportion that suits the short crop. Position it just behind the hairline, tying a small knot at one side rather than the back. Tuck any loose fringe pieces gently over the top edge of the scarf for a blended look. Pair this accessory with second-day hair, since the slight texture helps the scarf grip and stay in place longer.
Shop the Look
| Product |
| Thin silk headscarf set multiple colors |
| Small fabric knot clip |
| Lightweight texturizing spray for grip |
| Bobby pins for scarf security |
| Silk scarf storage pouch |
21. Light-Hold Texture Powder
MAINTENANCE
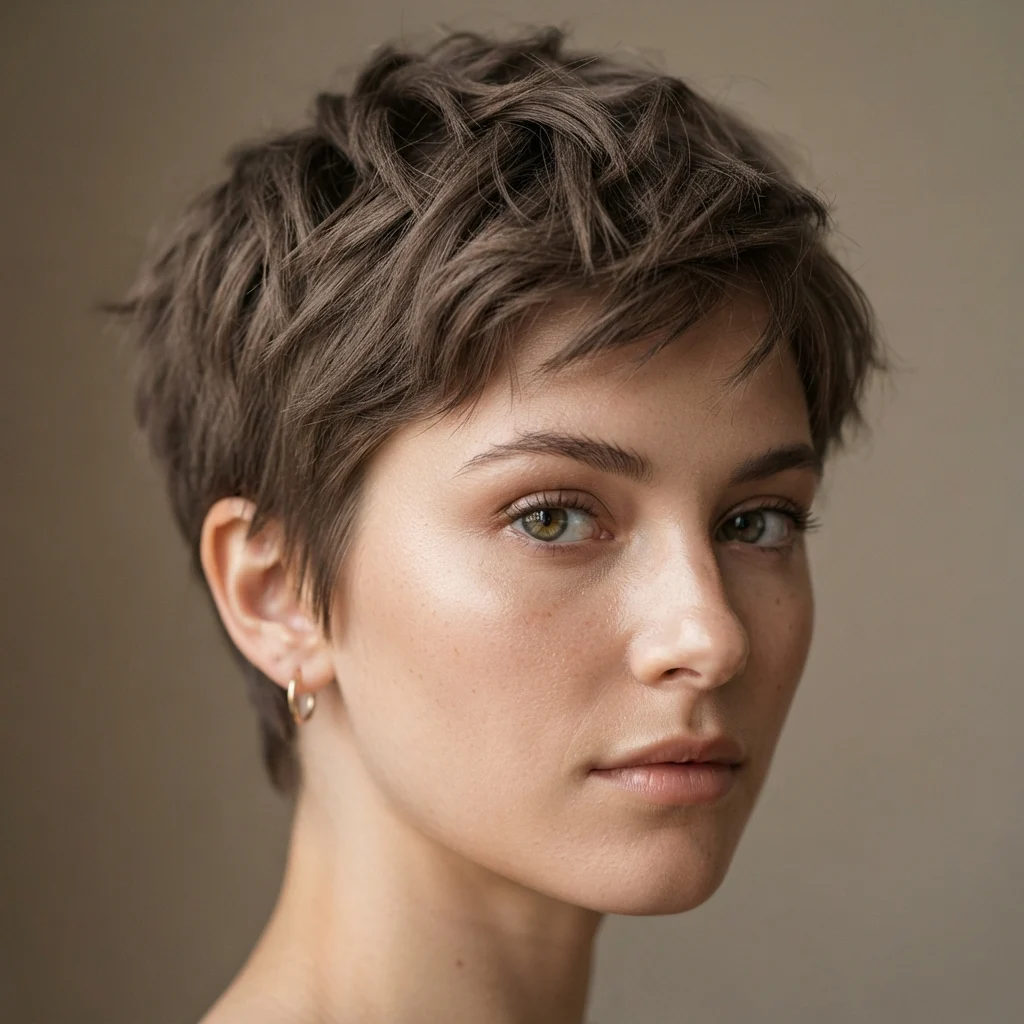
Vibe: This texture feels weightless, structure without any visible product.
Why it works: Texturizing powder works by coating individual strands with a fine matte layer that adds friction, allowing hair to hold shape without the heaviness of cream or wax formulas. This maintenance method is ideal for fine hair types, where heavier products can quickly overwhelm the strand and cause limpness. The powder format also doubles as a light dry shampoo, extending the time between washes. This is the lowest-effort maintenance option on this list, requiring only seconds to apply.
How to get it: Section the crown into small pieces before sprinkling powder directly at the roots. Massage it in with fingertips, working from roots toward mid-strand for even distribution. Use sparingly, since a small amount goes further than expected with powder formulas. Reapply only at the roots on day two or three rather than throughout the entire head.
💡 Quick Win: Keep a travel-size texturizing powder in your bag; a ten-second application at the roots refreshes flat hair without a full restyle.
Shop the Look
| Product |
| Matte texturizing root powder |
| Travel-size powder applicator brush |
| Dry shampoo powder tinted for brunettes |
| Small mixing comb for powder distribution |
| Compact mirror for on-the-go touch-ups |
22. Razored Point-Cut Ends
TEXTURE
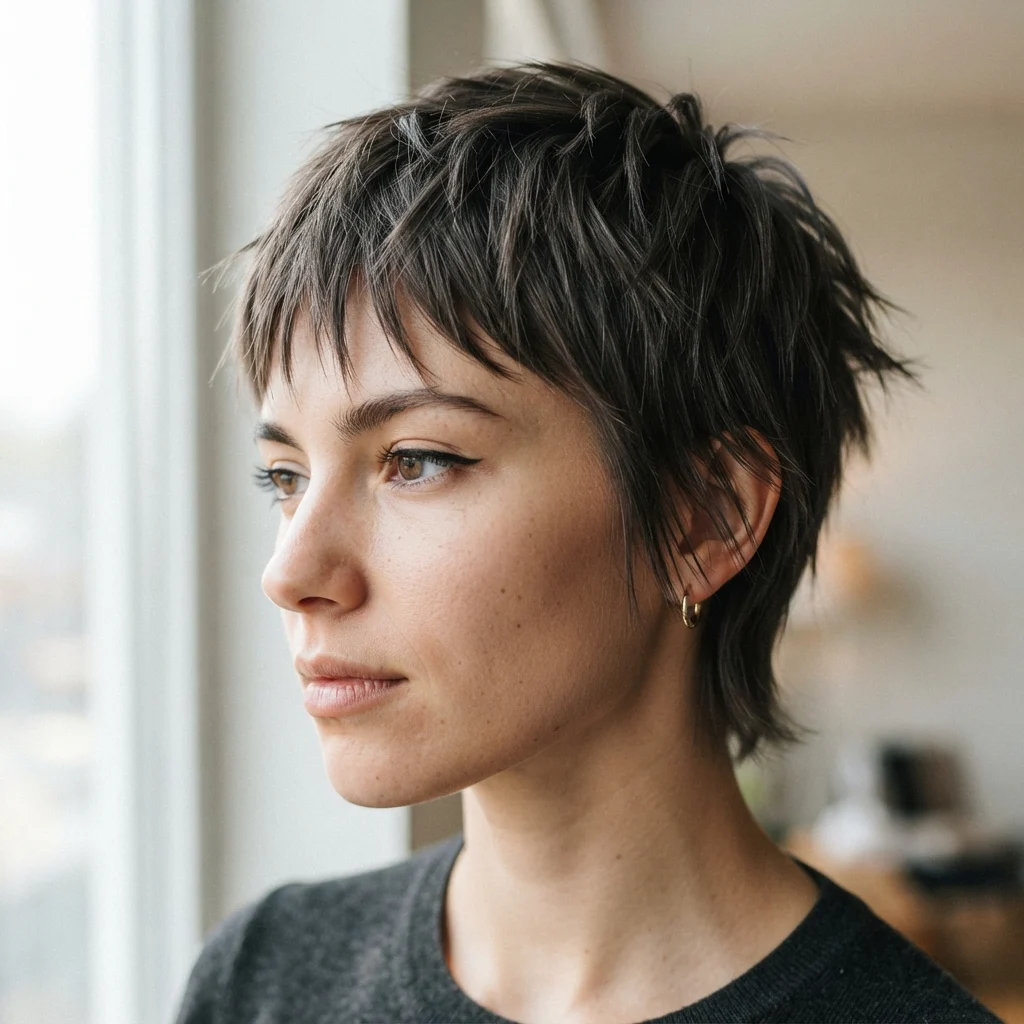
Vibe: This texture feels irregular, deliberately imperfect at every tip.
Why it works: Point-cutting angles the scissors vertically into the hair ends rather than cutting straight across, which removes small triangular sections and softens the line without thinning the overall density. The irregular tips scatter light unpredictably, reinforcing the piecey look central to the gamine style. This technique is often used as a finishing step after the primary cut to fine-tune texture without removing more length.
How to get it: Ask your stylist to point-cut, not razor, if your hair is prone to breakage or has been recently color-treated. Have this technique applied only to the outer third of each section for a naturally imperfect edge. Style with a texturizing cream rather than a stiff gel to let the point-cut shape read clearly. Avoid over-brushing after styling, since smoothing will minimize the irregular tip pattern.
Shop the Look
| Product |
| Texturizing cream for point-cut definition |
| Precision point-cutting shears |
| Bond-strengthening leave-in spray |
| Wide-tooth comb for gentle detangling |
| Silk finishing serum lightweight |
23. Icy Silver Fashion Pixie
COLOR
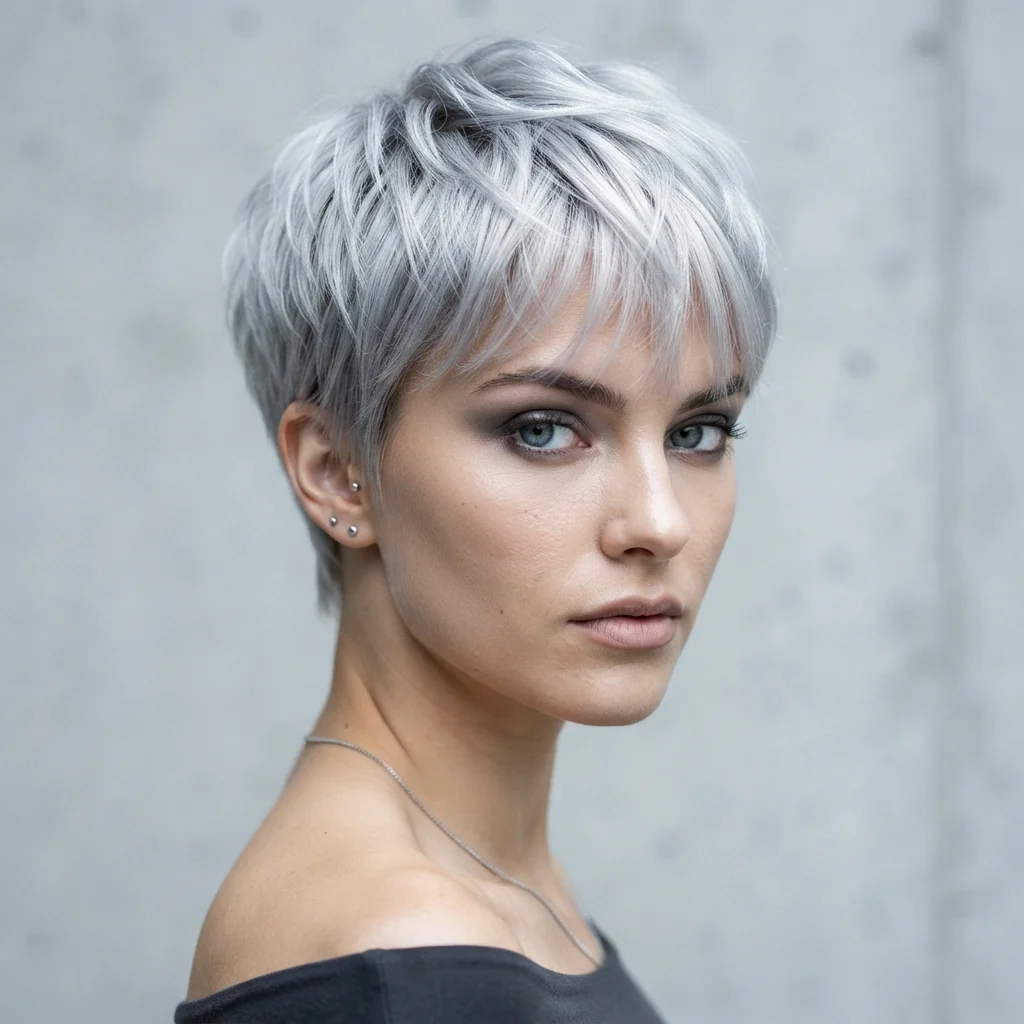
Vibe: This color feels bold, a fashion statement rather than a background detail.
Why it works: Achieving true silver requires lifting hair to the palest possible level before toning, a more intensive lightening process than the ash or blonde options elsewhere on this list. Because the color itself carries so much visual weight, the crown texture can be kept slightly simpler to avoid competing for attention. This is a high-commitment color that signals fashion-forward intent rather than subtle enhancement.
How to get it: Consult a colorist experienced specifically in fashion-color lightening, since achieving silver without damage typically requires multiple sessions. Use a bond-building treatment during and after the lightening process to protect strand integrity. Apply a silver-toning conditioner every wash to prevent the color from drifting yellow between salon visits. Budget for a color refresh every two to three weeks, as this shade fades and shifts faster than any other option on this list.
Shop the Look
| Product |
| Silver toning conditioner for lightened hair |
| Bond-building repair treatment mask |
| Color-safe sulfate-free shampoo |
| UV protectant spray for fashion color |
| Silicone-free leave-in detangler |
24. Micro Fringe with Softened Corners
FRINGE STYLE
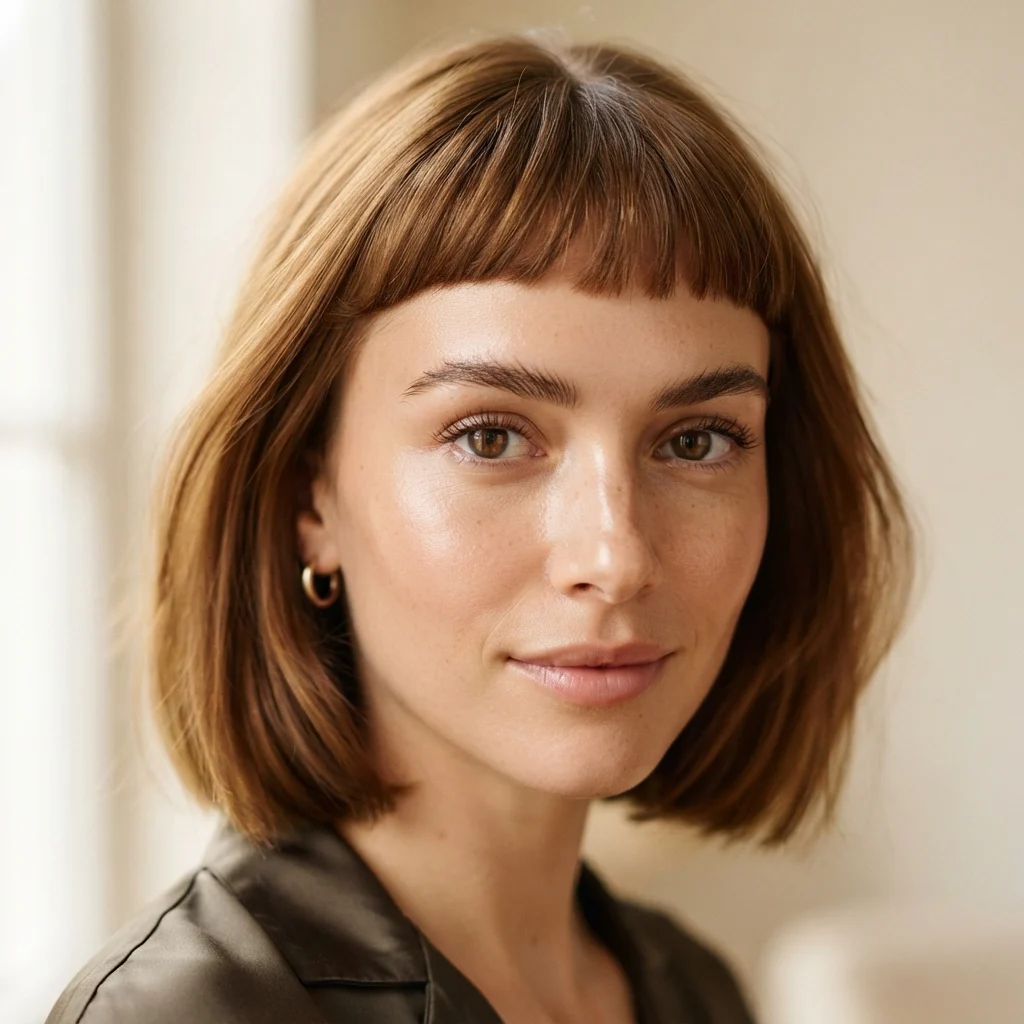
Vibe: This fringe feels gentle, sharp only at its center point.
Why it works: Rounding the outer corners of a micro fringe rather than leaving them squared softens the transition into the temple hair, a shaping technique that avoids the harsh stepped line a straight-across cut can create. The center of the fringe still carries the short, striking length that defines a micro fringe, so the style loses none of its impact. This softened shape also blends more forgivingly as the fringe grows out between trims.
How to get it: Ask your stylist to round the corners of the fringe using scissor-over-comb technique rather than a straight horizontal cut. Keep the center point at the shortest length, tapering gradually toward each temple. Style by directing the corners slightly outward with a small brush while blow-drying. Trim the fringe yourself every two weeks using curved cutting shears designed for softer, rounded lines.
Shop the Look
| Product |
| Curved cutting shears for fringe shaping |
| Small round detail brush |
| Lightweight styling cream for temples |
| Fine-mist water spray for trimming |
| Anti-frizz fringe finishing serum |
25. High Fade Undercut Pixie
TAPER & LENGTH
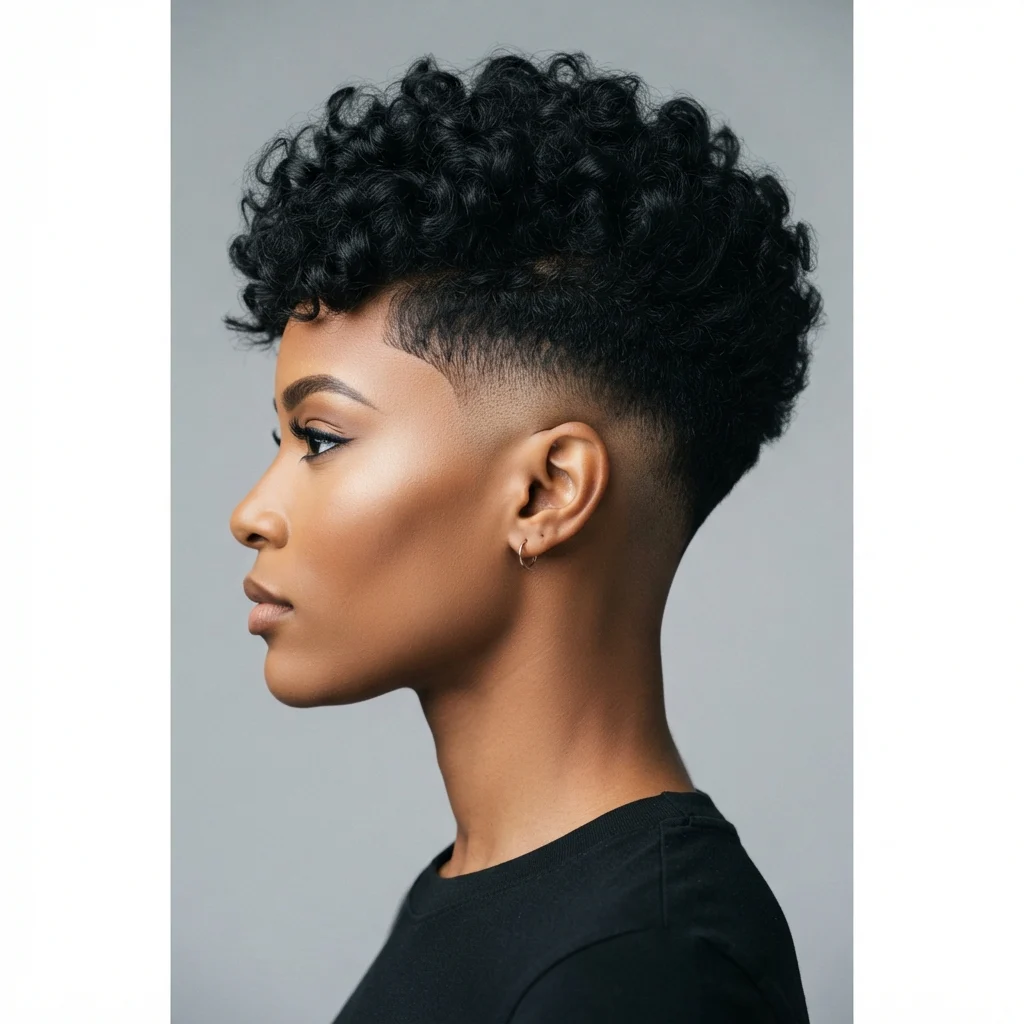
Vibe: This fade feels precise, a gradient with no visible seams.
Why it works: A high fade uses a gradual clipper gradient rather than a single guard length, which is a more technical taper than the disconnected or graduated styles elsewhere on this list. This taper also requires the most frequent maintenance of any option here, since even slight regrowth disrupts the smooth gradient. It is the boldest taper choice for those fully committed to a high-contrast gamine look.
How to get it: Request a high fade specifically, noting the guard should start above the ear rather than at it. Ask your barber to blend at least three different guard lengths for a true gradient rather than a stepped line. Book maintenance appointments every two weeks, since fades grow out faster visually than any other taper style. Use a light pomade at the fade line only to keep stray regrowth pieces from standing out between cuts.
Shop the Look
| Product |
| Professional clipper set with fade guards |
| Fade blending comb |
| Light pomade for fade line touch-ups |
| Barber cape with fine hair collection |
| Aftershave balm for fresh fades |
26. Diffused Curl Definition
STYLING TECHNIQUE
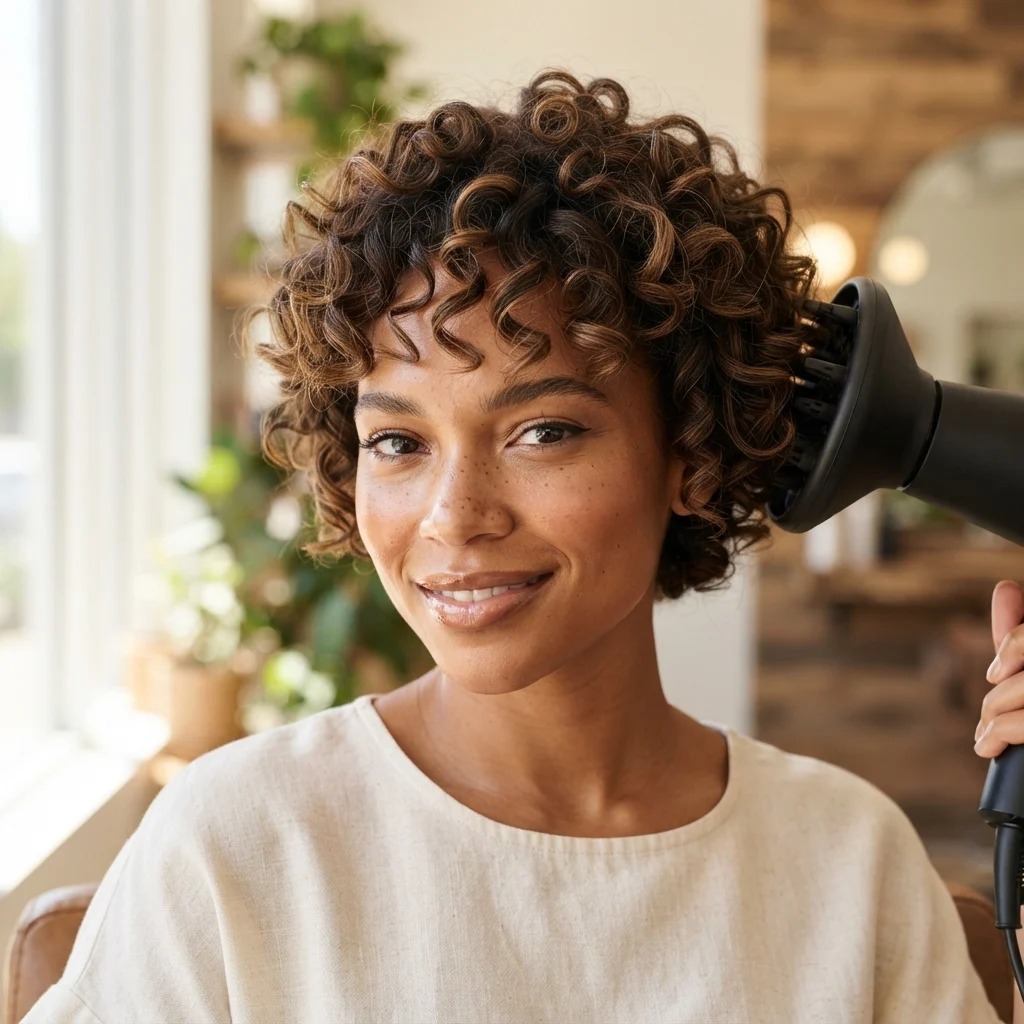
Vibe: This texture feels alive, curls defined rather than smoothed away.
Why it works: A diffuser distributes airflow across a wider surface than a standard dryer nozzle, which dries curls without disturbing their natural pattern, a technique that respects curl formation rather than fighting it with tension. The short length also means curls dry faster and hold their shape longer than on longer hair, where weight can pull curls loose. This styling method celebrates natural texture as the primary design element rather than a base to be altered.
How to get it: Apply a curl-defining cream to soaking wet hair before scrunching gently from ends to roots. Cup sections of hair into the diffuser bowl and hold at the scalp rather than moving it around during drying. Dry until roughly eighty percent dry, then let the remaining moisture air-dry to prevent frizz from overdrying. Avoid touching curls once dry, since disturbing them at this stage breaks the defined pattern.
Shop the Look
| Product |
| Curl-defining styling cream |
| Diffuser attachment universal fit |
| Microfiber curl-drying towel |
| Anti-frizz curl serum |
| Wide-tooth comb for wet detangling |
27. Delicate Ear Cuff Pairing
ACCESSORY
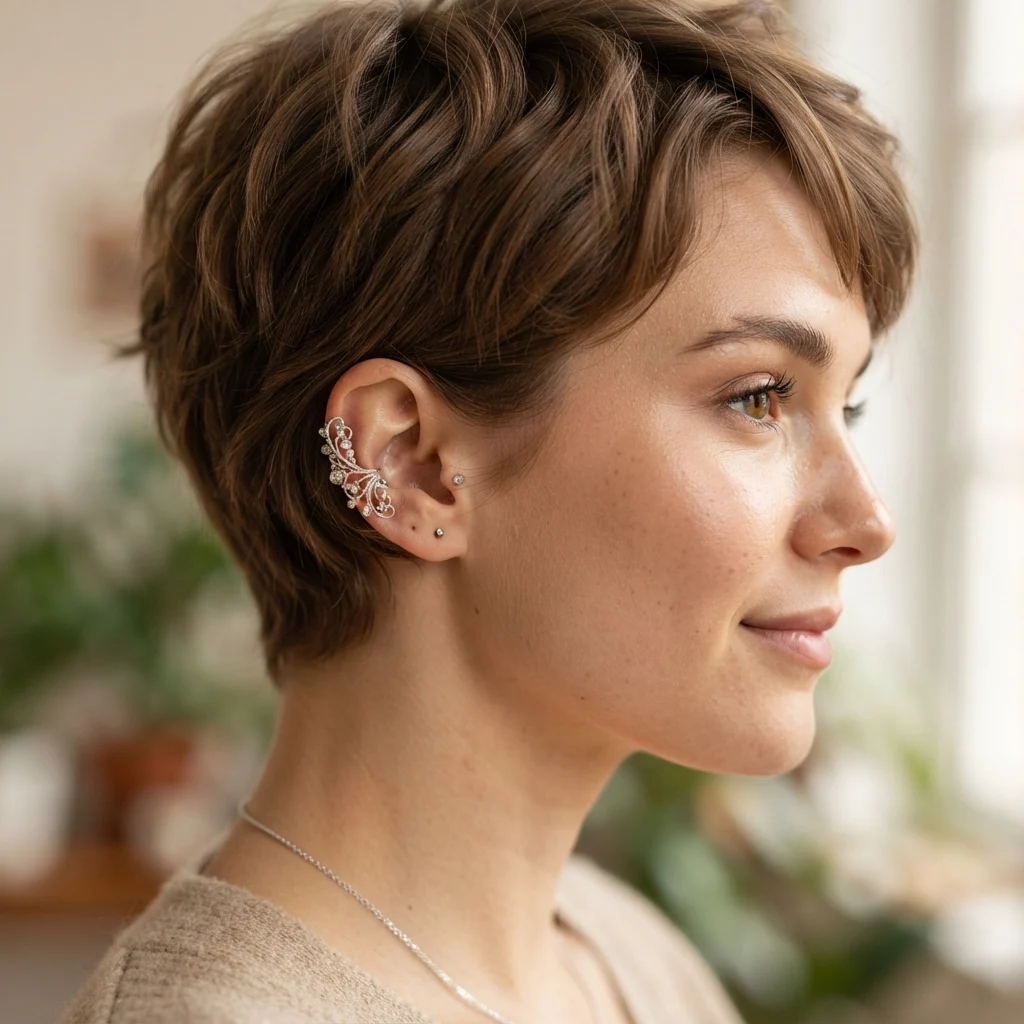
Vibe: This pairing feels intimate, drawing attention to a feature length hair often hides.
Why it works: A pixie cut exposes the ear fully, an anatomical opportunity that longer hairstyles rarely allow, making ear jewelry a functional styling extension rather than a separate accessory category. A delicate, thin cuff photographs cleanly against short hair without competing with the fringe for attention. This pairing is one of the simplest ways to elevate the cut for evening wear without altering the hair itself.
How to get it: Choose a thin, single-band ear cuff rather than a stacked or beaded style for the cleanest look against short hair. Position it at the upper cartilage rather than the lobe to keep the eye moving upward with the crown texture. Keep hair swept slightly away from the ear on the cuffed side using a small amount of pomade. Match the cuff’s metal tone to any other jewelry worn that day for a cohesive finish.
Shop the Look
| Product |
| Thin single-band ear cuff set |
| Lightweight pomade for ear-framing sweep |
| Small precision comb for sectioning |
| Jewelry cleaning cloth for metal accessories |
| Compact travel jewelry case |
28. Sea Salt Texturizing Spray Finish
MAINTENANCE
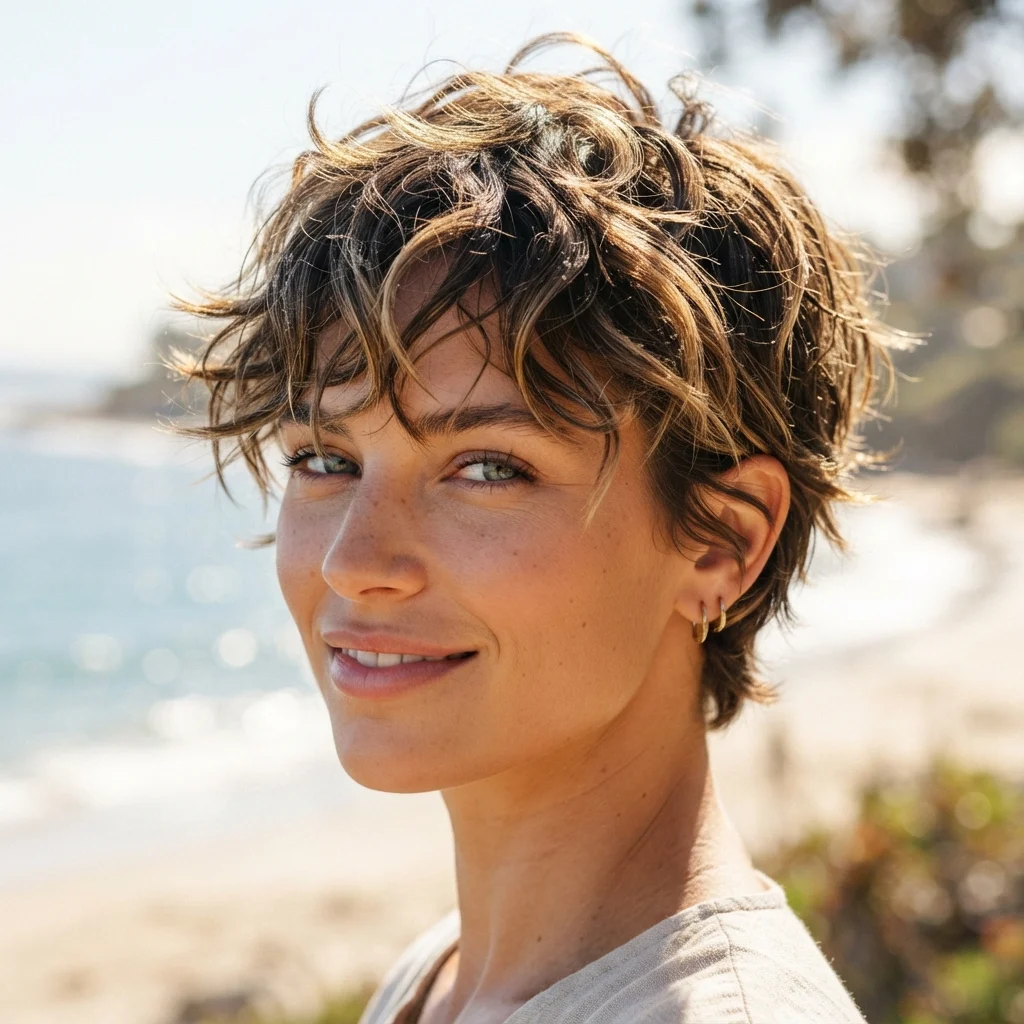
Vibe: This finish feels tousled, texture that looks sun-earned.
Why it works: Sea salt spray works by drawing moisture out of the hair shaft slightly, roughening the cuticle to create grip and texture without the tackiness of gel or wax. The gritty finish also mimics natural, sun-dried hair texture, which pairs well with lighter or highlighted color choices. This spray works fastest on damp hair, making it a quick styling step for those short on morning time.
How to get it: Spray sea salt formula evenly over damp hair, focusing on the crown rather than the nape. Scrunch gently with cupped hands to encourage texture rather than smoothing it down. Air-dry when possible, or use a diffuser on low heat to preserve the gritty finish. Reapply a light mist to dry hair on day two for a texture refresh without a full rewash.
Shop the Look
| Product |
| Sea salt texturizing spray |
| Microfiber towel for gentle drying |
| Low-heat diffuser attachment |
| Lightweight leave-in detangler |
| Travel-size salt spray bottle |
29. Heavily Textured Crown Spikes
TEXTURE
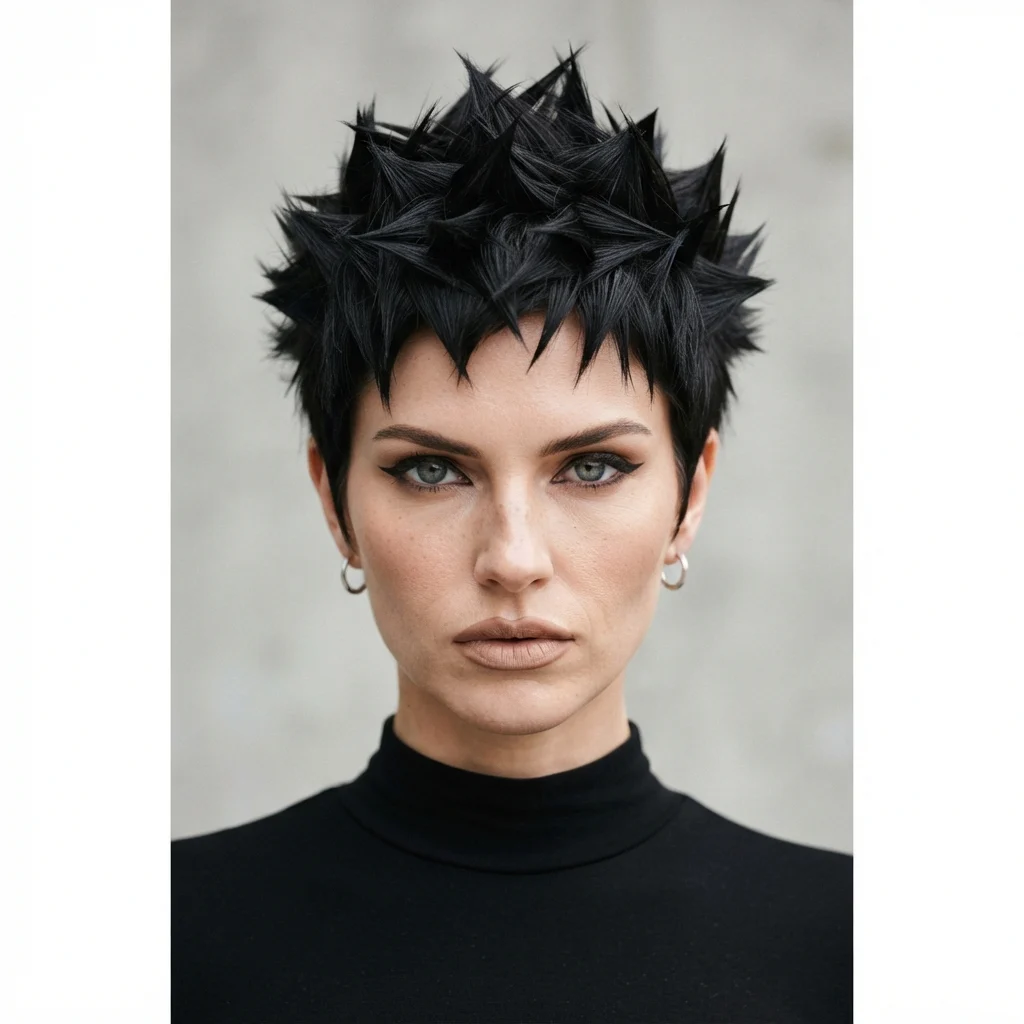
Vibe: This crown feels electric, texture pushed to its most dramatic point.
Why it works: Spiked texture takes the razoring principle used throughout this list to its most extreme application, using maximum-hold product to lift each piece vertically rather than allowing natural fall. The verticality also adds significant height to the crown, a strong proportion choice for those wanting the most dramatic silhouette possible. This style requires strong-hold product specifically, since lighter formulas cannot support fully upright pieces.
How to get it: Apply a strong-hold gel or wax to damp hair before drying, focusing product at the roots where lift needs to originate. Blow-dry with fingers lifting each section upward as it dries to train the direction. Use a fine-tooth comb to separate individual spikes once the hair is fully dry and set. Finish with a strong-hold hairspray to lock the shape in place through the day.
Shop the Look
| Product |
| Strong-hold spiking wax |
| Fine-tooth separating comb |
| Maximum-hold finishing hairspray |
| High-heat blow dryer with concentrator nozzle |
| Texturizing gel for root lift |
30. Honey Caramel Highlights
COLOR
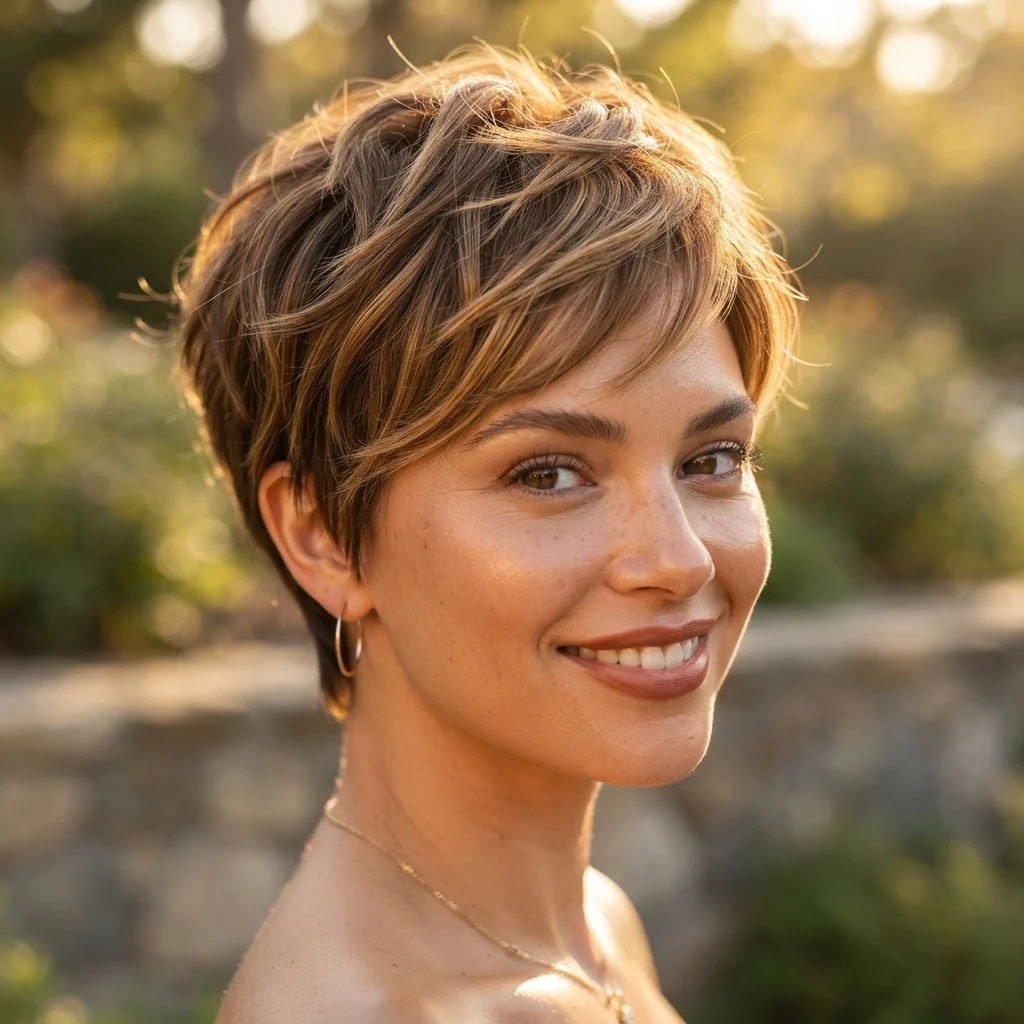
Vibe: This color feels sun-kissed, warmth woven through every layer.
Why it works: Fine, closely spaced highlights create dimension without the high-contrast drama of balayage, a subtler color-layering technique suited to those wanting warmth rather than a dramatic transformation. Because the crown is short, even fine highlights are visible in nearly every piece, amplifying their effect beyond what the same technique would achieve on longer hair. This is a low-commitment color option, since the highlights blend into a natural base rather than requiring root touch-ups.
How to get it: Request fine-foil highlights in honey and caramel tones placed throughout the crown rather than concentrated at the front. Space foils closely together for a woven, dimensional effect rather than isolated streaks. Use a color-safe conditioning mask weekly to maintain shine in the lightened pieces. Refresh highlights every eight to ten weeks, since this technique grows out more gradually than an all-over color.
Shop the Look
| Product |
| Color-safe weekly conditioning hair mask |
| Warm-toned shine-enhancing shampoo |
| Heat protectant spray for highlighted hair |
| Fine-tooth foiling comb for touch-ups |
| Leave-in treatment for lightened strands |
31. Asymmetrical Long Fringe
FRINGE STYLE
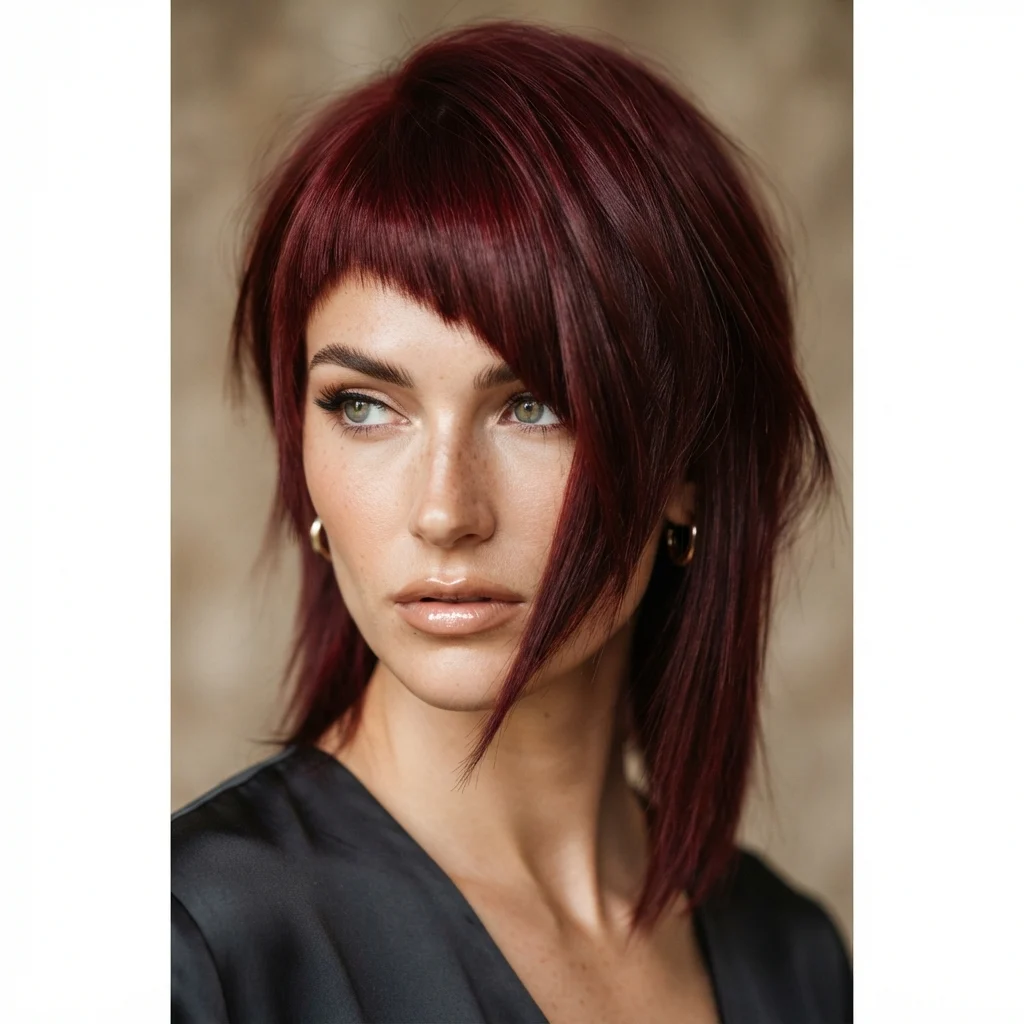
Vibe: This fringe feels off-kilter, deliberate imbalance instead of symmetry.
Why it works: Cutting the fringe on a diagonal so one side extends past the eyebrow while the other stays micro-short creates deliberate asymmetry, a more dramatic departure from the standard even fringe than the side-swept version elsewhere on this list. The uneven proportion also gives the wearer styling choice each day, tucking the longer side back or letting it fall forward. This fringe requires a skilled cut to keep the diagonal line intentional rather than accidental-looking.
How to get it: Ask your stylist to cut the fringe on a clear diagonal, specifying the exact length difference you want between the two sides. Use a fine-tooth comb to establish the diagonal part before each styling session. Apply pomade to the shorter side to keep it textured while leaving the longer side smoother for contrast. Trim only the shorter side between full cuts, since the longer side can grow out gracefully into the crown.
Shop the Look
| Product |
| Fine-tooth comb for diagonal parting |
| Texturizing pomade for short-side definition |
| Smoothing serum for longer-side polish |
| Precision cutting shears for touch-ups |
| Flexible hold hairspray |
32. Classic Gamine Cropped Nape
TAPER & LENGTH
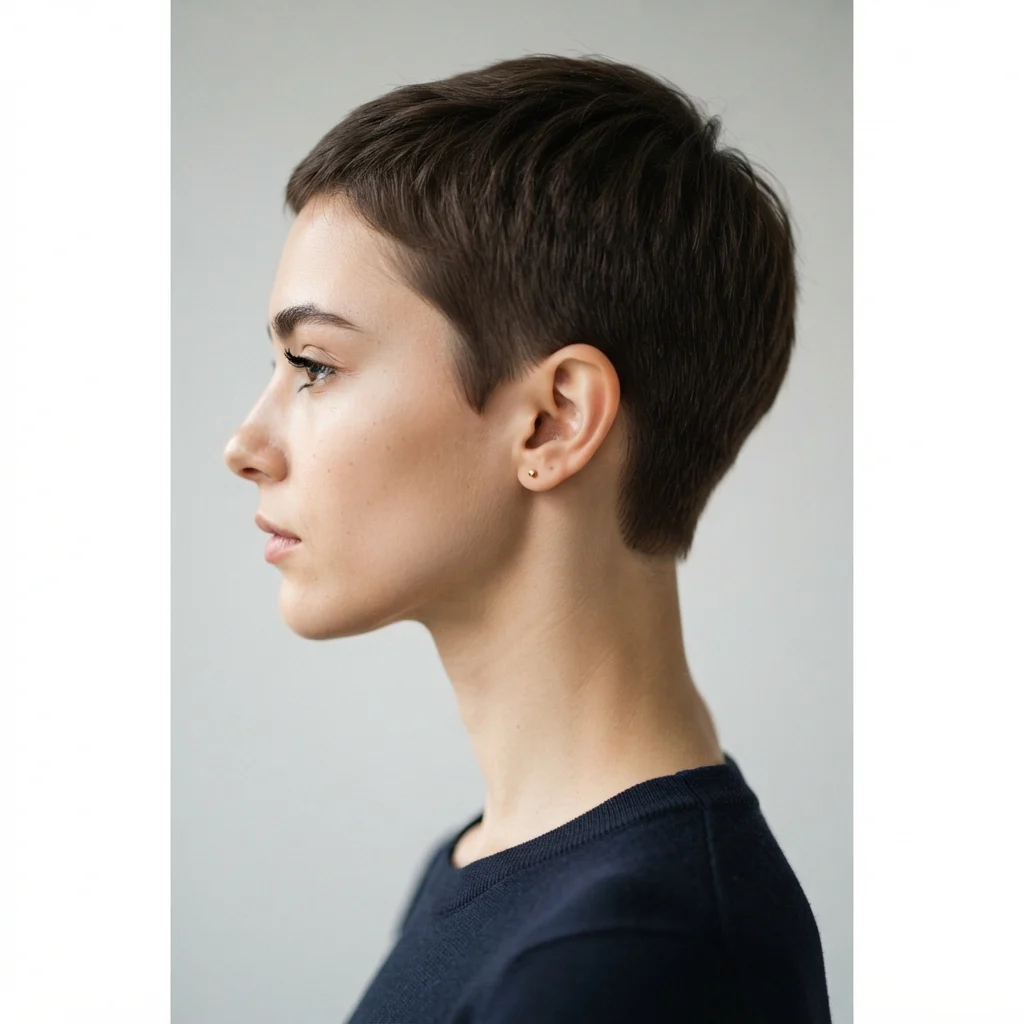
Vibe: This nape feels timeless, the original gamine shape unchanged.
Why it works: This is the foundational taper the gamine style originated from, a closely cropped nape with minimal length variation, predating the more dramatic disconnected and faded versions elsewhere on this list. This taper also ages gracefully across face shapes and hair textures, which is why it remains the reference point for the entire category. Choosing this classic taper is a statement of restraint within an otherwise texture-heavy cut.
How to get it: Request a traditional gamine nape, describing it to your stylist as close-cropped with minimal graduation, closer to the original mid-century silhouette. Keep the nape length consistent at roughly a quarter inch for the authentic classic proportion. Maintain with clipper touch-ups every three weeks to preserve the clean, close shape. Pair this understated taper with a more textured crown to keep the overall look from feeling flat.
Shop the Look
| Product |
| Precision clipper for close nape maintenance |
| Neck brush for clean touch-ups |
| Light styling cream for crown contrast |
| Barber cape for at-home trims |
| Fine-tooth comb for nape sectioning |
33. Side-Swept Comb Styling
STYLING TECHNIQUE
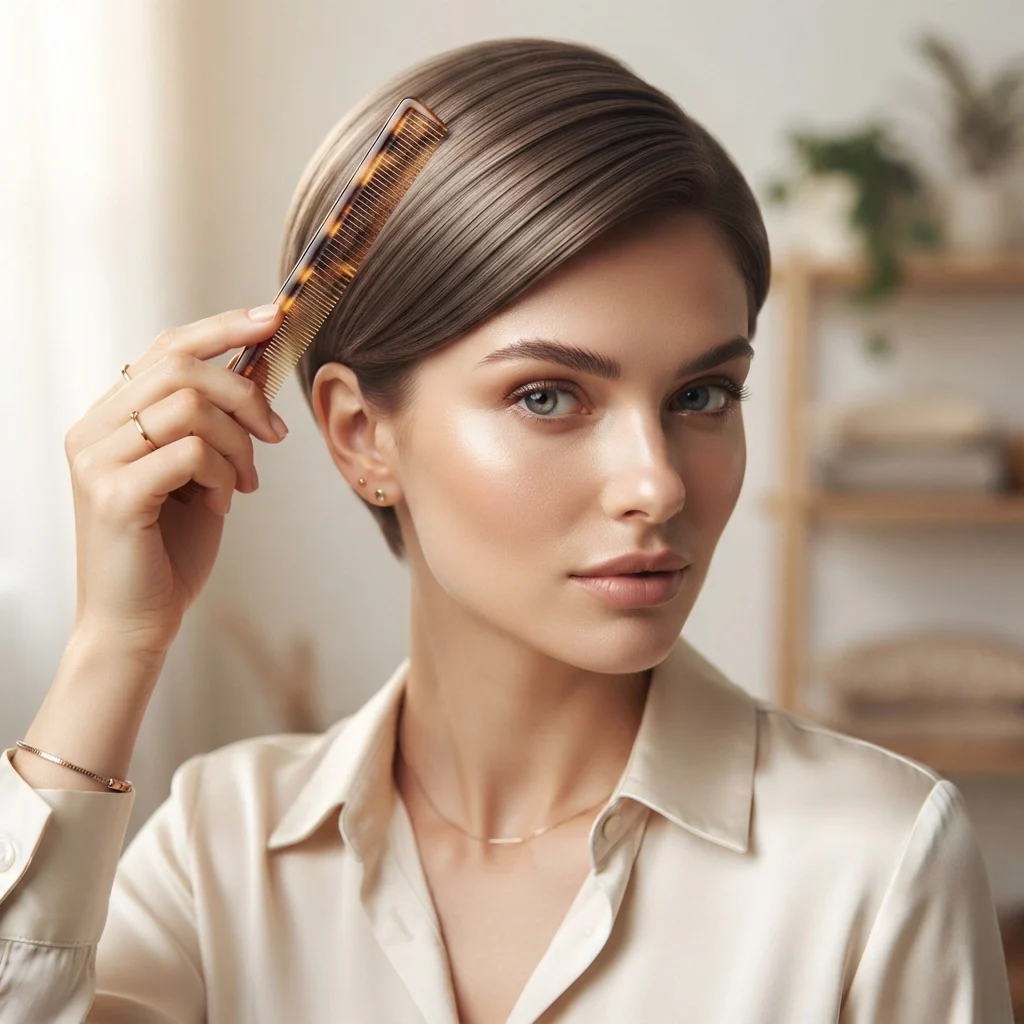
Vibe: This style feels deliberate, every strand combed into one clear direction.
Why it works: Comb styling directs all crown pieces toward a single side rather than letting texture fall randomly, a controlled alternative to the finger-combed piecey finish described earlier on this list. It also creates a more polished, less casual version of the gamine crop, suitable for professional settings where full texture might read as too undone. The comb lines themselves become a visible design element rather than something to be hidden.
How to get it: Apply a lightweight cream to damp hair before combing all crown sections in the same direction using a fine-tooth comb. Work from the part outward in long, even strokes to keep comb lines visible and clean. Blow-dry briefly on a low setting to set the direction without disrupting the combed lines. Touch up throughout the day with the same comb rather than fingers to maintain the polished effect.
Shop the Look
| Product |
| Fine-tooth styling comb metal |
| Lightweight styling cream for combed finish |
| Low-heat travel hair dryer |
| Shine spray for polished styling |
| Small detail comb for touch-ups |
34. Vintage Bobby Pin Sweep
ACCESSORY
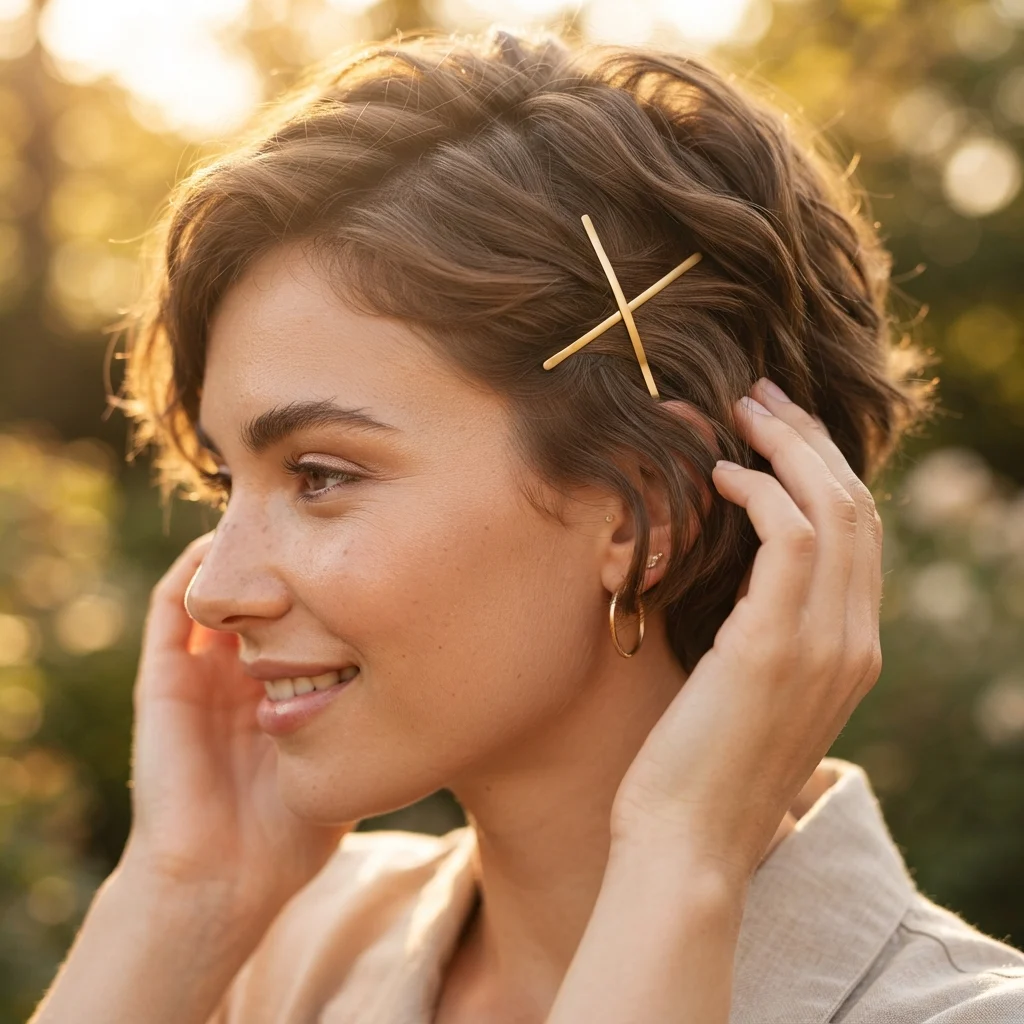
Vibe: This sweep feels nostalgic, a small nod to vintage pin-curl styling.
Why it works: Crossing two bobby pins in an X shape rather than using a single pin creates a stronger hold on short hair, which slips more easily than longer strands, a practical technique borrowed from vintage styling traditions. The visible crossed pins become a deliberate design detail rather than a hidden practicality, especially in a matte gold or tortoiseshell finish. This sweep works well for keeping the fringe out of the eyes without cutting it shorter.
How to get it: Take a one-inch section from the front of the crown and sweep it back at a diagonal angle. Cross two matching bobby pins in an X shape directly beneath the section for maximum grip. Leave the remaining crown texture untouched for contrast against the swept, controlled section. Choose a pin finish, matte gold or tortoiseshell, that complements your hair’s undertone.
Shop the Look
| Product |
| Matte gold bobby pin set |
| Tortoiseshell bobby pins alternative finish |
| Texturizing spray for grip before pinning |
| Small sectioning clip for prep |
| Compact pin storage case |
35. Lightweight Sea Foam Mousse
MAINTENANCE
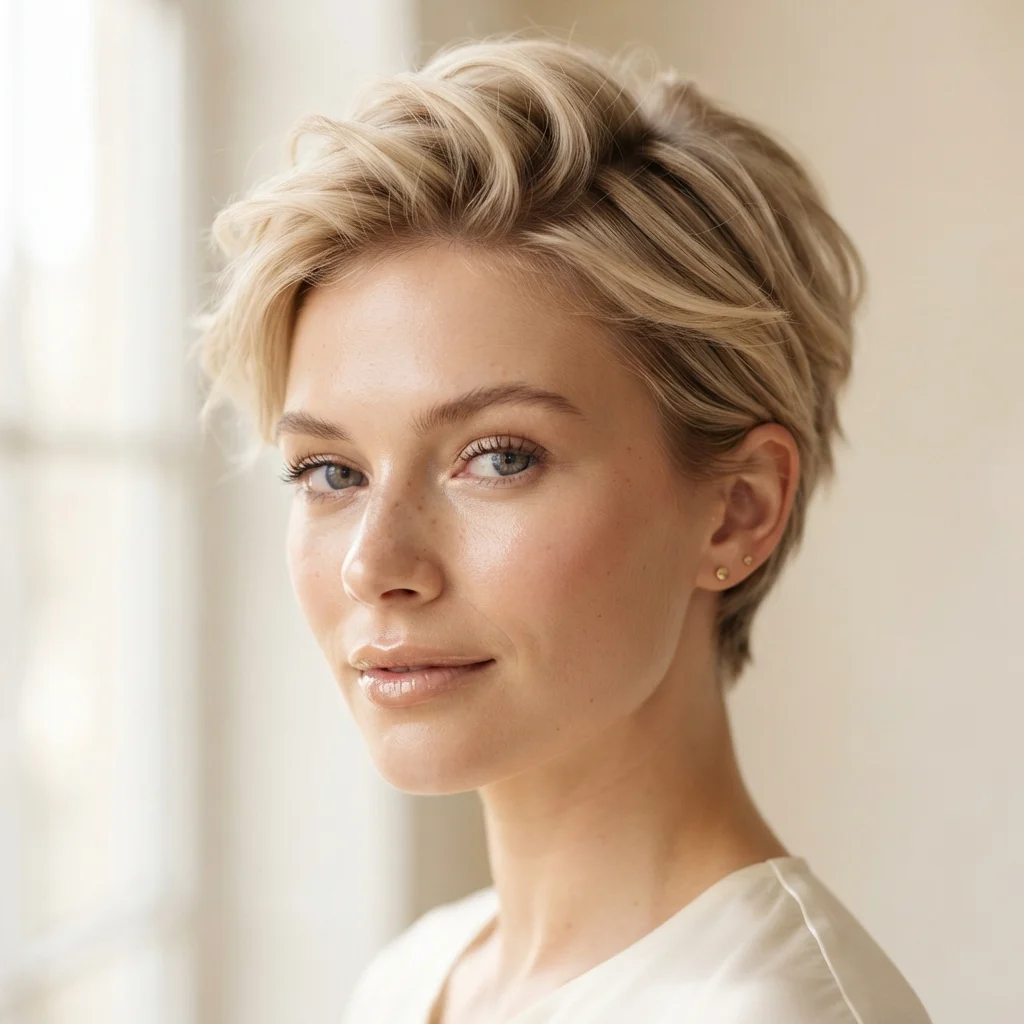
Vibe: This finish feels soft, structure without any stiffness.
Why it works: Mousse distributes as a light foam rather than a concentrated product, coating strands evenly without the heaviness of clay or the shine of gel, making it the gentlest hold option on this list. The foam format also expands to fill volume as it dries, giving a subtle lift alongside its hold. This is a good everyday product for those who want the gamine texture without a heavily styled appearance.
How to get it: Dispense a golf-ball-sized amount of mousse into palms and rub together before working through damp hair from roots to ends. Focus application at the crown, where lift and hold matter most, using less through the nape. Diffuse-dry on low heat to activate the mousse’s volumizing properties without overdrying. Avoid touching the style excessively once dry, since mousse loses hold with repeated handling more than clay or wax formulas do.
Shop the Look
| Product |
| Lightweight volumizing mousse |
| Low-heat diffuser dryer attachment |
| Wide-tooth comb for mousse distribution |
| Volumizing root spray complement |
| Soft-bristle brush for gentle styling |
36. Piecey Crown Separation
TEXTURE
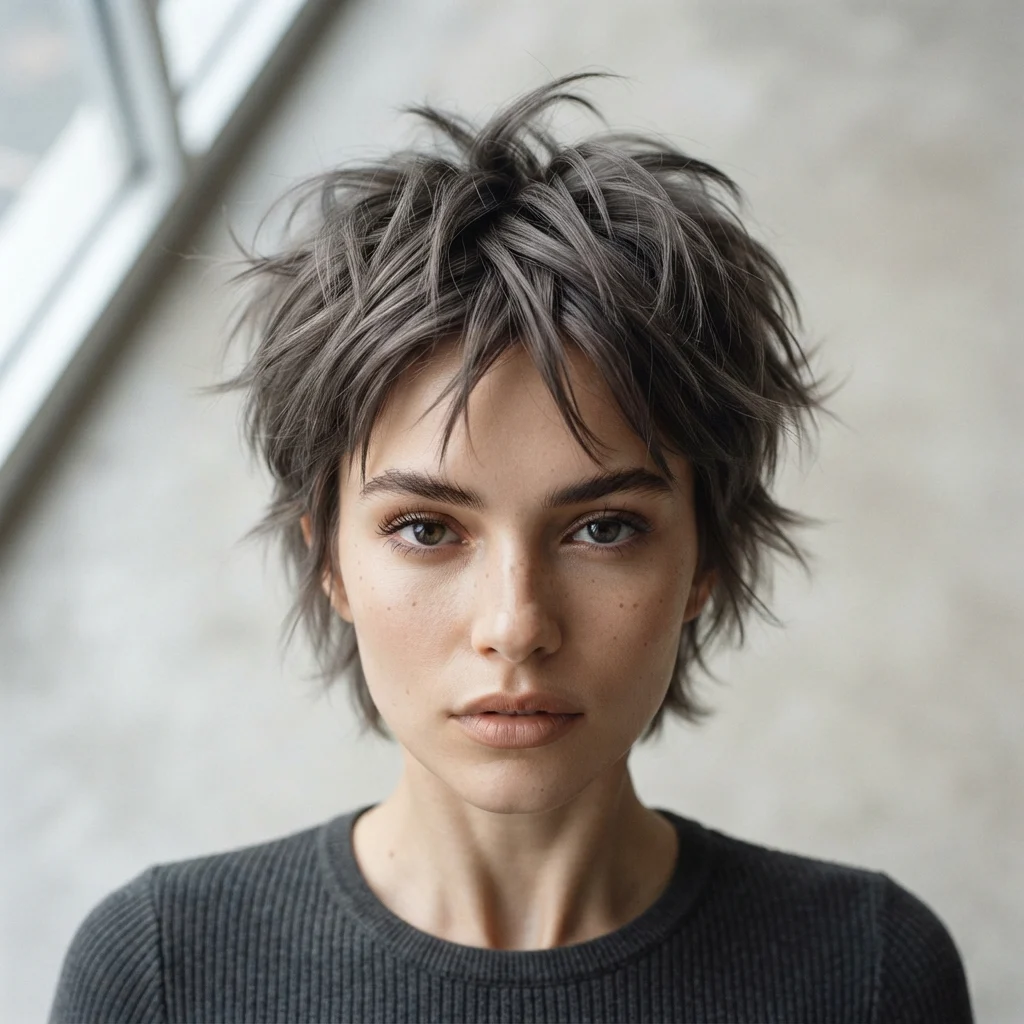
Vibe: This separation feels graphic, each piece its own distinct shape.
Why it works: Deliberate piece separation uses product applied to individual sections rather than the whole head at once, a more labor-intensive technique than the general texturizing methods described elsewhere on this list.The technique works best on hair with enough natural coarseness to hold defined shapes, since fine hair can struggle to maintain individual piece separation through the day. This is the most detail-oriented styling approach on this list, best suited for occasions where extra time is available.
How to get it: Section the crown into small, defined pieces roughly a half-inch wide before applying product to each individually. Use a small amount of strong-hold wax on fingertips, twisting each piece as you apply for defined separation. Allow pieces to dry fully before touching again, since disturbing them too early blends the separation together. Set with a light-hold spray applied from a distance so it does not collapse the piece definition.
Shop the Look
| Product |
| Strong-hold texturizing wax for separation |
| Fine-tooth sectioning comb |
| Light-hold finishing spray |
| Small styling clips for sectioning |
| Detail brush for precise piece placement |
37. Deep Chestnut Red Tones
COLOR
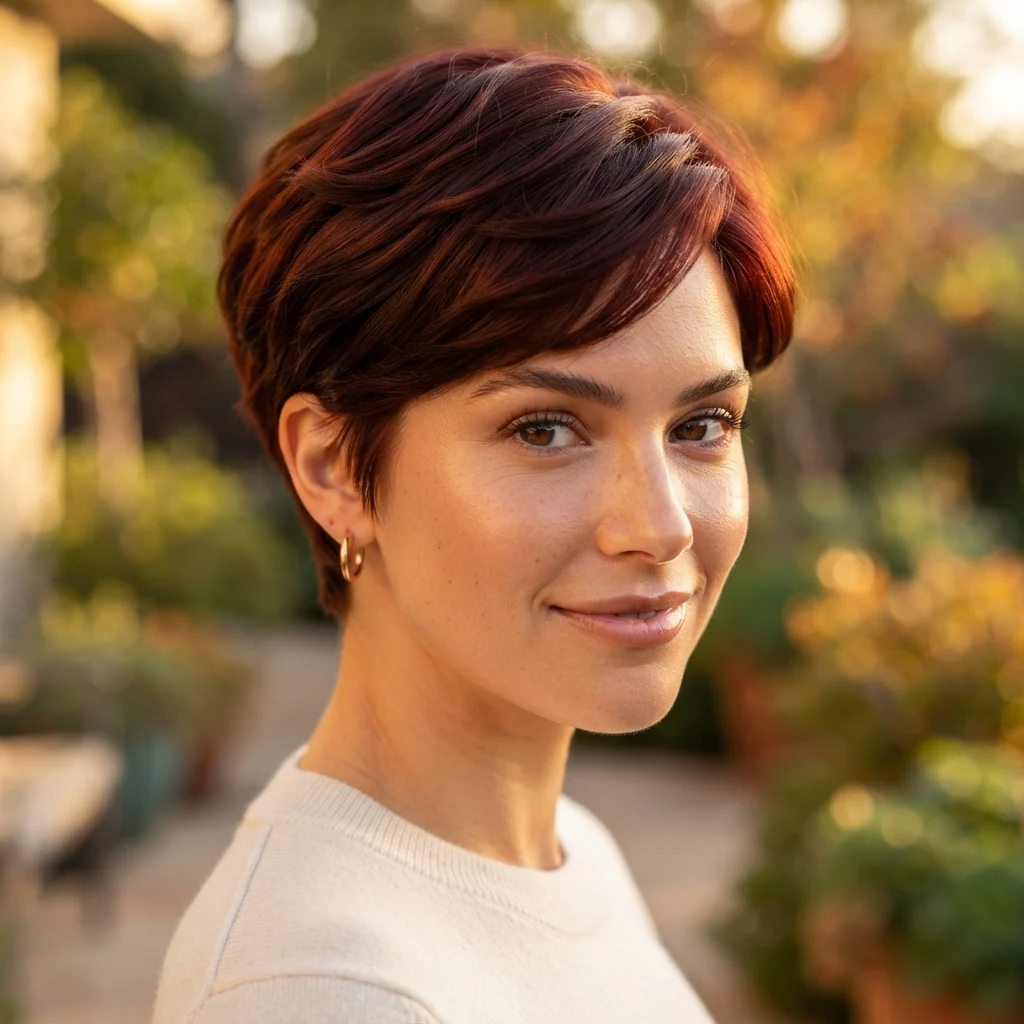
Vibe: This color feels rich, warmth deepening with every angle of light.
Why it works: Chestnut red sits between brown and auburn on the color wheel, giving it more warmth than the espresso base described earlier while requiring less lightening than a full red fashion color. The tone also deepens visually in low light and brightens under sun, giving the style two distinct moods depending on setting. This color pairs particularly well with the softer, rounded fringe shapes on this list, since warmth tends to complement gentler cutting lines.
How to get it: Request a demi-permanent chestnut red gloss over a natural brunette base for richness without a lengthy lightening process. Ask your colorist to add subtle red-toned lowlights for depth rather than an entirely flat color application. Use a color-depositing conditioner in a matching auburn shade every few washes to maintain vibrancy. Protect the tone from sun exposure with a UV-protectant spray, since red pigments fade faster than brown under direct light.
Shop the Look
| Product |
| Demi-permanent chestnut red gloss kit |
| Color-depositing auburn conditioner |
| UV protectant spray for red tones |
| Color-safe sulfate-free shampoo |
| Glossing shine serum for red hair |
38. Full Blunt Micro Bangs
FRINGE STYLE
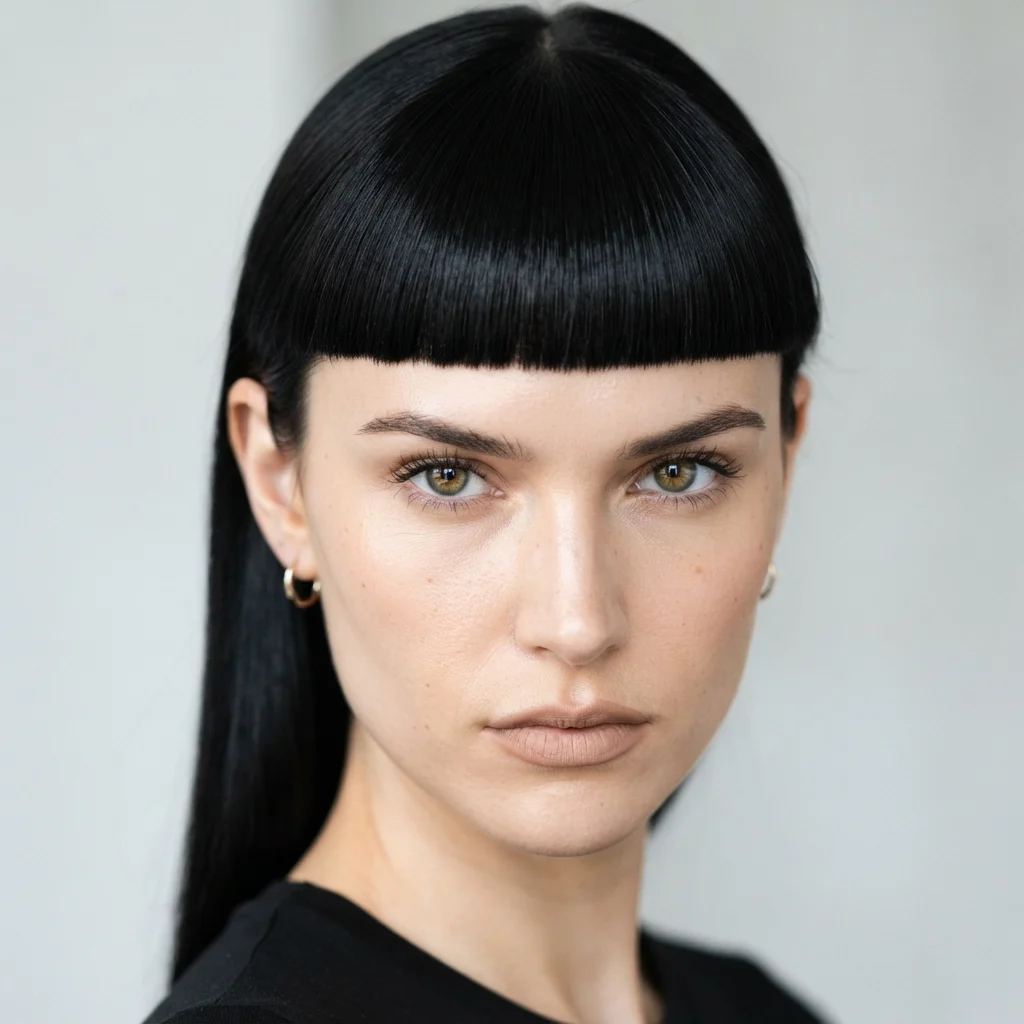
Vibe: This fringe feels graphic, dense and unmoving across the brow.
Why it works: Full micro bangs maximize density across the entire forehead rather than thinning strands for a wispy effect, the most solid, high-contrast fringe option on this list. The straight-across cut also requires the most precision of any fringe style here, since any unevenness is immediately visible against the fringe’s solid mass. This is a statement fringe, best suited to those wanting their haircut to read as a clear style choice rather than a subtle enhancement.
How to get it: Have your stylist cut this fringe using the full front section of hair rather than a thinned subsection, keeping density intentionally high. Cut dry and check the line from multiple angles before finalizing, since density can hide small unevenness until it dries fully. Style with a flat brush and light tension while blow-drying to keep the line crisp. Trim every ten days at home using sharp, dedicated fringe shears to maintain the sharp edge.
Shop the Look
| Product |
| Dedicated fringe-cutting shears |
| Small flat styling brush for tension |
| Fine-mist water bottle for trims |
| Anti-static finishing spray |
| Handheld mirror for precision checks |
39. Long-Top Short-Sides Silhouette
TAPER & LENGTH
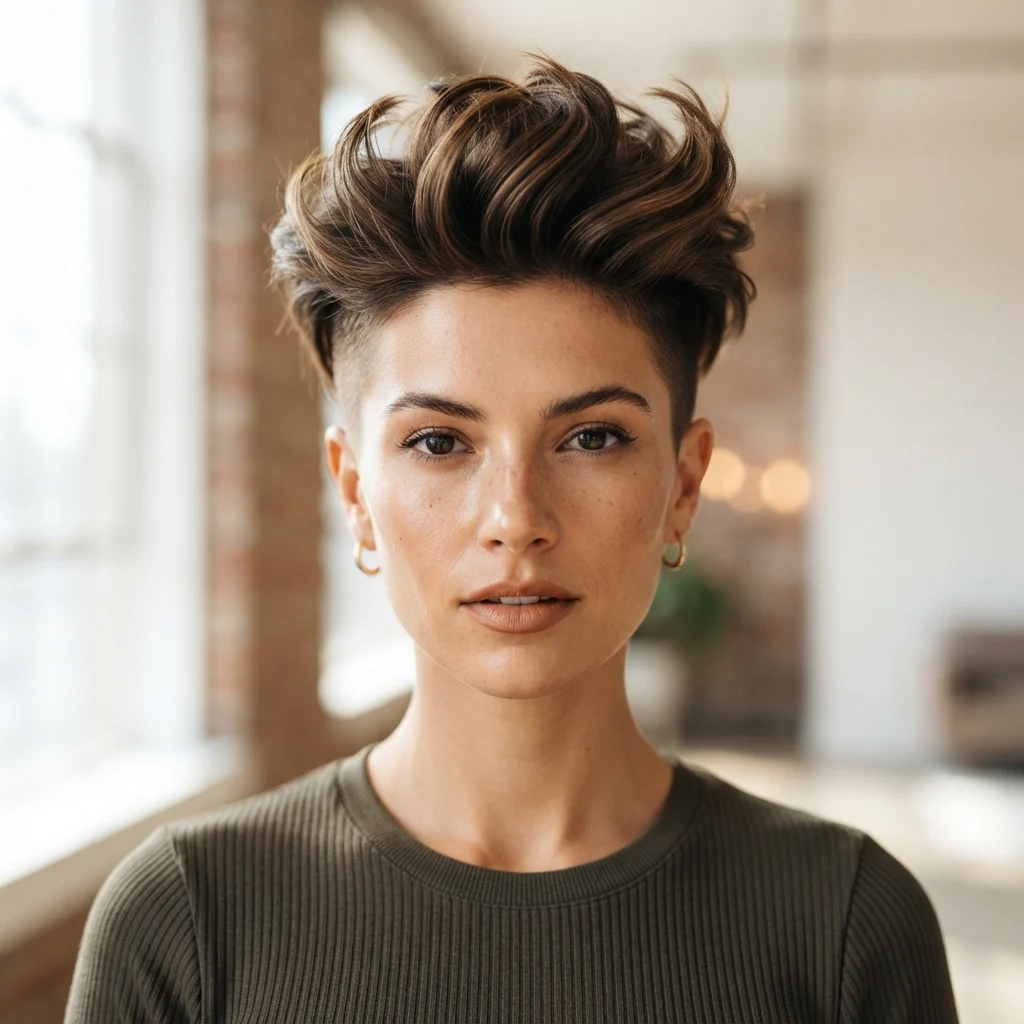
Vibe: This silhouette feels architectural, two lengths in clear conversation.
Why it works: This silhouette exaggerates the length contrast beyond any other taper on this list, keeping the sides extremely short while allowing the top to grow to several inches for maximum styling versatility. This shape also offers the most adaptability day to day, since the longer top can be styled swept, spiked, or flat depending on the occasion. It requires confidence to wear, as the contrast reads as a clear fashion choice rather than a conservative option.
How to get it: Request the sides clipped short, guard number one or shorter, while explicitly asking your stylist to leave the top section long enough to style in multiple directions. Use a strong-hold product on the top section daily to manage the added length and prevent flatness. Keep the sides maintained every two weeks even while the top continues growing between full cuts. Experiment with styling direction, swept back one day and forward the next, to get full value from this versatile shape.
Shop the Look
| Product |
| Strong-hold styling wax for longer top |
| Clipper set for short-side maintenance |
| Wide-tooth comb for top styling |
| Volumizing spray for added height |
| Flexible finishing spray for hold |
40. Air-Dried Natural Texture
STYLING TECHNIQUE
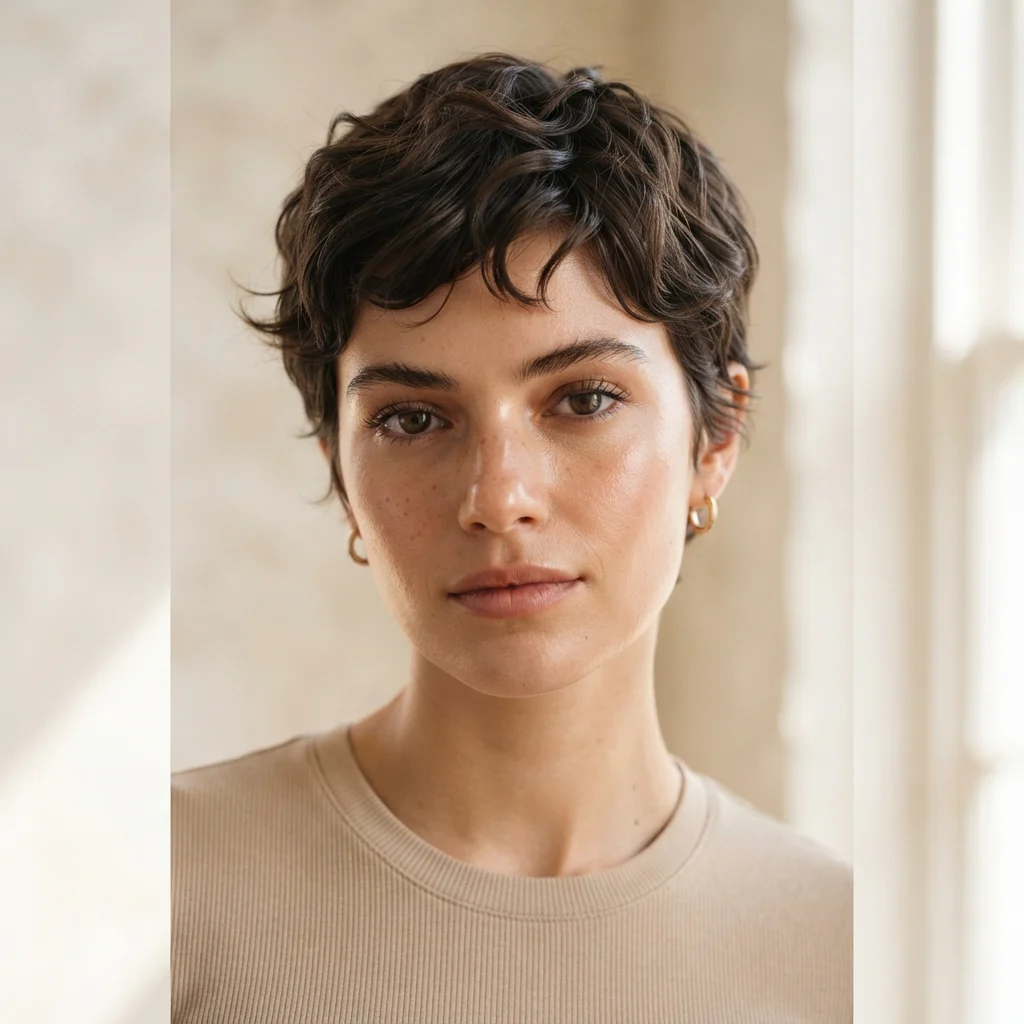
Vibe: This texture feels honest, no heat tool involved at all.
Why it works: Air-drying eliminates thermal styling entirely, relying instead on the cut’s own structure and a lightweight product to guide texture as it dries naturally, the lowest-effort technique on this list. The gamine crop’s short length actually supports this method well, since less hair mass means faster, more predictable air-drying results than longer styles allow. This technique also reveals the true quality of the underlying cut, since there is no styling tool to disguise an uneven line.
How to get it: Apply a lightweight leave-in cream to towel-dried hair, scrunching gently rather than combing through completely. Let hair dry undisturbed for the first fifteen minutes before any reshaping with fingers. Avoid touching the crown repeatedly while damp, since overhandling during the drying process tends to create frizz rather than texture. Save any restyling for once hair is fully dry, using fingertips only to adjust piece direction.
Shop the Look
| Product |
| Lightweight leave-in styling cream |
| Microfiber towel for gentle drying |
| Anti-frizz air-dry serum |
| Wide-tooth comb for pre-dry detangling |
| Travel-size leave-in spray |
41. Thin Gold Chain Headband
ACCESSORY
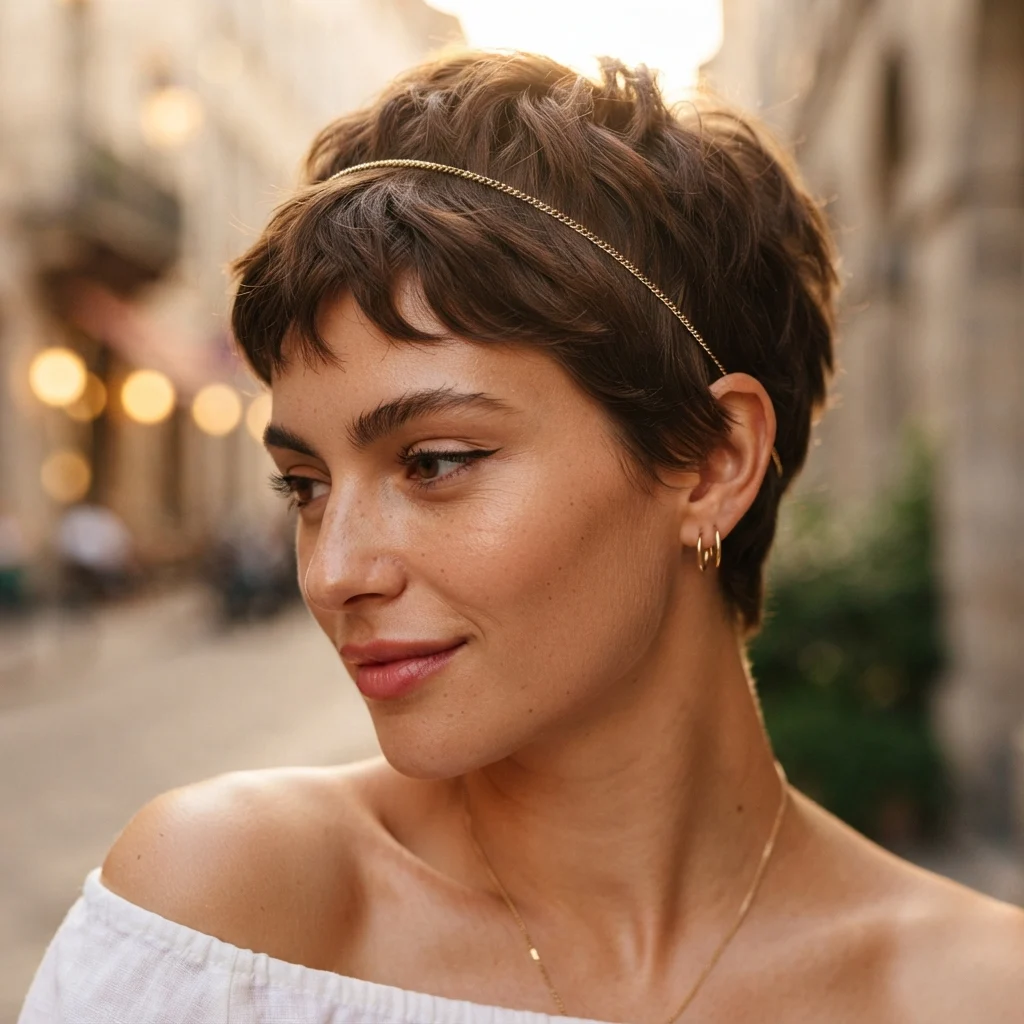
Vibe: This chain feels ornamental, a fine gold line across matte texture.
Why it works: A chain headband introduces a linear, reflective element that contrasts with the matte, irregular texture of the crown, a material contrast principle that adds richness without covering the cut itself. Positioned just behind the hairline rather than pushed back fully, it stays visible against short hair instead of disappearing the way it might on a longer style. The delicate scale of a thin chain suits the gamine crop’s precision better than a chunkier headband would. This accessory is particularly effective at elevating a daytime look into evening-appropriate styling with minimal effort.
How to get it: Choose a thin, single-strand gold chain headband rather than a beaded or thick metal style. Position it roughly an inch back from the hairline, letting a small amount of fringe fall over the front edge. Secure with small clear grips on either side to prevent the chain from sliding on shorter hair. Pair with minimal other jewelry to let the headband remain the focal accessory.
Shop the Look
| Product |
| Thin gold chain headband |
| Small clear hair grips for security |
| Lightweight pomade for fringe placement |
| Jewelry polishing cloth |
| Compact accessory travel case |
42. Weekly Bond-Repair Treatment
MAINTENANCE
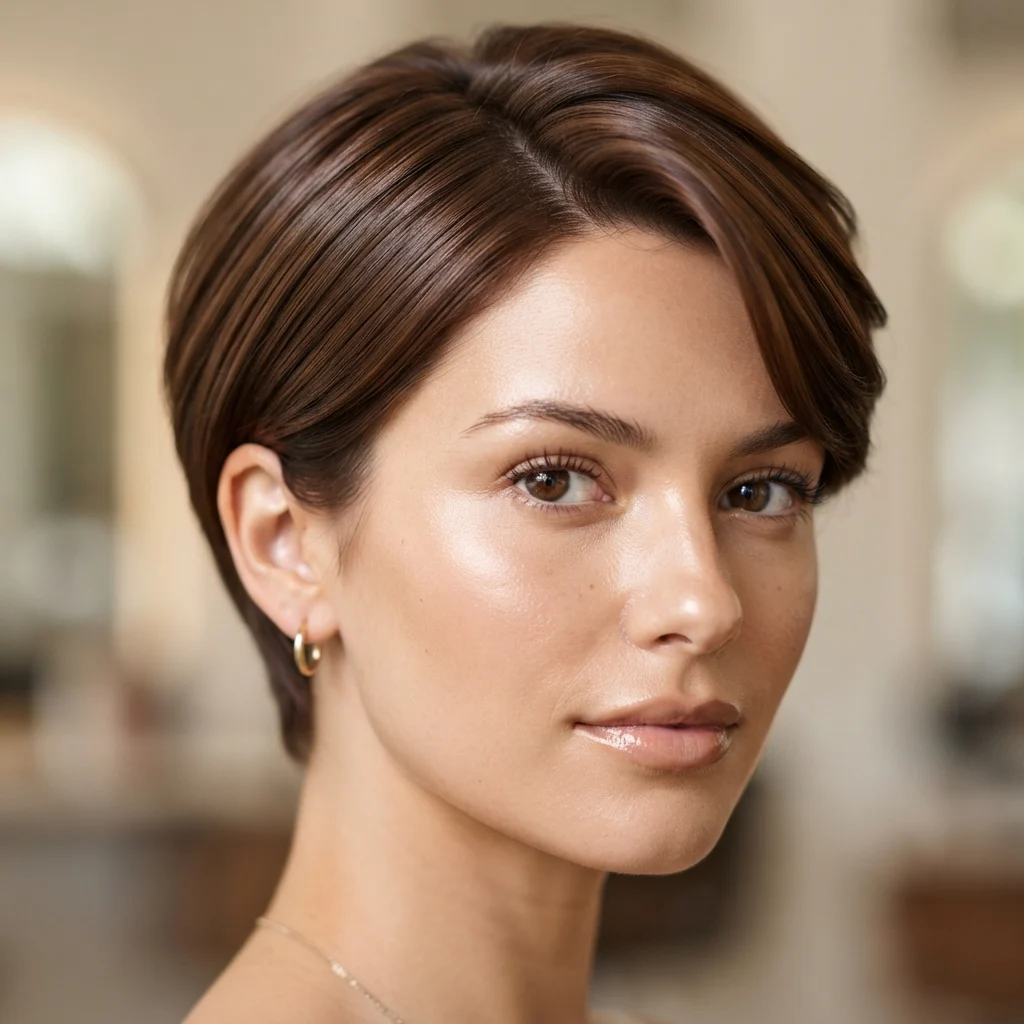
Vibe: This routine feels restorative, strength rebuilt one wash at a time.
Why it works: Bond-repair treatments contain ingredients that rebuild broken disulfide bonds within the hair shaft, a chemical maintenance step distinct from the styling-focused products elsewhere on this list. Strong, well-maintained hair also holds texture and styling product more effectively than damaged strands, making this treatment foundational to every other technique on this list working well. This is a health-focused maintenance step rather than a purely cosmetic one.
How to get it: Use a bond-repair treatment formulated with ingredients designed to rebuild internal hair structure, applying it once weekly on clean, damp hair. Leave the treatment on for the full time specified on the product, typically ten to twenty minutes, rather than rinsing early. Follow with a lightweight conditioner to seal the treatment without weighing down short hair. Pair this weekly treatment with a daily heat protectant if you use hot tools regularly, since prevention and repair work together most effectively.
Shop the Look
| Product |
| Weekly bond-repair hair treatment |
| Lightweight sealing conditioner |
| Daily heat protectant spray |
| Wide-tooth comb for treatment application |
| Shower cap for treatment processing time |
43. Scrunched Textured Waves
TEXTURE
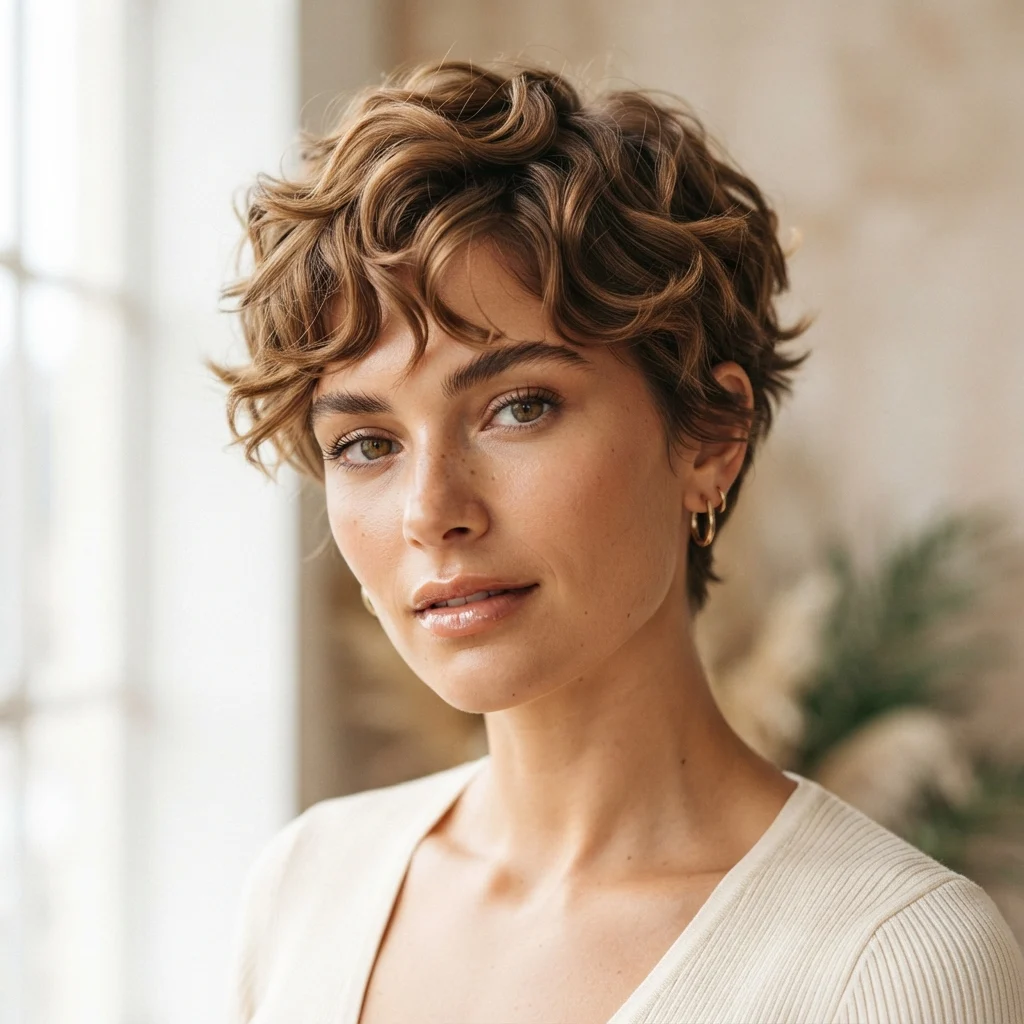
Vibe: This texture feels loose, waves gathered rather than smoothed.
Why it works: Scrunching compresses hair inward toward the scalp as it dries, encouraging a soft wave pattern in hair that is naturally straight or only slightly textured, a technique distinct from the diffused curl method used for naturally curly hair earlier on this list. This works best on the slightly longer crown lengths within the gamine category, since enough hair mass is needed to form a visible wave. This method also requires the least heat exposure of the wave-creating techniques on this list.
How to get it: Apply a texturizing sea salt or wave spray to damp hair before scrunching upward from the ends toward the scalp with cupped palms. Continue scrunching intermittently as hair air-dries or diffuses to reinforce the wave pattern. Avoid brushing once the waves have formed, since brushing will separate them into frizz rather than defined texture. Finish with a small amount of curl cream on dry hair to define any looser sections.
Shop the Look
| Product |
| Texturizing wave spray |
| Curl cream for wave definition |
| Low-heat diffuser attachment |
| Microfiber scrunch-drying towel |
| Anti-frizz finishing mist |
44. Two-Tone Money Piece Fringe
COLOR
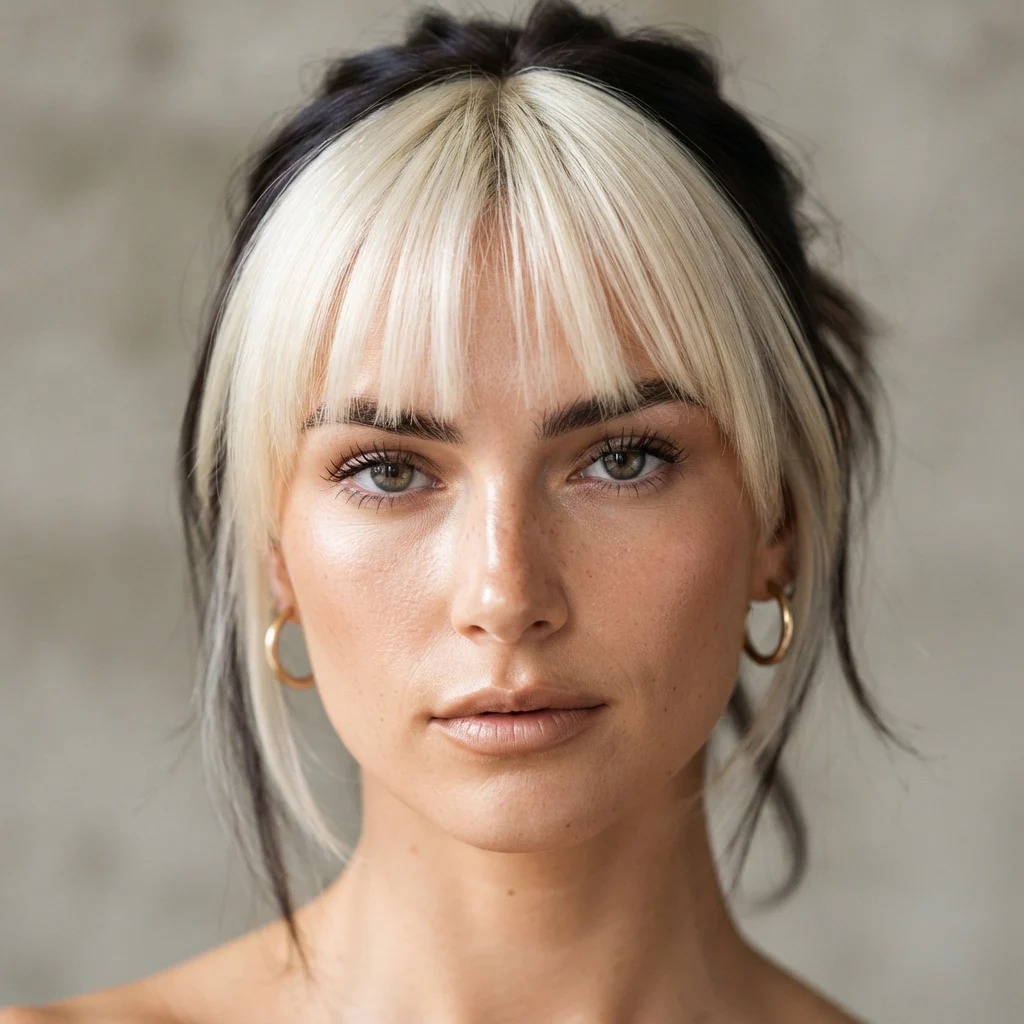
Vibe: This color feels graphic, one bright piece against a dark field.
Why it works: A money piece places a bold, lightened highlight specifically at the fringe rather than throughout the crown, concentrating maximum contrast exactly where the eye naturally lands first. The dark base color surrounding the highlight actually intensifies the contrast further, a principle of using darkness to make brightness read more vividly. This is an efficient color choice for those wanting maximum visual impact with minimal maintenance elsewhere on the head.
How to get it: Ask your colorist to lighten only the front-most section of the fringe, roughly one to two pieces wide, rather than blending it into the surrounding hair. Request a clean, visible line between the highlighted piece and the dark base for the strongest contrast. Use a purple-toning treatment on just the highlighted section to keep it from turning brassy. Touch up only this small section every four to five weeks, since the rest of the color requires no maintenance.
Shop the Look
| Product |
| Purple toning spot-treatment for highlights |
| Fine-tip color applicator brush |
| Color-safe shampoo for dual-tone hair |
| Small sectioning clip for highlight isolation |
| Glossing treatment for highlight shine |
45. Softly Curled Fringe Ends
FRINGE STYLE
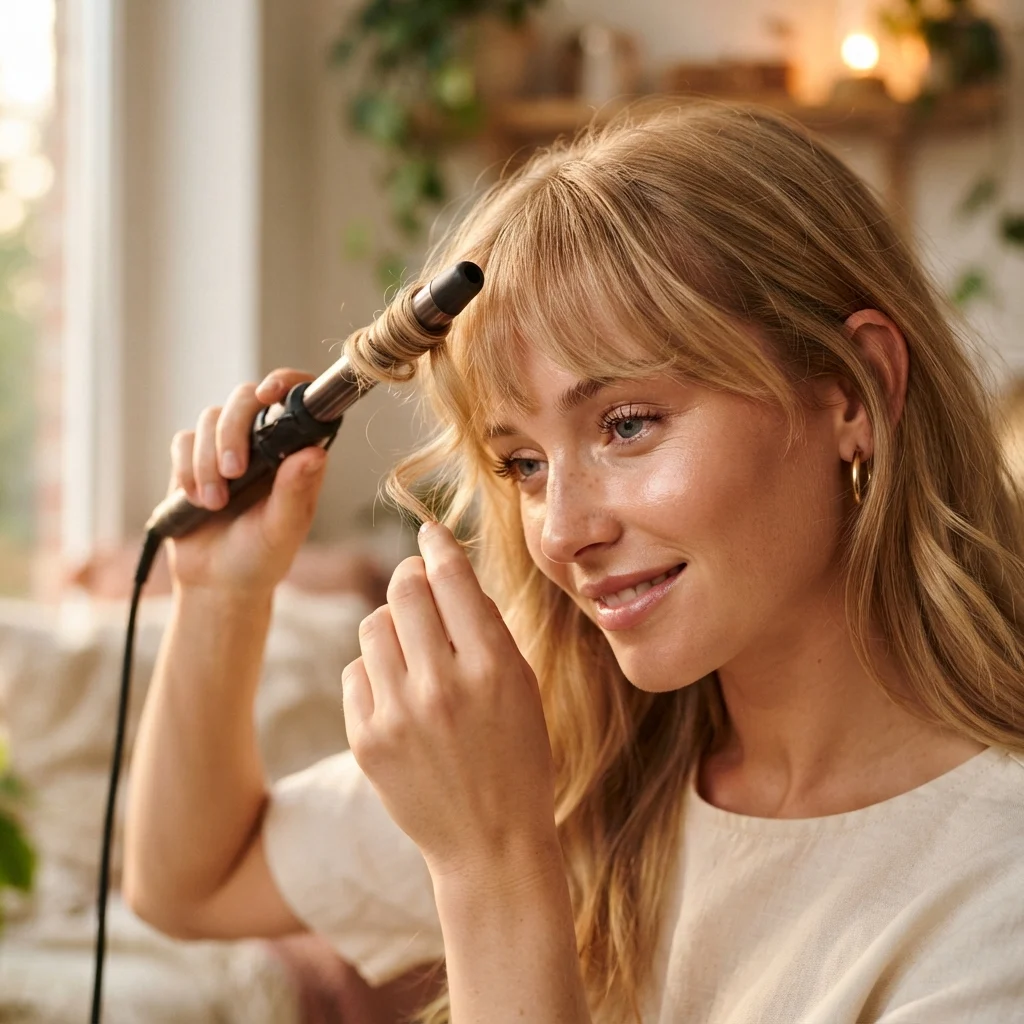
Vibe: This fringe feels soft, ends curved gently away from the face.
Why it works: A small-barrel curling iron applied only to the fringe’s ends, not its full length, creates gentle movement without the volume a full curl would add, a targeted heat-styling technique distinct from the flat-ironed or wet-look options elsewhere on this list.The curl also lifts the fringe slightly off the brow, which keeps hair out of the eyes without additional cutting. This technique works especially well paired with warmer color tones, since the curved shape catches light similarly to a wave.
How to get it: Use a three-quarter-inch curling iron or wand, wrapping only the bottom half-inch of the fringe around the barrel. Hold for no more than five seconds, since short fringe pieces heat and curl faster than longer hair. Release into your palm to cup and cool the curl before it falls, which helps the shape set. Finish with a light-hold spray applied from a distance to avoid weighing down the soft curl.
Shop the Look
| Product |
| Small barrel curling wand three-quarter inch |
| Heat protectant spray for fringe |
| Light-hold finishing spray |
| Heat-resistant styling glove |
| Fine-tooth comb for fringe sectioning |
46. Skin Fade with Textured Top
TAPER & LENGTH
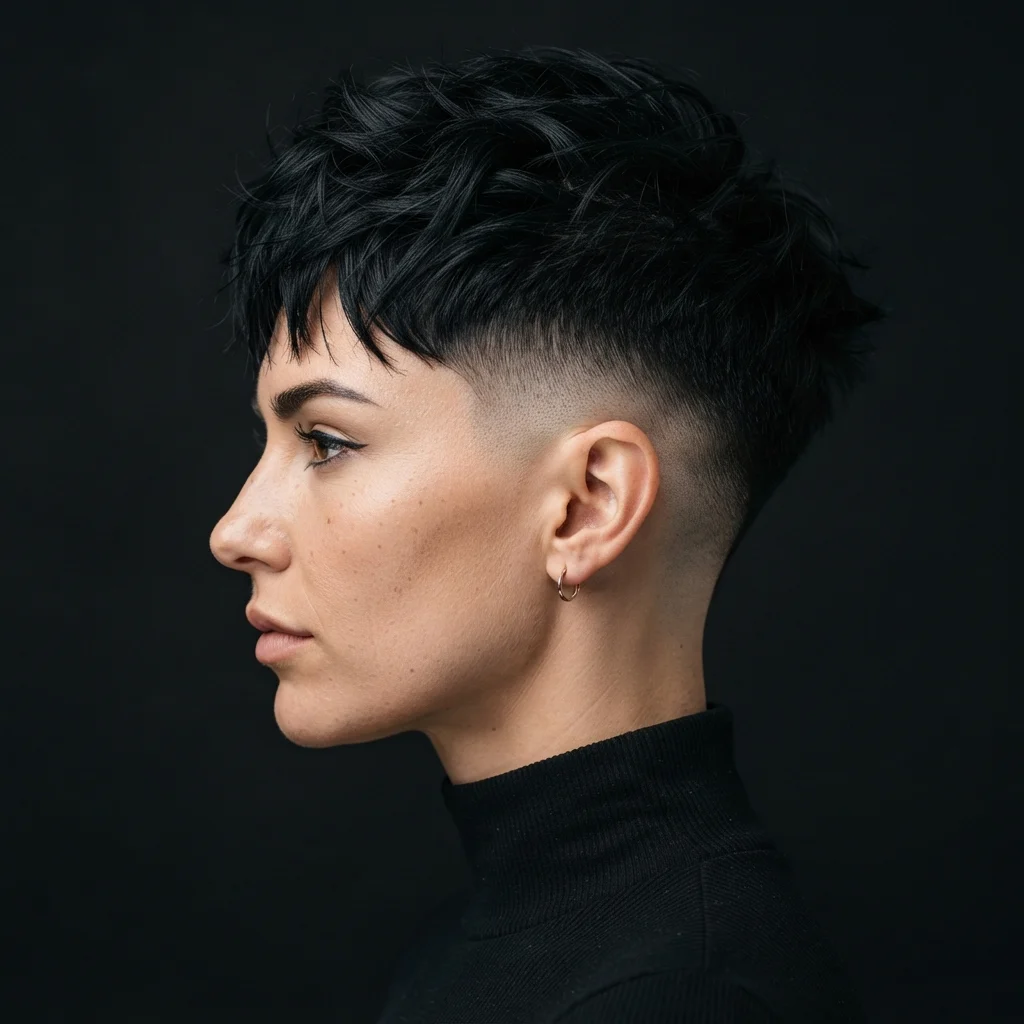
Vibe: This fade feels extreme, skin visible beneath a wild crown above.
Why it works: A skin fade tapers all the way down to bare skin at its shortest point, the most extreme version of the taper techniques covered on this list, creating maximum contrast against the textured top section. The stark exposure of scalp at the sides also makes the crown texture appear even more voluminous by comparison, a strong use of contrast to amplify perceived volume. This is the highest-maintenance taper on this list and suits those wanting the most fashion-forward version of the gamine silhouette.
How to get it: Seek out a barber specifically experienced in skin fades, since the technique differs meaningfully from a standard clipper taper. Request the fade blend from skin up to at least three guard lengths before reaching the textured crown. Schedule maintenance every ten to fourteen days, more frequent than any other taper on this list, to preserve the clean fade line. Use a light styling product only on the crown, keeping the faded sides product-free to maintain their crisp, clean appearance.
Shop the Look
| Product |
| Professional skin fade clipper set |
| Fade blending brush |
| Aftershave balm for sensitive faded skin |
| Barber cape with fine hair collection |
| Texturizing paste for crown contrast |
47. Cool Blow-Out Root Lift
STYLING TECHNIQUE
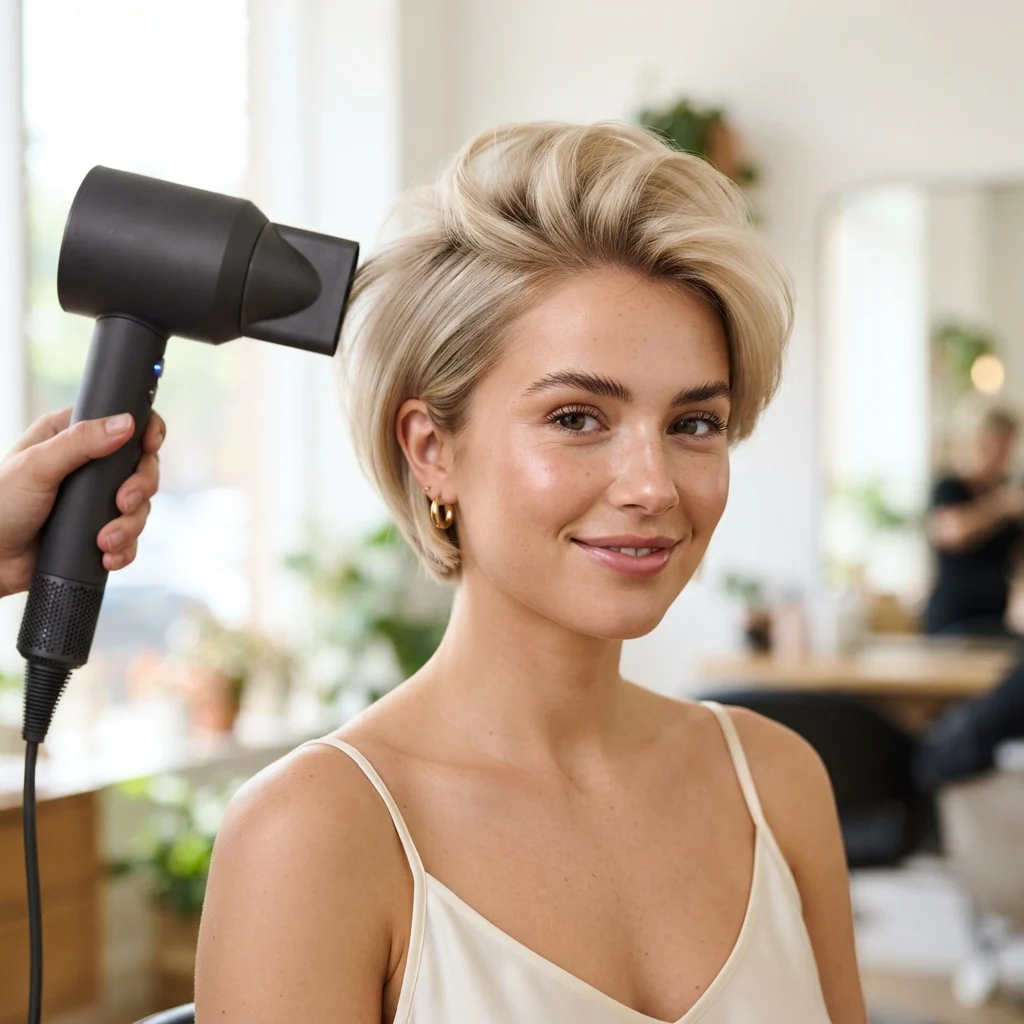
Vibe: This lift feels crisp, set cool rather than left warm and soft.
Why it works: Finishing a blow-out with a sustained blast of cool air, rather than stopping at the warm-air styling stage, closes the hair cuticle and locks the root lift in place for longer wear, a finishing technique distinct from the general volume-lift method described earlier on this list. This cool-set step is particularly effective for fine hair prone to losing volume within hours of styling. The technique also adds subtle shine, since a closed cuticle reflects light more evenly than a heat-roughened one.
How to get it: Complete your regular blow-dry and rounding-brush routine as usual through the crown. Switch the dryer to its coolest setting and hold it several inches from each section for fifteen to twenty seconds. Keep the round brush in place while applying cool air, rather than removing it first, for the strongest set. Finish with a light shine spray held at a distance to avoid weighing down the lifted roots.
Shop the Look
| Product |
| Dryer with dedicated cool-shot button |
| Small round volumizing brush |
| Lightweight shine finishing spray |
| Root-lift spray for pre-styling prep |
| Sectioning clips for controlled drying |
48. Statement Pearl Barrette
ACCESSORY
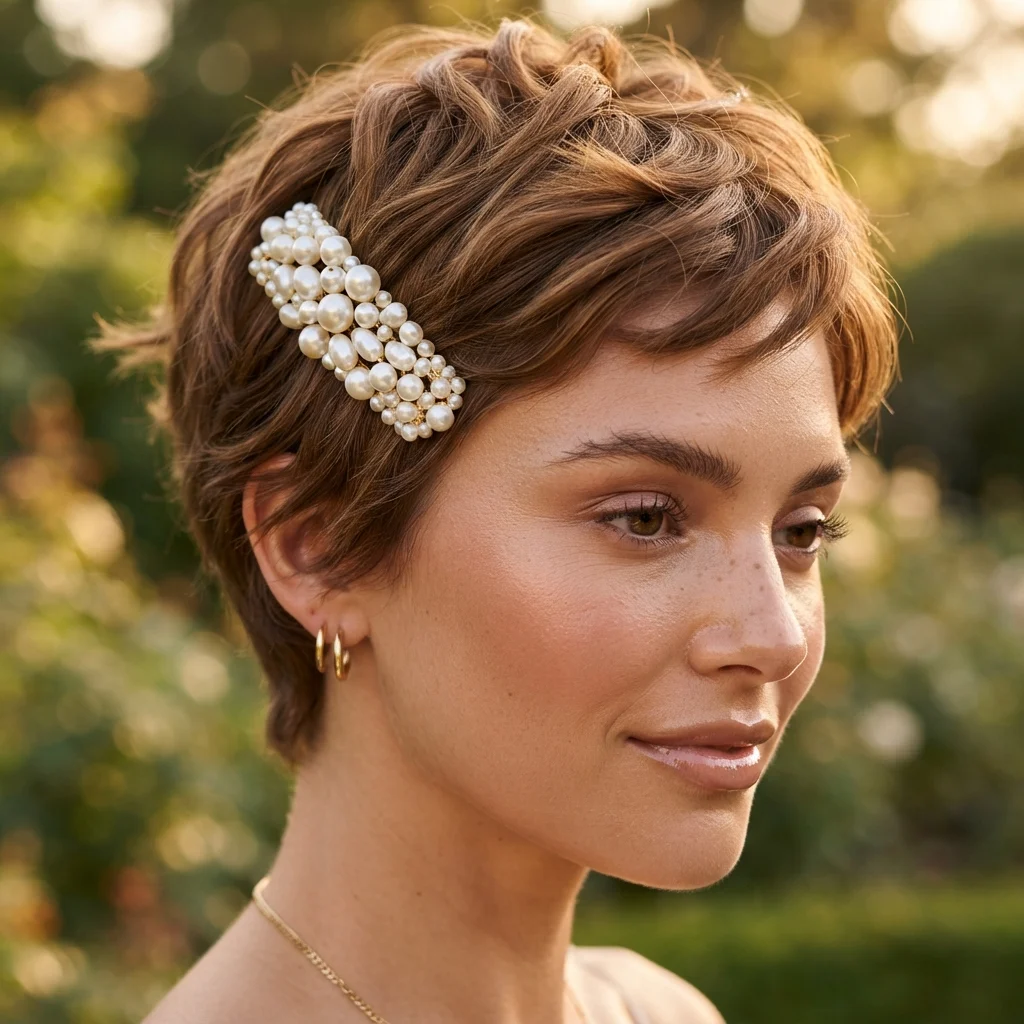
Vibe: This barrette feels celebratory, a bold pearl moment against matte texture.
Why it works: A larger, statement-scale pearl barrette departs from the small clip and cuff accessories described earlier on this list, using scale itself as the design choice rather than subtlety. This barrette also functions practically, holding back a larger section of the crown on days the texture needs more control. Reserved for occasions rather than daily wear, it turns the cut into an intentional styling statement.
How to get it: Choose a barrette at least two inches wide to achieve genuine statement scale against short hair. Clip back a substantial section, roughly a third of the crown, rather than a thin piece for the barrette to sit properly. Position it slightly off-center rather than dead center for a more editorial placement. Save this accessory for events, since its size makes it less practical for everyday wear or activity.
Shop the Look
| Product |
| Oversized statement pearl barrette |
| Wide-tooth comb for sectioning before clipping |
| Texturizing spray for grip |
| Anti-slip clip grip pads |
| Padded jewelry box for barrette storage |
49. Daily Light Serum Smoothing
MAINTENANCE
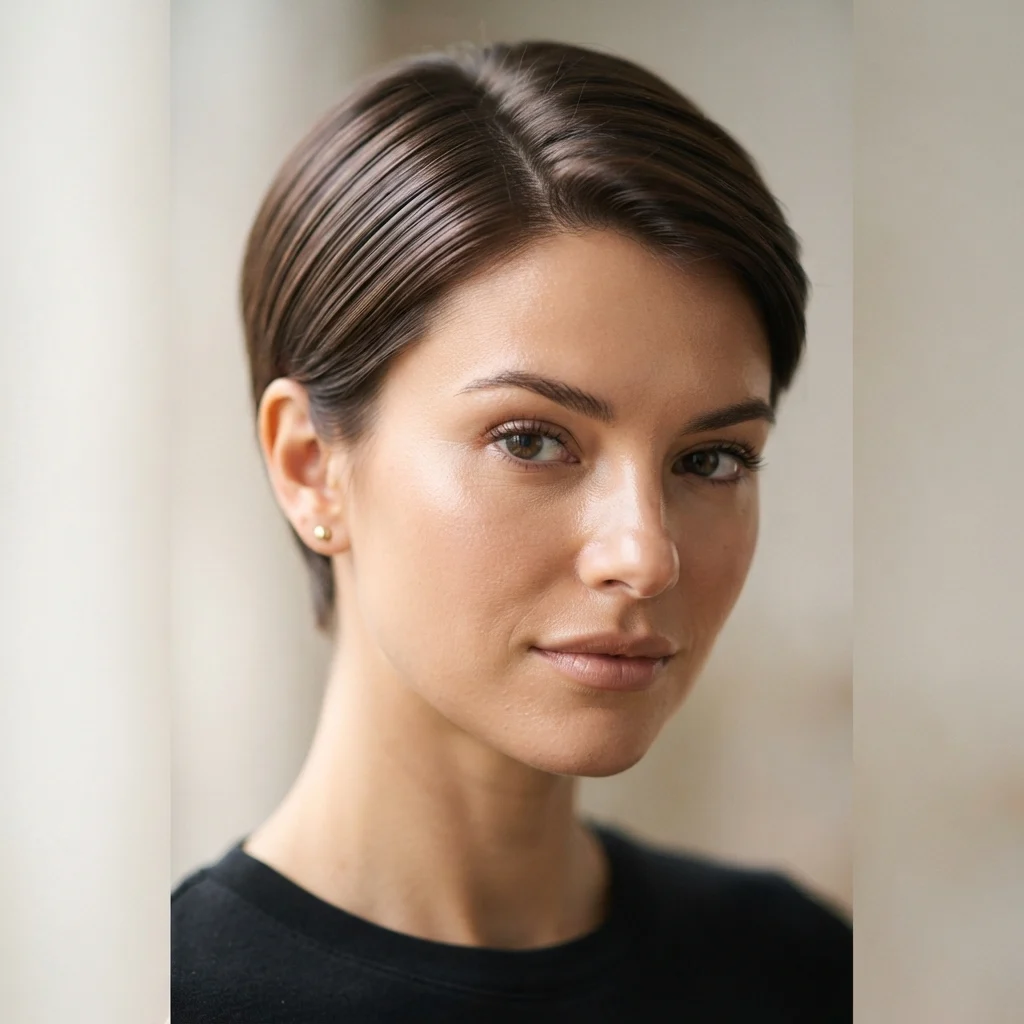
Vibe: This finish feels settled, flyaways smoothed without losing texture.
Why it works: A lightweight serum controls flyaways at the surface level without penetrating or weighing down the strand the way a heavier cream would, making it the final polishing step rather than a primary styling product on this list. A small amount of shine-enhancing serum also counters the flatness that clay or powder products can leave behind after a full day of wear. This is a finishing touch applied after all other styling is complete, not a substitute for it.
How to get it: Warm a single drop of lightweight serum between fingertips before smoothing it lightly over the surface of the style, focusing on the perimeter rather than the crown’s texture. Apply as the final step after all other products have been used and styling is complete. Reapply a small amount midday if flyaways reappear, using no more than a drop at a time to avoid greasiness. Choose a silicone-light or oil-based formula specifically labeled for fine hair to avoid buildup on short strands.
Shop the Look
| Product |
| Lightweight finishing hair serum |
| Small dropper applicator bottle |
| Shine-enhancing polishing spray |
| Soft-bristle detail brush |
| Travel-size serum vial |
50. Ultra-Cropped Micro Pixie Finish
TEXTURE
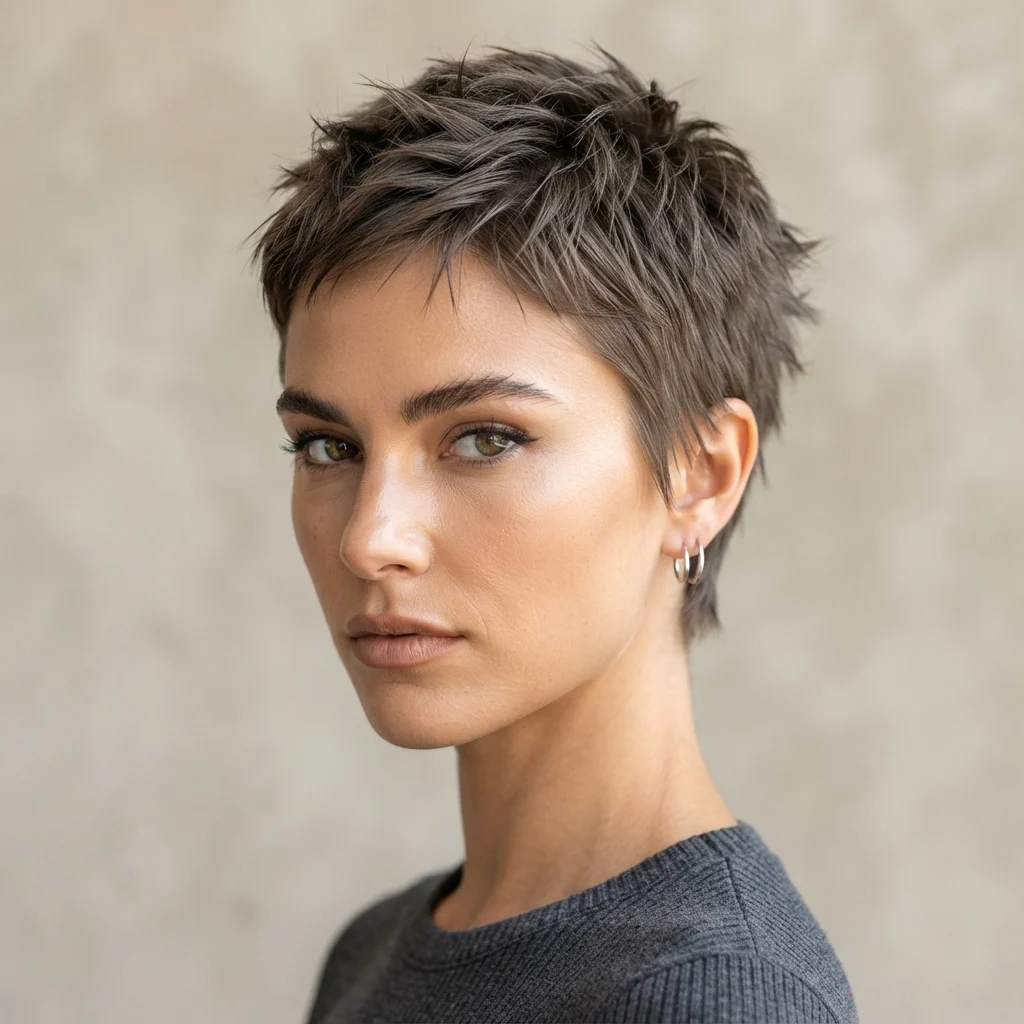
Vibe: This finish feels distilled, the gamine crop reduced to its purest form.
Why it works: Cropping the entire style down to its shortest possible length removes any length-related softness, leaving texture as the sole design element carrying the entire look, the most concentrated expression of every technique covered on this list.This ultra-short finish also dries fastest of any style here and requires the least daily product, trading styling time for a more committed trim schedule. This is the purest, most distilled version of the textured gamine crop, best suited to those who want the concept taken to its logical endpoint.
How to get it: Have your stylist cut the crown to no more than one and a half inches at its longest point, with razoring applied throughout for maximum texture at this reduced length. Use only a small amount of matte paste, since shorter hair requires far less product than longer crown lengths. Style with fingertips in under a minute, as this length holds shape with minimal manipulation. Commit to trims every three to four weeks, since regrowth is more visible at this short a length than at any other length on this list.
Shop the Look
| Product |
| Matte finishing paste travel size |
| Precision razor for ultra-short texture |
| Small detail comb for micro-length styling |
| Neck duster for frequent trims |
| Handheld mirror for close inspection |
How to Start Your Textured Gamine Crop Transformation
Your first move should be booking a consultation specifically with a stylist who lists pixie or short-hair cutting as a specialty, not a generalist. This single decision anchors everything else, since the razoring, point-cutting, and disconnection techniques that define this style require precision most stylists only develop through repeated short-hair work. A strong first cut sets the template every future trim will follow.
The most common mistake is choosing a fringe length that photographs well on someone else but ignores your own hair’s natural growth pattern and cowlicks. This breaks the look because a fringe cut against your natural fall will separate awkwardly within days, no matter how sharp it looked in the chair. Fix this by asking your stylist to check your hairline’s growth direction before finalizing fringe length, and expect the first two weeks of styling to involve some trial and error.
Three items under $50 create immediate impact: a small tin of matte clay pomade, a mini ionic travel dryer for controlling the crown at the roots, and a set of precision fringe-cutting shears for between-visit maintenance. Each supports a different technique covered across the fifty ideas above.
A full transformation, cut plus color plus a settled styling routine, realistically takes four to six weeks as you learn your fringe’s growth pattern and refine product use. A starter version, cut and basic maintenance products only, runs roughly $150 to $250. A single weekend is enough to master one or two styling techniques from this list, while building a full rotation across color, texture, and accessories takes a few months.
Frequently Asked Questions About Textured Gamine Crop French Pixie
What is the difference between a gamine pixie and a classic pixie?
A classic pixie typically uses uniform, blunt layering across the crown, while a gamine pixie relies on razored, piecey texture and often pairs with a wispy micro fringe for a more androgynous, editorial finish. The gamine version also tends to feature a more disconnected or tapered nape rather than the softer graduation seen in classic pixies. Both share a short overall length, but the gamine style leans into visible texture as its defining feature.
What hair colors work best with a textured gamine pixie?
Platinum ash, espresso brunette, rose gold balayage, and chestnut red all pair well with this cut, since each either amplifies the texture through contrast or adds warmth without competing with the crown’s shape. Cooler tones like icy silver tend to emphasize the sharpness of razored ends, while warmer tones like honey caramel soften the overall effect. The right choice depends more on your skin’s undertone than any rule specific to the cut itself.
How much does a textured gamine crop cost to maintain?
Expect to spend $60 to $120 per cut at a specialist salon, with trims needed every three to six weeks depending on your chosen taper, since a disconnected or skin-fade nape requires more frequent visits than a graduated one. Color services add $80 to $200 depending on complexity, with balayage and fashion colors like silver costing more than a single-process brunette. Budget an additional $30 to $50 for a starter set of styling products like clay pomade and texturizing spray.
Is this cut compatible with curly or wavy hair types?
Yes, curly and wavy textures work well with this cut, particularly when styled using diffused drying techniques that define natural curl pattern rather than fighting it with heat tools. The shorter length actually helps curls hold their shape more predictably than on longer hair, where added weight can loosen curl definition. A stylist experienced in curly-hair cutting should still adjust the layering approach slightly to account for shrinkage.
How do I keep the micro fringe from looking too severe?
Softening the fringe’s corners rather than cutting it perfectly straight across, or splitting it gently at the center rather than keeping it as one solid block, both reduce visual heaviness while keeping the short length. Blending the fringe into the crown layers rather than cutting it as a separate section also helps it read as part of a cohesive style rather than an isolated element. Regular trims every two weeks keep the fringe’s shape controlled, since overgrown micro fringe tends to look uneven rather than intentionally severe.
Ready to Create Your Dream Textured Gamine Crop French Pixie?
From platinum ash color to skin-fade tapers, wispy side fringes to statement pearl barrettes, these 50 ideas cover the full range of ways to wear a textured gamine crop. You do not need to commit to every technique at once, and choosing just one fringe shape or one styling product to start with is genuinely the right way to begin.
Book a consultation with a short-hair specialist this week and bring two or three reference photos from this list to guide the conversation. Once the cut settles into your routine, the gamine crop rewards you with a cut that feels sharp, quick to style, and entirely your own each morning. Save your favorite ash, fringe, and taper combinations now, since this is the kind of cut best planned before you sit in the chair.