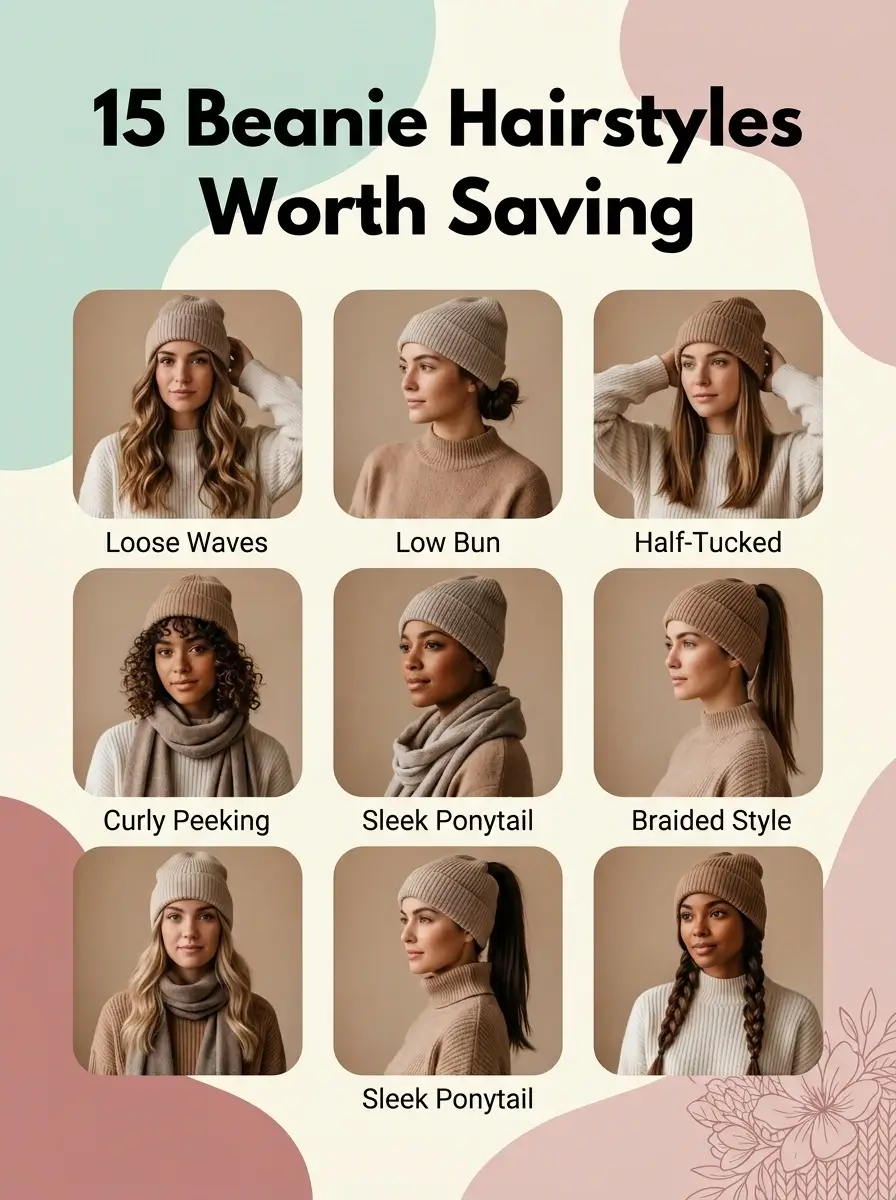
15 Cute Beanie Hairstyles You’ll Want to Copy

A beanie hairstyle is any hair styling approach built specifically around wearing a close-fitting knit hat, one that accounts for the flattening pressure at the crown, the static it creates at the hairline, and the pieces of hair meant to show at the nape or temples. This article gives you 15 beanie hairstyles, covering color placement, texture technique, updo pairings, and adaptations for curly, fine, and short hair.
There is a particular ease to getting this right. A beanie should look like part of the outfit, not something fighting the hair underneath it. Done well, it frames the face instead of hiding it, and it survives a full day of wear instead of collapsing the second the hat comes off. It reads as effortless, but every version worth copying accounts for the hat itself as part of the styling, not an afterthought on top of it.
Here are 15 ideas worth saving, and stealing.
Why Beanie Hairstyles Work So Well
A beanie hairstyle is distinct from ordinary hair styling because it has to survive direct, sustained pressure at the crown and friction at the hairline for hours at a time, something no other hair accessory demands in the same way a fitted or slouchy knit hat does. The category draws from cold-weather practicality as much as style, adapted over the past decade into a deliberate aesthetic choice rather than a purely functional one, as beanies moved from purely utilitarian wear into a styled layer photographed as often as the hair itself.
The materials and colors that pair best with beanie styling include ribbed wool or acrylic knits in oatmeal, camel, charcoal, and forest green, worn against hair in warm honey blonde, deep espresso, or a money-piece highlight that peeks out at the temple. Texture matters more than color here, since a beanie flattens whatever it sits against, so loose waves, defined curls, or a sleek straight finish all read differently once compressed under knit fabric for an hour or more.
Small amounts of visible hair, whether it is a face-framing piece, a low ponytail, or a low bun at the nape, can carry an entire beanie look, which is the honest answer for anyone with short hair or very fine hair. The priority for shorter or finer hair is texture at the ends rather than volume at the crown, since the beanie itself already supplies the shape at the top of the head.
| Element | Trait 1 | Trait 2 |
|---|---|---|
| Philosophy | Hair styled to survive the hat, not fight it | Small visible sections carry the whole look |
| Key Materials | Ribbed wool or acrylic knit beanie | Flexible hold texture spray or edge gel |
| Key Colors | Oatmeal, camel, charcoal knit tones | Honey blonde or copper face-framing color |
15 Beanie Hairstyles
1. Money Piece Highlights Peeking from the Beanie

Vibe: Luminous, like one small detail is doing all the work.
Why it works: A money-piece highlight placed at the temple stays visible even when a beanie covers most of the hairline, since the beanie’s brim sits above the highlight rather than over it. That small visible strip of lighter color creates the same face-framing effect a full head of highlights would, at a fraction of the maintenance.
How to get it: Ask your colorist for two foils placed only at the front hairline on each side, lifted two shades lighter than your base, positioned to sit just below where a beanie’s brim typically rests.
💡 Quick Win: A root-tinted highlight spray applied only at the temple fakes this placement for a single outing without any color commitment.
Shop the Look
| Product |
|---|
| Oatmeal ribbed knit beanie, fitted style |
| Root touch up temporary highlight spray, honey blonde |
| Flexible hold texturizing spray for face-framing pieces |
| Fine tooth comb for precise sectioning |
| Shine serum, lightweight, non-greasy |
2. Sleek Straight Ponytail Under a Ribbed Beanie
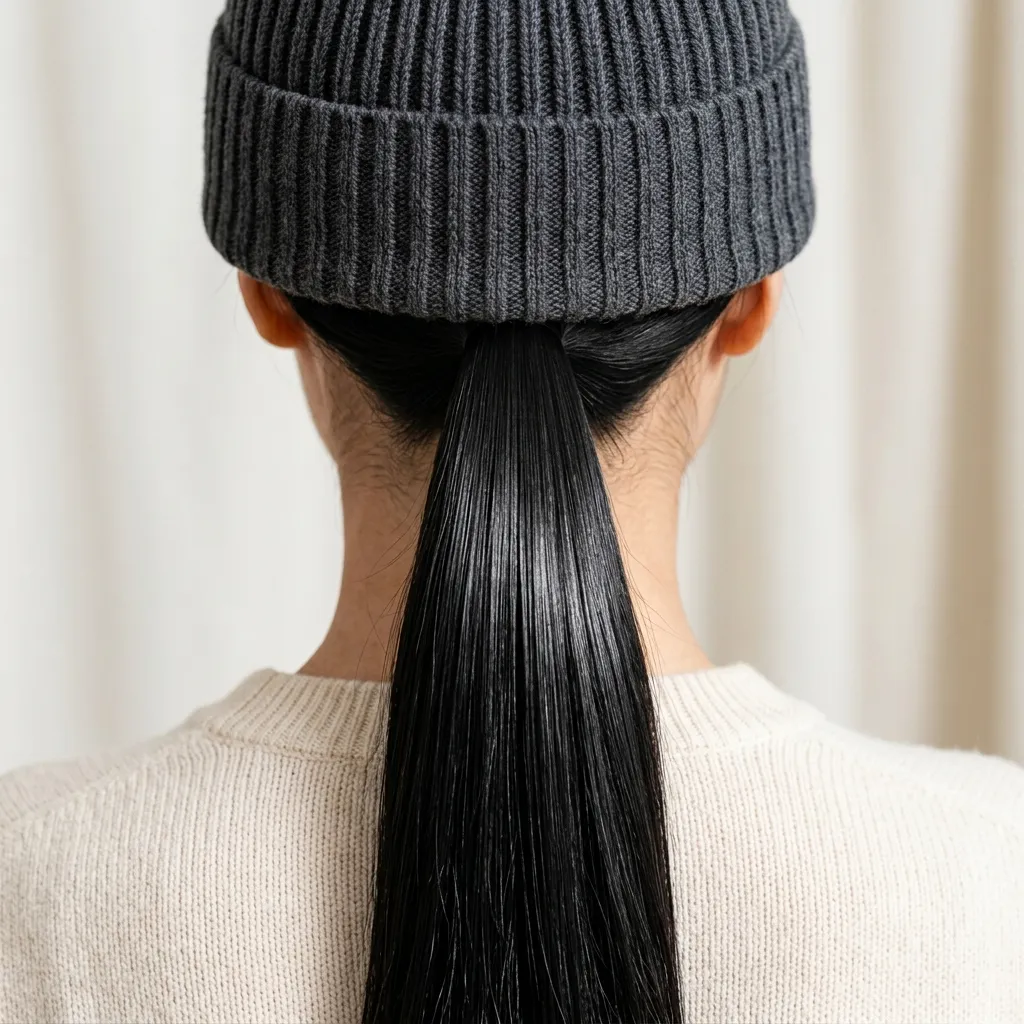
Vibe: Sleek, like the beanie and the ponytail were styled as one piece.
Why it works: Flat-ironing hair straight before gathering it into a ponytail keeps the beanie from creating visible dents or waves once it comes off, since a smooth cuticle resists the crimping a beanie’s ribbed texture can leave on textured hair. The straight finish also makes the beanie’s own ribbed pattern the only texture on display, rather than competing with a wavy ponytail underneath.
How to get it: Flat iron hair at 300 to 320 degrees Fahrenheit before pulling into a low ponytail, then smooth flyaways with a boar bristle brush right before placing the beanie so nothing catches on the knit fabric.
Shop the Look
| Product |
|---|
| Charcoal ribbed knit beanie, fitted |
| Ceramic flat iron, adjustable heat |
| Heat protectant spray for flat ironing |
| Boar bristle smoothing brush |
| Snag-free hair elastics, set of 20 |
3. Claw Clip Half-Up Under a Slouchy Beanie
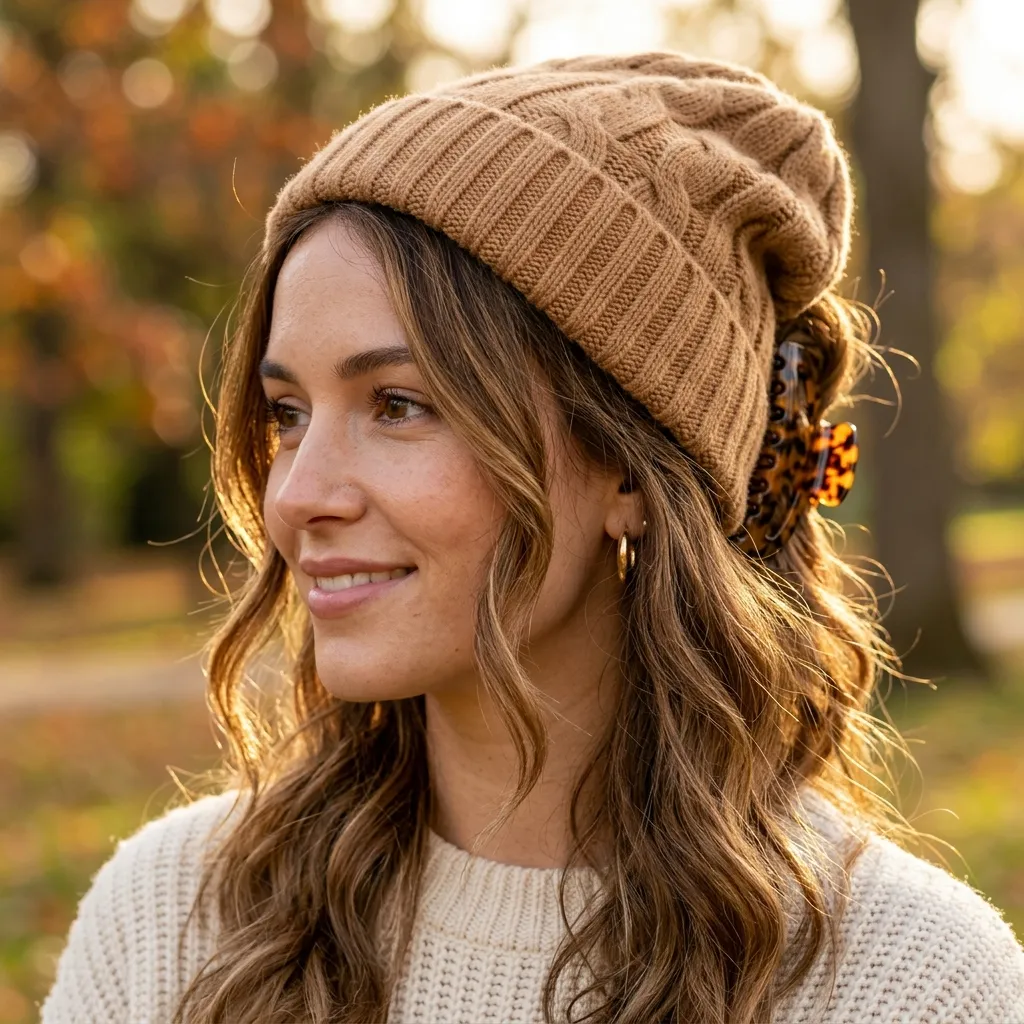
Vibe: Relaxed, like the hat and the hair are both a little undone on purpose.
Why it works: A slouchy beanie has enough excess fabric at the crown to accommodate the height of a claw clip without visible bulging, something a fitted beanie cannot do. Leaving face-framing pieces down while the crown is clipped up keeps the beanie from looking like it is holding the whole style together on its own.
How to get it: Gather hair from the temples back, twist once, and secure with a medium claw clip positioned high enough that the slouchy fabric can drape over it without tension.
💡 Quick Win: A smaller claw clip than you would normally use prevents an obvious bump from showing through slouchy knit fabric.
Shop the Look
| Product |
|---|
| Camel slouchy knit beanie, oversized fit |
| Tortoiseshell claw clip, medium size |
| Wide tooth detangling comb |
| Argan oil hair shine drops |
| Matte bobby pins for securing loose pieces |
4. Overnight Heatless Waves for Beanie Hair
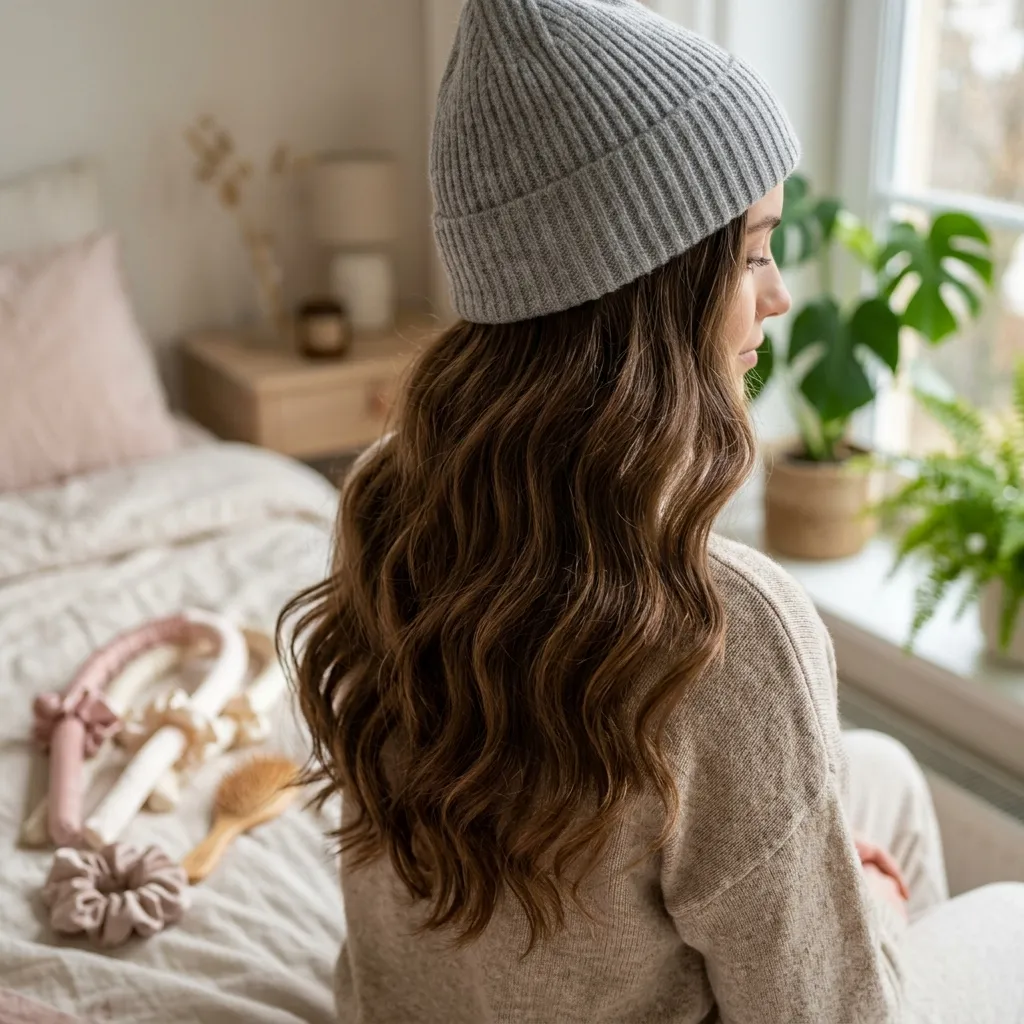
Vibe: Soft, like the wave was never forced into shape.
Why it works: Heatless waves set overnight hold their shape under beanie compression better than a same-day heat-styled curl does, since the wave pattern is already set into the hair’s structure rather than sitting on the surface. A curl created with heat that same morning is more likely to fall flat within the first hour under a fitted beanie.
How to get it: Dampen hair slightly, wrap sections around a silk heatless curling rod, and secure overnight, releasing in the morning to a soft wave that can be tucked under a beanie without immediate loss of shape.
Shop the Look
| Product |
|---|
| Silk heatless curling rod set |
| Satin pillowcase for hair protection |
| Texturizing spray for wave hold |
| Silk hair scrunchie set |
| Curl refreshing spray, travel size |
5. High Bun Under a Fitted Beanie

Vibe: Grounded, like the whole look has one clear point of structure.
Why it works: A high bun placed at the exact crown of the head gives a fitted beanie a defined shape to sit around rather than collapsing flat against the scalp. The bun’s position matters more than its size here, since a bun placed too low leaves the beanie’s crown looking empty and shapeless.
How to get it: Gather hair at the highest point of the crown, twist into a low-tension bun, and secure with two bobby pins crossed in an X, then pull the beanie down around the bun rather than over it.
💡 Quick Win: A small foam bun ring under thin hair gives a fitted beanie the same rounded shape at the crown without needing thick hair to fill it out.
Shop the Look
| Product |
|---|
| Forest green ribbed knit beanie, fitted |
| Foam bun ring for added crown volume |
| Snag-free hair elastics, set of 20 |
| Matte bobby pins, box of 60 |
| Smoothing hair serum for a clean bun base |
6. Copper Balayage Peeking at the Nape
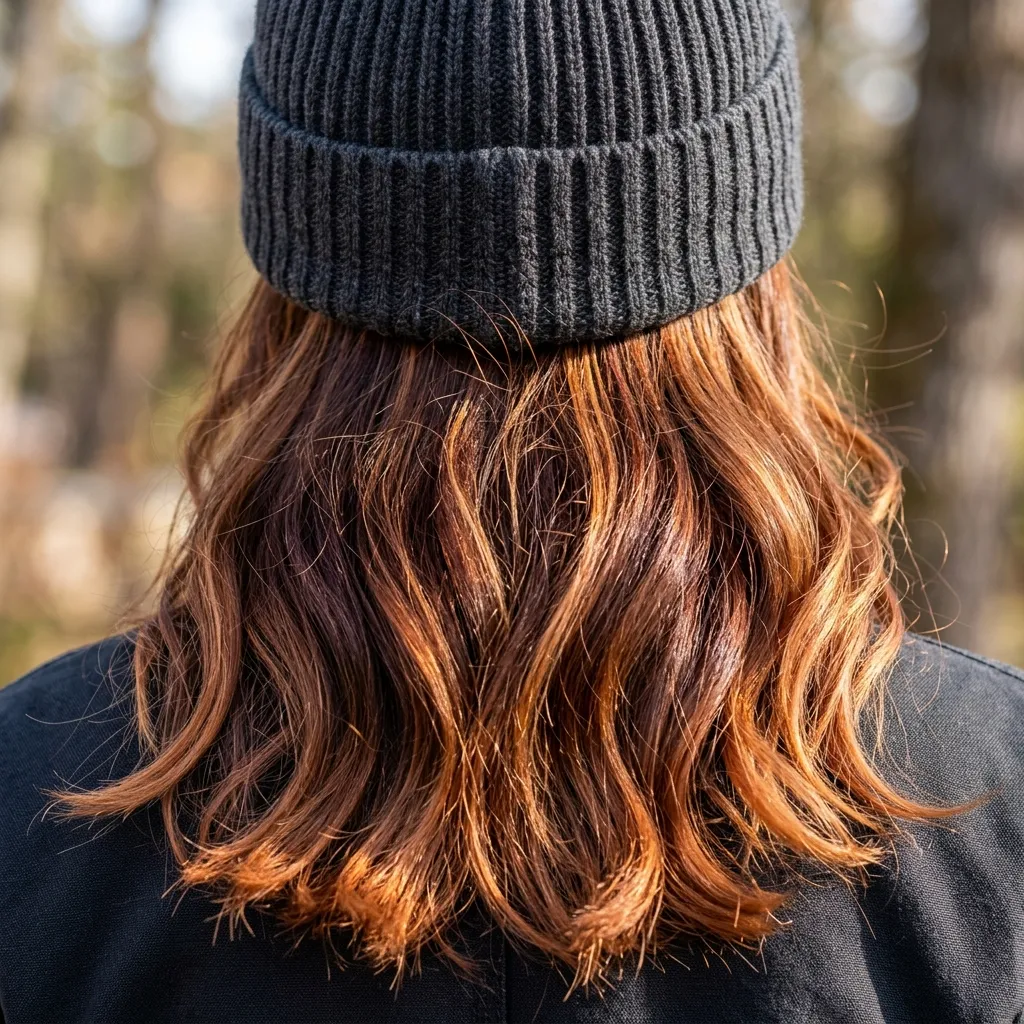
Vibe: Rich, like autumn light caught at exactly the right spot.
Why it works: Placing warm copper tone from the mid-shaft down, rather than throughout the whole head, means the color shows up specifically where a beanie leaves hair uncovered, at the nape and lower back of the head. That concentrated placement makes the color visible even when most of the hair is hidden under knit fabric.
How to get it: Ask for a balayage that starts about halfway down the length rather than near the root, since a beanie will cover the upper portion of the hair for most of the day anyway.
Shop the Look
| Product |
|---|
| Color depositing conditioner, copper tone |
| Sulfate-free shampoo for color-treated hair |
| Glossing hair serum for shine |
| UV protectant spray for color fade prevention |
| Wide tooth comb for gentle detangling |
7. Curly Wash-and-Go Under an Oversized Beanie
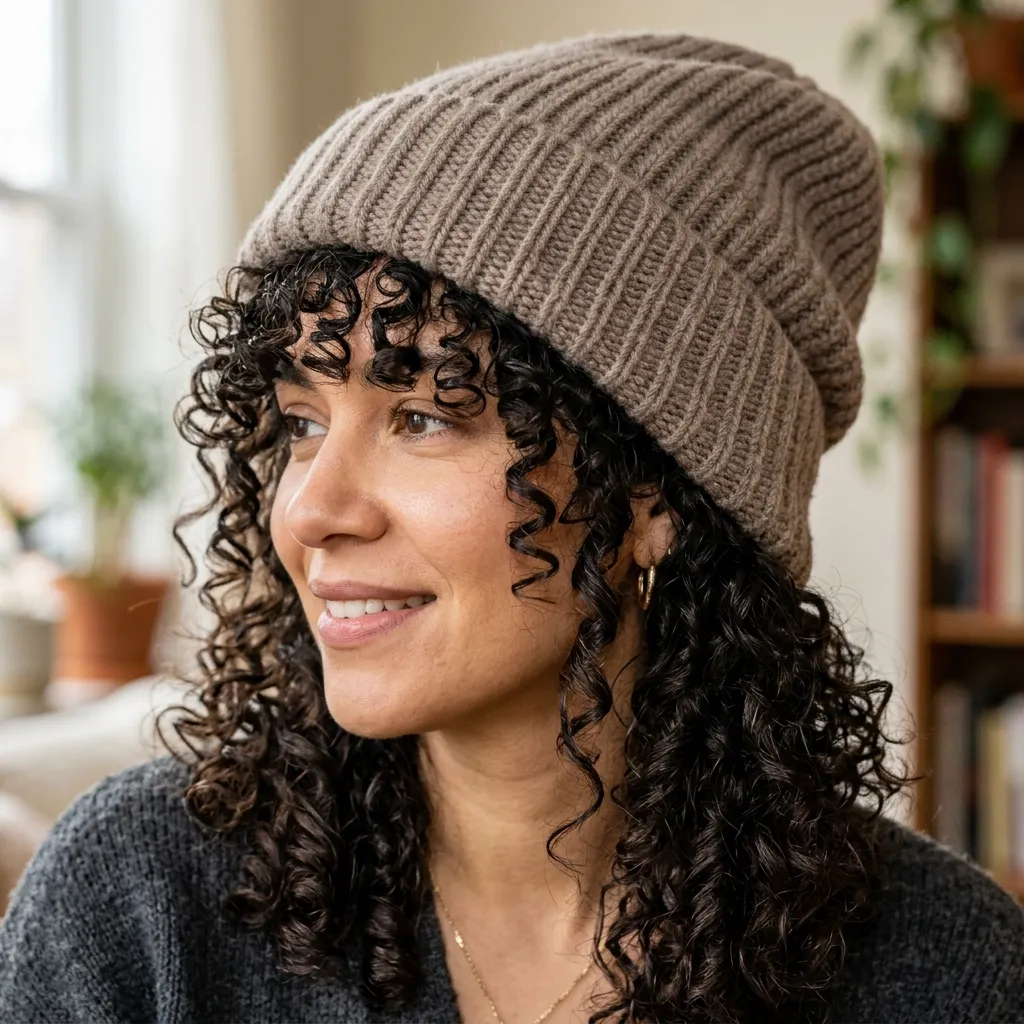
Vibe: Full, like the curls have enough room to breathe under the hat.
Why it works: An oversized, slouchy beanie gives curly hair the vertical room a fitted beanie cannot, which matters because curls compressed flat against the scalp for hours tend to lose their pattern and frizz once released. The extra volume inside a slouchy shape protects the curl clumps instead of crushing them.
How to get it: Apply a curl-defining gel to damp hair and let it dry fully before putting on the beanie, since curls set into their final shape hold up far better under compression than curls still damp and pliable.
💡 Quick Win: Flipping hair upside down for a few seconds after removing the beanie restores volume at the root that the hat pressed flat.
Shop the Look
| Product |
|---|
| Taupe oversized slouchy knit beanie |
| Curl defining gel, strong hold |
| Microfiber hair towel for curl drying |
| Leave-in conditioner for coily hair |
| Curl refreshing spray for post-beanie revival |
8. Butterfly Clips Pinning Back Beanie-Flattened Hair

Vibe: Practical, like the fix took less time than the walk to the mirror.
Why it works: Small butterfly clips placed at the crown redirect attention to the face-framing pieces rather than the flattened section a beanie leaves behind, since the eye follows the clips’ placement before it registers the texture underneath. This is a distraction technique as much as a styling one, and it works because it is fast.
How to get it: Section off the front two inches of hair on each side, clip them back and slightly upward at the crown to create lift, then leave the rest of the hair down to cover the flattest section.
Shop the Look
| Product |
|---|
| Small gold butterfly hair clips, set of 20 |
| Volumizing root spray for instant lift |
| Dry shampoo for quick refresh after beanie removal |
| Fine tooth comb for smoothing flyaways |
| Travel size texturizing spray |
9. Post-Beanie Blowout Revival Technique
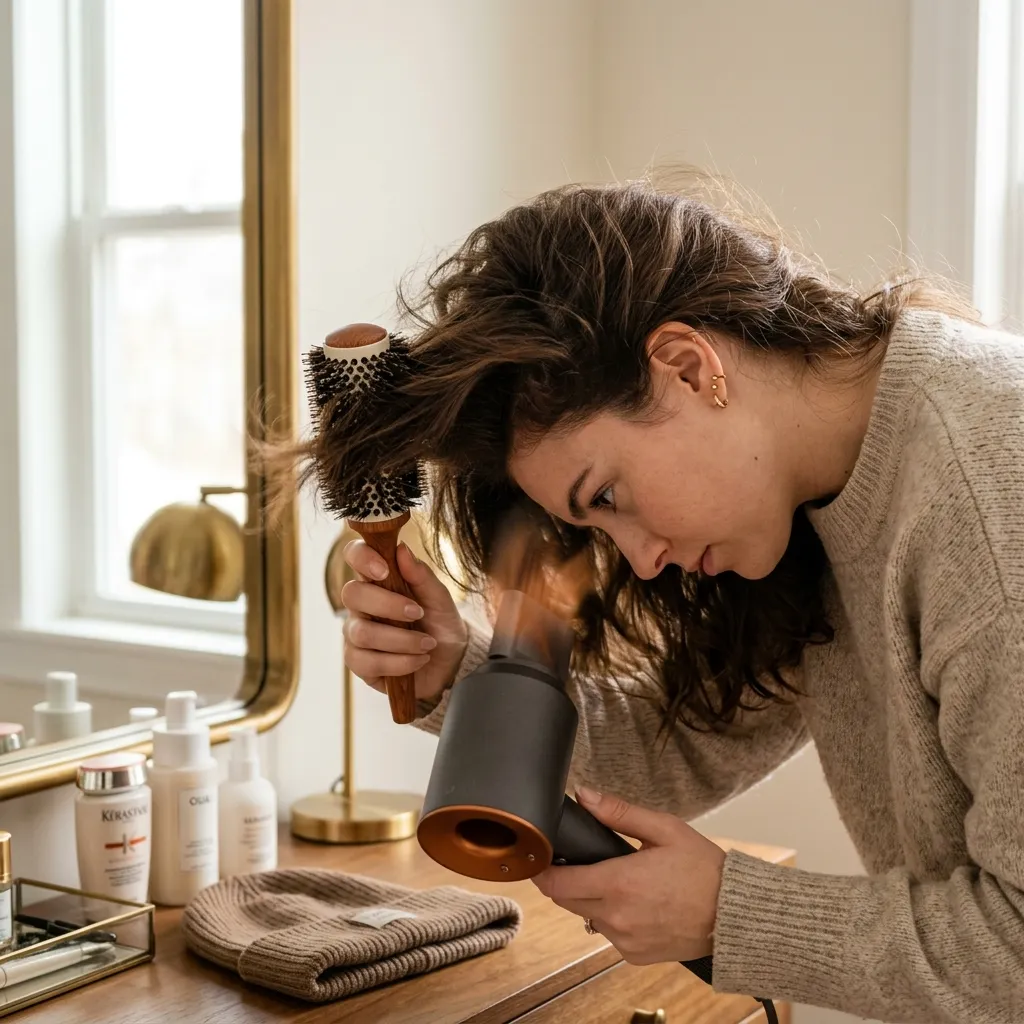
Vibe: Warm, like the flatness never happened at all.
Why it works: Flipping the head upside down while blow-drying redirects hair growth against gravity at the root, which counteracts the specific downward pressure a beanie applies for hours. This works faster than trying to add volume with the head upright, since gravity is working with the technique instead of against it.
How to get it: Flip your head forward, blow-dry the roots on medium heat for thirty seconds while scrunching upward with your fingers, then flip back up and finish with a light dusting of root powder at the crown.
💡 Quick Win: A travel-size root volumizing spray kept in a bag or car makes this revival possible anywhere, not just at home.
Shop the Look
| Product |
|---|
| Ionic hair dryer with concentrator nozzle |
| Volumizing root spray, travel size |
| Dry texturizing powder for instant root lift |
| Boar bristle round brush |
| Light hold finishing spray |
10. Low Ponytail with Beanie Brim Tucked
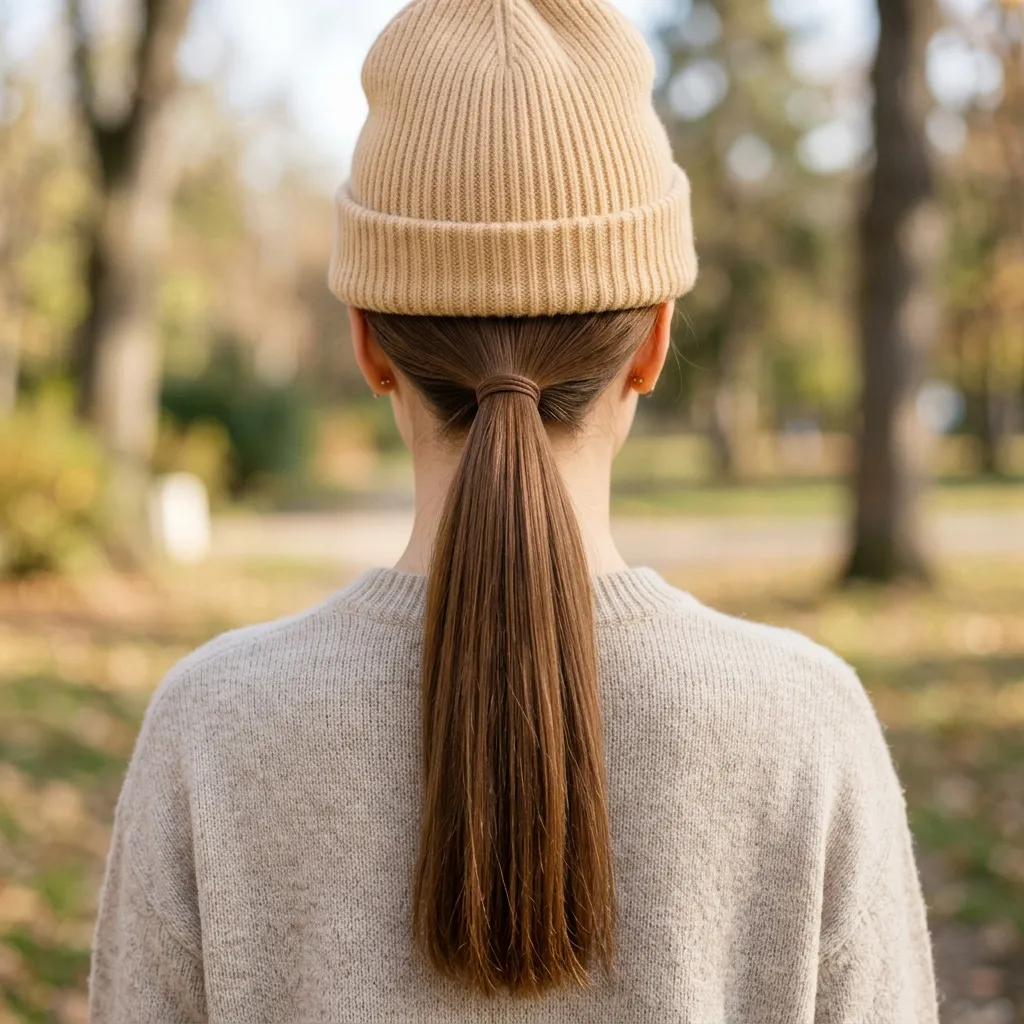
Vibe: Tidy, like every piece has a defined place to sit.
Why it works: Tucking the beanie’s brim slightly around the ponytail’s base at the nape, rather than letting the ponytail hang freely over the fabric, keeps the hat and the hair reading as one coordinated look instead of two separate elements stacked on top of each other. This small tuck is a proportion adjustment more than a styling technique.
How to get it: Gather hair into a low ponytail at the nape, then fold the beanie’s back edge slightly upward and inward so it sits just above the elastic rather than directly over it.
Shop the Look
| Product |
|---|
| Ribbed knit beanie, standard fit |
| Snag-free hair elastics, set of 20 |
| Boar bristle smoothing brush |
| Shine spray for finishing |
| Small hair pins for securing loose strands at the nape |
11. Money Piece Framing with a Dark Base
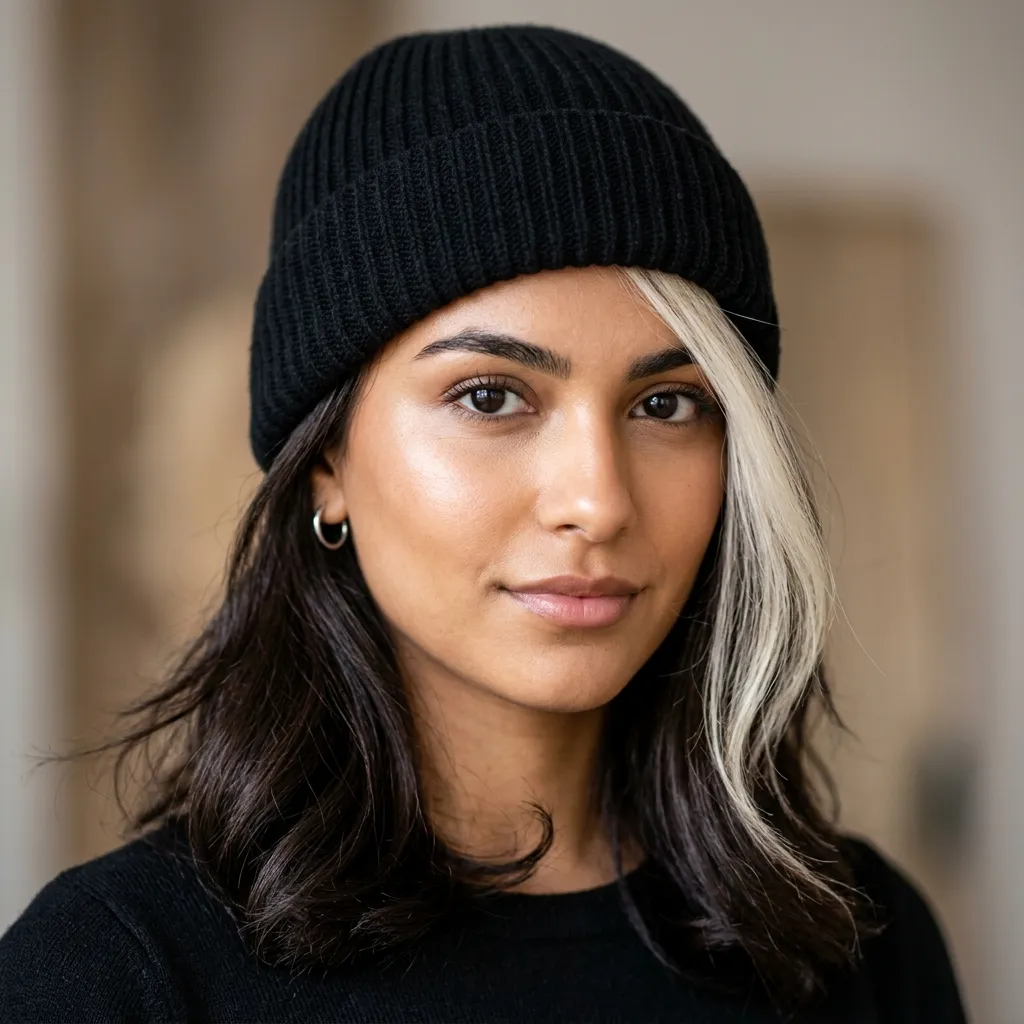
Vibe: Striking, like one bright line against all that dark.
Why it works: A high-contrast base and highlight combination reads clearly even in the small sliver of hair a beanie leaves visible at the front hairline, since maximum contrast requires the least surface area to register visually. A subtler, lower-contrast highlight would barely show in that same narrow strip.
How to get it: Request a single foil at the front hairline lifted three to four shades lighter than a deep espresso base, positioned to land just below where the beanie’s brim typically sits.
💡 Quick Win: A temporary highlight chalk in a bright tone tests this placement before committing to a permanent lightening service.
Shop the Look
| Product |
|---|
| Black ribbed knit beanie, fitted |
| Temporary hair highlight chalk |
| Purple shampoo for maintaining cool blonde tones |
| Glossing serum for shine |
| Fine tooth comb for precise sectioning |
12. Braided Crown Under a Beanie for Second-Day Hair
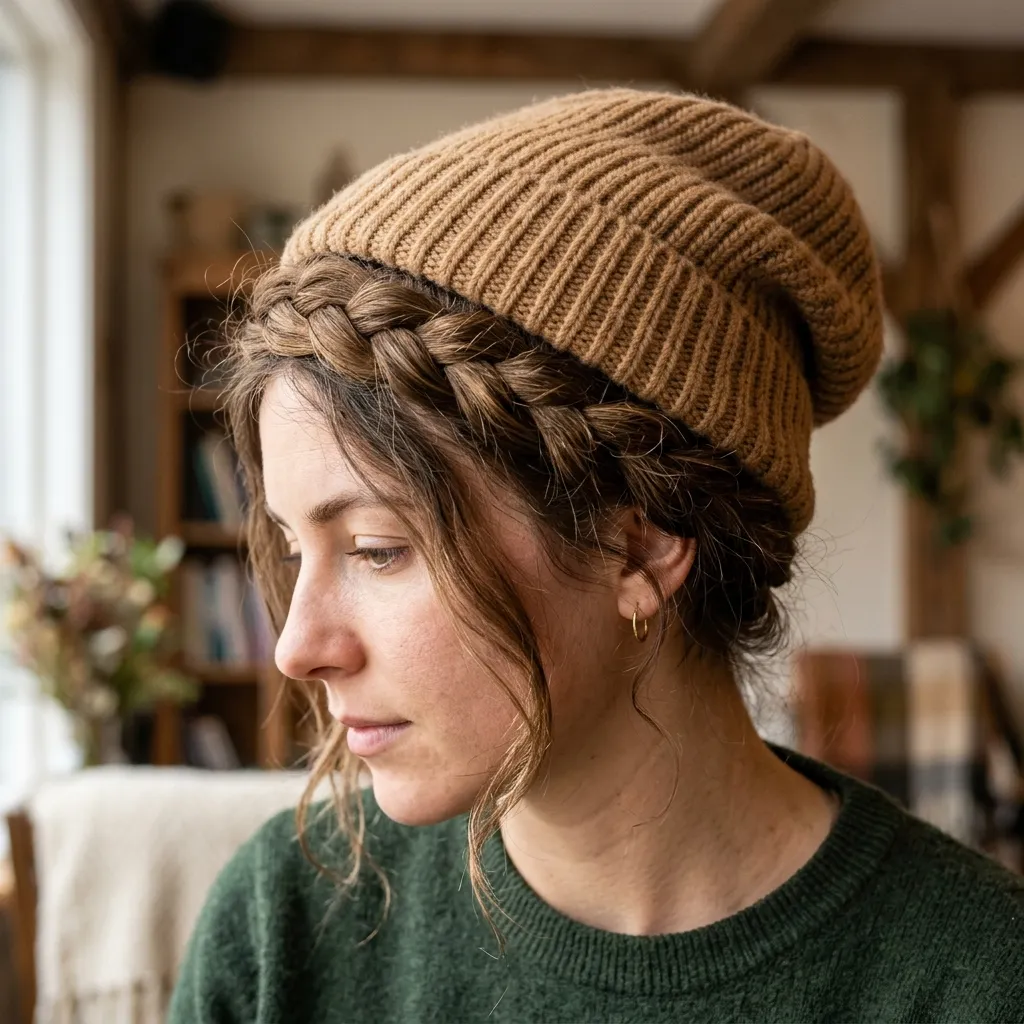
Vibe: Relaxed, like the hair had a plan before the hat went on.
Why it works: A loose braid across the crown distributes oily or flattened roots across a textured surface rather than leaving them exposed as a smooth, shiny patch, which is what a beanie alone tends to reveal on second or third-day hair. The braid’s texture also gives the beanie something to grip instead of sliding around on smooth strands.
How to get it: French braid a section from temple to temple across the crown before putting on the beanie, leaving the rest of the hair down or in a low ponytail underneath.
Shop the Look
| Product |
|---|
| Camel slouchy knit beanie |
| Dry shampoo for root refresh |
| Small hair elastics for securing the braid |
| Texturizing spray for grip and hold |
| Edge control gel for smoothing flyaways at the hairline |
13. Silk Liner Beanie for Frizz-Free Hair
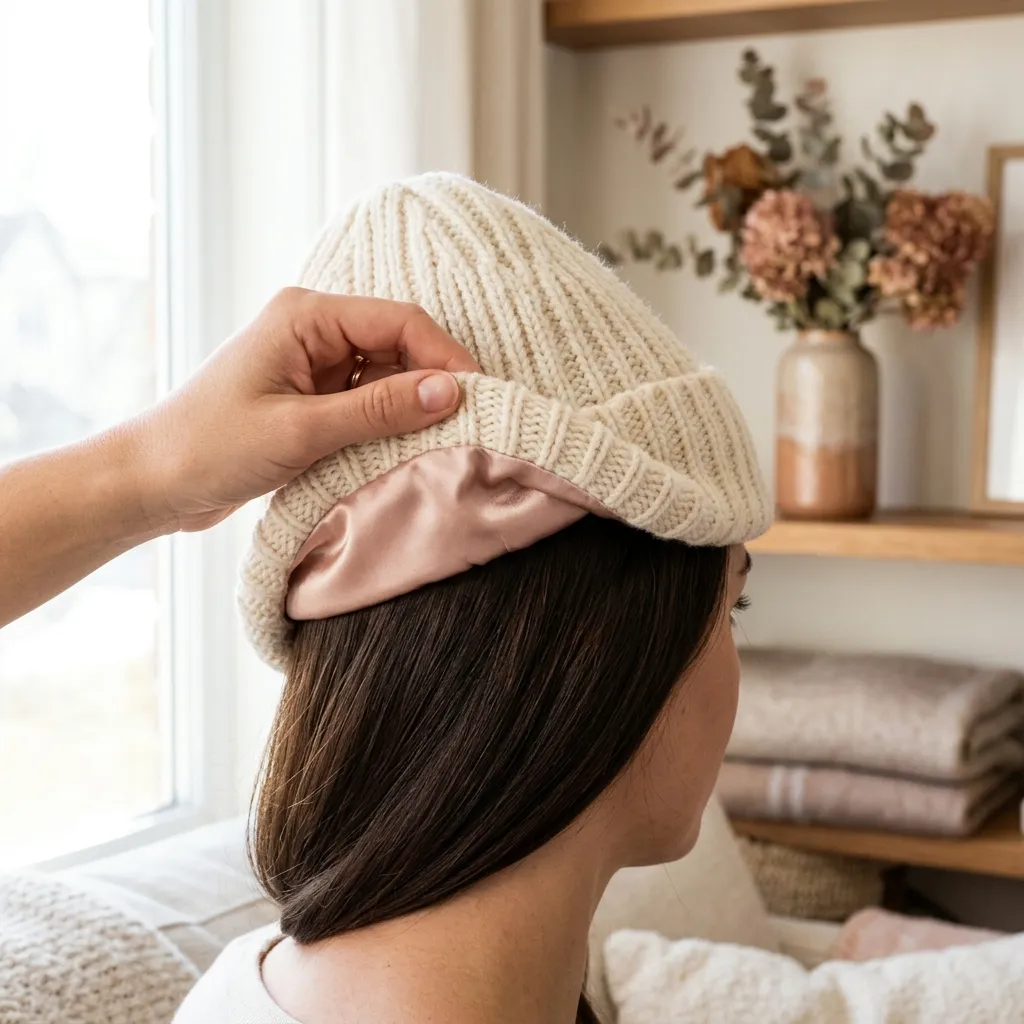
Vibe: Soft, like the hat is finally on the hair’s side.
Why it works: A satin or silk liner inside a beanie reduces the friction between knit fabric and hair cuticle that causes both static and frizz, since silk creates far less surface drag than raw wool or acrylic does directly against the scalp. This is a material solution to a problem most people try to fix with product alone.
How to get it: Choose a beanie with a sewn-in satin lining, or hand-sew a circle of silk fabric into the inner band of an existing beanie so it sits directly against the hairline.
💡 Quick Win: A thin silk headband worn underneath any beanie creates the same friction-reducing barrier without needing to alter the hat itself.
Shop the Look
| Product |
|---|
| Silk-lined knit beanie |
| Thin silk headband for added protection |
| Anti-static hair serum |
| Wide tooth comb for gentle detangling |
| Travel size smoothing cream |
14. Center Part Versus Side Part Under a Beanie
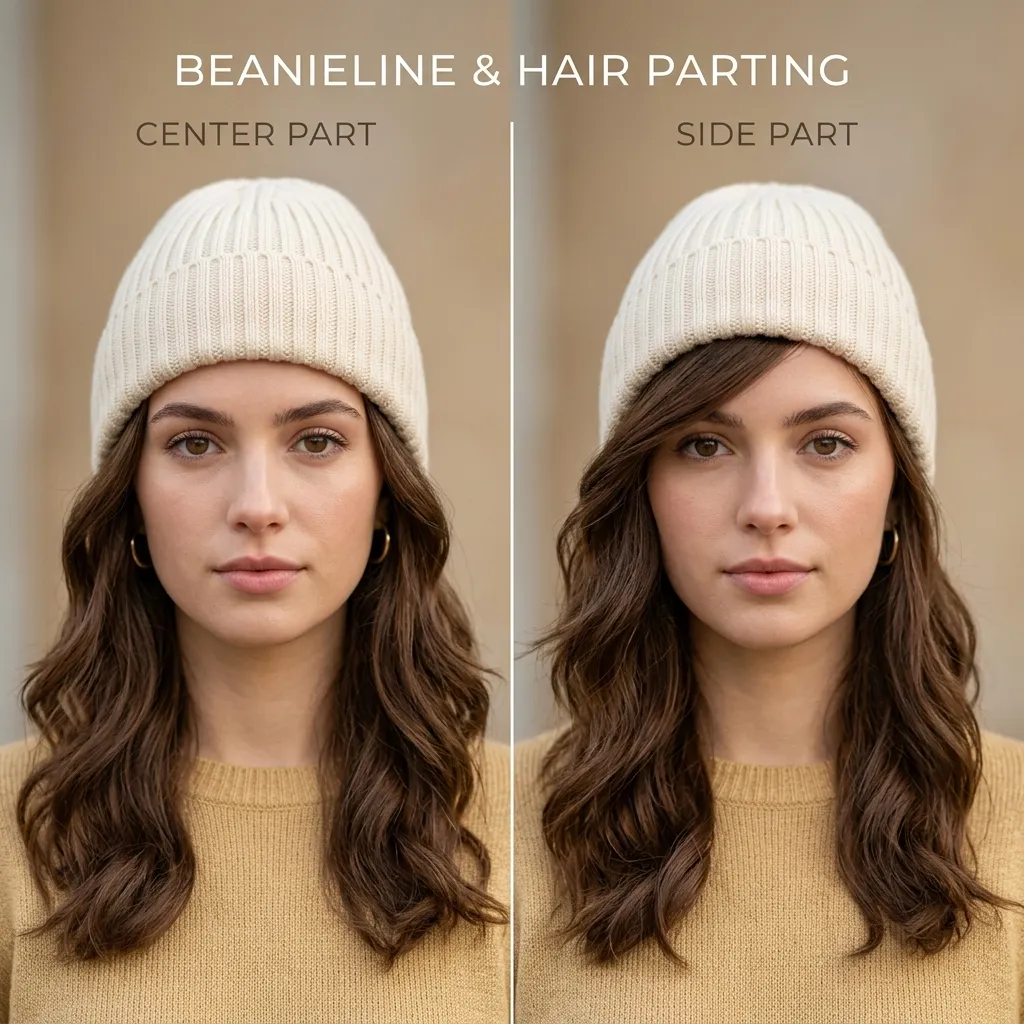
Vibe: Instructional, like a before-and-after in the same frame.
Why it works: A beanie’s brim sits at a fixed height across the forehead, so a center part distributes visible hair evenly on both sides beneath that line, while a side part concentrates more length on one side, changing how much face the beanie appears to frame. Face shape, not the beanie itself, should decide which placement to choose.
How to get it: Try the beanie on with hair parted center first, then shift to a side part at roughly a 45-degree angle, keeping whichever placement leaves the most flattering amount of hair visible below the brim on your face shape.
Shop the Look
| Product |
|---|
| Handheld mirror for styling comparison |
| Fine tooth comb for precise parting |
| Flexible hold hairspray |
| Sectioning clips, set of 6 |
| Shine spray for finishing |
15. Short Hair Styling Under a Beanie
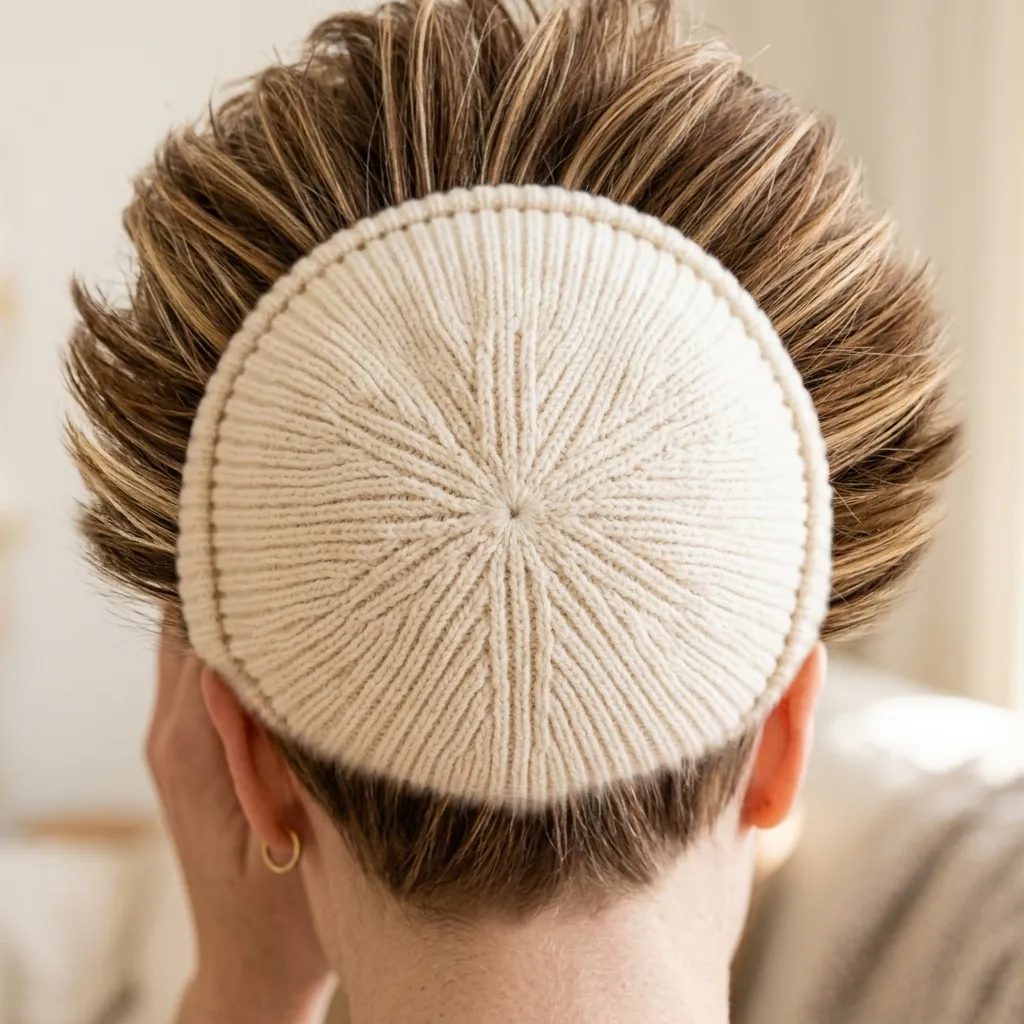
Vibe: Playful, like short hair and a beanie were made for each other.
Why it works: Short hair has less length to compensate for a beanie’s flattening pressure, so texture at the ends matters more than it does on longer hair, since there is no length left to distract from a flat crown. A textured, slightly tousled finish reads intentional even once the crown has been pressed down for hours.
How to get it: Apply a small amount of texturizing paste to dry hair before putting on the beanie, working it only through the ends so the crown stays smooth enough for the hat to sit flat.
💡 Quick Win: Pulling a few short pieces forward at the temples after removing the beanie instantly softens the flattened crown line.
Shop the Look
| Product |
|---|
| Fitted ribbed knit beanie, short-hair sizing |
| Texturizing paste for short hair ends |
| Small round brush for post-beanie styling |
| Light hold pomade for finishing |
| Travel size dry shampoo |
How to Start Your Beanie Hairstyle Routine
Your single best first move is choosing one well-fitted, ribbed knit beanie in a neutral tone like oatmeal or charcoal before building any styling routine around it, since an ill-fitting beanie undermines every hairstyle underneath it regardless of how well the hair itself is done. A beanie that sits too loose slides back and exposes more forehead than intended, while one that is too tight leaves a visible line once removed.
The most common mistake is styling hair as if no hat will sit on top of it, adding heavy volume or a tall updo that a beanie simply crushes within minutes. Fix this by styling with the beanie already on, or trying it on partway through the process, so you can see exactly how much height and texture actually survives underneath the fabric.
Three specific items under $50 that create immediate impact: a silk-lined knit beanie ($18 to $32), a travel-size volumizing root spray ($8 to $14), and a set of small butterfly hair clips for quick post-beanie fixes ($6 to $12).
A full beanie-ready styling routine takes under fifteen minutes most mornings, while a proper heatless overnight set takes about ten minutes the night before. A starter kit of two or three core products runs $30 to $50, while building out a full rotation of beanies and accessories typically lands between $80 and $150.
Frequently Asked Questions About Beanie Hairstyles
What is the difference between a fitted beanie and a slouchy beanie for styling hair?
A fitted beanie sits close to the head and works best with sleek, low-volume styles like a straight ponytail or a smooth low bun, since there is no extra fabric to accommodate height. A slouchy beanie has extra fabric at the crown, which makes it the better choice for curly wash-and-go styles, high buns, or claw clips, since it can drape over volume rather than crushing it flat.
What hair color shows up best under a beanie?
High-contrast color placements, like a bright money-piece highlight against a deep espresso or jet black base, show up most clearly in the small visible strip of hair a beanie leaves at the front hairline. Subtler, low-contrast colors like a soft balayage tend to disappear visually once most of the head is covered, so placing warmer tones like copper or honey blonde specifically at the temple or nape gets the most visible payoff.
How much does it cost to build a beanie-ready hair routine?
A quality silk-lined beanie typically runs $18 to $35, while a basic ribbed knit beanie without a liner costs $10 to $20. Adding two or three core styling products, a volumizing root spray, a texturizing spray, and a heatless curling set, brings the full starter routine to roughly $40 to $70 total, without needing any salon service.
Do beanie hairstyles work with curly or coily hair?
Yes, though an oversized or slouchy beanie works significantly better than a fitted one, since curls need vertical room to avoid being pressed flat against the scalp for hours. Applying a curl-defining gel and letting hair dry fully before putting the beanie on protects the curl pattern far more effectively than putting a beanie over damp, still-forming curls.
How do I fix flat hair after taking off a beanie?
Flipping your head forward and blow-drying the roots on medium heat for about thirty seconds while scrunching upward is the fastest way to restore lost volume, followed by a light dusting of root powder at the crown. If a dryer is not available, small butterfly clips pinned at the crown can redirect attention to face-framing pieces while the flattened section relaxes on its own over the next hour.
Ready to Try a New Beanie Hairstyle?
These 15 beanie hairstyles cover far more ground than a single hat-and-hair photo ever could, from money-piece color placement and silk-lined liners to heatless waves, braided crowns, and specific adaptations for short and curly hair. Starting small, with just one well-fitted beanie and a single new product like a travel-size root spray, is genuinely the smarter way to build this routine than overhauling your entire hair and hat collection at once.
Today, try on your current beanie with hair parted center and then to the side, and notice which placement actually leaves the most flattering amount of hair visible below the brim. Done well, a beanie stops being something you style around and becomes part of the styling itself, the kind of detail that makes cold-weather mornings feel put together instead of rushed. Save your favorite version now, especially the silk-lined beanie fix and the post-beanie blowout revival, since those two solve the two problems almost everyone runs into with this look.