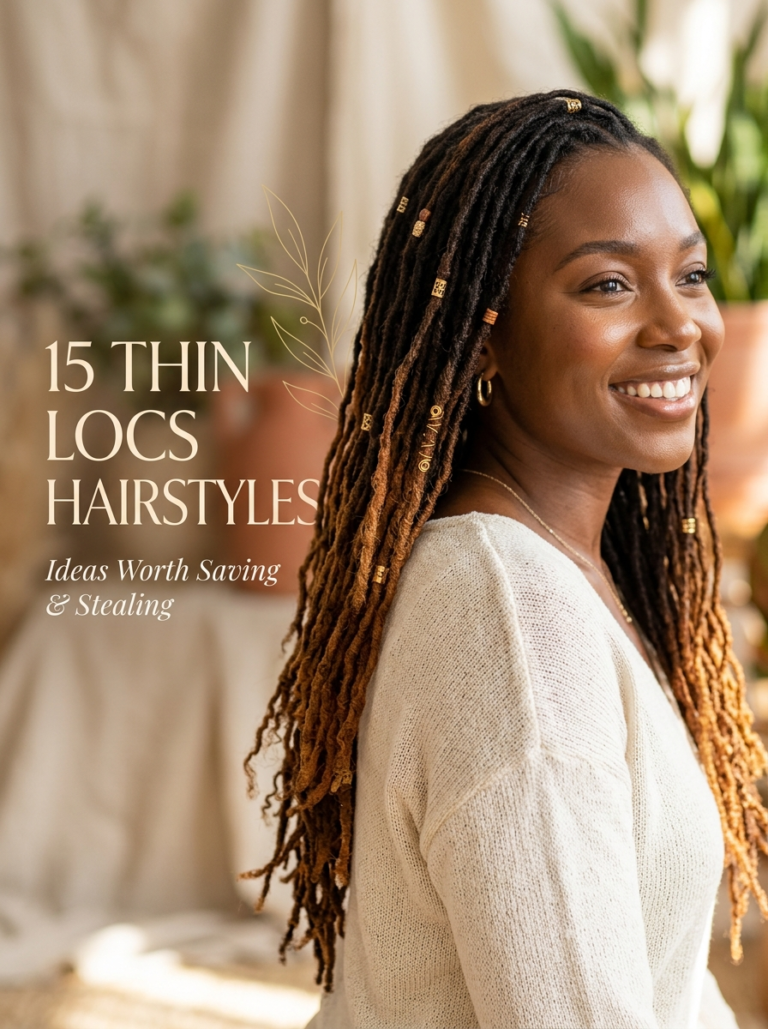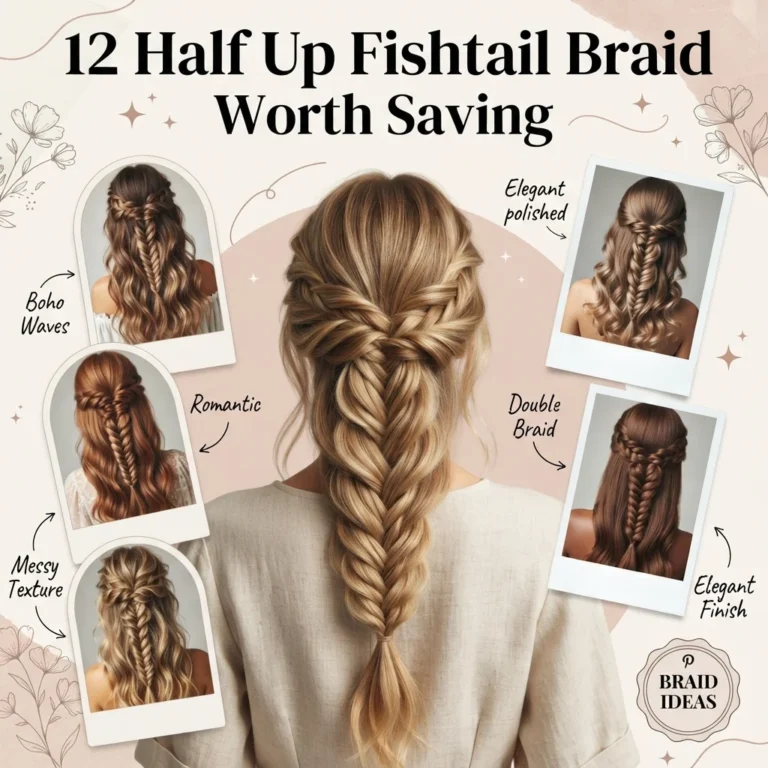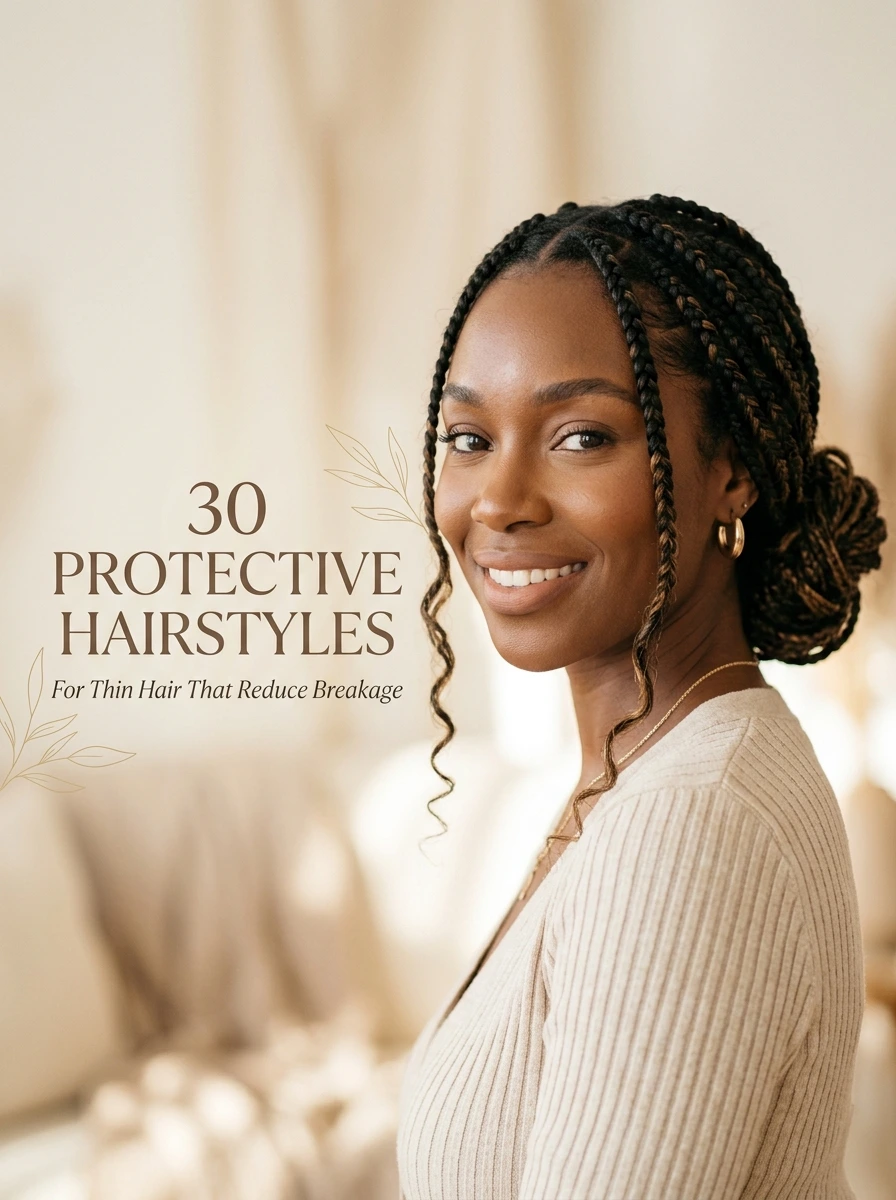
30 Protective Hairstyles for Thin Hair That Reduce Breakage

Protective hairstyles are styles that tuck the ends of the hair away and minimize daily manipulation (brushing, heat, friction, and tension), so strands are given time to grow without the constant handling that causes breakage. This article gives you 30 protective hairstyle ideas for thin hair, each chosen for how gently it treats fragile strands rather than for how elaborate it looks.
Thin hair breaks faster than it grows back, which means every day of tight ponytails, daily heat styling, and rough brushing is a day working against length and density instead of toward it. A genuine protective style takes the guesswork out of that math. The ends are secured, the tension is distributed instead of concentrated, and the hair simply gets left alone long enough to do what hair does best when it isn’t fighting you. There’s a quiet relief to that, the kind that comes with not having to think about your hair every single morning. Here are 30 ideas worth saving, and stealing.
Why Protective Hairstyles Work So Well for Thin Hair
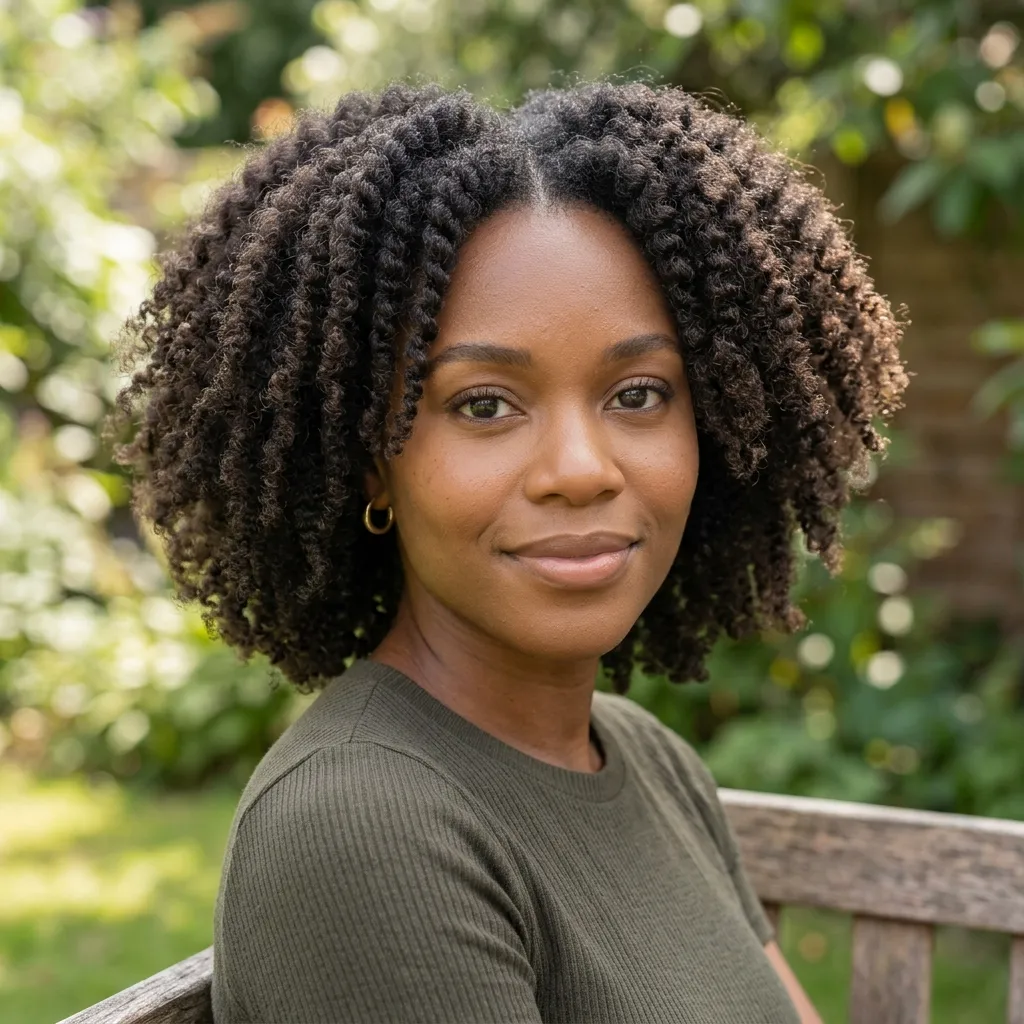
Protective styling as a haircare practice traces back generations within Black hair care traditions: cornrows, braids, and twists worn specifically to tuck ends away from friction and reduce daily manipulation, a practice rooted in both practicality and cultural history long before “protective styling” became a widely used term. The concept reached a much broader audience through natural hair blogs and YouTube tutorials in the early 2010s, as more people with varied hair types began applying the same core principle (minimize handling, protect the ends) to their own breakage and thinning concerns.
The materials that make a protective style genuinely protective rather than just decorative are the ones addressing friction and tension directly. Satin and silk linings (inside bonnets, scarves, and even some wig caps) reduce the cuticle-roughening friction that cotton pillowcases and hoods cause overnight. Low-tension braiding hair, rather than a heavier or coarser synthetic blend, keeps added weight from pulling on a fragile root. Pre-braid bond treatments like Olaplex No. 0 and leave-in proteins from Mielle Organics or As I Am give the hair a stronger starting point before it’s put under any tension at all, and edge-friendly styling creams, rather than alcohol-heavy gels, hold baby hairs without drying out the hairline.
Protective styling is having a visible cultural moment right now for a specific reason: dermatologist-led content on traction alopecia and postpartum shedding has spread widely across TikTok and Instagram over the past few years, and search interest in “low manipulation hairstyles” and “protective styles for thin edges” has climbed alongside it as more people connect their own thinning directly to styling habits rather than assuming it’s purely genetic.
Can someone with genuinely low-density, very fine hair achieve a real protective style, or is this mostly built for thicker natural hair textures? It works, but the adaptation matters: very fine, low-density hair should avoid tight micro-braids and heavy extension weight that a denser head of hair can support, and should prioritize looser, lighter-weight styles with shorter wear times between removals.
Style at a Glance
| Element | Braided & Twisted Styles | Wig & Extension-Based Styles |
|---|---|---|
| Philosophy | Tension-distributed, hair-only protection | Full coverage that rests natural hair completely |
| Key materials | Low-tension braiding hair, edge cream, satin scarf | Lace closure, bond-safe adhesive, satin wig cap |
| Best for | Moderate density, styles worn 1-4 weeks | Very low density, longer rest periods |
30 Protective Hairstyles for Thin Hair
1. Loose Box Braids for Thin Hair

Category: Style-Type
Vibe: Relaxed.
Why it works: Standard box braids are often installed with the same tension regardless of hair density, but on thin hair that uniform tension concentrates weight on roots that can’t support it: braiding looser specifically at the root, while keeping the mid-length and ends secure, distributes the pulling force across a wider section of scalp instead of a single stressed point.
How to get it: Ask your braider explicitly for “root-loose, tip-secure” tension, and request medium-weight braiding hair rather than the heaviest available bundle, since lighter synthetic hair reduces the overall pull on each individual braid.
Shop the Look
- Medium-weight synthetic braiding hair, natural black
- Edge control cream, alcohol-free formula
- Satin-lined braiding cape for salon or at-home installs
- Braid spray for shine and frizz control between washes
- Wide-tooth rat-tail comb for clean sectioning
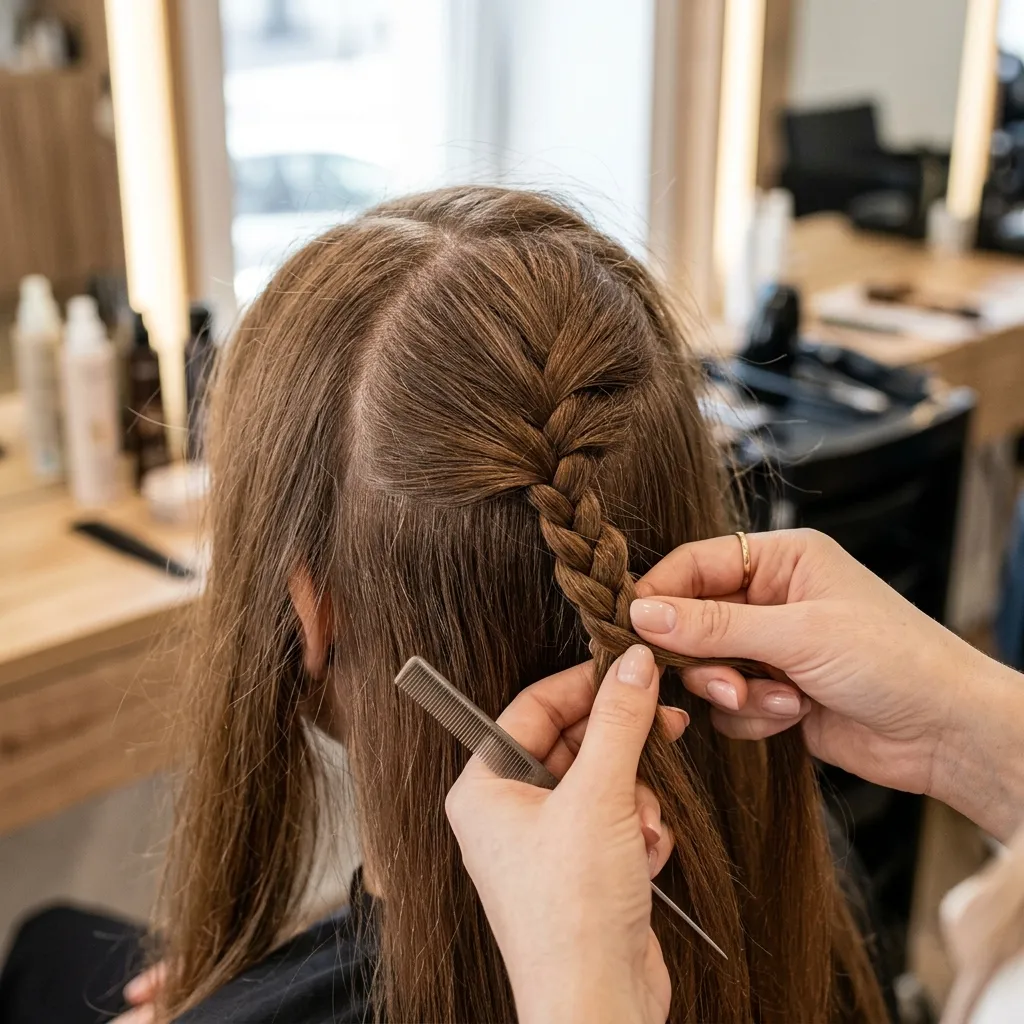
2. Low-Tension Color-Matched Braiding Hair for Seamless Blending
Category: Color
Vibe: Seamless.
Why it works: A braiding hair shade that’s slightly off from your natural color creates a visible line at the root the moment new growth appears, and on thin hair, where the natural strands are already sparse, that contrast line is far more noticeable than it would be against a fuller head of hair.
How to get it: Bring two or three strands of your own hair to the beauty supply store under natural daylight, not fluorescent store lighting, to match the braiding hair shade as closely as possible before purchasing.
💡 Quick Win: Blending two adjacent shades of braiding hair (rather than one single pack) usually matches natural hair more accurately than any single boxed color, since most natural hair isn’t one uniform tone.
Shop the Look
- Pack of blendable synthetic braiding hair in two adjacent shades
- Color-matching comparison ring or swatch card
- Root touch-up powder for the visible parting
- Lightweight braid gel for a smooth, natural root
- Small handheld mirror for checking blend under different light
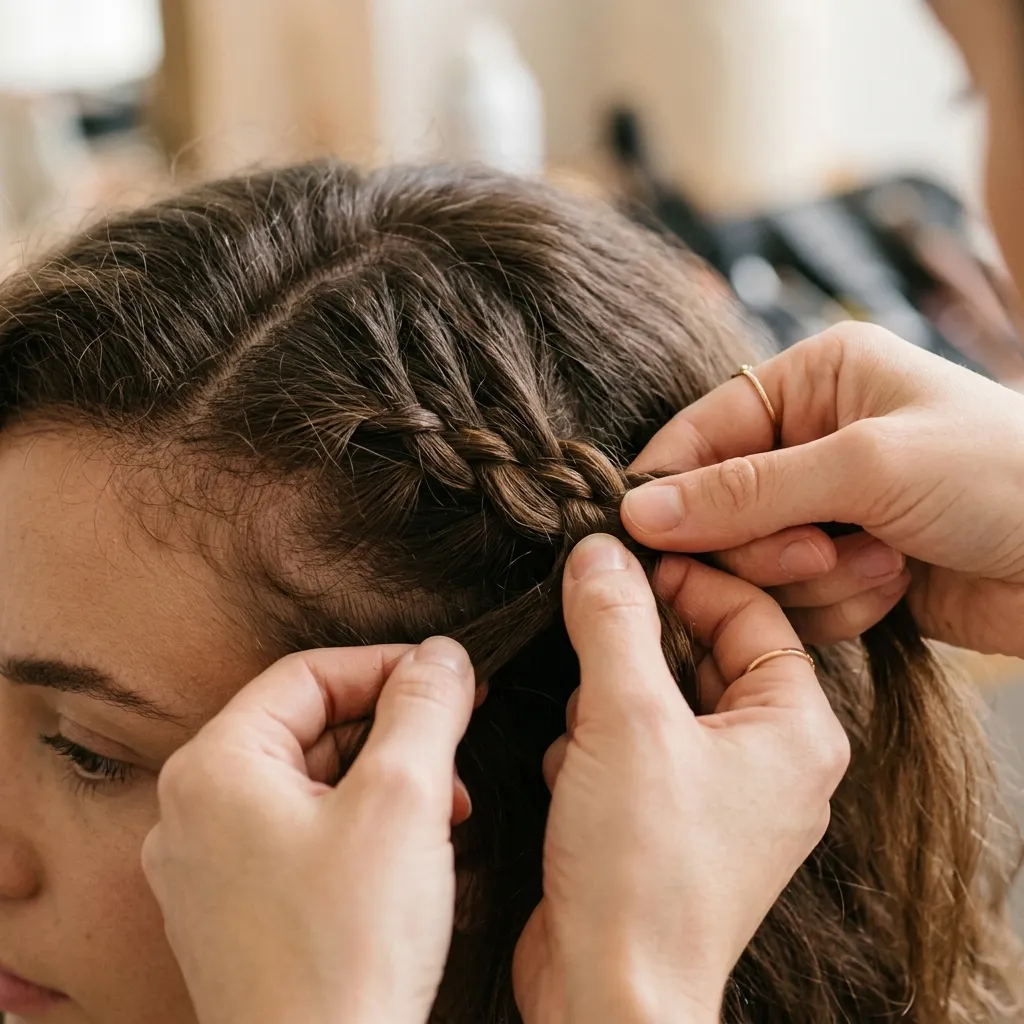
3. Low-Tension Braiding Technique for Fragile Edges
Category: Technique
Vibe: Careful.
Why it works: The hairline is the single most common site of traction-related thinning because it’s the area stylists most often pull tightest for a “clean” finished look: deliberately loosening tension specifically along the front hairline and temples, even if the rest of the braid pattern is secured normally, protects the area with the least room for damage to recover from.
How to get it: Tell your stylist directly, before they start, to braid the front hairline and temple sections at roughly half the tension used elsewhere, and to check in with you about tightness as they go rather than only after the style is finished.
Shop the Look
- Tension-free edge brush, soft-bristle
- Lightweight edge gel with slip, non-drying formula
- Silk-lined headband for post-install hairline protection
- Scalp massage tool for circulation around the hairline
- Leave-in protein spray for the hairline area specifically
4. Low Bun for Minimal Tension on Thin Strands

Category: Structure
Vibe: Undone.
Why it works: A low bun positioned at the nape rather than the crown distributes the gathered hair’s weight downward along the length of the neck rather than pulling directly upward against the root, which is a genuine mechanical difference from a high bun or ponytail and one of the lowest-tension updo options available for fragile strands.
How to get it: Gather hair loosely with your fingers rather than a brush before securing it, leaving slight looseness at the root instead of pulling every strand flat and tight against the scalp.
Shop the Look
- Soft spiral hair tie, no-crease formula
- Wide-tooth comb for gentle gathering
- Lightweight smoothing cream for loose flyaways
- Small decorative hair pin for securing the bun’s shape
- Satin hair tie for reduced friction at the base
5. Silk Bonnet for Nightly Hair Protection

Category: Accessories
Vibe: Calm.
Why it works: Cotton pillowcases and unlined sleep create friction against the hair cuticle throughout the night as you move, and on already-fragile thin hair, that repeated friction is a genuine cumulative source of breakage over months, a silk or satin bonnet eliminates that friction entirely by creating a smooth surface the hair glides against instead of catching on.
How to get it: Choose a bonnet with an adjustable elastic band rather than a fixed one, since a too-tight bonnet band re-introduces the exact tension problem you’re trying to avoid, particularly around the hairline.
Shop the Look
- Adjustable silk bonnet, deep-fit style
- Satin pillowcase as a backup for bonnet-free nights
- Leave-in overnight conditioning spray
- Wide-tooth detangling comb for pre-bed use
- Silk scrunchie for a loose pre-sleep ponytail underneath
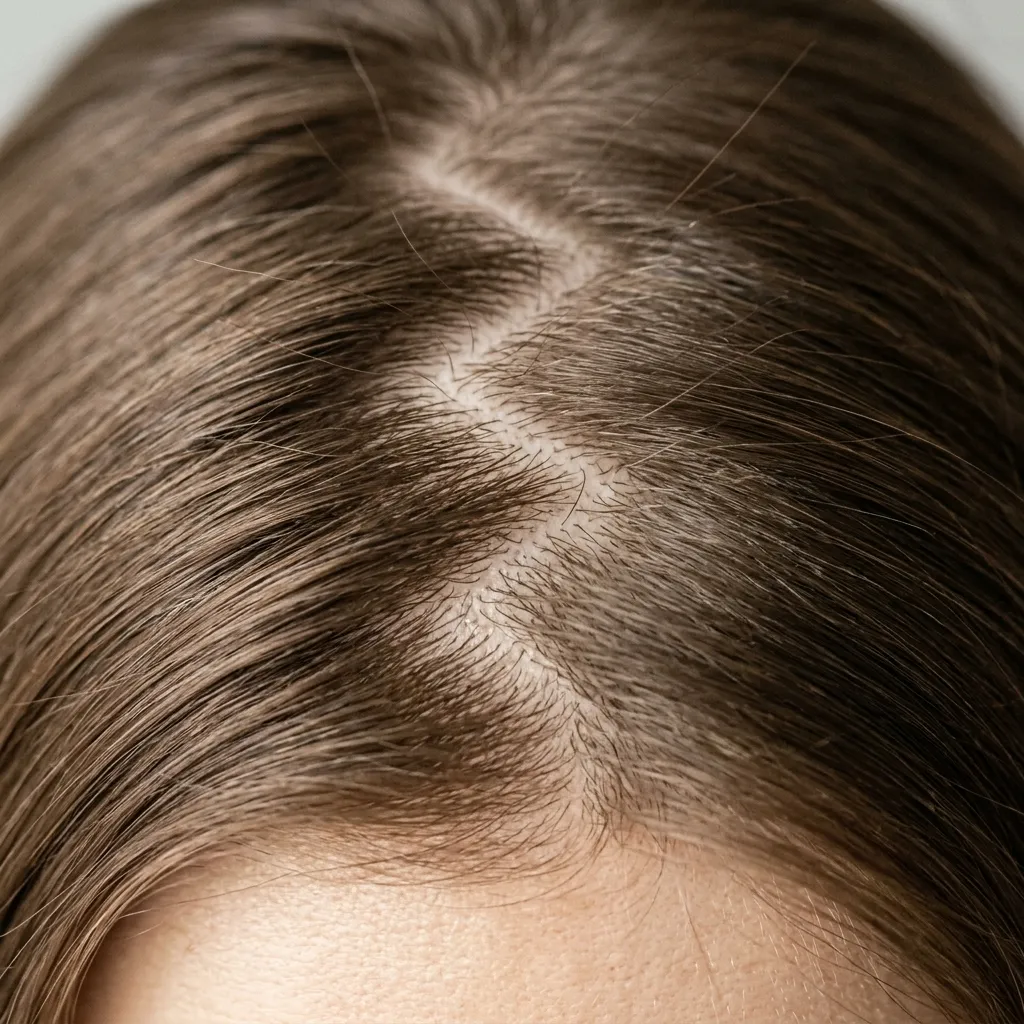
6. Zigzag Parting to Distribute Tension Evenly
Category: Layout
Vibe: Adaptive.
Why it works: A straight, unchanging part worn every single day places continuous pressure and sun exposure along the exact same scalp line, which over months can visibly thin that specific strip faster than the surrounding hair: a zigzag part spreads that daily pressure and exposure across a wider, irregular area instead of concentrating it in one place.
How to get it: Use the pointed end of a rat-tail comb to zigzag the part in small, irregular segments rather than one continuous diagonal line, and vary the general part location by an inch or two every few weeks.
Shop the Look
- Fine-tooth rat-tail comb for precise zigzag parting
- Root-lift spray for volume along varied part lines
- Wide-tooth comb for gentle daily detangling
- Scalp serum for the previously stressed part line
- Small flexible-hold clips for setting the new part shape
7. Micro-Braid-Free Protective Style for Very Fine Hair

Category: Low-Density Adaptation
Vibe: Gentle.
Why it works: Micro-braids and other very small-sectioned protective styles multiply the number of individual tension points across the scalp, and on genuinely low-density hair, that multiplied tension is distributed across fewer strands per section than it would be on denser hair. The honest fix for very fine hair is choosing fewer, larger sections rather than more numerous small ones.
How to get it: Ask specifically for jumbo or large-section braids or twists rather than the small or medium sizing most stylists default to, since each larger section spreads its tension across meaningfully more strands.
Shop the Look
- Jumbo-size synthetic braiding hair
- Wide-tooth sectioning comb for large partitions
- Lightweight leave-in conditioner for fine-hair sections
- Low-tension hair ties for securing larger sections
- Scalp-nourishing oil for use between larger sections
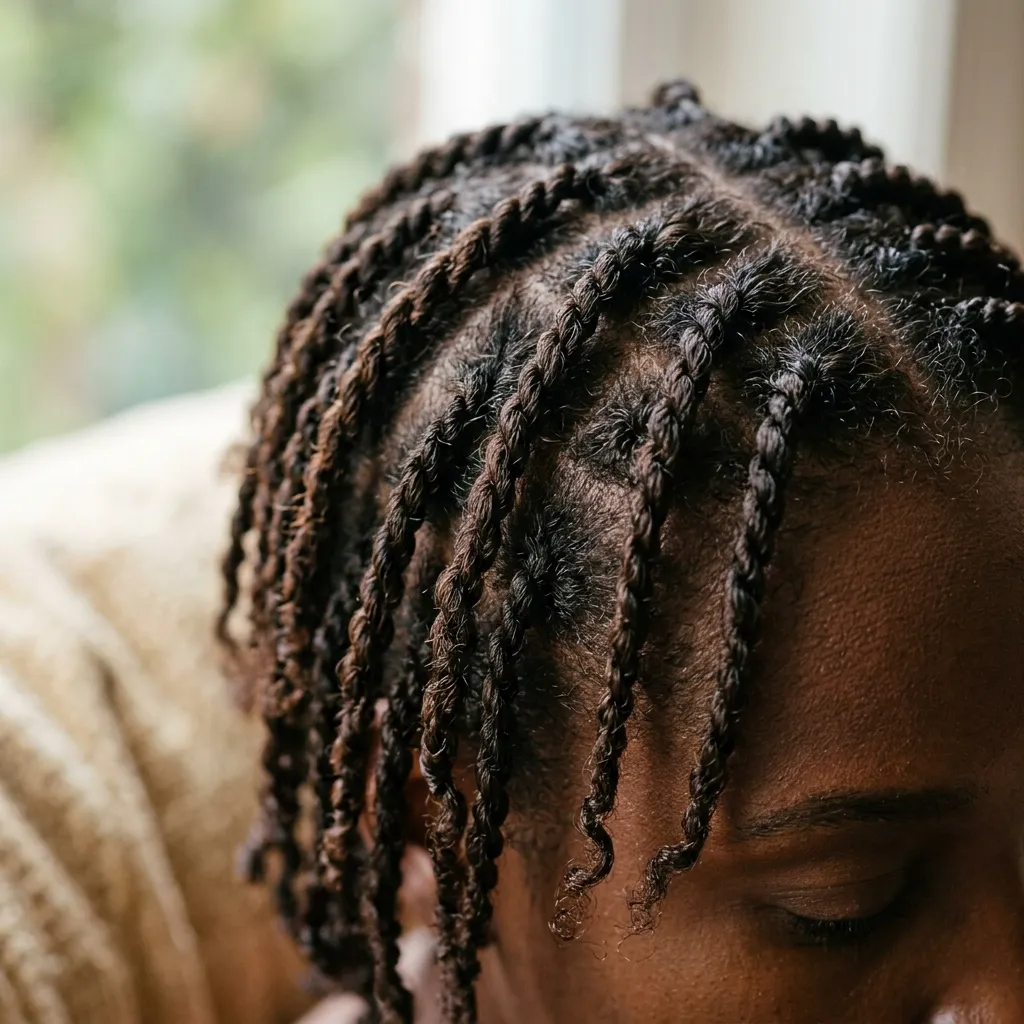
8. Two-Strand Twists for Fine, Thin Hair
Category: Style-Type
Vibe: Textured.
Why it works: Two-strand twists distribute tension across only two sections of hair per twist rather than the three sections a braid requires, which on thin hair means less overall friction and crossing-over at the root. The twisting motion itself is also inherently gentler than the interlacing motion of braiding.
How to get it: Twist starting about half an inch away from the root rather than directly at the scalp, leaving that small root section smooth and untwisted to reduce tension at the most fragile point.
Shop the Look
- Twisting cream with hold and slip, lightweight formula
- Wide-tooth comb for pre-twist detangling
- Soft-bristle brush for smoothing twist edges
- Satin twist-out bonnet for overnight setting
- Light-hold edge gel for the untwisted root section
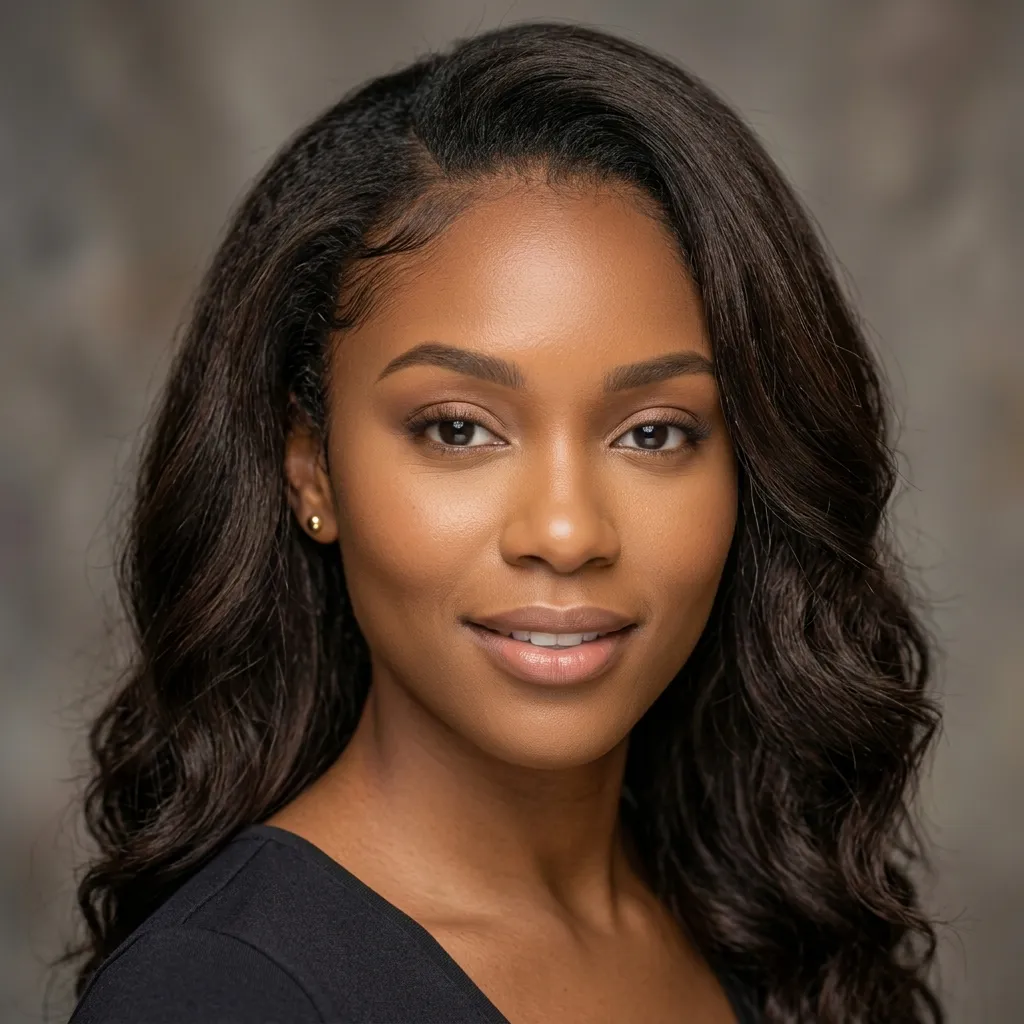
9. Balayage Wig for a Natural, Undetectable Color Match

Category: Color
Vibe: Sun-warmed.
Why it works: A hand-painted balayage wig avoids the harsh, uniform color line that a single-process wig color creates at the part, and because the natural hair underneath is fully protected and resting, the wig’s own color realism, not the natural hair’s condition, becomes the only factor determining how convincing the style looks.
How to get it: Choose a lace-front wig with a balayage pattern that’s darkest at the root and lightens toward the ends, matching the darkest root tone to your own natural color for the most seamless part line.
Shop the Look
- Lace-front balayage wig, human hair blend
- Wig grip band for a secure, low-tension fit
- Satin wig cap for underneath protection
- Lace tint spray for matching the part to scalp tone
- Wig-safe edge control for laying down the hairline
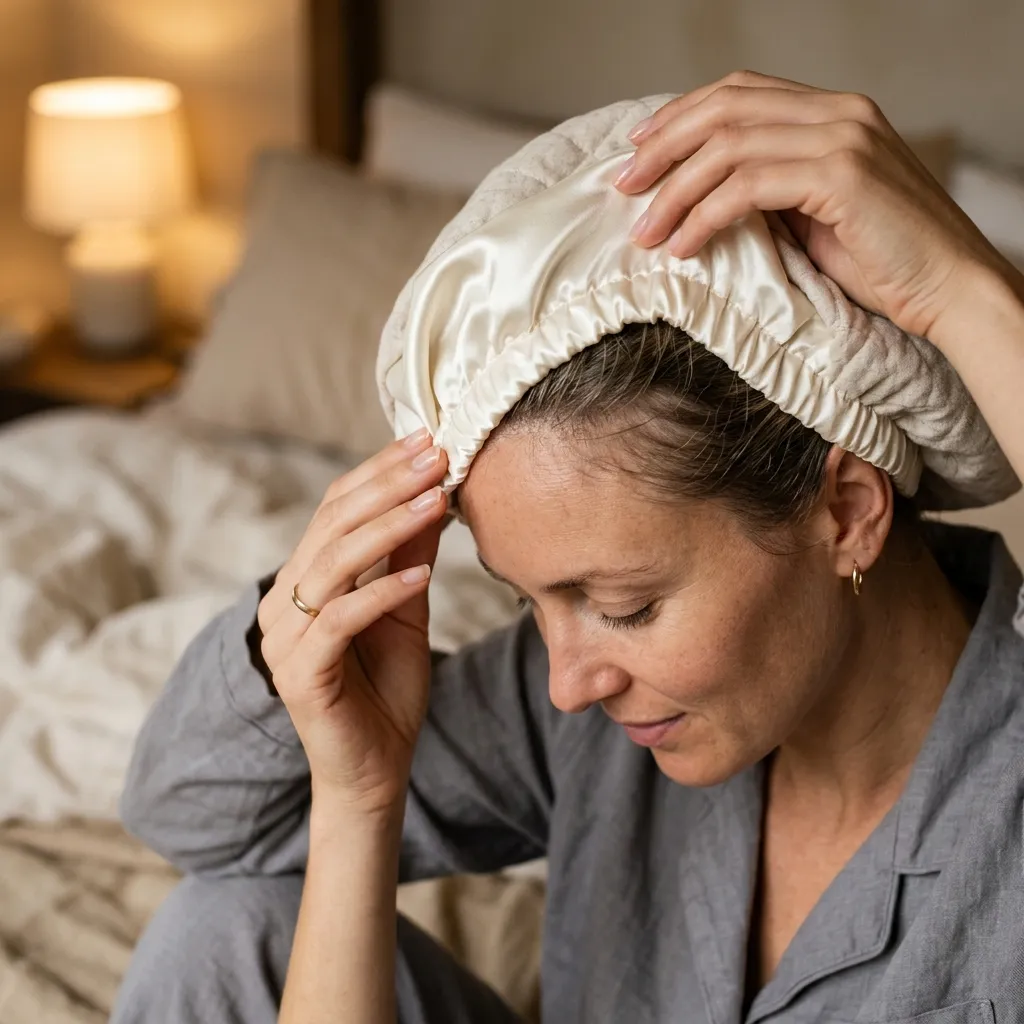
10. Satin-Lined Cap Method for Overnight Protection
Category: Technique
Vibe: Restorative.
Why it works: A satin-lined cap combines the coverage of a full bonnet with a snugger, more secure fit than a loose scarf, which matters specifically for people who move a lot in their sleep. The snugness keeps the satin surface in constant contact with the hair throughout the night rather than shifting away and exposing hair to the cotton pillowcase underneath.
How to get it: Choose a cap with a wide, soft elastic band and test it for tightness before sleeping in it. If it leaves a visible indent line at the hairline in the morning, size up or loosen the band.
Shop the Look
- Satin-lined sleep cap, wide-band style
- Overnight leave-in detangling spray
- Wide-tooth comb for pre-sleep detangling
- Satin pillowcase as backup coverage
- Travel-size satin cap for overnight bags
11. Half-Up Protective Style for Everyday Wear

Category: Structure
Vibe: Everyday.
Why it works: A half-up style protects only the crown section while leaving the ends completely free of any tension, elastic, or pin. Since the ends are typically the oldest, most fragile part of the hair shaft, keeping them entirely untouched while still gaining some protective benefit at the root is a reasonable middle-ground style for daily wear.
How to get it: Use a soft, no-crease spiral tie for the gathered section rather than a standard elastic, which reduces the localized breakage point that a regular hair tie creates at the base of the gathered hair.
Shop the Look
- No-crease spiral hair tie
- Small round brush for smoothing the gathered crown
- Lightweight shine spray for the loose ends
- Wide-tooth comb for gentle sectioning
- Decorative hair pin for a polished half-up finish
12. Satin-Lined Beanie for Cold-Weather Protection

Category: Accessories
Vibe: Cozy.
Why it works: Standard wool and acrylic beanies create the same friction problem as cotton pillowcases, except concentrated at the hairline and crown for hours at a time during cold-weather wear, a satin lining sewn or clipped into the inside of a beanie removes that friction source while still providing the warmth the outer fabric is worn for.
How to get it: Look specifically for beanies labeled “satin-lined” rather than assuming any soft-feeling hat qualifies, since many knit hats that feel soft on the hand are still rough against a hair cuticle at the microscopic level.
Shop the Look
- Satin-lined knit beanie
- Clip-in satin liner for existing hats
- Leave-in anti-friction hair serum
- Wide-tooth comb for post-beanie detangling
- Silk scarf as an under-layer for extra hairline protection
13. Diagonal Side Part for Thinning Crown Coverage
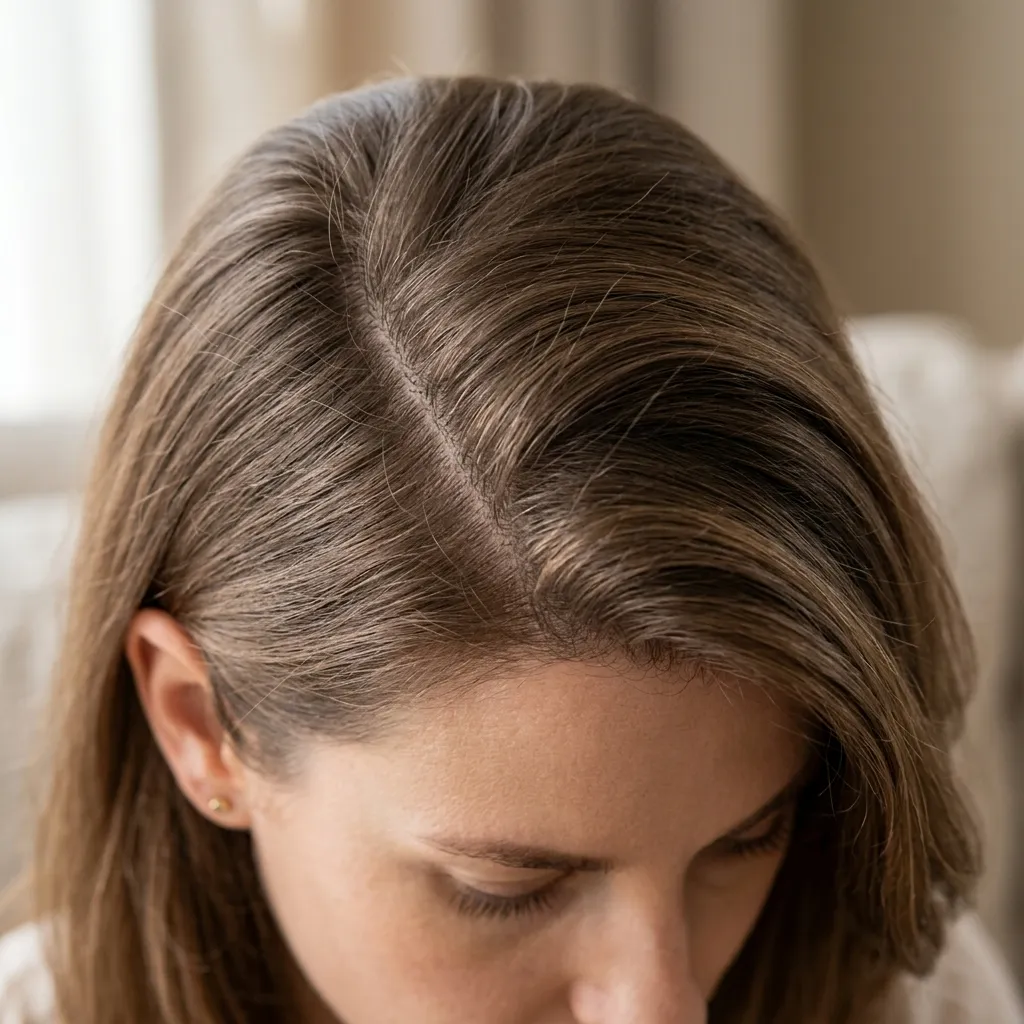
Category: Layout
Vibe: Strategic.
Why it works: A diagonal part directs more hair volume across the crown at an angle rather than straight down the center, which covers a thinning crown zone more completely than a straight center part does, since the diagonal angle uses the hair’s natural fall to bridge over the sparser area instead of parting directly through it.
How to get it: Angle the part starting about an inch above one eyebrow and running back toward the opposite ear, adjusting the exact angle based on which side of the crown needs the most coverage.
Shop the Look
- Rat-tail comb for precise diagonal parting
- Root-lift powder for volume along the parted line
- Lightweight volumizing mousse for the crown section
- Flexible-hold hairspray to hold the angled part in place
- Small teasing comb for subtle lift at the crown
14. Extension-Free Protective Twist-Out for Minimal-Density Hair
Category: Low-Density Adaptation
Vibe: Natural.
Why it works: Adding synthetic or human hair extensions to already low-density hair adds weight the natural strands still have to support, even in a “protective” style, so an extension-free twist-out (using only the natural hair, twisted while damp and unraveled once dry) delivers a protective, low-manipulation result without introducing any added pulling weight at all.
How to get it: Twist hair while it’s about 70% dry rather than fully wet, since twisting fully saturated hair takes far longer to dry and increases the amount of time the twists spend under tension before they’re taken down.
Shop the Look
- Lightweight curl-defining twisting cream
- Wide-tooth comb for gentle pre-twist detangling
- Microfiber towel for gentle pre-twist drying
- Satin bonnet for overnight twist-out preservation
- Light-hold finishing gel for frizz control post-unravel
15. Sew-In Weave with a Leave-Out for Thin Edges
Category: Style-Type
Vibe: Blended.
Why it works: A sew-in weave secures the bulk of the hair underneath a fully braided base, resting nearly all of the natural hair completely, while a small leave-out section at the front blends the install and hides the tracks. The leave-out is deliberately kept small and low-tension since it’s the only part of the natural hair still exposed to daily styling.
How to get it: Ask for the braided base underneath the weave to be cornrowed loosely rather than tightly, since a too-tight base braid pattern is one of the most common causes of tension headaches and hairline thinning from sew-in installs.
Shop the Look
- Human hair weave bundles matched to natural texture
- Weaving needle and thread, salon-grade
- Edge control cream for blending the leave-out
- Satin-lined wig cap for underneath the braided base
- Leave-in protein treatment for the exposed leave-out section
16. Ombré Twist Extensions for Added Visual Density

Category: Color
Vibe: Gradual.
Why it works: An ombré gradient in twist extensions draws the eye downward along the length of the twist rather than concentrating attention at the root, which is useful specifically for thin hair since the root and part line are usually the areas with the least natural density to show off.
How to get it: Choose extension hair that transitions from your natural root color to a warm caramel or honey tone at the ends, avoiding a stark blonde ombré, which creates more contrast than a low-density root section can visually support.
Shop the Look
- Ombré twisting hair, root-to-tip gradient
- Lightweight twisting gel for hold without buildup
- Wide-tooth comb for gentle sectioning
- Satin twist-out bonnet for overnight setting
- Shine spray for the lightened ends
17. Rotating Part Technique to Prevent Traction Alopecia
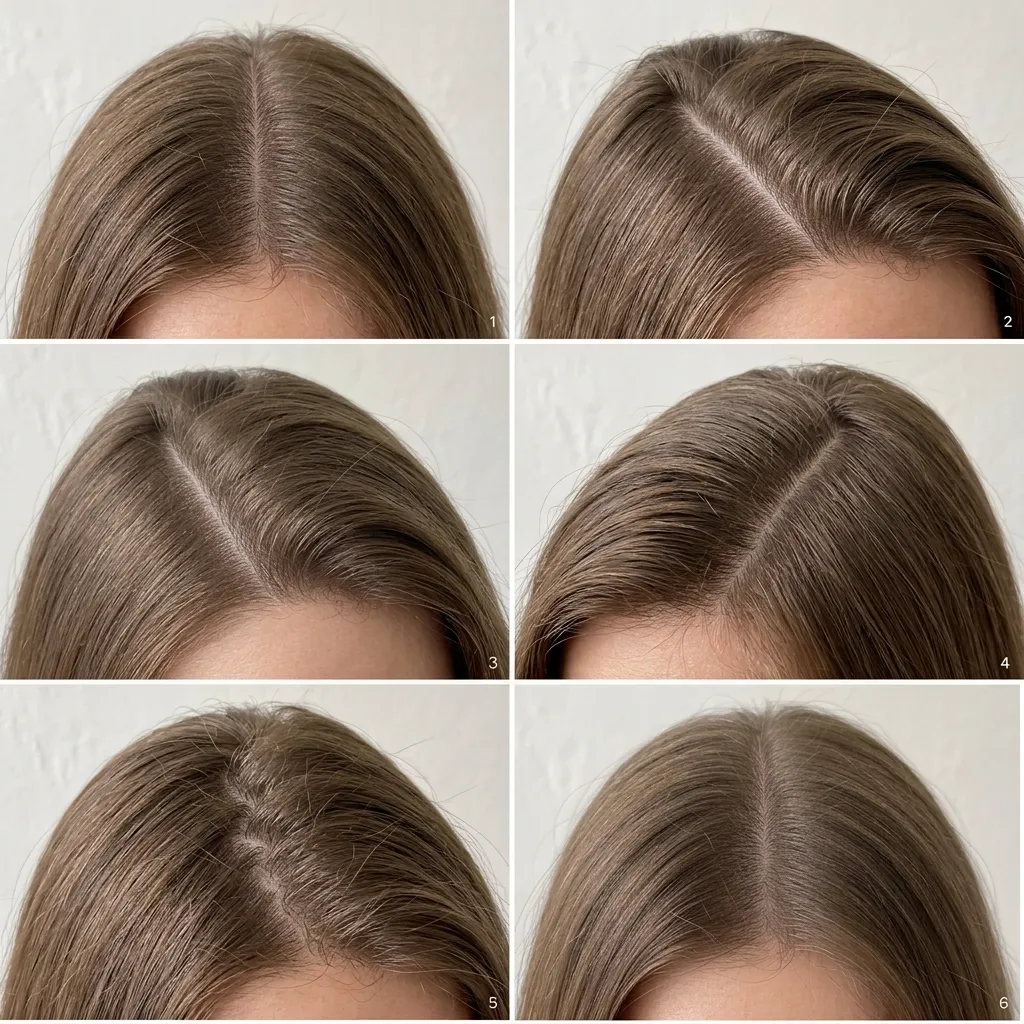
Category: Technique
Vibe: Methodical.
Why it works: Traction alopecia develops specifically from repeated tension applied to the same follicles over time, so the single most direct prevention method is simply not applying that repeated tension in the same spot: rotating the part, the ponytail placement, or the braid pattern’s starting point every few weeks spreads any tension across a wider set of follicles instead of concentrating cumulative stress on one line.
How to get it: Keep a simple mental note (or phone photo) of your current part or gathering point each time you restyle, and deliberately shift it by an inch or more the next time you install a new protective style.
Shop the Look
- Fine-tooth comb for varying part placement
- Scalp massage brush for circulation across rotated areas
- Leave-in scalp serum for previously stressed sections
- Wide-tooth comb for gentle detangling before restyling
- Small mirror set for checking part placement from multiple angles
18. Pineapple Updo for Nighttime Volume Protection

Category: Structure
Vibe: Gathered.
Why it works: Gathering hair loosely at the very top of the head before sleep keeps the length from getting crushed or tangled against the pillow overnight, and because the gathering point sits at the crown rather than tight against the scalp, it avoids the localized tension a low, tight ponytail would create over an entire night’s sleep.
How to get it: Use a soft scrunchie rather than a thin elastic, and gather the hair loosely enough that you can still slide two fingers underneath the tie at the scalp.
Shop the Look
- Oversized silk scrunchie for loose overnight gathering
- Satin bonnet to cover the gathered pineapple shape
- Leave-in overnight detangling spray
- Wide-tooth comb for gentle pre-bed detangling
- Silk pillowcase as additional overnight friction protection
19. Silk Scarf Wrap for Daytime Edge Protection
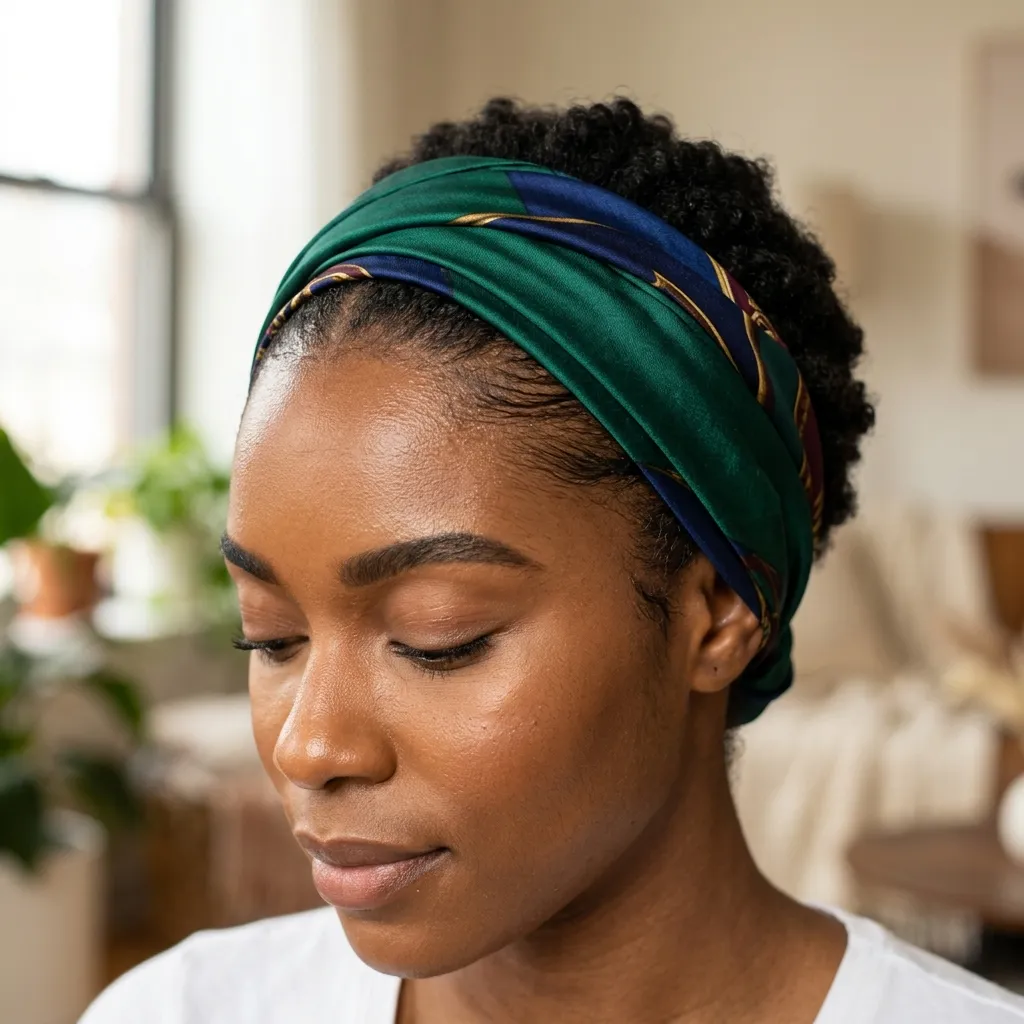
Category: Accessories
Vibe: Polished.
Why it works: Wrapping a silk scarf specifically along the hairline, rather than the whole head, provides friction protection during the day in exactly the zone most prone to breakage from sunglasses, hats, and repeated hand-touching. A partial wrap gives targeted protection without committing to a full head covering for people who still want most of their hair visible.
How to get it: Fold the scarf into a two-inch band and tie it directly along the hairline before adding any other daytime hat or accessory on top, so the silk sits closest to the hair itself.
Shop the Look
- Silk scarf, narrow band style
- Small bobby pins for securing the scarf ends
- Lightweight edge cream for underneath the wrap
- Shine spray for hair left visible below the wrap
- Wide-tooth comb for smoothing before wrapping
20. Crochet Braids for Low-Density Hair
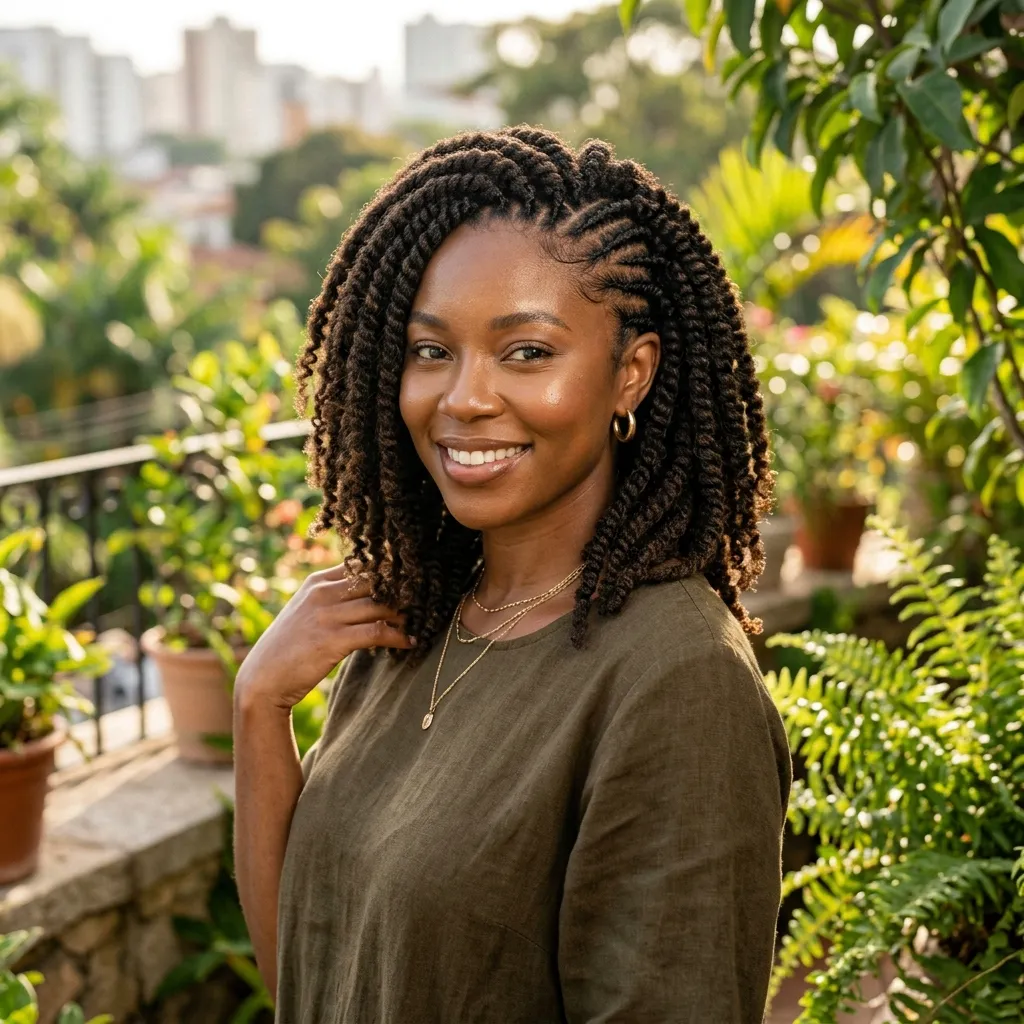
Category: Style-Type
Vibe: Full.
Why it works: Crochet braids attach pre-made braided or curled extensions to a cornrowed base using a latch hook, rather than braiding each section from scratch with the natural hair. This means the natural hair itself is only handled once, during the initial cornrow base, and then rests completely for the full duration of the style.
How to get it: Have the cornrow base braided in a simple, wide pattern rather than an intricate small one, since fewer, larger cornrows underneath mean fewer individual tension points on low-density hair.
Shop the Look
- Pre-looped crochet braiding hair
- Latch hook crochet needle
- Satin-lined wig cap for underneath the cornrow base
- Edge control cream for the exposed perimeter
- Braid spray for shine and frizz control
21. Root-Matched Closure Color for a Natural Part
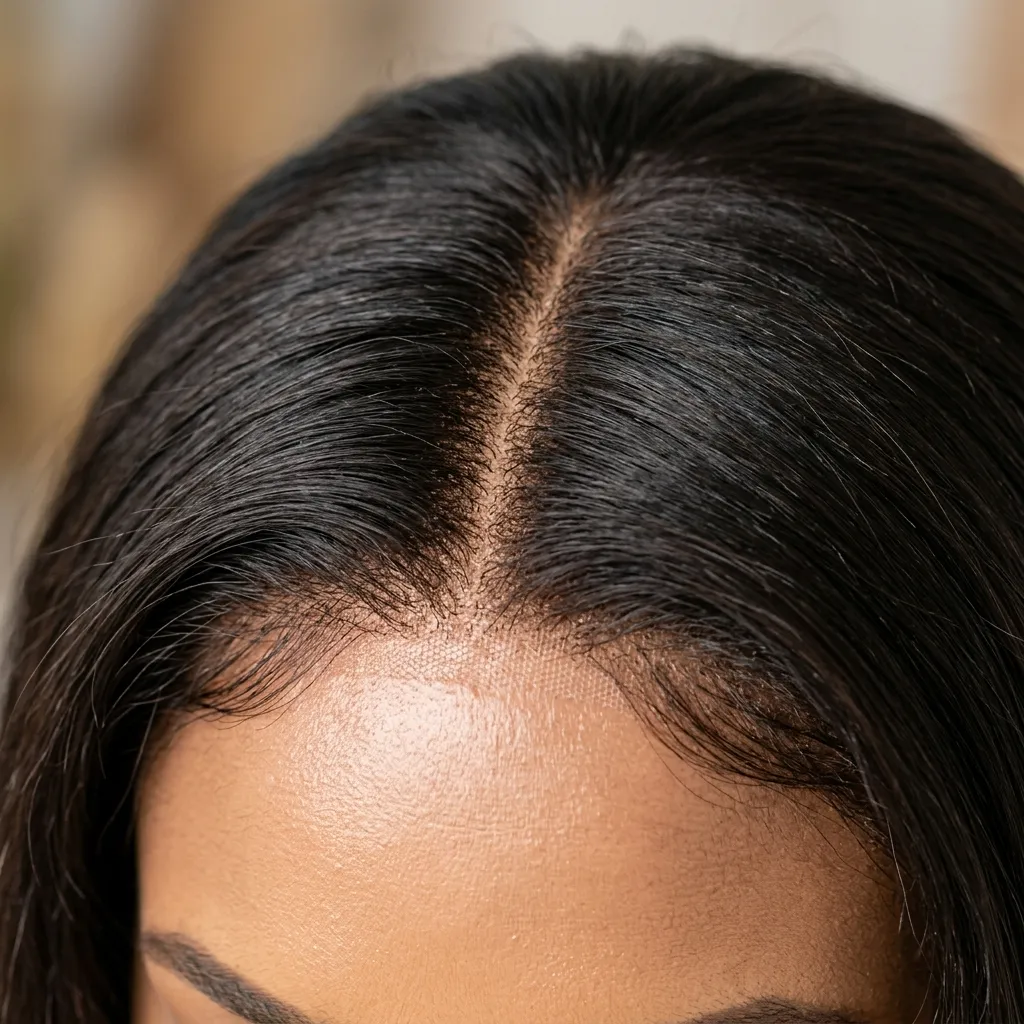
Category: Color
Vibe: Seamless.
Why it works: A closure or frontal’s lace color needs to match the wearer’s actual scalp tone, not their hair color, since the lace itself is what’s visible at the part. A mismatch here is one of the most common reasons a protective wig install looks obviously artificial, regardless of how well the hair color itself is matched.
How to get it: Tint the lace with a small amount of foundation or specialized lace tint in a shade matching your scalp, applied with a small sponge and blended before the closure is installed.
Shop the Look
- Lace tinting spray in a scalp-matched shade
- Small makeup sponge for blending lace tint
- Lace closure or frontal, pre-plucked hairline
- Wig-safe adhesive for a secure, low-tension hold
- Edge control for laying the perimeter hair over the lace
22. Protective Detangling Method Before Any Style
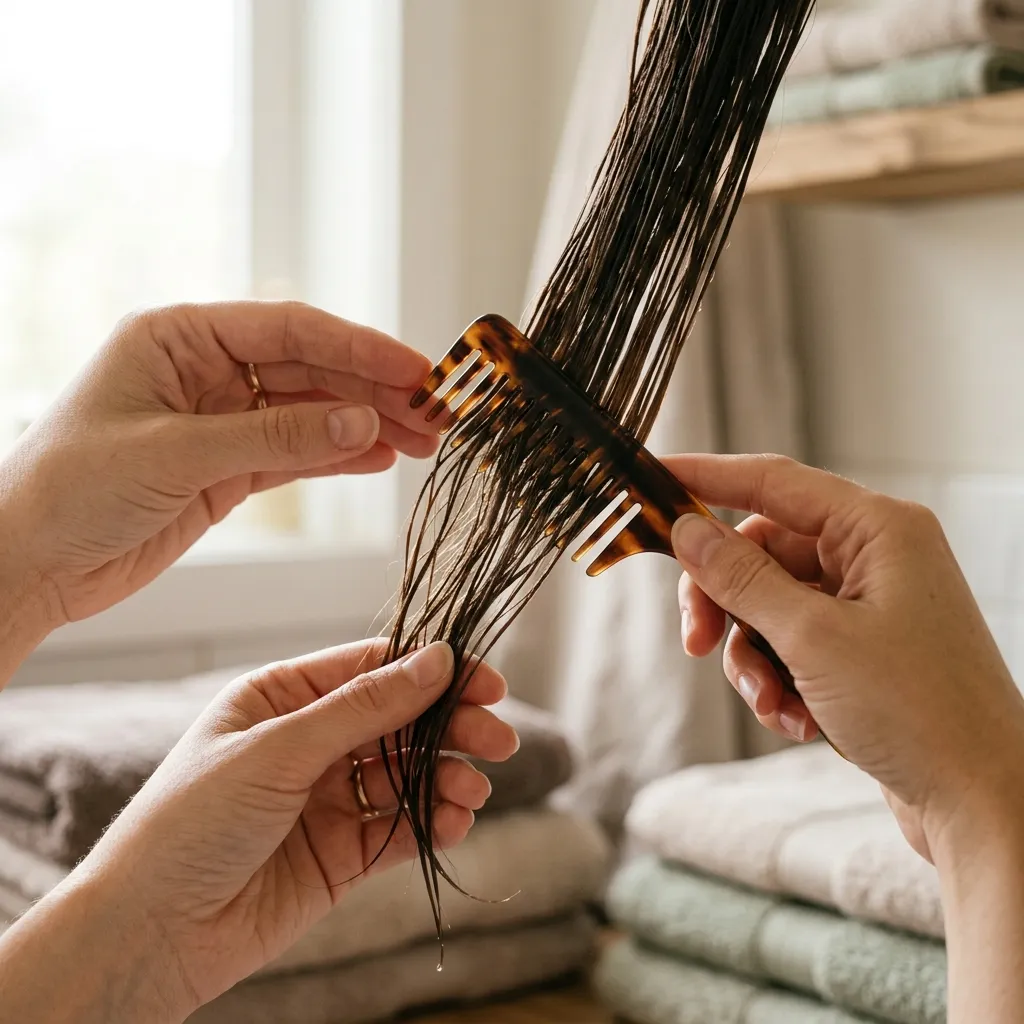
Category: Technique
Vibe: Gentle.
Why it works: Most breakage during protective style installation happens before the actual braiding, twisting, or wig prep even begins (it happens during rough detangling of already-tangled, dry hair), so the underlying technique that protects every style on this list equally is detangling correctly in the first place, regardless of what’s installed afterward.
How to get it: Detangle hair while soaking wet and fully saturated with conditioner, starting at the very ends and working upward in small sections, never starting from the root and pulling downward through knots.
Shop the Look
- Wide-tooth detangling comb
- Slip-heavy conditioner for detangling sessions
- Detangling brush with flexible bristles
- Leave-in conditioner spray for post-detangle protection
- Sectioning clips for detangling in manageable portions
23. Flat Twist Updo for a Polished, Low-Manipulation Look

Category: Structure
Vibe: Structured.
Why it works: Flat twists lie directly against the scalp rather than hanging freely, which means the hair is fully secured and shielded from daily friction the moment it’s styled. Because the finished look also reads as polished and intentional rather than purely functional, it holds up well for multiple days without needing to be redone, extending the protective benefit.
How to get it: Twist each section flat against the scalp using a small amount of edge cream for grip, then gather the twisted sections loosely into a low bun or ponytail at the back rather than pulling them tight.
Shop the Look
- Lightweight edge cream for flat twist grip
- Fine-tooth rat-tail comb for clean sectioning
- Soft hair tie for gathering the twisted sections
- Satin scarf for overnight preservation
- Shine spray for a polished twist finish
24. Claw Clip Updo for Tension-Free Styling
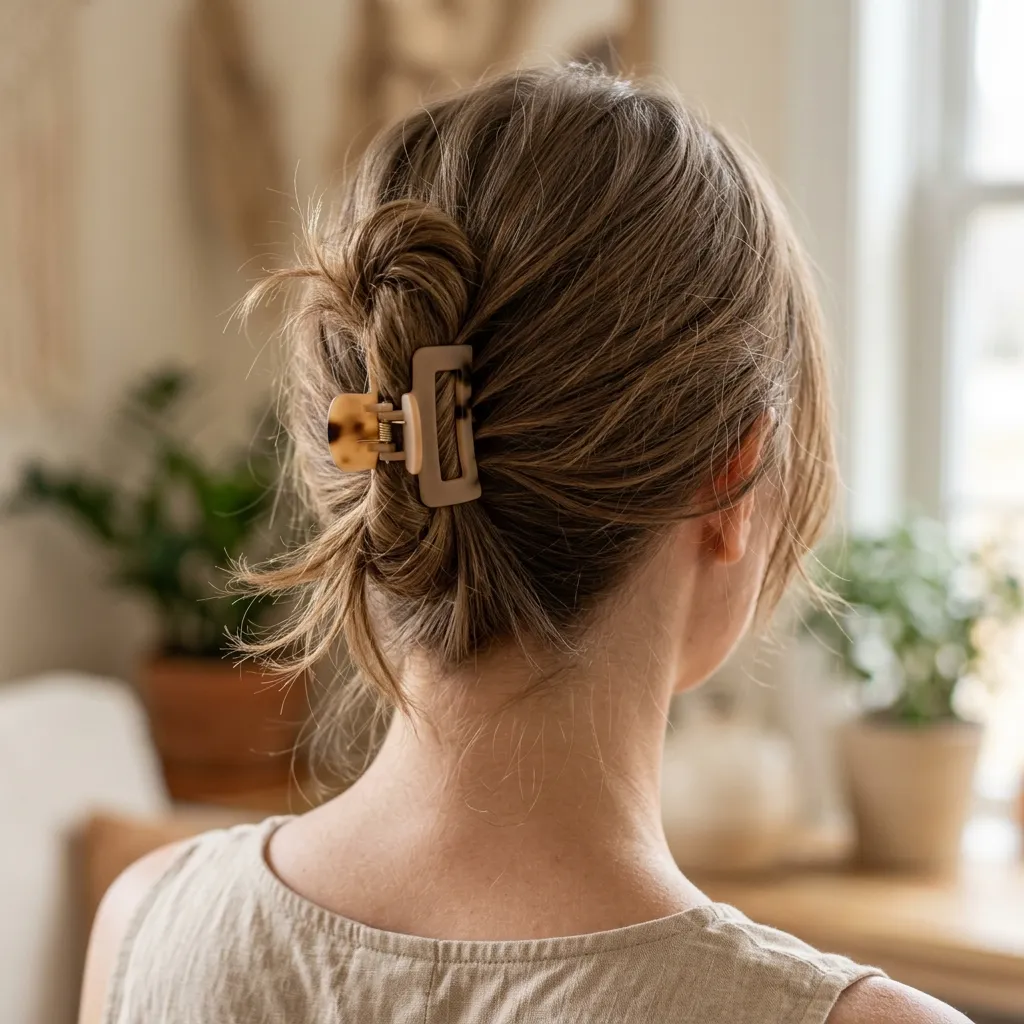
Category: Accessories
Vibe: Effortless.
Why it works: A claw clip secures gathered hair through clamping pressure rather than through the twisting, wrapping, or elastic tension other updos rely on, which makes it one of the lowest-tension ways to get hair up and off the neck. There’s genuinely no pulling force involved beyond the initial gather, unlike a tight elastic that continues applying tension for as long as it’s worn.
How to get it: Gather hair loosely with your fingers, twist it once gently, and clamp the claw clip in the middle of the twist rather than at the very base, which keeps the root section relaxed.
Shop the Look
- Large matte claw clip, secure-grip design
- Wide-tooth comb for gentle gathering
- Lightweight texturizing spray for grip before clipping
- Smoothing serum for a polished finish around the clip
- Small round brush for face-framing pieces left loose
25. Silk Press Wrap as a Protective Overnight Style
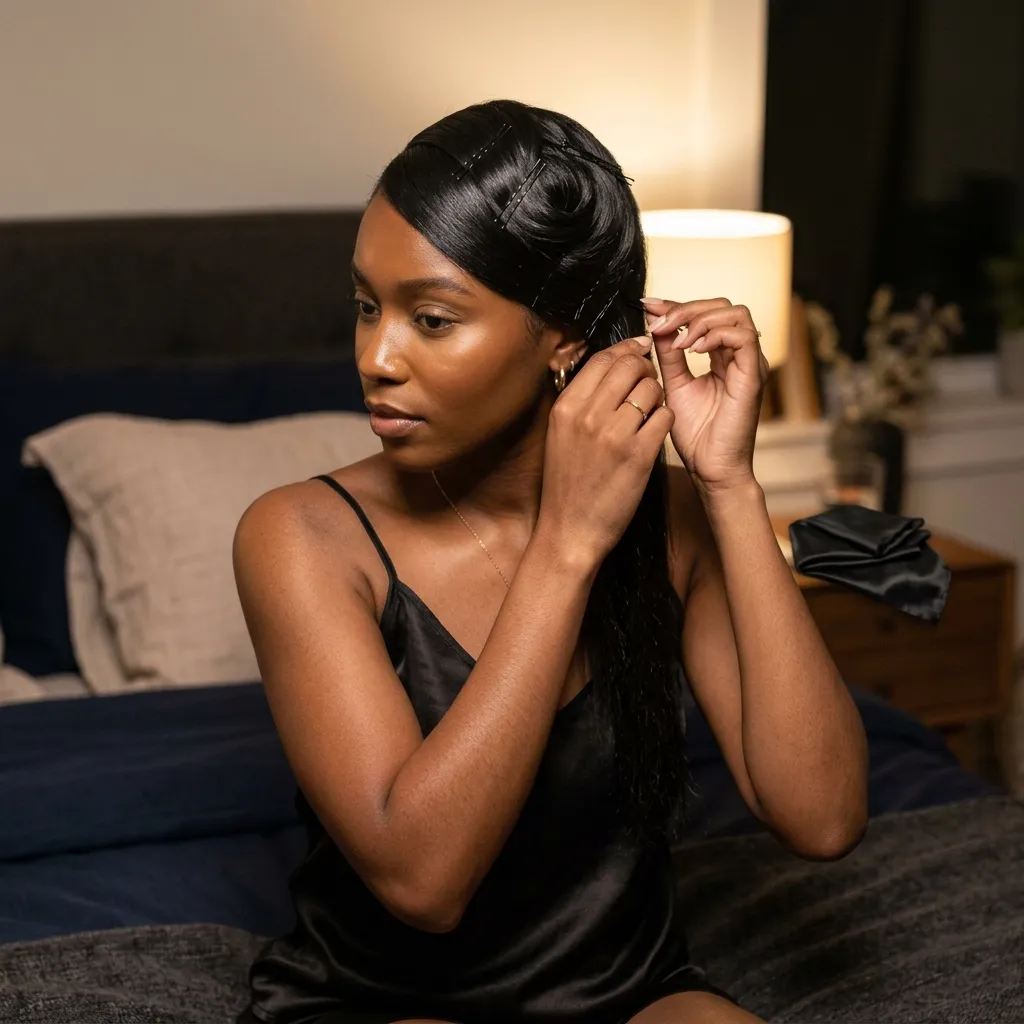
Category: Style-Type
Vibe: Preserved.
Why it works: A silk press (a smooth, heat-styled finish rather than an added extension) still counts as a protective approach specifically at night, since wrapping the hair flat around the head after styling prevents the natural humidity and movement of sleep from reversing the smooth finish and requiring re-styling with heat again the next morning.
How to get it: Wrap hair around the head in the direction it was styled, using a soft-bristle brush to smooth it flat, then secure with duckbill clips rather than tight bobby pins before covering with a satin scarf.
Shop the Look
- Soft-bristle wrap brush for smoothing before wrapping
- Duckbill clips for securing the wrap shape
- Silk wrap scarf, extra-long style
- Lightweight anti-humidity serum for overnight hold
- Satin bonnet as an outer layer over the wrap
26. Highlighted Crochet Curls for Dimension Without Damage

Category: Color
Vibe: Dimensional.
Why it works: Since crochet extensions are pre-colored and pre-processed before installation rather than chemically lightened on the natural hair itself, the highlight or dimension effect is achieved entirely without any bleach, heat, or lightening chemical ever touching the natural strands underneath, genuine color dimension with zero chemical exposure to the hair being protected.
How to get it: Choose crochet hair with highlights already woven through the bundle rather than attempting to add highlights to the extensions yourself after install, since pre-colored extension hair is processed more evenly than a home dye job would be.
Shop the Look
- Pre-highlighted crochet curl extension bundles
- Latch hook crochet needle
- Satin-lined cap for underneath the cornrow base
- Curl-defining spray for the extension curls
- Edge control cream for the perimeter blend
27. Loose French Braid for Gentle, All-Day Protection
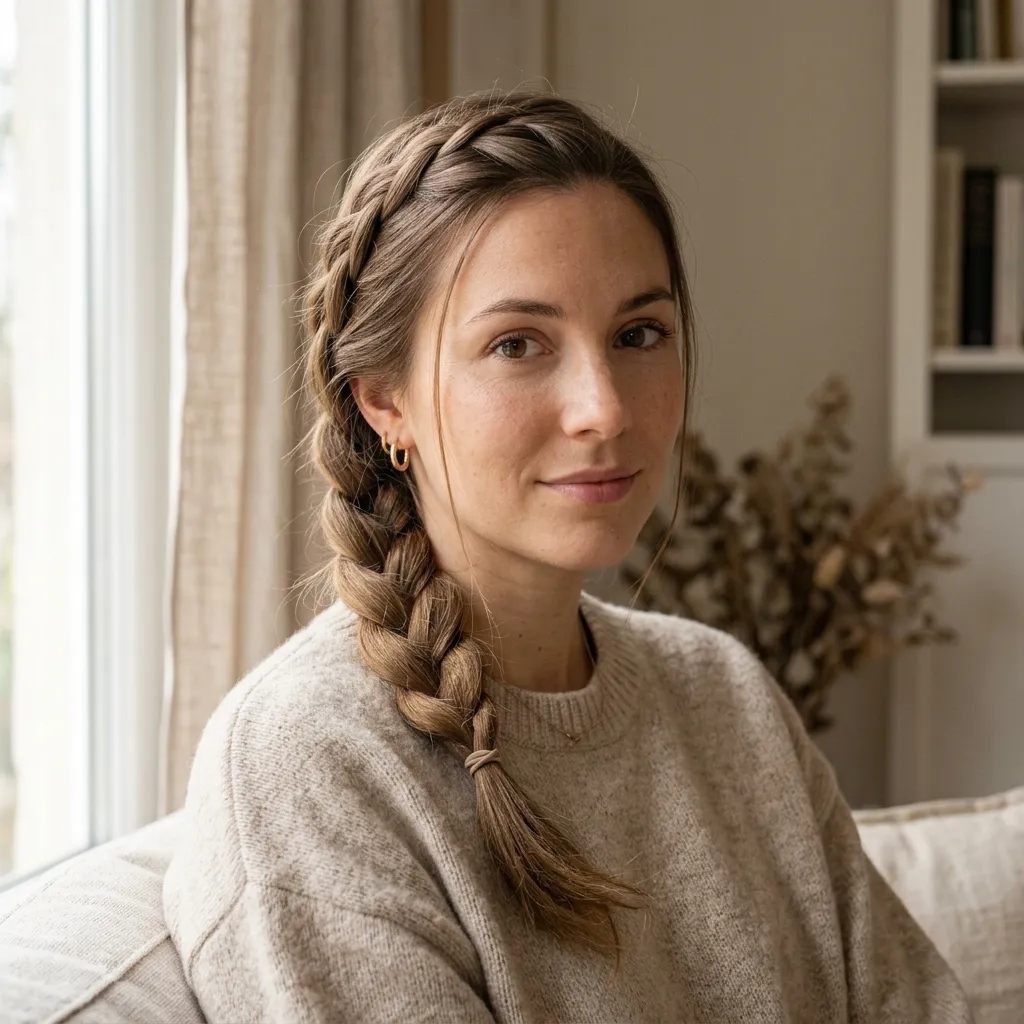
Category: Structure
Vibe: Relaxed.
Why it works: A tightly braided French braid pulls tension continuously along the entire scalp line it follows, while a deliberately loose version keeps the same tucked-away, protective structure without that continuous pull. The looseness doesn’t compromise how long the braid holds, since a French braid’s woven structure stays intact even without being pulled tight.
How to get it: Add each new section into the braid without pulling it taut against the previous section, checking periodically that you can still see slight separation between the woven strands rather than a flat, compressed braid.
Shop the Look
- Wide-tooth comb for gentle pre-braid detangling
- Lightweight braiding cream for grip without tension
- Soft hair tie for securing the braid’s end
- Shine spray for a smooth braid finish
- Small bobby pins for loose flyaway control
28. Satin Hair Wrap for Post-Wash Protective Drying
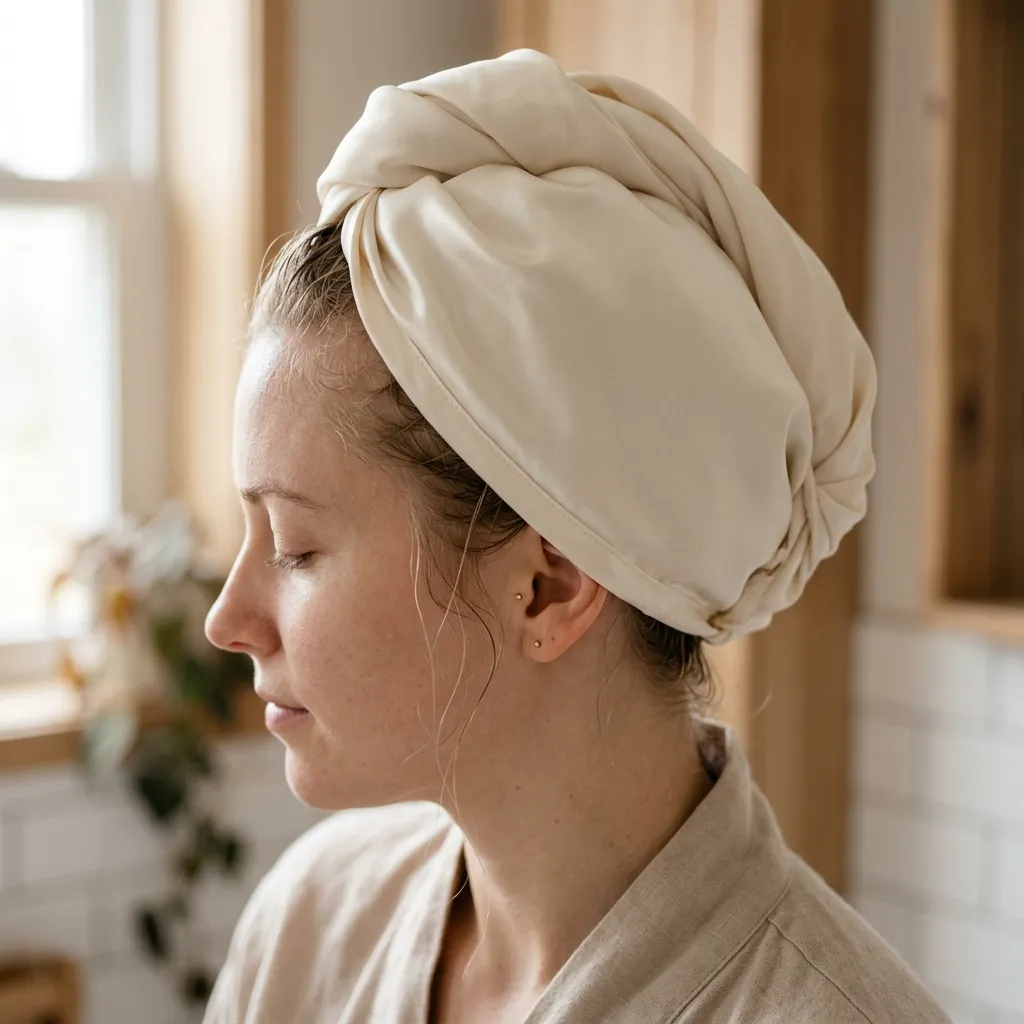
Category: Accessories
Vibe: Restorative.
Why it works: Wet hair is at its most fragile and stretchable state, and rubbing it dry with a rough cotton towel, or even wrapping it in one, creates friction against the most vulnerable version of the cuticle it will experience all week; a satin or microfiber wrap absorbs water with far less abrasive contact.
How to get it: Blot and squeeze water out gently with the satin wrap rather than rubbing, wringing, or twisting the hair, which can stretch already-weakened wet strands past their breaking point.
Shop the Look
- Satin hair-drying wrap or turban
- Microfiber towel as an alternative option
- Leave-in detangling spray for post-wash use
- Wide-tooth comb for detangling while damp
- Lightweight leave-in cream for damp-hair protection
29. Wig Install Over Cornrows for Thinning Hair

Category: Style-Type
Vibe: Secure.
Why it works: A wig installed over a simple cornrow base gives natural hair the longest, most complete rest of any style on this list, since none of the natural hair is exposed to daily styling, weather, or manipulation at all for the full duration of the install. The tradeoff is that the cornrow base itself needs to be loose and simple, since a tight, elaborate base defeats the purpose entirely.
How to get it: Request a basic, four-to-six cornrow base rather than an intricate pattern, and have it braided loosely enough that you can comfortably move your scalp and forehead without feeling any pulling.
Shop the Look
- Lace-front wig, natural hairline pre-plucked
- Wig grip band for secure, low-tension fit
- Satin-lined wig cap for underneath the cornrow base
- Bond-safe wig adhesive or clips, non-damaging formula
- Scalp oil for the resting natural hair underneath
30. Tonal Braiding Hair Blend for Thinning Edges
Category: Color
Vibe: Considered.
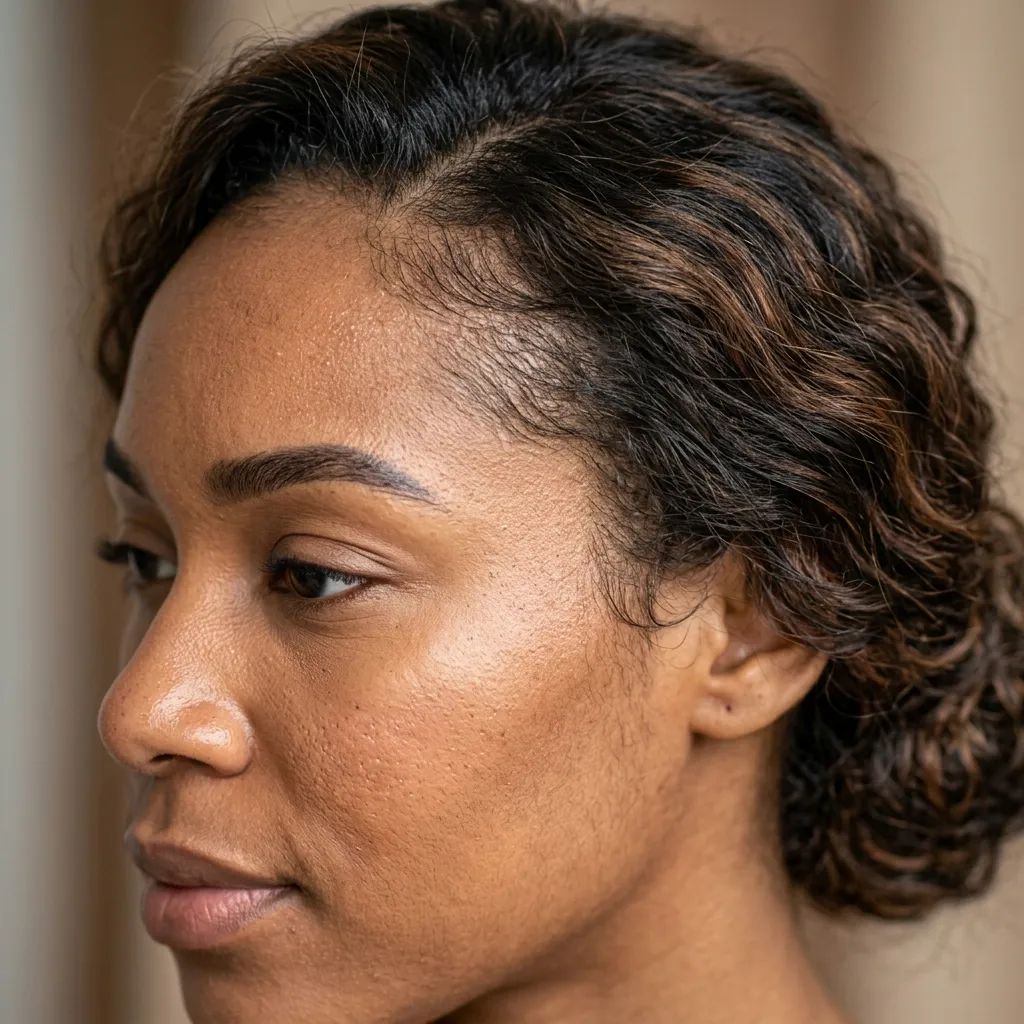
Why it works: Thinning edges show scalp more than any other section of hair, and a single flat color of braiding hair against that visible scalp creates more contrast than natural, uneven-density hair actually has, blending two or three closely related tones specifically at the edge sections mimics the natural color variation of real hair growing at different densities, which reads as far less obviously “added” than one uniform shade.
How to get it: Reserve your most carefully color-matched braiding hair specifically for the front edge sections, saving any slightly-off shades for sections further back where less scalp is visible.
Shop the Look
- Multiple packs of blendable tonal braiding hair
- Fine-tooth rat-tail comb for precise edge sectioning
- Root touch-up powder matched to natural scalp tone
- Lightweight edge gel for a smooth blended finish
- Small handheld mirror for checking the edge blend closely
How to Start Your Protective Hairstyle Journey
Your single first move is switching your sleep setup to a satin or silk pillowcase or bonnet before you install any protective style at all. Every style on this list still gets undone by nightly friction if the surface you sleep on undoes it, so this is the one change that supports literally every other decision that follows.
The most common mistake is choosing a style based on how long it can stay in rather than how much tension it takes to install. A style that lasts six weeks but was braided or gathered too tightly does more cumulative damage than a lower-maintenance style replaced every two weeks with gentler tension. The fix is asking directly for looser installation and accepting a shorter wear time if that’s the tradeoff.
Three items under $50 that create immediate impact: a satin bonnet with an adjustable band, a wide-tooth detangling comb for wet, conditioner-saturated hair, and a set of soft, no-crease spiral hair ties.
A full protective style install, from braids to a wig, typically takes 2-6 hours depending on complexity, and most styles are worn 1-6 weeks before removal and a rest period. A realistic starter budget for a simple braided or twisted style runs $60-$150 for professional installation, while a quality wig setup runs $150-$400 but can be reworn across multiple install cycles, making it more cost-effective over several months.
Frequently Asked Questions About Protective Hairstyles for Thin Hair
What actually counts as a protective hairstyle?
A protective hairstyle is any style that tucks the hair’s ends away and significantly reduces daily manipulation, heat, and friction, rather than a specific list of approved styles. Braids, twists, buns, wigs, and even a simple satin-wrapped low ponytail can all qualify, while a daily heat-styled style worn loose, even if it looks neat, generally does not because the ends stay exposed to ongoing handling.
What hair color works best for protective styles with thin hair?
Colors matched closely to your natural root, or a blended two-to-three tone mix for extensions, tend to work best because thin hair shows more scalp than denser hair, making any color mismatch at the part or edges more visible. A single flat, uniform shade of braiding or wig hair against sparse natural hair often looks more artificial than a subtly blended tonal mix would.
How much do protective hairstyles cost?
A simple braided or twisted protective style typically costs $60-$150 for professional installation, while more complex styles like sew-in weaves or lace-front wig installs run $150-$400 depending on the hair quality and salon. Budgeting for a rest period and maintenance products (bonnets, leave-in sprays, edge cream) adds roughly $30-$60 on top of the install itself.
Can protective hairstyles cause hair loss instead of preventing it?
Yes, if the style is installed with too much tension. This is specifically how traction alopecia develops, and it’s a real risk with any protective style, not just braids or weaves, if tension is concentrated at the same follicles for weeks at a time. The fix isn’t avoiding protective styling altogether but choosing looser tension, rotating part placement between installs, and removing a style immediately if it causes ongoing tenderness rather than just initial tightness on install day.
How long should you wear a protective style before taking it down?
Most protective styles are worn for one to six weeks, with the exact range depending on the style’s tension level and how quickly buildup accumulates at the scalp. A general guideline dermatologists commonly cite is giving natural hair at least one to two weeks of genuine rest between protective styles, with no tight styling during that break, to let any accumulated tension fully release before the next install.
Ready to Try a Protective Hairstyle?
Between the braided and twisted styles, the wig and extension options, the accessory-based protection like bonnets and scarves, and the low-density adaptations covered across these 30 ideas, there’s a genuinely workable protective style for nearly any thin or thinning hair type and any comfort level with maintenance. You don’t need to jump straight to a six-week install, starting with something as simple as a satin bonnet and a looser everyday bun is a completely legitimate way to begin protecting your hair today.
The easiest concrete step right now is switching tonight’s pillowcase for a satin one, or picking up a bonnet before bed, so the very first night of protection starts before any bigger style decision is even made. Once the tension and friction are genuinely reduced, thin hair stops feeling like something that’s constantly being lost and starts feeling like it finally has room to hold onto its length. Save your favorites from this list the low-tension loose bun and the satin bonnet are consistently the two easiest starting points, and for good reason.