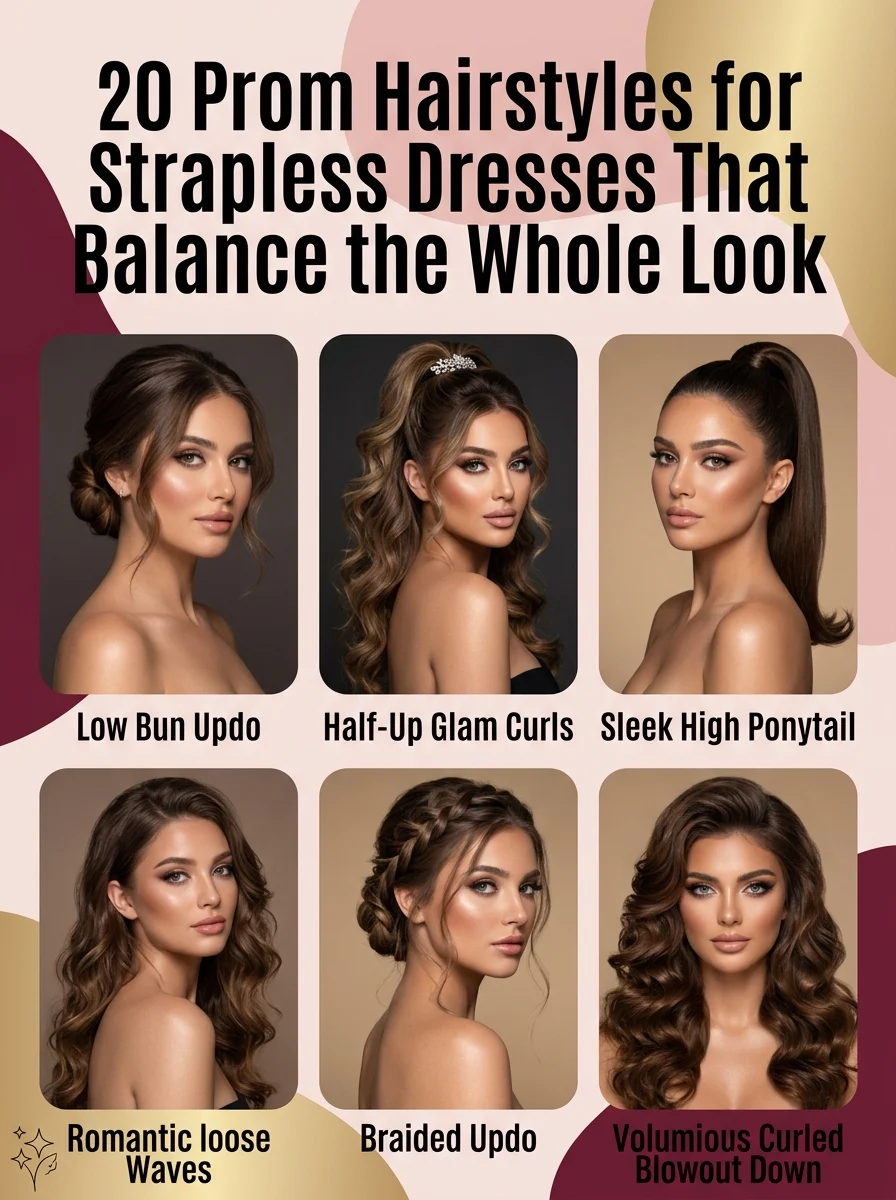
20 Prom Hairstyles for Strapless Dresses That Balance the Whole Look

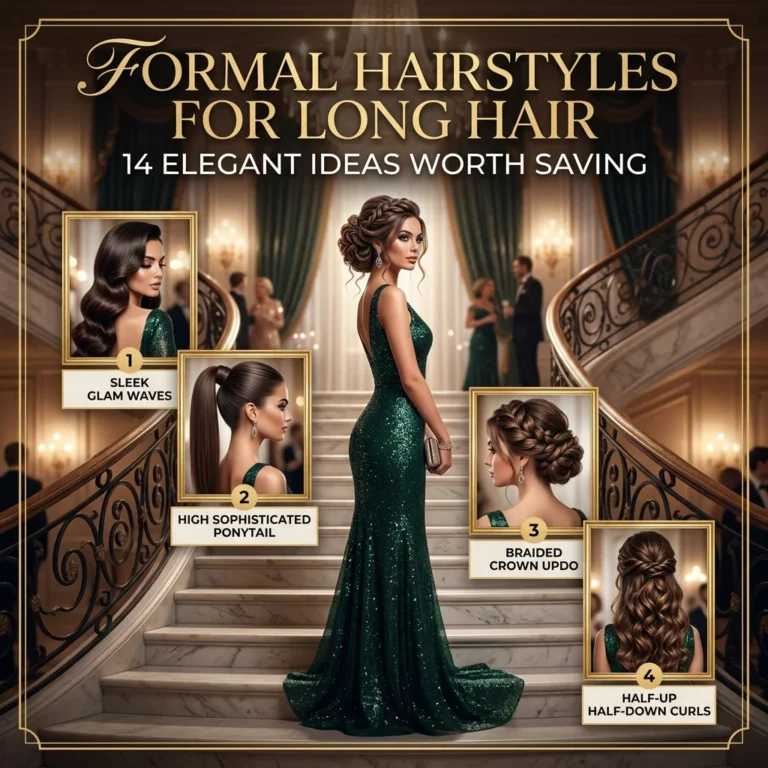
Prom hairstyles for strapless dresses are updos, half-up styles, and styled-back looks that keep the neckline, shoulders, and collarbone visible instead of covering them with loose length, which is what creates visual balance between a bare bodice and the head above it. This article gives you 20 prom hairstyles for strapless dresses: updos, half-up looks, sleek ponytails, and soft curled styles each matched to a specific dress silhouette, hair type, or accessory approach.
Done right, this pairing feels intentional rather than accidental, the dress and the hair reading as one composed look instead of two separate decisions made the same afternoon. There’s a lift to it, a sense of the neck and shoulders being framed rather than hidden, light catching bare skin the way it catches a smoothed updo or a cascade of curls pulled just off the face. It’s polished with a little bit of nerve to it.
Here are 20 prom hairstyles for strapless dresses worth saving and stealing.
Why These Prom Hairstyles for Strapless Dresses Work So Well
The pairing logic behind prom hairstyles for strapless dresses comes down to a proportion rule borrowed directly from bridal and red-carpet styling: a strapless neckline is already the boldest structural statement in the outfit, so the hair either needs to lift away from it (an updo, a half-up style, a high ponytail), or move deliberately around it, like soft curls pulled back off the shoulders, rather than compete with it by falling straight down and covering the collarbone.
This is the same reasoning that governs strapless bridal gown styling, where hair worn fully down and unstyled almost never appears on a runway or in an editorial shoot, because an open neckline with no visual anchor above it reads as unfinished rather than deliberately simple. The eye needs somewhere to land first, and a well-placed updo or a swept-back curl gives it exactly that landing point before it travels down to the dress itself.
Prom hair trends shift meaningfully year to year, but the current cycle: driven heavily by Pinterest search spikes every February through May and by prom-season TikTok tutorials that rack up millions of views each spring favors low, textured buns and face-framing curtain pieces over the tightly slicked, rhinestone-heavy updos that dominated a decade ago.
The bridal-adjacent aesthetic has crossed over hard into prom styling in the last several seasons, with soft, deliberately undone-looking updos, delicate hair vines, and loose face-framing tendrils replacing the teased, heavily hairsprayed formality that once defined the category almost entirely.
Style at a Glance
| Element | Classic Updo | Modern Textured Style |
| Philosophy | Polished symmetry, smooth lines, formal structure | Undone movement, face-framing pieces, soft asymmetry |
| Key Products | Strong-hold hairspray, smoothing gel, bobby pins | Texturizing spray, sea salt spray, hair wax |
| Key Accents | Crystal hairpins, sleek headbands, pearl combs | Hair vines, dried florals, loose tendrils |
| Best For | Ball gown or fitted mermaid dresses, formal photos | A-line or flowy strapless dresses, dancing all night |
20 Prom Hairstyles for Strapless Dresses
1. Golden Balayage Low Chignon
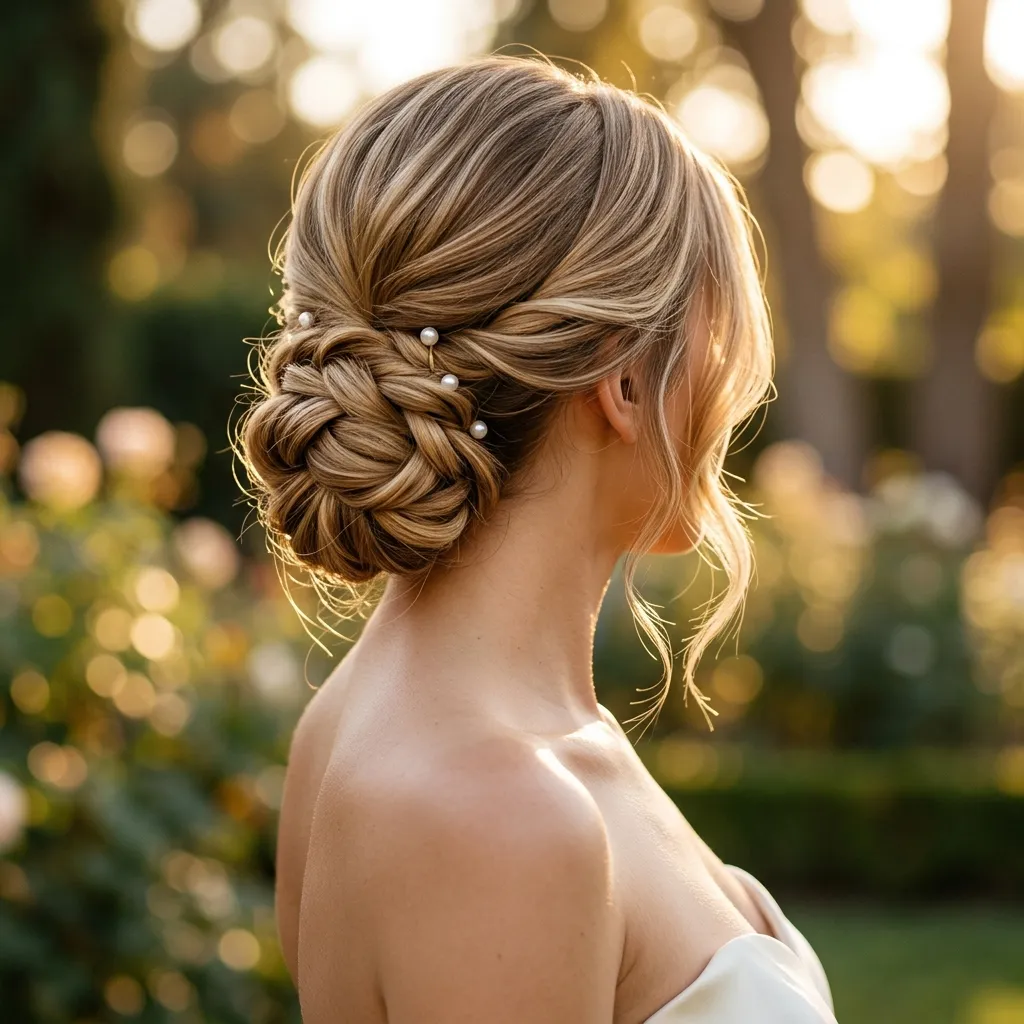
Vibe: Luminous. Hair that catches light the same way the dress does.
Why it works: A low chignon gathered at the nape keeps the entire neckline and shoulder line open, which is the exact negative space a strapless bodice needs to read as intentional rather than incomplete the same principle a stylist applies when choosing where to place a single statement earring against an otherwise bare neck.
How to get it: Blow-dry with a round brush for smoothness at the crown, gather hair low at the nape, twist once, and pin in a figure-eight pattern rather than a single tight coil. The figure-eight keeps balayage pieces visible from multiple angles instead of bunching the color into one hidden fold. Finish by gently pulling on the outer layer of the twist with your fingers to loosen it slightly, which prevents the bun from reading as stiff or overly structured against the softness of the balayage color.
Shop The Look
| Product |
| Pearl-cluster hairpin set |
| Smoothing round brush, medium barrel |
| Strong-hold finishing hairspray |
| Bobby pins, blonde-matched tone |
| Shine serum for balayage color |
2. Voluminous Hollywood Waves with Texturizing Mousse
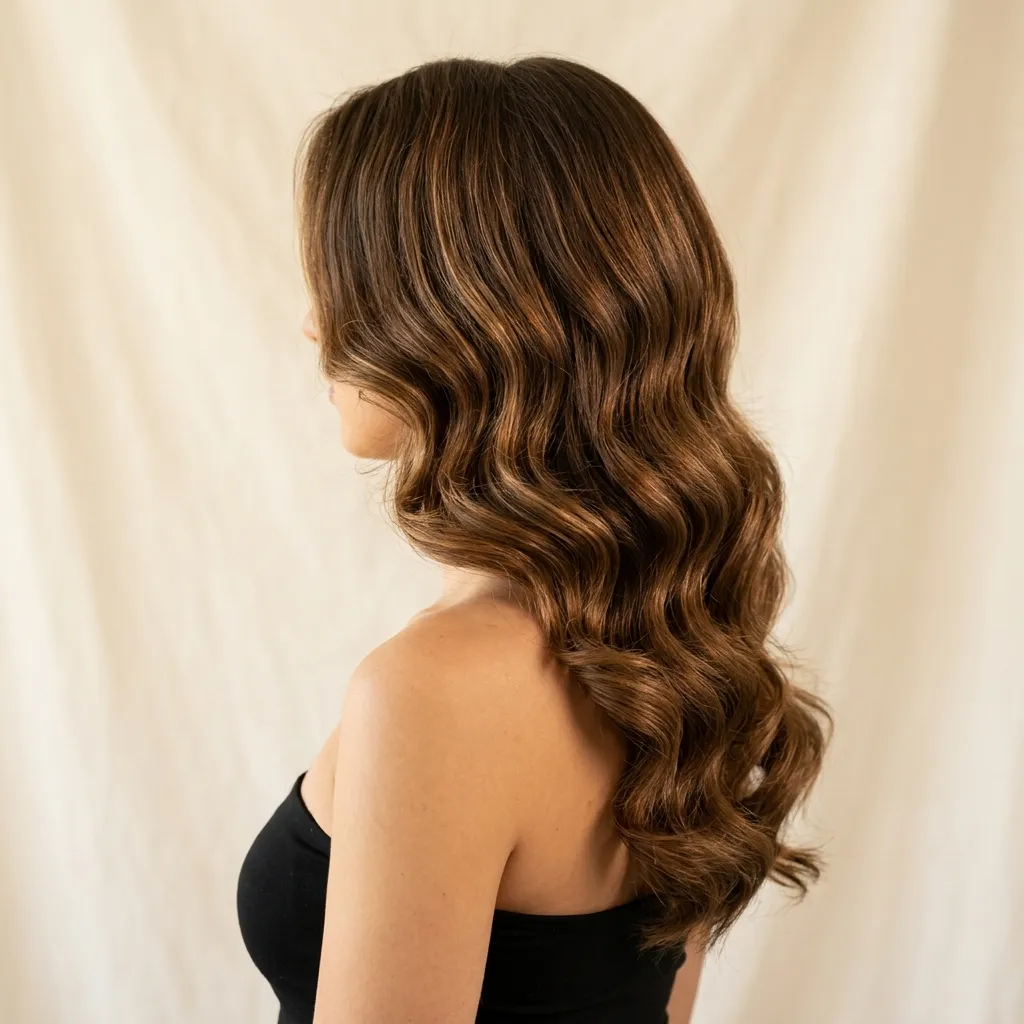
Vibe: Glamorous. Old-Hollywood curl with modern root lift.
Why it works: Deep, uniform S-waves pulled slightly back and pinned away from the face still leave the shoulders and neckline visible, which is what makes this a strapless-appropriate style despite the hair falling past the collarbone the waves are directed backward and outward rather than straight down over the bodice, the same directional-styling logic used in old studio portraiture to keep an actress’s shoulders visible in profile.
How to get it: Apply a texturizing mousse like Amika Un.done to damp roots before blow-drying for lift, then curl in 1.5-inch sections with the wand pointed vertically, and pin the front two sections back loosely with clear pins once the curls cool. Let every curl cool fully before releasing it from its pin, since curls set while warm hold significantly longer than those brushed out immediately off the iron.
💡 Quick Win: A $12 volumizing mousse applied only at the root, not the length, prevents the weighed-down look that a full-head mousse application often causes on fine or medium hair.
Shop The Look
| Product |
| Root-volumizing mousse |
| 1.5-inch curling wand |
| Clear bobby pins for front sections |
| Flexible-hold finishing spray |
| Wide-tooth comb for loosening curls |
3. Reverse French Braid into a Low Bun
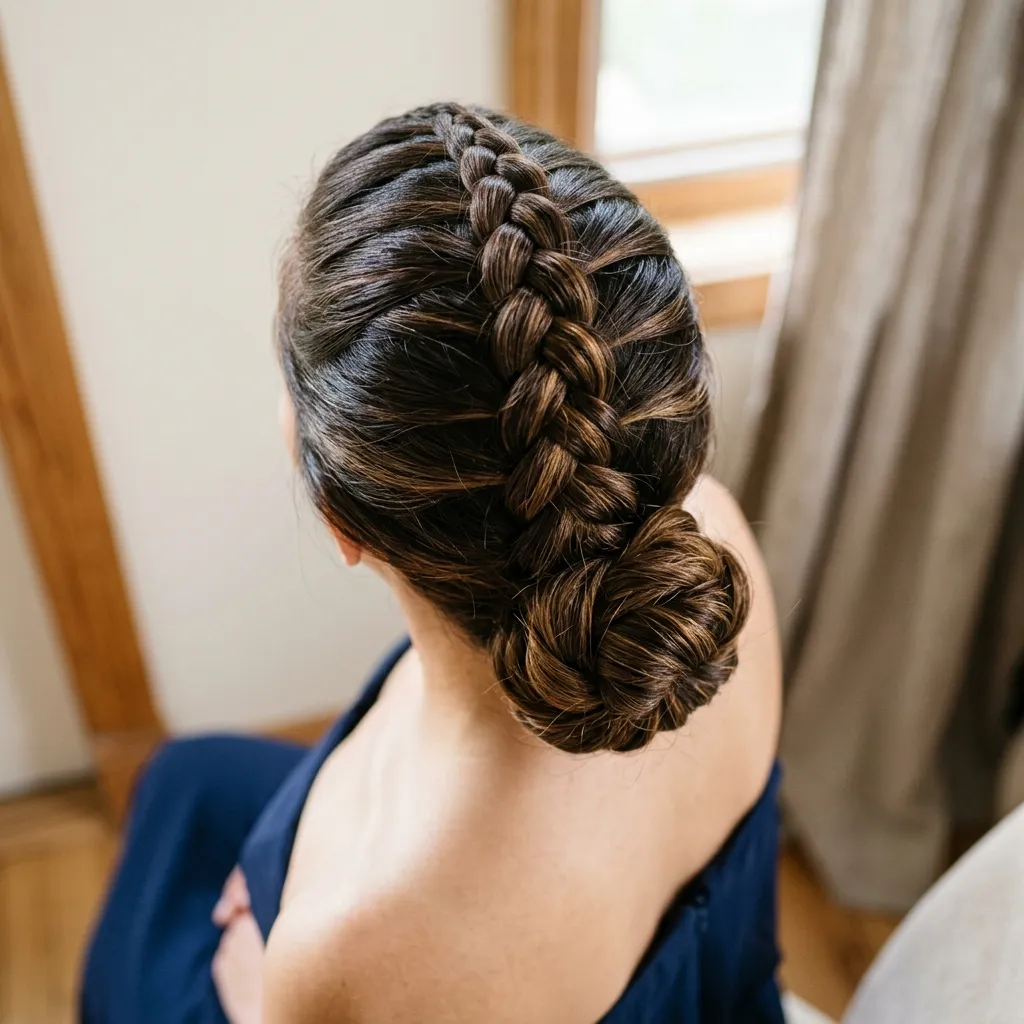
Vibe: Intricate. Detail that reads beautifully in photos taken from behind.
Why it works: A reverse French braid, also called a Dutch braid, sits raised above the scalp rather than flat against it, creating dimensional texture that a standard French braid doesn’t, and feeding it into a low bun keeps that texture as the visual focal point above an open, strapless neckline. This matters more than it might seem for prom specifically, since strapless dresses are photographed from every angle throughout the night. A braid’s raised texture holds visual interest from behind in a way a plain smoothed-back section simply can’t.
How to get it: Start the braid at the crown, crossing sections underneath rather than over as you would in a standard French braid, work down to the nape, then twist the remaining tail into a bun and secure with pins hidden underneath the braid’s raised ridges. Spritz each section with a light hold spray before crossing it, which keeps flyaways from escaping the braid as the night goes on.
Shop The Look
| Product |
| Edge control gel for braid baby hairs |
| Small clear hair elastics |
| Bobby pins, tone-matched |
| Braid spray for hold without stiffness |
| Detail comb for sectioning the braid |
4. Classic Chignon at the Nape
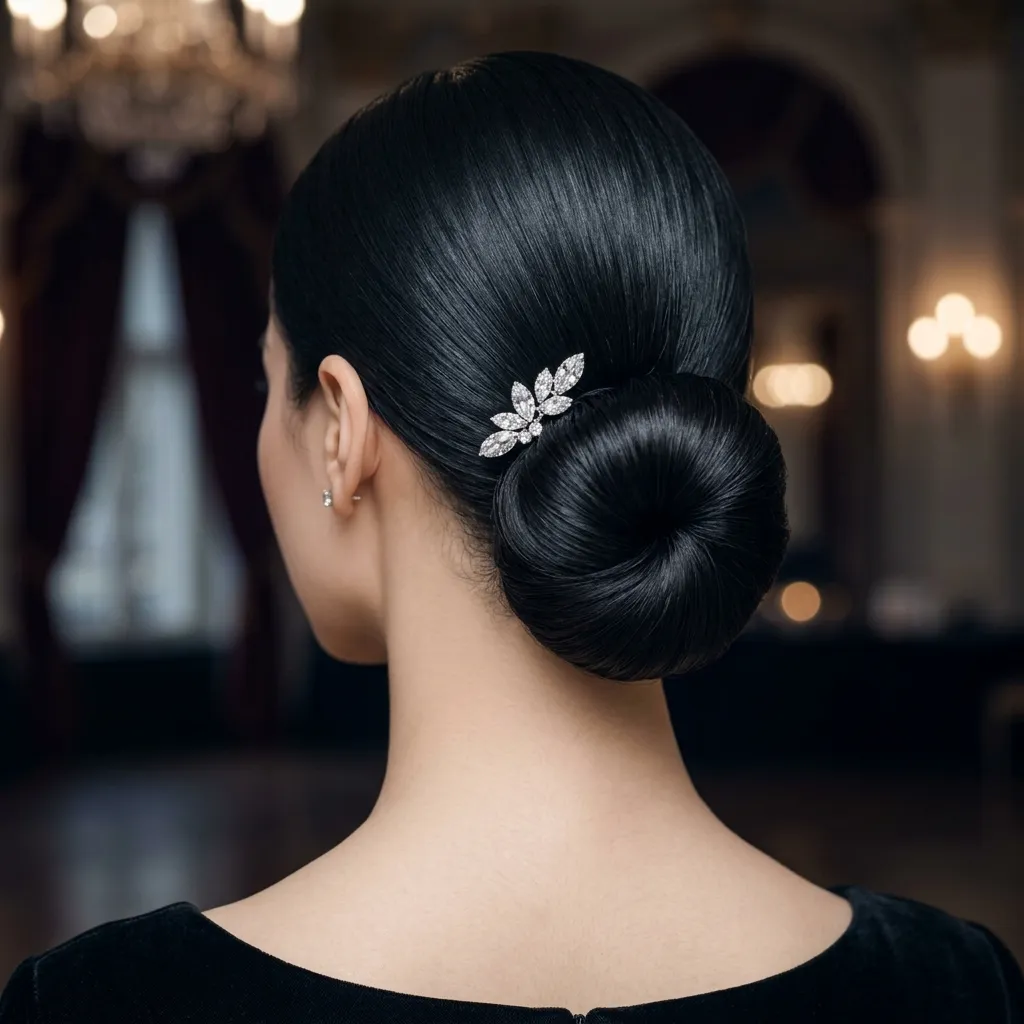
Vibe: Elegant: the most formal option on this list, and the safest with a structured gown.
Why it works: A chignon’s compact, low silhouette keeps all visual weight below the ears and off the shoulders entirely, which is the proportion choice that pairs best with a structured ball gown or mermaid-cut strapless dress anything with its own dramatic silhouette needs a quiet, controlled hair shape rather than a competing one, the same rule stylists apply when a dress already has significant volume through the skirt. Adding a large, textured updo on top of a voluminous gown creates two competing focal points instead of one cohesive silhouette, which is exactly what a tight chignon avoids.
How to get it: Smooth hair back with a boar bristle brush and a light gel, gather at the nape, twist the length around itself twice, and pin flat against the head rather than letting it sit away from the scalp, which keeps the chignon reading formal rather than casual. Check the chignon’s position in profile before finishing. It should sit at or just below the hairline where the neck meets the head, not higher, or the silhouette starts to read as a smaller version of a crown updo rather than a true chignon.
💡 Quick Win: A single oversized crystal hairpin placed just above the twist does more visual work than a full cluster of small pins scattered through the style.
Shop The Look
| Product |
| Smoothing styling gel |
| Boar bristle smoothing brush |
| Large crystal statement hairpin |
| Bobby pins, matte black |
| Long-hold setting spray |
5. Rich Brunette with Face-Framing Money Pieces
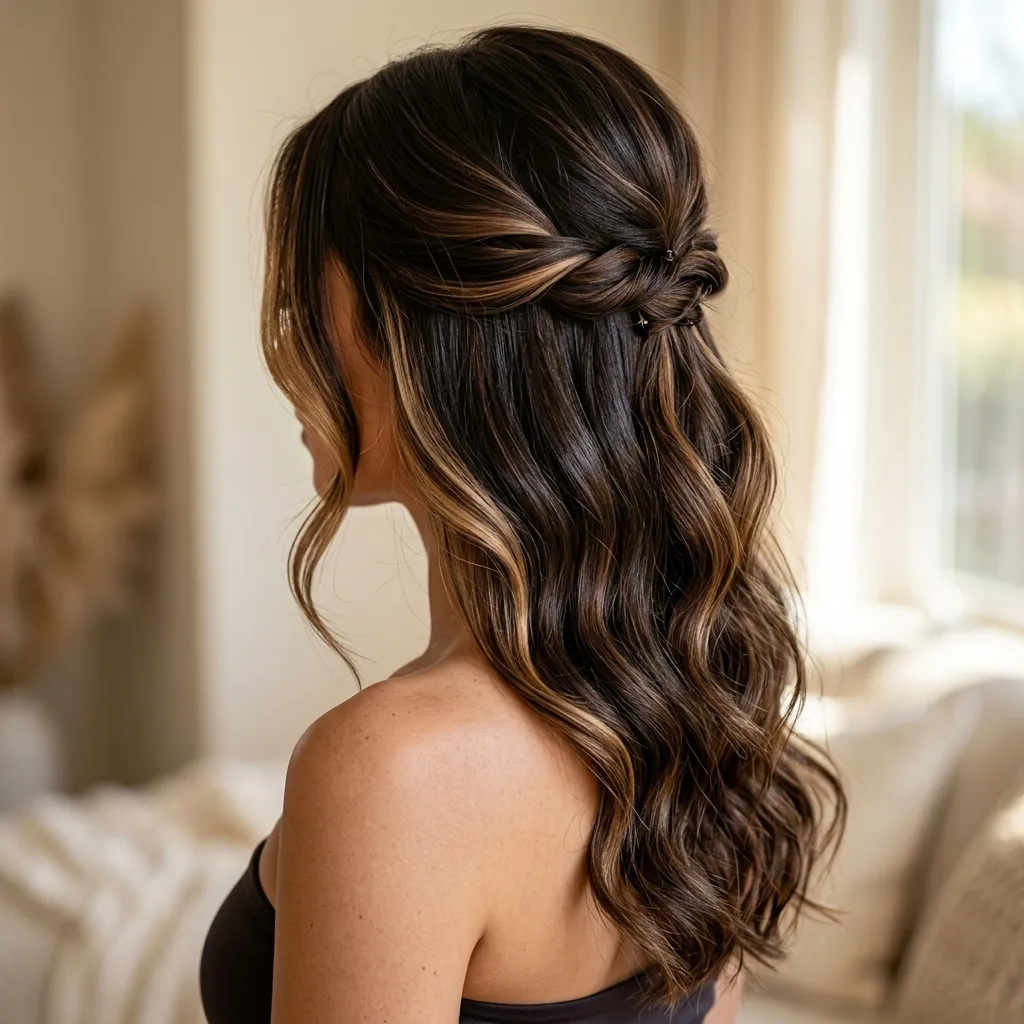
Vibe: Warm. Color doing quiet work around the face while the rest stays classic.
Why it works: Face-framing highlights, or “money pieces,” concentrate lighter tone exactly where a half-up style leaves hair visible near the face, which means the color investment shows up precisely where the eye lands first instead of being diluted across a full head of foils that a gathered updo would mostly hide anyway.
How to get it: Curl the two front face-framing sections separately from the rest of the hair using a slightly smaller barrel than the back sections, which keeps the highlighted pieces more defined and visually separate from the deeper brunette base gathered behind them. Leave these two pieces loose even if the rest of the hair is gathered into a half-up style, since pinning them back defeats the purpose of the highlight placement entirely.
Shop The Look
| Product |
| 1-inch curling wand for face-framing pieces |
| Color-safe shine spray |
| Small clear elastics for the half-up section |
| Heat protectant spray |
| Root-touch-up concealer for regrowth |
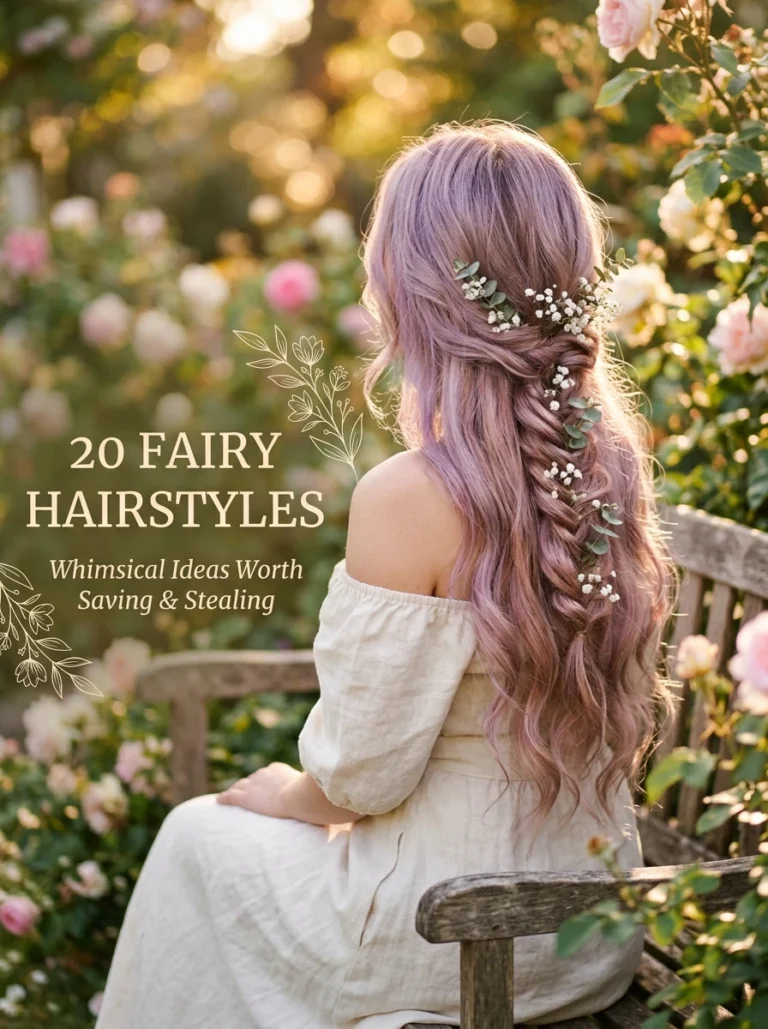
6. Pearl-Studded Hair Vine Halo
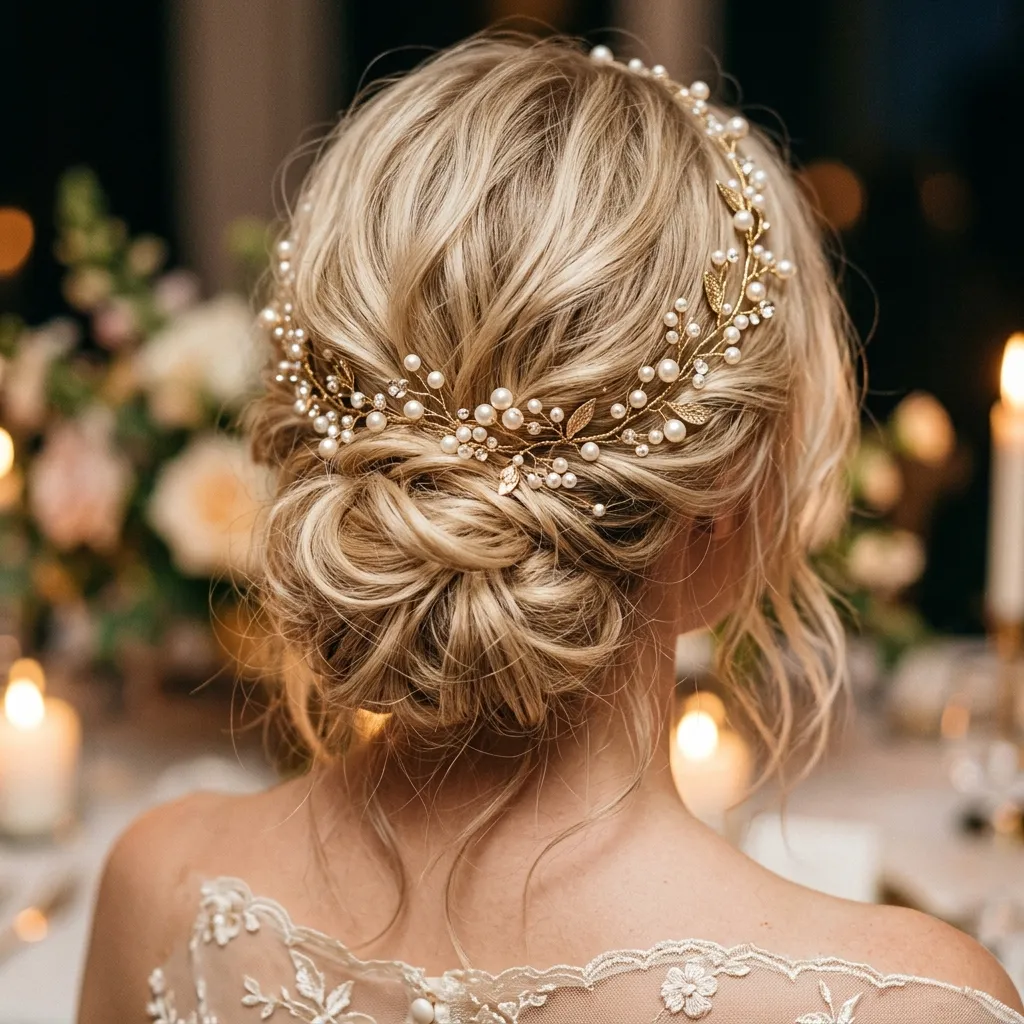
Vibe: Delicate, the bridal-adjacent detail that elevates a simple updo instantly.
Why it works: A hair vine wraps around the head rather than sitting as a single fixed piece, which lets it follow the natural shape of a loose bun or half-up style instead of fighting it the way a rigid headband can this flexibility is what makes vines read as woven into the style rather than clipped on top of it, and it’s the same reason bridal stylists reach for wire-based vines over fixed combs when a hairstyle has any texture or movement to it.
How to get it: Build the base updo first and let it set with hairspray, then wrap the pearl vine starting at one ear, crossing over the crown, and tucking the end into the bun itself so both ends are secured and invisible. Test the vine’s placement before committing to the final wrap, moving it even half an inch forward or back changes how much of it is visible from the front versus hidden in the hair.
💡 Quick Win: A $15–25 pearl hair vine from a bridal accessory retailer does more to elevate a simple loose bun than any additional curling or texturizing step would.
Shop The Look
| Product |
| Pearl and gold hair vine |
| Long-hold setting spray |
| Bobby pins for securing vine ends |
| Loose-hold texturizing spray for the base updo |
| Small gold hairpins as backup anchors |
7. Sleek High Ponytail with a Silk Wrap
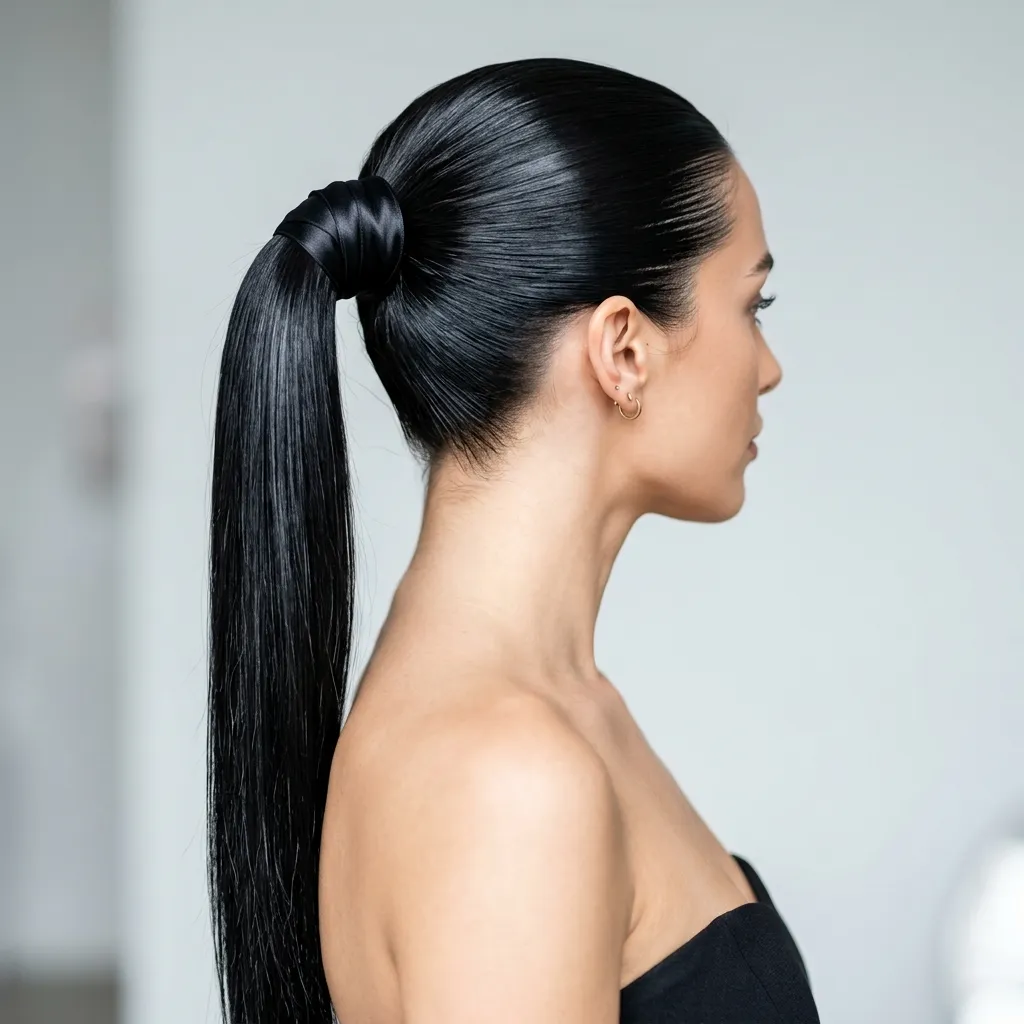
Vibe: Sharp, the most modern, editorial option on this list.
Why it works: A high ponytail lifts all the hair’s visual weight above and behind the head entirely, leaving the shoulders and collarbone completely unobstructed the maximum possible negative space a strapless neckline can be given, which is why this style photographs so cleanly from every angle a prom photographer might shoot from.
How to get it: Smooth hair back with a flat-back comb and strong gel, secure the ponytail high on the crown with a snag-free elastic, then wrap a length of silk ribbon around the base to hide the elastic completely rather than leaving it visible. Smooth the crown in small sections rather than one large sweep, working each section flat against the scalp before moving to the next, which prevents the small bumps and ridges that a rushed single pass tends to leave behind.
Shop The Look
| Product |
| Silk ribbon in a coordinating color |
| Flat-back styling comb |
| Strong-hold smoothing gel |
| Snag-free hair elastic |
| Edge control brush for a clean hairline |
8. Deep Side Part Waterfall Waves
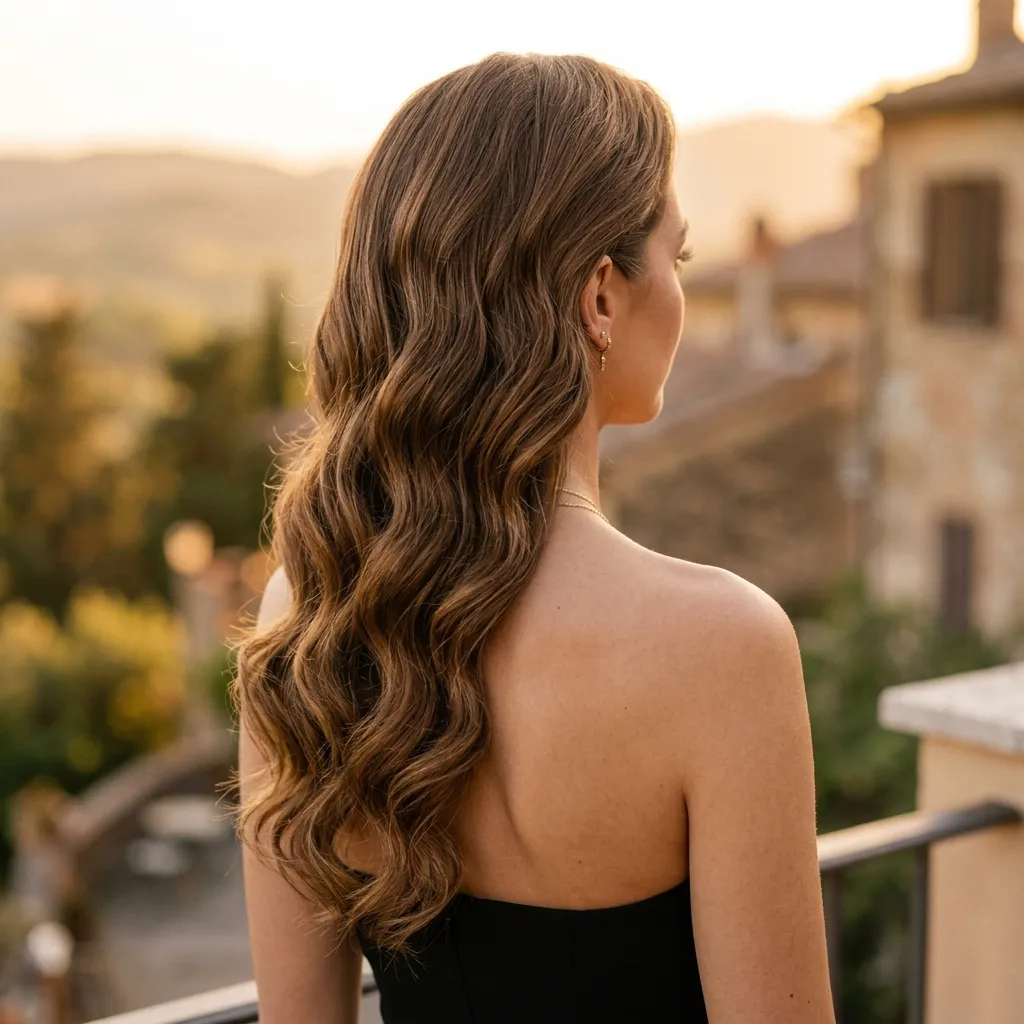
Vibe: Soft. Asymmetry that still respects the strapless neckline’s need for open space.
Why it works: A deep side part directs the bulk of the hair toward one shoulder while sweeping the rest back behind the opposite one, an asymmetrical balance that keeps at least one side of the collarbone and shoulder fully visible even though the style technically falls down rather than up. This asymmetry also gives the style a more candid, movement-forward quality than a fully centered or fully swept-back look, which suits dresses with asymmetrical draping or a one-shoulder detail particularly well.
How to get it: Part hair roughly two inches off-center, curl in loose 1.5-inch waves, then use your fingers rather than a comb to sweep the heavier side forward over the shoulder and pin the lighter side back behind the ear on the opposite side. Check the balance from the front in a full-length mirror before finalizing. The goal is roughly two-thirds of the hair’s visual weight on the covered shoulder and one-third swept back, not an even split.
💡 Quick Win: A single decorative pin placed behind the ear on the swept-back side is enough to keep this style from sliding forward and covering both shoulders by the end of the night.
Shop The Look
| Product |
| 1.5-inch curling wand |
| Decorative pin for the swept-back side |
| Lightweight flexible-hold spray |
| Shine-boosting hair oil |
| Wide-tooth comb for loosening curls |
9. Hot Tool Waves for Soft, Directional Movement
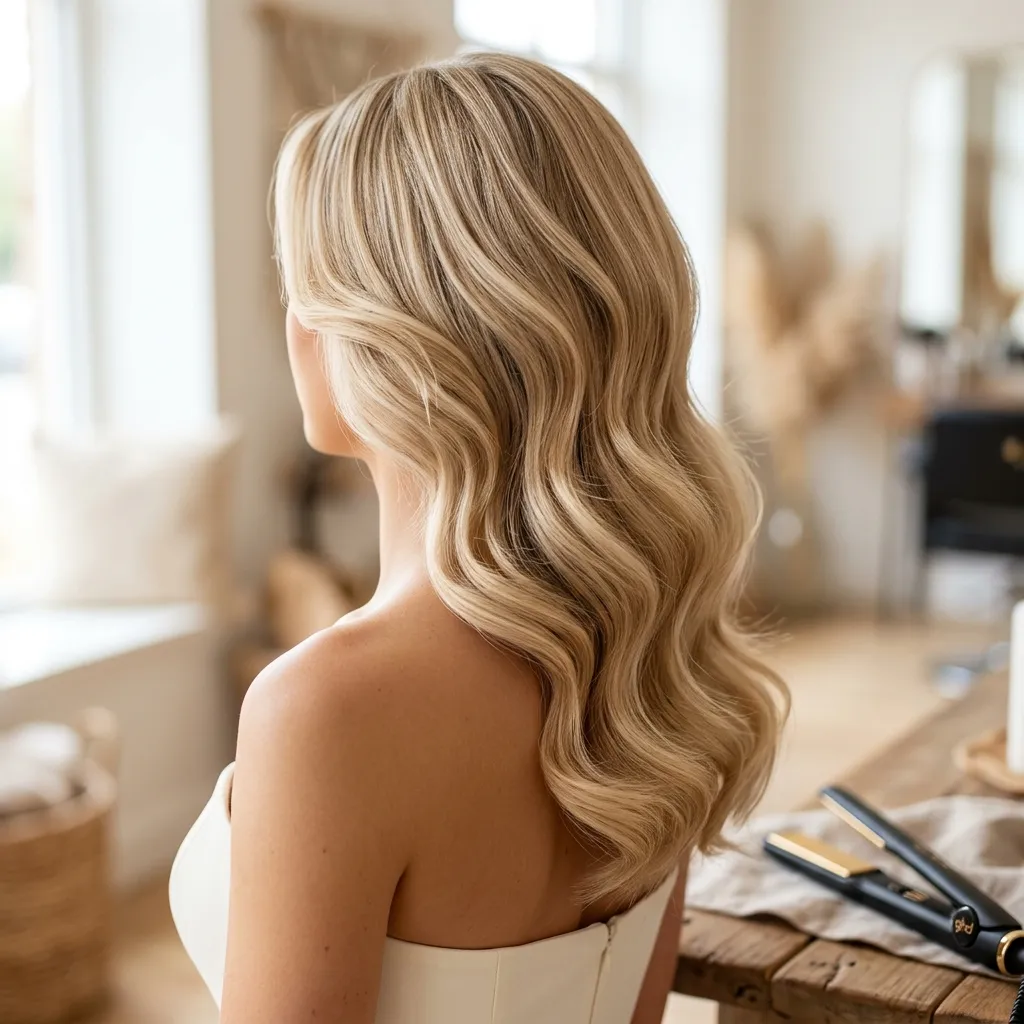
Vibe: Airy, waves with movement rather than a fixed curl shape.
Why it works: Flat-iron waves, created by clamping and twisting the iron through each section rather than wrapping hair around a curling barrel, produce a looser, more directional bend than a curling wand the technique gives you control over which way each wave falls, which matters when you need the hair to move backward and away from a bare neckline rather than straight down over it.
How to get it: Clamp a 1-inch flat iron at the root, twist it a half-turn away from your face, and glide down slowly, alternating twist direction section by section so the finished waves fall in a natural, slightly irregular pattern rather than a uniform curl. Run a wide-tooth comb through the finished waves once they’ve cooled, which breaks the wave into softer, more directional movement rather than leaving it in tight, defined S-shapes.
Shop The Look
| Product |
| 1-inch flat iron with rounded edges |
| Heat protectant spray |
| Lightweight sea salt texturizing spray |
| Wide-tooth comb |
| Flexible-hold finishing spray |
10. Short Bob Half-Up for Strapless Necklines
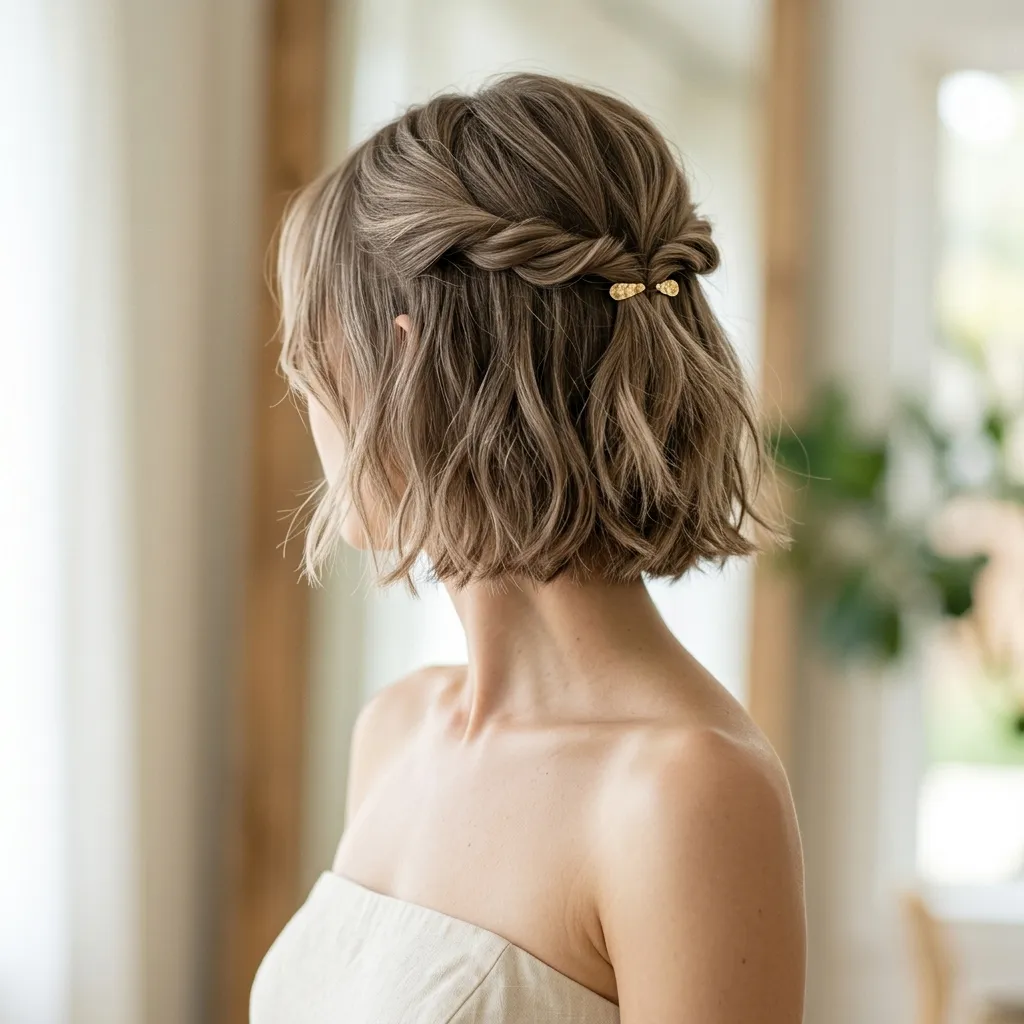
Vibe: Fresh. Proof that short hair doesn’t limit strapless-dress styling options.
Why it works: A full updo isn’t realistic on hair shorter than the chin because there isn’t enough length to gather and pin securely for a full evening, so a half-up style solves the same proportion problem, creating lift and openness around the neckline, using only the crown section, which even a bob has enough length to work with. This is worth stating plainly because a lot of prom hair inspiration defaults to long-hair updos without acknowledging that a bob needs a fundamentally different technique, not a scaled-down version of the same style.
How to get it: Section a two-inch strip from each side of the crown, twist them back and cross them over each other at the back of the head, then pin flat with two small hairpins, leaving the rest of the bob loose and lightly curled with a 1-inch wand. Keep the twisted crown sections tight against the scalp rather than loose, since a bob’s shorter length has less natural weight to hold a looser twist in place through movement.
Shop The Look
| Product |
| Small gold hairpins, set of six |
| 1-inch curling wand for short lengths |
| Lightweight texturizing spray |
| Fine-tooth sectioning comb |
| Flexible-hold finishing spray |
11. Copper Red Curls for Warm Undertones
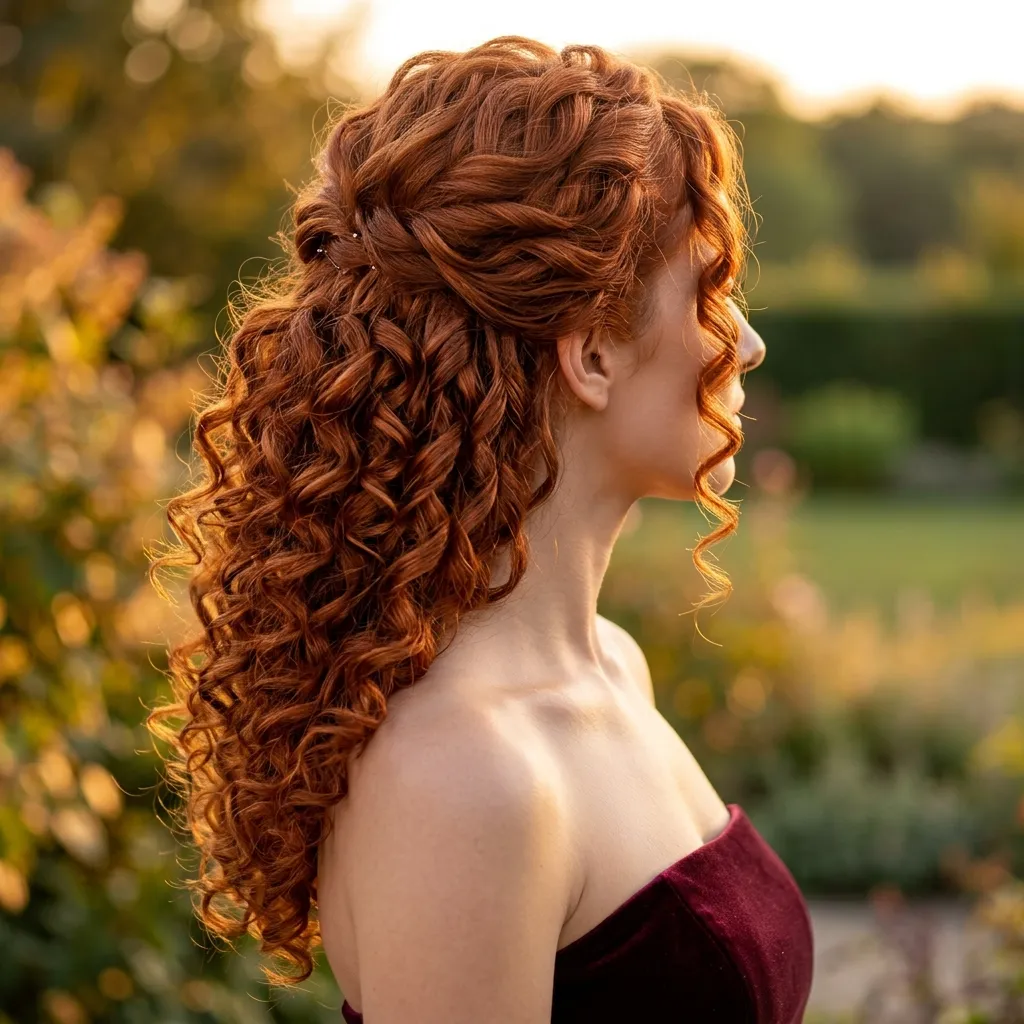
Vibe: Bold. A color saturated enough to be the outfit’s second statement piece.
Why it works: Copper and auburn tones reflect warm light more intensely than neutral browns, which means every curl catches and holds highlight individually a visual effect that rewards a tighter curl pattern because there’s more surface area per inch to catch that light than a loose wave would offer.
How to get it: Curl in 1-inch sections for a tighter, more defined ringlet, alternate curl direction away from the face on each section, then pin the crown pieces back loosely so the color and curl definition stay visible from the front rather than falling forward over the face. Use a color-depositing gloss in the weeks before prom rather than immediately before, since fresh color-correcting treatments can occasionally shift a copper tone slightly warmer or cooler than intended right after application.
Shop The Look
| Product |
| 1-inch curling wand |
| Color-safe shine serum for red tones |
| Clear pins for the crown section |
| Heat protectant spray |
| Purple-free color-depositing gloss for copper hair |
12. Braided Crown Updo
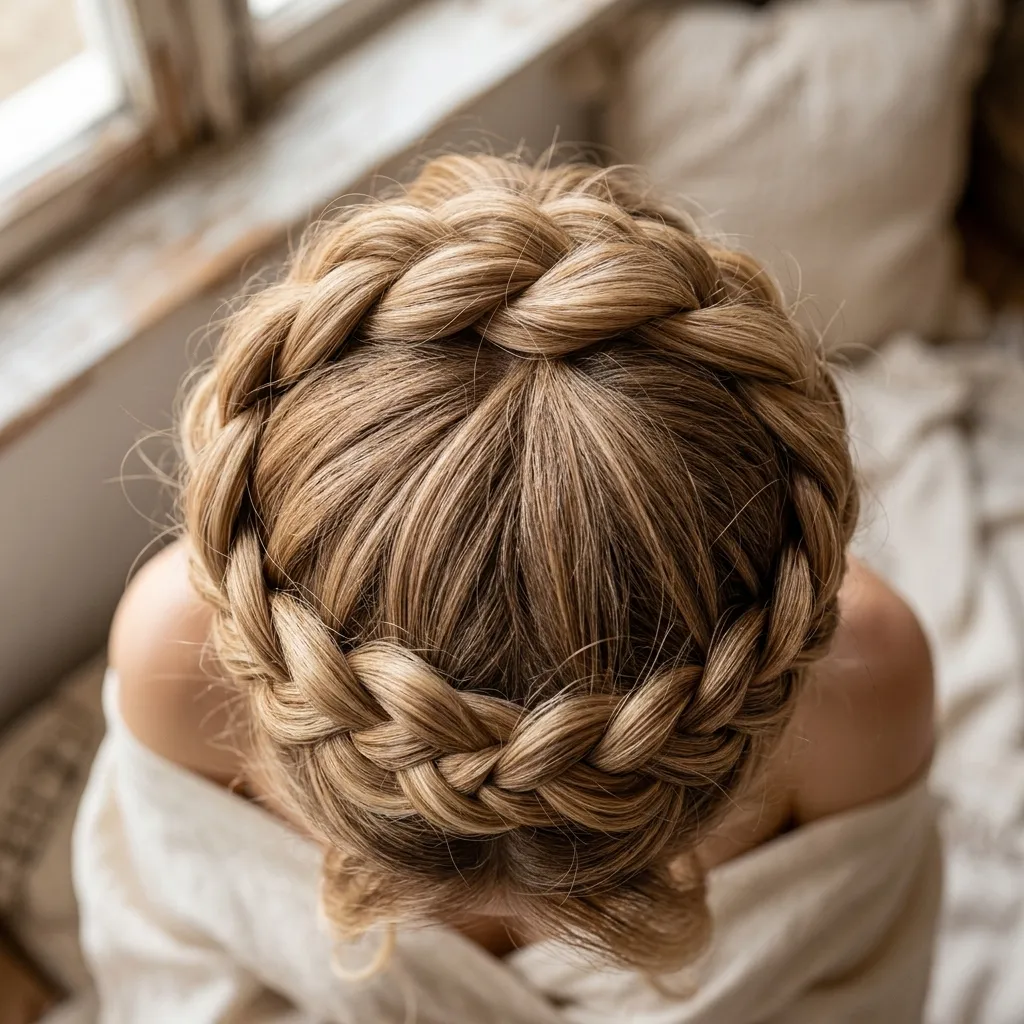
Vibe: Romantic. A woven silhouette that reads beautifully from any direction.
Why it works: A braided crown distributes hair’s visual weight evenly around the head rather than concentrating it at the back or nape, which creates a balanced, 360-degree silhouette, a genuine advantage over a bun-based updo for dresses with a low back or cutout detail that will also be seen from behind.
How to get it: Braid two Dutch braids starting at each temple, cross them at the back of the crown, pin the ends flat and tucked under the opposite braid, then gently loosen each braid’s edges with your fingers for volume rather than leaving them tight and flat. Anchor the crossed ends with at least four bobby pins arranged in an X pattern rather than two straight pins, since this is the point of the style under the most tension throughout the night.
💡 Quick Win: Loosening the braid edges with your fingers after braiding, rather than braiding loosely from the start, gives more even, controlled volume without the braid falling apart mid-evening.
Shop The Look
| Product |
| Braid-specific texturizing spray |
| Bobby pins, blonde-matched tone |
| Fine-tooth sectioning comb |
| Long-hold finishing spray |
| Small clear elastics for braid ends |
13. Clip-In Extensions for Extra Updo Volume
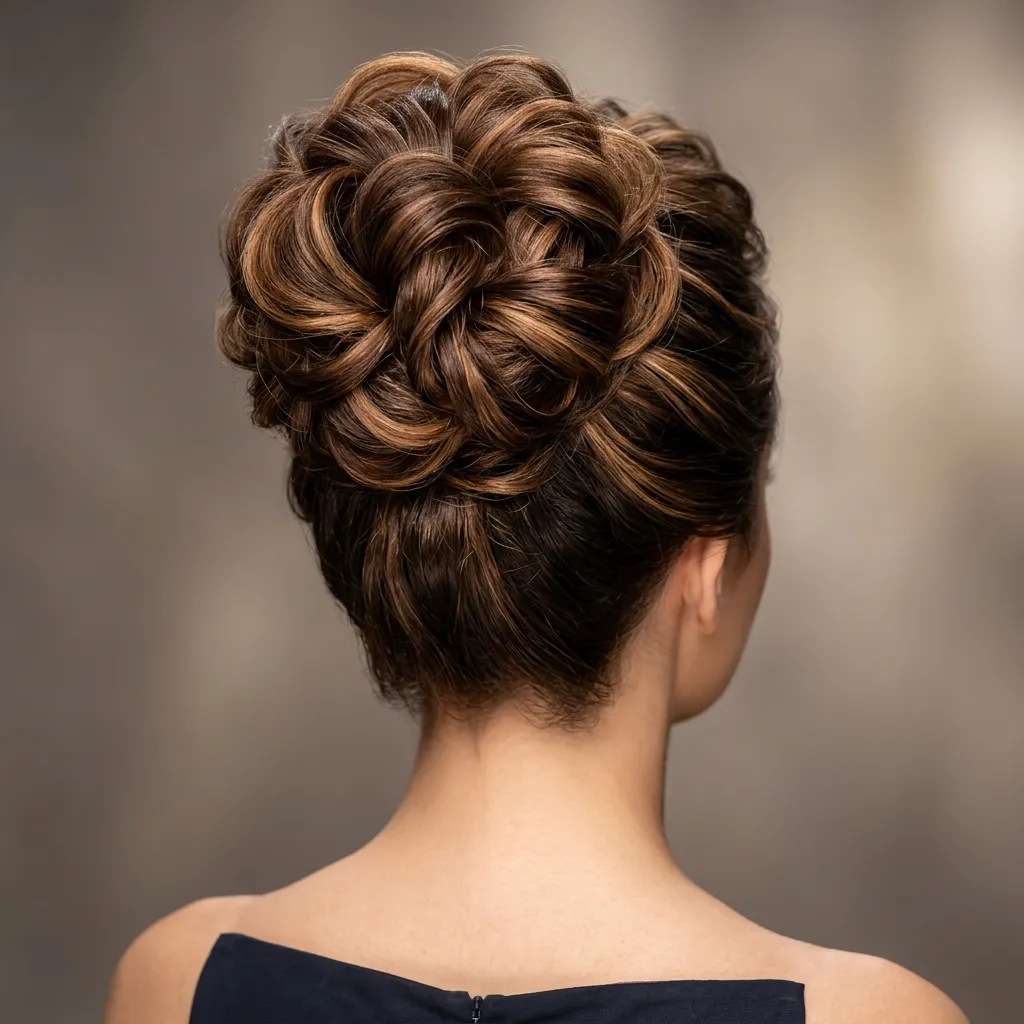
Vibe: Full, an updo with the visual weight a strapless bodice deserves.
Why it works: A strapless dress leaves a large expanse of bare skin at the shoulders and chest, and thin or fine hair pulled into a small updo can look visually undersized against that much negative space. Clip-in wefts add the volume needed to balance the proportion without changing the hair’s actual length or requiring a salon visit or a longer growing-out period.
How to get it: Clip in one weft at the crown and one at the nape before building the updo, teasing the natural hair at the roots first so the clip attachment points are fully hidden, then style the combined hair as a single unit rather than styling around the extensions separately. Color-match the wefts to your mid-lengths rather than your roots if you have any balayage or highlights, since the extensions will blend into the visible, styled portion of the updo rather than the hidden root section.
Shop The Look
| Product |
| Clip-in hair extension wefts, color-matched |
| Teasing comb for root volume |
| Long-hold finishing spray |
| Bobby pins, extra-strength hold |
| Heat protectant spray for blending curls |
14. Crystal Hairpins Scattered Through a Loose Updo
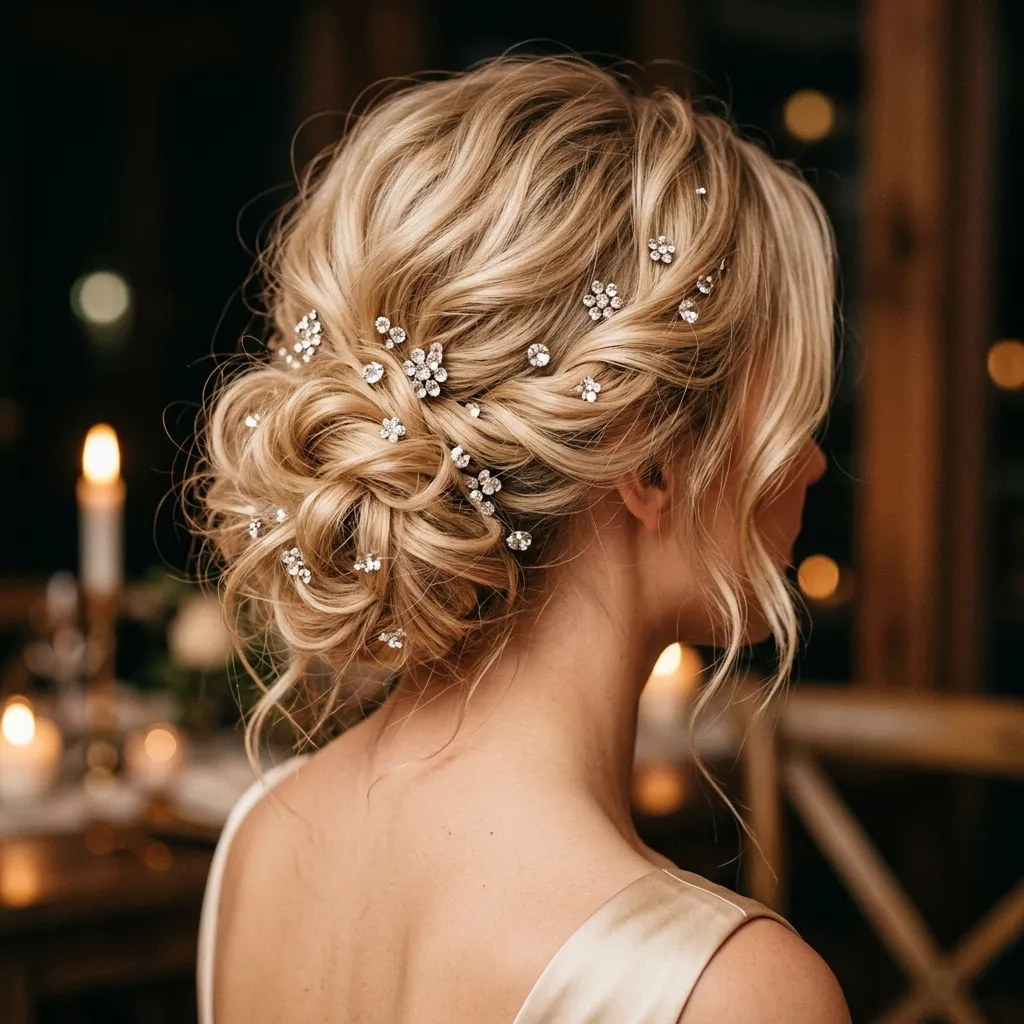
Vibe: Sparkling, the updo that photographs well under both flash and low light.
Why it works: Scattering several small crystal pins irregularly through a loose bun, rather than clustering them in one spot, catches camera flash from multiple angles throughout the night, a lighting-behavior principle borrowed from how jewelry designers place stones for maximum sparkle under moving light rather than concentrating brilliance in one fixed area. A single dense cluster of pins, by contrast, only catches light well from one or two angles and can look comparatively flat the rest of the time.
How to get it: Build a deliberately loose, slightly undone bun first, then place five to seven small crystal pins at irregular intervals and depths rather than in a straight line or single cluster, angling a few slightly outward so they catch light from the side as well as the front. Vary the depth at which each pin sits (some closer to the scalp, some further out in the twist) since uniform depth placement is what makes scattered pins accidentally look patterned rather than naturally distributed.
Shop The Look
| Product |
| Small crystal hairpin set, 6-8 pieces |
| Texturizing spray for a deliberately loose bun |
| Bobby pins for base structure |
| Long-hold setting spray |
| Shine spray for extra light reflection |
15. Blowout Volume at the Crown Before Any Styling
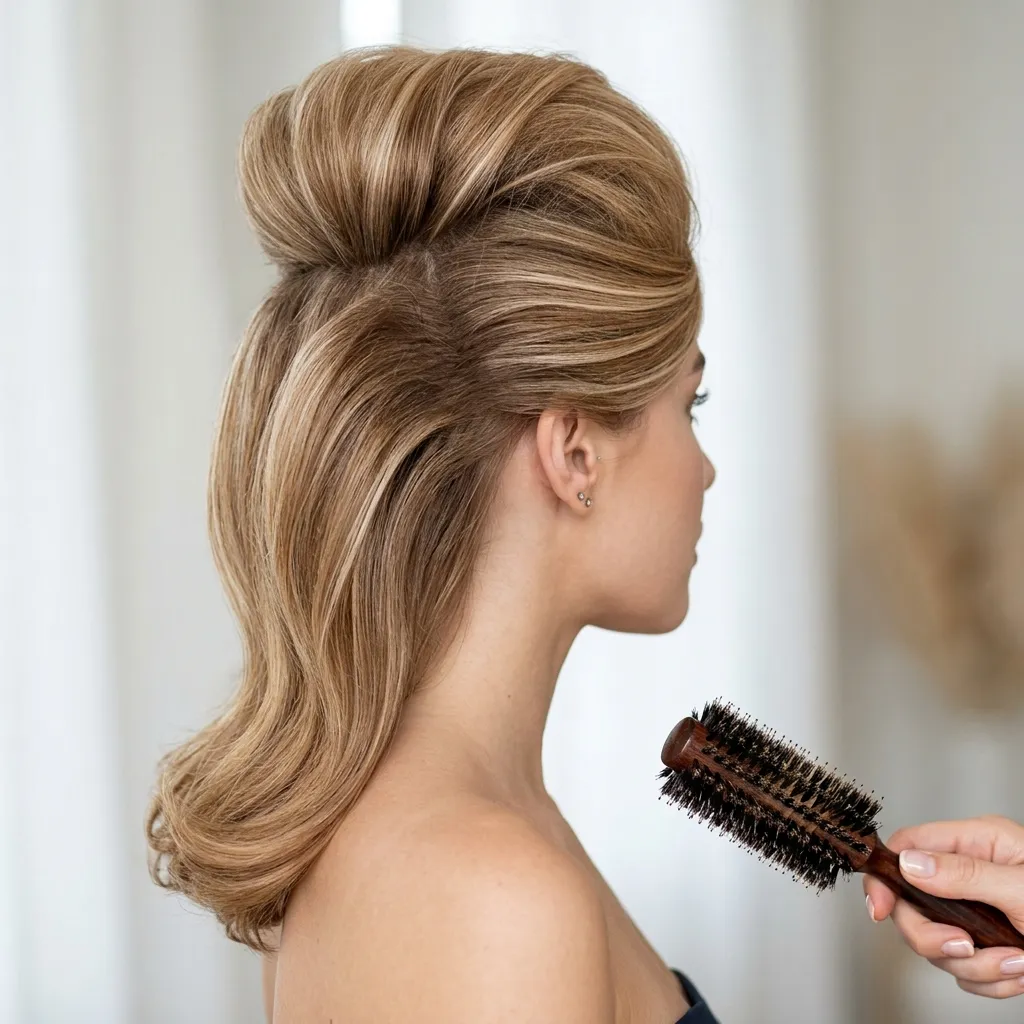
Vibe: Lifted. The foundation step most prom hairstyles skip and shouldn’t.
Why it works: Nearly every style on this list (updo, half-up, or curled and pinned back) depends on root volume to avoid looking flat against the head by the time photos happen two hours into the night, and a proper blowout with a round brush builds that lift into the hair’s actual structure rather than relying on backcombing alone to fake it later.
How to get it: Blow-dry in one-inch sections using a large round brush, directing airflow against the direction of growth at the root for the first thirty seconds of each section before smoothing the airflow downward for the rest of the section this sequence builds lasting lift that backcombing alone can’t replicate. Let each section cool completely, ideally with a cool-shot burst from the dryer, before releasing it from the brush and moving to the next section, since hair sets its shape as it cools rather than while it’s still hot.
Shop The Look
| Product |
| Large round brush, ceramic barrel |
| Root-lift volumizing spray |
| High-heat blow dryer with concentrator |
| Heat protectant spray |
| Duckbill clips for root-lift sectioning |
16. Center Part Sleek Low Bun
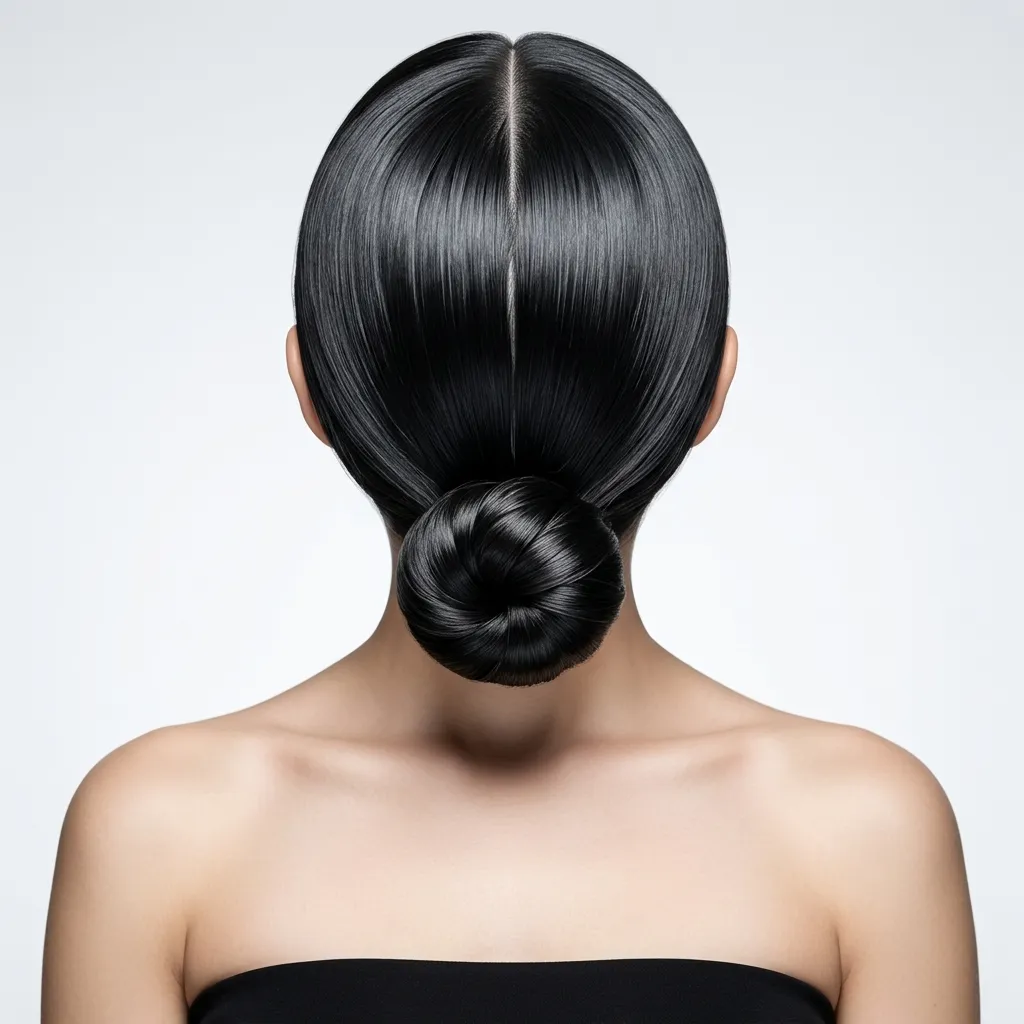
Vibe: Minimal, the most architectural option, built for a simple dress.
Why it works: A perfectly centered part creates bilateral symmetry that draws the eye straight down the face rather than to either side, a compositional choice that pairs specifically well with minimalist strapless dresses that have no embellishment competing for attention the hair becomes the only asymmetry-free element in the whole look, reinforcing rather than distracting from a clean, unembellished neckline. This is a look that depends heavily on precision; a slightly off-center part undermines the entire symmetry the style is built around far more noticeably than it would in a looser, more textured style.
How to get it: Use a rat-tail comb to carve the part exactly at the center before applying any product, smooth both sides back with a light gel using flat palms rather than a brush, and secure the low bun with pins placed in a cross pattern for maximum hold through movement. Check the part’s accuracy from directly in front of a mirror, not at an angle, since even a well-centered part can look crooked when checked from the side.
Shop The Look
| Product |
| Rat-tail comb for a precise center part |
| Smoothing gel, light hold |
| Bobby pins, matte black |
| Edge control brush |
| Long-hold finishing spray |
17. Platinum Blonde Sleek Updo
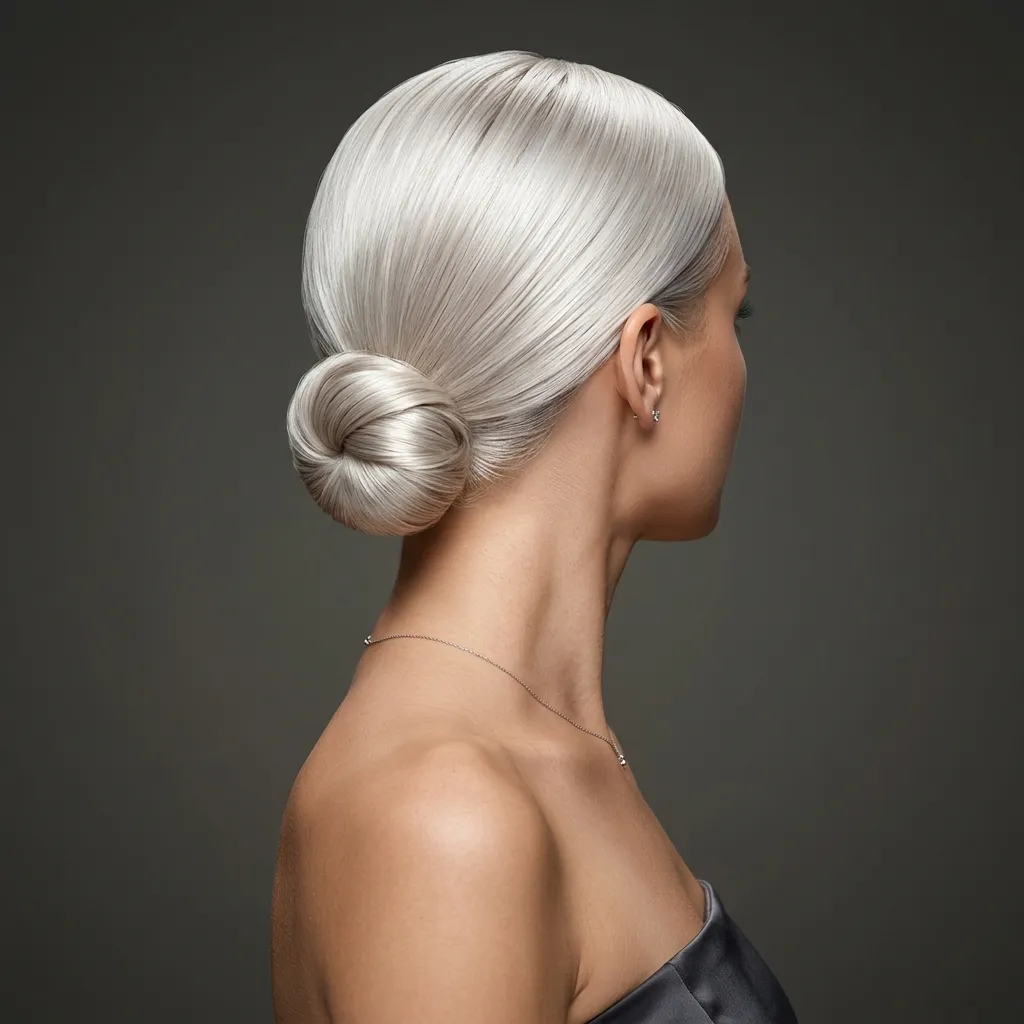
Vibe: Bold, the highest-contrast color and finish combination on this list.
Why it works: Platinum hair reflects significantly more light than any natural tone, and combining that reflectivity with a glass-smooth updo doubles down on shine rather than balancing it with texture, a deliberate, high-impact choice that reads dramatically in flash photography specifically, where texture tends to scatter light unpredictably but a smooth surface reflects it in one clean, controlled sheet.
How to get it: Use a violet-tinted smoothing gel rather than a clear one to keep brassiness at bay through the styling process, smooth hair back fully before gathering, and finish with a lightweight shine spray rather than a heavier oil, which can dull platinum’s characteristic icy tone. Wash with a purple shampoo no more than 48 hours before prom, since washing the same day can leave hair slightly too slippery to hold a sleek updo’s tension.
💡 Quick Win: A violet-tinted styling gel under $18 does double duty as both a smoothing product and a toner touch-up, useful if your last salon appointment was more than three weeks ago.
Shop The Look
| Product |
| Violet-tinted smoothing gel |
| Purple shampoo for pre-event wash |
| Lightweight shine spray |
| Bobby pins, silver-toned |
| Long-hold finishing spray |
18. Textured Low Ponytail with Face-Framing Pieces
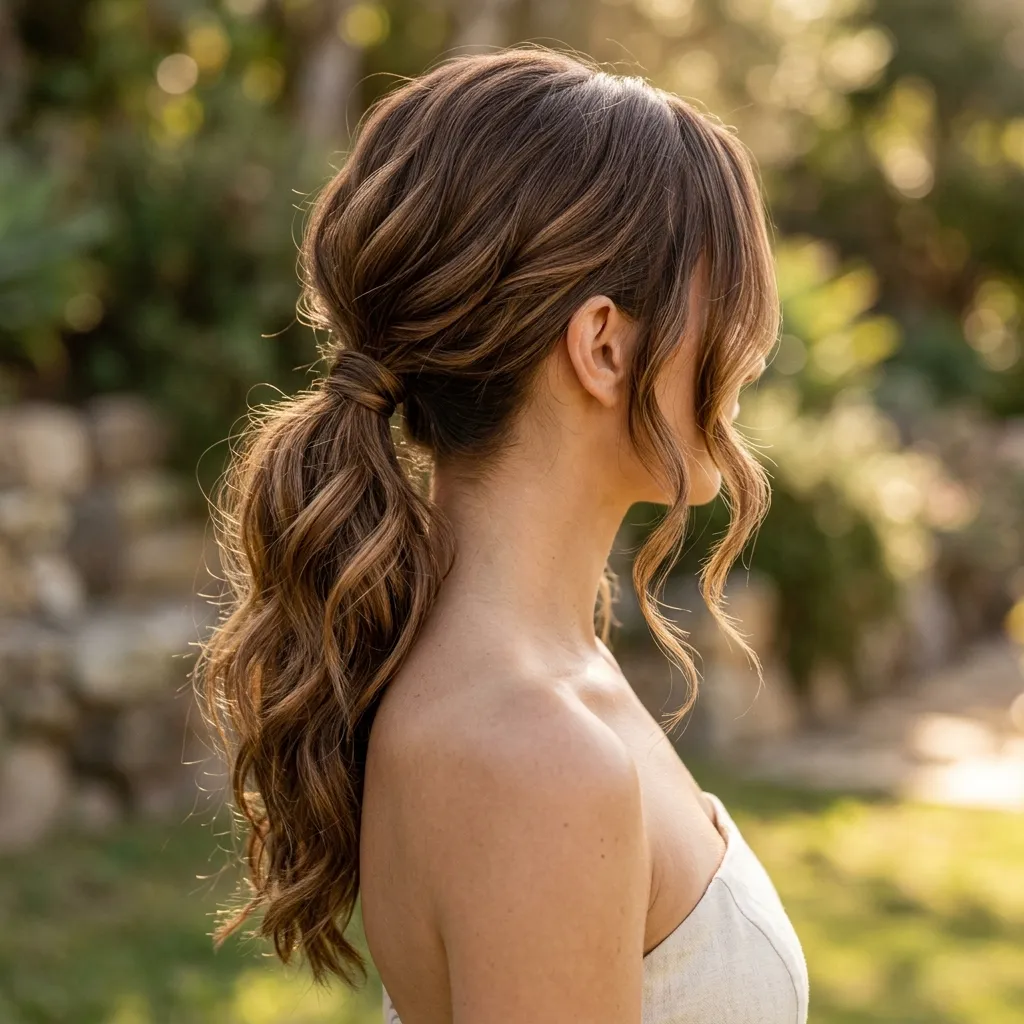
Vibe: Relaxed, polish without the severity of a fully sleek pull-back.
Why it works: Leaving two curled sections loose at the front softens the hard structural line a low ponytail would otherwise create, giving the style a more approachable, romantic quality while the gathered length still keeps the shoulders and neckline largely open the way a strapless dress calls for. This middle-ground approach, neither fully sleek nor fully down, suits readers who find a full high ponytail too severe but still want the openness a gathered style provides.
How to get it: Gather the ponytail low and loosely, pulling small pieces out from the sides with your fingers before securing the elastic fully, then curl only the two face-framing sections you left out and leave the rest of the ponytail’s texture as-is rather than smoothing it flat. Tug gently at the crown of the ponytail after securing it to create a small amount of intentional volume, which keeps the base from looking flat against the head even though the overall style reads as relaxed.
Shop The Look
| Product |
| Snag-free elastic for the base ponytail |
| 1-inch curling wand for face-framing pieces |
| Texturizing spray for the ponytail body |
| Shine serum |
| Bobby pins for loose front sections |
19. Glossy Finish for a Polished Updo
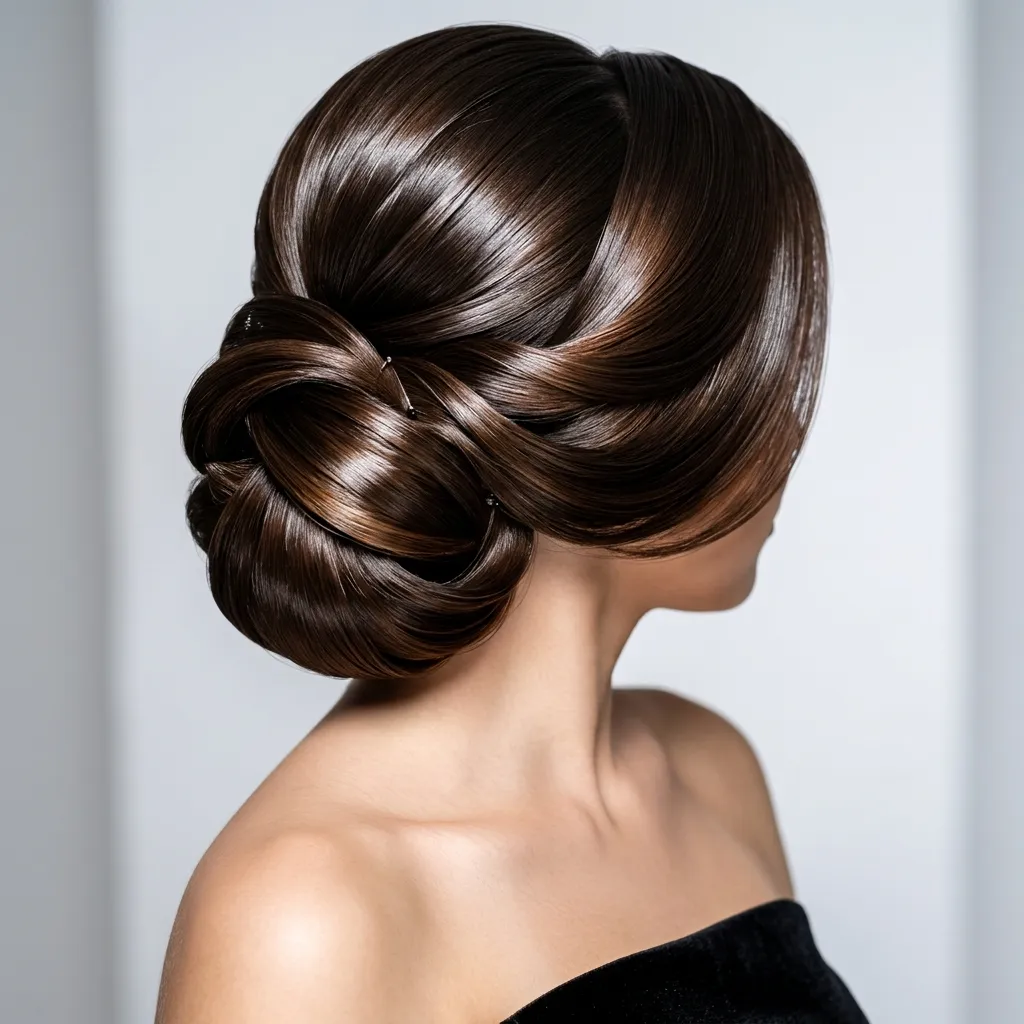
Vibe: Polished, the finishing layer that separates a good updo from a great one.
Why it works: A shine serum applied after the updo is fully pinned reflects light differently than one applied to loose hair before styling, since the smoothed, compact surface of an updo has less texture to scatter light. This is why glossing products read as more dramatic and camera-ready specifically on structured styles, where light travels across a continuous surface instead of bouncing between individual strands.
How to get it: Once the updo is fully pinned and set, warm two drops of a lightweight shine serum between your palms and smooth them over the surface of the style only, avoiding the roots, where oil-based product can create unwanted grease rather than shine. Apply the serum in the same direction the hair is styled, following the twist or the smoothed sweep rather than rubbing against it, which keeps the shine even rather than patchy.
Shop The Look
| Product |
| Lightweight shine serum |
| Long-hold finishing spray, glossy finish |
| Bobby pins for base structure |
| Smoothing brush for the final pass |
| Anti-humidity spray for lasting shine |
20. Fine Hair Half-Up with Backcombing for Volume
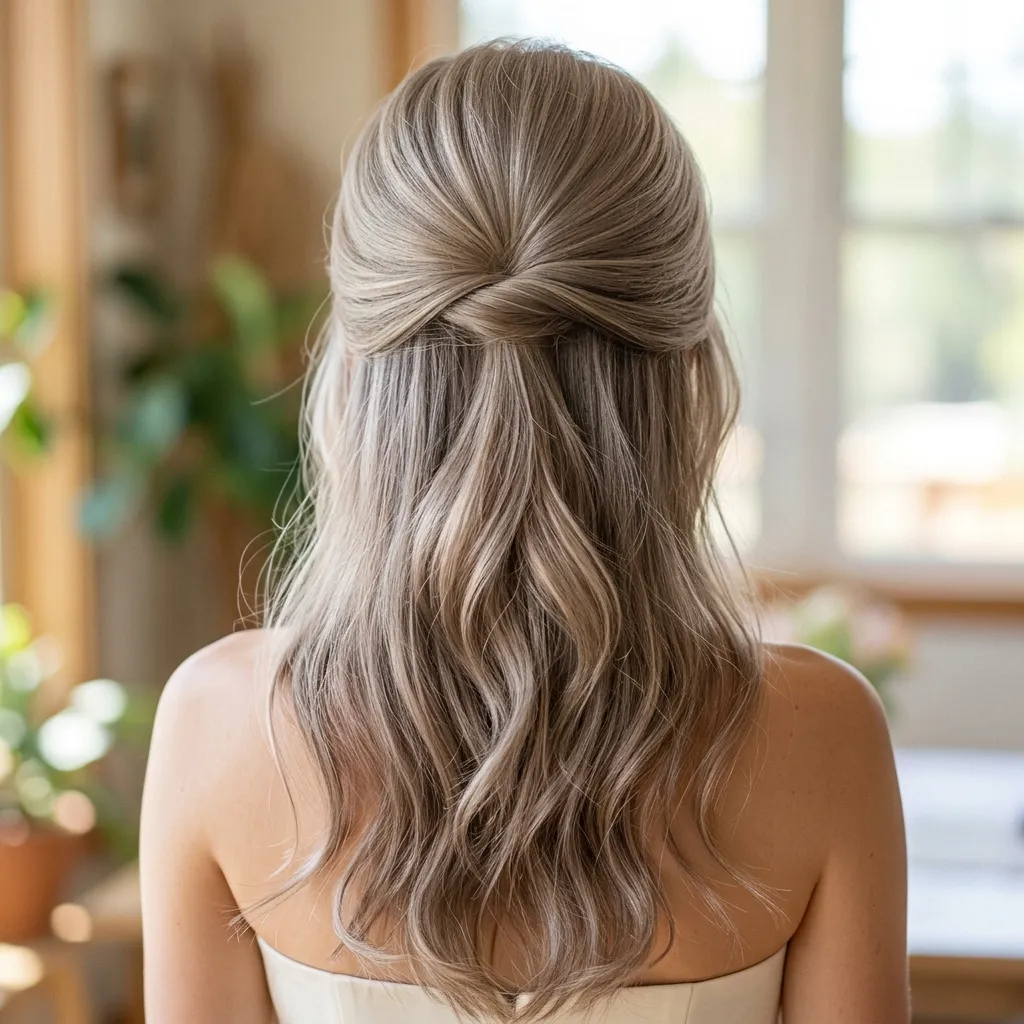
Vibe: Light, real volume built from technique, not product weight.
Why it works: Fine hair often can’t hold enough natural volume to balance a bold strapless neckline on its own, and backcombing solves this by physically tangling the hair’s cuticle layer at the root to create structural lift that lasts far longer than a volumizing spray alone can provide on thin strands. Product-based volume tends to fall flat within an hour or two on fine hair specifically, while mechanically backcombed volume holds through an entire night because it’s a structural change to the hair rather than a surface coating.
How to get it: Take a two-inch section at the crown, hold it straight up, and backcomb downward toward the scalp in short strokes with a fine-tooth comb, then smooth only the top layer of that section flat before securing it back with the rest of the half-up gathering. Spray a light-hold product into the section before backcombing rather than after, which gives the teasing something to grip onto and makes the volume last considerably longer.
💡 Quick Win: Backcombing only the crown section, not the whole head, gives fine hair believable volume without creating the tangled mess that full-head teasing leaves behind at the end of the night.
Shop The Look
| Product |
| Fine-tooth teasing comb |
| Root-volumizing spray |
| Small clear elastics for the half-up section |
| Long-hold finishing spray |
| Smoothing brush for the top layer |
How to Start Your Prom Hairstyle Planning
Your single first move is booking a hair trial two to three weeks before prom, not the week of. This is the one step that anchors everything else, because a trial reveals exactly how your specific hair type holds curl, whether your natural texture fights a particular updo, and whether the style you pinned on Pinterest actually works with your hair’s real length and thickness. Problems that are easy to fix with three weeks of runway and nearly impossible to fix the morning of.
The most common mistake is choosing a hairstyle based on the photo alone without accounting for your dress’s neckline height and back detail. A gorgeous loose, wavy half-up style can completely hide a strapless sweetheart neckline’s clean line, or fall directly over an illusion-mesh back panel a dress was specifically designed to show off. Fix this by holding your actual dress up to a mirror while testing hairstyles at your trial, not by choosing the style first and hoping it works with the dress later.
Three specific items under $50 that make a real difference: a $12 root-volumizing mousse for lasting lift, a $10 pack of clear, snag-free elastics that won’t tug or break under an updo’s tension, and an $18 travel-size strong-hold hairspray to carry in your prom-night bag for touch-ups between photos and dancing.
A trial run takes about an hour; the actual prom-day style, if it’s a full updo with curling and pinning, takes 60–90 minutes at a salon or with a hired stylist. A DIY version at home with practice from the trial run can be done in 30–45 minutes. Salon prom styling typically runs $65–150 depending on your market and how elaborate the style is, while at-home styling costs closer to $20–40 in products if you already own basic hot tools.
Frequently Asked Questions
What’s the difference between hairstyles for strapless dresses versus dresses with straps?
Hairstyles for strapless dresses need to keep the shoulders, collarbone, and upper chest visually open, since that bare expanse is the dress’s main structural feature: updos, half-up styles, and hair swept back off the shoulders all work toward this. Dresses with straps or sleeves already break up that same expanse of skin, so hair worn fully down is a much more natural pairing since there’s less bare space for loose hair to visually crowd. The strapless-specific styling rule is really about proportion and negative space, not about strict style categories.
What hair color works best with a strapless prom dress?
Any hair color works, but the finish matters more than the shade: high-shine, glossy styles in platinum blonde, jet black, or rich copper tend to photograph most dramatically under flash photography, while balayage and dimensional color show up beautifully in updos and half-up styles where the color is visible from multiple angles. If your dress has a bold, saturated color, a more neutral hair tone like a soft brunette keeps the outfit balanced; a black or white dress gives you more freedom to go bold with a vivid copper or platinum.
How much does prom hair styling typically cost?
Salon prom hairstyling generally runs $65–150 depending on your city and the complexity of the style, with elaborate braided updos or styles requiring extensions on the higher end of that range. Many salons offer package deals combining hair and makeup for $150–250 total. A DIY approach with quality tools you already own, plus $20–40 in styling products like mousse, hairspray, and pins, is the most budget-friendly route if you’re comfortable curling and pinning your own hair.
Does this work with curly or very short hair?
Yes, though the technique shifts. Curly hair holds an updo particularly well since the natural texture provides built-in grip for pins, but it benefits from a curl-defining gel applied before any pulled-back styling to prevent frizz around the hairline. Very short hair, above the chin, works best with a half-up style using small twisted or braided crown sections rather than a full gathered updo, since there isn’t enough length to secure a bun reliably through a full night of dancing.
What’s the best hair accessory for a strapless prom look?
Delicate pearl or crystal hairpins scattered through a loose updo are the most versatile accessory, working with nearly any dress style without competing for attention the way a large statement headpiece can. Pearl and gold hair vines are the next most popular choice, particularly for bridal-adjacent romantic updos, and work best wrapped into the style rather than perched on top of it. Avoid large, heavily embellished headbands with a strapless dress that already has beading or embellishment at the neckline. Two competing focal points tend to overwhelm the overall look rather than complement it.
Ready to Create Your Dream Prom Hairstyle for Your Strapless Dress?
Between sleek low buns, soft Hollywood waves, braided crowns, and half-up styles built for every hair length and texture, there’s a version of these 20 prom hairstyles for strapless dresses that fits your hair, your dress, and how much time you actually want to spend getting ready. You don’t need to master an elaborate updo technique overnight booking a trial run two to three weeks out, with your actual dress in hand, is the right way to start.
Once the style is locked in, the payoff is exactly what a strapless dress is built for: a neckline and shoulder line that feel open, framed, and entirely yours for the night, instead of hidden under hair that was never quite right for the dress underneath it. Save the looks that matched your dress’s neckline and your hair’s natural texture, and let the one that felt most like you at the trial run whether it’s the pearl-vine halo or the sleek high ponytail be the one you walk in wearing.