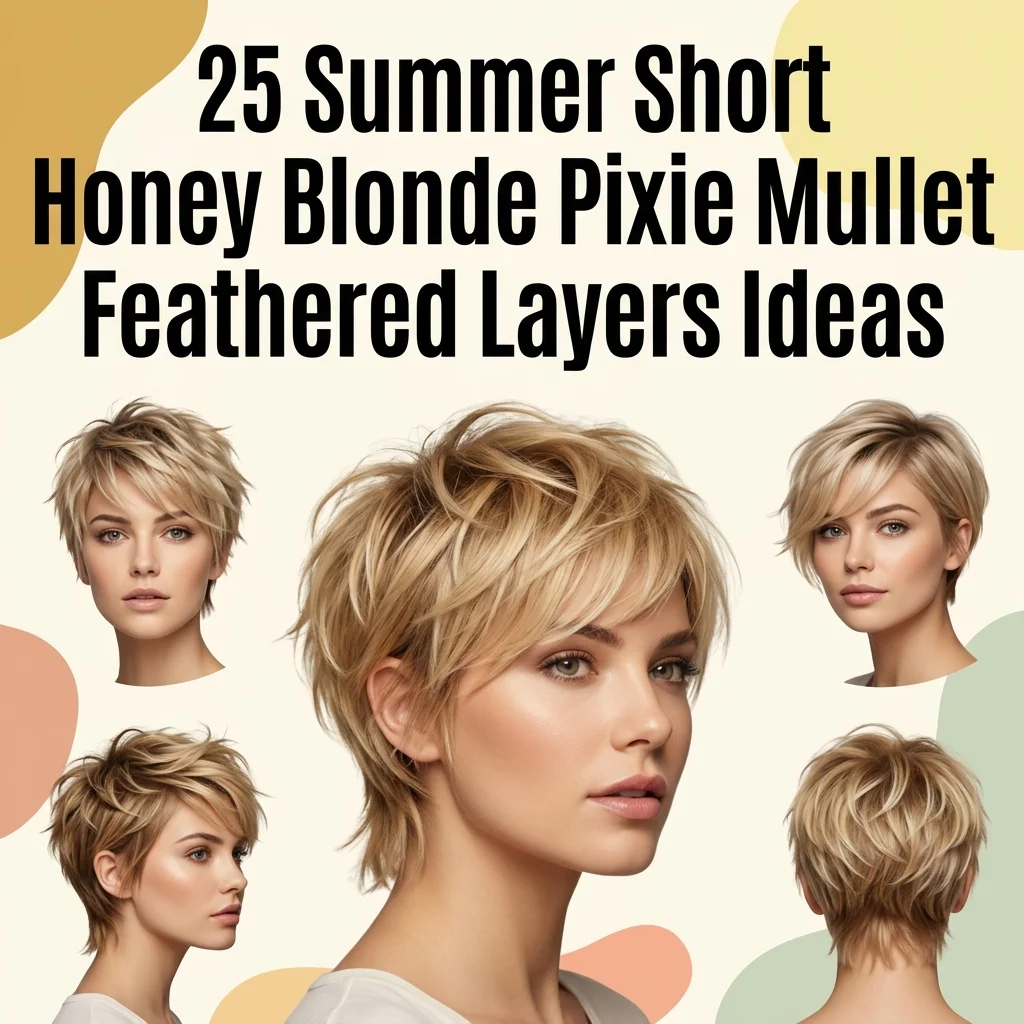
25 Honey Blonde Pixie Mullet Ideas With Feathered Layers

A short honey blonde pixie mullet with feathered layers is a cropped, textured hybrid: pixie-short through the front and sides, left longer and shaggier through the crown and nape the way a mullet is, with feathered, razor-cut layers that add movement throughout. This article gives you 25 ways to wear it this summer, from color formula to layering technique to shape.
The cut feels alive the moment it dries, texture catching light from every angle instead of sitting flat. Honey blonde reads warm against sun-kissed summer skin, golden and caramel-toned rather than cool or stark. The feathered layering keeps the shorter front from looking severe while the longer back gives it real movement. It is a bold, editorial cut that still styles itself most mornings.
Here are 25 ideas worth saving, and stealing.
Why This Style Works So Well
What makes a pixie mullet different from a standard pixie or a standard mullet? A pixie mullet borrows the pixie’s short, close front and sides and the mullet’s longer, shaggier back and crown, landing somewhere between the two rather than fully committing to either. It became a mainstream request as the mullet revival moved past its 1980s reputation and stylists began softening the length contrast with feathering, which is what keeps a pixie mullet from reading as a costume rather than a considered cut.
What materials and formulas define the honey blonde palette? Honey blonde is built on a level 7 or 8 base with warm gold and caramel tones, formulated with a gold-based gloss such as Redken Shades EQ 08GB or a comparable warm formula, often paired with a caramel money piece framing the face. Maintenance runs on a color-safe sulfate-free shampoo, a warm-toned glossing treatment, and a lightweight shine oil that keeps the gold reflective rather than dull.
Why is this style trending now? Search interest in “pixie mullet” and “honey blonde mullet” has climbed as the broader mullet revival matures past its shock-value phase into softer, more wearable versions, and warm blonde tones have overtaken cool platinum in seasonal searches as people move toward lower-maintenance color that grows out less visibly. The feathered layering specifically photographs well on video and short-form content, which has accelerated its spread past salon walls.
Style at a Glance
| Element | Pixie Influence | Mullet Influence |
| Length | Short, close front and sides | Longer, shaggy crown and nape |
| Cutting technique | Point-cutting, texturizing | Feathered layering |
| Color base | Level 7–8 warm gold | Caramel money piece |
25 Honey Blonde Pixie Mullet Feathered Layers Ideas
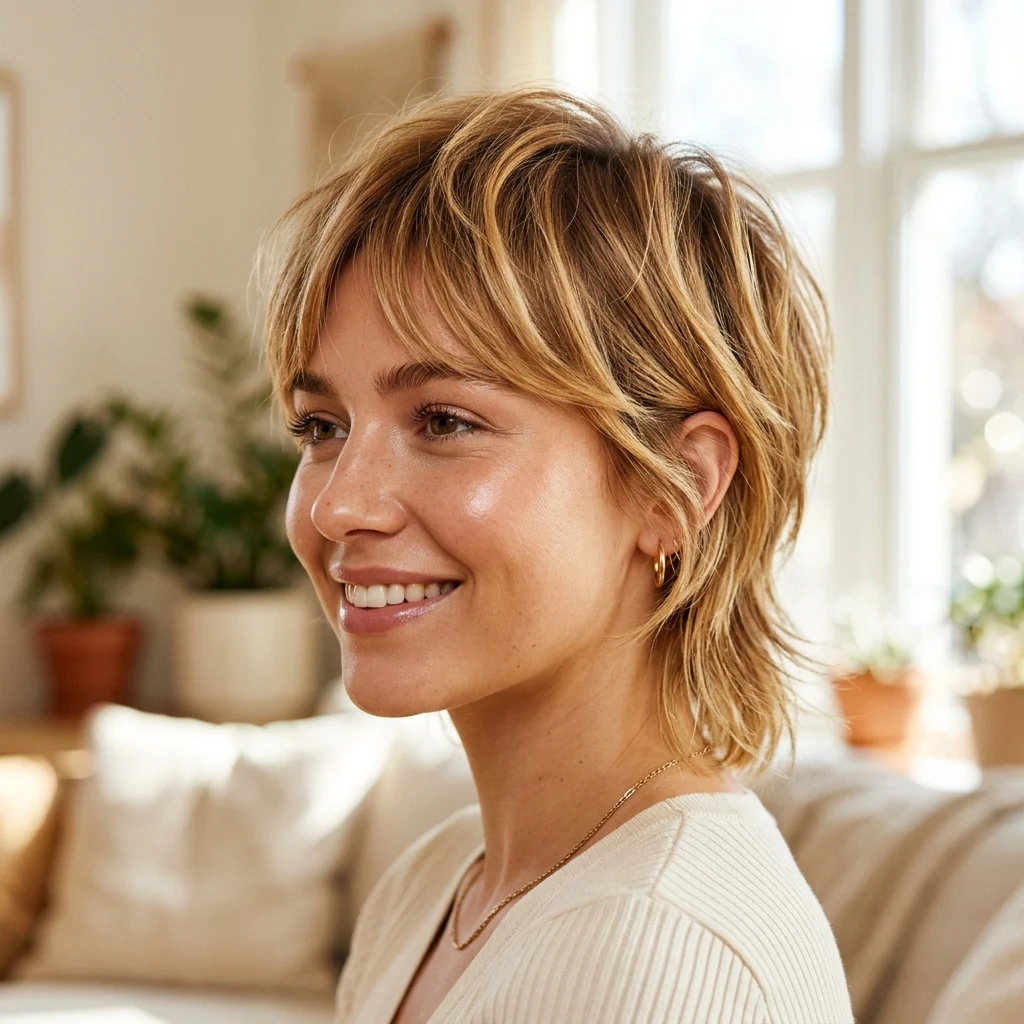
1. Honey Blonde Balayage Base Throughout
Vibe: Warm, sun-touched.
Why it works: The technique is balayage, hand-painting lightener onto the surface of each section so color builds gradually from mid-length to end rather than starting at the root. This produces the soft, sun-drawn gradient that defines honey blonde, since balayage avoids the harder demarcation line a foil application creates. On a pixie mullet, the shorter front catches the lightest painted pieces while the longer back holds slightly more depth. It is the base technique nearly every idea on this list builds from.
How to get it: Ask your colorist for a balayage using a warm, gold-based lightener rather than a cool or ash one, since ash-based lifting fights the honey tone you’re after. Request a level 7 to 8 finish toned with a gold gloss, such as Redken Shades EQ 08GB, to lock in warmth without pushing brassy.
Shop The Look
| Product |
| Color-safe sulfate-free shampoo |
| Warm-toned glossing treatment |
| Lightweight shine oil for blonde hair |
| UV protection spray for color-treated hair |
2. Feathered Razored Layers Throughout
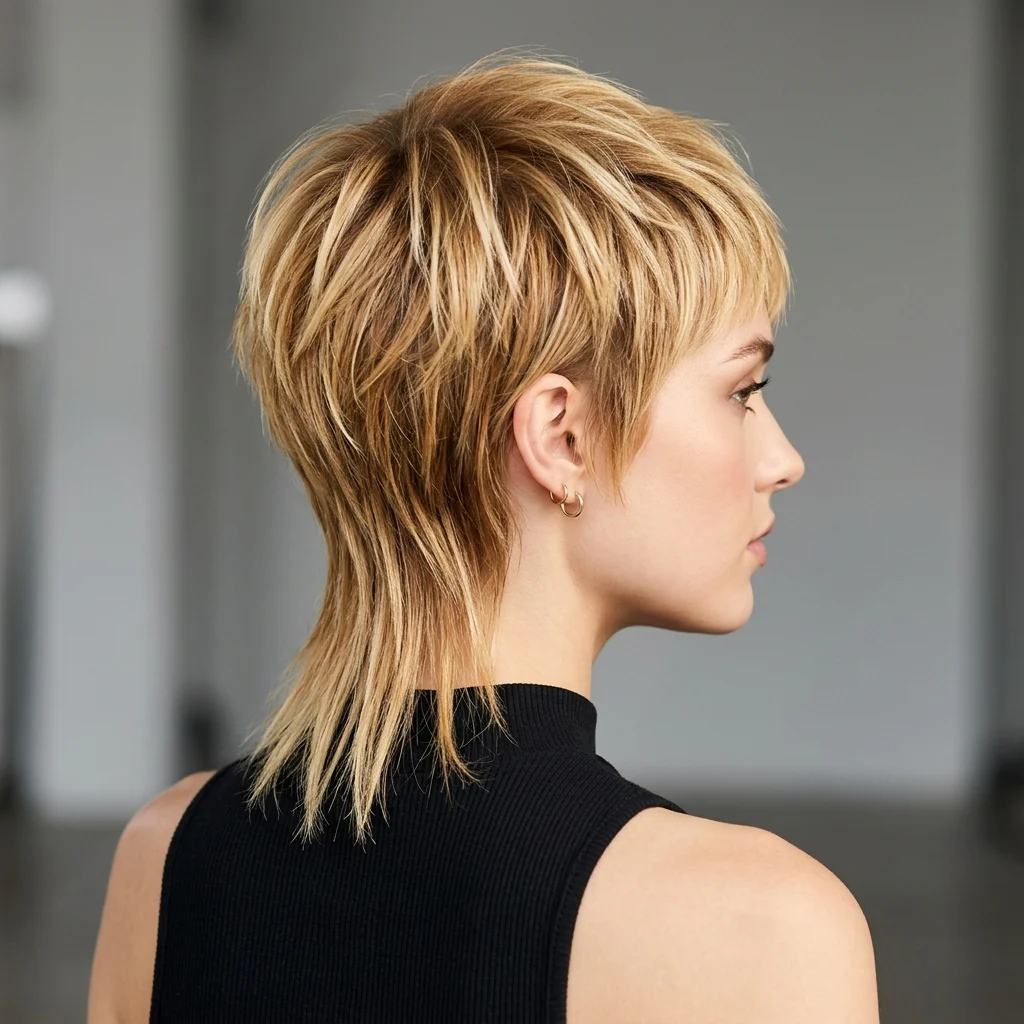
Vibe: Dynamic, in motion.
Why it works: The technique is feathering with a razor rather than shears, cutting fine, vertical lines into each layer’s end so the hair fans rather than falls in a solid sheet. This is what separates a soft, wearable pixie mullet from the choppier, blunter mullets of past decades. Feathering removes weight gradually instead of all at once, which is why the layers still hold shape even at shorter lengths. It is a finishing technique applied after the main shape is already cut.
How to get it: Ask your stylist to feather every layer’s end with a razor, not just the perimeter, so movement reads throughout the whole shape rather than only at the bottom. Style with a lightweight texturizing spray worked through damp hair before drying, since heavier products flatten the fine feathered edges.
Shop The Look
| Product |
| Lightweight texturizing spray |
| Fine-tooth styling comb |
| Small round brush, 1-inch |
| Flexible-hold finishing spray |
3. Disconnected Mullet Nape
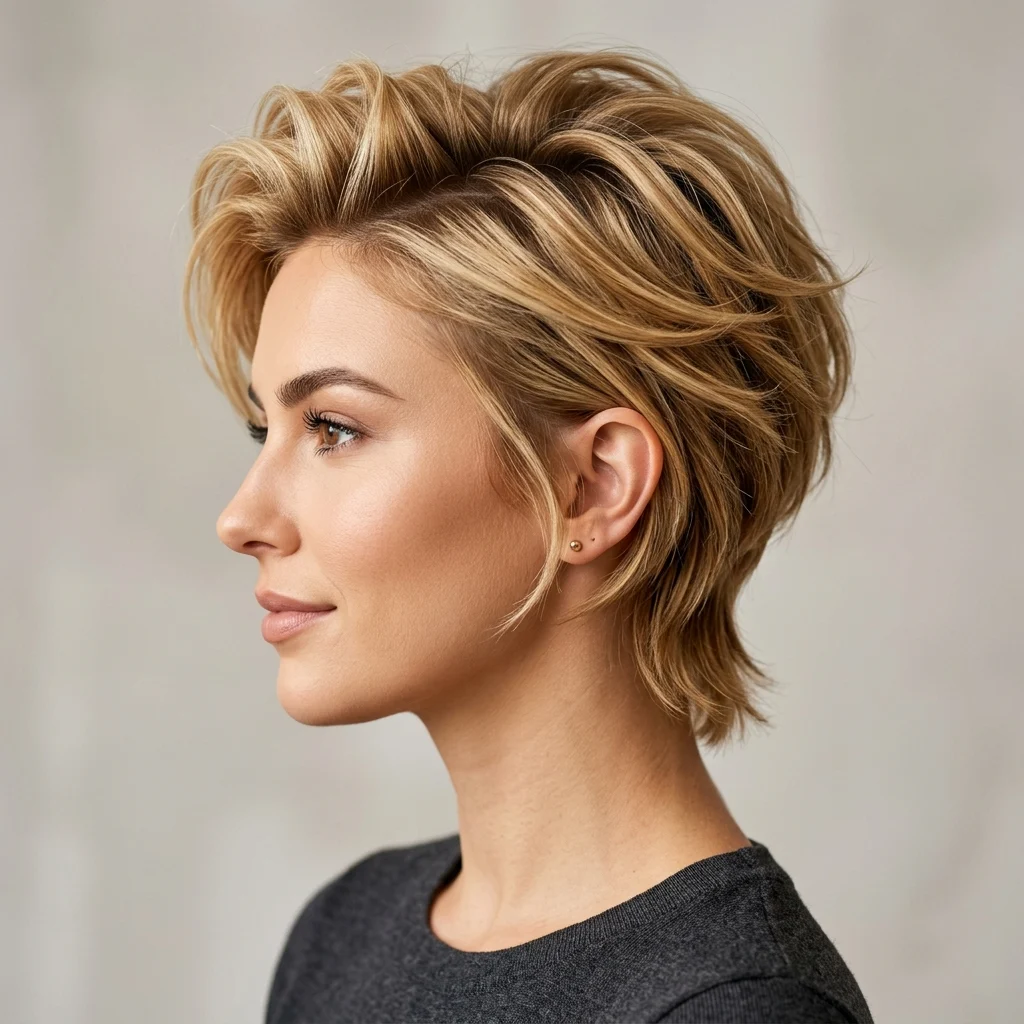
Vibe: Bold, unapologetic.
Why it works: The technique is disconnection, cutting a deliberate length gap between the crown and nape instead of blending them gradually into each other. This is the most mullet-forward version on this list, leaning into contrast rather than softening it. The visible jump in length is the entire point, which means it should never be smoothed over with heavy blending. It suits thick or medium-density hair best, since fine hair can look sparse at the disconnection line.
How to get it: Ask your stylist for a disconnected nape specifically, noting how many inches of contrast you want between the crown and nape length. Keep the nape trimmed every three to four weeks, since a disconnected shape grows out less gracefully than a blended one.
Shop The Look
| Product |
| Cordless nape trimmer for touch-ups |
| Strong-hold matte paste |
| Texturizing powder for the crown |
| Precision edge comb |
4. Blow-Dry Volume at the Crown

Vibe: Lifted, confident.
Why it works: The technique is directional root lift, blow-drying against the hair’s natural fall to build height at the crown rather than length. This balances the pixie mullet’s proportions, since a flat crown makes the longer back read heavier than intended. It’s the blow-drying method, not a product, that does most of the lifting work. A cool-air finish locks the volume in place once the shape sets.
How to get it: Flip your head forward while blow-drying the crown, directing airflow against the hair’s natural fall, then flip back and finish with a cool shot of air. Use a one-inch round brush only at the root, since brushing the longer back the same way pulls out the feathered texture.
Shop The Look
| Product |
| Root-lifting spray |
| Ionic blow-dryer with cool-shot setting |
| One-inch round brush |
| Firm-hold finishing spray |
5. Gold Chain Necklace Pairing
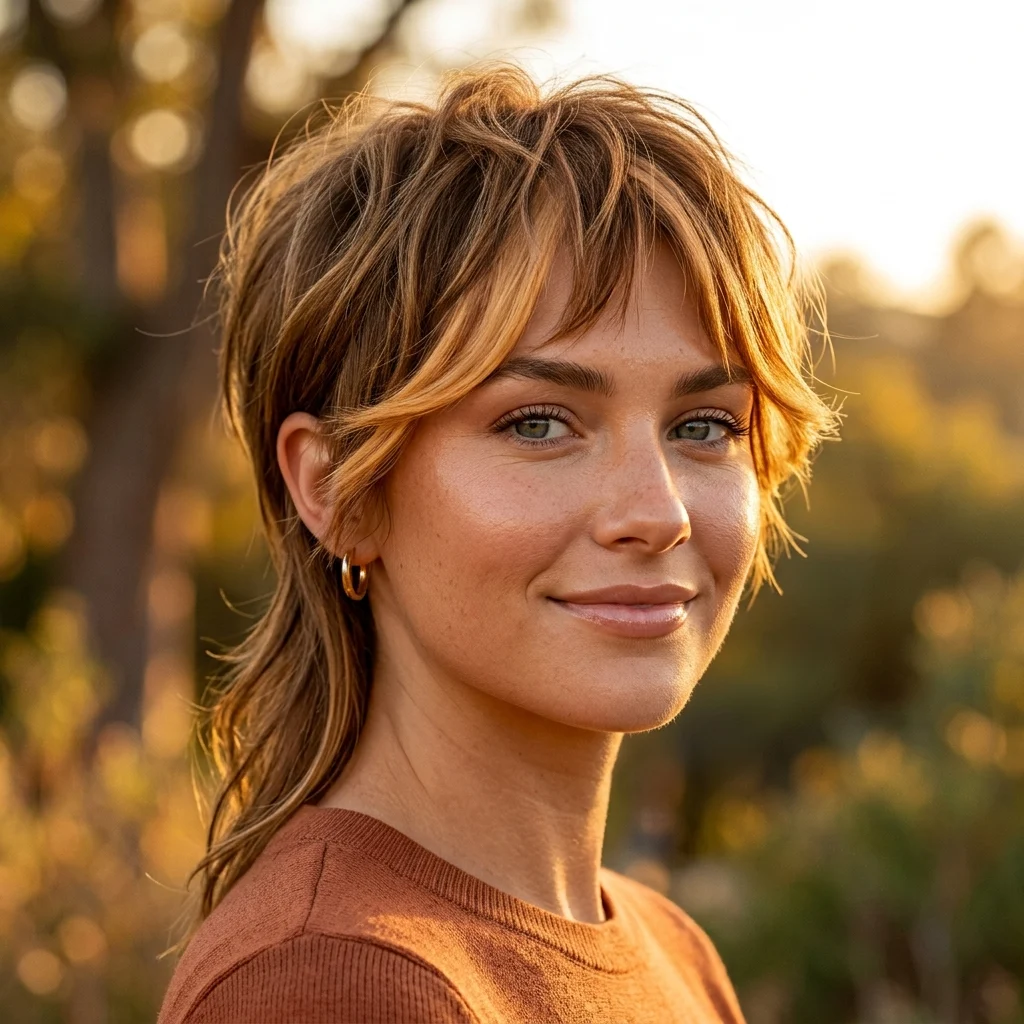
Vibe: Warm, neck-forward.
Why it works: The principle is tonal harmony, pairing warm honey blonde with warm gold jewelry so the two elements reinforce rather than contrast each other. A pixie mullet’s shorter front exposes the neckline more than longer hair does, which gives jewelry more visual presence in the finished look. A delicate chain, rather than a chunky one, keeps the focus balanced between the hair’s texture and the jewelry instead of competing for attention. This pairing reads intentional rather than accidental.
How to get it: Choose a thin gold chain, 16 to 18 inches, that sits at or just below the collarbone rather than a longer length that gets visually lost against the shorter cut. Add a single small pendant rather than a layered stack, which keeps the pairing understated.
Shop The Look
| Product |
| Delicate gold chain necklace |
| Small gold pendant |
| Shine spray for exposed ends |
| Lightweight neck and shoulder highlighter |
6. Caramel Money Piece Framing the Face
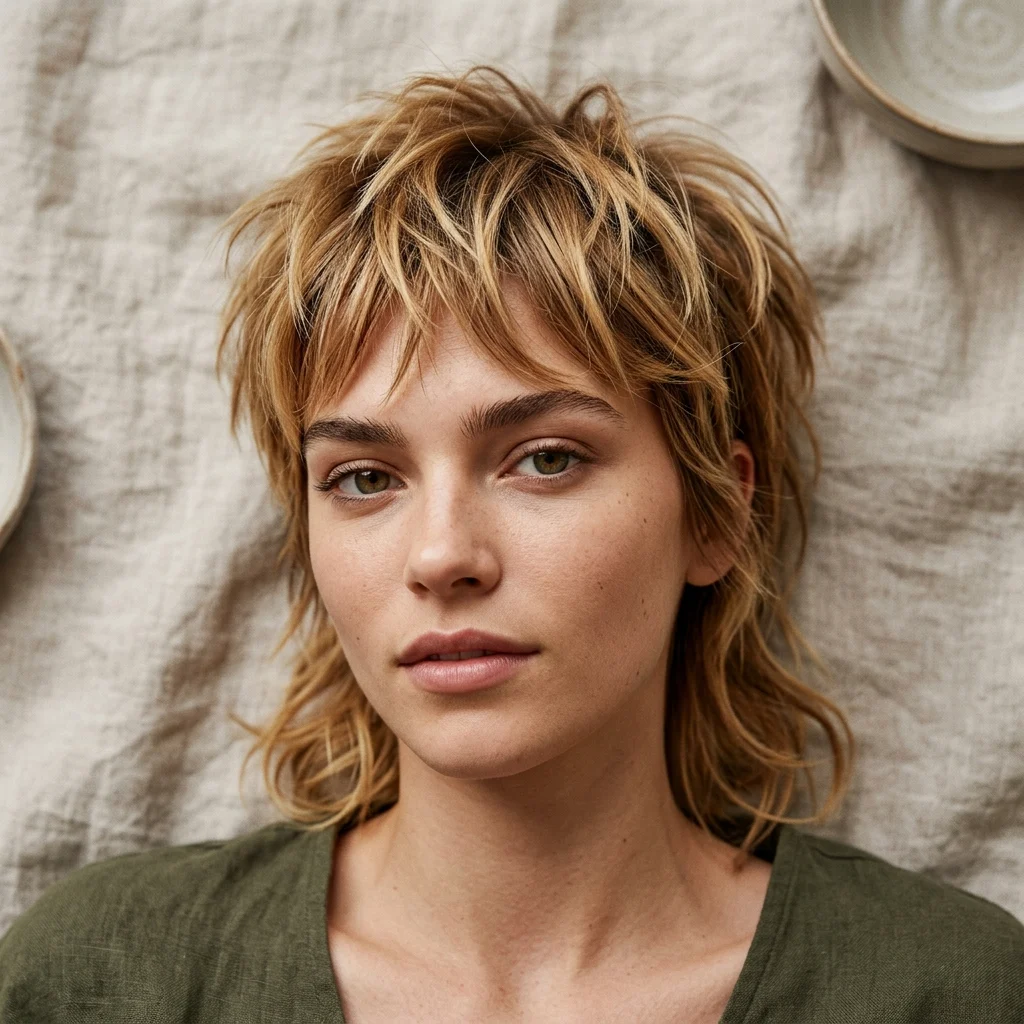
Vibe: Sun-drawn, radiant.
Why it works: The technique is a money piece, lightening only the one or two face-framing sections significantly brighter than the rest of the base color. This concentrates the brightest, most attention-catching color exactly where it does the most work, framing the eyes and cheekbones rather than spreading warmth evenly across the whole head. It requires less overall lightening than a full-head balayage, which means less cumulative damage. This is the single most requested honey blonde technique for shorter cuts specifically because it reads clearly even at pixie length.
How to get it: Ask your colorist for a money piece lightened two to three shades brighter than your base, positioned to frame the front of the face on both sides. Keep the rest of the color one or two shades deeper so the money piece has real contrast to stand out against.
Shop The Look
| Product |
| Purple-free toning shampoo for warm blonde |
| Bond-repair leave-in treatment |
| Half-inch flat iron for face-framing pieces |
| Heat protectant spray |
7. Shaggy Piecey Ends
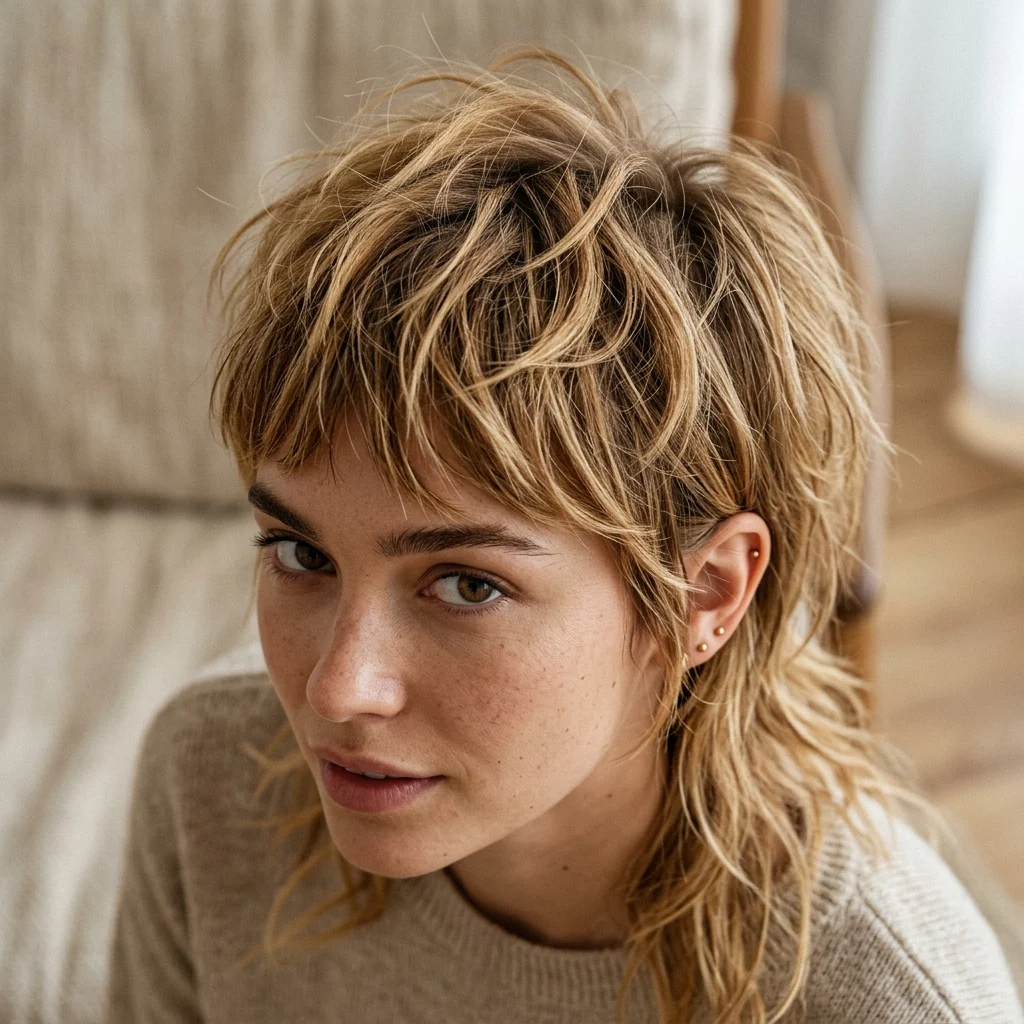
Vibe: Raw, undone.
Why it works: The technique is point-cutting combined with heavy texturizing, removing weight unevenly along each strand so pieces separate rather than falling as one solid mass. This is a shaggier, less refined finish than feathering alone produces, closer to the mullet’s original rock-and-roll reference point. Uneven ends catch light differently at every angle, which reads as movement even in still photographs. It works especially well on medium to thick density hair that can support the visual weight of chunky separation.
How to get it: Work a dime-sized amount of matte texturizing paste through damp hair, twisting small sections between your fingers rather than smoothing it through evenly. Focus product at the ends only, leaving the roots untouched for natural volume.
Shop The Look
| Product |
| Matte texturizing paste |
| Wide-tooth detangling comb |
| Dry texturizing spray |
| Boar bristle round brush |
8. Beach-Day Tousled Texture
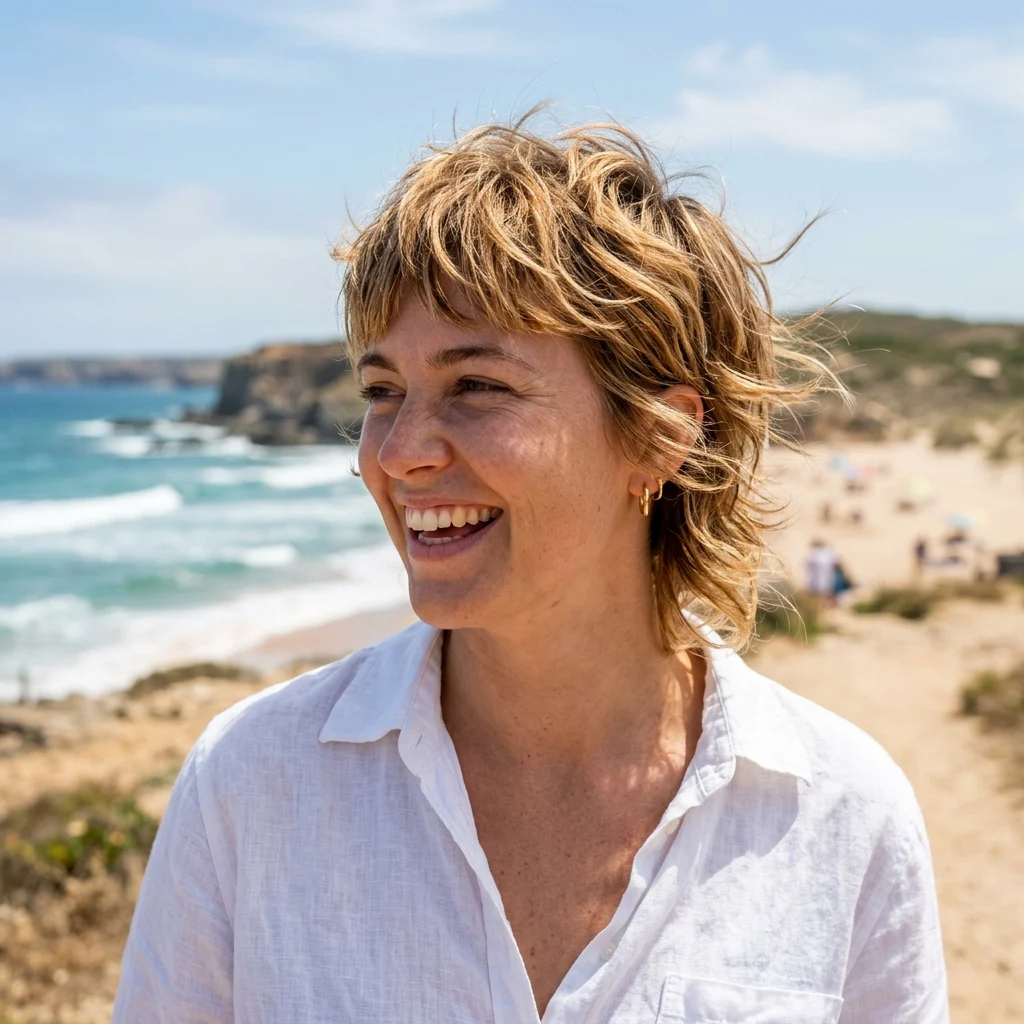
Vibe: Salt-air texture, wind-caught.
Why it works: The principle is surface roughening, using a gritty sea-salt formula to lift the hair’s outer cuticle so strands grip each other instead of sliding smooth. The pixie mullet’s mixed lengths respond well to this technique because the shorter front dries fast while the longer back holds enough length to actually tousle. It’s the look that requires the least effort of anything on this list, since it depends on air-drying rather than heat tools. The effect fades within a day, which keeps it from building product buildup over a beach trip.
How to get it: Spray a fine-mist sea salt formula onto damp hair before air-drying, scrunching lightly at the crown and longer nape pieces. Reapply a light mist to dry hair for a quick refresh after swimming, focusing on the ends rather than the roots.
Shop The Look
| Product |
| Fine-mist sea salt texturizing spray |
| Travel-size dry shampoo |
| UV-protecting leave-in spray |
| Wide sunglasses sized for shorter hair |
9. Soft Blended Mullet for Everyday Wear
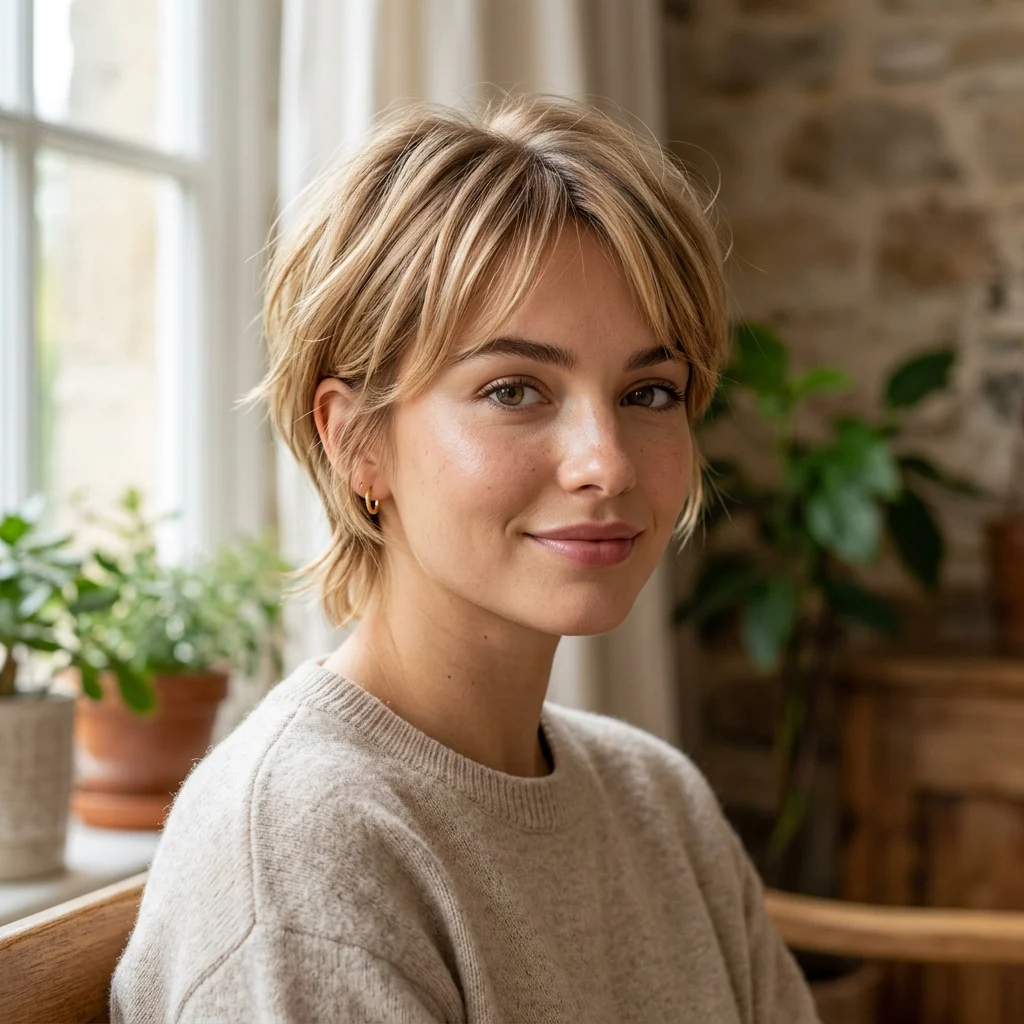
Vibe: Soft, seamless.
Why it works: The technique is graduated layering, cutting the transition between the shorter crown and longer nape in small incremental steps rather than one visible jump. This produces a mullet influence readers can wear to work or family events without the boldness of a fully disconnected version. It suits first-timers trying the pixie mullet shape without committing to its most editorial extreme. The softer transition also grows out with far less visible awkwardness between salon visits.
How to get it: Ask your stylist for a blended, rather than disconnected, transition between the crown and nape, specifying that you want the mullet influence softened rather than dramatic. Style by brushing everything in one direction while blow-drying so the graduated layers read as one continuous shape.
Shop The Look
| Product |
| Wide-tooth comb for blending sections |
| Lightweight texturizing cream |
| One-inch round brush |
| Flexible hairspray |
10. Air-Dried Natural Texture
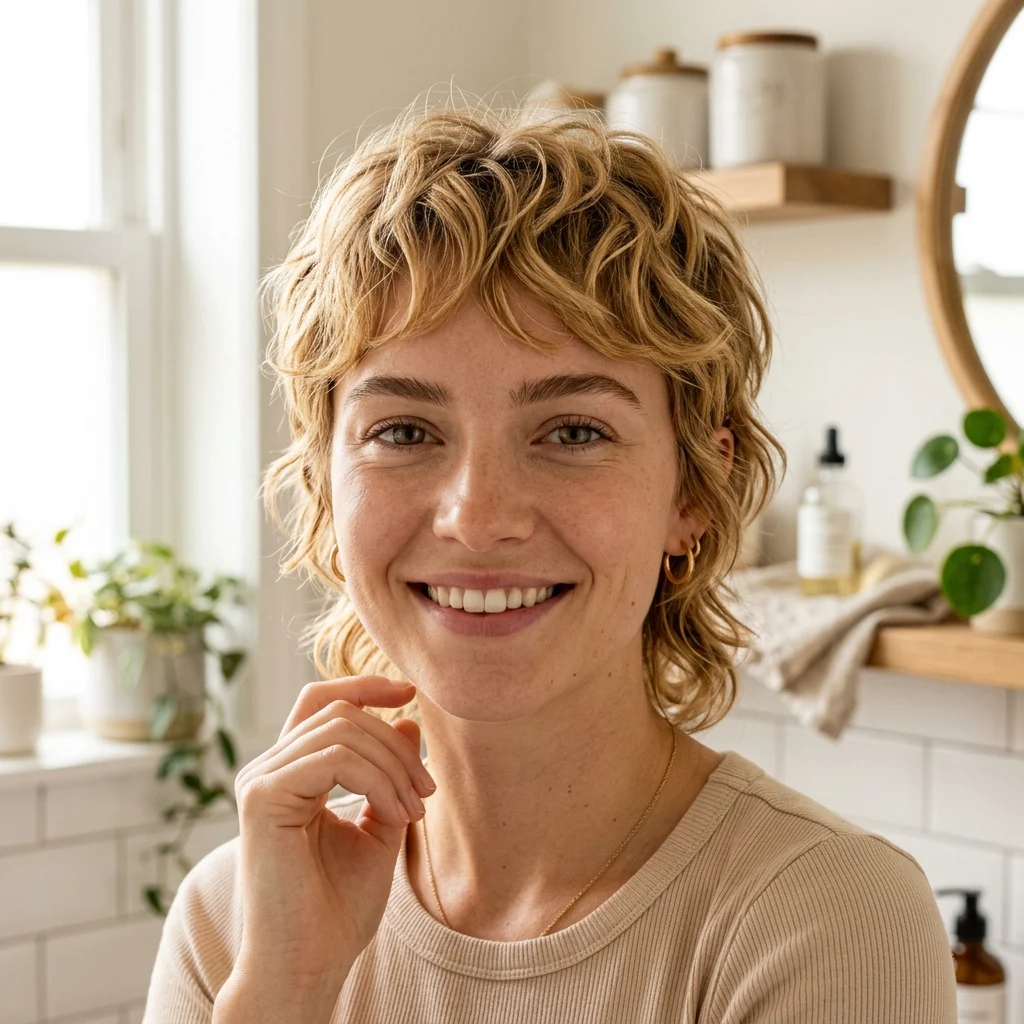
Vibe: Fresh, unbothered.
Why it works: The principle is texture reliance over heat styling, since the feathered layers depend on the hair’s own natural bend rather than a brush and heat forcing a shape. Air-drying preserves whatever wave pattern the hair naturally has, which reads differently across every hair type wearing this cut. It’s the fastest possible wash-day routine this article covers. It also reduces cumulative heat damage across a summer of frequent washing.
How to get it: Apply a lightweight curl or texture cream to towel-dried hair, scrunching gently from the ends upward through both the shorter front and longer back sections. Leave it alone until fully dry, since touching damp hair disrupts the pattern before it sets.
Shop The Look
| Product |
| Lightweight curl and texture cream |
| Microfiber hair towel |
| Alcohol-free texturizing spray |
| Diffuser attachment for short hair |
11. Warm Honey Root Melt
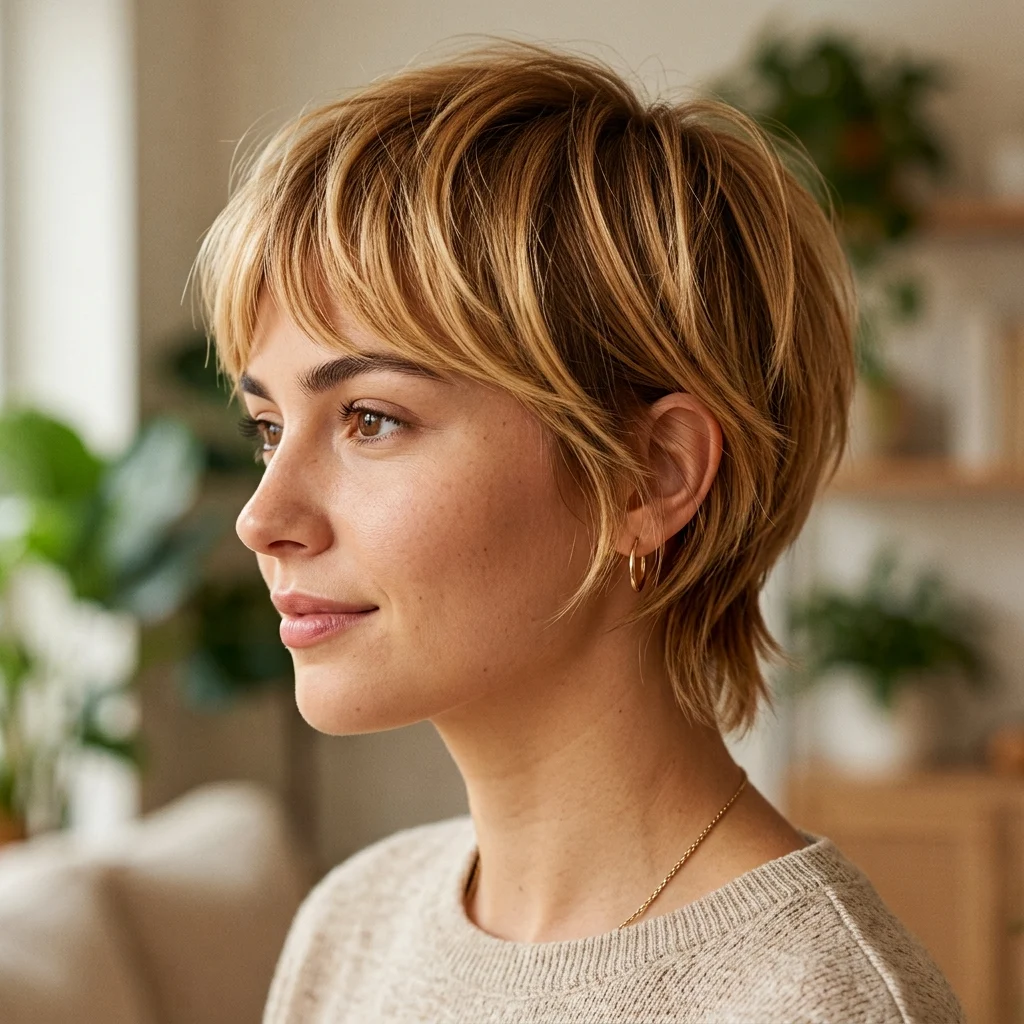
Vibe: Warm, gradual.
Why it works: The technique is a root melt, blending a warm brown root color gradually into the honey blonde lengths so there is no visible line where color changes begin. This stretches the time between color appointments significantly, since new growth blends into the melted root rather than creating a hard demarcation. It works especially well on the pixie mullet’s shorter front, where root growth is otherwise most visible fastest. The gradient also adds visual depth that a flat, single-tone blonde lacks.
How to get it: Ask your colorist for a root melt using a shade close to your natural color, blended two to three inches down before transitioning into the honey blonde lengths. Touch up every ten to twelve weeks instead of the six weeks a solid all-over color would need.
Shop The Look
| Product |
| Root touch-up powder in warm brown tone |
| Bond-repair conditioner mask |
| Warm-toned dry shampoo |
| Color-safe hydrating conditioner |
12. Printed Bandana Headscarf Styling
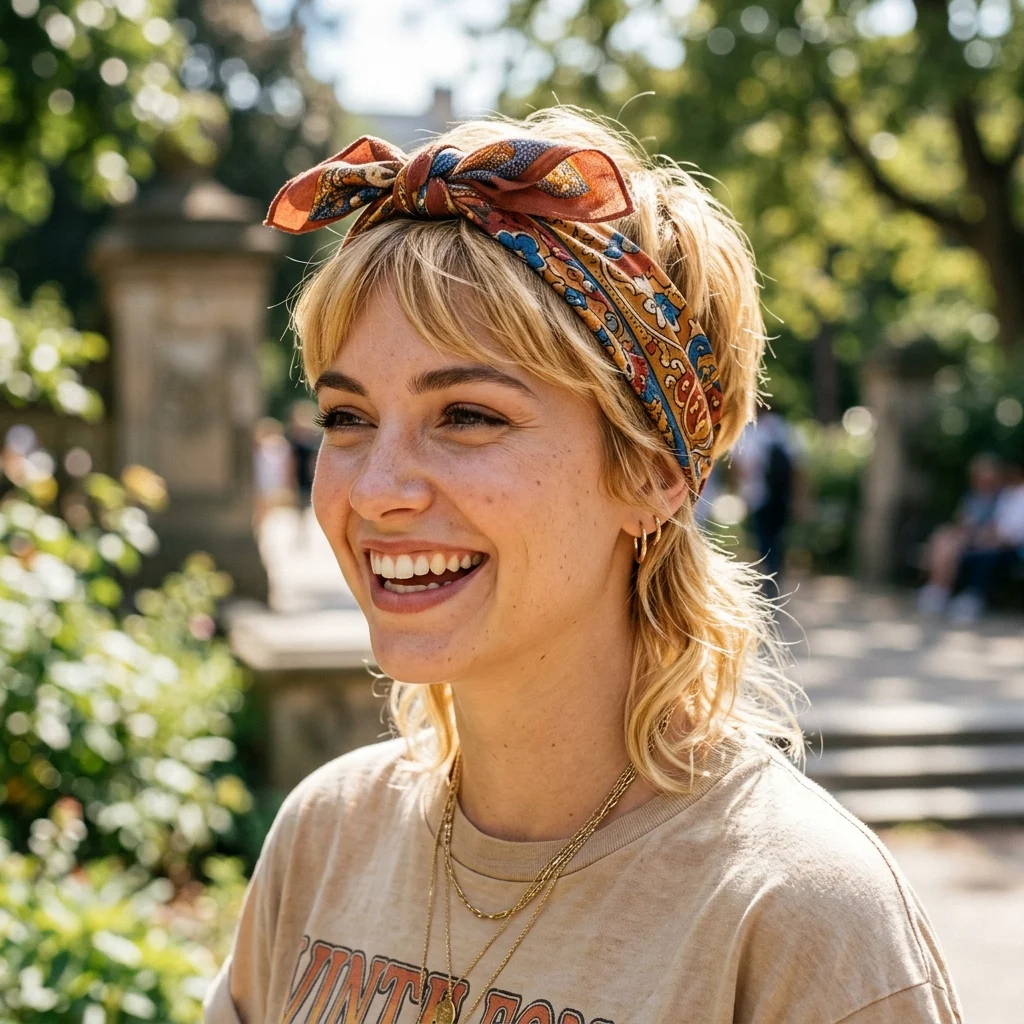
Vibe: Playful, retro-leaning.
Why it works: The principle is era-appropriate accessorizing, since a bandana headscarf references the same retro decades the mullet itself draws from, which makes the pairing feel considered rather than random. The pixie mullet’s shorter front holds a bandana knot securely while the longer back stays visible beneath it, showing off the cut’s signature length contrast. This solves the practical problem of keeping shorter front pieces controlled on windy or high-heat days. It is one of the few accessory looks built specifically around this cut’s shape.
How to get it: Fold a square bandana into a triangle, position the long edge at the hairline, and knot it at the nape rather than on top of the head, letting the longer back hair fall loose beneath the knot. Secure with two bobby pins at the temples for hold through a full day.
Shop The Look
| Product |
| Printed cotton bandana, square |
| Matte-finish bobby pins |
| Texturizing spray for grip |
| Lightweight finishing pomade |
13. Blunt Fringe Within Feathered Layers
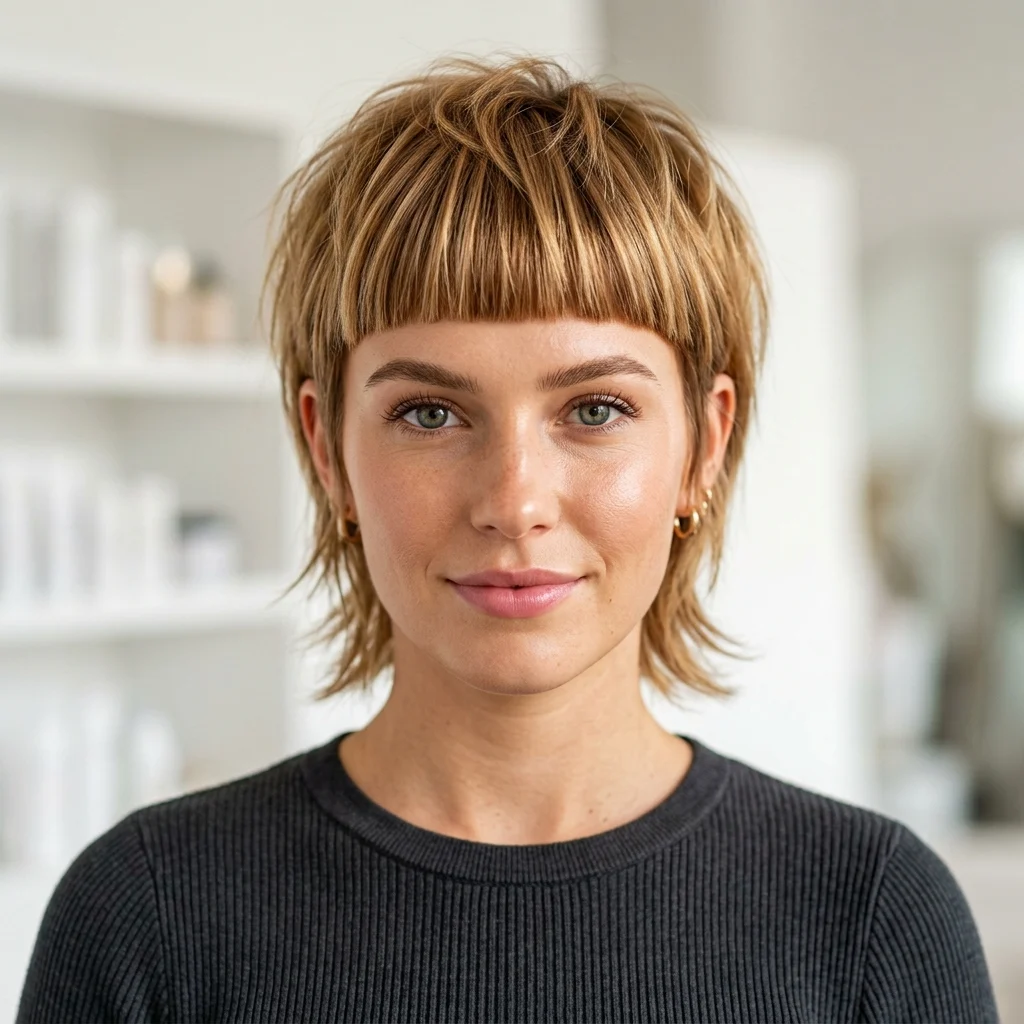
Vibe: Graphic, contrasted.
Why it works: The principle is deliberate contrast, cutting one blunt, sharp-edged element against an otherwise soft, feathered shape so the two techniques highlight each other. A blunt fringe reads more structured than the swept or wispy fringes common on softer cuts, which suits the pixie mullet’s already-bold length contrast between front and back. The single hard line anchors the rest of the shape’s movement, giving the eye a clear focal point. This combination is specific to bolder, more editorial versions of the cut.
How to get it: Ask your stylist to keep the fringe cut blunt and straight across at brow length while feathering every other section of the cut. Set the fringe with a small amount of flat, matte pomade rather than a shine product, which would undercut the blunt line’s graphic quality.
Shop The Look
| Product |
| Precision styling scissors |
| Matte-finish pomade |
| Fine-tooth comb for fringe sectioning |
| Setting spray for fine fringe pieces |
14. Face-Framing Adjustment for Square Faces
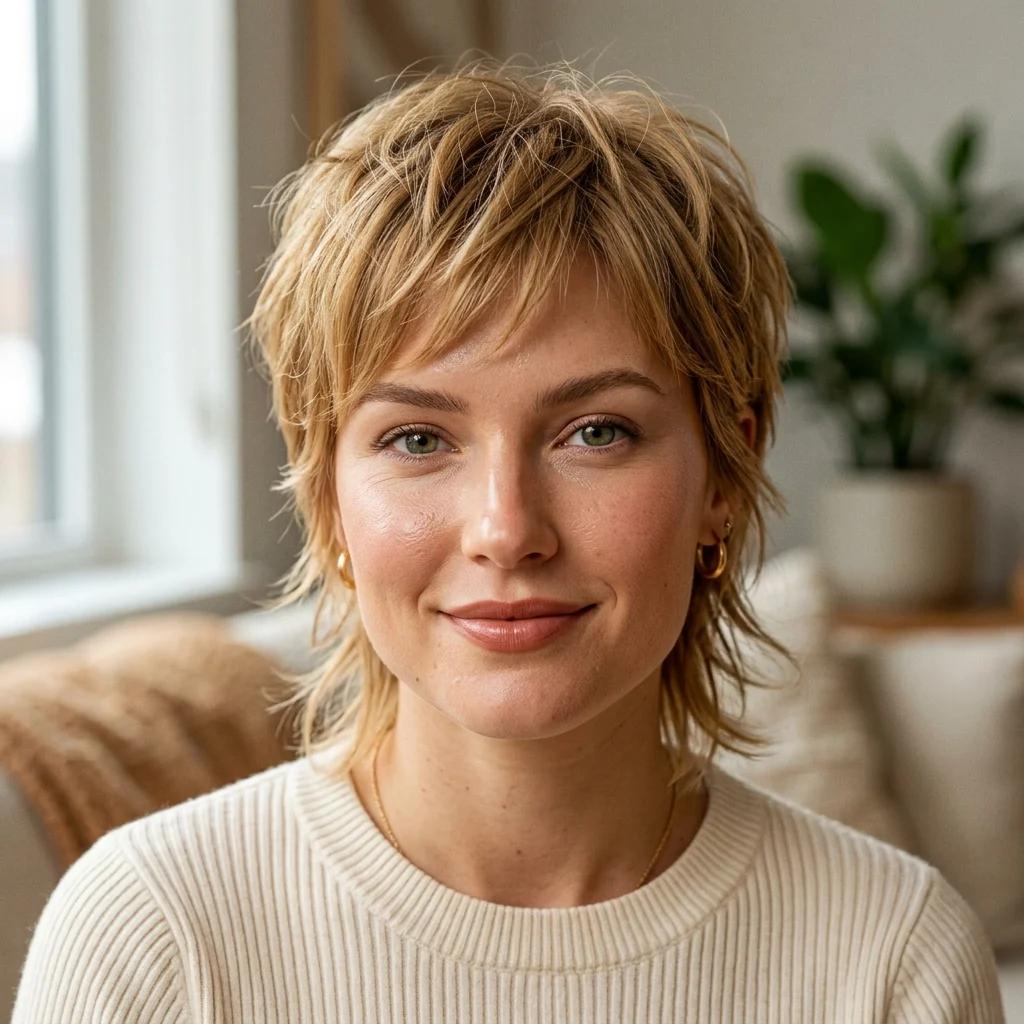
Vibe: Softly rounded.
Why it works: The principle is angle softening, cutting the front pieces with a rounded rather than sharp edge to counter a square face’s strong jawline. A pixie mullet’s short front sits close to the jaw, which means the shape of that front section has an outsized effect on how the jawline reads. Rounding the ends, rather than leaving them blunt or razored to a point, takes visual weight off the corners of the face. This is the most requested adjustment for square and rectangular face shapes specifically.
How to get it: Ask specifically for the front face-framing pieces to be cut with rounded, not blunt or pointed, ends, and mention your face shape so your stylist adjusts the angle accordingly. Style by curving the front pieces slightly toward the cheek with a small round brush rather than drying them straight down.
Shop The Look
| Product |
| One-inch round brush for face-framing pieces |
| Flexible-hold styling cream |
| Fine-mist finishing spray |
| Boar bristle detangling brush |
15. Long Feathered Back Panel
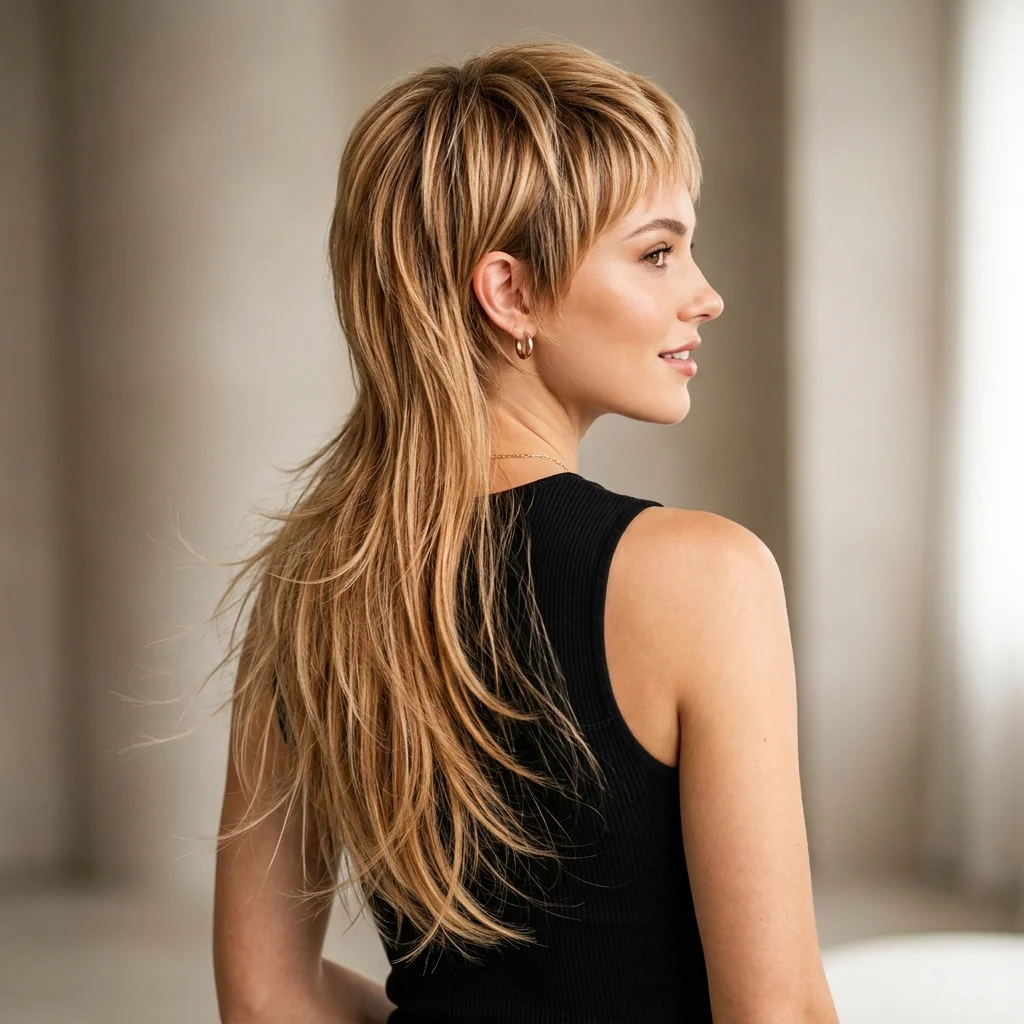
Vibe: Dramatic, flowing.
Why it works: The technique is extended proportion, leaving significantly more length at the back panel than a standard pixie mullet carries, which pushes the mullet influence toward the more dramatic end of the spectrum. Heavy feathering throughout this longer section keeps the extra length from reading heavy or static. It is the version of this cut with the most movement, since the longer panel has real length to swing and catch light. This works best on hair with some natural body, since pin-straight fine hair can look stringy at this length without added texture.
How to get it: Ask your stylist to leave four to six inches of length at the back panel, well past a standard pixie mullet’s nape length, while keeping the front pixie-short. Add a texturizing spray to the back panel specifically before air-drying to encourage movement through the extra length.
Shop The Look
| Product |
| Texturizing spray for longer panels |
| Wide-tooth comb for longer sections |
| Weightless finishing serum |
| Large-barrel curling wand for soft movement |
16. Golden Fine Money Piece Highlights
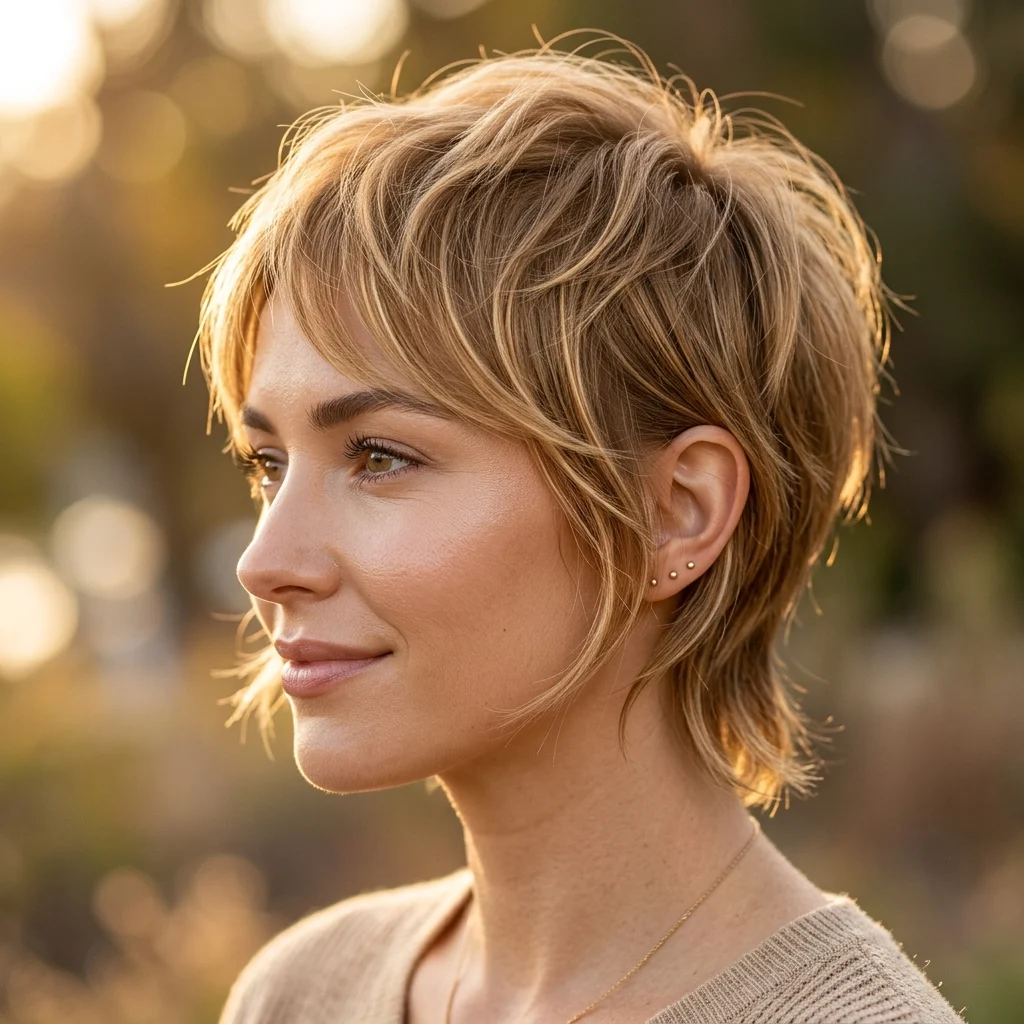
Vibe: Subtle, sun-kissed.
Why it works: The technique is fine-strand foiling, weaving thin, individual highlight strands rather than painting broad sections, which produces a more delicate, dimensional gold than a bold money piece does. This suits readers who want the honey blonde effect without the higher-contrast statement of a full balayage. The fine strands catch light individually rather than as one large block of color, which is what gives this version its subtlety. It requires more time in the chair than balayage but produces the softest, most natural-looking result on this list.
How to get it: Ask your colorist for fine-weave foil highlights, no wider than an eighth of an inch per strand, concentrated at the front and crown where light naturally hits first. Request a warm gold toner over the highlights to prevent them from reading pale yellow rather than honey-toned.
Shop The Look
| Product |
| Warm-toned purple-free blonde shampoo |
| Lightweight shine serum |
| Bond-repair mask |
| Heat protectant mist |
17. Finger-Tousled Texture
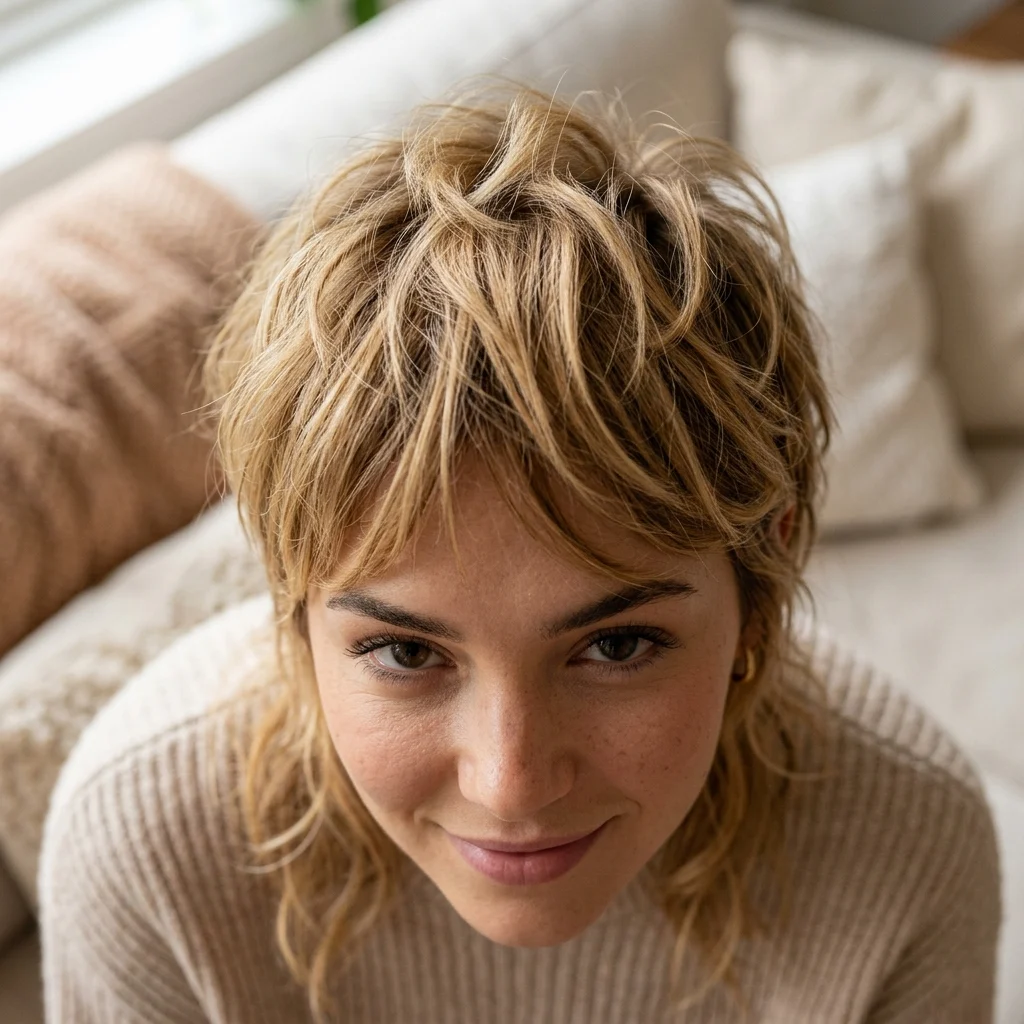
Vibe: Relaxed, hands-only.
Why it works: The technique is hand-styling instead of brush-styling, which avoids the smoothing effect a brush creates and keeps individual feathered pieces separated. This suits a pixie mullet’s already-textured structure, since the layers are short enough at the front to hold shape without a brush’s added tension. It takes under two minutes and needs no heat tool. It is the fastest styling method that still shows off the cut’s feathered detail.
How to get it: Work a small amount of clay or paste through damp hair using only your fingers, twisting small sections at both the short front and longer back pieces. Let the rest air-dry rather than brushing it smooth, which is what preserves the separated, tousled texture.
Shop The Look
| Product |
| Matte clay for texture |
| Alcohol-free texturizing spray |
| Wide-tooth detangling comb |
| Lightweight hold hairspray |
18. Wispy Face-Framing Pieces
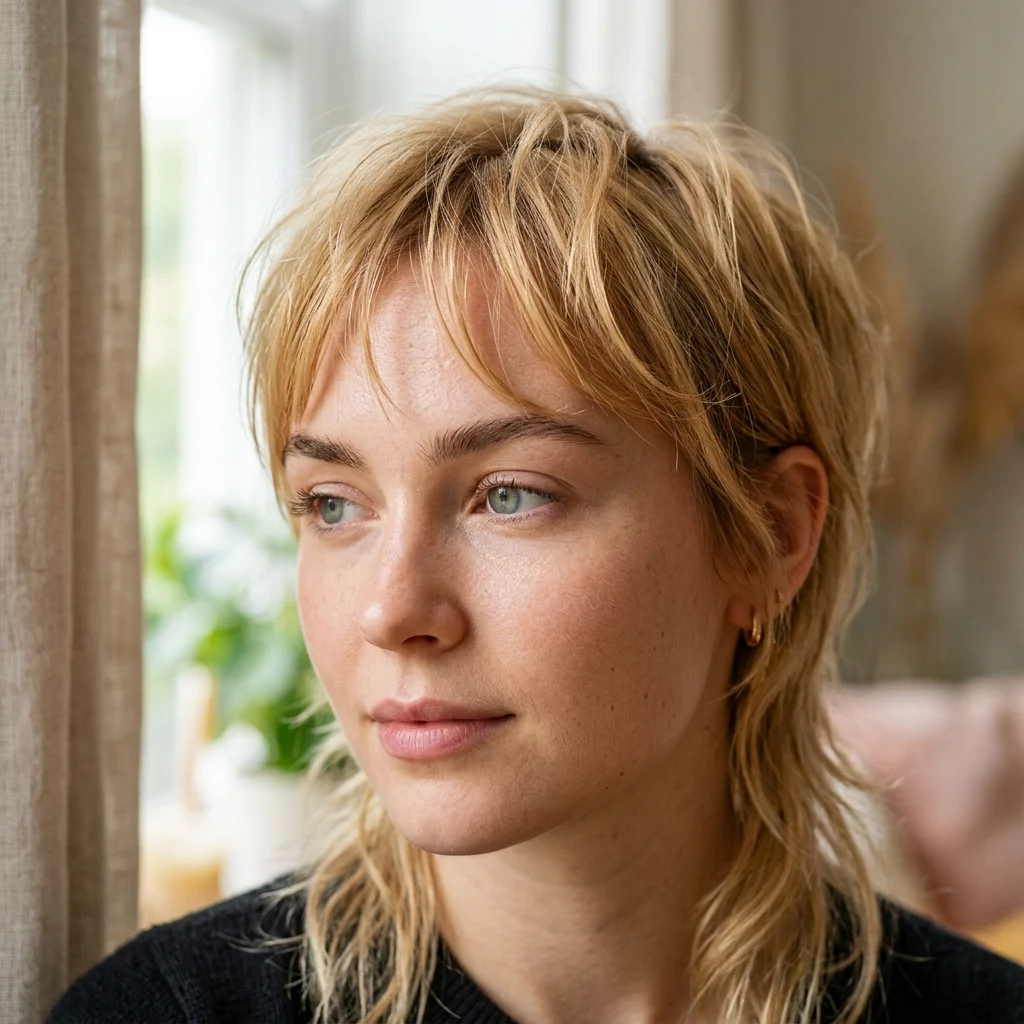
Vibe: Delicate, barely there.
Why it works: The technique is narrow sectioning, taking face-framing pieces from a section no wider than two fingers rather than a full fringe. This keeps the pieces from adding visual weight to the forehead, which suits finer hair densities especially well. A fuller fringe on thin hair reads sparse and patchy instead of intentional, while a narrow wispy section reads deliberate at any density. It softens the pixie mullet’s overall boldness without changing its core shape.
How to get it: Section off a narrow triangle no wider than two fingers at the crown for the face-framing pieces, leaving the rest of the front hairline pixie-short and untouched. Trim only the very ends yourself between salon visits, using small precision scissors.
Shop The Look
| Product |
| Precision styling scissors for at-home trims |
| Volumizing root spray |
| Soft-hold pomade, small tin |
| Fine-tooth tail comb |
19. Statement Sunglasses Pairing
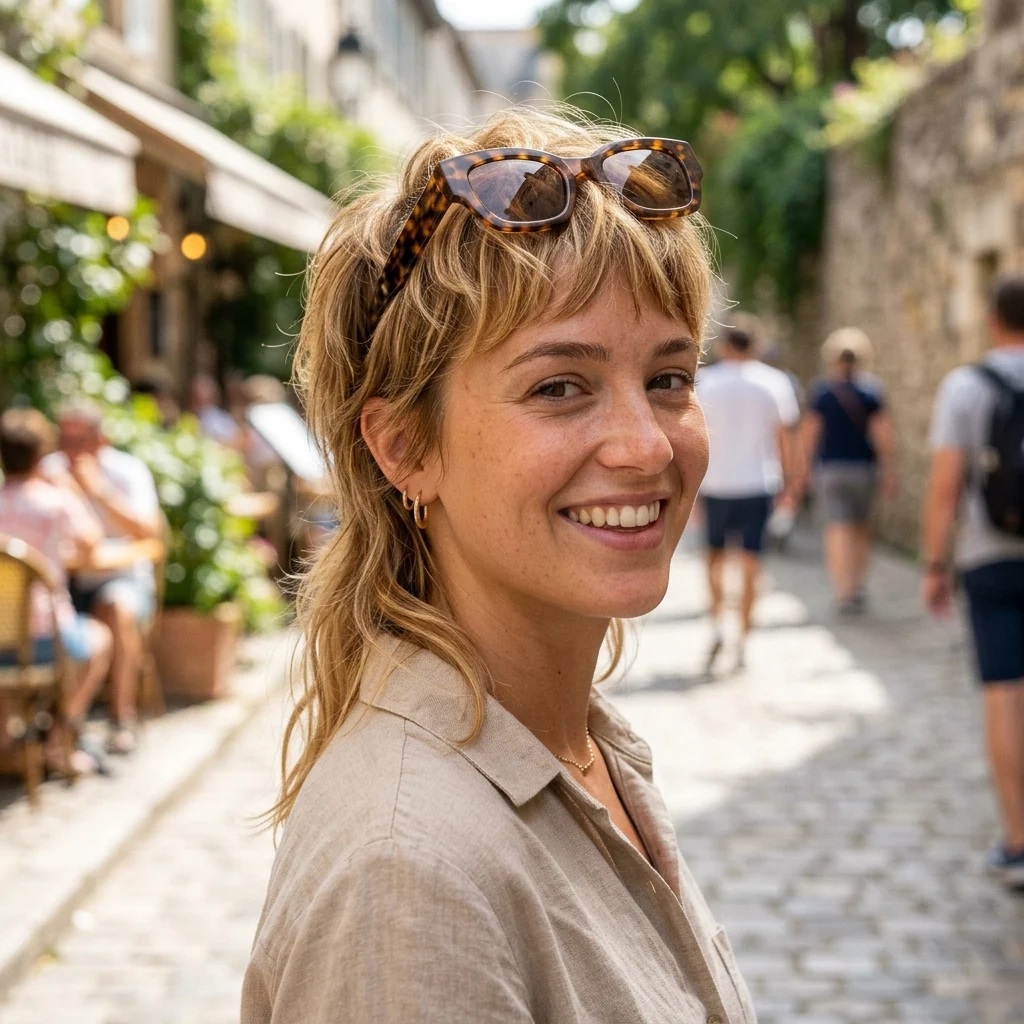
Vibe: Playful, sun-drenched.
Why it works: The principle is proportional pairing, since an oversized tortoiseshell frame has enough visual weight to balance the pixie mullet’s bold, mixed-length shape rather than getting visually lost against it. Pushing sunglasses back over the short front works cleanly because there is little length to catch or pull awkwardly. The tortoiseshell tone also echoes the honey and caramel tones in the hair color itself, which ties the whole look together. It’s a two-second styling addition that reads as considered rather than incidental.
How to get it: Choose an oversized round or cat-eye frame in a tortoiseshell or warm brown tone rather than a small or black frame, which would contrast too sharply against the warm color. Push the frame back from the hairline rather than perching it low on the nose.
Shop The Look
| Product |
| Oversized tortoiseshell sunglasses |
| Flexible-hold texturizing spray |
| Small hair clip for pinning back pieces |
| Lightweight SPF hair mist |
20. Evening-Out Slicked Front
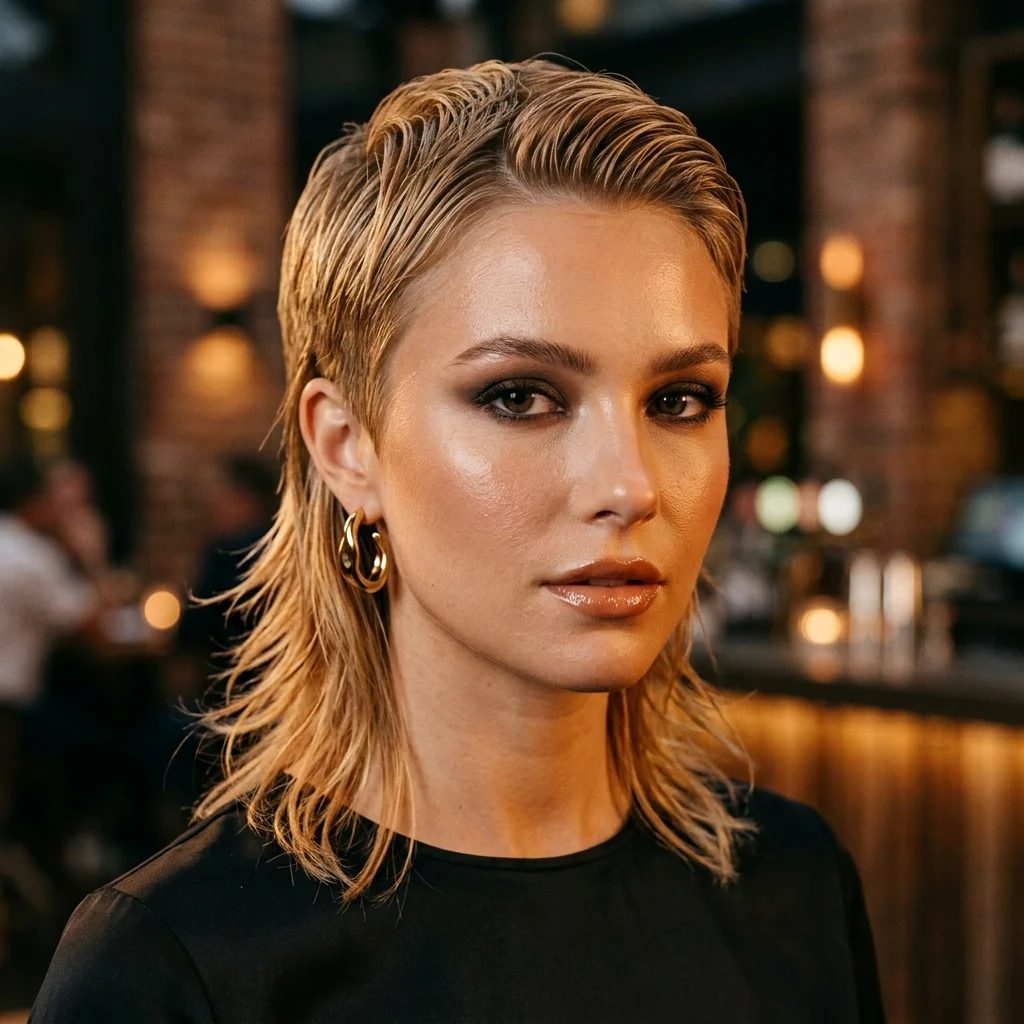
Vibe: Bold, high-contrast.
Why it works: The principle is deliberate contrast between zones, slicking the shorter front flat and glossy while leaving the longer back textured and full. This split styling approach highlights the pixie mullet’s built-in length contrast rather than smoothing it into one uniform finish. It reads dramatically under evening or event lighting in a way the softer daytime versions of this cut do not attempt. The technique requires no heat tool for the front, relying entirely on gel and a comb.
How to get it: Apply a clear, high-shine gel to the damp front section only, combing it flat against the head with a fine-tooth comb. Leave the back section unslicked, working a texturizing paste through it separately so the contrast between the two zones stays sharp.
Shop The Look
| Product |
| Clear high-shine styling gel |
| Fine-tooth styling comb |
| Matte texturizing paste for the back |
| Long-hold setting spray |
21. Caramel Balayage on a Darker Base
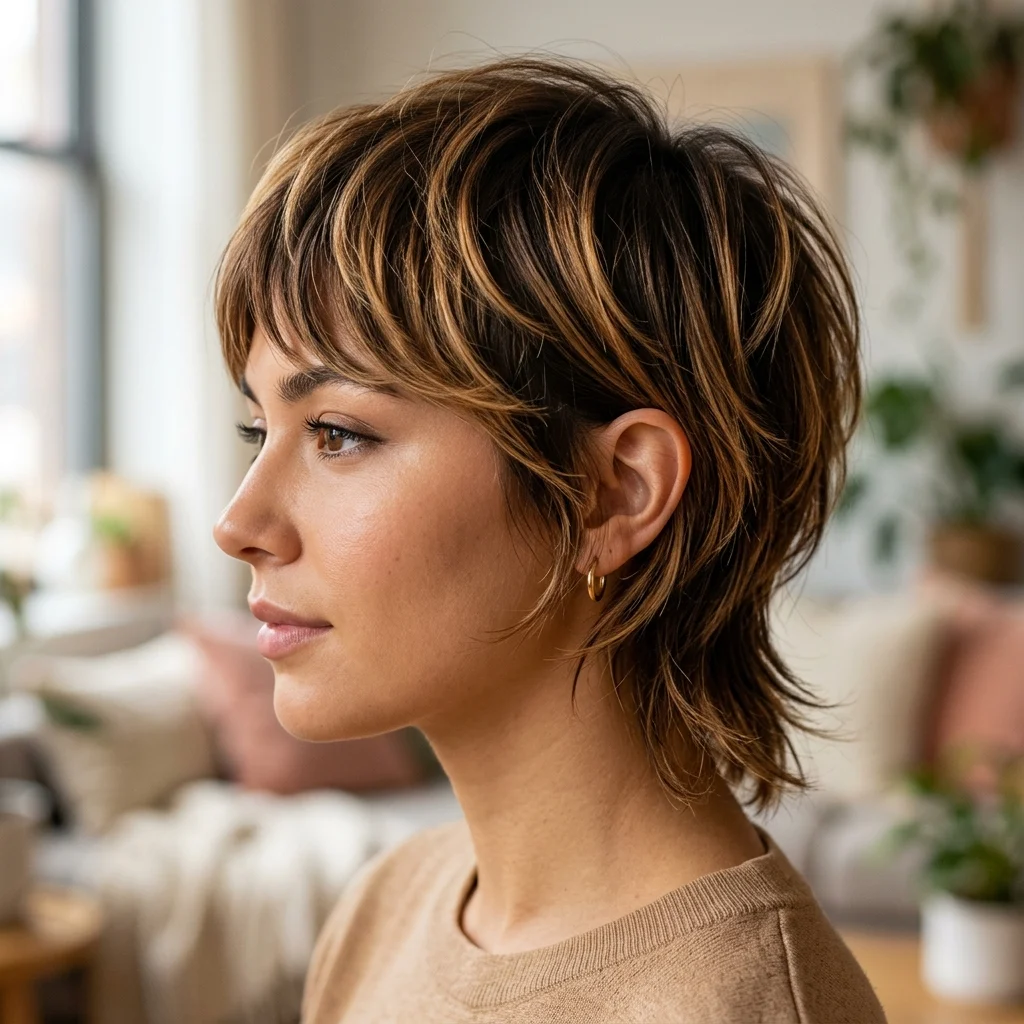
Vibe: Warm, dimensional.
Why it works: The technique is low-maintenance balayage, keeping the root close to the natural base color and concentrating caramel and honey tones through the mid-lengths and ends only. This produces real dimension without the full-head lightening a solid honey blonde base requires, which means significantly less damage and a longer stretch between color appointments. It suits readers who want the honey blonde effect on a budget or timeline that doesn’t allow frequent salon visits. It also grows out with almost no visible regrowth line, since the root was never lightened to begin with.
How to get it: Ask your colorist to keep the root within one to two shades of your natural color and concentrate the caramel and honey balayage from the mid-lengths down. Refresh every ten to fourteen weeks with a gloss rather than a full balayage appointment, which keeps cost and damage down significantly.
Shop The Look
| Product |
| Color-safe hydrating shampoo |
| Warm-toned glossing treatment |
| Bond-repair leave-in spray |
| Weightless shine drops |
22. Textured Crown with Long Nape
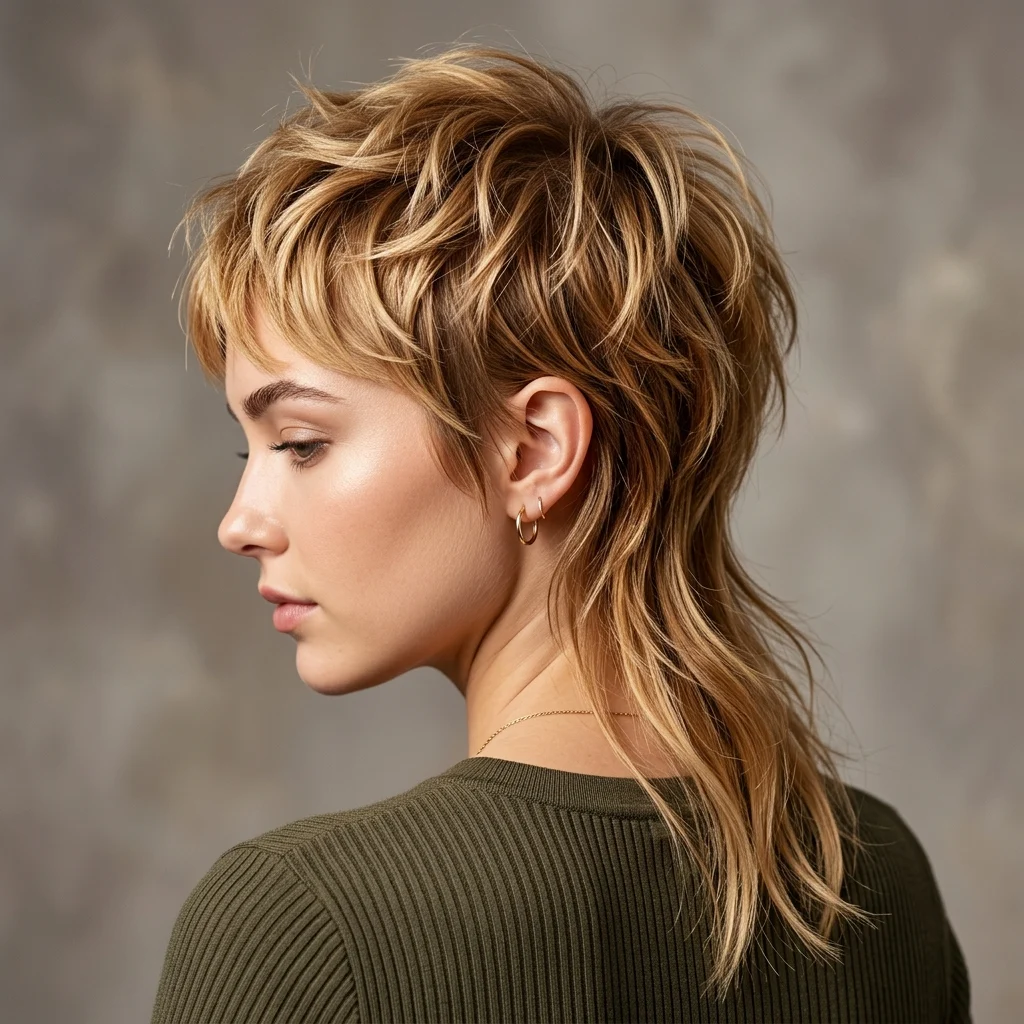
Vibe: Edgy, structured.
Why it works: The technique is zone-specific texturizing, applying heavy point-cutting only at the crown while leaving the nape length largely uncut and simply feathered at the very ends. This produces two distinctly different textures within one cut, an editorial choice that reads more architectural than a uniformly textured shape. The crown’s choppiness draws the eye upward while the nape’s length balances it below. It’s a more technical cut than most on this list and benefits from a stylist experienced specifically with mullet shapes.
How to get it: Ask your stylist to concentrate point-cutting and texturizing specifically at the crown, leaving the nape length comparatively smooth and only lightly feathered at the ends. Style the crown with a matte paste worked in with fingers, then smooth the nape separately with a paddle brush for contrast.
Shop The Look
| Product |
| Matte texturizing paste |
| Small ceramic paddle brush for the nape |
| Precision styling scissors |
| Volumizing root spray for the crown |
23. Glossy Versus Matte Zone Contrast
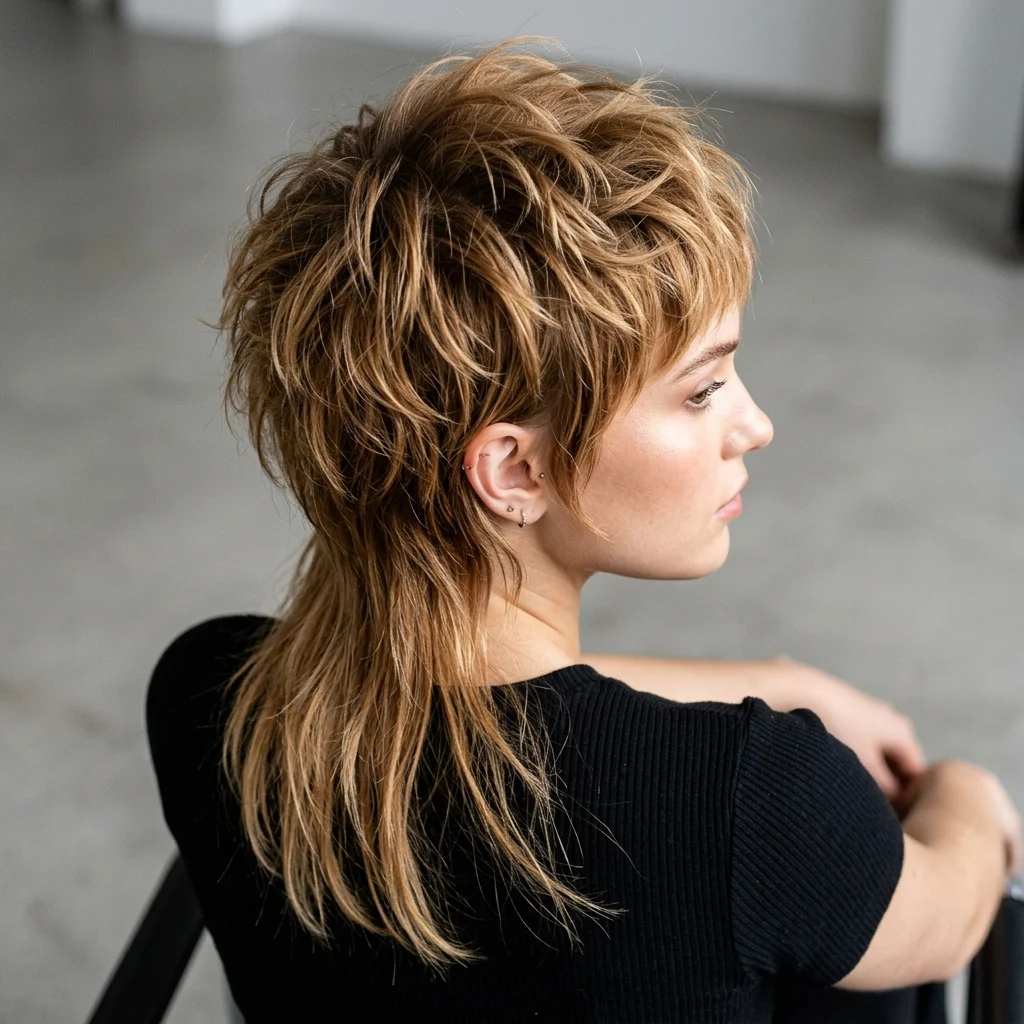
Vibe: Polished, contrasted.
Why it works: The principle is finish contrast, using a glossy, cuticle-sealed product on the front section and a matte, texturizing product on the back so the two zones reflect light completely differently. This is a subtler version of the slicked-front evening look, wearable for daytime rather than events. It highlights the pixie mullet’s built-in length and texture contrast through product finish rather than cutting technique alone. The two finishes photograph distinctly, which is part of why this styling choice performs well on camera.
How to get it: Apply a glossing serum to the front section only, smoothing with a flat iron for shine, then work a matte clay through the back and crown separately for contrast. Keep the two products in separate zones rather than blending them, which is what preserves the deliberate contrast.
Shop The Look
| Product |
| Glossing shine serum |
| Matte clay for texture |
| Small ceramic flat iron |
| Anti-static finishing spray |
24. Heat-Styled Waves at the Ends
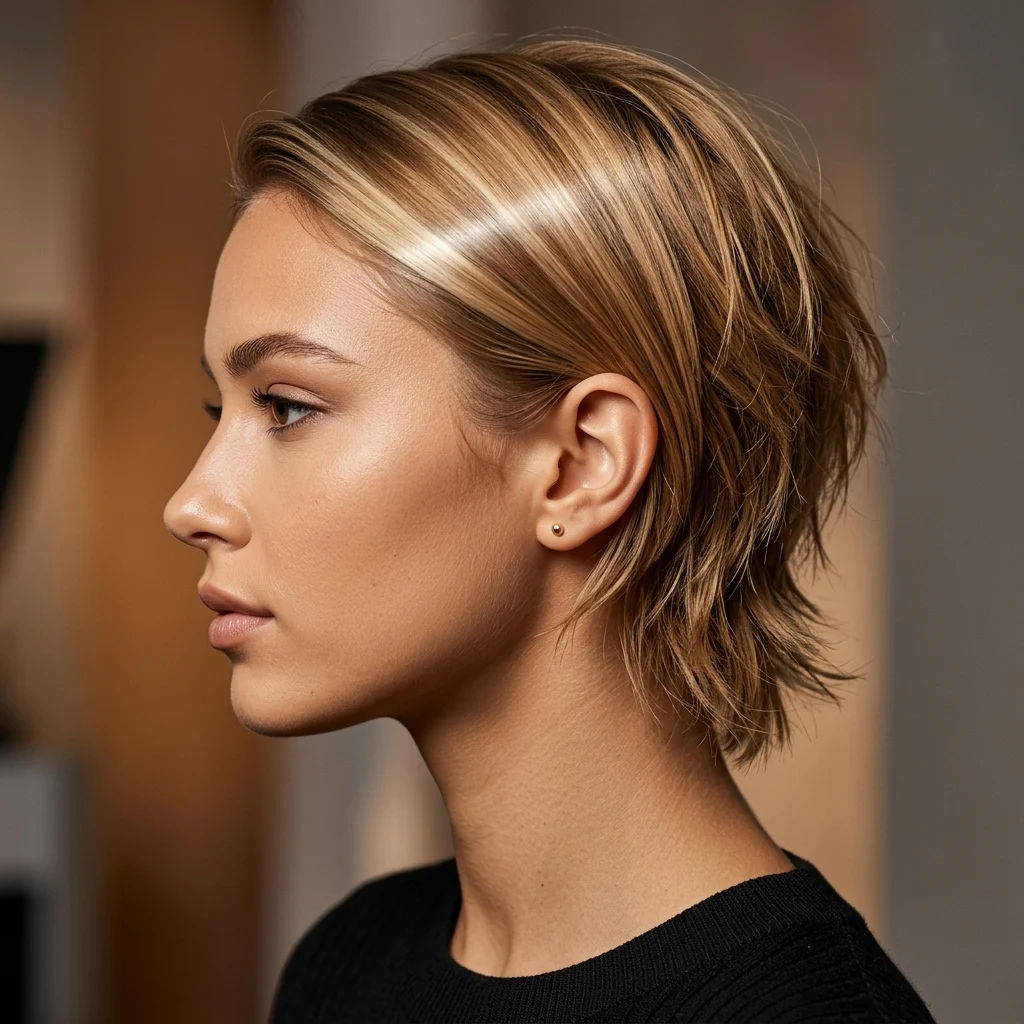
Vibe: Soft, romantic movement.
Why it works: The principle is targeted styling, waving only the longer back and nape pieces rather than the whole head, since the shorter front doesn’t carry enough length to hold a curl. This softens the mullet influence into something closer to romantic than edgy, while still showing off the cut’s length contrast. It also takes less time than a full head of curls, since only the longer sections need heat. Alternating curl direction between sections keeps the pattern from reading uniform.
How to get it: Use a half-inch curling wand on the longer back and nape pieces only, alternating curl direction between sections for a natural pattern. Brush the curls out gently with your fingers once cool, leaving the pixie-short front untouched.
Shop The Look
| Product |
| Half-inch curling wand |
| Heat protectant spray |
| Flexible-hold finishing spray |
| Small tail comb for sectioning |
25. Adjustment for Fine, Thin Hair
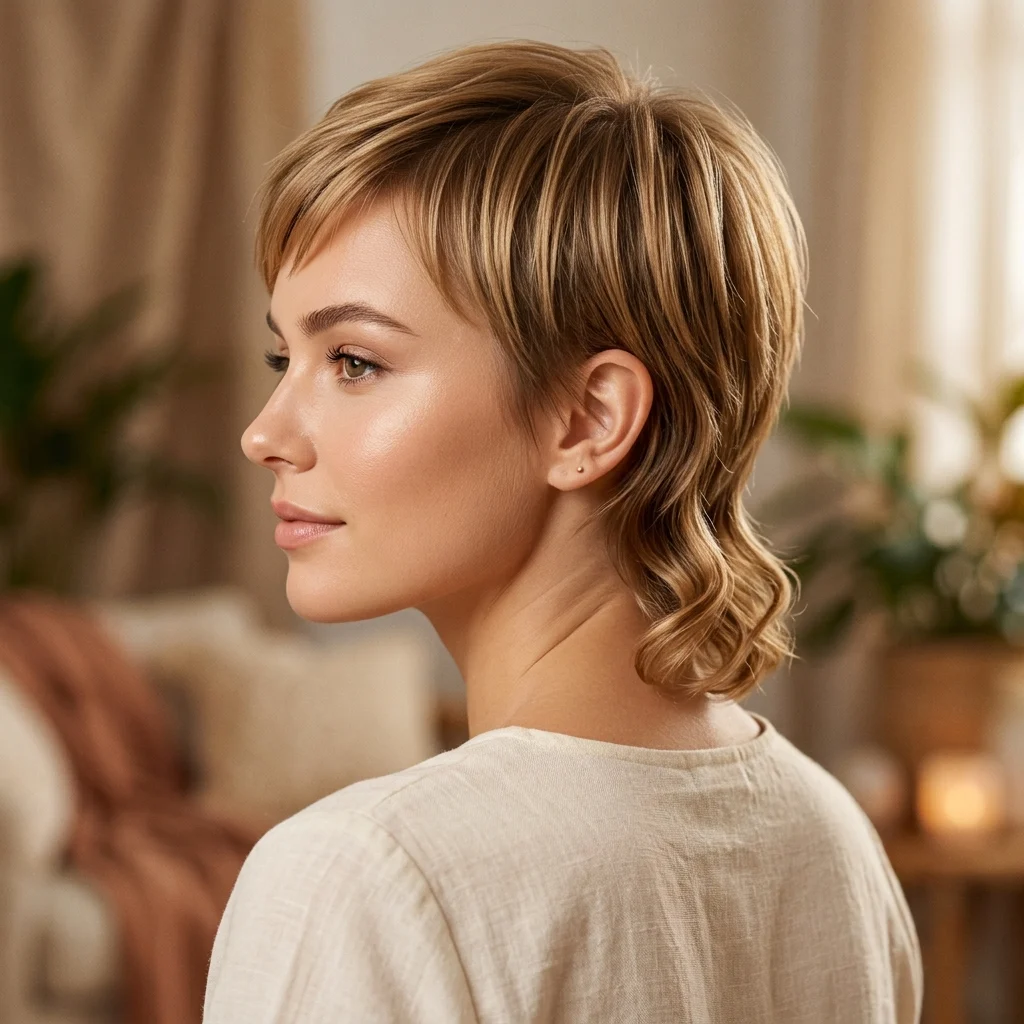
Vibe: Lifted, fuller.
Why it works: The principle is a reduced feathering ratio, since fine hair loses density visually with heavy razoring and needs a blunter overall shape to read full. The length contrast between front and back still creates the pixie mullet’s signature silhouette, but with less texturizing at each layer’s end than a thicker-haired version would carry. Shorter, more compact layers at the crown also add built-in lift that longer layers cannot on fine hair. This adjustment is specific to hair density, not a different haircut altogether.
How to get it: Ask specifically for reduced feathering and a blunter perimeter, mentioning that your hair is fine so your stylist limits the texturizing accordingly. Apply a root-lifting spray at the crown before blow-drying upside down for two minutes of added volume.
Shop The Look
| Product |
| Root-lifting volumizing spray |
| Thickening dry shampoo |
| One-inch round brush for crown volume |
| Lightweight volumizing mousse |
How to Start Your Honey Blonde Pixie Mullet Transformation
The single first move is booking a consultation specifically with a stylist experienced in mullet and shag cuts, since the length contrast this shape depends on requires different technical skill than a standard layered pixie. Bring a reference photo showing the exact ratio of short-to-long you want between the front and back, since “pixie mullet” alone covers a wide range of possible proportions. This first conversation determines whether you end up with the soft, blended version or the bold, disconnected one.
The most common mistake is going too light on the base color in a single session on hair that has never been lightened. This leaves the shorter front pieces, which show the most, brittle and prone to breakage right where the feathering depends on strand strength to hold shape. The fix is a multi-session lightening process spaced four to six weeks apart, or a balayage that keeps the root close to natural, which reaches honey blonde with far less overall lift.
Three items under $50 to start building the look at home: a travel-size tin of matte texturizing paste, a bottle of purple-free toning shampoo for warm blonde, and a half-inch curling wand for the longer back pieces.
A full transformation, cut and color together, realistically takes two salon visits over four to six weeks, at $150 to $280 per session depending on your area. A cut-only refresh on hair that’s already blonde fits into one weekend appointment for under $90.
Frequently Asked Questions About Honey Blonde Pixie Mullet Cuts
What is the difference between a pixie mullet and a regular mullet?
A regular mullet keeps more length throughout the top and sides, with the back simply longer than the front. A pixie mullet cuts the front and sides pixie-short, close to the head, while keeping the mullet’s signature longer, shaggier back and crown. The contrast is more extreme in a pixie mullet, and the front requires far more frequent trims, roughly every three to four weeks, to maintain its short length.
What blonde shade should I ask for to get a honey tone?
Ask for a level 7 or 8 base toned with a gold-based gloss, such as Redken Shades EQ 08GB or a comparable warm formula, rather than an ash or violet one. A caramel money piece framing the face adds the warmest, most concentrated color exactly where it shows most. Ask specifically for “honey” or “caramel” blonde by name, since “ash blonde” or “platinum” will produce a cooler result entirely.
How much does a honey blonde pixie mullet typically cost?
A full color and cut transformation from a darker natural shade usually runs $150 to $300 per session, often needing two sessions spaced four to six weeks apart if starting from a significantly darker base. A cut alone, once the color is established, typically costs $50 to $90 depending on your area. A low-maintenance balayage version that keeps the root close to natural can cost less overall since it needs fewer follow-up sessions.
Does this style work with curly or wavy natural hair texture?
Yes, and curly texture actually enhances the mullet’s shaggy character at the back, since natural curl adds volume and movement without extra styling effort. The front pixie section needs slightly longer layers than a straight-hair version to account for curl shrinkage, since curls appear shorter than their actual cut length. A diffuser attachment helps maintain natural pattern on the shorter front without daily heat styling.
How often does the front of a pixie mullet need to be trimmed?
The pixie-short front grows out of shape faster than the longer back, typically needing a trim every three to four weeks to hold its close, cropped silhouette, compared to eight to ten weeks for the longer back panel. Many stylists offer a lower-cost front-only trim between full cut appointments specifically for this reason, so it’s worth asking when you book.
Ready to Create Your Dream Honey Blonde Pixie Mullet?
From the caramel money piece to the disconnected nape to the small styling details like a printed bandana or a pair of tortoiseshell sunglasses, these 25 ideas cover a lot more ground than just one haircut. Starting small is not a compromise here, since a single texturizing paste and a bottle of warm-toned shampoo can get you testing the vibe before you ever commit to the cut itself. Book a consultation this week with a stylist who has real mullet experience, even if the cut is still a few weeks out, so you can settle on the exact length contrast you want. There’s a particular kind of confidence that comes with wearing a shape this bold and still having it style itself most mornings. Save your favorites now, especially the ones with the length contrast you’re drawn to, since that’s the detail worth bringing straight into your consultation.