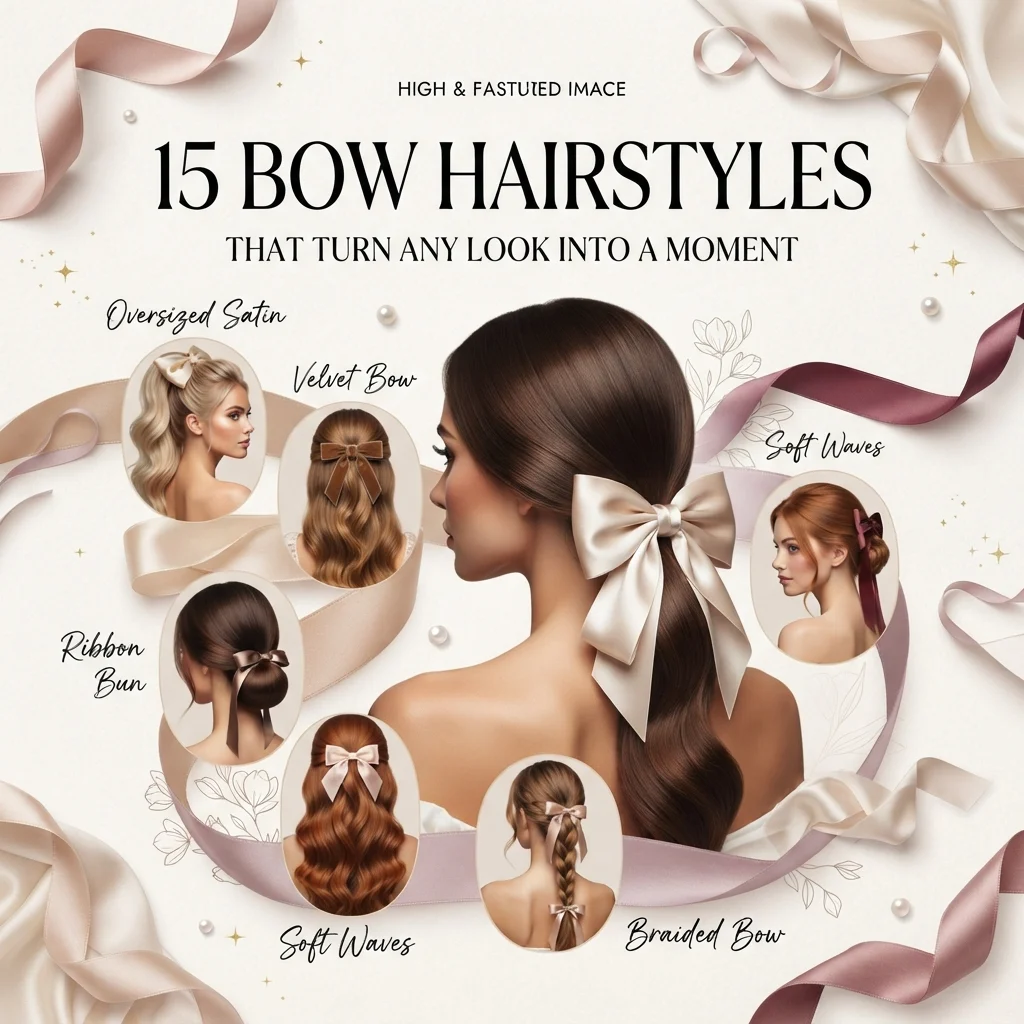
15 Bow Hairstyles That Turn Any Look Into a Moment

Bow hairstyles use a fabric or ribbon bow as the central styling element, built into the hair itself rather than clipped on as an afterthought. This article gives you 15 bow hairstyles, from oversized statement bows to two-minute clip-on fixes, ready to recreate for everyday wear or a special occasion.
There’s a softness to a bow hairstyle that no other accessory quite replicates, a little playful, a little polished, never trying too hard. Silk catches light differently than metal or plastic ever could, giving the whole look a hushed, romantic quality even in a simple ponytail. Bow hairstyles have that rare quality of feeling both nostalgic and completely current at once. Here are 15 ideas worth saving, and stealing.
Why Bow Hairstyles Work So Well
Bow hairstyles trace back to Victorian-era ribbon styling and saw a major revival through 1990s prep culture, but the current version draws more directly from coquette and balletcore aesthetics: softer palettes, larger proportions, and fabric bows instead of stiff grosgrain. What separates a true bow hairstyle from simply clipping on an accessory is intentional placement: the bow becomes part of the hair’s structure, wrapped around a ponytail base or woven into a braid, not just pinned on top.
Core materials are silk, satin, velvet, and organza, chosen specifically for how each fabric catches light and holds shape. Color palettes lean toward soft ivory, dusty rose, sage green, and chocolate brown for everyday wear, or high-contrast black and red for statement styling. Ribbon width matters as much as color. A two-inch silk ribbon reads as delicate, while a four-inch velvet bow reads as a full statement piece.
This style is trending because of a broader cultural pull toward softness and nostalgia in beauty, visible in Pinterest search spikes for “coquette hair” and “bow hairstyle” over the past several seasons. It offers an easy way to add personality to a simple style without committing to a haircut or color change.
Bow hairstyles work at any hair length, which makes them unusually accessible. Short hair benefits most from smaller bows clipped near the crown, since there’s less length to gather into a base, while longer hair can support larger, more structural bow placements.
| Element | Delicate & Romantic | Bold & Statement |
|---|---|---|
| Philosophy | Soft, understated femininity | Confident, focal-point styling |
| Materials | Silk, thin satin ribbon | Velvet, oversized organza |
| Color Palette | Ivory, dusty rose, sage | Black, red, deep burgundy |
15 Bow Hairstyles to Try
1. Pastel Ribbon on a Low Ponytail
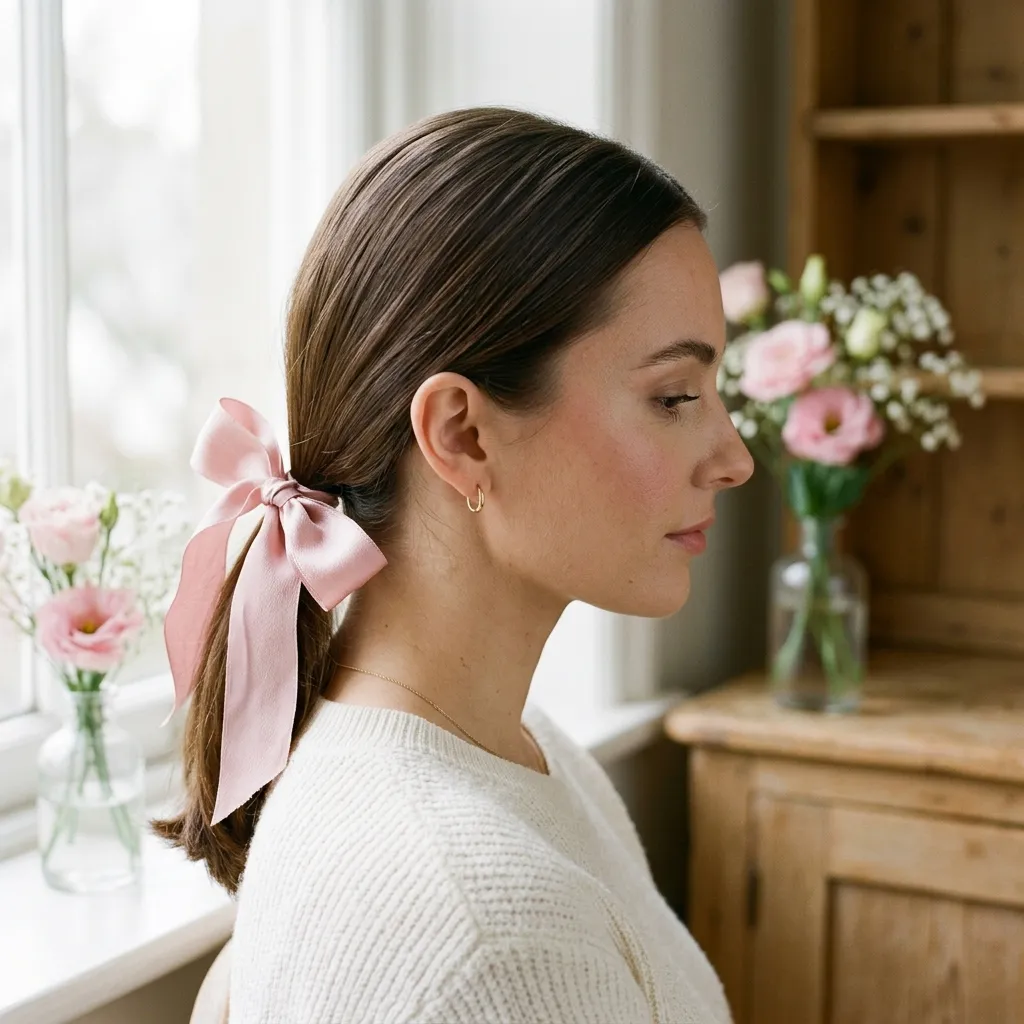
This look feels hushed and soft, like it belongs in a quiet morning.
Wrapping a pastel silk ribbon directly around the base of a low ponytail conceals the elastic completely, which is what separates a true bow hairstyle from an accessory simply clipped on top, the ribbon becomes structural, not decorative. Soft pink against brunette hair creates gentle contrast without competing with the hair color itself.
Gather hair into a low ponytail, secure with a thin elastic, then wrap a thirty-inch silk ribbon around the base three times before tying a bow, adjusting the loops to sit slightly off-center for a less stiff finish.
Quick Win: A pre-cut silk ribbon spool under $12 gives enough length for several ponytail wraps.
Shop the Look
- Silk ribbon spool, blush pink
- Silicone-grip thin hair elastics
- Boar-bristle smoothing brush
- Shine finishing serum
- Fine-tooth sectioning comb
2. Structured Silk Bow Clip
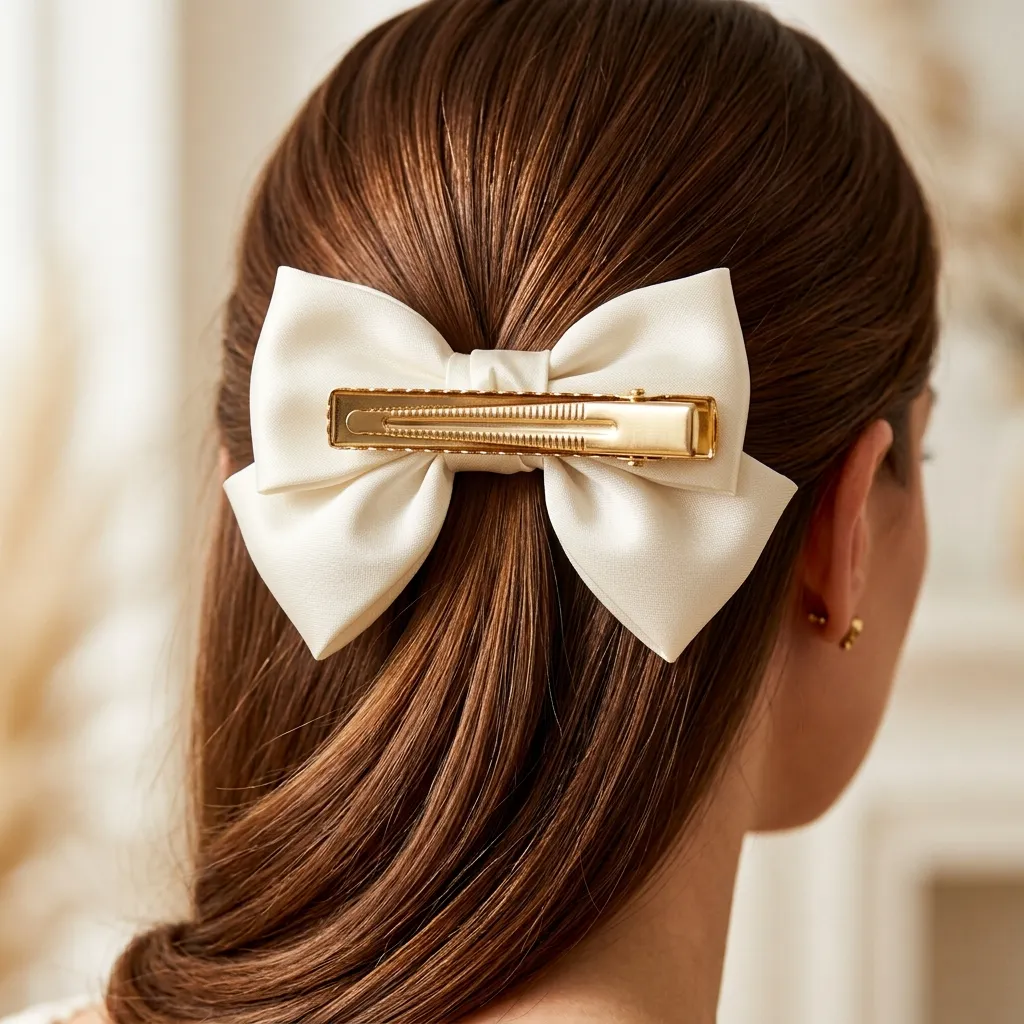
This bow feels polished, holding its shape no matter how the day moves.
A structured silk bow, built over a wire or interfacing core, keeps its loops crisp instead of collapsing flat the way a tied ribbon can by midday. That structural rigidity is what makes it read as a finished accessory rather than a loose tie, and it works on smooth or textured hair equally well since the bow itself carries the visual weight.
Clip the structured bow at a slight diagonal near the crown, backcomb a small section beneath it for lift, and smooth the surrounding hair flat so the bow stays the clear focal point.
Shop the Look
- Structured silk bow hair clip, ivory
- Fine-tooth teasing comb
- Flexible-hold hairspray
- Smoothing shine serum
- Bobby pins, tone-matched
3. Oversized Velvet Statement Bow
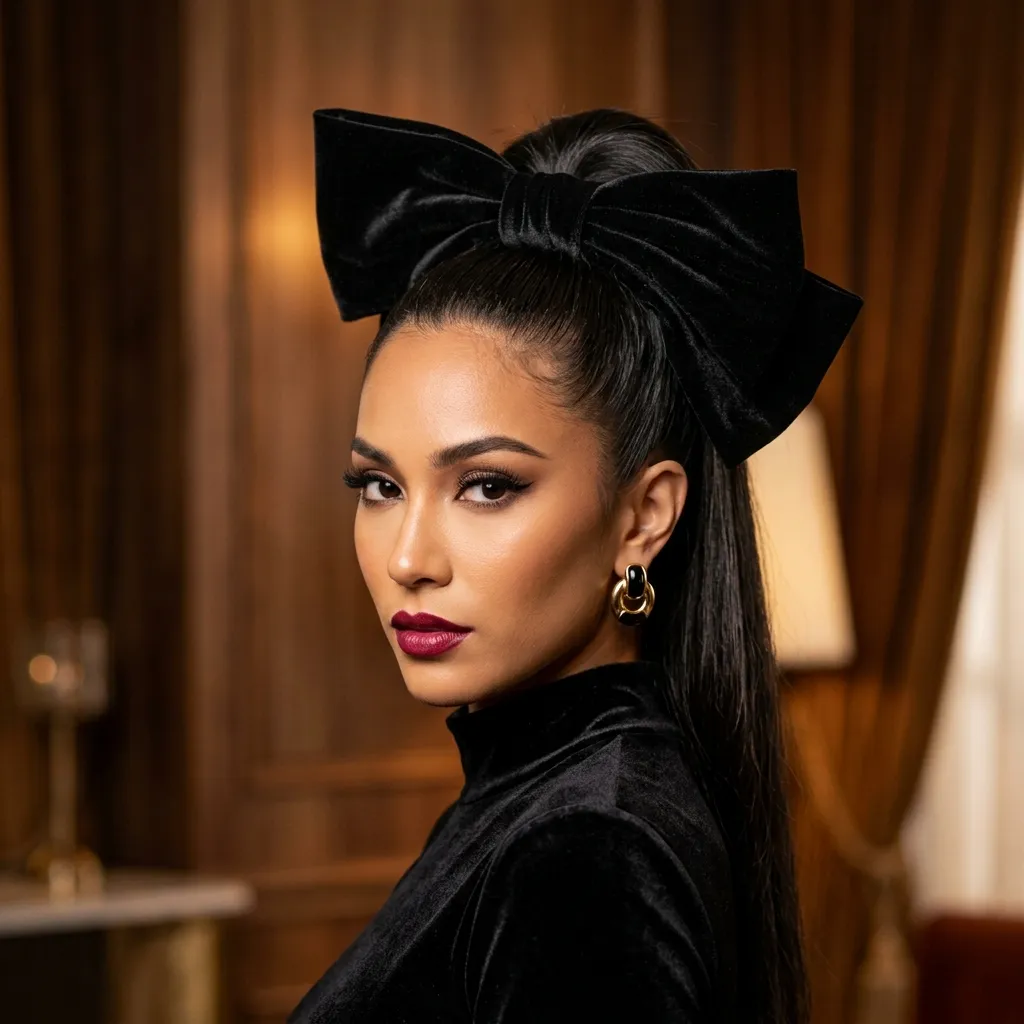
This bow feels dramatic on purpose, unapologetically the main event.
Scaling the bow up to four or five inches wide shifts it from accessory to focal point, using the same proportion principle that makes one large statement piece read as more intentional than several small ones. Velvet specifically absorbs light rather than reflecting it, which keeps an oversized bow from looking overly shiny or costume-like.
Secure a high, sleek ponytail first, then wrap and tie a wide velvet ribbon around the base, fluffing the loops outward by hand so the bow reads as full rather than flat against the head.
Quick Win: A single oversized velvet bow clip under $15 skips the wrapping step entirely for a faster version of this look.
Shop the Look
- Oversized velvet bow, black
- Strong-hold styling gel
- Fine-tooth rat-tail comb
- High-shine finishing spray
- Thick hair elastics, black
4. Glossy Sleek Base Under a Bow
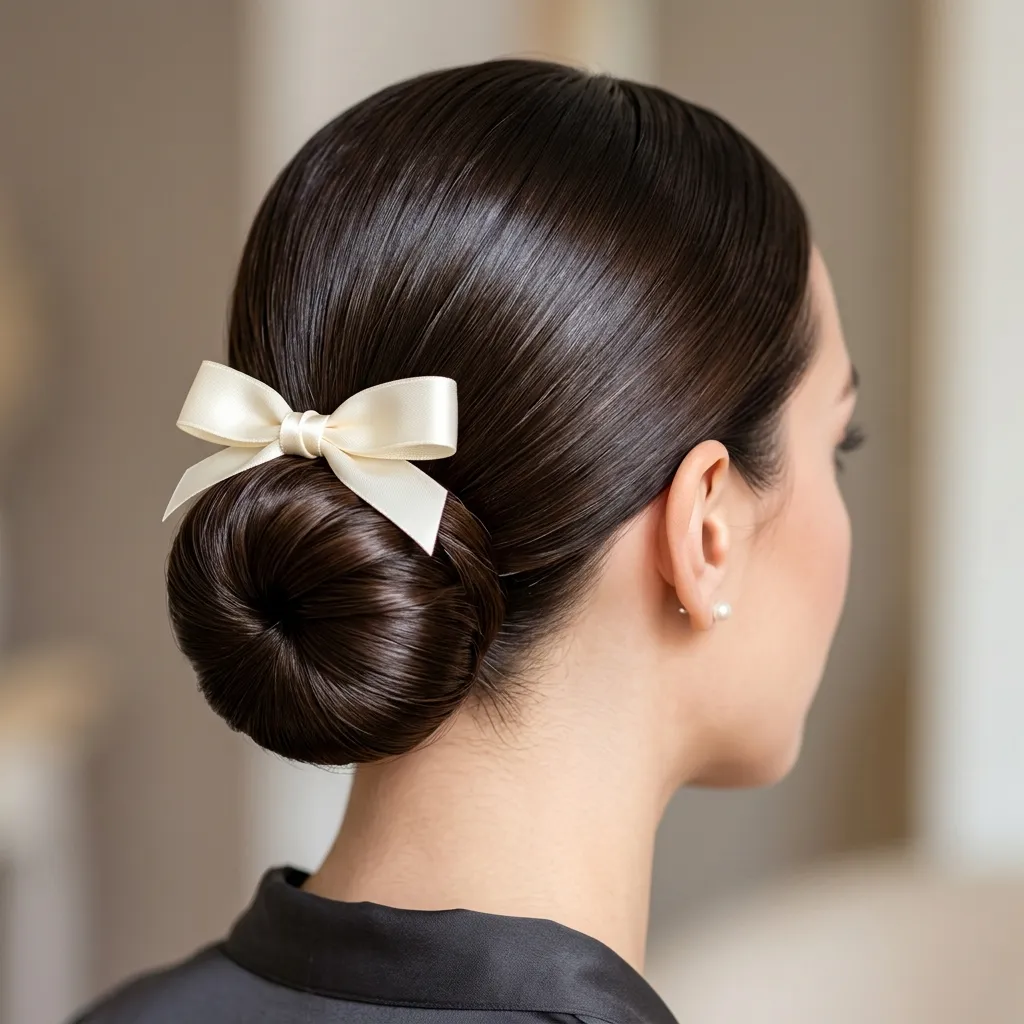
This finish feels sleek enough that the bow becomes the only texture in the whole look.
A high-gloss base flattens the hair’s cuticle so light reflects in one clean line, which creates contrast against the matte or satin texture of the bow itself, a technique called texture layering, where two different surface finishes sit side by side instead of competing. Without that gloss, the bow and hair blend together and lose definition.
Apply a silicone smoothing serum before styling into a low bun, then position a small satin bow just above the bun’s base where the glossy surface meets the fabric texture most directly.
Shop the Look
- Silicone smoothing hair serum
- Small satin ribbon bow, ivory
- Ceramic flat iron
- Bun-shaping donut, small
- Anti-frizz finishing spray
5. Low Ponytail with Wrapped Bow Tail
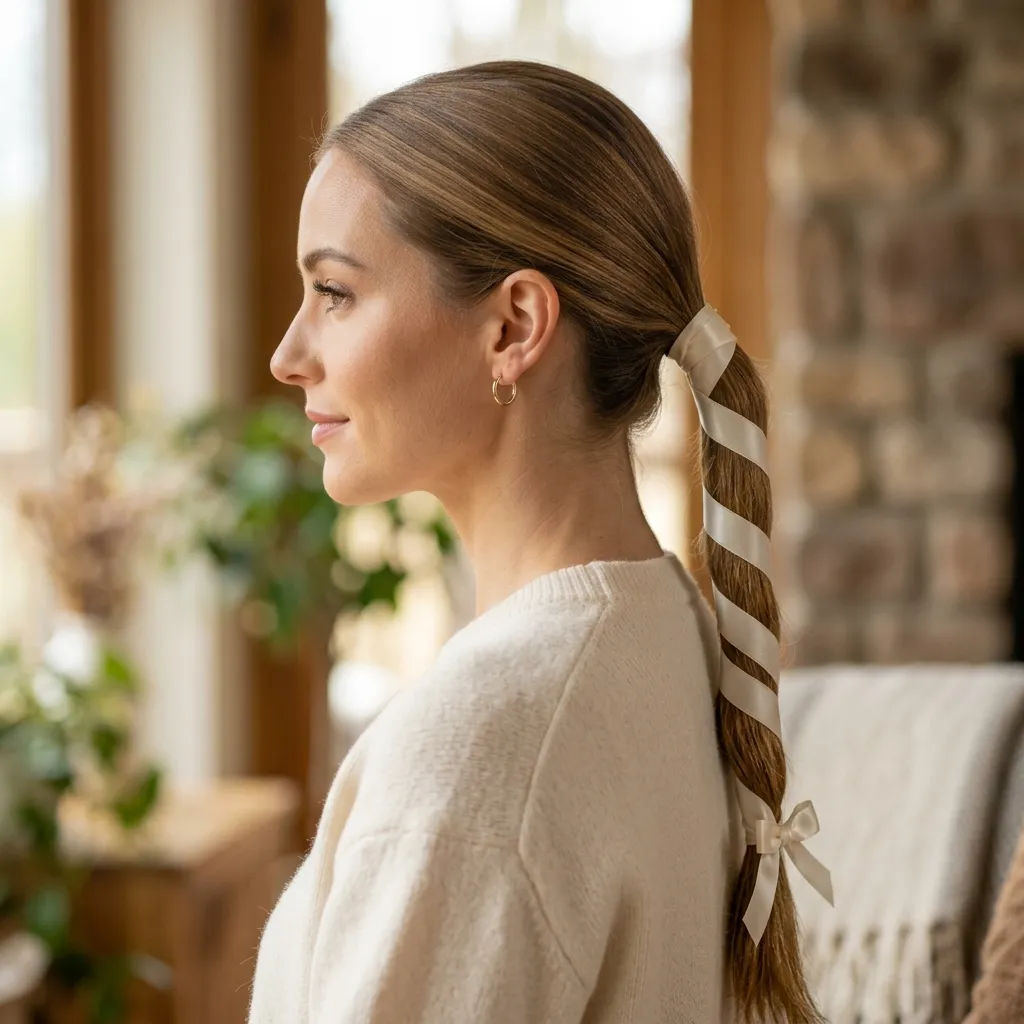
This silhouette feels layered and deliberate, like it took real thought to build.
Wrapping ribbon in a spiral down the length of a ponytail, rather than only at the base, extends the bow’s presence through the whole silhouette instead of confining it to one point. A technique that uses repetition of line to keep the eye moving down the style. The bow at the end becomes a natural stopping point for that visual journey.
Secure a low ponytail, then wind a satin ribbon in a loose spiral from base to about two inches from the ends, tying off the remaining ribbon into a small bow.
Quick Win: A pack of two matching ribbon spools under $10 gives enough length to wrap even long ponytails fully.
Shop the Look
- Satin ribbon spool, caramel tone
- Silicone-grip hair elastic
- Boar-bristle smoothing brush
- Shine spray, lightweight
- Small fabric scissors
6. Tonal Bow Matching Hair Color
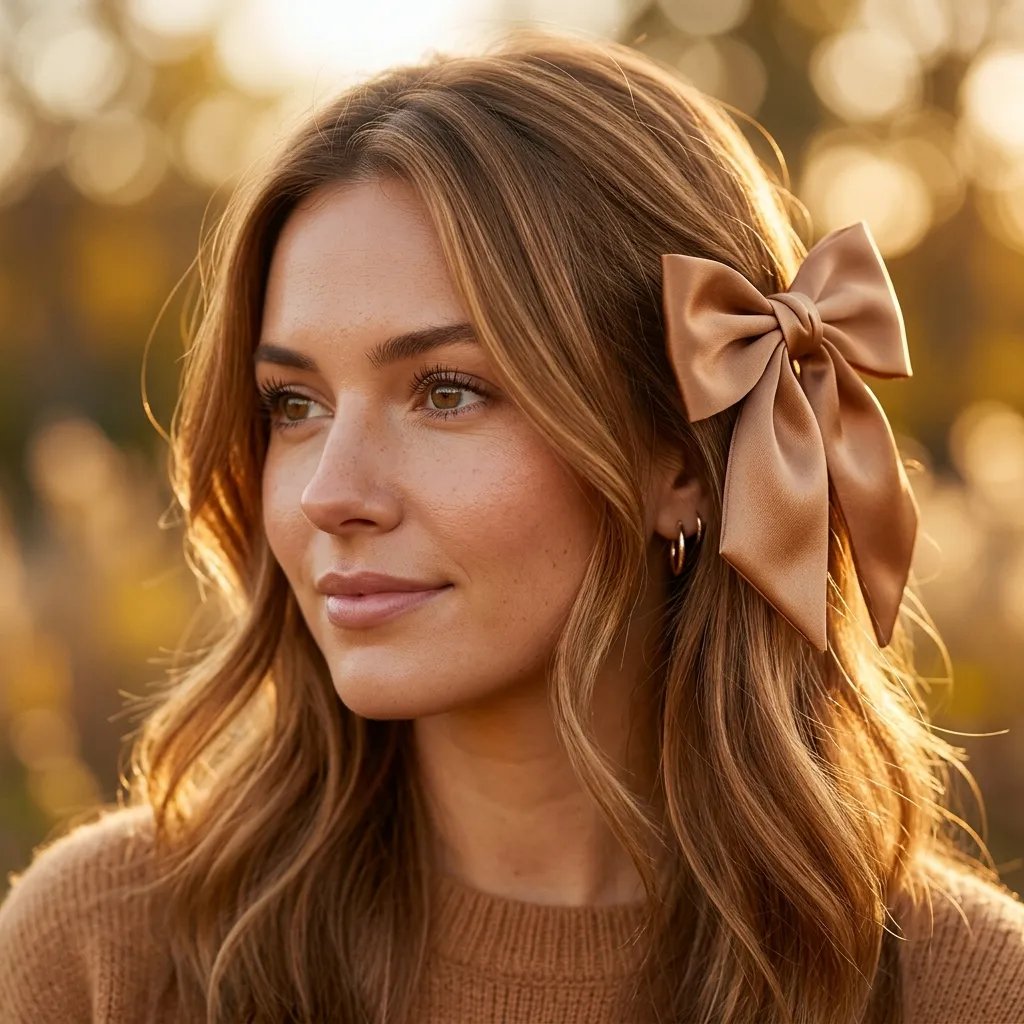
This look feels cohesive, almost like the bow grew out of the hair itself.
Matching the bow’s fabric tone closely to the hair color creates a monochrome effect, where the bow’s satin sheen provides the only real contrast against the matte hair surface, a subtler technique than a contrasting color, relying entirely on texture rather than hue to create interest. It works especially well on hair with warm, saturated tones.
Hold swatches of ribbon against dry hair in natural light to find the closest tonal match, favoring a shade slightly lighter than the hair itself since satin tends to read darker once tied.
Shop the Look
- Satin ribbon multi-shade sample pack
- Shine-enhancing hair serum
- Fine-tooth sectioning comb
- Flexible-hold hairspray
- Small hair elastics, matched tone
7. Velvet Bow Woven Into a Braid
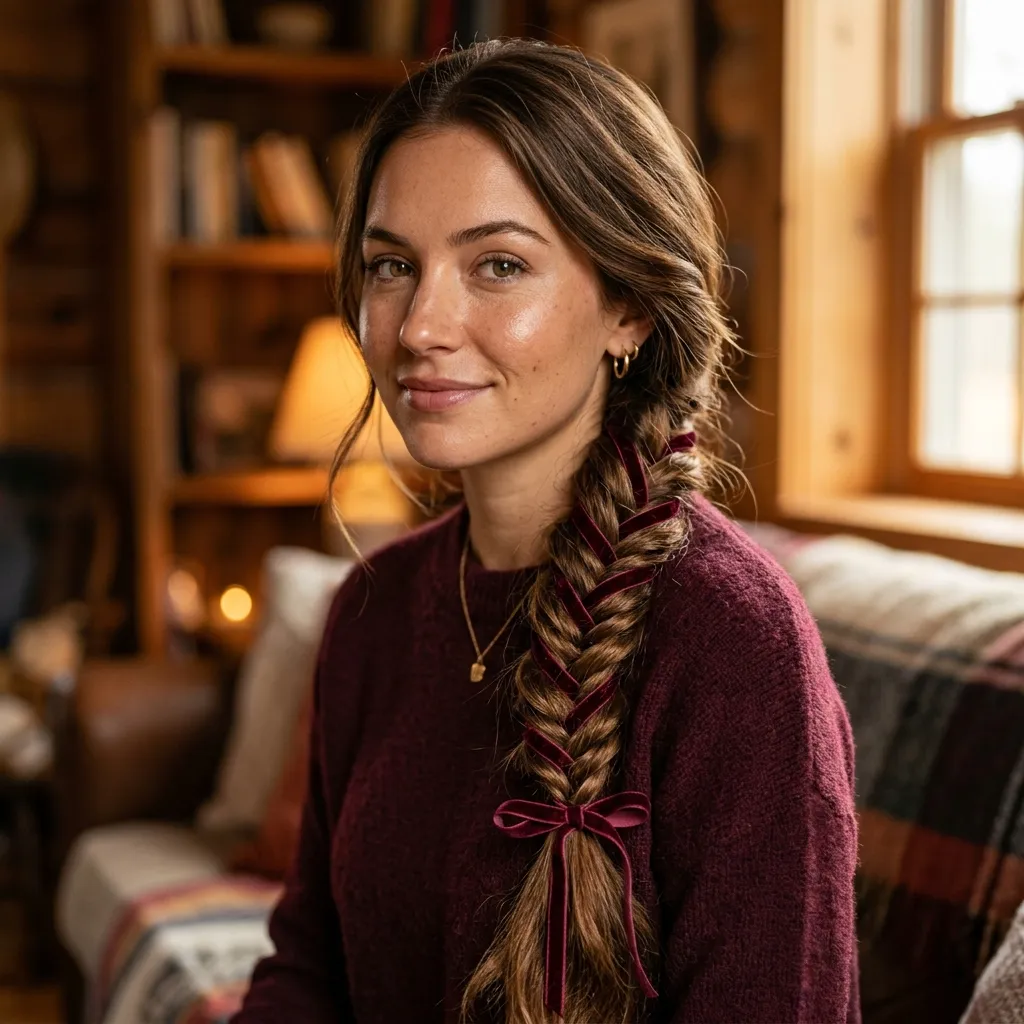
This braid feels warm and a little unexpected, ribbon threading through every strand.
Weaving ribbon directly into a braid, rather than tying it on afterward, integrates the bow material into the hair’s actual structure, the same principle that separates true bow hairstyling from simple accessorizing. Velvet’s texture stands out clearly against the smoother strands of a fishtail braid, creating natural contrast without needing a contrasting color.
Tape one end of a velvet ribbon to the underside of your part, then braid it in as a third “strand” alongside your hair, finishing with a small bow once the braid ends.
Quick Win: Securing the ribbon with a small piece of clear tape at the start keeps it from slipping while you braid.
Shop the Look
- Velvet ribbon spool, burgundy
- Hair-safe clear tape
- Fine-tooth sectioning comb
- Small clear elastic ties
- Flexible-hold finishing spray
8. Finding the Right Bow Placement
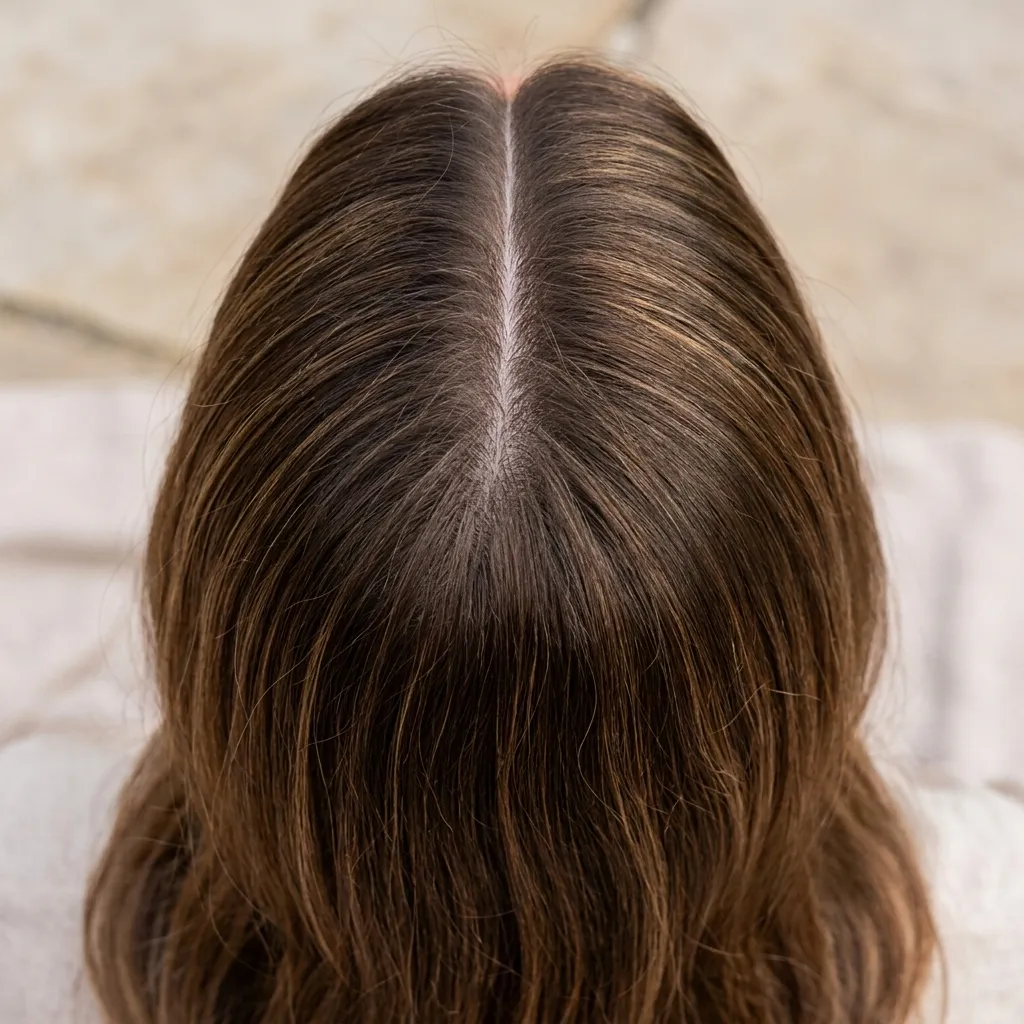
This starting point feels grounding, the one decision that shapes everything after it.
Bow placement changes the entire proportion of a hairstyle: a bow at the crown draws the eye upward and adds height, one at the nape elongates the neck, and one at the side creates asymmetry that softens a symmetrical face. Choosing placement based on face shape and hair length, rather than habit, is what separates styling that flatters from styling that simply decorates.
Stand in front of a mirror and hold a bow at the crown, nape, and side part in turn, noting which placement visually lengthens or balances your face shape best before committing to a style.
Shop the Look
- Adjustable hair bow clip, neutral
- Rat-tail parting comb
- Small hand mirror
- Flexible-hold hairspray
- Fine-tooth sectioning comb
9. Mini Bow Cluster Along the Part
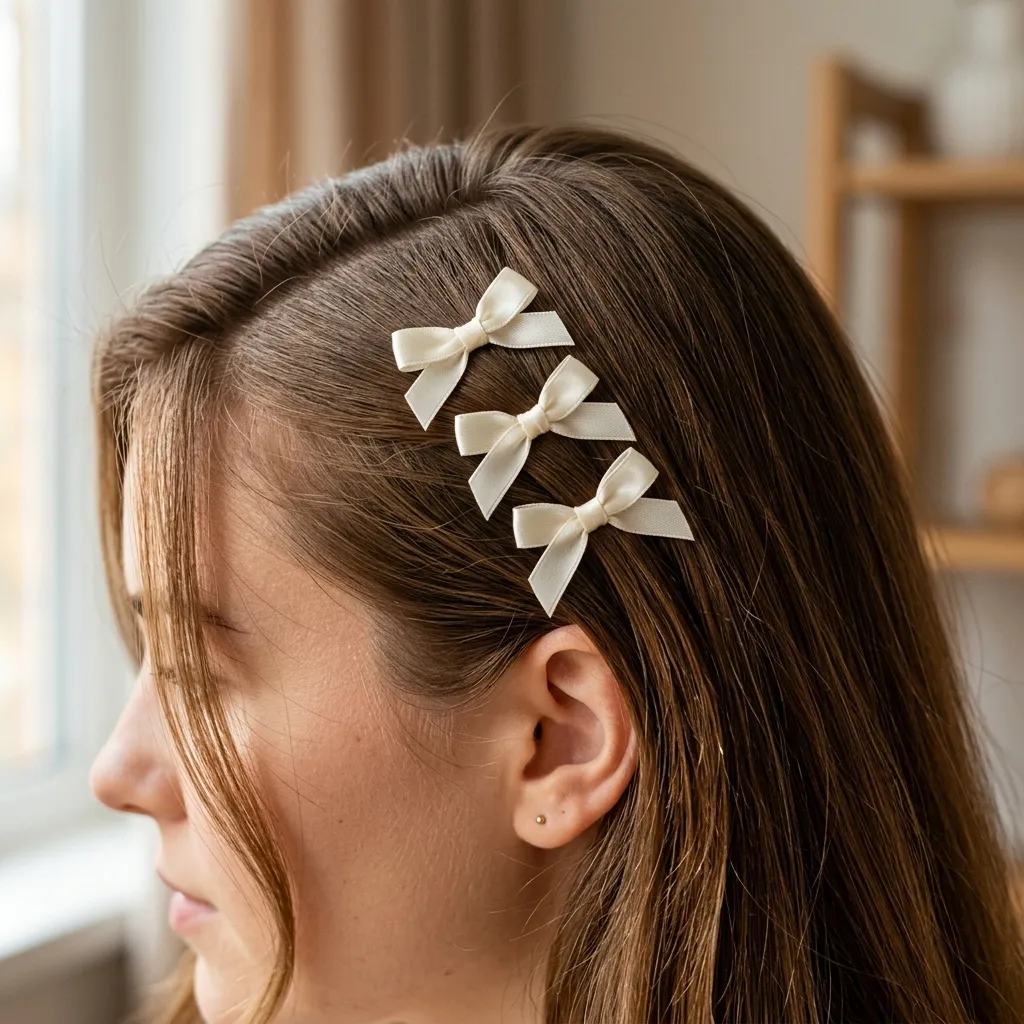
This detail feels playful, small enough to notice only up close.
Lining several miniature bows along the part uses repetition of a single small shape to create rhythm, the same visual technique as a trail of pins, but softer because fabric absorbs light instead of reflecting it. Keeping each bow under an inch wide prevents the cluster from reading as cluttered.
Section a straight line along the part, clip three mini bows evenly spaced about an inch and a half apart, angling each one in the same direction for a cohesive trail rather than a scattered look.
Quick Win: A six-pack of mini satin bow clips under $10 covers this look and several single-bow styles besides.
Shop the Look
- Mini satin bow clip set
- Fine-tooth sectioning comb
- Lightweight shine serum
- Small bobby pins, tone-matched
- Flexible-hold finishing spray
10. Soft Matte Base for a Textured Bow
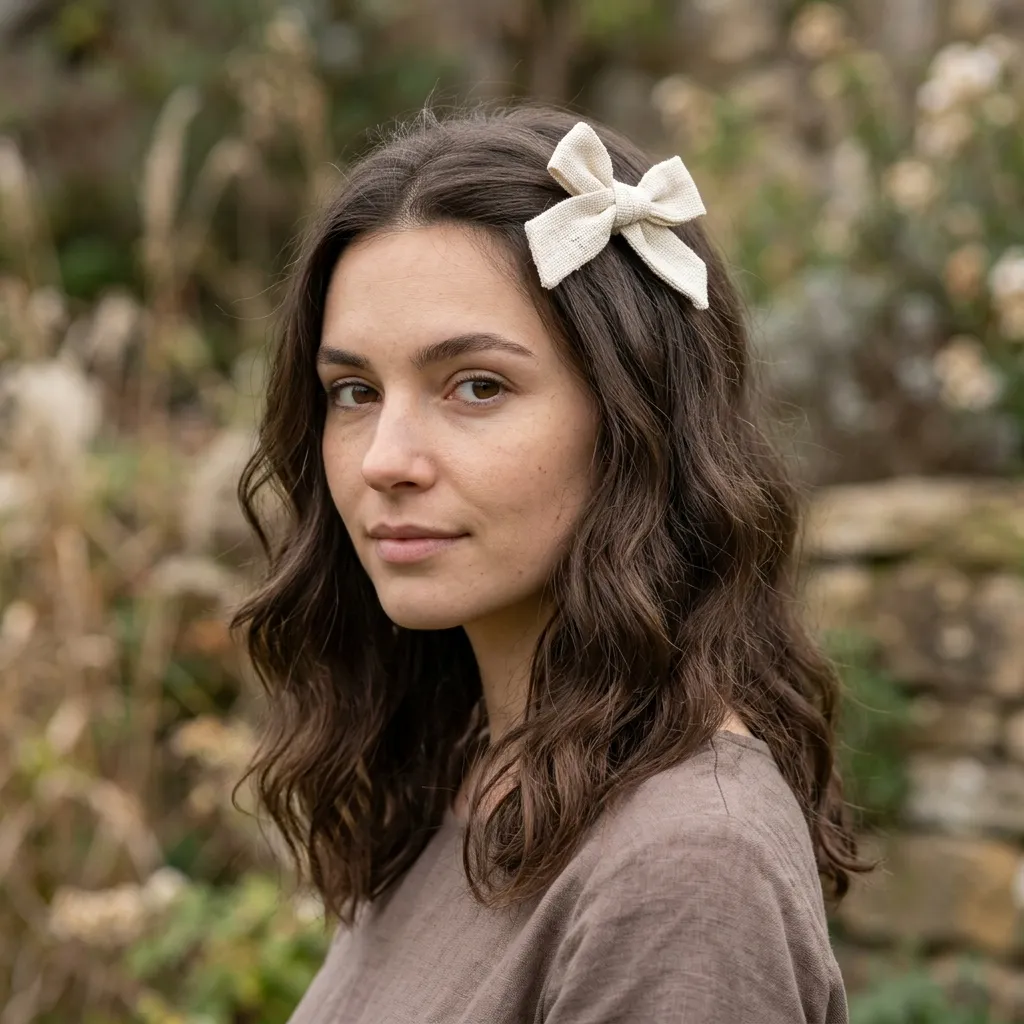
This look feels grounded, quiet in a way glossier bow styles rarely are.
Pairing a matte cotton or linen bow with a matte, texturized hair base keeps the whole look in one tonal register instead of creating shine contrast, which suits softer, more natural-leaning styling. This is the inverse of the glossy-base technique, instead of contrast through texture, it uses consistency to keep the look cohesive and calm.
Work a texturizing clay through damp waves for a matte finish, let hair air-dry fully, then clip a cotton or linen bow near the crown once the texture has completely set.
Shop the Look
- Matte texturizing clay
- Cotton or linen fabric bow clip
- Wide-tooth detangling comb
- Sea salt texturizing spray
- Matte-finish flexible hairspray
11. Half-Up Bow with Twisted Sections
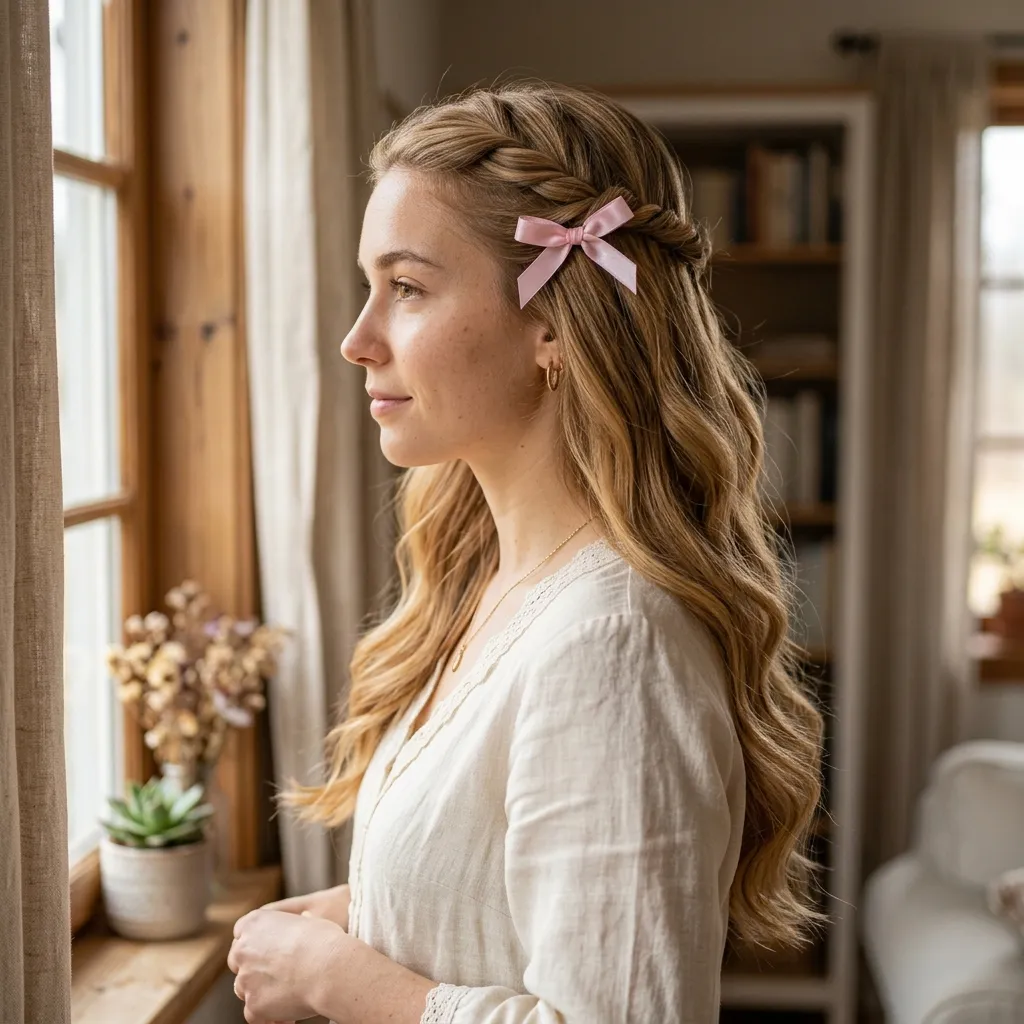
This shape feels effortless, like the bow simply landed where the twists met.
Twisting two sections from either side of the head toward the crown creates negative space in the gathered area, and securing that meeting point with a bow gives the twists a clear, finished endpoint instead of trailing off into loose pins. This half-up structure works with any hair length past the shoulders.
Take two one-inch sections from the front hairline, twist each toward the back, cross them at the crown, and tie a small bow directly over the point where they meet.
Shop the Look
- Small satin bow, pre-tied
- Bobby pins, crossed-pin pack
- Texturizing sea salt spray
- Shine serum, lightweight
- Fine-tooth sectioning comb
12. High-Contrast Red Bow on Dark Hair
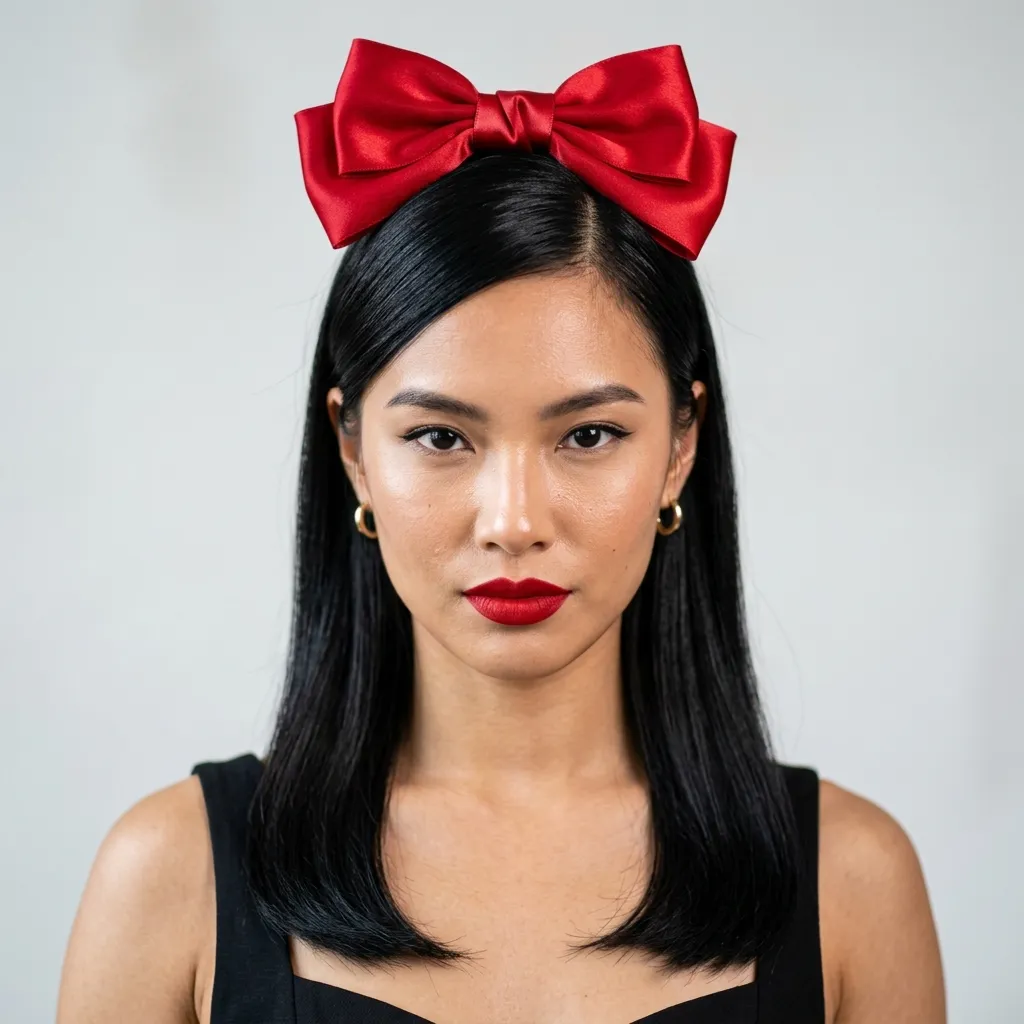
This bow feels striking, the single loudest element in an otherwise simple style.
Red against jet black hair creates the strongest possible contrast on the color wheel available to bow styling, which is why this pairing reads as bold even with an otherwise minimal hairstyle. High contrast works best when the rest of the style stays deliberately simple, since a busy base would compete with the bow for attention.
Keep the hair sleek and smooth with no additional texture or accessories, then position a single red bow at the crown as the only focal point in the entire look.
Quick Win: A single well-made red satin bow under $15 works as a reusable statement piece across many future looks.
Shop the Look
- Structured satin bow, red
- Strong-hold smoothing gel
- Ceramic flat iron
- High-shine finishing spray
- Fine-tooth rat-tail comb
13. Airy Organza Bow for Special Occasions
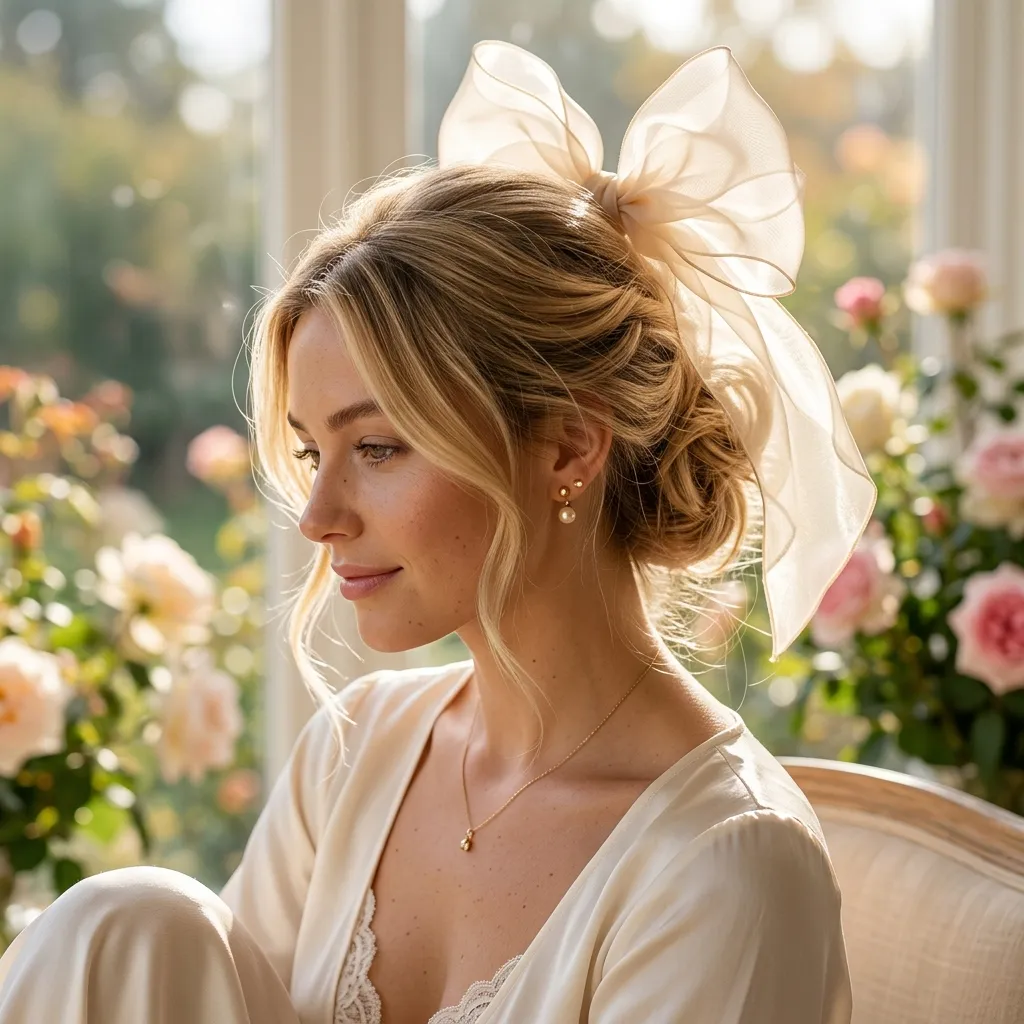
This bow feels airy, almost weightless against an otherwise structured updo.
Organza is a sheer, crisp fabric that holds shape while still letting light pass through it, which is why it photographs so differently from opaque silk or velvet bows. It adds volume without adding visual heaviness. That translucency makes it especially suited to occasion styling, where the bow needs to read as delicate rather than heavy under event lighting.
Build a loose updo first, then attach a pre-tied organza bow at the base, fluffing each loop by hand so the sheer fabric catches light from multiple angles rather than lying flat.
Shop the Look
- Sheer organza bow, champagne
- Bobby pins, updo-strength
- Texturizing sea salt spray
- Flexible-hold hairspray
- Small hair pins, gold-toned
14. Two-Minute Clip-On Bow Fix
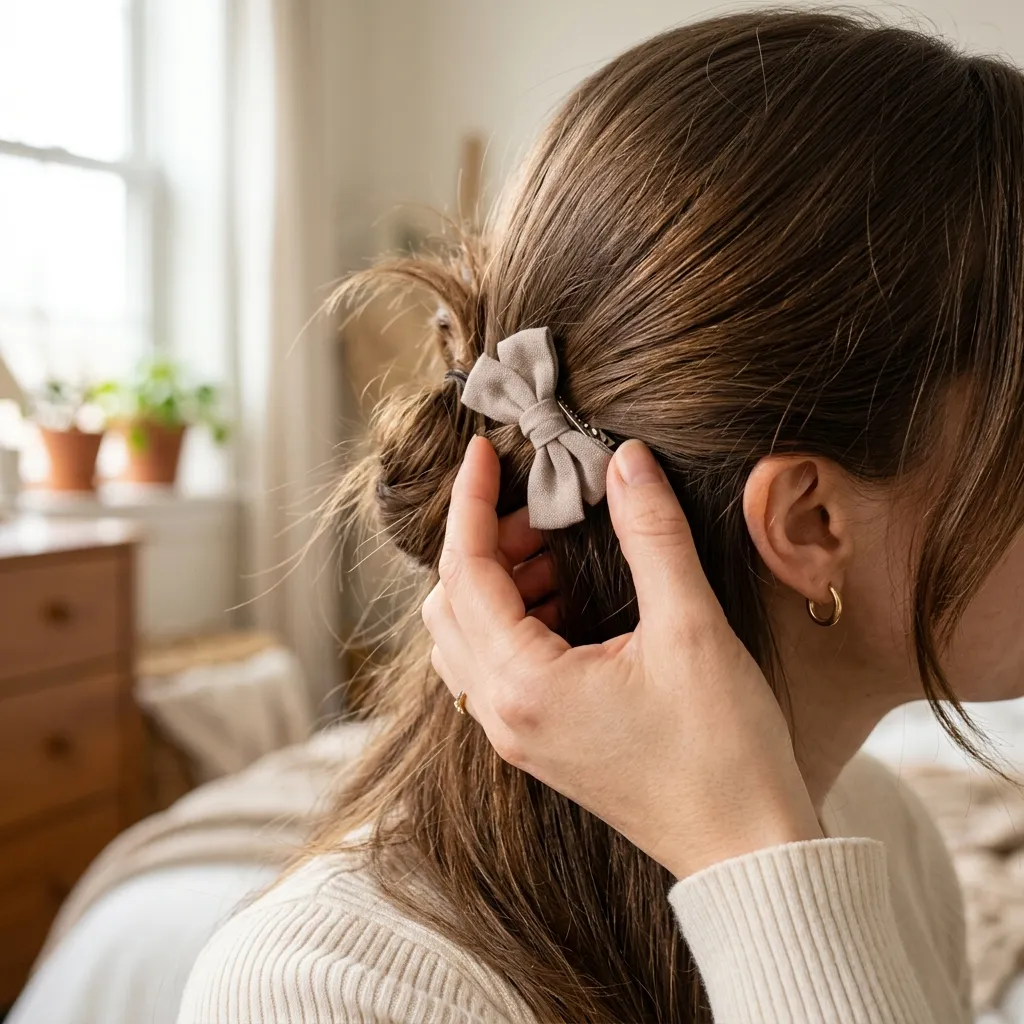
This fix feels fast, built for mornings with no time to spare.
A pre-tied bow on a spring clip skips the wrapping and tying steps entirely, since the bow shape is already fixed permanently to the clip mechanism. The fastest possible way to add the bow-hairstyle effect to hair that’s otherwise unstyled. This is the small-space equivalent of bow styling: minimal effort concentrated in one small, high-impact area.
Comb hair smooth at the crown, clip the pre-tied bow at a slight angle near the part, and mist lightly with finishing spray to keep flyaways from disrupting the clean line around it.
Quick Win: Keep two or three pre-tied bow clips in different colors in your bag for instant outfit-matching all week.
Shop the Look
- Pre-tied bow clip set, mixed colors
- Fine-tooth mini comb
- Travel-size finishing spray
- Small flyaway taming stick
- Compact hair pin case
15. Layered Bow Barrette Over a Braid
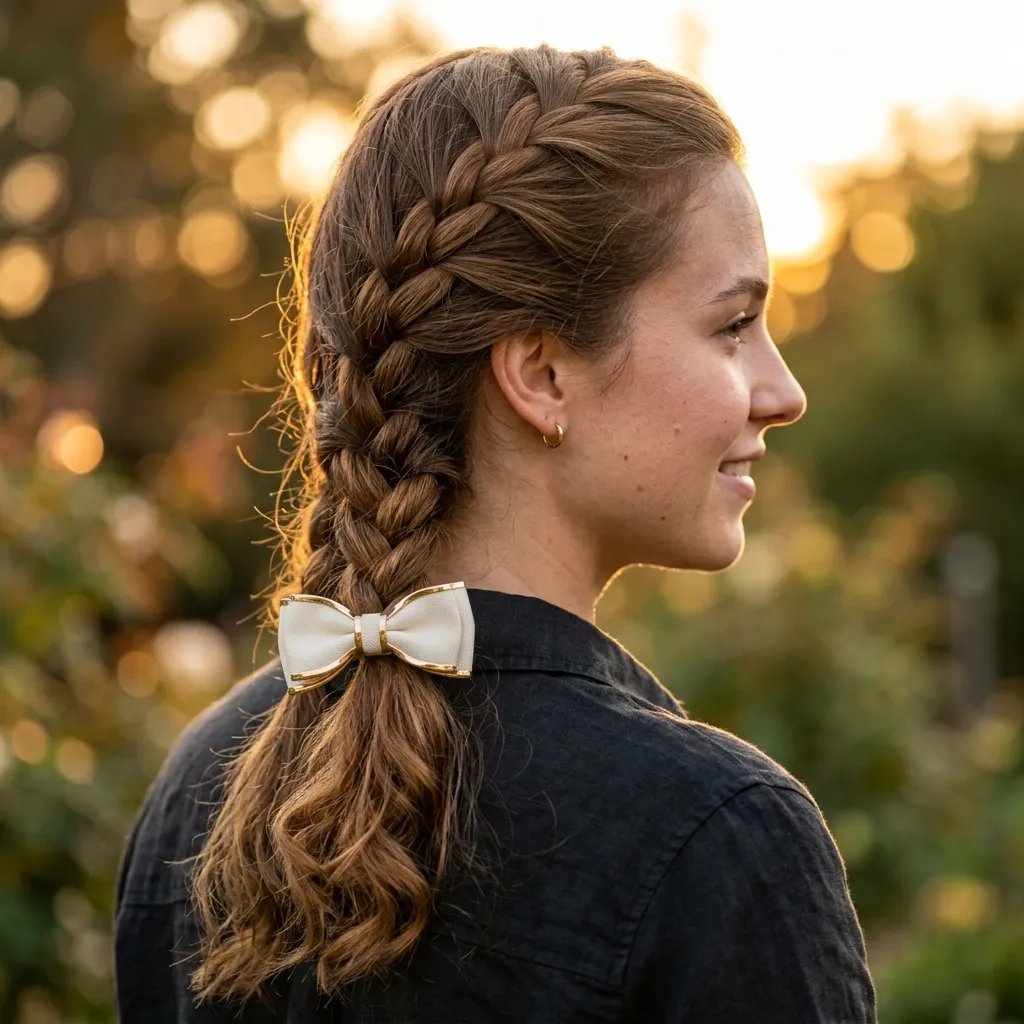
This detail feels layered, a small pause partway down an otherwise simple braid.
Placing the bow partway down a braid rather than at the very top or bottom creates an unexpected focal point, using the same visual-weight principle that makes an off-center accent more interesting than a centered one. The gold edging on the barrette catches light differently than the fabric bow itself, adding a second material into the mix without overcrowding the look.
Braid hair loosely to about the midpoint, clip the bow barrette directly over the braid at that point, and let the remaining length continue loose and slightly undone below it.
Shop the Look
- Gold-edged fabric bow barrette
- Texturizing sea salt spray
- Fine-tooth sectioning comb
- Small clear elastic ties
- Lightweight shine serum
How to Start Your Bow Hairstyle Transformation
Start with one structured silk bow clip, not a whole ribbon collection. A single well-made bow in a neutral tone like ivory or chocolate brown works across nearly every style in this list, giving you a reliable anchor piece before investing in more colors or fabrics.
The most common mistake is choosing a bow that’s too small for the hair length it’s paired against. A tiny bow on long, thick hair reads as an afterthought because it gets visually lost, breaking the intended focal-point effect. The fix is scaling bow size up with hair volume, sizing closer to three or four inches wide on medium to long hair.
Three items under $50 create immediate impact: a $10 structured silk bow clip in ivory, a $12 spool of satin ribbon for wrapped-ponytail looks, and a $10 six-pack of mini bow clips for cluster styling.
A full ribbon-wrapping technique takes about ten minutes to master and costs under $30 for a starter ribbon and clip set. A clip-on bow look takes under two minutes once the right bow is on hand, making this one of the fastest style upgrades available for any hair length.
Frequently Asked Questions About Bow Hairstyles
What’s the difference between a bow hairstyle and just clipping on a bow?
A true bow hairstyle integrates the bow into the hair’s structure (wrapped around a ponytail base, woven into a braid, or built into an updo) rather than simply pinned on top of an existing style. Clip-on bows are faster and more casual, while wrapped or woven bows read as more intentional and occasion-appropriate. Both use the same core materials, but placement technique is what separates the two looks.
What color bow works best with different hair colors?
Ivory and soft blush tend to complement brunette and black hair through gentle contrast, while chocolate brown or burgundy bows blend more tonally with red or auburn shades. Blonde hair pairs well with both pastel and jewel-toned bows since the lighter base creates contrast either way. A $12 sample pack of ribbon in five shades makes it easy to test what suits your specific hair color before committing to one.
How much does it cost to build a bow hairstyle collection?
A basic starter set (one structured bow clip, one ribbon spool, and a pack of mini bows) typically costs under $35 total. Higher-end velvet or silk bows from specialty retailers can run $20–$40 per piece, but a single well-made neutral bow covers most of the styles in this list. Ribbon by the spool remains the most budget-friendly option since one spool creates multiple wrapped looks.
Can bow hairstyles work with short hair?
Yes, though placement shifts toward smaller bows clipped near the crown or part rather than styles built around a ponytail or braid base, since short hair has less length to gather. Mini bow clusters and single structured clips work especially well on short cuts. Wrapped-ribbon styles need at least shoulder-length hair to execute properly.
What’s the most requested bow hairstyle right now?
The low ponytail wrapped in ribbon remains the most searched bow hairstyle, driven by its balance of simplicity and polish across both everyday and occasion wear. Oversized statement bows are a close second, particularly in black velvet, as bolder proportions trend upward in searches. Both styles work on medium to long hair without requiring advanced braiding skills.
Ready to Try a Bow Hairstyle?
From wrapped ponytails to woven braids and a two-minute clip-on fix, these 15 bow hairstyles cover placement, fabric, color, and speed for every kind of day. You don’t need every ribbon and clip from this list to start picking up one structured bow in a neutral shade is a complete, real first step. Try it tonight: clip a single bow near the crown of a simple low ponytail and see how it changes the whole silhouette. Once you find the placement and fabric that suits your hair, a bow hairstyle stops feeling like a costume piece and starts feeling like part of how you naturally get ready. Save the looks that caught your eye, especially any of the ribbon-wrapped styles, and keep them handy for the next time your hair needs a little softness.