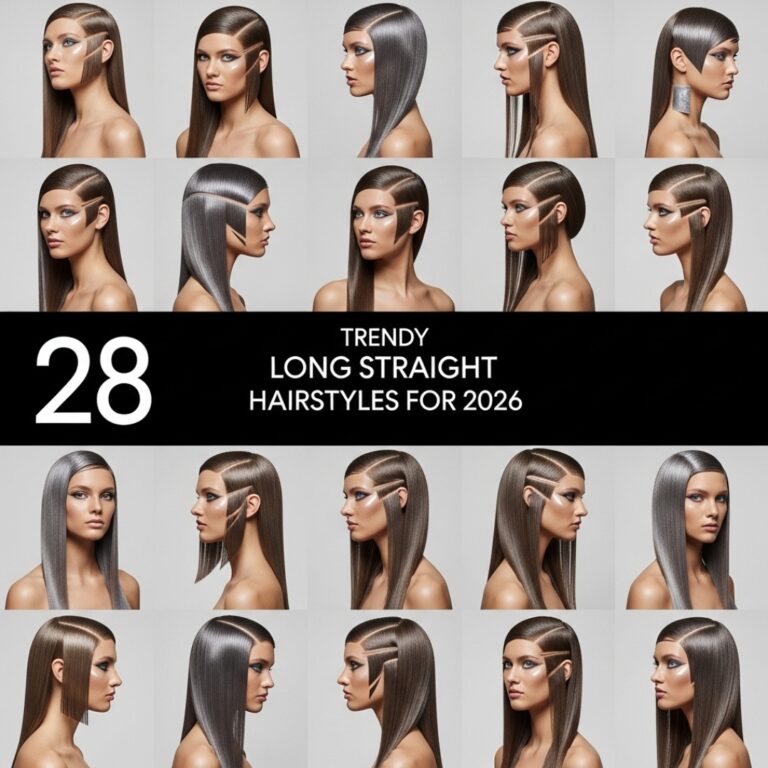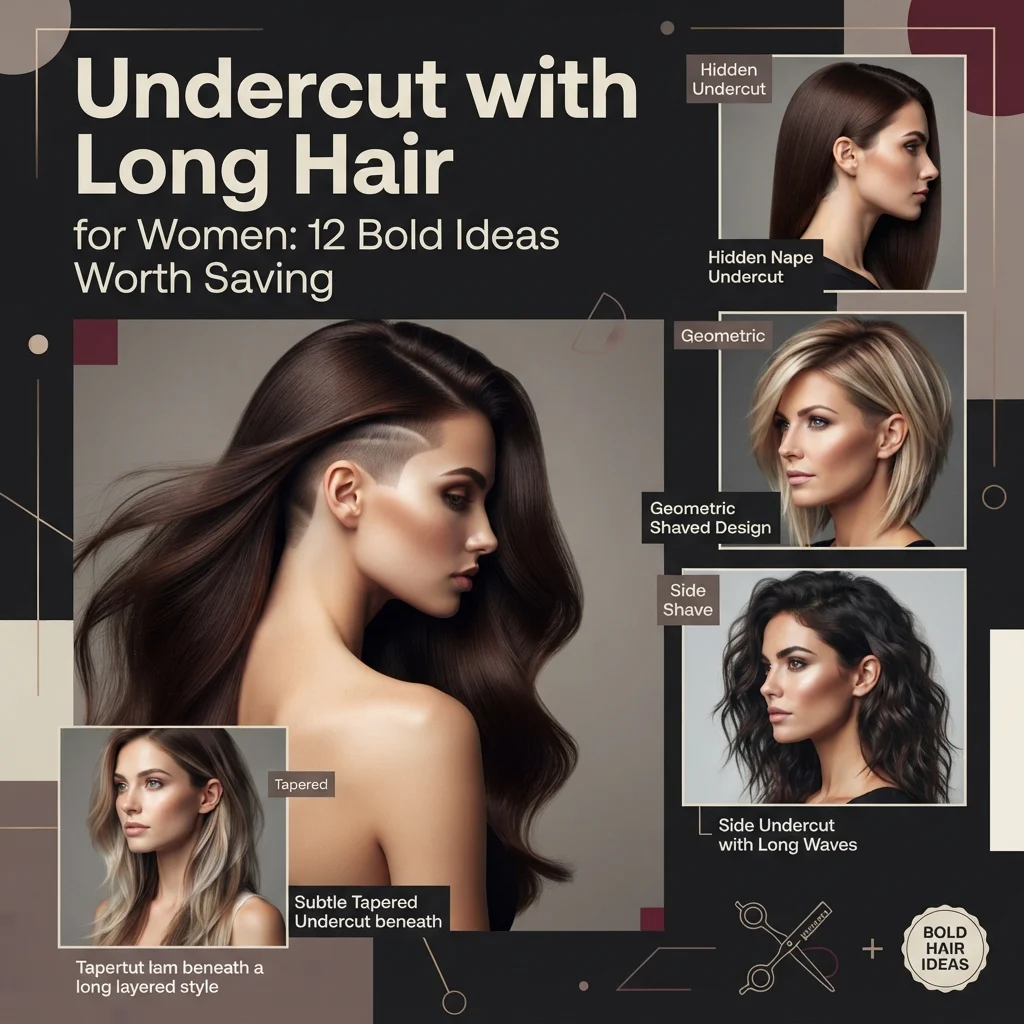
Undercut with Long Hair for Women: 12 Bold Ideas Worth Saving

An undercut with long hair is a two-length haircut technique in which the hair beneath the crown: most often at the nape, side, or temple is clipped down to skin or left at a #1 to #3 guard length, while the surrounding and top hair is kept at its full, uncut length to fall over it. This article gives you 12 genuinely wearable undercut ideas for long hair, covering placement, color, texture, and styling, so you can choose a version that fits your lifestyle rather than just your saved Pinterest board.
Worn well, it feels less like a haircut and more like a piece of information you get to control. The surface stays smooth, unbroken, entirely conventional until you tuck your hair back, flip a low bun, or catch a gust of wind, and a sharp, buzzed edge appears where nobody expected one. It is quiet on a Monday morning and unmistakable the second you want it to be. Here are 12 ideas worth saving, and wearing.
Why the Undercut with Long Hair Works So Well
The undercut originated as a purely functional military and working-class grooming cut in the early 20th century, engineered to keep hair off the neck under helmets and uniforms without sacrificing length on top. It resurfaced decades later through 1980s skinhead and punk subcultures, then again through 1990s grunge, before high-fashion editorial stylists, most visibly at Alexander McQueen and Comme des Garçons runway shows in the 2010s, repositioned it as a deliberate design statement rather than a practical necessity. Combined with long hair, the technique flips its own original logic entirely: instead of an all-over buzz for low maintenance, it becomes a concealment technique, a hidden architectural layer beneath length that can be revealed or hidden entirely at the wearer’s discretion. That is the specific quality that separates a long-hair undercut from a bob undercut, a pixie undercut, or a full buzzed sidecut, here, length itself performs the covering.
Search interest around “hidden undercut” and “undercut long hair women” has climbed steadily on Pinterest and TikTok over the past two years, largely because it answers a specific consumer hesitation: people want to test an edgier, more expressive hairstyle without cutting the length they may have spent years growing out. It also fits a broader shift in how people actually move through a single day. One hairstyle that reads as polished and conventional in a client meeting and can be repositioned, in under a minute, into something sharper for going out afterward. That dual-function quality is a large part of why session stylists on platforms like Instagram increasingly tag long-hair undercuts as “commitment-light edge.”
Fine or thin hair can carry this style, but it requires a specific adjustment: the stylist needs to leave noticeably more length directly above the shaved section, generally at least 5 to 6 inches, because thin hair has less natural volume to create a covering “curtain,” and too little coverage will expose the undercut even when hair is worn down and unstyled, which isn’t every client’s intention. Thick or coarse hair conceals more easily with less length reserved, but it requires more frequent thinning (every 6 to 8 weeks) at the blend line specifically, since thick hair builds visible bulk at that transition point faster than it does elsewhere in the cut.
Style at a Glance
| Element | Detail |
| Philosophy | Hidden-by-default, revealed-on-purpose contrast, length performs the concealment |
| Key Techniques | Graduated clipper fade (#1–#3 guard), point-cutting blend, root shadow/smudge color matching |
| Best For | Medium-to-thick hair, low-daily-maintenance styling, first-time edgy-cut clients |
12 Undercut Ideas for Long Hair
1. The Classic Nape Undercut
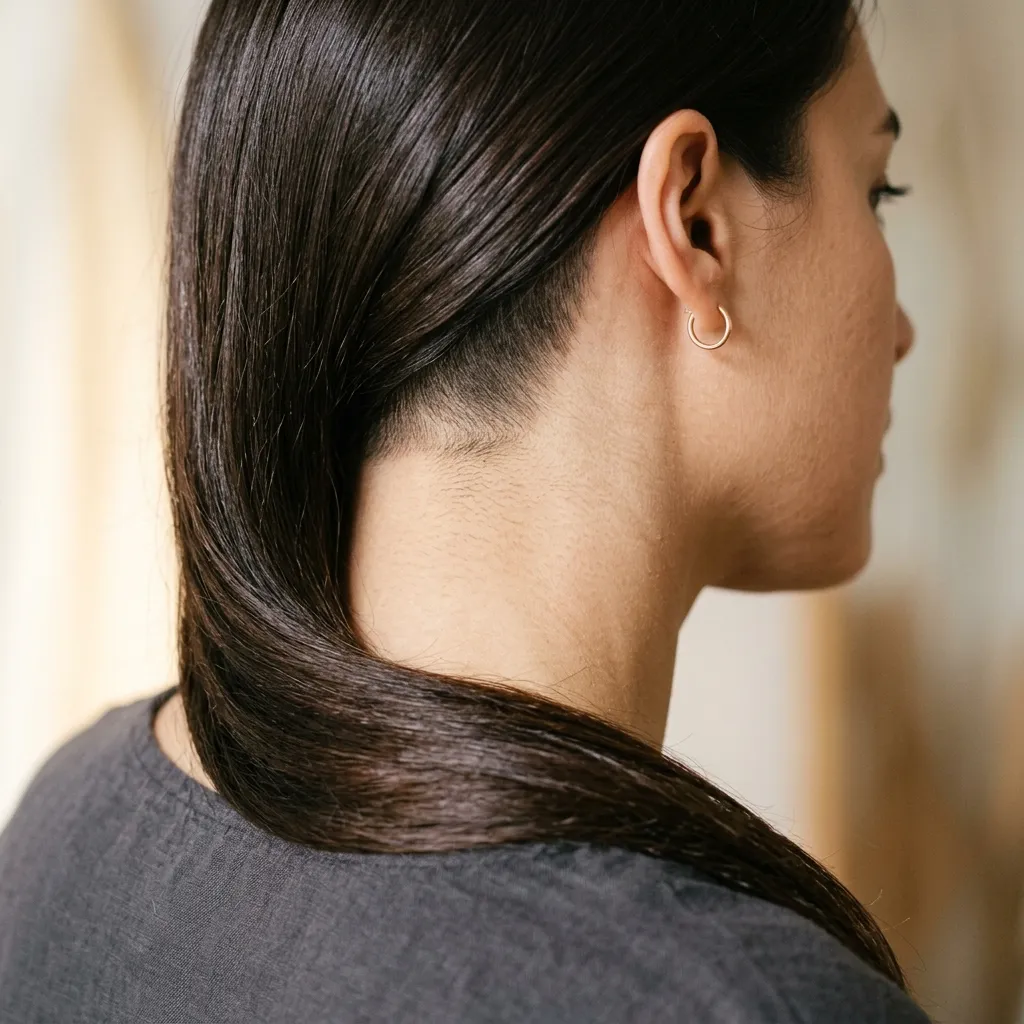
Vibe: Quiet, the kind of cut that says nothing until you move your hair.
Why it works: The nape is the single lowest-visibility zone on the head relative to how hair naturally falls, which is exactly why it’s the most requested placement for first-time undercut clients bit gives you the visual and psychological experience of an undercut while retaining near-total daily concealment.
How to get it: Ask your stylist for a #2 guard (6mm) shaved within a defined 2 to 3 inch section directly at the nape not the full width of the head blended upward using point-cutting rather than a razor’s straight edge, which is what prevents a visible ledge or “step” when hair is worn down. Expect the appointment to run 20 to 30 minutes longer than a standard trim, and budget for a touch-up every 3 to 4 weeks to maintain the crisp line, since nape hair tends to grow back faster than crown hair.
Shop The Look
| Product |
| Slim gold huggie hoop earring set |
| Silk hair scrunchie set, neutral tones |
| Boar bristle smoothing brush |
| Lightweight shine serum for fine to medium hair |
| Round handheld mirror for checking nape styling |
Also view: 15 Long Layered Haircuts That Photograph Beautifully From Every Angle
2. Warm Caramel Balayage Over a Hidden Undercut
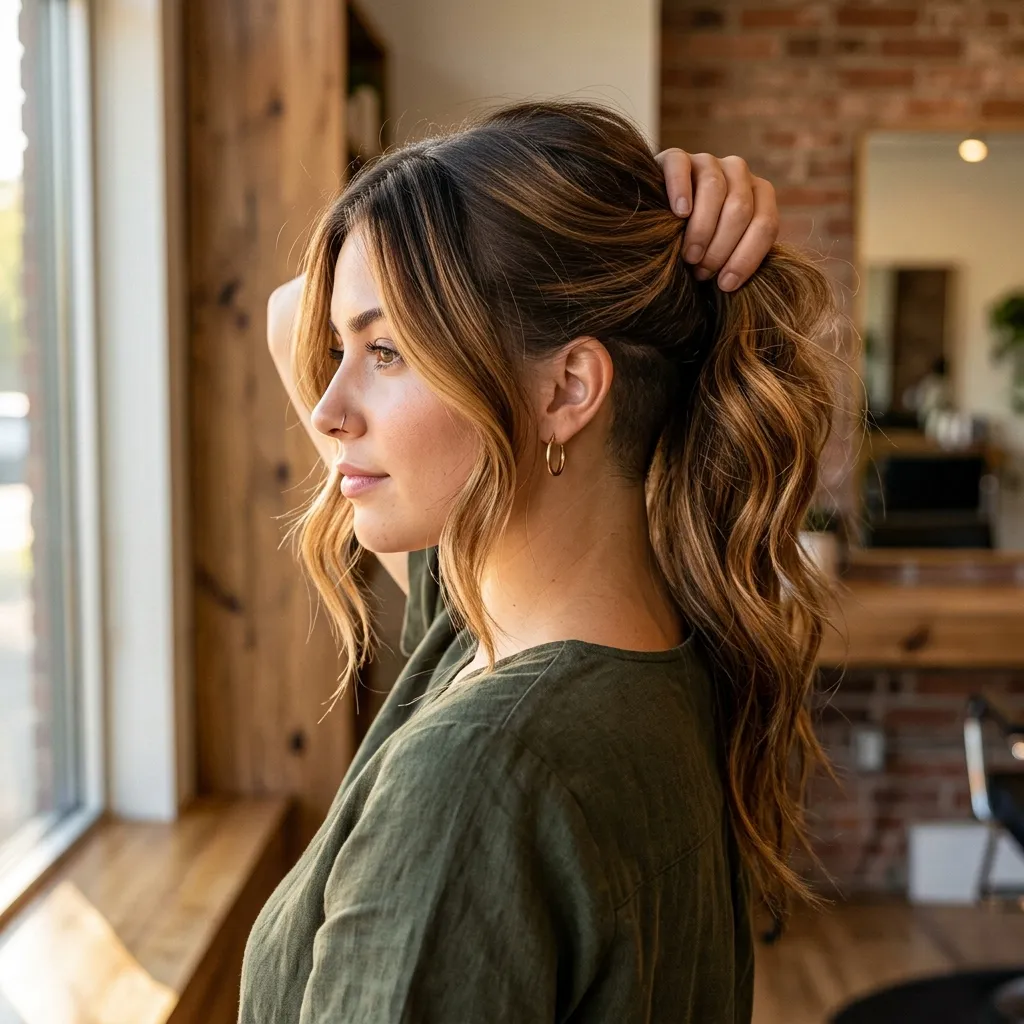
Vibe: Sun-warmed, like light caught mid-strand.
Why it works: This is a color-layering decision rather than a cutting one: the caramel balayage deliberately draws the eye upward and outward toward the mid-lengths and ends, using warmth and directional contrast to visually counterbalance the cool, close-cropped undercut sitting underneath.
💡 Quick Win: Ask specifically for a 10 to 15 minute “root shadow gloss” as an add-on to your next color appointment: most salons price this separately from a full balayage refresh, typically $25 to $45, and it keeps the undercut-to-regrowth blend seamless between full color visits.
Shop The Look
| Product |
| Purple toning shampoo for warm blonde or caramel tones |
| Argan oil deep conditioning hair mask |
| Wide-tooth wooden detangling comb |
| Heat protectant spray for color-treated hair |
| Amber glass dropper bottle for hair oil |
3. Textured Side Undercut with Choppy Razored Layers
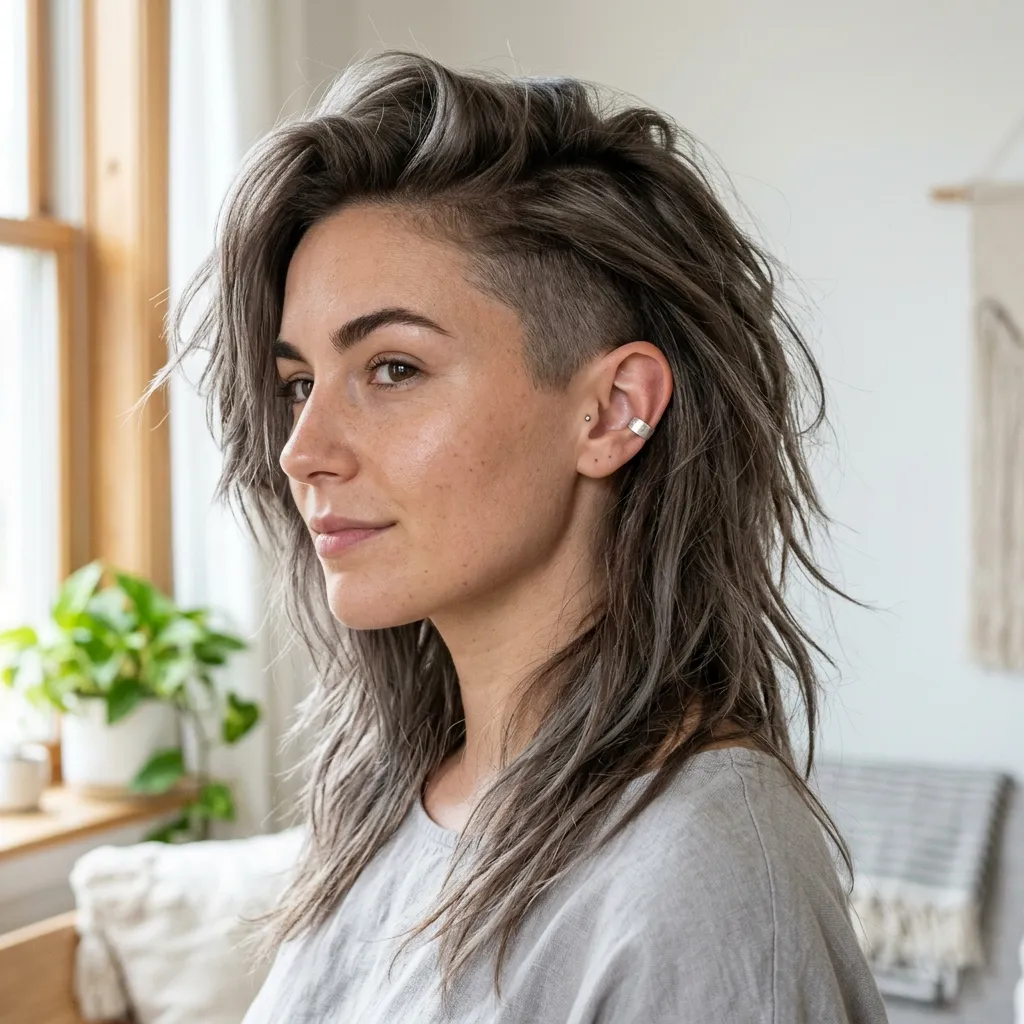
Vibe: Raw, deliberately unfinished at the edges.
Why it works: This idea builds on texture contrast instead of color contrast: razor-cut, choppy layers through the top two to three inches echo the buzzed clipper texture underneath, so the two zones read as related rather than jarring, a technique stylists call “texture bridging.”
How to get it: Have your stylist use an actual razor, not just texturizing shears, through the top two to three inches of length to create soft, deliberately uneven ends; this is the specific detail that makes the shaved underlayer read as an extension of the overall cut rather than a separate, disconnected decision. Ask for the razoring to be concentrated at the crown and mid-lengths, not the very ends, to avoid over-thinning fine hair.
Shop The Look
| Product |
| Texturizing sea salt spray, matte finish |
| Small silver huggie ear cuff |
| Flexible-hold texture paste for layered hair |
| Wide-barrel curling wand, 1.5 inch |
| Matte finishing spray, lightweight hold |
Also view: 14 Effortless Beach Waves Techniques for Every Hair Length
4. Deep Side Part for Maximum Coverage
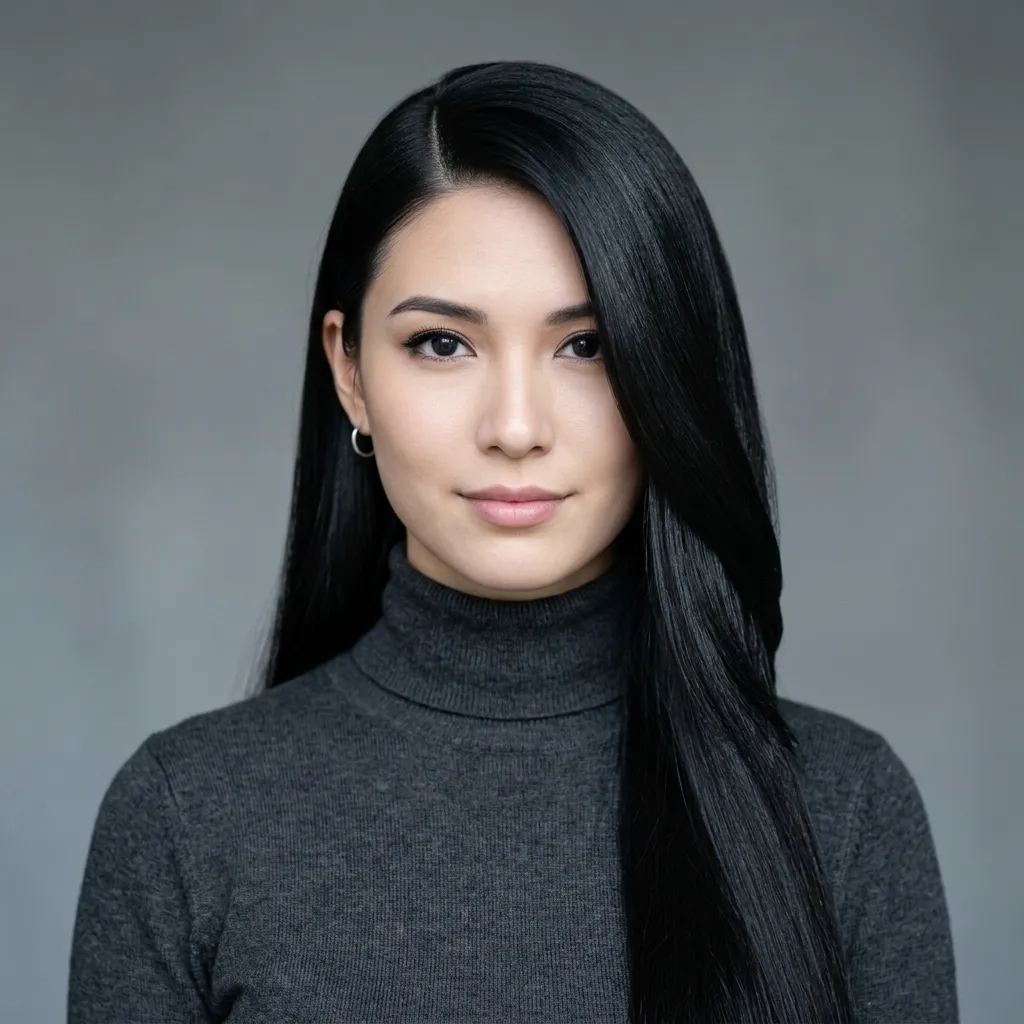
Vibe: Hushed. A cut that keeps its secret until you decide otherwise.
Why it works: Unlike the cutting- and color-based ideas above, this is purely a styling and layout decision: shifting the part line to an 80/20 or even 90/10 ratio, instead of a centered or standard side part, creates a substantially heavier curtain of hair on one side.
How to get it: Have your stylist place the undercut on the side you naturally part away from, this is a critical sequencing detail many clients get backward, and ask for slightly more length directly above that zone than elsewhere in the cut, giving you extra “curtain” fabric to work with. Section your part with a fine-tooth comb at the natural cowlick point at your crown for the most consistent deep-part placement day to day.
Shop The Look
| Product |
| Ceramic flat iron for straight, sleek styling |
| Anti-frizz smoothing serum, lightweight |
| Fine-tooth parting comb with metal tail |
| Silk pillowcase for smooth overnight hair |
| Fine-mist shine spray for a glass-hair finish |
5. High Side Undercut with Custom Clipper Design
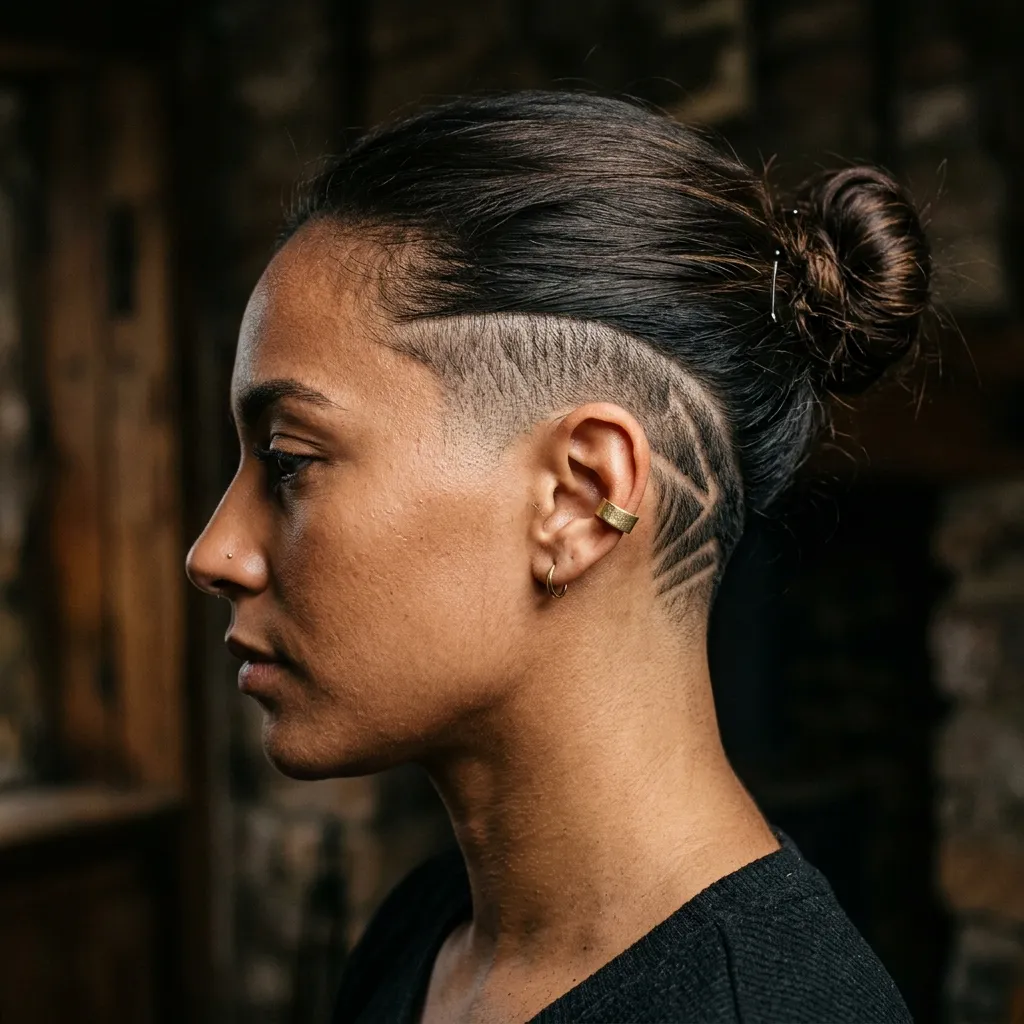
Vibe: Bold, no attempt to hide it, and it doesn’t need to.
Why it works: Placing the undercut higher on the side, close to the temple, maximizes visibility on purpose, turning it into the style’s primary feature rather than a hidden detail an entirely different design intention from placements 1 and 4. The sharp taper fade, moving from bare skin through a #1, #2, and #3 guard within roughly 1.5 inches, creates strong contrast against the retained length above it, which reads as confident precisely because there’s no softening transition disguising it.
How to get it: Request a high skin fade starting just above the ear, tapering to a #3 guard within an inch and a half, styled by pulling the top length back and securing it away from the fade whenever you want the design fully visible. Barbers and stylists who regularly do men’s fades are often the most technically equipped for this specific placement. Don’t hesitate to ask a stylist about their fade experience specifically before booking.
Shop The Look
| Product |
| Flat metal bobby pins for securing pulled-back styles |
| Strong-hold gel for slicked-back styling |
| Dual-sided edge control brush |
| Small gold ear cuff set |
| Wide flat clip for sectioning hair |
6. Low, Loose Bun That Frames the Undercut
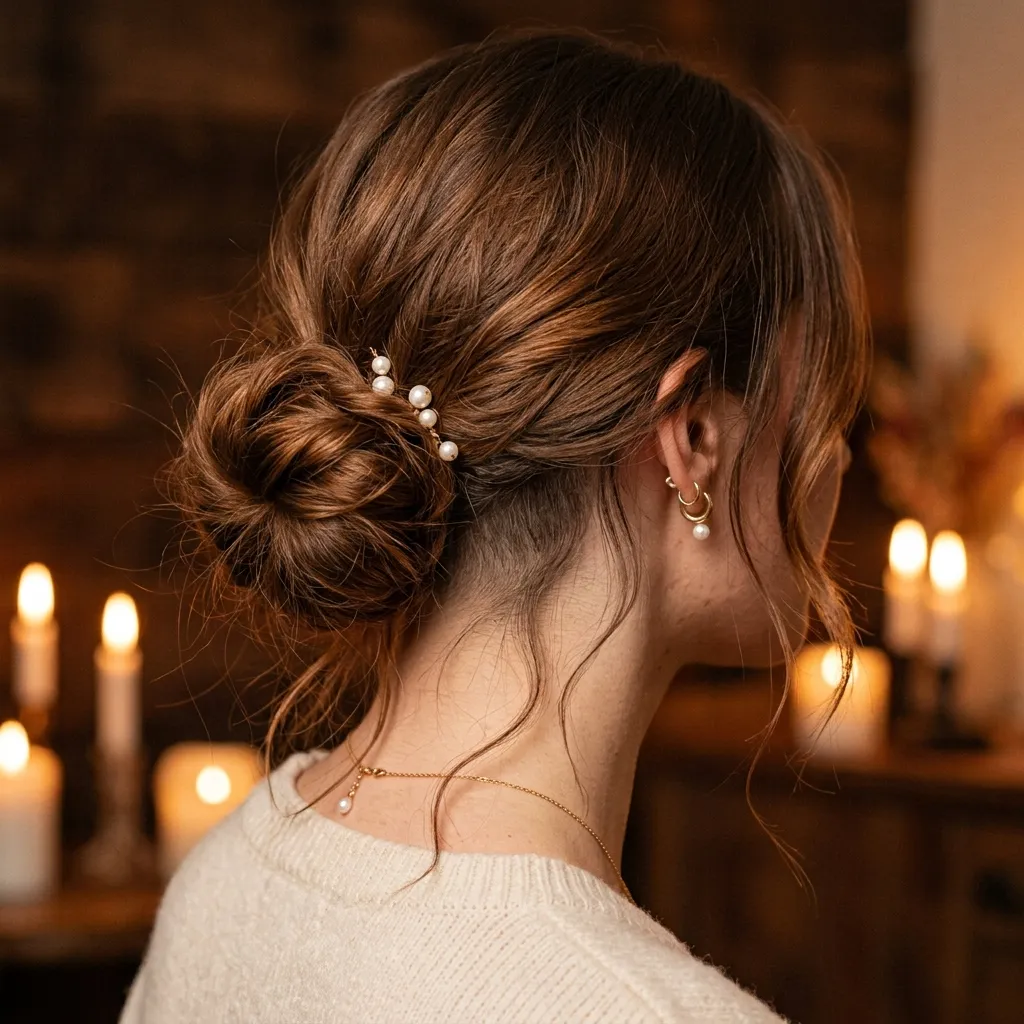
Vibe: Soft, romantic on the surface, sharp underneath.
Why it works: This is an arrangement idea rather than a cutting or color one how you gather the length determines whether the undercut shows at all, independent of placement or technique. A loose, lower bun keeps tension off the shaved section entirely, letting gravity pull the surrounding hair down and over it naturally, while a tight, high bun would pull hair up and away, exposing the same undercut fully.
💡 Quick Win: Twist the bun instead of wrapping it flat. The extra volume a twist creates naturally drapes more surrounding hair over a nape or low-side undercut without any additional pinning or product.
Shop The Look
| Product |
| Small pearl hairpin set, decorative |
| Medium hair-doughnut bun maker |
| Texturizing spray for grip and hold |
| Soft jersey scrunchie, neutral colors |
| Flyaway-taming wax stick |
7. Matte Charcoal Root Shadow Under Platinum Blonde Lengths
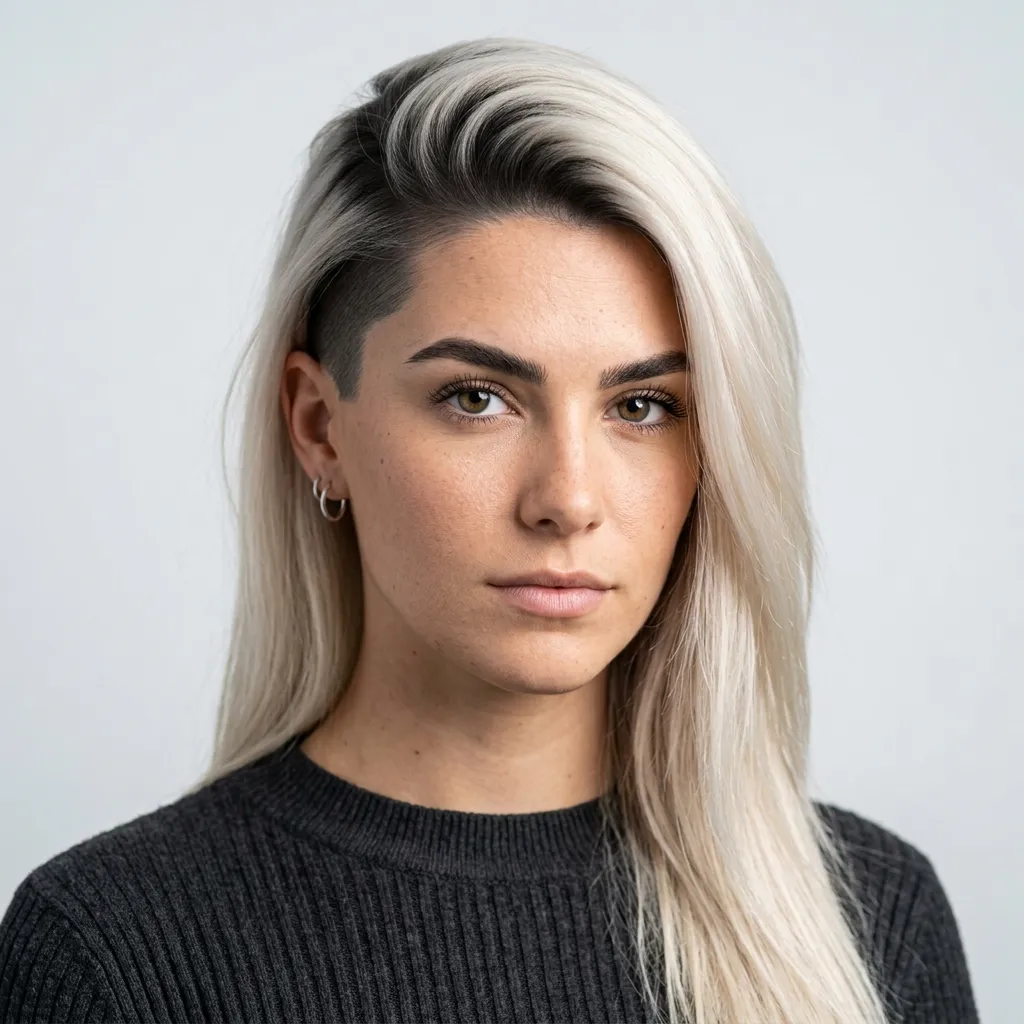
Vibe: Striking, the highest-contrast version on this whole list.
Why it works: This is the boldest color decision here because it maximizes contrast instead of minimizing it: matte charcoal against platinum blonde creates a hard visual line by design, using deliberate discord rather than blending as the guiding principle.
How to get it: Ask your colorist for a toner-matched charcoal root shadow that extends slightly past the point where the undercut begins, so the darkest elements on your head, the root shadow and the shave, visually connect rather than compete. Because platinum requires significant chemical processing, budget for a bond-repair treatment (Olaplex, K18, or a comparable in-salon bonding service) at every color appointment to protect hair integrity above the undercut.
Shop The Look
| Product |
| Purple toning conditioner for platinum blonde |
| Bond-repair treatment for lightened hair |
| Temporary dark-root touch-up powder |
| Wide-tooth comb for detangling fragile blonde hair |
| Silicone-free leave-in conditioner |
8. Micro-Braids Concealing the Undercut
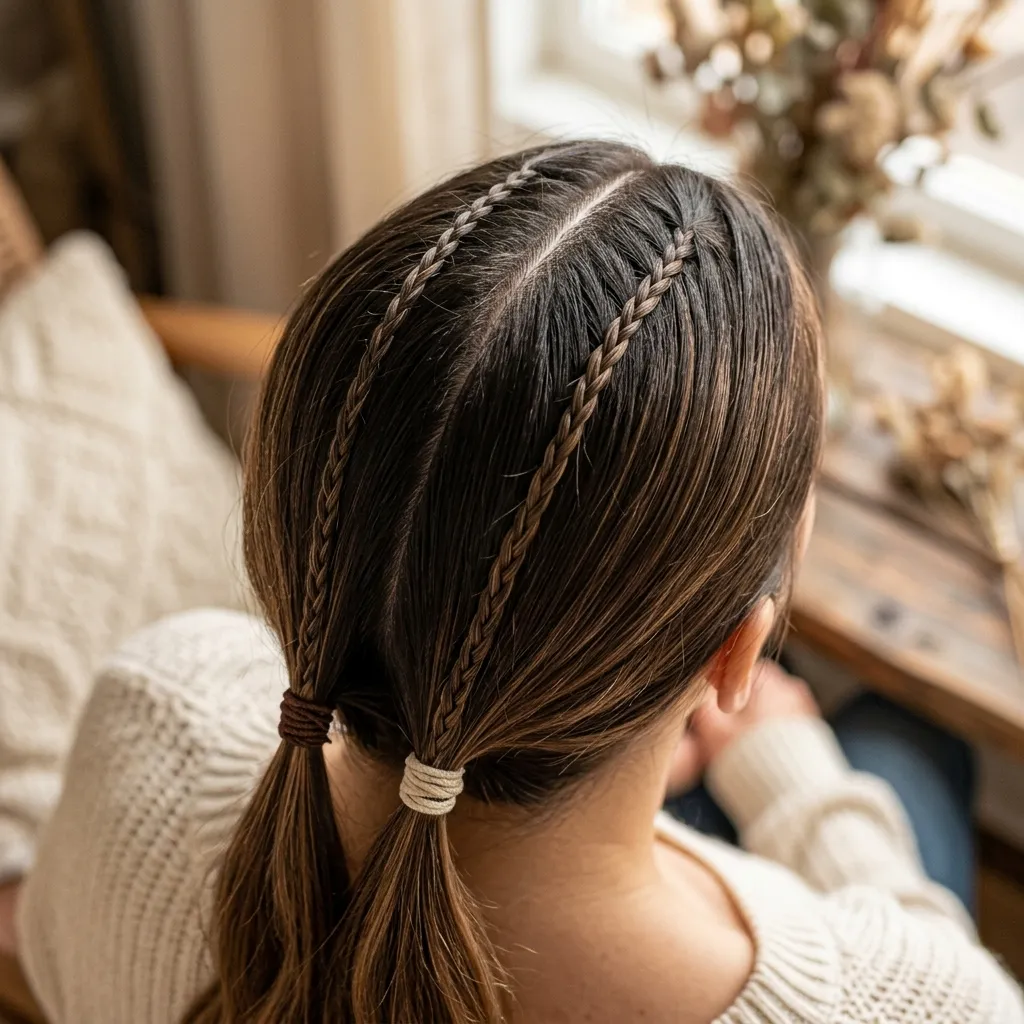
Vibe: Intricate, a styling technique, not just a cover-up.
Why it works: This idea combines accessories and texture with a practical function: two or three thin braids laid flat across the crown act as a woven “lid” that stays anchored through a full day of movement, unlike loose hair, which shifts and eventually reveals the shave underneath regardless of part placement.
It’s also a texture-layering technique in its own right: the tight, structured texture of a braid set against smooth or wavy length creates visual dimension even while it’s doing purely functional coverage work, which is why editorial stylists use it on shoots that require the undercut hidden for hours under lighting and movement.
How to get it: Section a one-inch strip of hair directly above the undercut, French braid it flat against the scalp toward the opposite side, and pin the tail securely into the rest of your hair. This anchoring is what keeps coverage stable through a full workday, unlike a simple hair flip or clip, which loosens within a couple of hours.
Shop The Look
| Product |
| Thread-wrapped hair tie set |
| Edge control gel for laying flat baby hairs |
| Rat-tail comb for precise sectioning |
| Small clear elastic bands |
| Braid-friendly light-hold hairspray |
9. Undercut Paired with Soft Curtain Bangs

Vibe: Effortless, two trends worn as one cohesive cut, not two competing statements.
Why it works: This pairs two proportion decisions deliberately: curtain bangs add softness and forward movement at the face, balancing the sharp geometry of an undercut placed farther back so the whole head reads as a considered, cohesive cut rather than “one edgy statement bolted onto a regular haircut.” The soft framing draws attention forward and upward, toward the face, which naturally shifts focus away from the shaved zone even when it’s only loosely covered.
How to get it: Ask your stylist to cut the curtain bangs long enough generally chin-length or slightly past: to tuck comfortably behind your ears, which is what lets you toggle between full curtain coverage on low-key days and a tucked look that reveals the undercut at the temple whenever you want it visible.
Shop The Look
| Product |
| Small round brush for blow-drying bangs |
| Lightweight mousse for beachy wave texture |
| Mini flat iron for quick bang touch-ups |
| Sectioning clip set for styling bangs |
| Dry shampoo for root refresh between washes |
10. Two-Zone Undercut for a Layered Silhouette

Vibe: Architectural, built in layers, not just one line.
Why it works: This silhouette idea uses two separate undercut zones instead of one, creating a stepped, dimensional shape beneath the length rather than a single flat plane, a more advanced technique that most stylists reserve for clients already comfortable wearing one undercut successfully. It fundamentally changes how the hair moves and settles, since each zone sits beneath a different weight and volume of hair, producing subtle movement patterns you can’t get from a single-zone cut.
How to get it: This placement genuinely requires a stylist experienced specifically in multi-zone clipper work, not just general undercut experience, request a consultation before booking, since the spacing between the two zones needs to be mapped against your individual hair growth pattern (whorl direction, density gradient) to avoid visible gapping when the style is worn down.
Shop The Look
| Product |
| Professional hair clippers with guard set |
| Wide-tooth sectioning clips |
| Volumizing root spray |
| Detail trimmer for clean undercut edges |
| Nourishing scalp oil for freshly shaved skin |
11. Slicked-Back Ponytail That Reveals the Undercut On Purpose
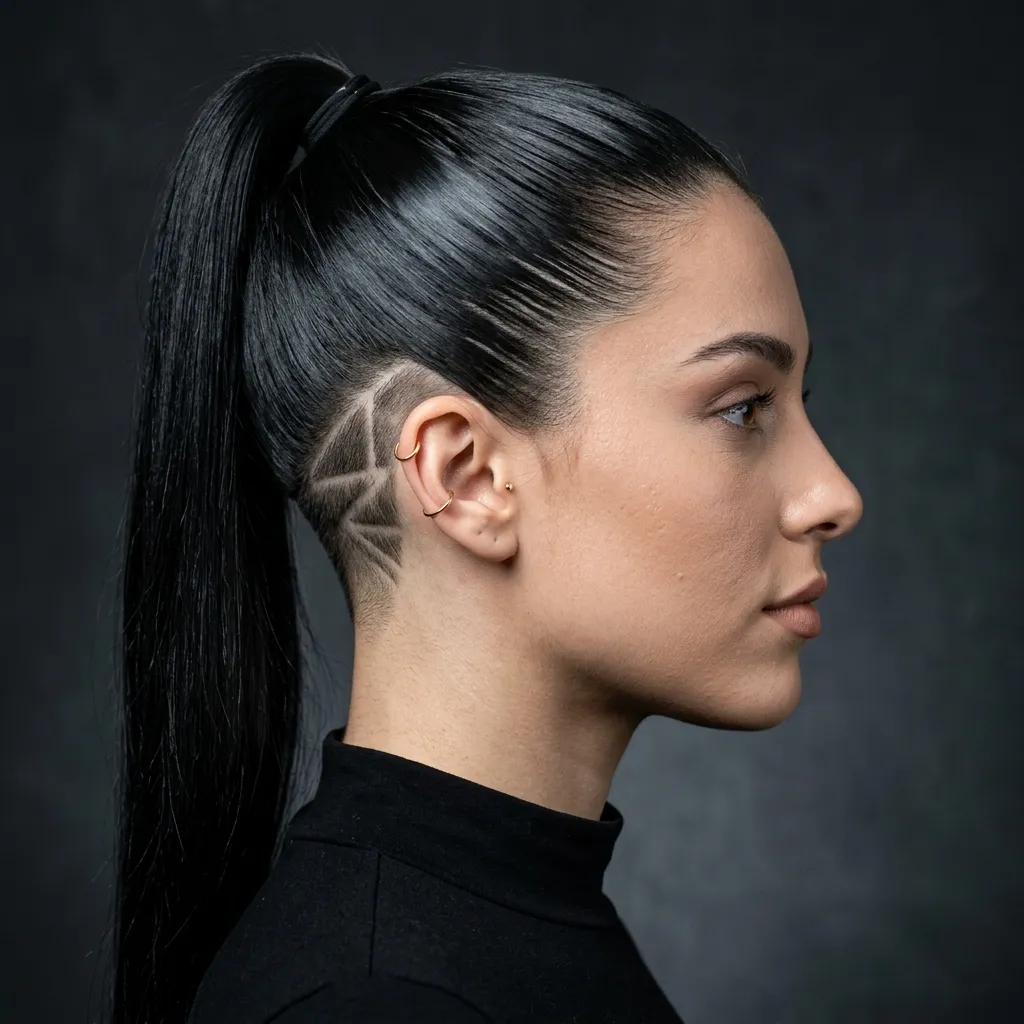
Vibe: Sharp, full reveal, fully intentional.
Why it works: This layout idea is built on tension rather than concealment: pulling every strand back and up removes all natural coverage, making the undercut the visual anchor of the entire style instead of a hidden layer the direct opposite design logic of the low-bun idea earlier in this list.
Here, visual weight is pulled tight and high on purpose, exposing rather than concealing, which is why this styling choice is popular specifically for events and shoots where the undercut is meant to be the statement, not a surprise.
💡 Quick Win: Use a boar-bristle brush instead of your hands to slick the top section back: it distributes gel far more evenly along the hair shaft and prevents the patchy, uneven wet-look sections that finger-styling with straight gel often leaves behind, especially at the hairline.
Shop The Look
| Product |
| Strong-hold slicking gel for sleek ponytails |
| Boar bristle smoothing brush |
| Elastic-free ponytail wrap tie |
| Edge control brush with built-in comb |
| Light-hold shine-enhancing hairspray |
12. Low-Maintenance Grow-Out Styling for a Softening Undercut

Vibe: Easy, for the version of this style that fits a genuinely busy week.
Why it works: This idea addresses a real, practical limitation of the undercut rather than glossing over it: the shaved section needs reshaving roughly every 3 to 5 weeks to stay crisp, and this styling approach is specifically built for the in-between weeks, when the clipper line has already softened into shorter, textured regrowth rather than a sharp fresh edge.
How to get it: Twist a small section from each side back toward the crown and secure with a single pin or tie this lifts just enough hair to create visible shape and movement without needing the undercut visible, sharp, or recently touched up underneath.
Shop The Look
| Product |
| Small fabric-covered elastic hair ties |
| Texturizing dry wax for grown-out styling |
| Matte-finish bobby pin set |
| Lightweight leave-in detangling spray |
| Compact travel-size hairbrush |
How to Start Your Undercut with Long Hair Transformation
Your single first move should be booking a dedicated consultation specifically to discuss placement (nape, side, or high temple) before a single clipper touches your head, because placement is the decision that determines everything downstream: how much length needs to be reserved above it, how often you’ll realistically need touch-ups, and whether it shows during normal daily styling or stays fully hidden. Get this one decision right, and every choice that follows (color, texture, styling routine) has a stable anchor to build from.
The most common mistake first-time clients make is not reserving enough length above the undercut to actually conceal it, if concealment is the goal. Many people ask for “just a little shaved underneath” without realizing they typically need at least 5 to 6 inches of hair directly above that zone to fully cover it while hair is down and unstyled. If hiding the undercut day-to-day matters to you, say so explicitly during your consultation, and ask your stylist to leave visibly more length in that specific section than elsewhere in the cut.
Three items under $50 that build the look immediately: a boar-bristle smoothing brush (roughly $12–20) for slicked reveal-day styling, a strong-hold slicking gel like a professional pomade or gel from a brand such as Got2b or R+Co (roughly $15–25), and a set of flat matte bobby pins (roughly $6–10) for securing pulled-back looks without visible shine or slipping.
A realistic timeline: the initial cut takes one salon visit, typically 45 to 90 minutes depending on placement complexity. Touch-up shaves run every 3 to 5 weeks and take about 15 to 20 minutes, often priced separately from a full haircut at $15–30. A starter version, a single nape undercut with no color change, typically costs $40–80 at a mid-range salon; adding a root shadow color service brings a fuller transformation to roughly $120–250, depending on your region and colorist experience level.
Frequently Asked Questions About Undercut with Long Hair
What’s the difference between an undercut and a shaved side?
An undercut typically refers to a closely clipped section, usually a #1 to #3 guard, placed underneath the top layers of hair, designed to be at least partially covered by the length above it, especially at the nape or a lower side placement. A shaved side generally means the entire side of the head is buzzed and left visible as a permanent, always-on design element rather than something that can be concealed. Because of that, the undercut is the more flexible, lower-commitment option, since it grows out less noticeably and can be styled to disappear entirely when you want it to.
What hair colors work best with an undercut?
Deep, cool tones like espresso brown or matte charcoal create the most seamless blend, because they naturally shadow-match freshly clipped skin and short regrowth without requiring frequent touch-ups. High-contrast combinations, like a platinum blonde length over a dark charcoal undercut, are popular for a bolder, more visible reveal and are often paired with a bond-repair treatment such as Olaplex to protect hair health through the lightening process. Warmer tones like caramel balayage soften the overall look and work especially well when the undercut is meant to stay mostly hidden day to day.
How much does an undercut with long hair typically cost?
A basic undercut added onto an existing long haircut typically runs $40–80 at most mid-range salons, comparable to a standard trim with extra clipper time factored in. Adding color services like a root shadow gloss or a full balayage refresh brings the total to roughly $120–250 depending on your salon’s region and the colorist’s experience level. Touch-up shaves alone, without a full haircut, are often priced separately at $15–30 every three to five weeks.
Does an undercut work with curly or wavy long hair?
Yes, though curl pattern affects how visible the undercut is day to day, curly hair carries more natural lift and volume, which can cause a nape or side undercut to peek through more often than it would on straight hair of the same length. Stylists typically recommend leaving noticeably more length above the shaved section on curly hair specifically to compensate for that extra lift and shrinkage. Wavy hair falls closer to straight hair in terms of coverage and generally hides the undercut well without needing significant extra length reserved.
How often do I need to maintain the shaved section?
Most undercuts need a touch-up shave every 3 to 5 weeks to keep the line crisp, since hair in that specific zone typically grows back faster than hair elsewhere on the head. Skipping a touch-up doesn’t ruin the style. It simply softens the sharp edge into a shorter, more textured section, which some clients genuinely prefer as a lower-maintenance in-between phase, as shown in idea 12 above. Many salons offer a discounted “undercut refresh” service, separate from a full haircut, specifically for maintaining this section between longer appointments.
Ready to Create Your Bold Undercut with Long Hair?
From the quiet, fully concealable nape undercut in idea 1 to the maximum-contrast platinum-over-charcoal reveal in idea 7, and from the practical, braid-anchored coverage of idea 8 to the honest, low-maintenance grow-out styling of idea 12, these 12 ideas cover the real range of how an undercut with long hair can actually look and actually live day to day, not just how it photographs once. You don’t need to start with the boldest version; choosing a small, fully hidden nape undercut is a completely legitimate way to test whether this style genuinely fits your life before committing to anything more visible.
Today’s concrete step is booking a placement consultation with your stylist and bringing at least two of these reference images with you, so the conversation starts from a shared, specific picture rather than a vague idea. There’s a particular kind of confidence in wearing a style that only you fully know is there until the moment you choose to reveal it. Save whichever ideas pulled at you most especially the ones you can genuinely picture wearing on an ordinary Tuesday, not just the ones that look best pinned.